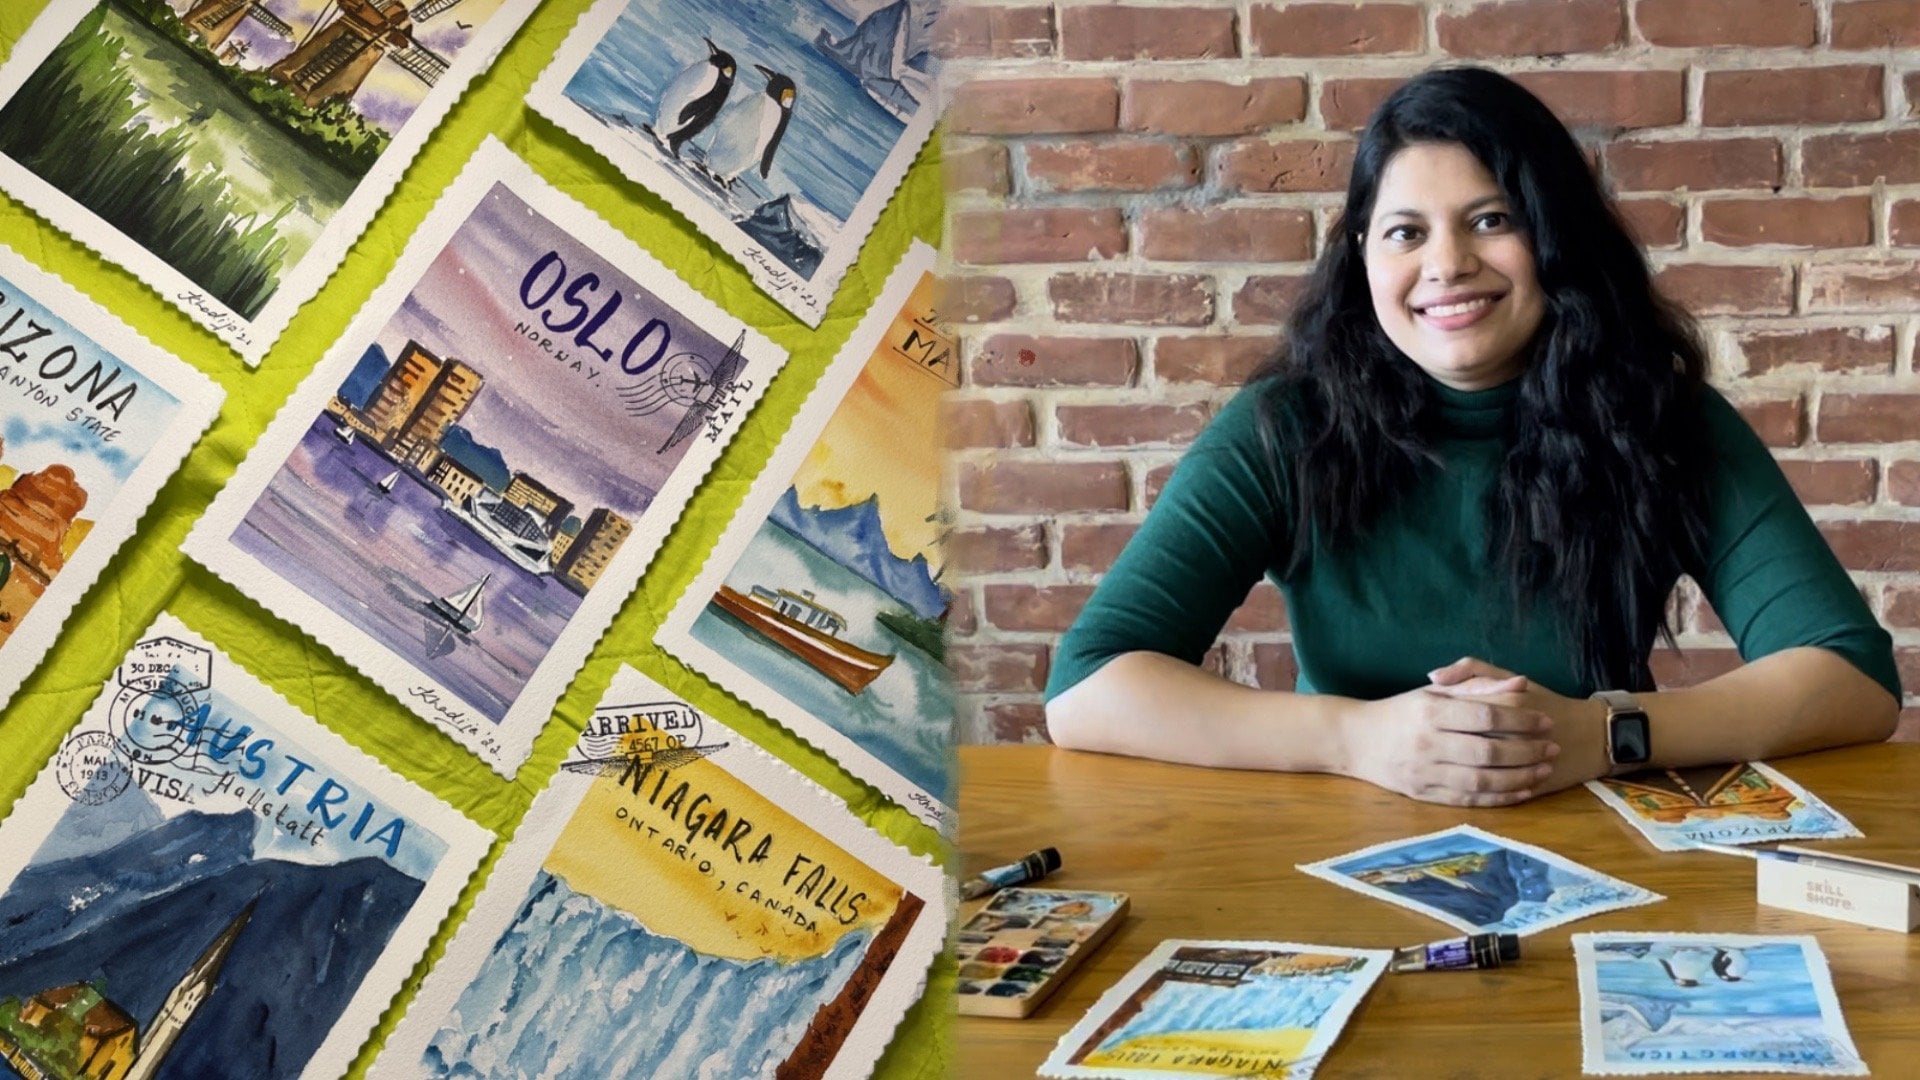
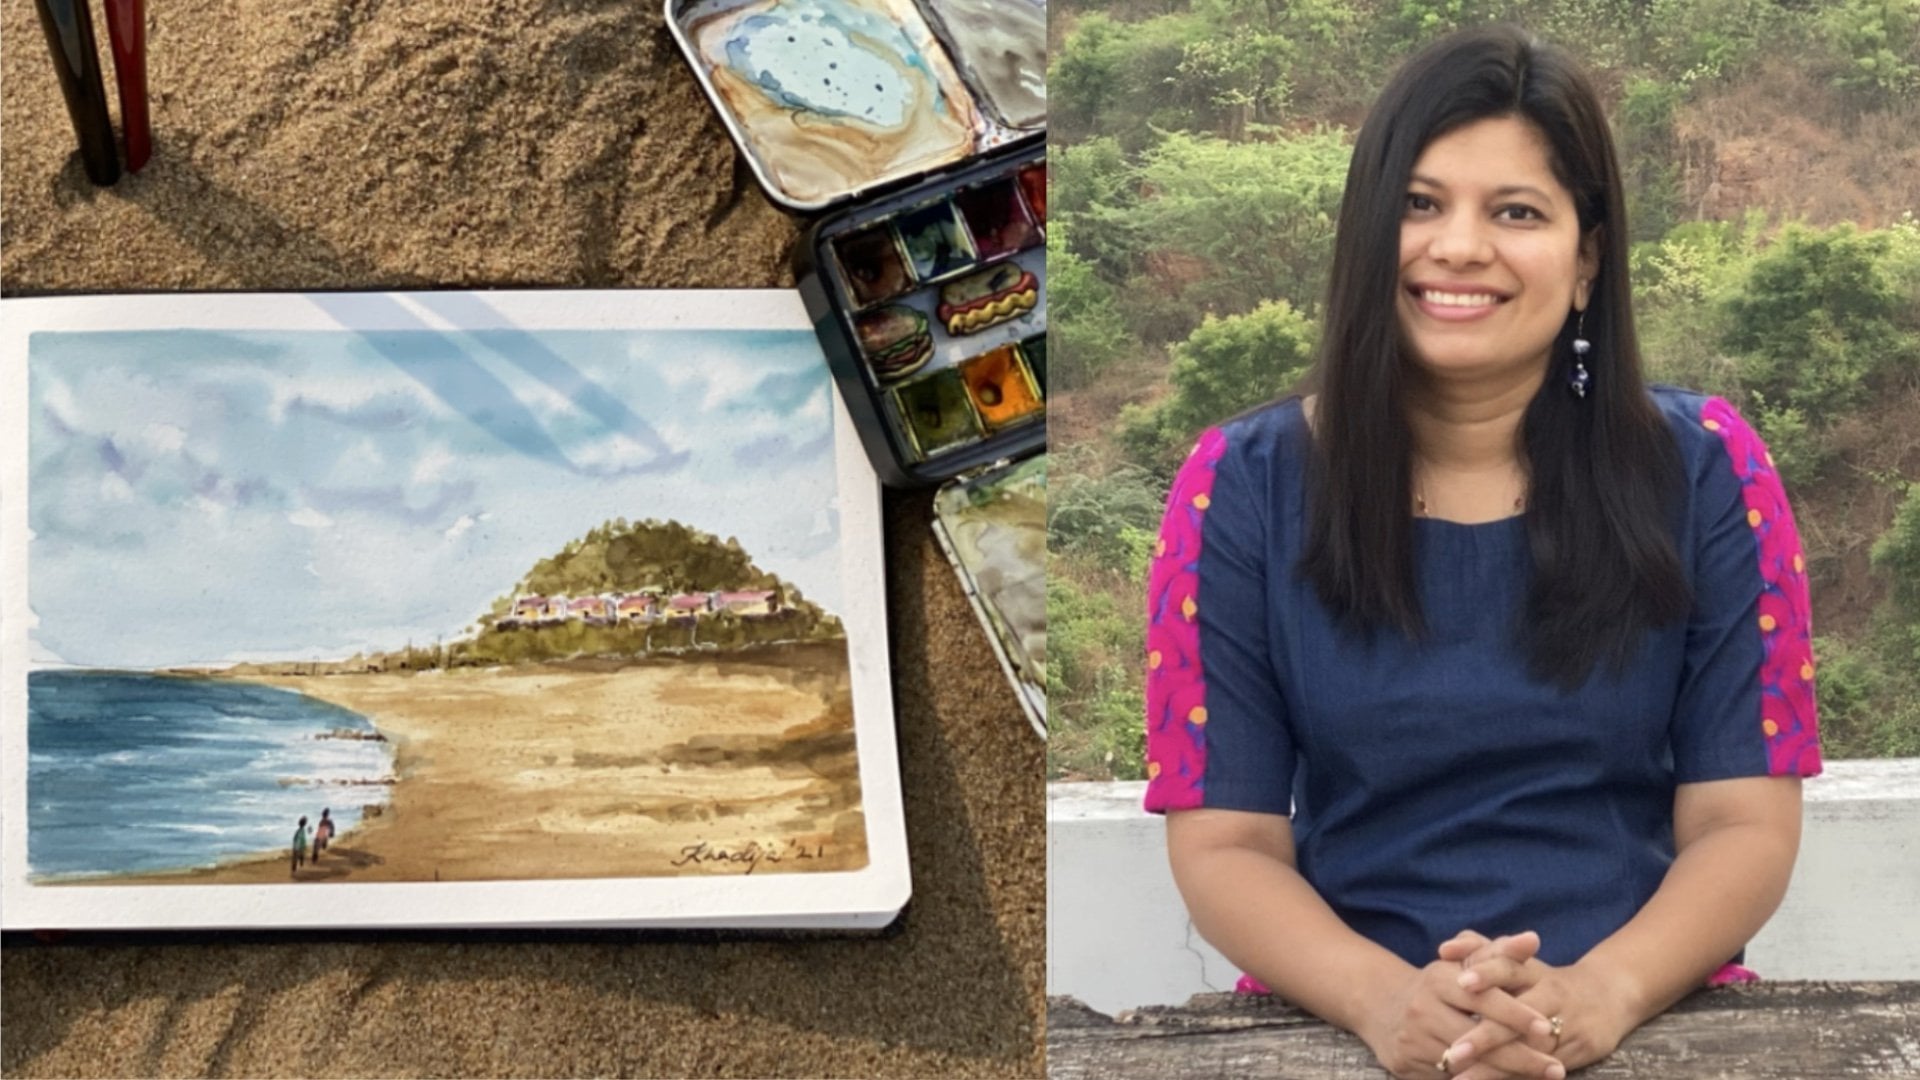
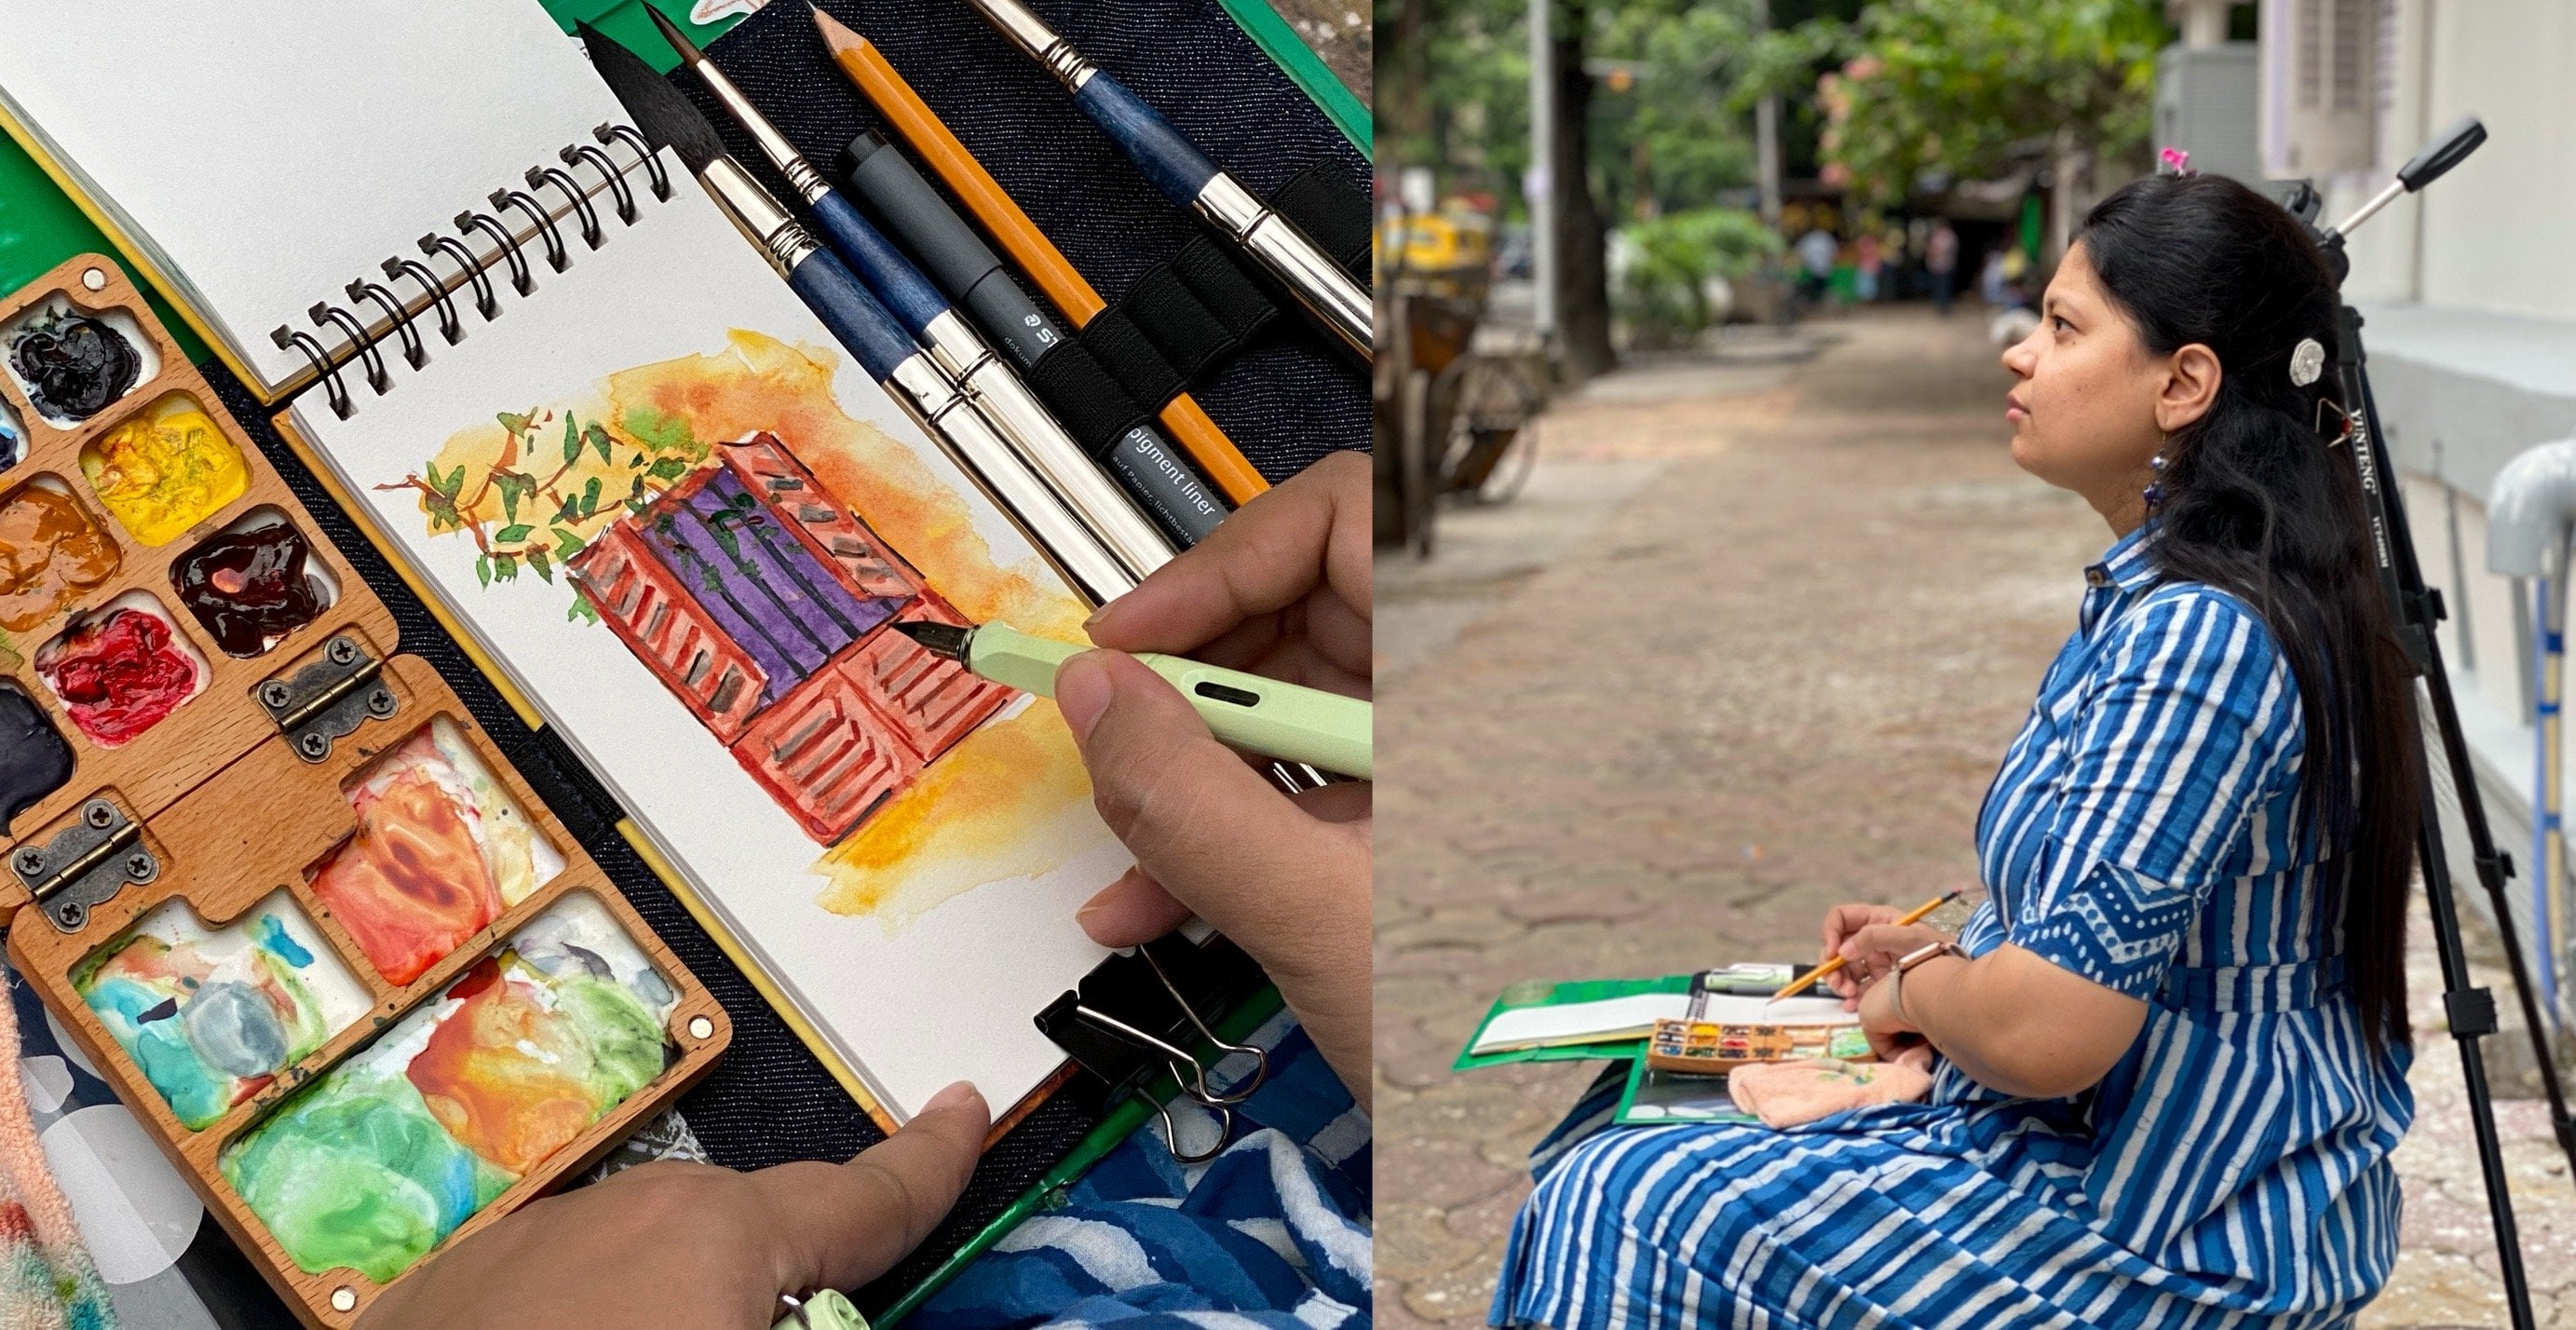
Transcripts
1. Intro: Have you ever wanted to capture your surroundings in a painting but had no idea where to start, what to include or exclude, what colors to use? In this class, you'll learn anything you need to know about painting outdoors, and the supplies you need to deciding your composition and painting in a limited timeframe. Hi, I'm Khadija, an artist, entrepreneur, and digital marketer from India. Most of my paintings are either places I've been to, or places I long to go to. For me, plain air brings two of my greatest loves together: the outdoors, and art. But painting outdoors comes with a few challenges. We are limited in the supplies we can carry, since we are painting live and limited in time and we're constantly overwhelmed with the immensity of the outdoors. In this class we'll give you a plan on how to tackle painting a landscape outside and walk you through the material we will use and how to make the most of them, what colors to select that are closest to nature, how to create your own composition using a thumbnail approach. Understanding the various elements of a landscape, like trees, foliage, sky, and hills, and breaking them down into background, middle ground, and foreground. As a bonus, I shall also teach you how to take a picture of your painting. What you will take away from this class is confidence and ability to take something immense and break it down into manageable steps that can be executed in a limited timeframe. Since most landscapes are made of the same basic elements, you can take this process and apply it to any landscape you can. I would love you to find your own place. It could be your backyard or a walk in the park. It doesn't have to be anything fancy, just a place that you can be still, soak yourself in the present and enjoy your one hour. After this class you will feel motivated to pack your paints, go outside and start sketching. Come, let's get started.
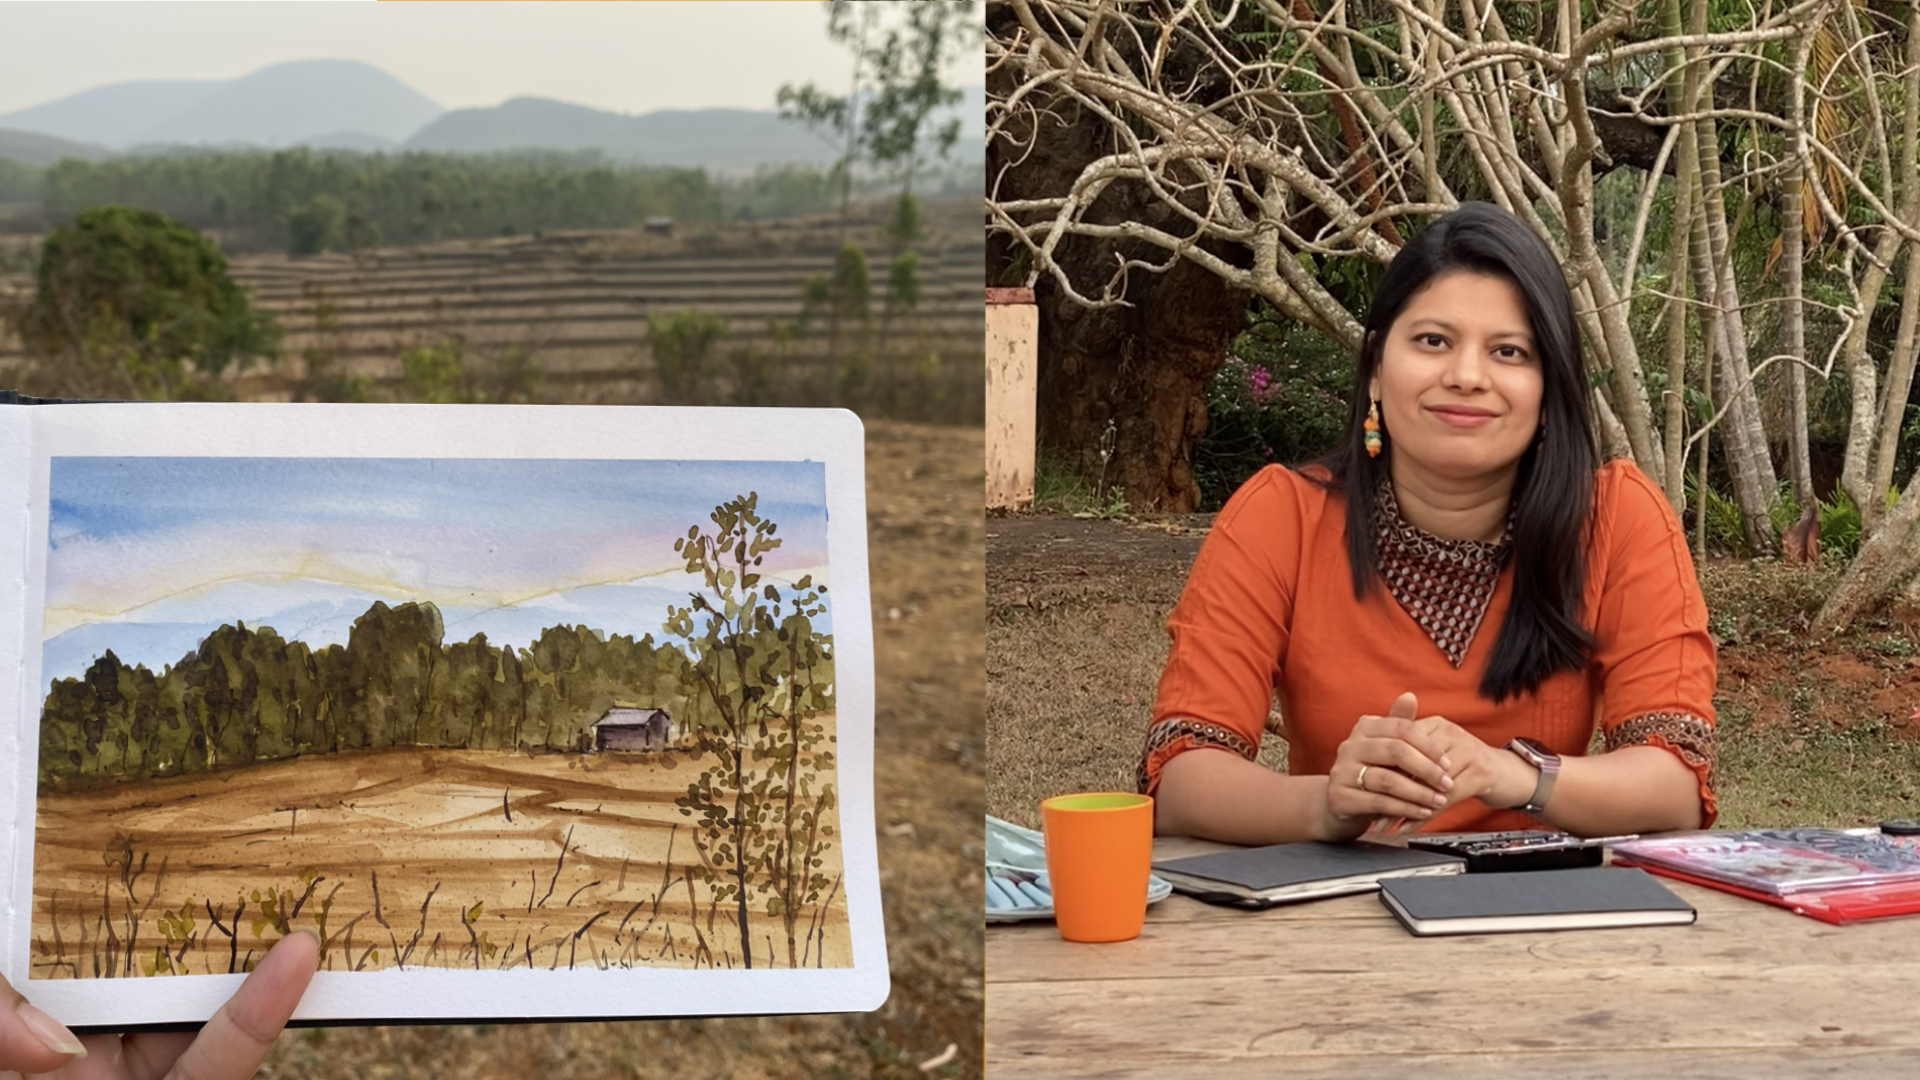
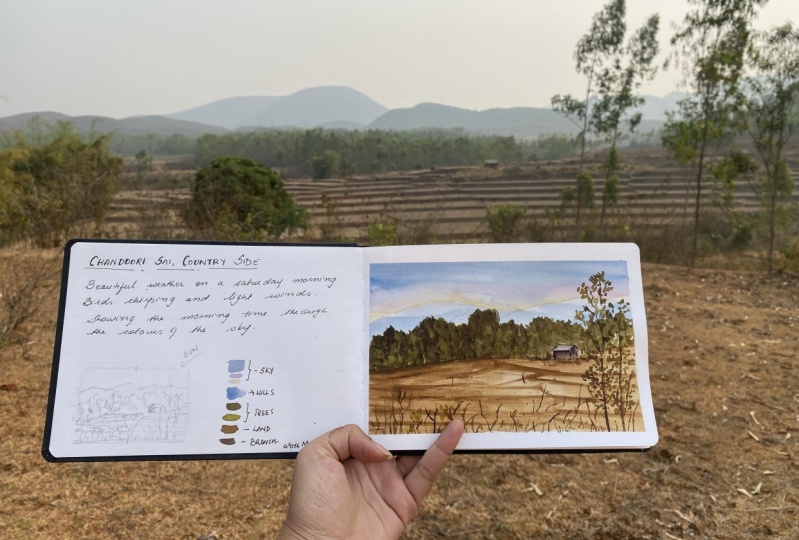
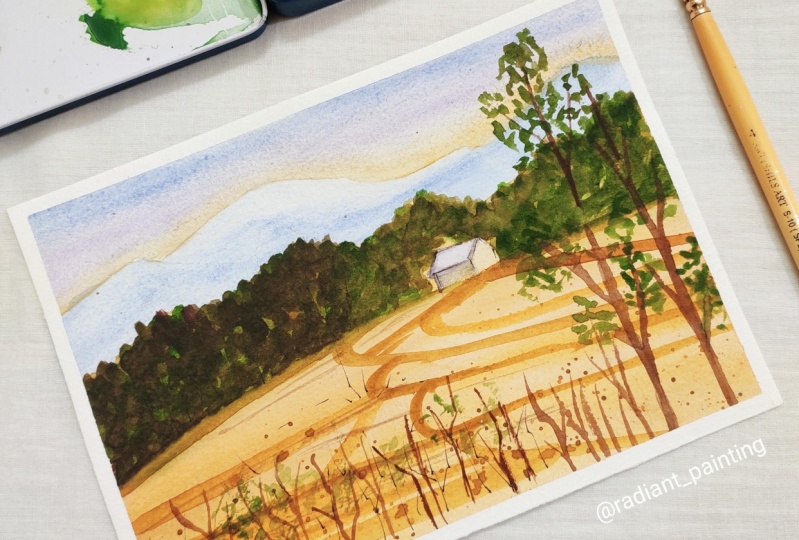
2. Your Project: For our final project, we shall be painting a countryside scene of Odisha , India. I encourage you to paint along. This will help you grasp the basics of a landscape. I've attached the reference image in the Resource section. I also encourage you to find your own spot, it could be your backyard or a walk in the park nearby. I encourage you to take a picture of your own artwork and upload it in the project section. This is a no-judgment section and a great place to collaborate and share our progress with one another. For this project, I should first walk you through the materials you will need for outdoor painting. Then you will understand how to create a good composition using a thumbnail approach. Once we have our composition, we shall talk about the colors in a palette that compliment nature. We shall then paint every element of the landscape, the sky, the foliage, and the land, and understand how to break them down into background, middleground, and foreground. While outdoor painting, you're pressed for time. So it becomes very important to manage your time well. Here is how I suggest you manage time; spend 20 minutes planning, drawing your thumbnails, and deciding your colors. Thirty minutes doing the action painting, and another 10 minutes to do the final details, and write a short note. This will take time to perfect, but as you keep practicing, you'll find your perfect sweet spot of time. Don't spend too much time trying to find the perfect spot. There's no such thing. When you look at an interesting subject, just stop and look at it. In the next class, I will be telling you how you can convert a location into a composition.
3. Your Materials: When you paint outdoors, it's very important to be minimal. Let me walk you through some of the basic supplies I use while outdoor painting. One is this DIY hardboard to hold the sketchbook. Two is this [inaudible] sketchbook. It's a 200 GSM watercolor paper. I carry this primal compact watercolor set. In addition to the colors they have, I have added three [inaudible] colors of turquoise blue, [inaudible] gray, and [inaudible]. This is because I personally use these colors a lot, and these two magnets are just to keep them in place. I never wash my pallet because keeping these colors helps me pick them up from time to time and create new colors from these itself. I just carry three or four brushes for planar. For this painting, I'm just going to be using a size 10 Princeton, size four Princeton, and a Rigger Escoda brush. Once you paint, you realize what brushes work for you and just take two or three at max. I also take a fountain pen and a white pen, these are just to add the details and a couple of highlights. These are waterproof, so they're really good for watercolor paintings. Then, I have this basic water container. You need masking tape, and a pencil, and an eraser. Remember, these are just a few suggestions. Use whatever supplies you have and don't let supplies stop you from trying.
4. Deciding Your Composition: Our eyes have a 360 degree field of view and we can't possibly include everything on a piece of paper. So it's important to narrow down and create your composition and decide what you're going to include, and most importantly, what you're going to exclude in your composition. Here are the five things I look for in a composition. Try to keep this in mind whether painting live or painting from a picture. A clear background and foreground. It's important to create depth in your painting and this comes from contrast and the difference in your background and foreground. Light source. Identify a clear light source. In this painting, I've decided that the light source is coming from here. So I've left these sides lighter and these sides much darker. See lighter and darker. This helps create a play of shadows and light. Focal point. The eye should always have one thing to look for, otherwise it won't remember anything. Add a vehicle or people so that your eye moves all around the painting but there's always a focal point. The rule of thirds. If you divide your building into the thirds, you should try and place your primary subject in the third quadrant, either on the right or the left and not in the middle. This helps move the eye all around and this acts as a good guideline. Perspectives. Broadly speaking, there are three types of perspectives. One-point perspective, two-point perspective, and three-point perspective. We won't get into the details, but I'll dive further when I draw my [inaudible]. In this painting, you can see two sides of the ship, so this makes it a two-point perspective. Now let's finalize our class composition. I usually use my hands like this to finalize the composition. But for this class, I'll be using a viewfinder. From my entire field of view, I use this view finder to finalize my composition. This is a composition I would like to finalize. You can see the viewfinder has been broken into the rule of thirds. This helps me place my subject, which is this cottage and these trees in the third quadrant of my composition. It makes it balanced with the sky and the fields.
5. Drawing Thumbnail: Please never skip this step. I cannot emphasize enough on the importance of a thumbnail. That thumbnail is your space to experiment, to add and subtract elements before you dive into the deep end of your sketch. First, for the thumbnail, I'll be drawing a rectangle on the left-hand side of my paper. As soon as I draw this out, I just mark out the middle points, and then I very lightly mark out my thirds. This helps me place my composition properly. The first thing I ever do in a painting, in a composition, is I draw the line of horizon. The line of horizon is usually the line that separates the land from the sky, or the sea from the land. This is my horizon line that's moving down. Now I place my subject, which is the hut, over here. After I've placed my subject, I start drawing the greenery. Don't draw the greenery even. Put it up and put it down and make it uneven. That's how nature is, so let's embrace the imperfections of nature. The greenery goes on to here. I would just like to extend this here. You can experiment in your thumbnail. You don't have to be extremely accurate. This is where you decide where you want to include, what you want to exclude. Now I'm drawing the hills that are coming from behind, and you see that it's a range, so when we finally do the painting, you also want to include and exclude things in this range. Now I just want to put a little of the grass in the foreground so I remember that there is this foreground, and in order to show there is farming, I'm going to just going to just mark out, initially putting less space, and then leaving more space between each thing. The further they are, the lesser that you can see. I would also like to include the tree that's closest to me. It will go like that. Be drawing two of them here. This is how basic and how simple your thumbnail needs to be, and all the detailing we'll do when we do the painting. But it's really important to set this frame right. Another thing to note is the source of light, which in this case is the sun is coming from your right-hand side. Everything this side will be a little darker than the ones here. This is something that is really important, and you should remember that all this part will be much darker than this one. This part would also have shadows, but not as much as this part. This part of your hut will be much darker, and this part will have the rays of the sun. I'm happy with that thumbnail, so join me in the next class as we talk about color selection.
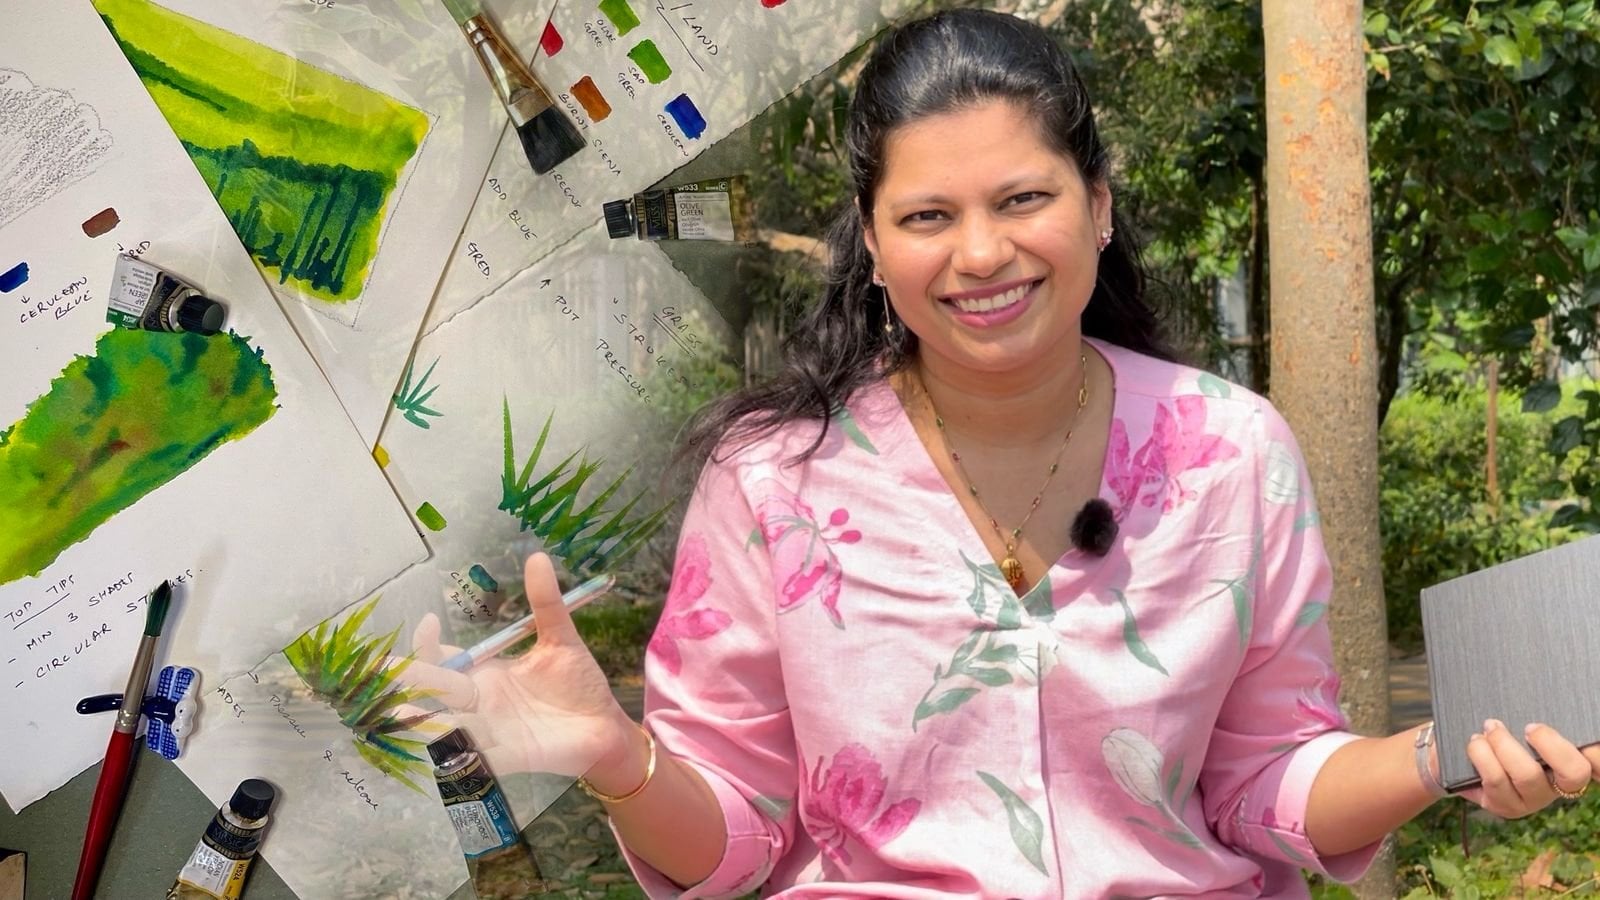
6. Colour Selection: Don't get hung up on trying to find the exact colors you see. Nature's colors are infinite. What we want to do is create a mood and a contrast through the colors. Remember, outdoor painting is an impressionist style of painting, not a realistic style. What we are trying to do is capture a mood, not every minuscule detail. For the color of the sky, I'll be choosing a blue and a purplish tinge. This is the top part of my sky. In the bottom part of my sky, I'm going to use a little more of a reddish, then I'm also going to use a little yellow because the sun has just risen, so there's a little reflection of the sun. This is how my sky is going to be. I'm just trying to get a feel of the place and the feeling of the morning. Now for the hills, I'm also going to continue using this blue and I'm going to just use shades of this blue for the hill. This is a color that will pace out for the hill. For the plants, I'm going to use sap green and I'm going to mix it with blue and a little red, which is basically crimson for the deepest end of it. This is going to be the deepest end of the trees. Then I'm going to use a lighter variant of this for the ones in front. I can add also a little yellow in that to make it brighter for the ones where the sun is falling. This will be the lighter shade of the tree. For the land, I'm going to use a mixture of yellow ocher and burnt sienna. Depending on where the light is falling, I will change from light to dark over there. This is the color of my land. For the bark of the trees and for the dried plants, I'm going to be using burnt sienna and a little bit of purplish mix to give it a little depth. This mix will be the dried leaves. Now we're going to use this in different combinations for our main painting.
7. Sketching Your Painting: Before I start sketching, I draw the middle point on my masking tape. This acts as a guideline for me to better understand where to place my objects. I always start with the horizon line. As we discussed, the horizon line is the line where the line meets the sky. The pencil sketch, at this point, is going to be extremely light. But by the time I finish this, you'll be able to see the elements clearly. The next thing I do is I draw my focal point, which is the hut. The process we're using is very similar to how we did it in the thumbnail. After my hut, I'm going to draw the trees. Just give an outline on where you want the trees to be. You don't need to draw the specifics of the trees. When you're drawing, keep in mind the things that you are drawing. It becomes easier when you're painting. Everything you are doing right now is to ease out your painting process. I'm not happy with the hut, so I'm going to go in and improve on the hut a little bit. As I look at the scene in front of me, I see just a couple of hills in the mountain range, and so that's what I'm going to do, just add a little bit of hills. This also helps create a good amount of depth in my landscape, to show how farther away the hills are. Now I'm moving to the terrace farming part. Notice over here the terrace that's further away from us will be more narrow, and the one that's closer to us will be wider. This helps create a good depth and perspective by reducing and increasing the distance between objects in your drawing. You don't have to be too specific over here. We are just marking out the lines to help us when we are painting. I'm quite happy with the way it is coming out. I'll just add a few dried plants so that I know how high the dried trees are going to be, and most importantly, I don't forget to do them. Keep observing your surroundings when you're doing this. At anytime you want to add or subtract any elements, feel free to do so. I'll also just put in the two foreground trees. Whenever you draw trees, don't draw straight lines. Draw crooked lines, draw uneven lines. When you do that, it gives away more natural effect of the trees than to just draw a straight line with straight branches coming out. This looks good to me. I'm just adding a few branches. I'm quite happy with the sketch now. Remember to keep it minimum. Join me in the next class as we paint it.
8. Sky and Hills: I always start with the sky. It helps set the mood for the painting. First, I'm going to start with the yellow ocher to show the reflection of the sun since the sun has just risen. This is a wet on a dry technique, some I'm taking pigment and just a little amount of water on my brush. Currently, there is no water on my page. I'm just using a little water to even this out, so that it doesn't have hard lines. Now, I'm going to take the purplish-blue mixture that we had shown in the color selection, which I'll be using for the top part of the sky. Over here also, I'm using a wet-on-dry technique. Be careful on amount of water you take. Right now, don't take too much water. Just take enough water to pull your paint through the sky. Be careful when the blue comes close to yellow, because if blue mix with yellow, it will give you green. When you go towards the yellow, just see that you don't have pigment on your brush, you just have a little bit of water, that's it. Now, I'm also adding a little crimson to set the morning mood for the sky, just a very light line of crimson. I think the sky is looking good so we could move on to the hills now. To show the hills, I'm just going to put a very light coat of blue. Here again, it's a wet-on-dry, so I've just taken a little bit of pigment on my brush and I'm pulling the paint along. I'm just taking a little water and blooding the part below because it's going to be the trees anyways and I don't want hard lines. I want soft lines for it to look more natural. I'm putting a few darker tones just to show the depth in the valley. The ones closer will always be darker and the ones further away will be lighter. If you're not happy at any point, you can always take a tissue and dab it on your paper so you can lift the color off that way. Don't worry if you ever add too much color anywhere. I think the hills are looking good and we let it dry and we'll move on to the next part of the painting.
9. Trees and Land - layer 01: Let's start with the trees. I'm still using my size 10 Princeton brush. I'm starting with adding a layer of yellow ocher. This is still a wet on dry, where I'm adding pigment directly to the paper. Let your color be uneven and don't worry about having a perfect tone. The whole beauty of nature is the unevenness of colors. Whenever you look at trees, notice the amount of shades, and tones, and variations that are there. As in a plain painting, we just want to set that tone by adding tonal variations in our colors, and not getting too specific. When you come towards the heart, please be sure to let that part stay white because we'll come back to it. If you add color now on it, it'll be very difficult to then give it the shape that you want to give it. Now I'm adding the second layer. This is a mix of sap green with crimson and blue. Notice how I'm just touching it in a few areas, the colors are going to spread now because it's a wet on wet as our first layer is still wet and the second layer of green that we are adding will become a wet on a wet. All across the greens, just keep adding as if you're adding dots on the entire section and let the color spread. I think the second layer looks good, so we could just add a third layer. This layer is just crimson and blue mix, so you can just use purple to give this layer. Like you can see, I'm just adding a few highlights and the top parts you can add a little darker green to show them further away. Since the light is coming from the right-hand side, give more darker tones on your left side. You can see even when I'm putting the darker tones, I'm putting it in the left and below. You can feel the sun's rays and you can feel that depth through light and shadow. Continue doing this for the entire trees range. Just enjoy yourself over here, you don't to be too perfect. Since now this is wet, I'm going to move on to the land and come back for a next layer of the trees when it's dried. Now for the land, I'm using a mix of yellow ocher and burnt sienna. Here what I'm doing is adding a flat wash where I'm going to put the same color throughout the entire land section. After I've created one entire layer, I'll add a few deeper tones. Even here be sure to leave the heart and try and not put color over the heart. Use enough water to spread the pigment to the land. Be careful not to use too much or too less. Now I'm using a deeper tone and putting on the left-hand side. Throughout your painting, remember the light source so you can create good light and shadow. That's why I've put the deeper tones towards the left-hand side. It's the same mix, just more of pigment and less of water. Then the second layer becomes a wet on wet, so it gives a nice softer look to the land. I think I'm happy with the land. Now I'm going to let it dry and more on to doing the second layer.
10. Trees and Land - layer 02: Now, we're going to add some depth to the trees. I first lightly wet the tree section and then add a deeper mix of sap green with crimson and blue. If you feel that your trees are already dark at this point, you can skip this step, but if you just want to add a few darker tones, you can go ahead and do the step. Be careful at this step. Don't add too much water. The previous layer will also start coming out, so add very less water and add the deeper tone. Add more depth towards the bottom of the trees showing where the box will come and be careful to leave the hut section, so we can come back to that later. Now it looks good to me. We could move on to the land section. Now, I'm going to start marking the different terrace levels. I'm using a deeper mix where it has more burnt sienna, less yellow ocher. With a very light hand, I'm just using the pencil marks as a reference to mark out these layers. Be sure not to make these lines too hard and too stiff. Put more amount of water at this point to just give a very soft and easy flowing lines. You don't have to be very specific about each line over here. You just have to get the impression of the different terraces. Don't worry about getting each line or getting caught up in the specifics of it. Now, you make or create a deeper mix with more of burnt sienna and less yellow ocher, and add these deeper lines to the terrace. Currently, I'm using a smaller size 6 Princeton brush. It's easier to handle when I'm trying to create thinner lines. Since we have this, I'm going to now try and create some atmospheric noise. To show the little grass that's dead, what I'm going to do here is in one brush, I'm going to take a generous amount of color and I'm going to use the other brush as a support. This is a fun of playing and things keep flying, and just gently hit that other brush. We just get random little small, big dots on the page. Once this is up you'll be able to see how nicely it creates that texture of little grass and use of little things that you have in the atmosphere that you can possibly create individually. I think I'm happy with the land now, and we could move on to the full brown trees and some finishing touches.
11. Foreground Trees: Now I'm going to do the bark of my main trees. I'm holding it upright and I'm using this finger to help support it. I feel it's too dark so I'm going to lighten it. Do uneven lines to come up. I'm just first drying the bark up and then I'll put the greens. We may make it darker right here maybe. Just keep going with your gut. Make something over here as well. Now I'm going to add greens to this. Same mixture as we did previously, where I'm using some sad green and some dark green. I'll just add it as [inaudible] some add some leaves. Since this plant is in front, we will over shadow all the ones at the back. You just keep painting your green. These dots, same with the tree we have. Just want to create some dots. We will add some of that a little later. I'm just going to go in and give some depth here. In some cases, this is on top. The lines you want them to be a straight line, they are just complete lines and then be incomplete lines. Now moving to a rigger brush, which is a size four brush. I am just adding lines over here. Notice how I'm holding my brush at a 90 degree angle and just creating a couple of uneven branches here and there. Don't create a line of straight lines. It doesn't look natural, just a couple of lines here and there. Uneven lines to create some branches that you can see. I'll just add a few highlights on the terrace as well. Well I'm happy with this. So I think we can move on to the heart and the foreground. We are almost close to completing this painting.
12. Foreground Plants and Hut: Now, let's move on to the hut. For the hut I'm taking a light purplish finish, which is very diluted and I'm going to apply that to the hut section. A little darker below. If I'm not happy with this, I'm just going to go ahead and lift it out with a tissue. Whenever you apply color and you're not happy with, you can immediately lift it with a tissue. If you wait for too long it will get dry. I'm still not happy with it, so I'm going to lift it, and this color seems pretty decent. I want to keep the hut light so that it stands out in the middle of all the deep green shades around it, and the roof is where the sun rays is falling, so that will be lighter, everything else will be darker. I'll just add some plants around the hut as well, and I'm going to come back to the hut and add the details with the pen, since it's so small, the brush is not doing justice to it. Now let's work on the foreground plants. I'm going to be using a brown sienna over here. I think I'll shift to a thinner brush and I'm using a size 4 Escoda river brush. I'm holding it at a 90 degree angle and I'm just adding some broken uneven lines. Don't get too specific over here, its nature, just add some broken lines for the foreground trees to stand out. A little bit here and there. We gave like a really nice natural look. Now I'm going to use some sap green and just add a few leaves to the dried plants. All you need to do over here is take the tip of your brush and just touch the tip of your brush to the paper, and it will give a nice effect of grass. Over here, as well, keep it uneven, this doesn't need to be symmetric. Now to take a lighter shade and add a few lighter shades of grass, which is basically a more diluted shade of brown sienna. Now, using a Lamy fountain pen and the ink in this pen is sepia, which is a dark brown, and just adding a couple of broken lines to define the hut but not very specific lines to make it too obvious, just a couple of highlights. See, just by adding a few broken lines an entire hut has come to life. Also, just add a couple of branches and darken a bit of the trees and the foreground grass. Now I'm using a little purple and adding a little bit of shadow to the hut, just at the bottom part of the hut. This looks good. Just a few finishing touches and we are all done.
13. Final Touches: Our painting is complete. I'm just going to look at a few areas that I would like to add a few deeper tones. In the tree, I'm going to add a few deeper tones using sap green and purple mix. Just a few here and there to show the shadow region. This is a completely optional step. If you feel that your painting is complete, don't go around adding highlights where it's not necessary, but I just feel it's required over here. Even in the fields' region on the left-hand side where the shadow will be, I'm going to add just a few darker spots. If you're going to do this, be careful, and do it in a very light-handed manner. I'm also just adding a little purple, a little darker shade for the hat, and walla our painting is complete.
14. Writing A Note: [inaudible] like to write short note in my sketchbook. Something peculiar, something interesting about the place and that moment. It feels really nice when you read that note after years or months and remember what you were thinking or how you feeling when you did that painting.
15. Bonus: Take A Photo: For keepsake and the digital world, I always take a photograph of my painting. Let me walk you through how I do it. Hold your painting against the view that you've just painted with one hand, and with the other hand hold your phone. I currently have the grid mode on, on my phone, and I placed the painting in the third quadrant. This gives a well-balanced beam photograph of my painting. Here's the final photograph of your painting. Yeah, it's that simple.
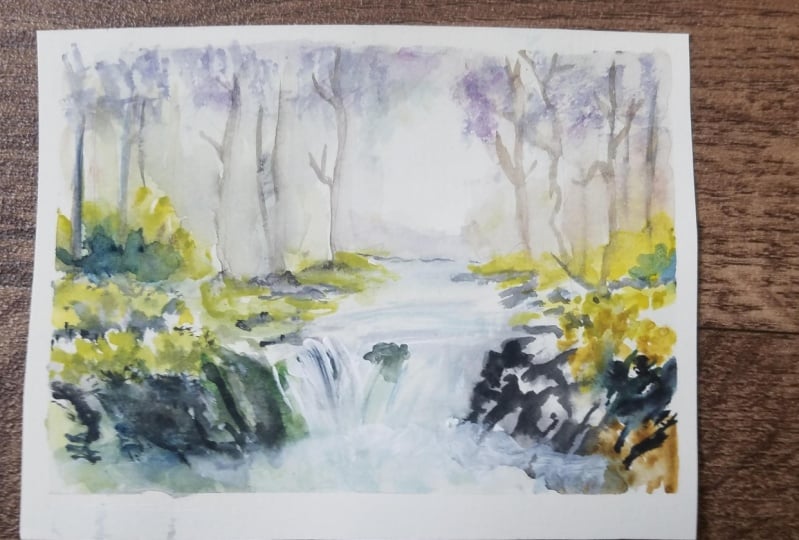
16. Bonus: My Sketchbook Walkthrough: Let me do a sketchbook walk-through. These are one of my initial paintings that I had made in North Sikkim, where I was trying to capture the snow. This is a very typical Lachen scene where you have a lot of colorful buildings right up to the mountains. This is a monastery in Sikkim. This is a painting of a running field in Vizag. This is a very quintessential Vizag scene where you have these little houses on the Rushikonda Beach side. This is a flop, I was trying to get the sun rays, but I'm very unhappy with this one. This one is a rope way, I was trying to capture the rope way that we have for Kailasagiri, also in Vizag. I've grown up there, so I have a lot of paintings from there. This is also a typical scene where you have a lot of colorful houses right up to the hills. This is a scene of the Tenneti Park where you can see the sea and the hills right in the background. This is a painting of the harbor. You can see the bigger ships, the smaller boats in the harbor. This is also another one that I'm very unhappy about. I didn't get the proportions right and you have to keep practicing. I really like this one, I'm trying to get a panoramic view from a hilltop in Vizag again. This is another flop, where I'm trying to learn rocks and I'll show you how I've improved my rock, so you have to just keep trying. This one is the submarine. I had come home and completed it, that's why you can see such extra detail. Otherwise, usually in plain air, there's lesser detail. This is obviously an incomplete one. But I believe every artist has a couple of incomplete pictures in their portfolio, so to say. This is also very serene beach. I haven't got the boat right, but keep practicing. This is close to Calcutta. This place is called Jalpath, very rustic, very nice place. This is on our drive to Simlipal forest in Orissa. This was a quick sketch where I tried to capture the waterfalls. See now, you can see how I've improved my rocks. That's why I said, keep trying. This is a very beautiful [inaudible] River in Orissa. Another incomplete one, like I said, you need to have a couple of incomplete ones. This is one of my favorite places in Calcutta. It's Rabindra Sarobar Lake. This is old street, Basanta Roy Road in Calcutta. This is again Vizag, where I'm trying to capture the sunrise and trying to add a little perspective. This is Kailasagiri and their train tracks. The water completely got off. The weather didn't permit me to let it dry fast. This is an abandoned ship in Vizag Beach again, very interesting ship. This is a lighthouse. We have a couple of lighthouses here, so I wanted to capture a morning lighthouse scene with people coming for their morning walks. This is Andhra University that I wanted to capture an old building and that stone effect and those beautiful roofs that they have. Also experimenting with the sky a little over here. This one is the Ripley Waterfalls. I feel a little happy from the 1st to the 2nd waterfall. This is my sketchbook. I've just got started with the 2nd one.
17. Final Thoughts: Thank you for watching this class. It's my first class, so I'm both excited and nervous. I love landscape paintings, and I hope that I pass some of my enthusiasm to you. I hope you have learned a lot from this class, and you are motivated enough to create your own painting. Please click a picture and upload it in the project section. Don't forget to leave me a feedback, it will help me reach out to more students. If you have any questions, please feel free to reach out in this discussion panel. If you're uploading your work on Instagram, please tag me @QUIRKYHADZ. Now, go out there, take out your paints, and get painting.
 Khadija Karachiwala, Watercolour Artist