Transcripts
1. Expanding Journals Info & Class Project: Hello. I'm Daniella Melon and author and artist. Welcome to my class. Expanding journals. Germans are an artist tool. We can record ideas and techniques, experiment or play with supplies and refer to previous sketches to build on them. Journals are a way to organize our art. They can include emotions and help us work through our feelings. And he kept private or the generals can be used in a professional capacity to share our work with others. I like to have dedicated journals for my classes and my art project. These are things that I'm comfortable sharing, like sketches, watercolors and brush stroke techniques. I found it challenging, though, to find a journal where I can remove pages, work on them and then return them back to the Journal. Or I sometimes get very involved in a topic, and I need just a few more pages in my journal and would like to find a way to add them. So it started making expandable journals using easy to acquire supplies and quality paper. Today I'm gonna share my process with you. I challenge you to create your own journal and posted in the project section of this class . I've included a lesson on the technique of mark making that you can add to your journal, and I've included a brief peek into some of my journals. I can't wait to get started.
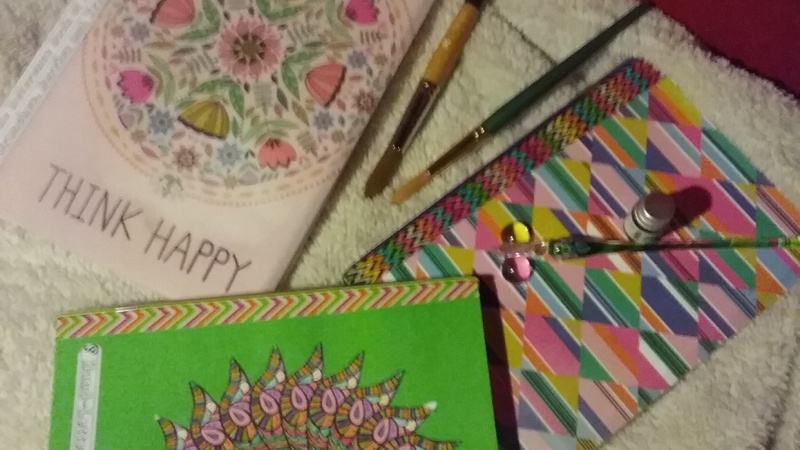
2. Class Supplies: for our expandable art. Generals will need some supplies. We'll start with just the basic ones. Um, a pencil eraser, a good pair of scissors, a bone folder. If you don't have a bone folder, you can use a dull butter knife or even your fingernail. A bone folder gives it a nice edge. When you flatten papers and you score them, you can also use a stiff ruler. We'll need some giant elastics. I find that the ones that I purchased at little stores for headbands work great. They have different widths and because they're made for ahead, they're not too tight. This is a thicker one. This will be This is a good one. For if you have a lot of pages in your journal, these are the super thin ones. Try and purchase these when I can find them because they make great elastics and these air kind of the mid between the thicker and the thin ones. Get him in a package of 10 or 12. We're gonna use Thies to hold our pages in our book. We'll need some file folders. These air the standard letter size these air manila folders fairly stiff, which is good. Here's a fancier one. When the school supplies air out, you can find some different colors. Different patterns. Basically, all you need to be able to do is open and close it. We're gonna cut off the edge and cut it down to size. So whatever size or pattern you like, get that one. To fill our journal, make our pages. We'll use watercolor paper, have £140 to make it easy to fit with our file folders. This is a nine by 12 for the watercolor. This will require some cutting down of the file folder, but it create creates a nice size journal for the other journals, which don't require as much. Cutting down the mixed media paper in 11 by 14 is the perfect size. This is also £140. We'll fold it over and score it. We'll need some taped to reinforce are binding. They're in love. Number of tapes that will work really well. Duct tape works terrifically. It's a nice, durable tape, comes in a lot of patterns and very reasonably priced masking tape work as well. Give them or generic look, but it doesn't look bad in the craft paper tape, not washi tape. But, um, this one's called Kraft Paper. I think it's made by the same company that makes the duct tape. I found out the washing tape comes on done doesn't tend to stick a much, so I avoid that. It also tears more easily, and lastly, we'll need a paper cutter. You can use a pair of scissors as well and trace a line, but this makes it super easy. You load your paper in and draw your line. It also helps sometimes if you want to score additional spots because you're nice straight edge that you can use your bone folder on Let's get Started.
3. Journal #1 Pages: to make our pages will take our large mixed media paper or are watercolor paper in a bone folder If you want to Dio is take the paper match the corners together when you make the fold something here and here the two corners I'm looking to match And then I gently hold it with my left hand My right hand a push just in the center And then I'll take my bone folder where I pushed and score to do me and away from me Then I'll flip it over because this paper, so thick and do it again gives a nice, crisp fold Show you one more time I take my paper folded corner to corner, Hold it in place, push down the center on the fold and then put Jimmy and away from me. Same thing. Now I've done to previously to make a signature packet, you're gonna use three papers. You could use a different amount if you'd like. I I find with this weight paper £140.3 makes a nice signature. So I'm gonna put the papers inside of each other. Here. We have one signature for your journal. You'll add as many signatures is that you like I'm gonna use this one to measure out for our cover
4. Journal #1 Cover: to make the cover for our journal. I like to take the file folder and you can see on most file folders. They have additional areas that you can score if you have more papers to fill. I like to score in the 2nd 1 so I'll take the current fold. I just use it as a guide for the second hold. You can. Also, if you have a lot of signatures that you'd like to place in, you can use the third fold. And again I pressed Stand with my hands once, and then I score it with the bone folder for the crisper fold. Okay, so here, with the one full, you can see this will be my folder. I'll take my papers. This is one signature will go in here, and I'm using this just is a guide. So I want the height of the cover to be just barely larger than the papers. If it's too large, it will bend in with the rubber bands that we used to hold it. So I'm gonna just mark just slightly above, um, pages. And for the length it can go much less a white as you like. I'm gonna give it a little bit. Maybe 1/4 of an inch for we'll take my cutter, place my paper right in there, make my cuts here. I'm gonna fold it down flat. Hold it up against where I want to make my cut. Okay? And then I'll just figure out where I want it on the back side, so I'll measure just to get it more precise. So it's seven and 1/4 inches. So open it up and from the bottom from that bottom fold, I'll measure seven and 1/4 inches, and I'll cut that one as well. So this is the pages inside are covered.
5. Journal #1 Spine: next up. We want to reinforce the spine. To do this, we're gonna open up our folder and then take out our tape. We're gonna pull enough tape. Um, well, actually, flip it over. So this is the outside of the cover and put tape hanging over both the top and the bottom here. I'm just using masking tape. I'm gonna line it up trying to make it straight, but just eyeballing it with the masking tape I can see underneath. Um, just to get a rough idea. Then I'm gonna very lightly burnish it with my side of my thumb. I will flip it over and fold over the top piece, furnishing that wealth enfolding over the bottom piece. Now I'll put another piece down the length of the interior of the spine to make it easy. I'm going to cut a nice straight edge so I don't have to do that. After I've pulled off the tape. Put my tape down, try and line it up slowly. Go down the length spine, clip my tape. I can see I was a little off. Um, what I can do, I don't want to pull up the tape again. I'm gonna do is clip it right at the end. And I think I'll just put a piece of tape on additional piece of tape right down the side. It's the interior is not going to show, but this will just further reinforce it. Okay, so now I'm gonna gently closed my folder trying to preserve both of the folds there. I have my completed folder. Here is one of the signatures that we had. I'll take one of the rubber bands, put my signature inside of my folder, put my rubber band in place right up against the spine, influence them. If I want to add additional signatures, I'll just take another one. This is just a single page. But if I had all three paper pages folded, I would add that again. I add my elastic, and then I put it in place. Okay. Next, we'll make up he folder with watercolor paper. It will be a little smaller and require additional cutting
6. Journal #2 Pages: for our smaller watercolor paper journal were using nine by 12 paper, which folds into a nine by six size. So we'll take the paper in the same way we did for the mixed media paper Journal. The larger journal. Match up the corners full down and use the bone folder, and I'm gonna show you what the difference if you don't use the bone folder corner to corner, pushed down and bend you get. It's still a nice bend, but not as crisp and not as tight as the one using the Bone folder. It's easy enough to remedy you just go back with the Bone folder, and this is because it's £140 paper and it's pretty stiff. You can, even if you'd like it to be even tighter. Just turn it over and fold it again. So here we have six pages, will make two signatures. Three open, one page said another page inside and in the final page. And then same thing with the side
7. Journal #2 Cover: for the watercolor paper. Our cover's gonna be even smaller. Here I am using the fancier of the file folders again. We want the same procedure. We don't have to measure it with numbers. If we don't want weaken, just eyeball it by taking our signature holding it up against the side of the file folder. And we're only really super concerned about getting the height pretty, pretty accurate. So here I am. I'm gonna make a little in Denton with my pencil and we'll cut that size and then we'll double check to make sure that it's what we want. Okay, so if I put the signature in point out, it's a nice height. So that's good now because we know we're doing two signatures. We're gonna have to add an additional score mark in this file folder. It's not pre scored, but that's not a problem. You can either use your paper cutter if it has a score mark, or if you don't have a paper cutter, you can just use a straight edge. So what you'll do if you don't have the paper cutter is your measure. The straight edge will measure it 1/4 inch from the original fold and we'll make a line. It's and on the bottom will do the same thing. Quarter inch from the original fold and make a line. We'll connect those lines, and then with our Bone folder, we'll score that line. We'll do this a couple of times. We're not trying to get it right. The first score and what this does is increases the paper just enough to allow us to fold it. Here. We have a nice, solid crease. So after right started the fold, used the bone folder again and score it further. So there we have a tiny little spine, and if we want to use our score here, do the same thing is all measure quarter inch from the again. The original fold and most of these paper cutters have marks here. Of course, the mark is covered, but I can see this is the one. I want the quarter mark here. We'll make a mark and then I'll move it over to my score bar and I will take my bone folder . And again, I'm not trying to do its on the first score, but I'll just gently bring drag it down and if I go off track, that's okay. Because I wasn't going to harsh. I didn't cut a hole through the boulder. Just do it a couple times, and then I'll start the score. The fold go over with my bone folder. So there we have a much thicker spine hold for holding our, um, two signatures. You can see the original fold and then the ones we added. So now we just have to get the whiff, correct? So, going up against the spine, I'm just gonna eyeball it and make a mark where I want in the front. And I'll do the same thing with the back again, trying to go to the scored line. Don't take it to my paper cutters. I will double check to make sure it's Chrisley, and it does
8. Journals #2 Spine : Okay. Now we want to reinforce the spine for our water color folder. Again. We'll start with the outside putting that up first. I'm gonna use the black duct tape again. I'm trying to eyeball it. See, that's the center. Gently pushing it down along the spine, trying to prevent any wrinkles. Flip it over and Poland press the tape on the inside of the spine. Okay, now that there's no more sticky part, press it down again with my finger. He was The bone folder will reinforce the interior of the spine, trying to line it up the best we can see. We have a little bit of a wrinkle here. See if we can pull that up. Set that down again. Reinforce that spine by scoring my thumbnail gently flipping it over on both folds. Reinforce. Here we have the front. We have our first signature, our second signature, each with three pages. Can we have our elastic? Put the 1st 1 in and the elastic? Close it 2nd 1 and the elastic and close it and then we'll just move the elastic so it's on the spine in. Our journals are ready to fill
9. Bonus Lesson! Mark Making: Here's one exercise for your journal that you can incorporate. Um, it's very simple. I use whatever brush uncomfortable with one color of pain, usually a fairly bright color. It's kind of cheerful, and it's unexpected. And again, this is for practice and just for you to work on thoughts, ideas and come up with some first stroke techniques. So first thing we'll do is we'll just dive right in with very bold color. We're just gonna make repeated patterns, have already sketched out a box six boxes for each page, and so each box will have a different pattern. I'm going here. I'm just repeating the same pattern over and over. He's just little plus signs working on a right angle again. It doesn't have to be perfect, because this is gonna wind up being actually a shadow. We're all when it's all said and done, come work on replicating the same size over and over again. It's next technique next mark making parallel lines. You get a feel for the paint. This is a good way to practice. If you have a new paint that you're working with, who get a feel for the paint, Um, how smooth it is how bright it goes on, how transparent, how easy it moves, fights you and you get a feel for what size brush you can use with each thickness of paint as well. Okay, just to repeat this over again, if it shows brushstrokes, I kind of like that. Look, when it's done, this is just for me in my art journal or some ideas, and I might expand on that later. After it dries, I'll take a look and see what I liked. I didn't like about each thing here. I'm just gonna make hollow triangles. You could do this with any shape. Want some overlap more here. I'm gonna go and test the length of the line I can make, and I'll just repeat that line. If you hear that markets that you're running out of paint you and it's too late, you already run ahead of paint on your paper. But again, I like the idea of the brush stroke, the look of the brushstrokes. So I'm okay with that for my journal for a painting. However not want that that look here good makes very thick shapes. Fill that right in and over here. Originally was just going to do the two shapes, but I think that incorporate a small little shape in the gap here. Maybe I'll do 1/2 1 over here. Okay, Here, we'll just do a grid and we'll go across with the lines using acrylic paint on the mixed media paper. They're crow. Paint will drive fairly quickly, and then we get to our next layer. This page will add some more. It's gonna do dashes running down the length of the page of the box. Hero's gonna make little sees repeatedly fill the box. This works on just the little organic shape you were gonna make long ovals just fill up the box a little bit of overlap on some. Not on all I was gonna do. Staggered line almost like polka dots. But with a line here, we're gonna do lines made up of dotted lines and the last one to do never ending pattern, no rhyme or reason to this. We're just connecting over and over again. And if we find ourselves that we've backed ourselves into a corner, we'll just start again. Well, let this drive, and then we'll add our top coat for a next and final layer. Um, this is where you you can work with different things, try different techniques and add different different parts different layers as you like. Because we put down such a bold color, it's now fun to decide if we want a place are finer line in black, right on top of it, or off to the side, which create makes the pink turns pink into a shadow. I kind of like the way that looks. It might not work for all of our marks that were made, but it kind of is a very interesting effect. I can come back to my sketchbook when I'm working on another piece and decide what kind of geometric element I want to add to the background. So for this one, I can use this as a reference tool, these pluses that I have the double layer, the hot pink, and then they black on top. But I can also look at it and say Whom do I want to try it with a closer grouping or throwing a different shape, maybe at a different color? I'm still undecided. I could just break out another page and try another square with my different techniques because the black is so intense and so dark and a neutral, it really makes the pink pop. And then when it's all said and done, the pink almost disappears at the same time. It's kind of interesting effect. I like to use bright colors like Thiel's Blues Yellows as my base color. So here on the last row, I think I'm gonna combine, connects the two and see effect what effect that gives us. And it becomes a different pattern altogether. Um, in here, I think you don't just go over the center of the triangles and see what happens. There kind of changes the shape of here. It looks like the butterfly butterfly wings, the way they intersected. So that was an unexpected experience to learn about that Here. I think I'm just gonna outline, um, thes large shapes because they're so large. Um, maybe I'll add another another shape within it, um, up and down and again, the brush strokes really show. I kind of like that look, but I can easily go over it again if I want to eliminate the breaststroke. Look, add more paint here. Another variation was would be that I could have gone in between the pinks here. I'm just gonna go slightly off one and enough color so that it does look like it's on top of a pink and not behind it here. I'm just gonna follow through with what we've already done. It's a simple pattern. Same thing with sees here. Okay. For these ovals, I like the way that brushstrokes really show. Think I might do multiple ovals on top with the black? Have a lot of brushstrokes really emphasize that on this one. So there are a lot of variations to do it. This is where it's good to just play in your journal. And here I think I'm just gonna run down the whole line. Length of the strike. Kisses, brushes, a little thinner. I can connect, make some connections here that I couldn't make with the thicker pink line. There you have it. Some practice for your journal
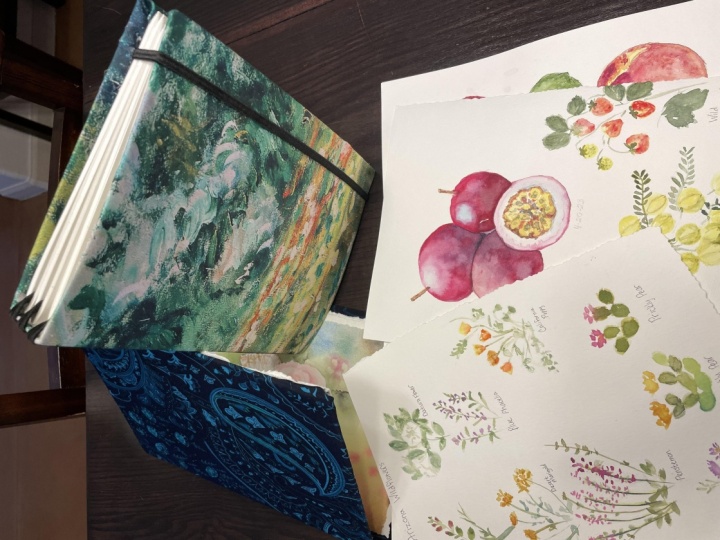
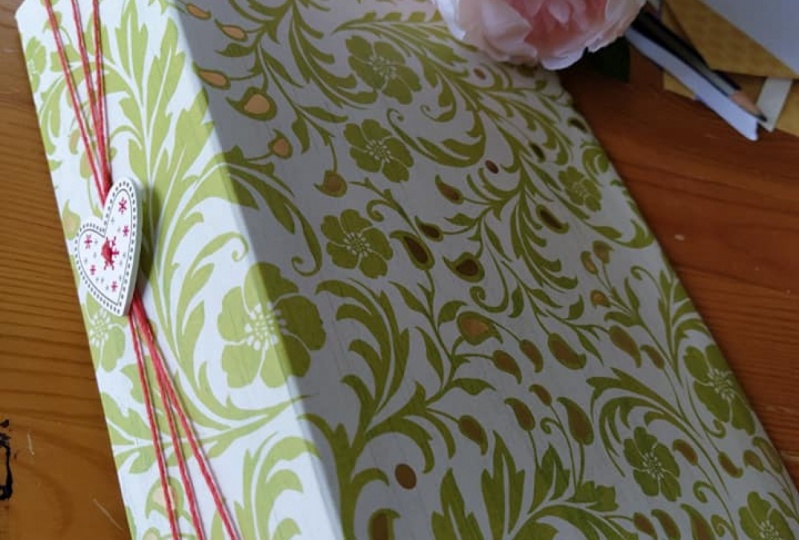
10. Bonus! A Look Inside My Journals: Now here's a peek inside the journals. These are the journals and made today, Um, we use the darker by file folder, and then we had two signatures inside of it. Because we use watercolor paper, we can water color. We can use marker. Um, we could collaged onto this if he wanted. Here's one I made earlier. I use just a plain file folder and I have the signature inside Just the one signature. Here's the original journal we made using the mixed media paper creates much larger journal with our two signatures and are thinner, elastic now, other things you can do for your journal to fill it. Here's a journal. I made the same technique instead of a file folder, I used just a 12 by 12 paper that I cut down to size. I used duct tape, spine to elastics and two signatures and here because I had the paperwork that I wanted to add. After I had made my journal, I just stapled it in or clipped it in beauty with the clipping it in is that I can take it out as I want and refer to it or add it to another piece I can scan it in. So I like that ability to move around what's inside of it on the actual paper have written notes, things I've included templates, different pumpkins, color swatches, geometric shapes. Continue to add this throughout my journal again with the easily to remove tags. What I like about this journal is that it's expanding as I want to it. Use it. So if I want to take this signature out and paint or cut on it or collage it, I can do that. And then I can add it back to my journal at any time. If I want an additional signature, I can do that. It's very forgiving, and it's really just for me from my reference. If I want to show somebody, that's my choice as well. But it's really just a personal tool becomes. Here's another one that I had would I use the watercolor paper, and I used uh, pattern duct tape with a few signatures, and this one I colored directly in with water colors the's air to create a project where I had and I jotted my idea ideas down in water color, and then I tested out different colors of acrylic paint that I wanted to use on the pieces . I like this color scheme. Here's one where I change the color scheme around a bit. It was a little too green for me here. I wanted more of a teal. Here's one that is ongoing that I'm working on. I have this shape. I'm adding colors. I have one more to do, and I'm not really sure which color to go with. So I put it down in my book, and then I refer back to it as I need when I have an idea, I can add to it. Lastly, this is my practice journal. This is where I have ideas for this basic geometric shapes. Um, these are backgrounds for different paintings. I want to use the shape of a circle. I really like the round shape, but I don't always want to just have a single circle. I have different things I could do with it. I can make brushstrokes and multiple circles. I can do repeated tiny circles that can do a take on a polka dot I could do intertwined. I like that idea, and here's the same thing I did with lines I used to colors. First I put down my bold color and then I used my black color to really emphasize the pattern that I'm going for and I will continue to add to. This is I want to practice my prince in here For a bunch of journals, there is enough to make they use everyday materials, and you could make a journal for each theme that you're working on.
 Daniela Mellen, Artist & Author