Transcripts
1. Intro : Hi, my name is Alice and I'm an illustrator
from the Netherlands. This class is about painting
the negative space. Painting the
negative space means that you're not painting
the object itself, but you are painting
around the object, starting with a
thumbnail sketch. With my design or your own. I will guide you step by step how to work
with this technique. You will learn how to apply this technique so you can
make beautiful backgrounds in your illustrations and also create more depth in
your illustration work. I learned from my husband
that soil worms or earthworms are very useful
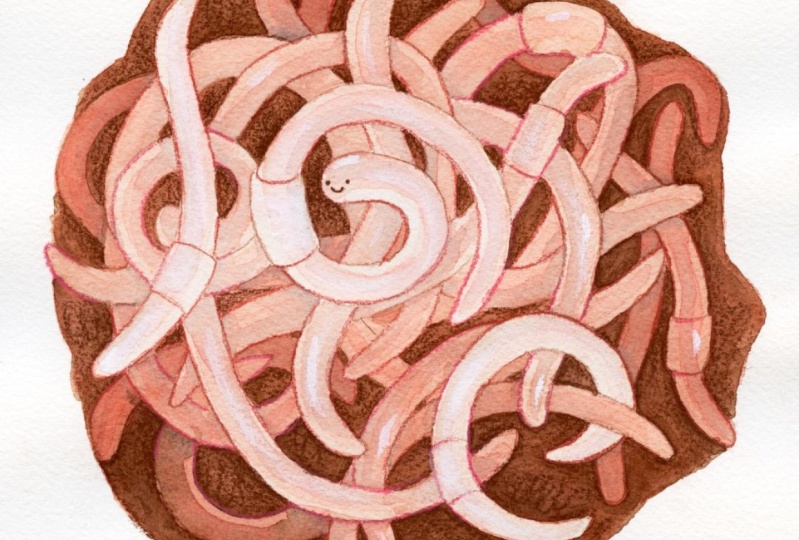
animals for soil health. I am going to paint
a bunch of worms. Today, I made an illustration
like this before. It was in black and white. But today I'm going to work with watercolors in three
different colors. Follow me along
in my worm quest, and I hope you will learn this technique to apply in
your own illustrations.
2. Planning Your Illustration : I made this negative space
painting some while ago. I really love this one. What I like about
it is that it is completely made with
black and white, just ink on top of it.
There's some white ink. I would like to
make a worm series. I'm exploring different shapes and different illustrations. Once this sketch is done, I'm going to transfer it
onto watercolor paper. The sketch doesn't
have to be perfect, but it has to be slightly darker so I can see it
on the light box. This was a very
good first draft, but I ended up drawing it again using a dark
colored pencil. As you can see, the illustration
wasn't in the center. I am adjusting this now. When I'm transferring it
onto watercolor paper, I am using a red
color arrays pencil. So I can easily adjust things also because I'm going to
work with red and brown. But I also like
it when the lines are a little bit darker than
the paint I'm going to use, because otherwise I have to redraw in between
the layers of paint. I am also using a dark
pencil, a brown one. Of course, you can
also use a window. You don't have to
own a light box. I am happy with this result. Let's move on to the next step. If you own a tablet, you can make a picture
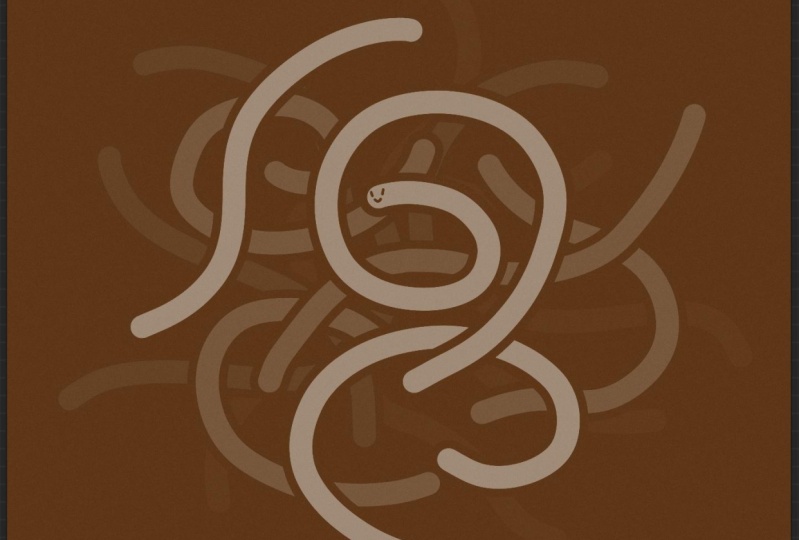
of your sketch. We are going to add
numbers to the worms. The numbers two underneath
the numbers one, and the numbers
three are underneath the numbers two, and so on. You can, of course,
also use your sketch and draw the numbers
directly onto your sketch. Congratulations, this
was the hardest part, the planning of
your illustration, and now we are
going to move on to the fun part we are
going to paint.
3. Exploring Colors : For this class, I am choosing two warm colors and
one cold color, a brown, a red and a blue. Choose your colors
and try them out. See how they mix on your papers. See how they work together, how they make shades,
how they blend. For our illustration, we
will use the red and the brown when we are finishing the illustration and we are going to
paint on top of it, we will use the
blue to add some. So when you're painting
the negative space, you're painting a whole
layer in one mix of color. Before you start, you need to dilute your watercolor
with water, so you've got enough of
every color of paint. The color I am using
for every layer will be in the middle of
this flower shape. I'm adding lots of water. Then I'm going to add
my brown and my red to the mix to make my first
color for my first layer, use some scrap paper to
test your colors and to make your mix just the
way you want it to be. I'm quite happy
with this result, so I think I am going to start.
4. Painting : First, apply some water. Just clean water and apply it
all over your illustration. For your first
layer, you have to find a very light
shade of your color. Apply the color to
your wet paper. For the background color, you don't have to
work very neatly. The color can be outside
of the shape you drew. You can add some extra
splashes here and there for extra texture
in the background. It's not necessary, but you can experiment with different
color combinations. For your next layer, your
paper has to be totally dry. You can have a cup
of coffee or tea, or in my case, you can
also use a hair dryer. Let's find the right color
for the second layer. It should be a little bit
more dark than the first one. For this one, I will put
some more brown into the mix and some more red,
a little bit more dark. The mix contains red,
brown, and water. The blue is not
added to the mix. Let's look at our sketch. Every worm has got a
number with this layer. The second layer, we
are going to paint everything except
for the number one. Make sure you've got enough
paint for every layer. You don't want to run out
in the middle of painting. Try to work neatly and quick. The paint should not dry out once you are working on a layer. Also, try to not activate the layers underneath the layer you are working on. When your brush touches
the paper too much, the layers underneath can dilute again and then
you will get spots. Try to be very gently
with the brush, a little bit of speed paint here to finish the second layer, let's make sure this
layer is totally dry and we are moving
on to the third layer. I am using thick
watercolor paper, but with all the wetting and the blow drying of the paper, it starts to curl up. That's why I used the tape. Let's look again
at our sketch for the third layer we are
going to apply this time, we're going to leave
out numbers 1.2 Again, I'm going to make my color
a little bit darker, putting in some
brown and some red. Every layer is going to be a
little bit more difficult. Don't worry, take your time. And if you make a mistake, you can easily adjust it or
just leave it the way it is. It's not an exact science. If you, for example, paint a layer you shouldn't have painted, nobody will notice. Let's finish this layer. You can already see
that the numbers two are a little bit more
darker than the number one. Some of the depth
is already showing. Make sure this layer is totally dry and let the next layer, this time we are
going to leave out numbers three and
also numbers 1.2 before we are going to
move on to the next layer, make sure you check if you didn't miss any
of the small spots. In this next layer, we are going to leave out number four, and of course also numbers 32.1 Make sure this layer is totally dry before
you start the next one. Depending on how many
layers you have got, you will continue this
process until you're done. This is my last layer of paint. You can see I made a slightly darker color
than the other ones. And I also skipped
apart because you know what to do and you know that when you've
got more layers, you have to continue doing
this process all over again. And I don't want to make
this video boring for you. So this is the last layer. And after this one,
we will continue finishing this illustration by adding some color on
top of the worms and also adding shadows
and lights to it. Let's move on to the next video, where we will learn how to
finish this illustration.
5. Adding Shadows : We will add details and shadows to our
final illustration. I drew two circles here, and by adding some
blue to our mix, I made a beautiful shade. By painting only a
piece of this circle, I can make it appear
more three dimensional. Here is the scrap paper
from the video about color. You can see that I made a
beautiful shade using blue. We are going to
reproduce this shade by adding blue to our
mix of red and brown, just like the circle at the
beginning of this video. I am using the shade to make
this worm stand out more. Make sure you only use the
paint on a side of the worm. This way it will look
more three dimensional. Just like working with
the negative space, we are going to work in layers. The first group of worms will
have a very light shade. The second group of have
a slightly darker shade. The third group of
worms will have a slightly darker shade than the second group of
worms and so on. But be very careful, you should not paint
the whole worm. When you are painting
the whole worm, then you can lose the effects of the negative space painting. Because remember,
we are painting positive space right
now for our details. After applying shadow to
the last group of worms, I am also making the background
a little bit darker. In our next video,
we are going to add some details using
colored pencil. See you in the next video.
6. Final Touch : In this last video, we will finish our
illustration using colored pencils and white
quash sharpen your pencils. And let's go. Starting with a brown pencil, I make the background
a little bit darker, especially around the worms. It's like a drop shadow. The background should
still be showing. So be careful not to
color everything. I'm going to redo the line
work where it's necessary. And I'm using a red
or brown pencil. I also use a piece of paper
so I can't smug my artwork. The artwork is almost finished. We are making the
lines more clear. We are adding details. Let's add the final touch. White pencil and white cosh
with a little bit of water and again, a little bit of speed paint just to finish
this beautiful illustration.
7. That's it!: And that's it. I hope you can incorporate this technique in your own illustration practice. Hope to see you next time. Thanks for watching
this. Bye bye.
 Alies Broekhuizen, Illustrator, art teacher, dog owner