Transcripts
1. Welcome!: Rowan is considered magical and protective across Celtic
and Norse folklore, due to its distinct
physical features and ancient myths, namely
the pentagram. The base of every Rowan features a natural
five pointed star. The color red in
traditional folklore, bright red was believed to be the most powerful color to deflect curses and the evil eye, and the flying ran Rowan
that take root high up in inaccessible clefts of rock or forks of other trees
rather than in the ground. These in Scotland
were believed to possess even stronger
elevated magic. Hi, I'm Holly, and I teach from my home studio in East Lothian in the
Lowlands of Scotland. Welcome to Rowan Expressive
leaves and berries. Today we're capturing the vibrant beauty
of the Rowan tree, also known as Mountain
Ash or Witchwood. This class is for all, whether you're a beginner or an intermediate level artist. Refining gouache
techniques is always fun. And in this session, I
will guide you step by step through the process of
bringing this Rowan to life. Gouache is the
perfect medium for this project because of its rich opacity
and matte finish, although this can be achieved
through acrylic too. So here is what we're going
to cover in today's lesson, warm and cool mixing a unique
palette, color mixing, mixing neutrals to use with
bright color, leaf shapes, mastering brush strokes to create our pinnate
rowing leaves, Impressionism by
blending colors on our brush and laying color
next to color on the page. And finally, a painterly
effect we'll be creating visible brush strokes and
a semi-impasto style. The end of the
class, you'll have a beautiful greetings card. Or if you decided to keep
it, you could frame it. If you'd like to
share your project, you can head over to our
projects and resources area, and on the right, you'll
see submit project. Subtitles are available
under each lesson, and there's also a full
transcript of the class. So grab your brushes, fill up your mug with
tea or hot chocolate, and let's get started.
2. Materials: Let's run through
materials together. So for paints, I
have lemon yellow. Sap Green, Spectrum Red, and Ultramarine Blue. And we have our three
primaries there, so we're going to use
those to mix with white, to create a neutral. As for brushes, I'm using a quarter inch silver
silk angle brush, but a filbert or a flat
brush would be great, too, and a size to
Princeton round brush. Now, my favorite paper
is Ash Hot Pressed, and this is a five. But you could use your
favorite paper for this as we're going to be
creating a background. I also use this palette paper, and I'm just demoing here
how you can just wipe off your paints and reuse
the sheet again. And,
3. Practice | Background: So let's put down some blue, and I'm using ultramarine blue, lemon yellow, and sap green. And let's put some white
on the side there. And let's mix all of these colors together
with the white. Mixing a lovely
bright lime colour. And let's just put down an
extra little bit of yellow. So I'm using an angle brush, which is the quarter inch. It's a new brush, actually, so I'm using it for
the first time. So what we're going to
do is go in and make these very brisk brush
drokes changing direction. Just adding some
lemon yellow so we can vary the color.
Just a little bit. And in with some white. So a little bit of mixing
on the brush and the page.
4. Practice | Boughs: Just taking over some
ultramarine, lemon yellow, and then let's add
a touch of red, and I'm using Spectrum Red. What we're going to
do is mix a neutral, which is very natural
towards a brown. And as you know, when we
mix the three primaries, we can get a big range of
neutrals if we're adding white to it from a cool
gray through to a brown. And I'm using a size
two round brush. And let's just pull out
some bows for our rowing. These bows don't
need to make sense. We're just getting
used to the feel of the brush and how
it can serve us. So for this brush, I'm
using just the tip, pushing down a little bit, but then I am trying to keep that level pressure as I
pull through the line.
5. Practice | Angle or Filbert Brush Leaves: A little bit of sap
green and lemon yellow. Adding a touch of water and
adding white makes a tint, and we've got this
lovely spring green. I think these are two of
my favorite mixing colors, lemon yellow and ultramarine. So with this angle brush, we get lovely rounded leaves like you would get
with a filbert. American practice going
in different directions. Just added a little bit more white there so we could see it. Then bringing over
some of that brown, a little bit more ultramarine. And let's do some
more leaves here. So because we have
the three primaries, we can really vary our greens.
6. Practice | Duck Egg Blue Scribbly Leaves : So let's start afresh with some ultramarine
and lemon yellow, and going to mix an
absolutely gorgeous color that I am in love
with at the moment. I'm using it a lot. So we're mixing a green, first of all, and
then adding white. And keep adding the blue
until we get a blue mix. So it's kind of almost
like a duck egg blue. It's such a lovely color. So I'm just mixing a
little bit of water in. And we're going to do my
favorite leaves at the moment. These are little
sketchy leaves that I kind of just happened on
one day and really liked, and I've used them in
quite a few classes now. So they're very
sketchy, very freeing. We're not thinking about each
leaf looking like a leaf. It's more kind of
a little sketchy, scribbly shape on a stem,
if that makes sense. I actually find it easier
to do these upside down, but I'm just going to show
you the right way up here. And just demonstrating there that you can do a
literal scribble. So keep it nice and light and sketchy and don't think of
them as leaves but shapes. They're not showing up here
as well as I would like. Just finish off the paint, and then I think I'll just
add a little bit of white to that so you can see them more. You can vary your strokes here. Some shapes can be
larger, some smaller. Isn't this color divine, and it just works with loads of different
palettes, as well. Gorgeous. So, as soon as I
have this paint, I'm going to just
carry on practicing. Let me know how you
get on with these and whether you feel it's something that you can
take forward in your work. For me, it was like
a eureka moment when these leaves just seem
to come out of nowhere. Since then, they have definitely been put
in my leaf glossary.
7. Practice | Berries: So we're mixing red and white, and of course, that's
going to mix pink. If you want to
tone the pink down and bring it back
more towards the red, if you add a little
yellow to it, it just takes it out of
that very pink range. And then let's have
another pool of almost pure red here with
a little yellow in it, but very much towards
the red this time, because we're going to smush
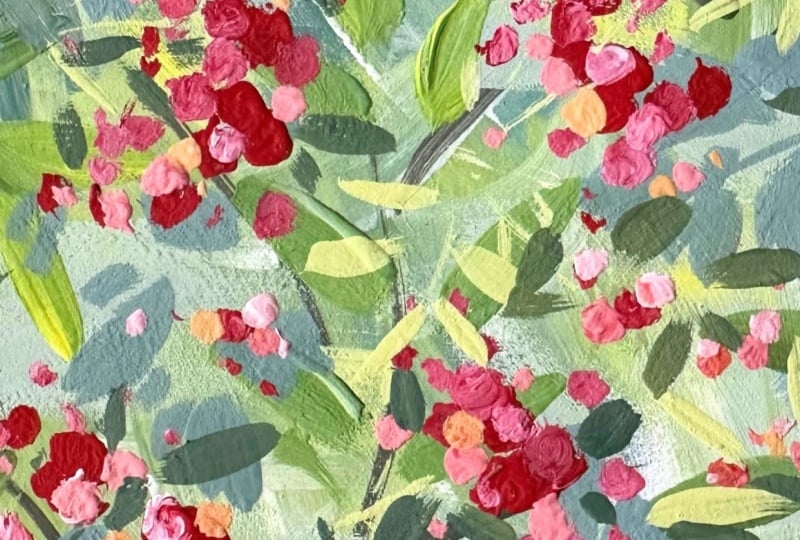
in various colors here. And we're going to start with that cluster shape that
rowing berries have. A little bit of white
there over the red. So this is where the
Impressionism comes in, laying que next to hue and allowing our brain to make the connections
and create the color. So we can go between
the almost neat red, the pinky peachy red. And if we put down some
more lemon yellow and bring that over here
and add white to it, we get this orange tint. And I think that's going
to look lovely with the red and pinky peach. A little bit more yellow, even. And then going in with some red next to the peach and yellow. So we're mixing on the
brush and on the page. And also, I'm using a very dry brush with
very thick paint. And what we get there is
a slightly rough edge. And that's something
I definitely wanted to achieve
with this painting. I don't want perfect
spherical shapes. I'm trying to achieve that
impressionistic feel. And because we're doing a
background that's very loose, I think it's
important to try and keep our foreground loose, too. Here I'm using just the tip of my round brush and putting
in some little stems. Now, because there's
going to be a lot going on in our painting
in the background, I think using this lovely light yellow will allow those
stems to show up. A little bit of sap green
and yellow and white. And just practice with the
brush that you're using. And we're using just the tip of the brush and try not
to push down too much, keeping an even pressure.
8. Practice | Lemon Yellow Leaves: And more lemon yellow and white. And let's mix a
really zingy color. And this yellow
looks lovely with that neutral blue that we
did for scrubly leaves. And then using our
size two round brush. We're going to elongate the leaves a little
bit this time, so pulling the brush through. And because of the
shape of the brush, we're getting more
of a pointy leaf. Just keep practicing until you have achieved the
leaf shape that you want. So the leaves that
we're doing have a slightly different
shape to the ones that we did with
the angle brush, just like ash and rowing
leaves in nature. And as we have paint, we might as well just use it up and keep practicing
these leaves. A little bit more ultramarine, and let's mix it in with that
luscious, neutral yellow. Let's create some little
leaves around the berries. Thought it would look quite
nice to have a little bit of fat bluey green next to the red. So I'm just creating
some baby leaves. And there may be some
larger ones here above just to go back to the
typical Rowan leaf shape. This is a side sweep here
that I use quite a lot. So you're putting
the tip of the brush down and moving sideways. Because these are
smaller leaves, I'm not pushing down
too far on my brush, maybe just a third. And let's practice
different directions. So going up and pulling
down towards us, different sizes, slightly
different shapes.
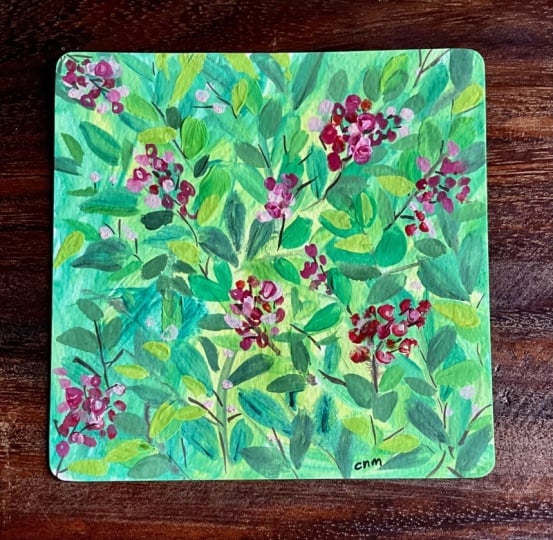
9. Class Project | Background Texture: I'm going to use palette paper, and I'm getting one
of my cards out. So this is three
inch by three inch. Let's put down some
blue and green, and I'm using ultramarine, sap, lemon yellow, and spectrum
red on the right there, and a few daubs of white. And let's start mixing all
of those colors on the left. And then very, very quick loose brush strokes with a little
bit of white in there. We want the paint to be just
slightly mixed on the brush, so it's not a flat
mix on the paper. Varying the direction of our brush strokes and a
fairly dry technique. Not a lot of water on our brush. Leaning towards the blue there. You can't go wrong
with this at all, so try and paint
intuitively and freely. A little bit more white. I think the main thing to
remember here is just to use your paint very thickly
on an almost dry brush. It gives us that lovely
textural look and also some little edges where our brush has
run out of paint. Uh so now bringing over a
little red to a green mix, and I forgot how vibrant
the spectrum red is, so I'm just correcting that by adding a
little more sap green. What I'm mixing here for is
some bows of our rowing tree. So it's a lovely, neutral, browny olive color and much better than going in with
just a pre mixed color. It's such a natural hue. These bows are
going to be knocked back as we move
through the painting. So try not to feel too
precious about them. And I'm just going
to give that a little dry before
our next layer.
10. Class Project | Warm Green & Duck-egg Blue Scribbly Leaves: And then we're
mixing sap green and lemon yellow for a
lovely spring green. And adding a touch of white. And let's add our first
sprig of rowing leaves. I'm using my paint very thickly wanting to
get lots of texture, and because I want these to
lie on top of the background, I'm going in with
even more paint. Picking up any paint you
like and just allowing them to mix on the brush before we apply
them on the page. So now mixing ultramarine
with a little yellow and some white
for a cooler tint. Just slowing down here so
you can see the process. Little stem and then I
do them quickly because they seem to have a
lot more movement and character when I do that. And we're also experimenting here with warm and cool colors. I love mixing warm
and cool together. So we've got that lovely vibrant
yellow and spring green, and now we have
this neutral blue And one more up here I feel. Lovely. Let's move on
to our next lesson.
11. Class Project | Rowan Berries: And and now on to our berries. And I'm using Spectrum Red. It could be any red
of your choice. Let's do a grouping here. I'm keeping these
impressionistic just so that it matches
the background so far. And Rowan berries always
hang in a cluster. I'm going to go with that here. And as you go along,
you can pick up red or white and just mix
on the brush again. And another cluster
here, I think. So a few overlapping there. Bit of white. So we're pushing
colour into color here, which, again, maintains that
sense of impressionism. Little dots here and there. And another grouping
at the bottom left. This is where the neutral blue
leaves come into their own because they're a
great background for these warm red berries. So we get that sense of depth. A few little throwaway dots. Keep it nice and loose. This is the point
in at any painting, I think, where we
start to tighten up. So just be aware of that. Take breaks, have
a deep breath in, and then start again just so
that you're not caving into that perfectionist
kind of approach because this is all
about slightly messy, slightly textural
and expressive. A few little dots
around the page and mixing in that white on the page over the red
berries in places. I'm now going to put
down some lemon yellow, and this is to show
you how we can mix a lighter red without
it going very pink. So just adding
little increments of the yellow until we get
a kind of peachy red. I'm going to add more white to that to make a lovely tint. And then let's just.in
some of this peachy red. I love placing hue by hue. It's such an
interesting technique. And just staying
true to the shape that rowing berries
tend to fall in. And then let's bring out some little confetti
dots of all of the colors around the groupings. I love my little confetti
dots. Very cute. Just placing color by color, so we get that lovely peachy red next to a really bright red. And I'm just adding a little
bit of white, as well. The white wheel show up very
close to us on the page. And it's another device
for creating depth. I'm going to add more
white to that peachy red. I wasn't sure about
that at first, but when I turned my
palette paper around, I thought it was
really interesting. So I'm going to use a
little bit of that to just.in the odd little
berry in there. What a gorgeous, neutral orange. And then confetti
around the page.
12. Class Project | Final Leaves: Let's add some lemon
yellow to our white, and my brush has picked up a
little bit of green as well. A little bit more yellow. I want to lean towards a lovely bright color that's going to come
really forward. And then let's add some
tiny little stems. You could go down
in brush sighs. I'm just using the very tip of my round brush and feeding them through the cluster just so we see little
glimpses of the stem. Then let's add some
gorgeous leaves. So that same pinnate leaf shape. And what we're doing is
echoing the other leaves that are that dark olive green
or the bright green. And let's slow right
down here because we're getting towards the end
of our little card. We started out very
loose, very sketchy. Now we can be a little bit more considered just with
our final leaves. And I absolutely adore how this yellow is lying on
top of that spring green, particularly in
the center there. It's also really easy to
overdo it at this stage. So I've learnt over
the years just to slow down sometimes when it's
appropriate for a painting. So let's mix a kind of
more neutral green here. It's bright, but
it has echoes of that deep olive green that we
mixed earlier in the class. I'm adding a bit of ultramarine, I just want to play around
with this final mix. It's a slightly cooler
blue now, blue green. I'm going to feed some leaves around our little
clusters of berries. This is the perfect green
to bring in at this stage. It's not going to announce
itself too loudly, and yet it brings in
another green neutral. A little side sweep there. And suddenly they
do look as if they are attached to a
tree. And I like that. Without being too prescriptive, you know, they're still very
sketchy and impressionistic. I love this bottom
left corner here. The last few leaves. And I think we're done.
13. Thank You!: We've reached the end
of the class together. I hope you've really
got a kick out of exploring this expressive
impressionistic style. We've covered mixing
warm and cool colors, mastering brush strokes to
create pinnate rowan leaves, exploring impressionism
and a painterly technique. And I hope this is
something that you feel you can take
forward in your work. I just wanted to take a moment
to thank you so much for your reviews and for engaging in my classes and uploading
your projects, which is my favorite part
of the whole process. If you enjoyed this class, you may also enjoy Briar Rose or my short ACO mini painting class wildflowers
on black paper. Or you could also check out my Skillshare colleague Mohii Sanhs tree
texture painting class. Don't forget to hit Follow, so I can update you about new classes, discussions,
or projects. If you have any questions, you can contact me through discussions or over on
Instagram or Tik Tok. I'm Holly Tomas Art. Before I go, I thought I'd just share this upgrade
to my class project. This is before. And after. So, what happened? This flufy goofy
fur ball is what? I was out of my
room for 2 minutes, and he took it upon
himself to jump up on my art table and upset my
water jar all over my desk. Thankfully, I had already
done my photo shoot. And to be honest, I thought
it was quite effective, so I have forgiven him. Here he is on his best behavior. So thanks again so much. Take care, and I shall
see you again very soon. Bye for now. H
 Holly Tomas Art, Watercolour | Gouache | Mixed Media | Scotland