Transcripts
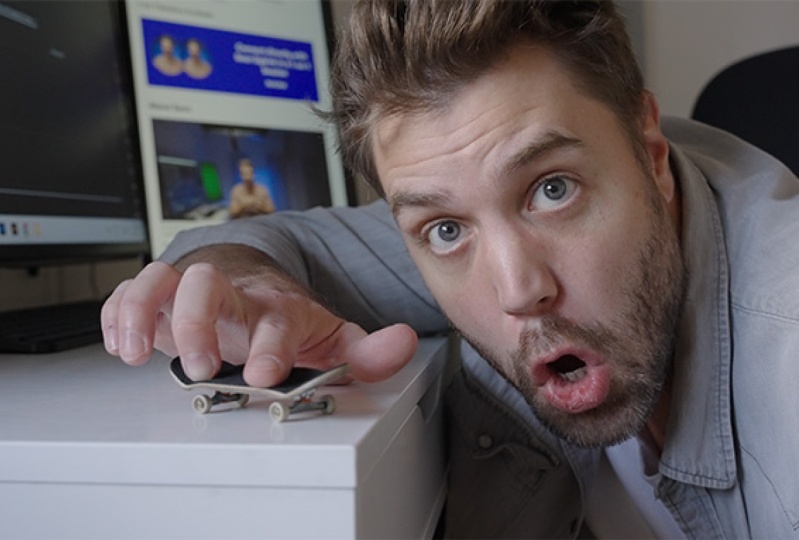
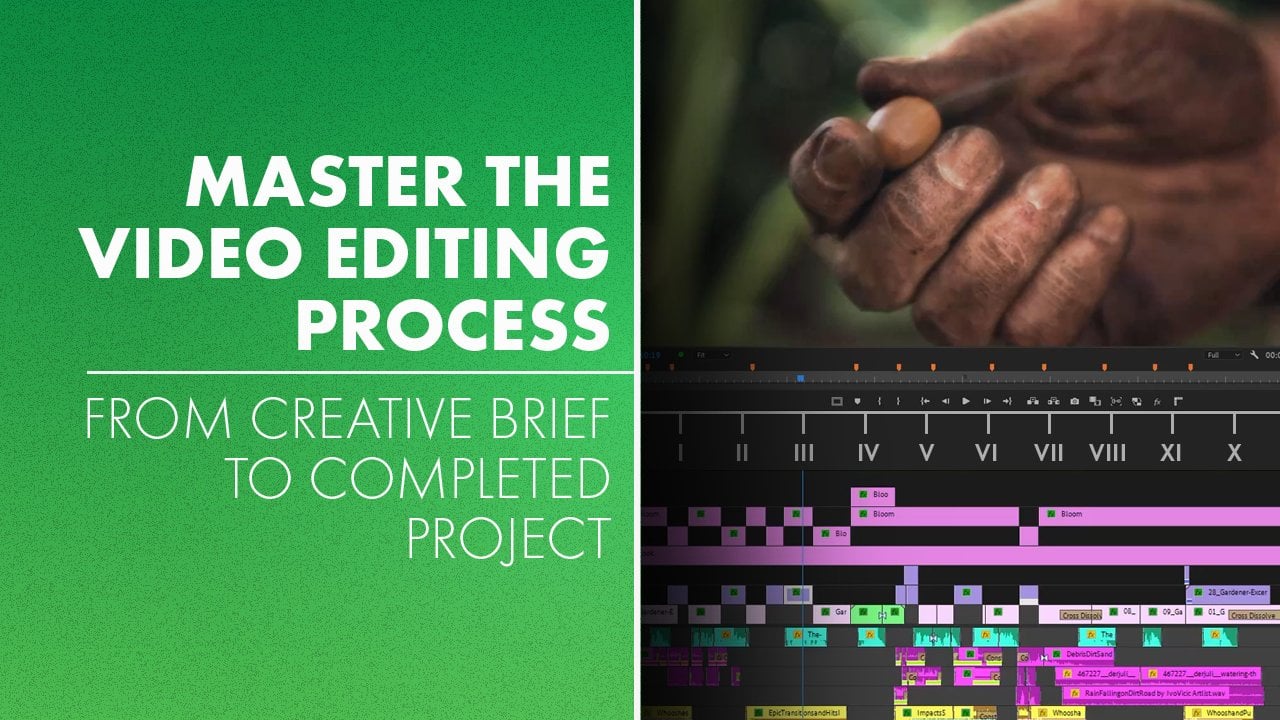
1. The Video Editing Process, One Step at a Time: When editing your first video,
it can be a lot of fun. Wow. Look at all this
footage I get to work with. There's endless opportunity. So many ways to edit this and a great simple program to make it all happen.
This is going. I'm having fun. Yeah. He
does. Hold on a second. You might just not have a
proper editing workflow yet. But don't be discouraged because
after taking this class, you're gonna learn a proven
process that will have you editing with confidence
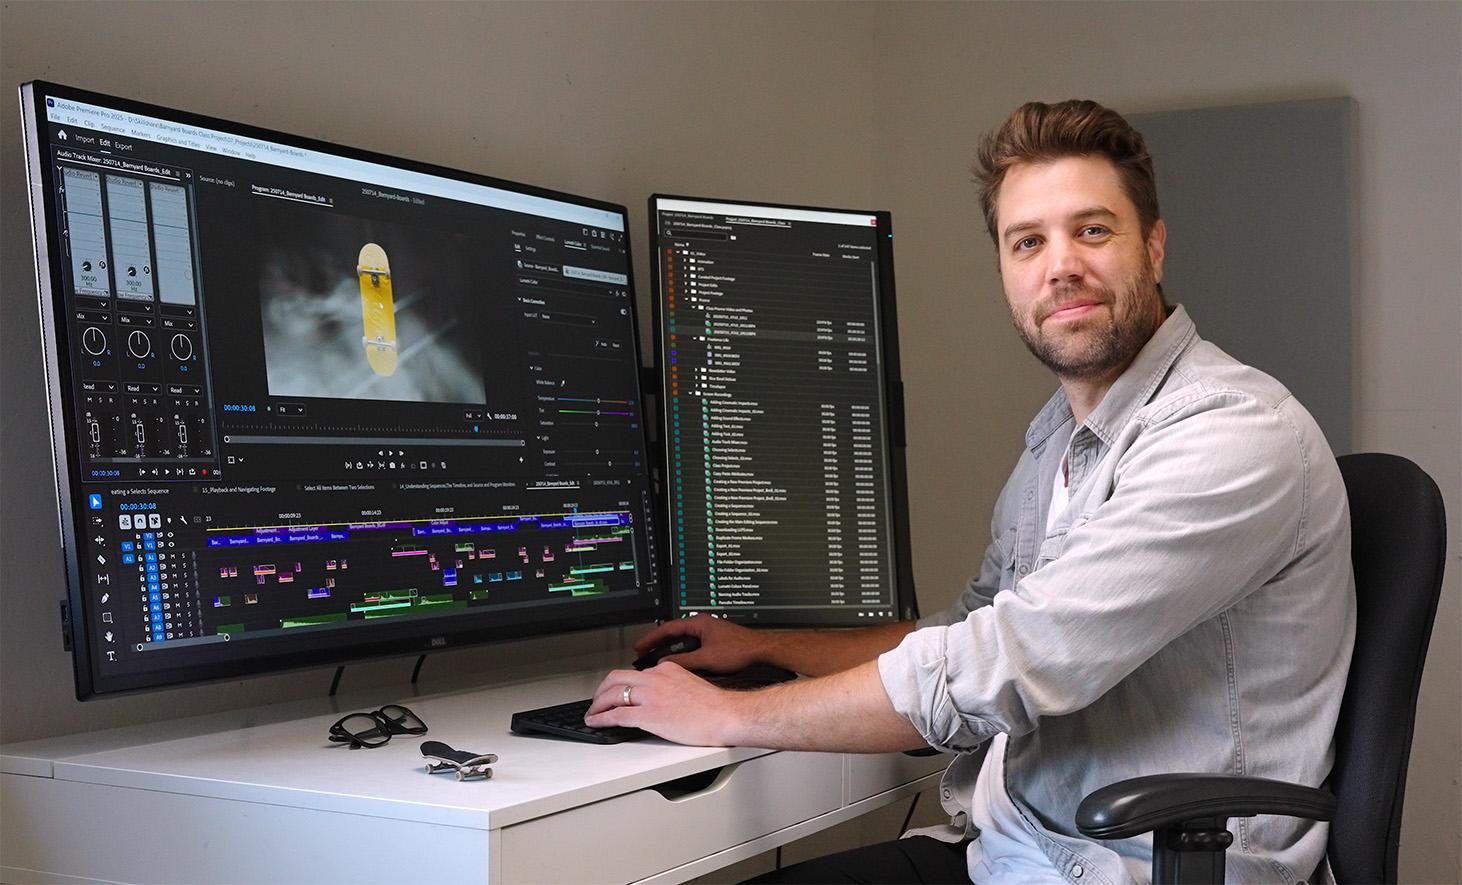
in Adobe Premiere Pro. Hi, I'm Sean Dikink. I've been working
professionally since 2005 in both studio and
freelance environments. I've spent years streamlining
my own editing process, and now I'm here to
share those same tips that help me simplify
my workflow, boost creativity,
and ultimately gain confidence when approaching
complex client projects. In this class,
we'll walk through an action packed edit for the fingerboard
company Barnyard B. Creating a short creative
ad in your own style. You'll learn the
fundamentals of editing Adobe Premiere Pro from
import to export with a strong focus on how
process can speed up your workflow and how story can guide your
creative decisions. You'll come away with knowing exactly where to
begin and edit and how to shape it with intention
up until final delivery. This class is built for
beginners, and by the end, you'll have a solid
foundation to carry into both personal
projects and client work. Let's dive in and get
you one step closer to becoming a confident
client ready editor. Alright, let's go. Ready to go. How do we get the video
inside the program?
2. Class Project: Thanks so much for
taking this class. I'm super excited to dive into our class project because
this one is pretty unique. Your class project is
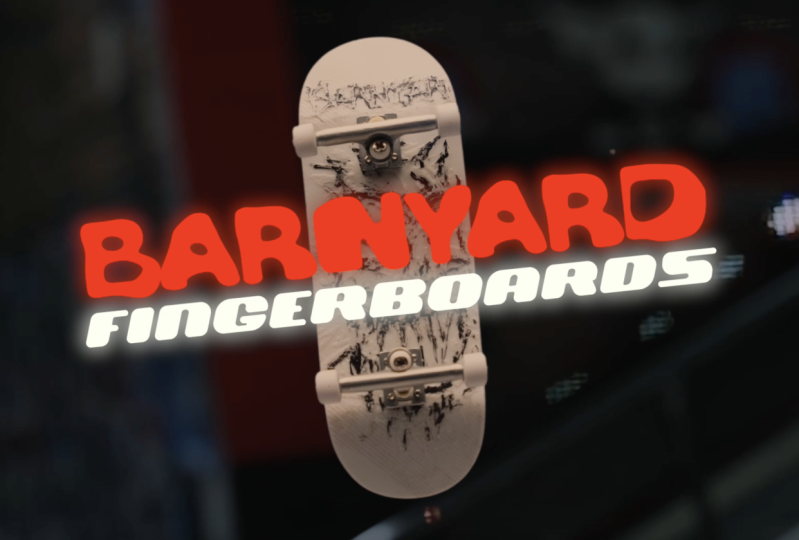
to create a 32nd ad for a fingerboard company called
Barnyard Fingerboards. And this toy, I guess
you can call it, had its heyday in
the 90s and 2000, but it's since grown into kind of an underground sport with pros, ambassadors
and influencers. The brand was created by my multi talented
friend, Greg Rose. And he has a serious
gift for building and creating these dioram as
I guess you could say. Has these artistic and
visually striking designs, but with these
practical dioramas built specifically
for fingerboarding. And he creates everything
from these custom park pieces to specialized boards for
pro level fingerboard. And the goal for this
class project is to make a short commercial
for Barnyard Boards using the assets provided. When talking through
this project with Greg, he was very open
to interpretation and creative options
for the edit itself. So this is incredibly
flexible for you to put your own style or creative
touch into your edit. Throughout this class,
I'm going to walk you through the post
production process, and you'll have tons
of footage to work with to craft your own
version of the ad. Recommend keeping it
short and simple. 30 seconds is great. You can post this on
your social media to show off your work and use it
as part of your portfolio. Please credit the
work where possible. But of course, take credit for all the editing and the hard work you put
into this class project. That is entirely yours. A quick technical note. This footage was
shot in log format, so it needs to be converted to Rec seven oh nine color space. That probably doesn't
make any sense to you, especially if you're
a beginner, but don't worry in this class,
we're going to cover. Are a lot of options
with this project. It's a very much choose your own adventure
kind of project. So learn what excites you, follow your creative instincts, and I'll guide you through
step by step to keep things approachable for
all skill levels. And one more cool
thing we recorded custom sound effects and original music tracks
that Greg made himself. So you'll have everything you need to create your own project. But by all means, if you have
your own track or you have your own sound effects
that you want to use for this class project,
go ahead and use those. Download the class assets. And let's go ahead and start with creating our class project.
3. Creating a New Premiere Pro Project: This lesson, I'm going to show
you the most efficient way to get started with your
project in Adobe Premiere Pro. So go ahead and open
up Adobe Premiere Pro. You can pretty much ignore
95% of this splash screen and navigate to the new
project button in the top left of this window. Click on New Project to begin, the new project
window will appear, and here you can
name your project. I recommend including the date and the project name and that the project name is
concise but descriptive. So you can quickly identify the project or its
version at a glance. So the reason for
including the date is so that if you need to go back
to an earlier version, you can open it up
without confusion. Example, if there's errors in your current version
or if you've upgraded to a new
version of Premiere Pro, having these older versions available can be very helpful, and it's a good habit to copy
and paste your project file or save as with a new date whenever you
make significant progress. This way, you can access
older project files in case of file corruption. So by organizing files
alphabetically in your folder, you can see all of
the versions by date tracking the
project's history easily. You might never need to roll
back to older projects, but it's nice to have that
redundancy in case a project becomes corrupt or a PC
prevents you from opening it, and that's happened
to me before. Was a nightmare. So having
the backup is great to have. Plus, the latest
version of your project is going to be easy to
identify within a long list, as it's going to appear
at the very bottom if you organize by file name
in ascending order. So I'll type in 25 for the
year 2025 oh seven for July 1 for July 1. I like to
go year, month, date. You can do whatever order you want, whatever
makes sense to you. And then I use an
underscore to separate this date from the
name of the project. I'll name it barn,
yard, hyphen, boards. I use the hyphen to connect separate words together
rather than using a space, I find there are limits to the characters that you can use when naming projects and files. So this just helps me create a consistent naming convention across the board for
different types of media.
4. Choosing a Save Location: So next is to choose where you want to save
your project files. And I recommend using a
dedicated external hard drive, so this could be an SSD, an internal hard drive, or just whatever you have. The idea is to keep your project and media files on a separate drive from
your main system drive, which allows your system to focus on running
Premiere Pro, while your external drive, whatever that may be, or an additional internal
drive is going to handle your project
files and media. If you haven't already download the class project assets and
copy that project folder, along with the media, the video, the sound effects to
your dedicated drive. Then we're going
to select location choose location, navigate
to the hard drive that your project is stored on and then scroll
down to projects. And you can just
highlight projects or double click to open
it, and then hit Save. That's where our
Premiere Pro project is going to be stored in
our projects folder. Next, we have templates, which are really handy because
they automatically create organized folders and sequences when you start a new project. I don't actually prefer
to use them, though, because I have a
pre made template that has already been created within the class project folder, and we're going
to dive into that when we begin importing media. Skip Import mode, I leave
this checked because we have most of
our media ready to be imported within our
class project folder. It's all nicely organized. I like to skip Import
mode because it's a whole different page
and it allows you to create sequences and
bins and all of that. But because I've already
done all of that in our class project
folder template, and it's already well organized, I find it's a bit redundant
and the import mode is a bit over engineered for
what we need in this project. Let's skip that. And
the next lesson, the essential project settings
you need for this edit.
5. Choosing Project Settings: Project settings can be quite confusing.
But not to worry. For this particular project, I'm going to show you
how to keep your editing running faster and your
color staying accurate. For this lesson I'm going
to show the key settings set up before you start. Let's look at the
project settings that we're planning
on adjusting. Most of these are going to
remain set to defaults. To access the project settings, click on this gear icon. First, video rendering
and playback. This is if you have
a graphic card. Do and you have this enabled, it allows your graphics card to handle some of
the heavy lifting, which improves playback and
export speeds rendering. So if you have an video card, that's going to be
set to default CUDA. And for AMD or Intel
graphics, OpenCL. If you select mercury
playback engine software, only it's not going to use
your GPU, your graphics card, and it's going to be a
lot slower when it comes to rendering, exporting
and playback. We want the faster option.
Navigate to color. Let's move down to three
D t interpolation. That sounds like a hefty
amount of words there. Clicking on this, we have
trilinear or tetrahedral. Select tetrahedral because
it requires a GPU. And with that GPU, we're going to get
some benefits which are smoother transitions
between colors, more accurate colors,
and this is going to be a lot better for us when
we start color grading. The only downside of this
is that it is a bit slower. It does require a bit
more processing power, which can slow things down.
This is very important. We want to enable color
space aware effects because we're going to be
applying what's called the ut. We're going to be
altering color. We're going to be
using more than one lumitary color effect, probably more effects,
that sort of thing. And if this isn't selected, it can cause issues like clipped highlights or
strange color shifts. We want everything to be
as accurate as possible. Without this checked, we
lose some of that accuracy, and we can run into
some weird issues with the way things look color
wise and effects wise. So enable color space
aware effects selected. I don't know why that's not
on by default. Who knows? Keep it selected. Alright,
that's it for now. So now hit Okay to
confirm those options. And then finally, click Create
to create your project. And now we have
successfully created a new Premiere Pro project and
are in the main workspace. This could be completely
new to you if you are a complete
beginner, but don't worry. We're going to focus
on one process at a time following a
specific workflow. It's going to make a lot
more sense and bring you confidence when you're
moving through an edit. So finish creating your project,
and in the next lesson, I'll give you an
introduction to what's arguably the most important
panel within Premiere Pro.
6. Introduction to the Project Panel: The project panel is the
brain of Premiere Pro. It's where you import media, preview clips and
stay organized. You'll come back to this panel
constantly while editing, so it's essential to
know how to navigate and control the space so it does
not become overwhelming. So at its core, the project panel is
where your media lives. Video files, audio files, sequences, images,
tiles, and more. You can think of this as the
central hub of your project. It's non destructive, just
like the media browser. So if I delete it clip here, it doesn't delete the original
file from your hard drive. It only removes the references inside of so if I delete
all my video here, Oh, no, it's gone.
Well, no, it's not. We can always go back
to our media browser, right click Import. All of our video intact,
non destructive. And if I right click
on the file and select Reveal in Explorer, that's referring to
Windows Explorer, and this is where all
of my original files are stored nicely, safely in the Barnier Boards
class project folder. So everything here
are my actual files. If I delete it here, then it's gone. So don't delete it here. But the files in
the Project panel within Premiere Pro
are all references to our project folder in the Windows Explorer or the Mac Finder, whatever
you're working on. If you accidentally
delete anything, you can just hit
Control or Command Z to undo that action. In the next lesson,
we're going to dive deeper into project
panel basics, organizing and previewing clips, working with panels
and their settings, and resetting the workspace.
7. Navigating the Media Browser: We've created a new
Premiere Pro project, and now we're ready to move
on to the next step in the editing workflow,
importing our media, meaning our footage,
music and sound effects, graphics, motion
effects, animation, whatever it is,
that's our media. To avoid getting overwhelmed
by Premiere Pro's workspace, let's take this one
step at a time, so don't worry
about every window or panel you see just yet. We're going to get to most of
those in upcoming lessons. There are a few ways to
import media in Premiere Pro, but the media browser is technically the best and
most reliable option. This is personally what I use over all of the other options. It ensures that clips are imported correctly,
handles metadata properly, and metadata is all
the information that's attached to your media, like the date it was created, the frame rate, the resolution, dimensions, that sort of thing. And the media browser can
deal with spanned clips, which are long takes recorded on certain cameras that need to be broken up into
multiple files. We're not going to worry about that in this class, though. You can import using
other methods, and I do cover that
in other classes. But for this class,
we're going to solely be using
the media browser. To open up the media browser, go to Window, Media Browser. It opens up in this group of panels in the top left of
our Premiere Pro workspace. And this panel
kind of looks like your computer file browser like Finder on Mac or file
explorer on Windows. But it's different in that
it's non destructive. That means you can't
accidentally move, delete or rename files here. It's strictly for viewing
and importing media, which gives you a nice
layer of protection in case you accidentally
hit that delete button or move something on acc. Left hand side here,
you're going to see a list of storage locations
you can access. I'm personally working off of a dedicated SSD
just for editing, so I'm going to
navigate to that. Some of my folder names
are cut off here. So what I'm going to
do is navigate to this blue line that shows
that this panel is in focus. The media browser is in focus, and you can see
how our mouse icon switches to this left
and right bracket icon. That allows us to click and open up the panel
for a larger view. You can also do this here, the bottom, make
this a bit bigger. Can move it back when
we're ready to edit. Now, wherever you saved your project files
for this class, go ahead and click
on that drive. The right hand side
is going to show you the folder structure
of that drive. I went into my main
project folder. I don't want to do that qui yet, so I'll hit the back
button to go back. Now, I've located my
class project folder, and what I'll do to make this easier to navigate
in the future, say I want to reimport media or import new types of media. Can do is right
click on this folder and then navigate to
add to favorites. Select this. I'll pop up into my favorite section
within the media browser. I'll click on these little
disclosure triangles to collapse all of this information so it's easier to look at. And then I can always access my project folder directly
in my favorites section. Saves you from digging through folders every time you
need to import something. If you typically work from the same drive for
client projects, you might even want to add the drive itself as a favorite. To get a better view
of the media browser, we can hover our mouse over this and then press
the Tilda key. That's a shortcut to maximize the panel under your cursor. And I know it can feel like everything else just
disappeared, but don't worry. It's just temporarily hidden. You didn't lose anything. If you hit the Tilda key again, it will bring the full ao back. And it's a great
shortcut to make better use of your screen space. You can always toggle back and forth as needed or
whatever you prefer. Once inside your project folder, open the video
folder, and you're going to see a list
of your clips. Well, we're going to
see our four K folder and our HD folder. Depending on which footage
type you downloaded, it's going to look
a bit different. I'm going to open up
this four K folder. Now, we can see a list of all of the available clips
for this project. Yes, it's quite a bit. See it as a list because
we're in List View. But if we switch to icon view, which is down here
on the bottom of the media browser,
thumbnail view, then we get to see a video
preview of all of our clips, which is so nice. And seeing at a glance, bird's eye view what we have
available to work with. You can hover over any one of these clips and get
a video preview. So in the case of some projects, you might have to preview
all of your clips before you import them and import only the ones that
you want to see. This is a great tool for that. Now you know how to use
the media browser to preview and organize your
footage before importing. This keeps your project
tidy and saves time. Next, we're going
to explore one of my favorite features
about the media browser.
8. Importing Media + Metadata Tips: Learn how to quickly find
and import new footage using Media Browsers metadata to
keep your project organized. I'm going to switch
to List View. Now, the media Browser gives you access to extra
metadata columns, which can help a lot
with organization. So let's say you get new footage partway
through your project, maybe from a collaborator or on the other side of
the world who's also working on this project, you can use the
date created column to sort your clips by the most
recently filmed versions, and that makes it super
easy to find and import just the new files without
guessing which ones they are. The most recent ones
would show up at the top. Since all of these
files were copy pasted into this project
all at the same time, they're going to have
basically the same time aside from the milliseconds
at the end of this time code. So it's not going to really
make much sense in this case. If Date created isn't
showing up for you, then navigate to the
project folder itself, right click on this and
then select Edit columns. This allows you to
choose any one of these metadata options to use as additional information about your files and folders, and then select Date
Created to apply that type of metadata
to your media browser. I highly recommend
using this option. I'm going to only import
from 01 to oh six. You can select that by clicking on the first
folder and then holding Shift and clicking on the final folder
in this sequence to select everything in between, right click and then hit Import. I'm not going to actually
hit Import quite yet. But what that's going to do
is bring in all my folders already organized before I
bring them into Premiere Pro. I don't have to organize
them in Premiere Pro itself. Everything's pre organized. You probably notice
that I break things up in separate
folders with numbers, video, audio graphics,
music, et cetera. And the reason why I number
them is so that force is alphabetical order
oh one to ten. Now, once again, let's
select the folders we want to import video to photos. Right click Import. And just like that,
we have all of our folders imported
into our project panel, ready to use in Premiere Pro. We saw the full screen view, so hit the Tilda key again to reveal the rest of the
Premiere Pro window layout. Yes, the project panel looks identical to
the media browser, but it functions differently. So import the folders
oh one to oh six, and in the next lesson, we're going to dive into
the project panel.
9. Project Panel Basics: Organize, Preview & Reset: In this lesson,
you'll learn how to organize your panels
on Premiere Pro, avoid clutter from extra bins, and set custom thumbnails
to quickly spot your clips. This will help keep
your workspace clean and your editing faster. The media browser is grouped with the project
panel right now, but we can also click
and drag the panel and reorganize it within
this group of panels, depending on how we like it. If we want to move
our media browser and we're going to
use it more often, we might want to move
it to the side here and nestle it to the right
of our project panel. If we don't want
to move it at all, we want to group it back in. We can click on the tab itself and drag it into the
middle of this panel. You can also move
it to the bottom, to the left, to the top. If I move it up
here, then it also moves it back into
this group of panels. Really wanted to, you
can also click on the Hamburger icon and then undock the panel to
move it around freely, but that's kind of annoying, so I'll just not do that. If I accidentally
close this panel, we can always reopen it
by navigating to Window, media browser, or any of the other panels that you might be using within Premiere Pro. Now one thing you got to
watch out for when you double click a folder or a bin
in the project panel, it opens up a new panel with just the contents
of that folder. If you do this too many times, then you're going to start
having multiple panels created from these bins. That can be
overwhelming and then you're going to end up
having to close them, and that becomes
just a bit tedious. Instead, we can hold
command or control. When you double click, the Bin will open up in place. And then to get back to
the main project folder, we can click on this
Return icon here. Alternatively, if you want
to control how this works, select Edit, navigate
down to preferences. General, in the Bins section, we have double click
Open and New Tab. That's why all these new
tabs are being created. If I click on this, then
select open in place, then it will act as if I'm using the Control or
Command click option, which is set to open in place. Similar to the media browser, you're going to see
List View or icon view. Selecting icon view, well, we see icons of our folders, but if I double click into
this video folder into four K, then once again, I
have the option to hover scrub over
all of my clips, previewing them before I bring them into the
timeline for editing. You can use a slider at the bottom to resize
your thumbnails. If Hover scrubbing
isn't working for you, then click the Hamburger icon on that bin panel tab and ensure that Hover
Scrub is selected. If you're browsing through
a bunch of clips that look similar like these ones
right here at the top, they're all the same shot. Here's a trick to
differentiate them. You can set a custom thumbnail that makes it easier to
recognize them at a glance. I'll find the moment
where I can see, okay, that's a kick flip. Right, click. Navigate
down to set poster frame. You can use a shortcut
Shift P. This will give you a still frame preview to help differentiate between all of
these similar looking shots. A right click, set poster
frame. What's this one? This is a crooked grind, right click, set poster frame. Now we can easily differentiate
between these three shots at a glance instead of having to hover
scrub through each. Turn back to the main section of my project folder and
switch back to List View. I recognize that
the project panel is bigger than everything
else in my workspace, and that could be a bit
irritating to fix this, select window, workspaces, and then click Reset
to saved layout. If you ever move panels around
and things become a mess, you can always go to that
option to reset everything. So to recap, the project
panel is your central hub. Keep it tidy. That helps you stay focused, not overwhelmed. List view is for scanning. Icon view is for preview if you accidentally
close a panel, select the window, find a panel and click
it to open again, move panels as you like, because the Premiere Pro
workspace is modular, meaning that you can move
things around and change it for whatever works
best for your workflow. And that's it. Keep your workspace tidy
and remember you can always reset things
if things get messy. I'll see you
in the next lesson.
10. File and Folder Organization: Staying organized in
the project panel isn't about being fussy. It's not about being particular. It's about working
faster, staying focused, and avoiding distraction,
maintaining anxiety levels. The more logical your folder structure, the more organized, the easier it is to find
what you need and keep your editing brain on task of what's important,
which is storytelling. First tip number your folders. Premier organizes
folders alphabetically, which can be a mess
if you're just naming things like video,
audio, and titles. If you want a custom
order like video first, audio second, start your
folder names with numbers. Each and every time
you work on a project, your brain's automatically
going to know where that type of media
is within this hierarchy. You're training your brain
to quickly be able to locate different types of media
within your project structure. Quick note that, yes, not all of these folders actually
have anything in them, but this is to show you that this is the structure
that I prefer, and I'm trying to
prepare you for the different types of
assets that might come in. So if you do have photos or
graphics that you want to create within after effects or something like
that or Photoshop, then you can do that, and you
can import the media using the media browser into
this particular folder. Everything is organized
in two folders, all my four K clips
and HD clips. But if you find
this overwhelming, we can easily manage this with subfolders and even
new file names. So if I switch to icon
view to be able to see what is in each
clip, I done it again. Let's go back here. And I'll scroll down to say
these stare clips. They're all the same. We can differentiate
them by clicking on the file and then clicking on the title of the file to
change the file name. I could change the
name to something like Sirail and this was
a crooked grind, I think, crooked, crooked grind. And I don't know if
this is a Slomo. I can't remember here.
Scrubbing doesn't necessarily give me a great idea of what the frame rate is. I can double click it and what happens is it loads up into what's called
the source monitor, which is this panel
right in the middle. And this source monitor
is helpful for getting a larger clip preview and allows for more
playback control. I can grab this
little blue thing, which is called the playhead
and I can click and drag it. I can also hit the play button to play through it,
and there you go. I can see that it is indeed
a real time playback clip. It's not slow motion. And that's actually
kick flip to 50 50. Rename this now to Sir rail, kick flip 50 50. If I wanted to specify that
it's real time footage, I could even just write
RT if I really wanted to. And once again, this
is non destructive. So this is not going to rename the source file on
your hard drive. It just updates the name in premiere so you're not
breaking anything. And if you ever need to
reference the original file, you can right click Select
Reveal and Explorer, and we can see that the
name has not changed. Important thing to
note is don't rename the source files on your drive once they've been imported. That's going to
break the link that Premiere Pro has
to your explorer, and it's going to cause
all sorts of issues. So if you want your
file names to be super clean and unique
to this project, you have to rename them
before you import them. I'll undo this, and I'll
have my original file name. What I could do if I really, really wanted to do this
is put my original name in parenthesis and then write
my new name in front. Now it's Sir rail, kick flip, 50 50 Barnard boards. It's a huge title,
but at least now I know what the original
file name is, so I can always
reference it as needed. When it comes to short
projects like this, I might not recommend
this option. This is more if
you're working with multiple editors or depending on your personal preference, you can do either one of
those naming methods. But in the next lesson, I'm
going to show you what I prefer when it comes to organization for a
project like this.
11. Boosting Organization with Subfolders: As I mentioned, I don't prefer renaming files in the
organization phase. Especially for a small
project like this. In this lesson,
I'm going to show you the preferred method. It's a lot faster, and it
doesn't require renaming files. If I need to differentiate all these similar looking clips, I'll use folders
or bins and then group similar clips into
their corresponding bins. For example, I might have a
folder that just has clips of this scene with the big
rail and the big staircase. Make a new bin, right click New bin or controller command B, use a number in it because I'm going to have
more than one scene. More than one location that I'm going to
store these clips in, type in staircase rail. And I can even write maybe big staircase because there's more than one staircase
in this park. Big staircase rail. Switch to the icon view,
take this down a bit. And I'll find all the
big staircase rail shots to select groups of clips. Hold control or command while clicking to add to
your selection. Find every clip with that big staircase and
rail. Here's another one. Here's another one.
Okay, and that's it. Now I have all of
those selected, click and drag it to my
big staircase rail folder, and there it goes. Then I'll just slowly
create more folders, 02 with different locations. So this one could
be curved rail. There's one, hold
control and click. That's not actually
the curve rail. Here's a curve rail trick. Is that the curve
rail? Yeah, that's the curve rail. Okay,
curve rail trick. Curve rail trick and throw them all in that folder.
Switch to list view. We can see that we're
starting to create some organization
with these bins, and if you need to access that
location for your project, you can simply open up the folder and find the
clip you're looking for. So, yes, you don't
need to follow every one of these tips every
time for every project. I might not even create these folders for
certain projects, especially if they're
really small. Just do what you need to do to make it manageable,
to reduce your stress, and based on what you prefer as an editor to do what makes
you happy when editing? If you don't want to work
on all this organization, do the bare minimum,
but make sure you're organized so that you
can work quickly. And you're not
wasting time looking for files that you don't
know where they are. If you're getting to that spot, then you need to start working
on creating file names or folder names to organize
your media a bit better. So to recap, organization is
great for reducing anxiety, overwhelm, to be able to locate files and folders
quickly to work faster. Use folders with numbers to effectively organize your clips. You can also rename your
clips if you really want to. It's not necessary for a project like this, but it
can be helpful. And remember, don't rename your source media unless
that is you decide to rename everything and then reimport it using
the media browser. But after you've already
imported the media, do not rename your source files. Now, this file and
folder organization may be already enough for you to be able to feel fine with editing and not anxious
or overwhelmed. But if you're finding
yourself a bit overwhelmed, maybe you have an
idea of how you want to organize this media, I would suggest you do that now, and then the next lesson, we're going to exp
powerful technique that ultimately guides all
of your editing choices.
12. Discovering the Purpose of Your Edit: Before I even start pulling
clips into the timeline, before any music
sound or B roll, I always stop and ask, what's the purpose of this edit? Why are we making this video, and the clearer the purpose
is from the beginning, the easier it's going
to become to make decisions from structure
to pacing to music, and to what you decide not
to include in your edit. The purpose of this edit, I already discussed
this a bit with the client Greg from
Barnier Boards, before we some of the
purposes we explored were to show off
the different kinds of boards that
Barnard Board sells, make it easy for people to
know where to buy them, highlight what makes
Barnard boards different from other brands, reinforce the brand
name and identity. And in my own edit, I'm not necessarily trying to accomplish all
of these things. Just choose one purpose and
try to focus on that purpose. I'm choosing what to include in the edit, I'm always asking, does this shot, does this music, does this sound effect
help support the purpose? And if the answer
is no, even if it's a beautiful shot or maybe
it's a clever graphic, it probably should be cut. And that's where the saying, kill your darlings comes from. You might have a
beautiful shot that took a lot of planning and prep, and in the end, unfortunately, it just doesn't make sense
to be in the final edit. And I know it's a bummer,
but we got to cut that. Stick to the purpose.
Lot of the times when you're talking to clients in
meetings or emails or texts, they're going to talk to you in terms of results
instead of purpose. They might say, Hey, we want
this video to go viral. Or I want 100,000
views from this video. Or I want more people to buy the product that you're
making and edit for. And these are great goals, but they're not
something you can edit. Can't cut a video in a way that guarantees it's going to go viral. That's just
not how it works. If that happens, if a client's
talking to me in that way, I'll usually steer
the conversation back to something
that's more actionable. I'll ask, Okay, what do you want the viewer to understand
after watching this? What do you hope that they're
going to feel after this? What's the main thing that
they should take away? These are the kinds of questions that can lead to purpose, and that is something you can
actually use when editing. Purpose is not result. The purpose of your edit or
your project is not a result. Alright, one last
thing, purpose, it's not always something
that's delivered in a nice, clean, single sentence
times you get a long email, a bunch of random text messages, or you're in a meeting where you get a bunch of
different ideas from the client of what they want
to include in the project. What I like to do
is gather all of these notes and ideas
into one place. And usually I use
Trelo for this. You can use Notion, Google
Doc, whatever it is, just put it somewhere so you can refer to it as your
editing and try to consolidate all of
these ideas and distill that into an
actionable purpose. Don't always need to know
what the purpose exactly is. Just start with something that you can actually
apply to the edit. Doesn't have to be
complicated. You can keep this simple. Just think
about it in this way. What are you trying to
communicate with the edit? What do you want the viewer to understand or what do you
hope that they all feel? What makes this product, service or story When
you focus on that, the editing process is going
to become a lot clearer, faster and more meaningful. You're going to spend less
time second guessing and more time making
purposeful decisions. So to recap, a result
is not a purpose, but what you hope the
purpose will provide. And if your client sends you
a bunch of scattered info, pull it all together, sort it, and look for the
thread that ties it all to the core purpose. You can even ask
clarifying questions if they're not sure
what they want. Now that you know
the purpose, we can be a lot more efficient. In the next lesson, we're
going to show you how to begin the process
of choosing selects.
13. Creating a Selects Sequence: Now that we have a rough idea of what the purpose
of our project is, we're ready for the next step, which is choosing selects. We can't use everything. There's just too much footage
to use, and that's fine. This edits only going
to be about 30 seconds. We need to be deliberate about what goes in
our final edit. And that means we're going
to have to go through all the footage and
pick the best clips. The ones that best
serve the purpose, we've just identified
in the last lesson. Is also the point
where we watch through all of the footage
at least once. Especially if you weren't
involved in the shoot, it's really important to get familiar with what
you're working with. Some editors even watch it
through multiple times, especially if it's
a longer project. Maybe it has actors
with multiple takes. In our case, it's
a shorter edit, so once might be enough. But the goal is the
same, know what's there, so that later, if a client says, I hate this shot, you can
just say, Hey, no problem. I got one that's
going to work better, and I'm going to go grab it
and replace it with this one. Going to do two
things here at once, getting familiar with
the footage and choosing the best parts of those
individual shots. The first thing we want to
do is create a sequence that contains all of
our raw footage so it's easier to look
through and pick select. In the project panel, I've gone ahead and organized most of my footage in
folders depending on its location or its
function within the your case, you might have all of your clips in one
folder. That's fine. To create a sequence
in this way, select the first clip
in your video folder. Hold Shift, select the last one to select everything in between. Right click and navigate down
to new sequence from clip. I'm not going to
select this because I have done things
slightly differently. I've organized everything
into my folders, and this is not going
to work in this case, but there is another way you've organized everything
into individual folders, you can click the
main video folder and drag it down to
this new item icon. Once you let go, it
creates a sequence. Now we have everything
laid out in one place, and we could start reviewing
and choosing our selects. In addition to all our clips
landing in the timeline, a sequence icon has appeared
within our project panel. Because we want to
keep things organized, click and drag this sequence. Wait a second. We don't
have a sequence folder yet. Let's create one.
Control Command B, oh seven because I
want my sequences at the bottom of this
hierarchy, sequences. We'll have more
than one sequence, and I'll click and drag this and move it into
my sequences Bn. I'm going to go ahead and
rename this sequence to barn yard boards selects because we're going to
have multiple sequences, this is a select sequence. It's specific for one task. It's not for editing.
What I'm going to do is add another folder in it 01 selects sequences, and then I'll create
a new folder and call this 02 main Edits. Move the select sequence into the select
sequences folder, and now we have just a
bit more hierarchy and organization and preparing
ourselves for our main edit, which we'll get to eventually. What exactly is the sequence? We're going to cover that
in the next lesson and how it interacts with our
different panels.
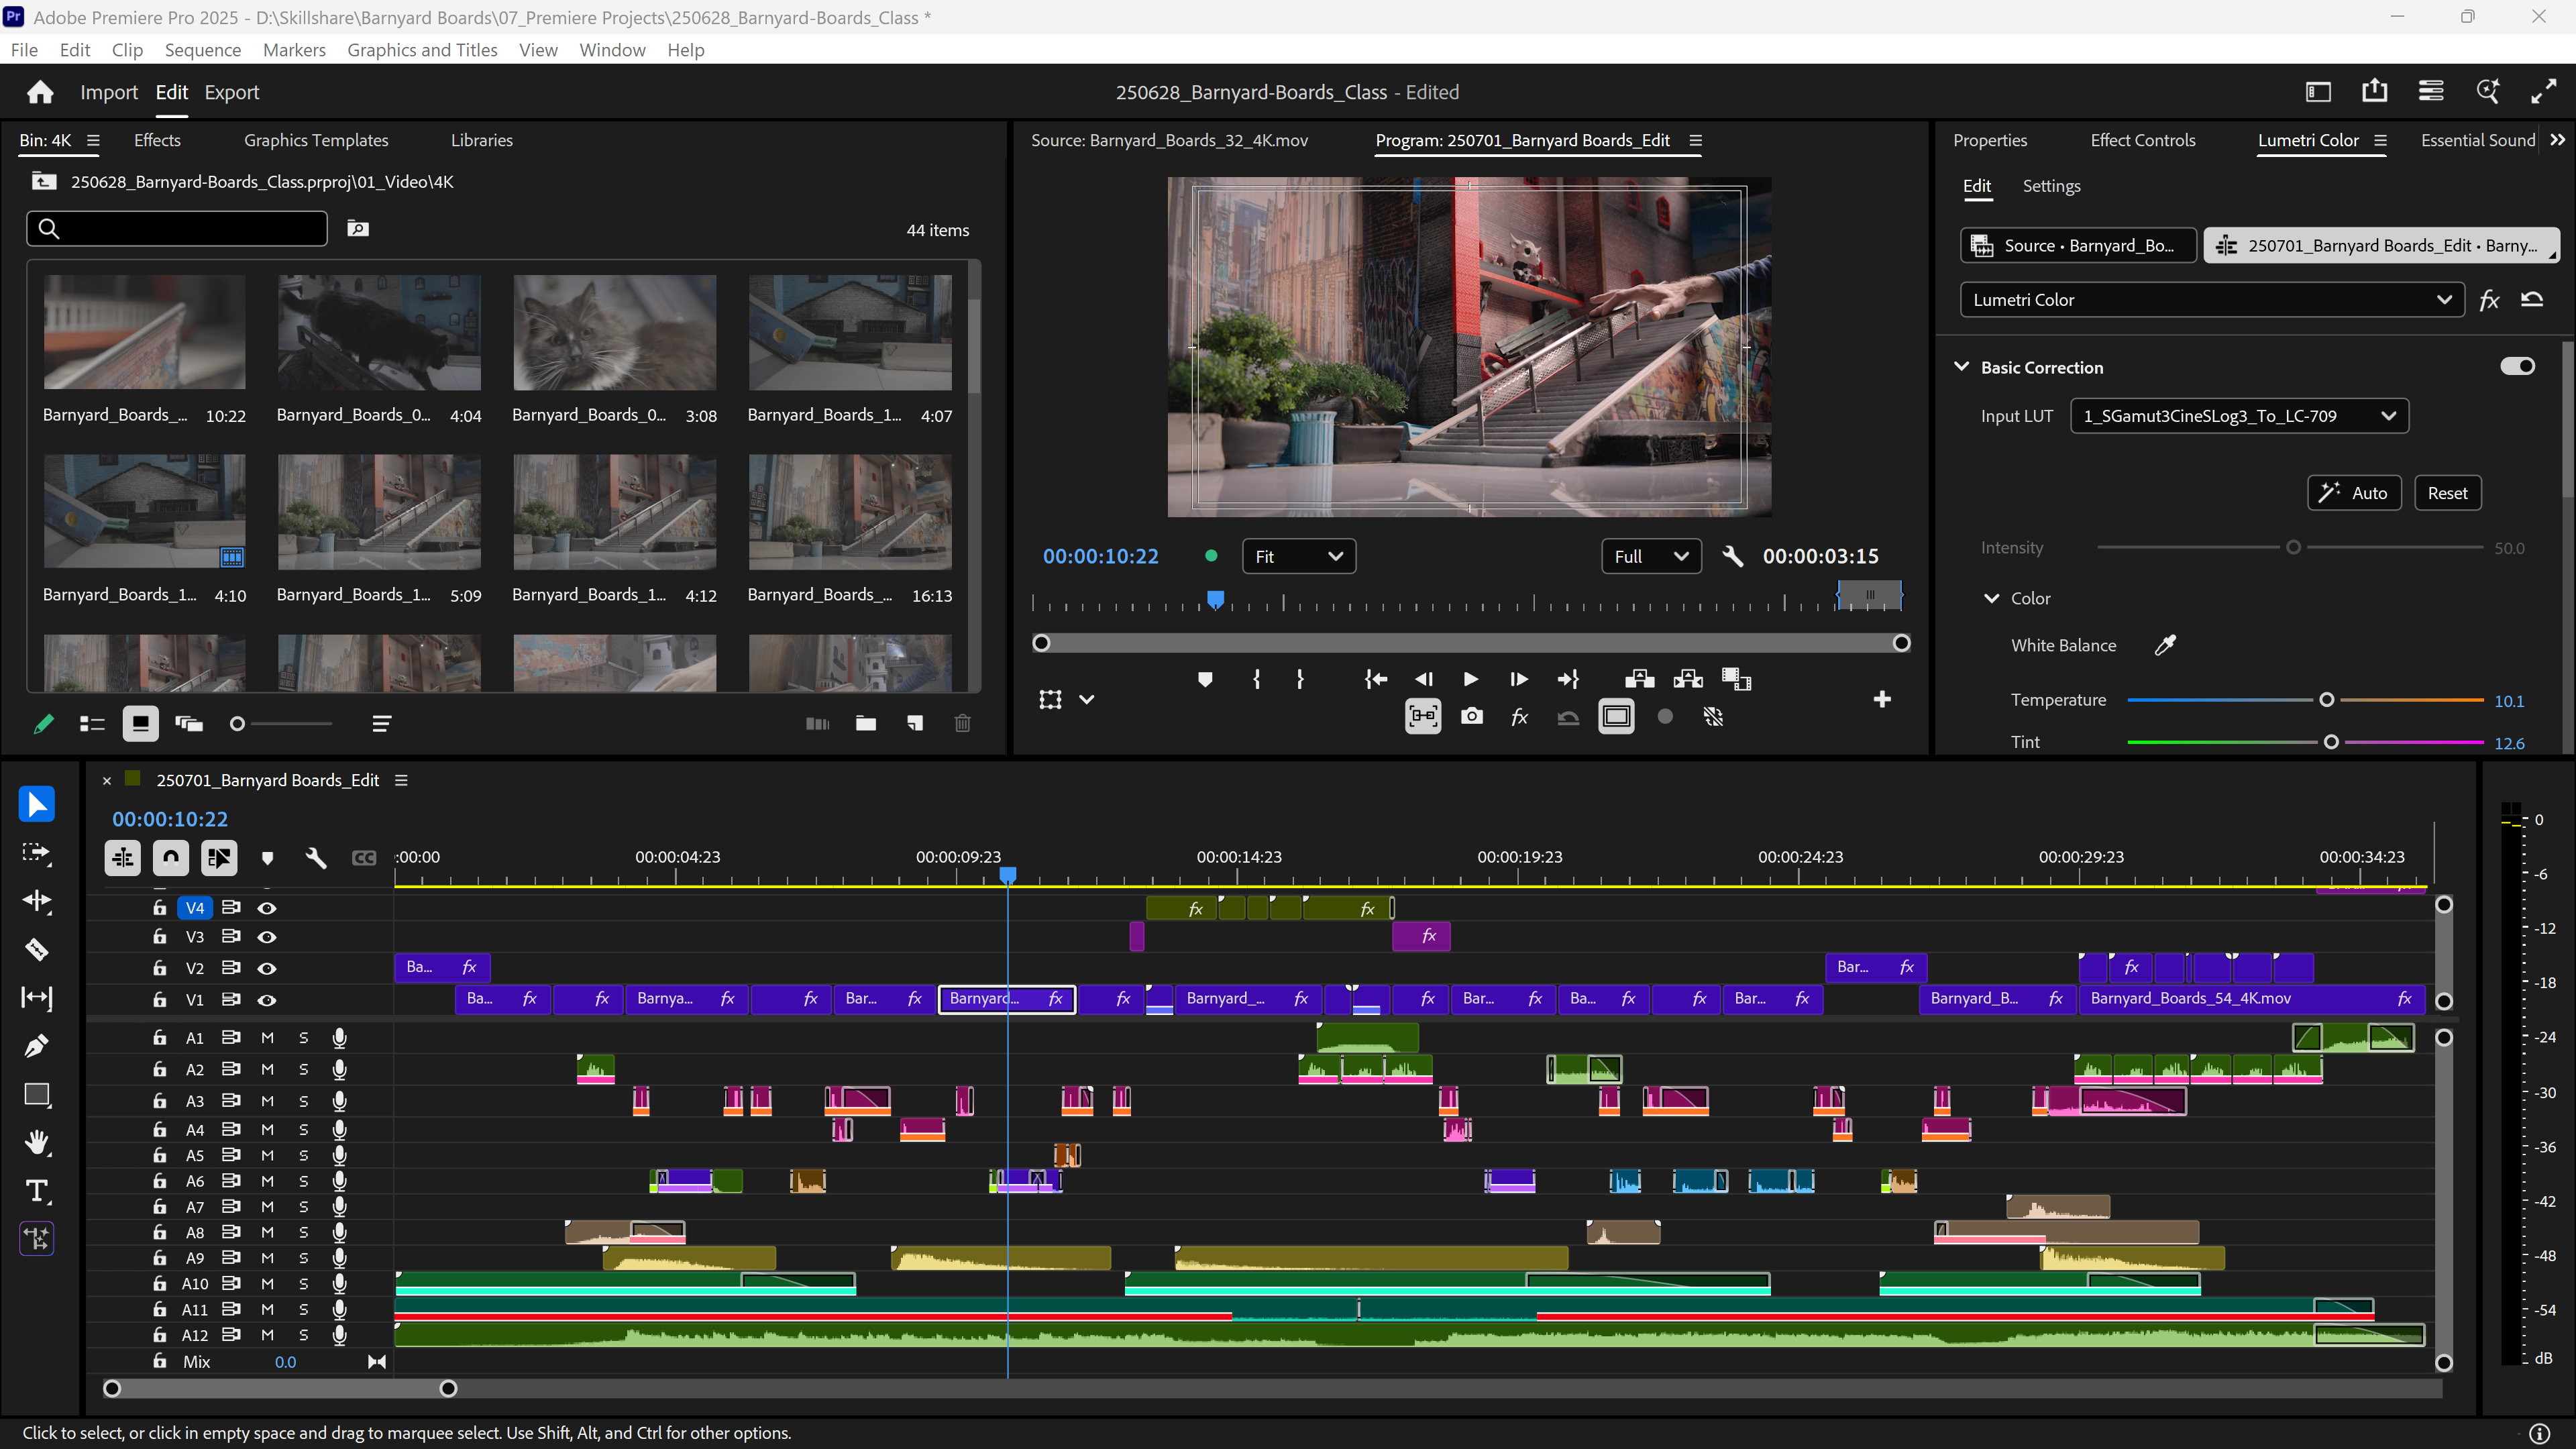
14. How Sequences, the Timeline, and Source & Program Monitors Work Together: Created a sequence. What
exactly is the sequence? Think of it like a
container that holds any type of media that
you want for your edit. When you double
click on a sequence, it opens into the timeline. This one's already open, so
when I double clicked it, it just put the
timeline in focus. If I do close the sequence,
I can double click on it, and it will load it right back up into the timeline once again. The sequence loaded up
into the timeline is also directly connected to what's
called the program monitor, and that is in the
same position that our source monitor is
because the source monitor program monitor are grouped
within the same panel. Now that we have the
source monitor in focus, if I click on the timeline, it automatically puts the program monitor
into focus because the program monitor
displays all of the footage and
cuts and effects, et cetera that are
in our timeline. From here, if I double
clicked on a clip in my timeline, it would load it up into the
source monitor, and you can see that the source
monitor is now in focus. The source monitor allows us to preview the original
source clip. If you did have cuts
in your timeline, I'm going to click and drag this trim point on either side. In the timeline, now
you can see I only have this part of the clip here appearing in my program monitor. But if I double click it
into the source monitor, an inpoint and an
outpoint appear. That shows that that range is currently located
in my timeline. But when I load it up
into the source monitor, I can see beyond those
in and out points and preview the
original source clip. This is great for
if you need to see which part of the clip
you're not using or if you want to slide the
in and out points over to feature a different
part within your edit. Now, if I navigate down
to the timeline again, it's updated to that new segment that I've clicked and dragged
those in and out points. Find that the
program monitor and the source monitor are easy
to confuse, like I do, sometimes it's helpful to
avoid grouping these panels, and you can click and drag the source monitor to the left. So you have both the
source monitor and the program monitor
displaying separately. But what's nice
about grouping them together is you have
more screen real estate for that. So what I'm going
to do is group them together. But you'll start to
get comfortable. Once you start editing. I know
it can be a bit confusing. To recap, you can
create a sequence by right clicking on a clip
or a group of clips, then hitting new
sequence from clip. Or you can click and drag any one of these
folders or a group of folders to the new item
icon to create a sequence. Think of a sequence
like a container that holds all of your media. You can playback your
media within the timeline, which is directly connected
to the program monitor. It's easy to get the
program monitor and the source monitor
confused with each other. Try to remember program monitor is connected to the
timeline and is there to help you see how your edits coming together
within the timeline, and the source monitor
is there to give you a preview of the source
clip in its entirety. In the next lesson, essential playback tools to
review your select.
15. How to Playback Footage: In this lesson,
I'll show you the most efficient way to play back the footage within your
timeline when reviewing select. I click on the play stop
toggle in the program monitor, we will initiate playback. You will see in the timeline
that this blue cursor, the playhead will start moving, and the playhead
indicates which frame is being played within
the program monitor. If I hit Stop, you can see
we land on the frame at the playhead and we see a stillimage preview in
the program monitor. Instead of clicking
the play button to start and stop playback, I recommend using the spacebar. It's a lot quicker and no
need to try to aim and click at this small
play stop toggle icon. But what's even more efficient
is to use what's known as the shuttle stop shuttle
right, shuttle left shortcut. Shuttling simply means
it's to move or travel, and by using the
shortcut keys JKL, we can perform these functions. Pressing L will shuttle forward so you get
regular playback. Pressing K will shuttle
stop, stopping playback. And pressing J will shuttle
backward, reversing playback. If I tap the J or
Algis multiple times, we can speed up playback. There are more
variations with JKL, but let's start
with these for now. In addition to JKL, I totally recommend just clicking and scrubbing
through your timeline. It's tactile, it's responsive.
You have a lot of control. It's satisfying when you can quickly move the playhead
where you want it to go. Hit the home key
on your keyboard to go back to the beginning
of your timeline. Using the JKL keys, I'll shuttle forward,
shuttle stop, and shuttle reverse
through the timeline. And as I watch, I'm
constantly asking myself, does this clip serve the
purpose of the edit? Definitely. I mean, any one of these clips can serve the
purpose of this edit. This one totally does. See this song? This
one totally does. This one totally does,
because I've already prepped most of these shots
for the class project. If I gave you all
the raw footage, it would be a bit of a
headache to go through. So part of the reason why most of these clips already look really good is because I've
prepped them for this class. That doesn't mean you find the best portion of the
clip and it cuts within it. And that's what we'll
tackle in the next lesson.
16. Making Edits in the Timeline: So here, for example,
I have the hand and skateboard trailing off of
camera and out of focus. I don't necessarily
think I need that. And to keep things concise, what I can do is I'll cut and not include the
rest of the clip. To cuto the portions
you don't want to include in your select,
use the razor tool. Navigate to the tool bar, select the razor tool, line it up with your playhead. It already kind of magnetizes
onto the playhead, and you can click near it,
and it'll make an edit. J, to shuttle reverse, I'll find the beginning
of this clip that I want. I don't need all of this run
up, so I can cut this out. Maybe we'll just
start right here. And click again to make a cut. If the razor tool isn't snapping to the
playhead like this, that's probably because
you don't have what's called Snap and
timeline turned on. At the top left of
the timeline panel, there's this magnet icon. You can click on this
to toggle it off, then you don't get snapping, which makes it a
lot more difficult to be intentional with our cuts. I do like to have Snap and timeline on and
recommend this to be on. Now with this portion
that I've just cut out, I can switch back to
my selection tool, shortcut V, click and then
drag it to the second track. This is my way of visually
organizing the timeline. Track one are all
the raw clips that I probably won't end up
using for my edit, and Track two are the best portions of these clips that I've
selected so far. I did skip these clips here, so I'll make some quick cuts. For our next clip, let's
speed things up a bit. When using the razor tool, essentially, we're adding
edits to our clips. There's a faster way to do this, and that's by using the add Edit shortcut, which is default, control or command
K. I'll make an edit directly on the playhead
so you no longer have to click on the clip
itself to make an edit. Find my outpoint, hit Add Edit, click on the clip and
drag it up to Track two. Scrub to my next clip, add Edit, find the
outpoint. Add Edit. And here's another
nifty shortcut you can use to speed
up the process. Instead of clicking and
dragging the clip to Track two, holding Alt or option, and hitting the
upkey we'll nudge our selected clip
upward to Track two. Scrub to my next clip. Add Edit, find Mile point, add Edit, select the clip, nudge selected clip up. If you want to nudge the
selected clip back down, hold Option Alt and
then press down. Up down, up down, up down.
Look how quick that is. I did mention using JKL keys, and you're probably
noticing that I don't really use them. And that's because I'm mostly
looking at the action. There's no talking, there's
no sound that I need to hear. I find that scrubbing is the
most efficient in this case. As I'm quickly moving
through my clips, what I'm doing is using
the scroll wheel to quickly readjust my view from left to right
or right to left. Eventually, I've come across
a clip that is cropped. It's smaller than the
full size of the frame, and that's because
this is an HD clip. The sequence I've created by
clicking and dragging it to the new item icon
chooses the first clip in that sequence to
create properties from because the first clip
in the sequence was four K, it's a bigger dimension. Therefore, the sequence is
larger than this HD clip. Come across this, don't
worry too much about it. Make edit points as
you normally would, and in a later lesson, I'll show you how to deal
with these clips. Because so many of these clips are already short and concise, they can probably all
work for your purpose. Take this as an opportunity
to make cuts on your clips to practice using
the add Edit shortcut, the razor tool, shuttling
through your project, and nudging your
clips up and down. After you're done, you should
have all of your selects nudged up to track two
within your select sequence. To recap, shuttle
right, shuttle stop, shuttle left in conjunction with scrubbing through
your timeline, I find is the most
efficient way to navigate. The razor tool is fine for
making edits on your timeline, but the add edit shortcut
is a lot faster, and in my opinion, is
a lot more efficient. The shortcut Option
or Alt plus up. Nud your selected clip
up to the second track. Track two represents
all of your selects. The best portions
of the clips on your timeline that you're probably going to
use for your edit, and Track one are all the clips that are still available in case you need them, but you're most likely
not going to use. Review all of the clips, look at what you have, choose
what stands out to you, and trust your gut on what suits the purpose of this piece. I'm going to take you
through more ways to distill this footage and to get more specific and clear on the story you're
creating. Be discouraged. We have more to come.
In the next lesson, we're going to create a
main editing sequence, and I'm going to
give you some super helpful tips on how to manage those sequences as you
progress with your edit.
17. Managing Multiple Sequences: Once you've picked the shots you think it's
going to work best, it can still be tricky
to know where to begin. That's totally normal.
In your Selex sequence, any clip might be a
good starting point. Before we jump into editing, we're going to want
to get clear on what we're trying to
say with the piece, and then start shaping
our footage around that. But here's the thing we
don't want to just start cutting directly
in the SelexTline. That sequence is meant
to be a clean space where you've gathered
your best options, and you can come back
to it if you need to. So you're going to
want to hang onto this and not change it dramatically. It's a helpful reference
point place where all of your unused shots are still easily accessible
if you need them later. What we want to do is create a new sequence for editing
together your selects. The fastest way to do this is by duplicating our already
created select sequence. Right click and navigate
up to duplicate. You can also use the shortcut
Control or Command plus Shift plus forward slash. And once that's done, we can
give it a clear name like Barnard Board's Underscore
Edit. Nothing fancy. And to keep this organized,
I'll click and drag it into my main Edits folder. Open that up so we can see it. And now you can see this is
why I number these folders. 01 select sequences is first, and it's first in the workflow, and 02 main edits is
second in the workflow. And then we will eventually, once the final edit is complete, have an 03 final edits folder. So it's easy to
distinguish where each sequence is within the
overall editing workflow. Can also date your sequences, especially if you're
working across multiple days, months, years. Each day, just duplicate your
main edit and add the date. And this gives you a running
timeline of your progress. If, say, on 10 July, I decide I want to do
another type of edit. I want to try something
completely different. Maybe it's an alternate
type of edit. I'll duplicate that sequence. And because it's the same date and it's a completely
different edit, I'll type in ALT or
Alt for alternative. If I decide to
continue to work on my regular edit and I've made a lot of progress
within the same day, I'm not going to
change the number to 11 because it's
actually the tenth. Rather, I can add
a B on the end. And you can do that as
many times B, C, D, wherever you're at, and
how much redundancy you want within
your day of edits. That way, you don't lose
work you've already done, and you can always go back
to it if you need to. This is especially
helpful when you make large changes to your edit or make a significant
amount of progress. This approach gives you a bird's eye view of your
project over time, and if you ever
need to reference something an earlier
version had, whether it's something
the client liked or something you lost track of,
you're going to have it. This has happened to me
on more than one occasion where I need to go back
and see what I've done, and that is exactly because a client has a note about
an edit that I've made. Maybe I've went
too far and I have to revert back to an
earlier sequence, or I simply need to
cut a segment out of that earlier sequence
and paste it into my new edit to
retain that portion. Key takeaway is this, your select sequence
and your edit sequence, they serve different purposes. The Select sequence is going to help you gather and explore and your editing sequence will
help you build your edit. Keeping them separate
gives you clarity, flexibility, and a safety
net as your edit evolves. Remember to separate all
the different stages of your edit within subfolders
and make sure you include the date in the
name of your sequences and Premiere Pro project
files for Extra Rdundancy. Next up, we're going
to talk about how to actually begin your edit.
18. Building the Foundation of Your Edit: How do you even know
where to start with edit? Which shot
should go first. With so much footage, it's
easy to feel overwhelmed. And that's exactly the problem we're going to solve
in this lesson. By the end of this lesson,
you're going to know exactly where to
begin and how to map out your entire 32nd
or whatever length video. We do this by understanding
the what of our story. When you dump clips onto the
timeline without a plan, you're going to end up confused, second guessing every choice. Should the shot come
before that one? Do I even need this?
There's a bit of that, but the what helps you define happens at the
beginning, middle, and end of your story. It gives you a clear
roadmap of where to go every step of the
way through your edit. Every clip you choose or
cut serves a purpose, and you can edit faster
because you can simply follow the what of
your story as a map. The what is simply
what happens in your story from the very
first frame to the very last. The easiest way to
find the what of your story is by
looking at your script. Open the script, and
you can see here, I have a beginning,
middle, and end. I can simply use this script to locate the clips
that I filmed for each section and place them into the timeline accordingly,
and that's really it. There's not much
to it. But there is something else
to keep in mind, which is when using
the beginning, middle, and end of this
script is to think about taking your
audience on a journey. I like to think about it
like a roller coaster ride, and I've attempted to do the
same with this short script. A roller coaster, it can
start with anticipation. A big drop, and you might hit a huge loop
right at the beginning, followed by a calm or track
that creates anticipation. Then once again,
you're thrown into a spiral of tracks
back to calm again, and then back into
the abyss of track. And much like your
roller coaster, the aim is not to be one consistent speed or
intensity all the way through. If it's flat and
straight the entire way, that's not going to
be exciting at all. But if it's full of loops and
speed with no slow moments, people are going to
throw up and feel dizzy and not know
what's going on. Need to have some ebb and flow. This can be different
than the script. In a lot of projects, you're not even going to have a script. Don't worry about getting
the beginning middle and end. Perfect or right. You're just trying to
put something together, and as you start going through the ways to structure the
beginning middle and end, your brain will automatically
fill in those gaps, and afterward, you can decide if you think it's an engaging
way to edit the footage. So as I was writing this lesson, first thing that came
to mind is I thought, Well, what if I started
with the boards themselves? Maybe I throw them together and show the different
colors and styles. And then I had another
thought crossed my mind. What if I made the boards
swipe onto the screen like it's some character
selection screen from a video that was kind of cool.
And then maybe I create a motion graphic that shows
the board being selected. And after that, I showcase
some tricks to get into the loop section
of my roller coaster. It gets exciting. Then
gets back to calm. We go back into the
board selection screen and reveal some unique
stats about the board, so we're getting
our purpose across. Then we show a huge trick to give some credibility
to those stats. And then what if after that, I go back once again to
the board select screen, then swipe over to the
barnyard bowl character. And we have the logo
with the call to action and the Barnard
Board's website. So we're covering the
beginning mineral and end with this
quick brainstorm. It's not perfect,
but I got something. I can use this as a map. Just by talking it out, you can let your brain fill in
the shot that comes next. Don't judge. Simply
talk it out or write it down and move on to the
next shot that comes to mind. Really easy to start judging, especially as an editor because we critique the footage we have. We're constantly
picking it apart, choosing the best shots,
choosing the best moments, trying to figure out
what's going to work. And when you're in
that phase of working, you're judging whether something
is going to work or not. That's an important
skill to have. But when you're in the
brainstorming phase, it's not helpful at all. So you might also notice when I'm in the brainstorm phase, I'm using the phrase what I? And I find this a powerful phrase to use
because it's noncommittal, it's non judgmental, and
it's not set in stone, so there's no worry
about messing it up. It's purely there to set
your imagination on fire. I don't need to
stick to this idea, but I've quickly created a
beginning middle and end. This beginning middle and
end is now your roadmap for which shots to choose
and even how you use them. This part of story, the what is part of
what I like to say, which is story is your guide. The what is one part of that. You now know which shots to use to fill in your
beginning middle and end. So give this a try on your end. Try talking out your
beginning, middle, and end, and maybe
writing is better. Whatever it is, remember, use the phrase, what if? It's non judgmental,
non committal, and engages your imagination. Try this a few times and see how many different beginning, middle, and ends you can
create just in your mind. And then choose the one you're most excited to get working on. So to recap, what is what happens from the beginning of your story all the
way to the end, keep in mind the roller
coaster metaphor to keep your sequence unpredictable
and engaging throughout. In the next lesson, we're
going to start by placing clips on the main
editing timeline.
19. The Pancake Timeline Method: Alright, it's finally time to start editing the main
timeline, and honestly, you should feel
good about getting to this point because
a huge part of editing actually happens before you even touch the
main timeline. That prep work, the
organization, the selects, the structure, this is what saves you from feeling
overwhelmed later on. If you just dumped
every clip into the timeline and it
started hacking away, it could be messy,
confusing and stressful. That's a shocking approach, and it tends to slow
everything down. We're doing instead
is deliberate. You've already sorted through
your footage and built a select sequence with your
strongest moments, organize, at least in your
head or on paper, a rough beginning,
middle, and end, and now we're going
to use that in conjunction with what's
called a pancake timeline. With your select sequence open, we're going to double
click the main edit sequence and
open it as well. You can see here we
have all our selects in this sequence as well because we duplicated it a
couple lessons ago. You can hit Control or Command A to select all of these clips, then hit delete
because we don't need these clips and we have them saved in our select
sequence still. This is going to be
our main edit sequence where we will build our edit. You'll also notice that we have both sequences open
within the timeline. But what we want to
do is stack them. So click the tab for your
select sequence and drag it upwards until you see
a highlighted area above your main timeline
and drop it there. Now you've got your
select sequence on top, your main edit timeline below, like a stack of
timeline pancakes. Wait until you see that
small thin strip on the top. This is quite a small
view of our timeline. So what I'll do is click on this divider on our
select sequence and click and drag it up and adjust until I have
something that I like. So I can see everything. And I can also click this divider between our video tracks and our audio tracks so I
can see more video. We're not working with
audio, so we don't even need audio in this part of
the post production process. Comes to this pancake setup, it's super easy to click
and drag clips from our Select sequence into
our editing timeline. Now, we don't have
to switch tabs or hunt through
bins for footage. This is way faster and way
less mentally draining. I'll click on our
Select sequence, and what I want to do is zoom in because right now my
view is quite small. So I'm constantly
having my fingers on the Zoom in and Zoom out shortcuts so I can get a better view of my timeline
as I go through it. It's as simple as going through your selects and start
building your rough cut. You already know your
story structure. So start placing clips in
the order you planned, beginning, middle, and end. You're not making any
final decisions yet. You're simply
assembling the edit. Think of this as your
first rough draft. The clips don't have to
be perfectly trimmed, and the timeline is
going to definitely be longer than your final
version. That's fine. What matters is you're
laying the foundation. When you drag clips down
from the select sequence, Premiere Pro automatically
copies them. Your select sequence
stays untouched. Also going to notice
that the clips snap together as you place them. That's because
snap and timeline, in my case, is turned on. Again, you can find
Snap and timeline in the top left of each
one of these sequences. If it's toggled on, it helps everything
fit tightly together, preventing accidental
gaps between clips. This sorts out all kinds
of problems later on, like blank frames, but it can also get in the way
of fine editing. So you can turn it off
temporarily, but for now, I definitely recommend
you keep it on to avoid any blank frames
between your clips, and it makes it a lot easier to snap these select
shots together. Don't worry about
perfection. Just focus on getting everything in the
timeline in the order that you dictated within the what don't second guess it or try to make every creative
choice at once. That's going to
create burnout and fear of where your
edit is going. So when you break it down, you're editing into simple
focus steps like this, it becomes way more
manageable and, in my opinion, more enjoyable. Now it's your turn to drag your selects down to
the main timeline. As you go, follow along with
the next four lessons for helpful tips and common
challenges to watch out for.
20. Quick Tips for Assembling Selects: Here's some tips for when
you're placing your selex. Clicking and dragging this
clip down to the timeline. If I ever miss snapping
these clips together and I just simply click it
down to my edit sequence, instead of clicking and
dragging it into place, I can also click on
this empty space, hit the delete key to delete that empty
space, closing the gap. Another tip here, when you're
going through your footage, you might start
noticing that some of your selects you've
chosen are redundant. Maybe you have three
different takes of one trick. You
don't need them all. So essentially, you're
doing another pass of Selex editing when you're dragging down your select clips to the main editing timeline. Final tip that I find incredibly helpful when you're navigating
the select sequence, there are a ton of clips. You might be at the end of
your sequence in one moment, the middle of your
sequence, the next, in the beginning, another time. You're clicking and
dragging clips from all over into your
main edit timeline, and it becomes difficult
to remember which clips you've actually put into
your main editing timeline. You don't want to put
duplicates in there. So to get around this, we can
click on the wrench icon. Within the main
edit timeline and select show duplicate
frame markers. What this does is
it shows duplicate. So I'll click and drag a clip that I've already
clicked and drag in before. I'm pretty sure it's this one. See it's hard to keep track. I'll click and drag it into
the main edit timeline. Okay, I haven't
used that one yet. So this is why it's helpful to have show duplicate
frame markers available. I'll click and drag the same
clip again to show you. Now look, this orange strip
on the bottom of this clip, and this shows us that all of these frames are duplicated
within the same sequence. If I click and drag
this one shorter, you'll see now that
only this portion is duplicated within
the sequence. It's very helpful
to see if you have any accidental duplicates
within your mean at a timeline.
21. Working with Alpha Channel Clips: One other thing to
take note is all of these clips right at
the end, these boards. They all have what's
called an Alpha channel. An Alpha channel
is what controls the transparency or
opacity of a pixel. So in this case, all the black footage around these boards are transparent. And you can see
this by clicking on this little wrench icon and then navigating down to
transparency grid. Licking on that, now we have the transparent
checkerboard in the background indicating that all of this is transparent. So what this means is I can
take one of these clips and layer it on Track two
within my main edit timeline. And then these ones
here are actually meant to be backgrounds
for these boards. I can select one like this one, click and drag it down to video Track one underneath
this board clip. And now all of that
invisible space around the board
contains our background. This is the intended way of
working with these clips. And I'm going to show you in
a later lesson how to loop this board spin along with
freezing the background.
22. Understanding the 4K vs HD problem: Now, here's where the
tricky part comes. We have this HD clip. It says HD on it. I
click and drag it down to our main editing
timeline. Look at that. It's still too small to fit
in this four k sequence. This is where I'm
going to go through a bit of technical jargon. Try to follow as
best you can here. Our edit sequence and
our select sequence are both four K sequences, meaning that they're
38 40 pixels wide by 21 60 pixels tall. Most of our clips are
in the same dimensions. But this clip here was
filmed in high definition, which is a completely
different dimension. It's half the size of four K, 1920 pixels wide by
1080 pixels high. But that 1920 by 1080 HD shot doesn't fit into something that's
twice as big as it. The thing is, I can
select this clip and then navigate to my
Properties panel, which appears in
the top right here. If it's not showing up for
you, go to Windows Property navigate down to scale. I see that this is 100%. It's already at full scale. It can't go any
bigger. Well, it can. I can drag this up to
200% and fill the frame, but then we start to
get a degradation in quality of this HD clip because we're blowing
it up twice as big. Those are digital pixels. Once you blow them
up big enough, then you're going to
start to see that, well, things are a bit blurry.
They don't look right. So you don't want to go and
blow things up past 100%. Typically, you don't
want to do that. So I'm going to go ahead and
click on the reset icon in the top right of this panel to reset everything
back to default. Way around this is not to adjust the HD clips to fill
the four K frame, but to take the four K clips
and scale them down to HD. And because the
final deliverable of this edit is going to be
HD, this makes sense. The deliverable just
means what we're going to be uploading
to the Internet. That final file will
be 1920 by 1080, so we don't even need
to export a four K 38 40 by 21 60 file.
23. Adjusting Sequence Settings: To make this
sequence not four K, but HD, we can adjust
our sequence settings. Navigate up to sequence
sequence settings. Right away, you're going
to see all these settings. Don't be scared. We're only focusing
on one thing here, and that is frame size. The frame size of our sequence
is four K, as I mentioned, we're going to change
this to 1920. By 1080. Now we've changed our
four K sequence to HD, which is half the size of four
K. I'll navigate down too, delete all previews for
this sequence. That's fine. Don't worry about this for now. We're not deleting any
important files here. We're not deleting any
source files, so hit Okay. Right away, you'll notice that
our sequence now is in HD, and the HD clip fills
the frame perfectly. But what happens with the
four K clips is now they're croupped off because they're too big to fit in this HD sequence. We'll fix this in
the next lesson.
24. Fit to Frame: In this lesson,
we're going to fit these four K clips
into this HD sequence. So you might think, right away, well, we can do this again. We'll click on the
clip, navigate to our properties panel, and scale them from 100% down
until they fit the frame, which is 50% because
half of four K is HD, so 50%, that makes sense, right? Well, yeah, we can do that. We can select every clip and scale it down to 50 or at least click on it
and then hit 50. That becomes a lot more time consuming and difficult
to work with. So instead, what
you want to do is select all the clips by
hitting Control or Command A, right clicking on the clips, then navigating to fit to frame. And this automatically
fits every clip within the sequence to the frame
size of the sequence itself. Some of you may be familiar with an older setting called
set to frame size. That is the same as this new setting which
is fit to frame. Fit to frame is the
same as set to frame. Don't get scale to frame size
mixed up with fit to frame. You want fit to frame to
not lose any quality and make the most of the quality of the four K clips that
you have available. Because I've changed our
main editing sequence, now our selexEediting
sequence is still in four K. So when I click
and drag clips down, our clips are still
going to be cropped off. So what we can do and what
I should have done in the beginning was change these sequence
settings right away. So go ahead, open up sequence settings again
under sequence settings, open up the sequence settings
for your select sequence, change the frame size 3840-1920. Tab to move over to
the horizontal factor and then change 21 60 to 1080. This is HD. Hit Okay. Delete all previews.
That's fine. Okay. Now all our four K
clips are cropped off. I'll zoom out to show you. Hit Control or Command
A is select all. Right click on the
highlighted clips. Select Fit to frame. Boom. Now, everything
fits to frame perfectly. Now I don't have to worry
about new clips coming in cropped into our
main editing sequence. Should have done this from
the beginning. That's okay. Now you know, and
you can take note of this for any new
projects you take on. So to recap, HD and
four K are different. HD is 1920 pixels wide
by 1080 pixels high. Four K is 38 40 pixels
wide by 21 60 pixels high. HD is half the size of four K. And that's why it doesn't fit
within a four K sequence. Don't blow up your
HD clips to 200%. You lose quality on final
export with these clips. Because we're delivering
this final file as an HD file for
web use online, that's what we want to set
our sequence settings too. That's the best practice
in this case is to set the sequence settings to
your final deliverable. If we had to deliver
this in four K, be a different story.
Then we would either have to navigate around
the HD clips we have or we'd have
to upscale them to four K. We're not going to cover that in this
class right now. Thankfully, we can
take this sequence, adjust to settings so that the frame size goes
from four K to HD and then select
all the clips within the sequence and
hit it to frame. Now four K and HD clips can
sit in the same timeline, all fitting nicely
perfectly in frame. In the next lesson, I'm going
to show you how to take this rough assembly at it and turn it into something
more polished.
25. Using Music to Cut Your Edit to Length: By now, your timeline should be pretty full with
lots of selects. Maybe you have more,
maybe you have less. Either way, that's totally fine. At this stage, it's not
about getting it perfect. What we're doing now is shaping all the raw footage into something more focused
and intentional. And we're doing
this in stages so it's not overwhelming
and we can make clear, thoughtful choices
along the way. I have about 3 minutes
of footage in here, and at this point, I prefer
to drop in some music. Why do we do this? Because
music has structure. It has a defined
length, a rhythm, and it can act like an
anchor for your edit. So it gives you a
framework to work with especially if you're
not sure yet how all your clips are
going to come together. Now, I'm not saying you got to cut to the beat
or anything like that. I don't love just
cutting strictly to the beat and trying to
be overly trendy per se, because the music is not
necessarily the story, but it contributes to it. So there is that balance. We want to let the music guide the pace of the
edit in some way. So we want to be able to
use it to our advantage, but we also don't want
to overly rely on it. Or allow it to take away from
the purpose of our edit. Now, go into your music folder and pick
the track that you like and drag it into Audio
one on your timeline. I edited down a track that I appreciated into
about 40 seconds. So I'll click and drag
this to Audio Track one, and Wow, that is a lot shorter than the clips in my
timeline, but that's okay. Now, you can see exactly
what you need to do to get your clips down
to the set length.
26. Adjusting Track Heights: We're going to get to this edit. Another thing,
though, that gets in the way are these track
heights. They're all different. You can control track
height by clicking on these empty spaces
within each track row. Double clicking on
it, opens it up, double clicking on it
again, closes it up. Double clicking on
the video track, opens it up, double clicking
on it again, closes it. But when you double
click it to close it, it doesn't close all the way. And what gets very
frustrating is when you try to click and
drag a clip or move it, you hit this effects bar
instead of the clip itself, and that can get very
frustrating when you're trying to just move
a clip out of the way. What I prefer to do is shrink these tracks
a little bit more, and you can do that
by holding shift and using the mouse wheel
to scroll to close it. It just needs to be hovering
in this empty space for video or this empty space for audio. Here, it's
not going to work. It's going to act as a
left to right scroll. The same goes for clicking. Double clicking on these tracks doesn't actually open these up. You have to double click
in these empty spaces within the video
and audio sections.
27. How to Trim Clips in the Timeline: I'm going to begin by editing
these three initial clips. I'll zoom in to get
where I need to go. The plan here, I had imagined
that this introsection, it's very short introsection, about 4 seconds would create
this feeling of calm. You get natural park
sounds, birds chirping. And then in the distance, you hear some
skateboarding noises. After that moment, we
crash into the first clip, which lands on this beat here. You can see it within the
waveform of this audio. These little peaks
and valleys of visualized audio is
called a waveform, and it helps you
see where the beats are within the music clip. This might be helpful
to open up so you can see what's going on
with your waveforms. If I play it back, you can see and hear that
initial beat right here. I need to fit these
first three clips. Oh, first four clips. I
might get rid of one. Oh, five. Oh, my goodness.
I got five clips here. I need to get rid of some
of these to be able to fit it into 4 seconds.
But that's okay. This is why the
music is great to place because it forces
you to make decisions. I'm going to start by showing
you how to trim clips. First way to do this is
using the selection tool. What we have toggle
on right now, it's the first tool
within the toolbar, default shortcut V. With
the selection tool enabled, I can click and drag
the outpoint of a clip or the point of a clip. When you're moving the
outpoint or the in point, that's what's called trimming. You're trimming a
clip. So I'll click and drag this clip
closer to the beginning. Maybe I'll have it
end right here and then trim this clip
to the playhead, and it snaps into place. One thing to try out
with an edit point selected is to use your
left and right arrow keys. Using them allows you to trim the edit point frame by frame
for ultimate precision. And next, I'll move these
two other clips into place and trim them down to roughly the same
length for now, just so we're keeping
these clips balanced. Trim. Instead of trimming, you could also make a cut
using the addited shortcut, selecting the clip, and
then hitting delete. Click and Drag this
clip into place. I do love this shot
of the cat of Henry. He doesn't really know what's
going on, so it's perfect. This could be a great
reaction shot as well. I might lose this clip. I find that it doesn't
have any branding in it. It's kind of interesting because I have five other clips
I'm going to delete. Click on the empty space
and hit delete again. I'll move this clip. Yes, the barnyard Bowl. We like this. Perfect. Now we'll click
and drag this clip. We'll trim these clips to
roughly the same sizes. There is a better
way to do this, and that's what I'm going
to show you next here. This might go well with
some bird chirping, so I'm going to place this. Actually, I'm going to
place this on track, too, and the reason why I
do that is because sometimes it's nice
to addition clips. I'm not sure I want
to use this or not, so I'll just place it there for now, and I can replace it. I could delete it. But I'm not sure yet, so I'll
just leave it there. Sometimes the
selection tool works really well for these
small little edits, but there's a more
efficient tool to use, especially when
you want to adjust the edits of two different
clips at the same time.
28. The Rolling Edit Tool: Thinking about the
roller coaster metaphor, this is the part
where we add energy, some big tricks, fast
movement, quicker cuts. I'll drag in this big trick
clip with lots of movement, and I want to have it happen right on this big musical beat. Now, what I can do is
I can click and drag these trim points and make
them meet in the middle. But that's not quite precise. And to make it precise
and do this, it clunky. So what I actually
prefer instead, if I undo all this is I know this isn't going to
be on the beat perfectly, but I can click and
drag this into place. And now I'll make use of the rolling Edit tool to
adjust this edit point. Navigate to the toolbar and
select the third tool down. And if you don't
see it like I do, you can click and hold
on the tool to bring up the sub menu and select
the rolling Edit tool. It's the icon with the
two arrows pointing in opposite directions,
Rolling Edit tool. That's default shortcut N. The rolling edit
tool allows you to adjust the outpoint of
one clip and the in point of the next
clip simultaneously. And this is perfect for
fine tuning transitions. You can drag the edit
point, left or right, or nudge it frame by frame
with the arrow keys. You'll see previews in
the program monitor. Left preview shows the
end of the first clip. The right shows the
start of the second, and that's super helpful
for visualizing how your edit will flow before
committing to the change. Our case, we want the cut to land right on the main
beat of the music. So I'll drag it as
close as I can, and then I'll let go,
zoom in as far as I can, select the edit point using
the rolling edit tool, and use my left and right arrow keys to nudge it into place. One other extremely helpful
thing to do here is to make use of stepping forward or backward
one frame at a time. And you can do that
using the arrow keys on the keyboard
to find the edit. But another really
cool kind of hack with the shuttle shortcuts is
to hold K and then tap L, move forward frame by frame or tap J to move backward
one frame at a time. So you're making use of your
shuttle keys while also being able to navigate your
timeline frame by frame. And we also have
the good old scrub. Whichever playback
choice you choose, choose the one that helps you
identify where the beat is. Now that I have that in place, I'm going to play this back. That's pretty good.
And actually, the landing of the
board is in sync, as well, which I kind of like.
29. The Slip Tool: The rolling edit tool changes where the cut happens
between two clips, but it doesn't change the
content within those clips. So if I wanted the trick itself, the action where the
board lands on the rail. What if I want that
to come in sooner? Well, you might say, okay, well, you could just
move the clip back and find okay, it lands there. But we're kind of guessing
where it's going to land, and then we have to adjust
these trim points again. And this is not the
best way to do this. What I'm going to
do is undo this, and I'm going to access the
slip tool within our toolbar. Is the fifth tool down. If it's not visible,
click and hold again to access the
sub menu and locate the icon with two arrows inside a pair of brackets,
the slip tool. And that's default shortcut Y. The slip tool allows you to shift the content of a clip left or right while keeping its in and out points
in the timeline. Fixed. As long as your source clip has
enough extra footage, you can slide the
internal content until it lands exactly
where you want it. So a great way to
think of this is when you double click a
clip in the timeline, we can load it into
the source monitor, and we can manually adjust the in and out points by clicking on the middle of
the in and out points. And when we let
go, it commits to that new in and out point
within the program monitor. Slip tool is doing
the same thing just faster and right
inside the timeline. This is where those previews
are extremely handy. I see that the board on the left here is coming
up and onto the rail. Maybe I want it to
start right here, right before it lands on the
rail. Let's try that out. Well, I might want to
see a bit more of that, so let's try it again. Start with it just right
in the air. That's okay. I might I actually kind of
liked where it was initially. I don't know where that was. I'll have to work
on this a bit more. Yeah, somewhere around there.
I think that's pretty good. So between the selection
tool for basic trimming, the rolling Edit tool
for shifting cut points, and the slip tool for
adjusting clip content, you've now got a solid tool kit to start shaping your story. So one last thing, well, I don't recommend cutting directly to every
beat of the music, using the rhythm as a guide can be super helpful,
especially early on. And you can think of it
as a map to help place your clips and shape your
pacing. Now it's your turn. Go through your timeline and start trimming down your clips, get rid of what isn't needed, and begin shaping
the rough cut so that it fits within the
length of your music.
30. Adjusting Clip Speed: As you work through your edit, you are eventually going to come across a bunch
of slow motion clips. And if you just leave
them as they are, they're going to stay in
slow motion the entire time, which is probably not
going to work for a short ad where you need
to fit in a lot of clips. Plus, if everything's
in slow motion, the edit can start to feel
a bit flat in one note. Luckily, we can fix this by
adjusting speed and duration. When you preview a clip, you can usually tell it's slow motion just by
looking at the movement. In this case, it's not because of the frame rate
and the metadata. Everything in this
project was filmed in slow motion but saved at 24 FPS. If I locate this clip
within my project panel, you can see that the frame right under this
metadata column, they're all 23.976
frames per second, regardless of whether they're
real time or slow motion. They're all saved at
24 frames per second. And that's why even if
some clips were shot at 61 20 or 240 frames per second, they all show up as
24 FPS in premiere. Keeps things simple and
consistent for editing, especially if you're
using proxies, which we're not
covering in this class. Even though they all say 24 FPS, here's what we really have. We have 24 60, 12240 FPS footage, all playing back at 24 frames per
second within the timeline. To adjust the clip speed, right click on it
in the timeline and choose speed duration. This opens a box where you'll see the current
speed percentage, and changing the percentage
changes how long the clip is. So, for example,
if I type in 200%, it becomes twice as fast, which makes the
clip half as long. Here's something
important because all our clips are
set to play back at 24 frames per second.'s the
limit for smooth playback. So if I slow down a 24 frame
per second clip below 100%, say 10%, I'll hit Okay. Notice the duration of
the clip is 25 seconds, and I play it back
in the timeline. I'll slip the clip so
you can see the action. So it's choppy. It's
very, very choppy. It's not smooth playback. So unless you're going
for that kind of effect, don't go below 100%. It's totally fine to go
for a look like this as long as it's intentional
and adds to your story. Just know that slow
motion only works when the original clip was filmed
at a higher frame rate.
31. Working With 60, 120, and 240 fps Footage: So let's walk through
a few examples here. We have this clip
within our timeline. This clip was filmed in
60 frames per second, and I can't tell based on the metadata that it was
filmed in that frame rate. I just have to trust
my eye in this case. So if I play it back,
that's slow motion, but it's not 120
frames per second, and you'll see the
difference in a minute here. So to play this slow motion, 60 frame per second
clip in real time, 24 frames per second, we have to figure out how
many times 24 goes into 60. So 60/24, that gives us 2.5. In the context of speed, 24 frames per second is 2.5 times faster than 60
frames per second. I open up my speed and
duration once again. If it's 2.5 times 100, I can actually hold
Shift and then press eight to use the
multiplication symbol that's times and then type
in 2.5 that gives us 250%. You could do that in your
head, but I wanted to show you that method in case you come across more
challenging equations. So Premiere Pro calculated
that for me, 250%. Now when I hit Okay,
this will play back this 60 frame per second
shot in real time. Extend that. So the
motion is quite fast, and that's why we filmed
a lot of these shots in slow motion so you
can really see what's going on with each trick. Now, I'm gonna move
over to a 120 FPS shot. Take a look at this one. Can see the difference. 121 is quite a bit slower. And the same idea applies here. If I want to take
this 120 FPS clip and turn it to real time, we need to divide 120
by 24. That's five. 24 frames per second is five times faster than 120
frames per second. Instead of right clicking on this clip to find
speed slash duration, I'll use the default shortcut Control or Command R to access this window quickly. I can do 100 times five
in my head. That's 500. So 500% should give us
real time playback. Extend that so we
get a full view. It'll go by quick.
Watch. Now, the motion does look a bit funny. It looks very what people like to say detailed
in this case. We have very little
motion blur going on, so it makes the clip
look ultra detailed. There's a lot of reasons for that that we're not going
to get into this class, but I do cover it
in my other class on filmmaking techniques. If you're interested in shutter speed and motion blur. That's what's happening here. So now let's go to our 240 frame per second
clip. I'll play this back. So you can see how much slower that is than
everything else. But the same thing
goes for here. If we want to change
this 240 frame per second clip to real time,
you can do the math. Pause the video and try to figure this one out on your own. Okay, did you get it? Let's see. I'll open up clip speed
slash RE and I'm going to change the speed from
a 100% to 1,000%. 24 frames per second is ten
times the speed of 240 FPS. I'll hit Okay and play it back. And that just flies by. Again, you get
these ultra sharp, no motion blur on this movement because of
the way it was filmed. So now it's your
turn. Try converting a few more clips like this. And just remember
in this project, real time means 24
frames per second. So any slow motion
clips that you want to convert to real time will
be done so in this way. Take a look at the
graphic on the screen to know exactly how to
convert each speed that the footage was recorded in to real time playback
on the timeline. Remember, don't go
below 100% speed unless you're
intentionally creating a choppy or dreamy effect. That's up to you, and this is your foundation for working
with speed changes. And the next lesson, we're
going to learn how to adjust something
called time remapping.
32. Time Remapping Basics: Now that you know how speed
and duration works for clips, it's time to level things
up with time remapping. This tool lets you
ramp your footage, either speeding it up
or slowing it down. This can add interest,
variation to your edit, adjust the pacing and rhythm, and draw attention to specific
moments if done right. We got to make some room
to work with this clip, so I'll double click
in this empty space on video track one to expand the track height.
I can move things around. Give yourself plenty
of room to work with. So clicking and dragging
the divider line between these tracks to increase the height as much as you want. Each clip by default has
an effects line across it. That line controls certain
properties, and by default, it's set to opacity, which controls how
transparent the clip is. But we want to control speed. So what we'll do is right click on this little effects badge, navigate down to time remapping. Speed. Selecting this, the
effects line adjusts slightly, but now it controls
the speed percentage. And also take note of the percentage next
to the clip name. This clip is currently
set to 500%. This is now playing
back in real time. To make this a little
bit easier to work with, I would suggest opening
up clip speed and duration and changing
this back to 100%. Now we have a longer clip, and it's all playing
back in slow motion, but now we can actually
adjust the effects line back to 500% to change this
clip back to real time. So this is playing
back at real time, and we've adjusted the speed using the the reason
for doing this is so now the effects line is easier to read what the speed of
the clip is actually at. If you have the clip
duration percentage changed, then you're dealing
with two percentages, one for the clip itself, and one for the effects line. In this case, we're just
simplifying it and only paying attention to the ex line and
what percentage it's at. So if I drag this
line up past 500%, then the clip gets shorter
and the speed increases. If I drag it down below 500%, the clip slows and gets longer. So I'm going to change
this back to 500%. There, now I got it
back to real time. And here's where it gets fun. Navigate to the
toolbar and select the Pen tool or default
shortcut P. Now, click on the effects
line where you want the speed change to begin or
anywhere, really for now. And then you'll see two little blue speed
ramp handles appear, and when clicking and dragging these apart
from each other, creating the in and
out of our speed ramp. It doesn't look like
much right now. Switching back to
my selection tool using default shortcut V. Click on this line and change
it from 500% down to say, real time if I want, or
doesn't need to be real time. It could just be
250%, for example. Now, what this is showing is we have our clip playing
in real time here, and it slows down to 250%
or half of that speed. I can play it back to show you. That doesn't really show you
the best part of the action. So what I can do is click
and drag these handles over, pay attention to my previews, find the moment where the
action is at the height. What I can also do is click and drag the little in and out points to make the
speed ramp smaller. I'll find where that goes.
Let's play this back. So you can see how it slows down right at the height
of the action there. It really makes that trick pop. To increase the
contrast of movement, I could even take
this percentage line down further, say to 100%. So I don't want to go beneath 100% because then I
get choppy playback. So I'll stick it to 100%. Full slow motion for this clip, which is 120 frames per second,
and let's play it back. And if I want to create
even more contrast, I can move these handles
in and sharpen the ramp. Hank change. Ak you change. So with some work to it, you can really create some
unique looking speed ramps.
33. Advanced Time Remapping Techniques: You're not bound to
just one speed ramp. Selecting the Pen tool,
I can click and add as many speed ramps as
I'd like to this clip. I'll just keep it
to one for now, and then I'll open
up these handles, and on this side,
I'll have it speed up back to real time
playback at 500%. Now let's play back. So now what this is doing is really
highlights the flip of the board and the
main action itself. Well, also, in some ways, if I manipulate this even more, I can get it to match the music, which can also be very
satisfying to watch. So here's a few tips with
working with speed ramps. Use them as intentionally
as you can. They pull focus to
a specific moment, especially when
you slow it down. So you got to choose wisely
where you place them. So, for example, if I
have this clip here, notice that at the beginning, there's a bit of a
stop right before. If I play it back
in slow motion, you can see that better. There's a bit of a stop. Where Greg flicks his hand
back. So it stops a bit. So if I slow it
down right there, then you're seeing that stop, and it might look
like a mistake. Same with at the
end of this clip, move things around
here so we can see it. Well, that was pretty clean, and the bounce is
really interesting. But if you didn't want
to see that bounce, and you found it
distracting or maybe it doesn't look perfect
enough for your taste, rather than displaying this
portion in slow motion, instead, we can adjust
the speed ramp. So it's happening
during that moment or right after the speed
ramps back up to 100%. So playing it back, we don't see the bauble quite
as much when it's sped up. And I could even increase
the speed past 500% if I wanted to to really hide that and create a
very unique look. Throw up to 800%. Then it really takes away from any mistakes that might
have happened in a trick. Maybe you want
smoother transitions. Right now, you can see in
the look of the ramp itself, the angle is very sharp. But we can actually
smooth this out by clicking in between
the two handles. And then what that
does is it reveals a little icon with a pair of
what's called ease handles. Click and Drag it left or right. You can control how
much ease there is to soften the transition. If I soften this up a bit, it'll ease out to ease in, let's play it back.
So you can see that. It eases in, eases out. Sometimes with that
smooth motion, you get something
that looks a bit more natural and
less mechanical, but that doesn't mean
you can't create sharper cuts between speeds. If we click and
drag these handles until we get a 90 degree angle, you get these sharp edges, then it will abruptly
change in speed. And that's great for
high impact moments, and you get this
very unique look to your motion and movement. Alright, so now it's your turn. Try out time remapping
on your own clips, add some speed ramps,
experiment with easing, and see what feels good
and looks good to you. And once you've played
around with that, go ahead and finish
your assembly edit. And next up, we're
diving into one of the most important parts of storytelling and editing tone.
34. Using Tone to Emotionally Connect: By now, your selects are trimmed to roughly the
final length of your edit, and as soon as you drop in music, something
magical happens. You feel that rush
of excitement, like the edit is finally alive. And that's awesome
because it pays off all the work that you put
in up until this point, you've created something
that's starting to look cool. But here's where we
have to stay sharp. It's easy to get swept up
by the excitement and lose perspective on whether the piece actually works
without the music. If you're riding purely on
the adrenaline, that feeling, you might overlook
timing issues, weak transitions or
moments that might drag. Feel that char feel
that excitement. Let that motivate you, but also let that push
you forward to making smarter choices rather than fool you into thinking that
everything is perfect. And that is what leads me into the next topic, which is tone. Tone is the how of story, how you make your audience feel. You know how you can talk
to a friend whose voice or body language leaves you
feeling maybe great. Maybe you feel empowered. Maybe on the other side,
you end up feeling deflated because something
about their delivery just rubbed you the wrong way. Even if their facial reactions
didn't match up with that, maybe they looked happy, but the way they said
it just sounded rude. And your edit works
the same way. When music cuts, color
and sound effects, all of these things,
they come together with a specific attitude. They can create a mood that
resonates with your audience. That's the feeling
you're getting. By watching your rough
edit back with music, you're starting to
feel that tone. So depending on what kind
of track you picked, maybe certain sound
effects or cuts you make, your viewers going to pick up
on that tension you create. Or when adding gentle bird
chirps or soft transitions, you can wrap your audience in this calm and peaceful vibe. The point here is to be conscious of those
choices and use them intentionally
rather than just letting them happen unintentionally
by accident. We want to have
control over this. This might be a
good time to play back your rough
cut without music. And you can do this by hitting the mute button on
the music track, and it won't play
the music back. Have a look at your
cut without music and see how these edits might
be affecting you now. When you enable music, it could get you excited again, but it can also hide, say, a rough patch in your edit. When you play back your
edit without the music, it can help you identify
problems with the edit. If there's any clip in
your sequence that feels like it doesn't fit with the vibe or the world
you're creating, it feels off, or maybe
it's a specific cut, it's too abrupt or the clip
itself plays out too long, and the rest of the clips
are all faster paced. You might have mismatched
tone in your sequence. And if you can catch that early, it's a bit easier to fix
than once you've layered graphics and sound effects and all of these other
things together. Maybe you've created
an edit where each shot feels like it
belongs with the other, and they're all working
together to support that tone that you're trying to communicate
to the audience. Vt is to inject this energy and excitement into the
audience as they watch it. Or maybe you are trying to
create a super slow paced, dramatic thought piece about fingerboards. I don't
know what it is. But the more specific
you can get, the easier it is
for the viewer to understand what it is
they're actually watching. In infinite ways to shape tone. You can do it through music, sound effects pacing,
framing, lighting, overlay graphics, the speed of motion within a shot,
time remapping, all of these things, but we
can't cover it all here, but nearly every one
of my other classes dives into some of
these techniques. So I'd recommend checking
some of those out. Tone is what makes
your story land, and if your audience feel it, the rest of the work
loses some of its power. Tone is also very
tricky to learn. It takes practice,
it takes experience. You're not going to be able
to identify it right away. It's something that you feel. So if you feel a certain way when watching something,
take note of that. There's always been those
movies that have been very exciting to watch or inspirational
or moving in some way. And that's the goal,
really, at the end of the video or at the end of
the ad or whatever it is, is that you're moved in
some way to take action. What we're trying to do. We're
trying to get the viewer interested in this brand
and excited about it. Hey, maybe I'm going to pick up a fingerboard after
watching this ad. So the next step is simple. Just keep in mind tone. You don't have to overhaul
your edit right now unless maybe you already have an idea of what
you want to test. If you do, go ahead,
try it out and watch how it changes
your emotional response. If you really want
to be objective, close the project for a while, maybe a few hours, maybe a day, and come back later
and watch it cold. And then you can see
whether you feel the same way or something
else entirely. So pay attention to
what sticks and what's working and what the overall
tone is of your edit. And in the next
lesson, we're going to begin to build this board spine.
35. Add Frame Hold: This lesson, I'm going
to show you how to build a short fingerboard sequence using these Alpha channel clips. Before we even look
at these boards, I want to create a background. And that's what
these blurred shots are for to be used
as backgrounds. If I locate them within
the project panel, you'll notice you have a number of backgrounds that
are available to you. Only issue with
these backgrounds is that they move slightly. You'll see that there
is some movement. But we can easily
fix that in post. I've already chosen my
background. This one here. I like it because it
has the barnyard bowl blurred out in the background, the big rail with
that final trick and some nice color here, which is going to pop even
more once we color grade it. So that's my reasoning
for choosing this clip. This also moves very slightly. You can see it. But this
is very simple to fix. What you can do is choose the
part of the clip you like. It's all pretty much the same, so it doesn't really matter. Right, click on
the clip and then select addFramehold,
and that's it. Anything to the
right of our play is now frozen. So you can delete this portion here because
that's still video, but everything to
the right, it's just a freeze frame.
It doesn't move. And I can even extend this frozen frame even
further indefinitely, actually, as far as I want to, and it's still going to remain frozen all the way
through the clip. I could even move the other
side of the clip, as well. And now I have a
background that I can use for these board shots.
36. The Properties Panel: The goal here is to
make all the boards look like they belong together. And that's kind
of tricky because they weren't all shot the same. Some have different sizes, speeds, positions,
but that's real life. When working with footage, things are rarely perfect. And part of the
process of editing is cleaning that up
behind the scenes, the stuff that the
viewer never sees. Let's start with one board, and we're going to
dial in the look, speed, scale, and position, and that will become your
reference for everything else. First, I'm going to
adjust the position. It's not quite center.
I don't like that. I'd rather center it
or totally not center. It's just a little
bit off of center, it's very noticeable and it looks like a mistake
because it's the product. I want it to be the
center of our attention, I'm going to center this
as perfectly as I can. And to do that, we can actually enable what's called
safe Margins, and you can find that by
clicking on the button Editor, and it's right
here, safe Margin. So you can click
and drag it down. I've already clicked
and dragged it down to my button Editor. Button Editor just
gives you a bunch of these different
buttons that each do different things and gives you quick access within this blue
bounding box down below. Once you have your
safe Margins button available, click
it to enable it. And safe Margins, it's
meant for older TVs that crop off the edges of the content that's
being broadcast. For web, nothing
gets cropped off. You don't really
have to worry about anything extending
beyond these edges. What I like to use this
for now is to help me have a quick reference of what the center of the frame is.
Doesn't need to be perfect. I'll click on this clip, and what we're
going to do now is navigate to what's called
the Properties panel. Properties panel allows you to adjust a number of
properties like position, anchor point, scale, rotation. You can crop it. You
can change the opacity. There's so much you can do here. When it comes to making
quick adjustments without having to keyframe or create animations
of anything, I like to stick
to the properties panel because it's
quick and easy. I'll navigate up to
the position property, and I can click and drag the exposition and
move it until it's centered on these little
safe margin markings in the center of our
horizontal axis, and then I'll adjust the Y
position and do the same. And that looks pretty good. I could probably scale it
up as well if I want to. So now I'll adjust the
scale I want this to fill most of the frame but not
be too close to the edges. If your subject gets too big, that it's infringing on
the edges of the frame, it can create a bit of tension and it doesn't feel
good to look at. And then it starts
feeling like it's not intentional and
a bit messy sloppy. I want to ensure that I have some negative space to create some breathing room
for our board. That's also changed
our position, so I'll go back to our position and change that and adjust that until we have what looks
like a centered shot. The scale and position look
relatively good to me. I'm going to toggle
off our safe margins so I get a better view of
what it actually looks like. You know, I still feel like
this board is just too big. I'm going to scale
this back down. It might have been actually perfect the way it
was, maybe 54%. Turn on my safe margins again, make some subtle adjustments
until I'm happy. Okay, that looks pretty
good. Let's turn off safe margins. Play it back. Nice. Now, we have
our reference. This is what I want to match all my other board shots too.
37. How to Hide Cuts with Time Remapping: Let's navigate to our next shot. I'm going to click on the barnyard boards
clip number two, nudge it up to track
three and click and drag it so it overlaps
our other shot. Because there's
transparency, you can see the board beneath it.
It's a bit trippy. The boards don't
match up in speed, and we'll deal with
that in a second here. First, we're going to
start with position. With this board
clip highlighted, I'm going to move the position using our properties panel. Now, it gets a bit tricky here because the rotation
is somewhat off. It's not perfect, but that's okay. We can
make do with this. We've mostly matched the
position of the board, and I think that's
going to work right. The speeds are different. We're not going to worry
about that quite yet. I'm going to click
and drag this clip to match the end of
our initial one, and I'm just going
to play through the outpoint and the in point. So it's not bad. Another
thing to take note of is you need to decide where exactly you
want to make the cut. Here, we just have a natural
cut on the grip tape itself, and that works well because
it's a darker surface. There's less detail
happening there. So even though it varies, the dark tone stays pretty consistent across
clips and it ends up hiding the cut.
It's a bit slow. It cuts okay together, but we want this
sequence to move quickly while still
looking clean, we can do that by
using speed ramps. Not only will speed ramps
make this feel smoother, it's also going to
help hide the cut. The faster the motion, the
harder it is for our eyes to notice small
differences between shots. So what we want to do is have enough time to see the artwork on the bottom of the board, but then at this moment where we cut from this
shot to this shot, speed it up. Create
a speed ramp. And we'll do this by first adjusting our initial clip
and using it as a reference. Right click on the effects badge in the top
right of the clip, navigates the time
remapping speed. I'll select the Pen
tool, shortcut P, create a set of speed ramp time remap handles at the
end of the clip, and at the beginning
of the clip, then I'll open these
in and out points out on each part of the clip. Okay, and now I'm going to
speed up the end of this clip. So it goes nice and fast. I'm going to speed
it up really fast. 800%. How about that? Now, if I play this through, extend the end of this
clip. It's a bit fast. Okay, make some
adjustments until it feels and looks
like how you want it. I'm losing a bit of
the end of this clip, so I think 800% might
have been too much. I'm going to drag
this down to 650. There. Can I get a little
bit more out of it? No. That's okay. I think
this is going to work. I'm just adjusting it so that
I have enough time to see the graphic on the
bottom of the board and speed it up for
the transition. I'll do the same at
the beginning of the shot because we don't need to really see
the grip tape. It's not really the
most interesting part. I'll speed through
that portion as well. 650 Okay? Now it's just trying
to find the part that is most
interesting to reveal, and I'll match the
in and out points of these speed ramps so that
they are generally the same. Now, it goes by pretty
quick, but that's okay. I think this looks pretty good. It's enough to tease the design without giving
everything away, I think. Cool. Now, I think we have a pretty good base motion that we can match to
the rest of our clips.
38. Matching Speed and Timing Across Clips: I'll take this second clip
here and I'll do the same. Navigate to the effects badge, right click time
remapping, speed, use the Pen tool, create time remap
handles at the point, and you're the outpoint. Open up these handles so we
have some room to work with. The speed of this clip
is quite a bit slower. So I might have to adjust the middle portion
of this time remap. But let's start with
the NML points. I'm going to match 650% and
see where that gets me. Not bad. This just slows
down a bit too fast, so I'll click and drag
these in and out points until we slow down on what's the most important
part of the board, which is the design. Nice. And then the same
goes for the end. Increase that to 650. I think we can move
this just a bit closer. By looking at these clips,
you can see that clip one is quite a bit
faster than Clip two. So that means we need to speed up the middle
portion of this time map. I'm going to speed this up to 200% and see
where that gets us. It's still a bit too slow. My goal here is to match this clip length
to this one here. Doesn't need to be perfect,
but I want to create as close as equal screen time as possible for these clips. Also matching the ramp
itself so that has a similar shape
and timing to it. You can see it's just a lot of experimentation and trial and error and seeing how
it looks and feels. Might just do a bit
more work with this, but it really does take a
lot of trial and error. But the speed ramps do hide that edit quite a
bit. So to recap. To freeze frame a background, right click on the clip,
select Add frame hold. Anything to the right of
the playhead is now frozen. You can go ahead and delete that video portion of the clip to the left of the playhead
and click and drag the in and out points of
this frozen background to create as much of
a background as you need for these
fingerboard clips. Boards themselves, they're all quite a bit different in size, speed, rotation and position. The goal here is to
match those things up. You can use the properties
panel to quickly do this, make use of the safe margins to help with the positioning
of these clips. The tricky part here is to create these speed
ramps between clips. It just takes a lot of
practice and massaging. Keep trying. Do your best. With practice, you'll
eventually get it.
39. Adding Text: Adding titles is a
great way to quickly communicate the key
features of these boards, the benefits, and
also the branding, like the Barnier Boards logo. This adds visual interest
without needing a voice over. We don't actually have
a Barnier Boards logo, so you can create
whatever you want here. And I'm leaving
it to you to pick a font and style that fits
the tone of your edit. For mine, I'm kind
of leaning into this whole country dubstep vibe, so I found a font
that I think is going to work well
for this style. To create text, head up to the graphics and titles
menu, new layer text. Now a text layer will appear at your playhead
within the timeline. And you'll notice that
the text layer is a different color than your
video clips in the timeline, and it's super helpful for
keeping things organized. It makes it really
easy to visually separate text from the
footage in your timeline. You'll notice that all the clips within my timeline are blue. I also have some adjustment
layers here on track two, which is a completely
different thing that I'm not covering
along with nests. These are more advanced topics that you can find in some
of my other classes. What this does is it helps visually separate
things within timeline. So for staying organized, I recommend keeping different
assets on different tracks. For instance, video tracks one to three might be
all your video. In our case, we have text now. So I would recommend
keeping text and graphics, special effects,
all of that stuff on a different layer
than your video. This is going to change, and you need to be flexible depending on how much assets are included within your
timeline, how complex it is. In this case, I would
suggest keeping it simple. But I'm going to nudge my
text clip up to track four, and any other text I add is going to be added
onto Track four. So anytime I go to my
main edit timeline, maybe a week from now,
a month from now, and I have to make adjustments, I quickly can identify where all my text is if I need
to make any changes.
40. Styling Text: To customize your text, select the text layer
and the timeline, then head over to the
Properties panel. If you don't see, you can
go to Window Properties. After selecting the text
layer within your timeline, you'll see the text layer appear at the top of
the Properties panel. Selecting the layer itself, now you can choose the font that you prefer
for your project. Chosen Kiln Serif. It's part of the
Adobe Fonts library. So it's got this kind of
distressed look kind of rustic. It's a serif text and kind of gives off
that country vibe to me. And with the text selected, you'll notice that I can
click and drag it around, and it's snapping in
the program monitor to these red dashed lines. And that's because I
have snapping enabled, and that feature is really helpful for when you want to
perfectly censor your text. And if you don't see
the snapping icon, you can click on the little Plus button, the button Editor, navigate to this snap in program monitor
icon and click and drag it down into the
toolbar, select Okay. And with Enable, do you
have snapping toggled on. And if it ever feels like
it's getting in the way, you can just turn it off and get a bit more control
over your text. Now, as you resize the font
using the font slider, you might notice something
a little bit weird. As I'm resizing the font, the text is expanding
from the left side, and that's because
we have our text aligned to the left side. If I center align the text, our text will now scale
up from its center. And it also moves it
over to the left, so I'll just click and
drag it. To place. You'll notice, too, that this
little icon in the middle, which is called the anchor point has moved to the center as well, and that controls things like
scale, rotation, position. And basically, what
it's saying is, this is the central point
where I want all of my transformations like scaling and rotation to be affected by. So, for example, if I navigate down a little bit within
the properties panel, you'll locate the align
and transform section. I can adjust the rotation, and now our rotation is
spinning around that point. I move the anchor point over to the left side and
I adjust rotation, it will now rotate around
the left side of the text. So you have a lot
of control over these properties when
adjusting the anchor point. I want to revert all this
back to default settings, so I'll navigate up to the reset icon in the top
right of this section. There. And it's kind of nudged
my text up a bit further. I don't like that
too much, so I'll click and drag it
down into the center. I can also move the anchor point into the center of my text. So any scaling or
positioning or rotating or whatever I decide to do is going to be more predictable. With your text selected,
you've also got a bunch of styling options available. Scrolling up a little bit, we'll have the
appearance section. The fill color is the
main color of the text. I want something
that's high contrast, something that's easy to read. Keeping it simple
is a great choice. For stroke, if I
enable this, Wow, I got a huge stroke
width happening here. I can decrease
this, increase it. This kind of gives it an interesting look,
though, doesn't it? You get this really
unique look to the text. It treats even more contrast. Adjust that to the
taste that you like. For now, I'm just going
to toggle stroke off. I'm not sure exactly what
I'm going to do yet here. For background, this creates
a box behind the text, and you can tweak the opacity, meaning the transparency of it, the size, and the
roundness of the corners. Shadow is super
helpful to create more separation between text and potentially
busy backgrounds. Again, we have opacity, angle, distance, size, and blur. None of this needs to be fancy
unless you want it to be. So sometimes simple is the best. The goal is readability, making sure the text stands out against the
background footage. When you're designing
your own text, think about these two things,
the tone of your edit. For me, it's that rustic
country kind of gritty vibe. And that's why I'm
using a Serafont. It's distressed. That
makes me think country. The other thing to keep
in mind is legibility. Always make sure that your
text is easy to read. So it's high contrast. Simple placement. You don't
have to get too crazy. You can just center the text. Clean design, it
goes a long way, especially for fast
paced ads like this one, where you need to be able to communicate to the
audience quickly. So don't overthink it. Just stick to the
tone of the brand, make it readable, and
you're good to go.
41. The Type Tool: One other thing to keep in mind, when you're editing your text, it's going to be a bit
frustrating because we now have the type tool
highlighted in the toolbar. And what happens when you
click somewhere else to try to click off of your highlighted text is you'll
create another text box, and that's not something you're going to want unless
you're creating more text to delete the
text, right click Clear. Now, I still have the
type tool enabled. You're going to have to switch back to the selection tool. So make sure you're using
your shortcuts for that. Problem is, though, if you're trying to
use your shortcut, you will most likely
end up changing your text to the shortcut you have enabled. You
can just undo that. Click off the program monitor. Click on the Properties
panel, for instance, use your shortcut to switch
to the selection tool, and then you'll once
again be able to control the text
without editing it.
42. Timeline Organization for Audio: Normally, you're going
to want your edit to be locked before diving
into sound effects. Locked means all
your cuts are final, but for the most part,
and realistically, that mostly never happens, especially if you're the
one doing everything, the editing music
sound, graphics. And the beauty of
working solo is that the timeline
can stay flexible. So don't stress about it
being completely locked. Aim to get it as
close as you can to a final cut before you
start adding sound effects. And when I mean final cut, it's mostly the
position of the cuts, how long each clip is, and not necessarily things like special effects or text or overlays or
anything like that. Those are things that you can
add later if you need to. But before you drag
anything into the timeline, we got to talk a bit more
about timeline organization. We already touched on this
with video a little bit. But for audio, it's a bit more
complex because normally, you'll have a lot
more tracks going on for audio than for video. So here's how I like to
set things up for audio. Music, I will normally nudge this all the way
down to the bottom. And as I'm nudging it down, it will add more tracks. And that's helpful
because I need a lot of tracks for the audio, the sound effects that
I'm going to add in. One or two tracks above that, I usually like to
place ambience, and above that, layer
in sound effects, sound design elements like
cinematic hits, risers, woohes, all of those stylized sounds
that you might hear in movie trailers that add to the tone or create
impact tension, but they're not really
tied to real world. We've got Nat sounds
or natural sounds, things like skateboard wheels, grinds, other skateboard
sounds, et cetera. I also like to group sounds
by type and frequency. Low frequency sounds like
deep hits or rumbles, go on lower tracks, high frequency stuff like
sharp clicks or metal scrapes. They go higher. And this just makes it easier to
control the mix later, but also visually
give you an idea. Lower basi sounds are on lower tracks and higher treble sounds
are on higher tracks. It just makes a bit more sense. These are just some
things to keep in mind as you're adding sound
effects to your project. Know what you're working
with, you can right click on the Audio Track area
and select Add tracks. You can add as many tracks
that you plan to be using. A lot of times you don't know
what you're working with. If you have an idea
of how many tracks you're going to need
for your audio, you can add them in now. You can always
delete them later. Just make sure you're not adding additional video tracks as well. Just hit zero for
that, and you can add as many tracks as you
need for your sound effects. I'm actually going to
hit Cancel on this. The way I like to
create new tracks is not by using the add tracks. Feature, I'll simply just
nudge my music down until I have as many tracks is I
N. This is a lot of tracks. I don't need all these
tracks, so I can right click Delete tracks. And you can delete
all empty tracks or select the ones
you want to delete. And make sure that you tag
on this checkbox, okay. And now our music is now once
again on Audio Track one.
43. Working with Labels: This part's optional,
but it's kind of fun and super helpful for
organization color coding. Head to the Project panel,
open up sound effects. I'm actually going
to click and drag the Project panel bigger so
I can see what's going on. And now we can group all
the different sounds. So I'll find all the
board slides here. I'm noticing board slide,
board slide, boardslide. I can click on all
these board slides and group these audio clips, but I'm also noticing that these are also concrete and rail. So I'm considering maybe
I organize by material, maybe I will organize
by the trick style. Board slide. See, and
this is the thing is I've never really worked with these kinds of
sound effects before, so I'm learning right
alongside with you. I think for now, I'm going
to organize them according to the type of grind,
not the material. I'll probably regret
this, but that's okay. We'll right click on this
group of selected clips, navigate down to label, and then you can choose
whatever color you want to organize these clips. If it's a board
slide, let's just stick to violet.
How about Violet? There. And you'll notice here
to the left of these clips, the label color changes. And now, when I click and drag
this down to the timeline, the colored label is
already assigned, so it will appear in
that color type within the timeline right away instead of having to
change it later on. So it's better to do this
upfront, if possible. I always appreciate seeing a
well labeled tidy timeline. So if you appreciate that, too, take a screenshot and share it along with your project
or share it right now. As you're progressing
through your project edit, I'd love to see it.
44. How to Add Sound Effects Using the Source Monitor: As you add sound
effects I'm going to suggest this a systematic
approach where you work through each sound
effect type in passes, and this is going
to help you keep things focused on process and not get overwhelmed by placing every sound
effect at once. Let's start with board
sounds, Allis and landings. First, I'm going to
expand my timeline, so there's a lot more
room to work with, and I'll click and drag
this divider line up. We're not really working
on video, just audio. And then I'm going to select
my music and nudge it down. That creates more audio
tracks for me to work with. Now let's locate
skateboard Ollie. And I don't want to click and drag this down to the
timeline right away. I'll show you why
because if I do, you'll notice the wave forms, there's four different Allies and landings within this clip. We want to only
edit one at a time. So I'll delete that.
We want to pre edit the clip before we
drag it into the timeline, and we can do this by loading
it into the source monitor. I'll double click on
skateboard Ollie, loads up into the
source monitor. And again, the source monitor is a great place to preview clips, to pre edit them for the
timeline. You can hear this. Yeah, so there's the
allies and landings. Perfect. So we got the landing. And they're all very similar, so it doesn't really matter
which one we choose. We just want to create enough
variation so that it's not noticeable that we're using
the exact same sound effect twice in a row immediately. If the audience notices
that you're using the same sound effect
two times in a row, it's going to sound cheap and it will take them out
of the experience. If I want to use
this first Allie sound in this clip recording, I can see the audio waveforms. This Allie is right
here and the landing. I only want the lie for now, so to isolate just this
part of this audio, you can use the Mark in bracket, move to the right side of this audio waveform
and Mark out. And now when I click and drag the audio only down
to the timeline, it will only bring
in that in and out point from that source clip. Well, I also need to find
out where that Ollie is, so I'm going to nudge
through timeline right here, and I'll place this clip, zoom in so I can see what's
going on a bit more there. And it's also really
difficult to hear the sound effects when
this music is blaring. So when I'm designing sounds, I like to mute the music
temporarily to do that, navigate down to the music
track, hit mute track. And now I can just focus
on the sound effects. That's a bit early, so
I'll nudge this over. Good. Okay. Because we're working with the
same sound effects, I'm going to locate the
landing of this trick. Boom, and right here. Great. Now I will once again, load the skateboard
Ollie dot wave into the source monitor. I'll locate the landing. Instead of using these brackets, I'll use shortcuts I
for in and O for out. And now, clicking and dragging, I only bring down that portion
of the clip. Place this. Great. Okay, that's
pretty well timed up. Now that you know how to
use the source monitor to add sound effects
to your timeline, I'll show you a
quicker alternative.
45. How to Work with Sound Effects in the Timeline: Doing this every
time, loading it into the source monitor and then setting in and out points
can take a bit of time here, and it might not
be that efficient. I just want to make sure you know how to use the
source monitor to pre edit your clips before clicking and dragging
them into the timeline. So it's probably going
to make more sense to copy paste these sound
effects in the timeline. A hold option, click and drag. Now we have the exact same
clip within our timeline, and now I can click on
the Trim points with our selection tool to
open up this clip. And then we have our original skateboard alli sound effect in our timeline info. You're working with audio,
make sure that your tracks are opened up as much as you need to be able to
see the waveforms. Being able to see
the waveforms makes it so much easier to edit audio. And without these,
you're going to be lost. I have four different Allies
and landings that I can basically cut from here and
copy paste where needed. For this, I could even just
click and drag this to a second audio track to
get it out of the way. And I'll just find every
instance where there's an Allie. And what I can do is cut out the Ollie of the
second one to keep the variation notice
I'm also selecting the clip using the ad Edit shortcut to cut
this segment out. And instead of clicking
and dragging it, I then lose this part of
the edit. I'll undo that. I can option click to
copy it from within the timeline quickly and then line it up with
this next shot. I'll find the landing, and I can take this
landing right here. Click drag to copy it. And when editing sound,
it can be very precise. So it's important to have precision when it
comes to making sure that the sound effects are
in sync with the video. So make sure you're using the
nudge forward and backward one frame after
selecting the clip to nudge the audio into
frame perfect position. Step forward and back, finding
frame perfect landing, and with the clip selected, I can nudge the clip one
frame and backward into place until it matches
up with the action. This is a bit early.
Nunge forward. There. And if you find that your sound
is getting cut off, you can use the selection tool to open up that trim point. Another useful thing
when editing audio is to adjust the fades of
the in and out points. You'll notice these
little gray icons on the Ipoint and the
outpoint of this audio, clicking and dragging the icon
will create an audio fade, which visually shows that the
audio fades out to nothing. This allows for a
gradual transition and avoids any jarring sounds. We can also add a
fade in on this clip. Nice. Because I have this audio clip
extended further out, it's going to overlap
with this next Ollie. So for my next sound effect, I'll keep it on Audio Track two. So now I'll just
systematically go through every Ollie and landing, and then I'll go through
every skateboard role. Then I'll go through
every grind, et cetera, until I am completely finished placing every sound effect
to match the action. Prefer to use this option by clicking and dragging
the full clip into the timeline and then cutting it up from here and copy
pasting because it's a lot faster than loading it into the source monitor
each and every time. One kind of cool thing
about this shot is that the landing is more like
the board is on its side, so it might not make
this exact sound. Thankfully, we have a sound effect that
might work for this. Navigating to the project panel, we have Power slide,
skateboard Power slide. I'm going to click and drag
this down into the timeline. What I'll do instead, actually, is globle click and load it into the source monitor a
preview in and out, click and drag it
down to the timeline. So you can see that sometimes
using the source monitor to preview and edit a
clip is the way to go. In this case, this
clip is way too long. So in the next lesson, I'm going to show you
how to deal with this, and I'm going to show
you how to quickly apply cross fades.
46. Working With Audio Crossfades: This sound effect is way
too long for this action. What I like to do
when trying to reduce the length of a sound effect is to find the end
of the sound effect, make a cut, and then click
and drag it into place. Let's play that back. That might still be too long.
Shorten it even more. But basically, what we're
doing is we're using the beginning of
the sound effect and the end of the sound effect, and we're cutting everything out in between to shorten it. Now I'll add fades on
the in and out points. What I'm also going to do is
select my rolling edit tool, highlight the edit between
these two audio chunks, navigate up to effects, audio transitions, cross fade, constant power cross fade. I've just found
that constant power is the most natural sounding, and I'll click and
drag that down to this edit point so it smooths it out a bit better.
Now playing it back. Clicking and dragging
the cross fade effect from the Effects panel
can be a bit cumbersome. So to do this quicker, you can use the shortcut
Control or Command Shift plus D to apply an
audio transition. The audio transition length is set to a certain
amount of frames. Now, I'm going to show you if I delete this audio
transition in the middle, select this edit
and I hit Shift D, it will create an audio
transition that is really small. It's only one frame on the left side of this edit and one frame on the other side, and that's because
I've customized it. By default, it's a lot longer, which isn't always ideal
for your situation. So to change this navigate
up to edit preferences, timeline, and the second item down audio transition
default duration. I've set this to two frames, meaning that you have one
frame on the left side of the edit and one frame on
the right side of the edit. This is just enough to create a very subtle audio transition. So I'd suggest that you
switch this to frames, a two frame audio transition
default duration. Also experiment
with this on your own and see what
sounds best for you. But the goal here
is to make this cut up sound effect sound seamless. So you want it to be subtle
because if you extend this audio transition to include too much of
each sound effect, it's not going to blend well, and you're going to hear both sound effects
at the same time. Now that I've used
every single instance of this Allie sound effect, I can simply option click
and drag the already cut up Ollie and landing sound effects and click
and drag them into place. It is also helpful to add
these audio transitions right away so that when you copy and paste them from
within the timeline, you're not having to reapply those transitions
each and every time. And what's great, too, about this default audio
transition is you can select any edit point and use the shortcut to create that
default audio transition. Now I've created a
quick two frame fade rather than having to manually
create each and every one. Great. Now that I've set all of my Allies and
landings in place, I can delete this
original source clip that's all cut up
from my timeline. Now all my landings and
allies are in place, and I can move on to the
next sound effect type.
47. Adding Track Names: To further organize this, you can add track names. Double click on Audio Track one, and then right click Be Name. And because I know that all of my Allies and landings
are on this track, I could type Allie and Landing. And I'll even type 01 because we also have Ali and
Landings on Track two. We'll open up Track two, do the same Allie and Landing
02, and there we go. And you can do this with every
single track, and again, only do as much as you feel like you need
to to be able to communicate to your
future self or to another editor who's
working on this project.
48. Matching Sound Effects to Motion: Another thing to keep in
mind is that this clip we speed ramped it right in the middle
here to slow it down. I could potentially match that by slowing down the sound
effect at this part right here. To do that quickly,
I can add a cut at the beginning of the
slow down movement, find out where it ends. I can even open up
the original clip and find out where the
speed ramp happens. So Ri is pretty slow all the
way through here, actually. So what I'll do is
adjust as necessary. I'll make a cut at the beginning
of the speed ramp here. So this is where it's
going to speed up. Mell just move that right there. Then add a cross fade
between these two segments, open up the clip
speed settings and change this to say 60%. Now that will sound
a bit slower, hopefully match the movement
of this time remap portion. And I can use this
transition point. With some leveling, I think I can get the sounding
a bit better. The rail sound doesn't quite match the rail type,
but I think it's okay. Let's listen to a short
bit of our edit so far. Oh Alright, right away, you'll notice that all
the sound effects, they sound great when
the music's off, but the music is now competing
with the sound effects, and we have to deal with that. Along with this, if
we're looking at our audio meters
to the right here, you'll see these
red icon indicators that shows that the
audio is peaking. It means it's going beyond zero, and that's a no no
when it comes to this. When it peaks, then you
get distorted audio, and it degrades the audio. It sounds unprofessional, so we want to make sure that
we're not peaking as well. That means we need to adjust the volume of some
of these clips, which is what we're going to
tackle in the next lesson. Oh
49. Basic Audio Mixing Techniques Part 1: Most of these sound effects
that you're working with that I've recorded are
around the same level. You shouldn't have to
worry too much about mixing the different
sound effects together. But if you're adding
additional sound effects, then it can become a bit trickier with the different
types of audio levels. I did mention in the last lesson that things were
peaking already. We need to work with our audio so that it's not peaking,
it's not distorting. I'll hit home to go
back to the beginning. I'm going to just show you
what I'm trying to do here. I have this riser. It's a sound effect
that builds up to a climax and then
just completely dies. So it's meant to build up
to an emotional impact or cinematic impact to create that tension
or anticipation. And then upon that impact or the initial
beat of the music, we have that release
or that payoff. Assisting in what I'm
already trying to do, start with this slow ambient
buildup to the main edit. So it is suitable in this
place to add a riser. The problem is the
riser is so loud. So what we need to
do is turn it down. One way to adjust audio is to simply open up the
audio track itself, and we can click and
drag this audio level. And when I'm placing
sound effects, I'm just trying to adjust
the levels so that I can hear what's going on without it overpowering
everything else. We also have this volume
slider available if you prefer to use a slider instead of the volume
line on our clip. I'll place this around -12, and let's give it a listen. Now, the riser, it
works audio level wise, but I'm not sure it
works completely yet. Maybe it'll work better once
I add a cinematic impact. I'll add a cinematic
impact at the end. Let's take a look
at some of these. Oh, that's pretty
good. Click and drag it down to our timeline. Sometimes it's hard to hear how the sound effect is
working timing wise. So a great way to
deal with this is to solo the clip by
clicking on this S, and all that does is mutes every other track
in the timeline. With a bit of
leveling, I can get this to not peak so loud. And that's what we're
going to explore in the next lesson is how to
determine the peaks of each individual audio track and some more audio mixing
techniques to deal with this.
50. Basic Audio Mixing Techniques Part 2: Now let's move on to the music. The music is sounding
quite loud, still. I'm going to solo this. So take a look at the peaks
of the audio. To be able to see the
peaks a bit easier, we can right click on
our audio meters and select static peaks
instead of dynamic peaks. What static Peaks
does is it shows us where the highest point
of this music is, and it stays there until the next highest point
happens within the music. Let's play back. So you can see there how
those yellow lines, they stay in place,
whereas dynamic peaks, they move along with the
volume of the audio. Static peaks helps
us determine what the loudest point of the
music is. It's super loud. We're going to want
to adjust our music to fit with the sound effects we have within our timeline, drag this down to around -12
so that it's not blaring. But another thing we can do to finas this audio is to make use of the pen tool and add
some keyframes to our music. The Pen tool or shortcut P, add keyframes on our volume
line and adjust as necessary. I want the beginning to
be a bit quieter anyway, and then it will pop in. So let's take a listen to that. Yeah, I like that, how it
comes in really high energy. What I can do, too, is
slowly bring the music level back down to something more reasonable so it doesn't
overtake the entire edit. Click again for
another key frame and then select the keyframe
somewhere down here, bring it back down to -12. And sometimes when you make
these really gradual changes, a lot of viewers will I didn't even notice
that there was cuts, and sometimes that
could be the highest praise because you as an editor are trying
to hide these changes and adjustments and keep things subtle so that
the viewer is affected emotionally without
actually knowing that they're being
affected emotionally, if that makes any sense. Now let's take another
listen to this. That is noticeable. So what I'll do is
I'll bring this up. -12 might just be too quiet. Let's bring this up
to, like, minus six. It's a lot of experimentation and tinkering until
you get things right. This is sounding way better. But there's still a lot
more that needs to be done. I still need to
place the rest of my sound effects and adjust more key frames so
that everything sounds cohesive and in
harmony with each other. Remember, there's
moments where you might want the
music to overpower or maybe you want to totally
feature the sound effects. Do your best to work with all of the sounds within your
soundscape so that they complement each other
and they're not battling against each other or
drowning each other out. Unless that's your intention, maybe you can make
that sound good. I'd be interested to see
what you come up with. If you're seeing the peak
indicators in your audiometers, that means you're
getting distorted audio. You want to avoid
that. So adjust your levels as necessary. If you have more sound
effects to place, do that now, and in
the next lesson, I'm going to show you how to make these skateboard sounds, work within this
environment just a bit better so they
sound more realistic. Right now, they're
just a bit dead. And we can liven
them up a bit with this special technique
in the next lesson.
51. Applying Reverb to the Audio Track Mixer: Great. I've done some more
work on this soundscape. But one thing that still sounds really off is the board sounds. They sound just a bit dead. But they were filmed
in an open space. There's no reverbs,
so the sound dies out quickly within
its environment. This park environment has
walls all over the place, so it would make much
more sense to hear sounds bouncing off those walls. And we could easily achieve
this with the reverb effect. When you're applying reverb, you might be tempted to click on any one of these sound
effects and go to your effects, select Audio Effects,
navigate a reverb, and then select any one of these reverb effects
and click and drag it down onto your clip. Now the problem with
this, I'll show you is if we solo this clip, then
listen to this now. You see how that cuts off? So you need to always expand this sound effect so it
rings out completely. And you don't always have that
luxury with sound effect. Sometimes sound effects are too short for you to
be able to do that, and then you have to apply
this reverb effect to every single sound
effect on these tracks. And I'd prefer not to do that. So rather than doing this, I'm going to click on this,
go to Effects Controls, delete Studio
reverb, and instead, navigate to Window
Audio Track Mixer. The Audio Track Mixer
allows us to add effects to each individual track if the effect section
isn't visible, it's because this
triangle is closed. Clicking on this
little triangle in the top left of the
audio track mixer, we'll close it up, click on it, and it'll open it right up. Another nice thing about
the audio track mixer is if you scroll down, you can see that we have
our names here as well. And you can change the
track name here, too, and this gives you a
better visual overview of what's happening
with your audio tracks. I might just quickly add these labels so we know what our skateboard
sound effects are. Let's start with our
Allies and landings. I'm going to solo this track. Could have done it here as well, and click on this
effect selection, the first one in this
stack of effects. Then navigate down to
reverb studio reverb. Now we've applied Studio reverb, but we want to
customize that reverb, and the way we do that
is right click on the effect, then select Edit. A great place to start
are these presets because these reverb controls are
very difficult to understand, so we won't cover them all here. We want to do first is start
with a default setting. See if it sounds okay. Maybe outside club. It's outside. Maybe that could
work. Let's try this out. Outside club. Here we go. And let's just play back
a few of these sounds. No, that sounds awful. And we know that
doesn't sound like a skateboard Ollie
or landing at all. Let's go back to
our studio reverb, right click Edit,
not outside club. And the reason why is because
we have no dry output. But again, I'm going to make sure that we just
keep this simple. Let's try Great Hall, and we might be able
to adjust from here. And instead of
closing this menu up, I can just move this
out of the way, and let's play this section. So it sounds way more
expansive and I like that. The only problem is that it's
so reverb very unrealistic, and that's okay if that's
what you're going for. But in our case,
it's not working. One way we could
take this reverb down is by adjusting our decay. We can take this from
6,000 milliseconds, so it's not ringing out so long, let's try 2000 instead. That actually
sounds pretty good. I think that sounds like a
reasonable amount of reverb, and you can adjust this as
much or as little as you want. I might just take it down just a bit and see how that sounds. I think I'm happy
with this for now. Try one of the presets until you find something that sounds
close to what you want. And if you want more
or less reverb, try adjusting the decay slider, which is just
saying, This is how long this reverb is
going to ring out for. Exit out of this menu. And now that I have the reverb that I like for
these board sounds, right click on this
track effects area, copy Track effects. Right click on the
next track Track two. We have more board sounds here, and then pace track effects. And I'll do the same
for the rest of the tracks that my
board sounds are on. Solo the rest of
these board sounds, and let's play back
just the board sounds. The reverb definitely creates more expansion and feels more real for these
board sounds. The board sounds don't
sound dead anymore.
52. Mixing Basics Using the Audio Track Mixer: Now let's unsolo
all of these clips, a whole shift and click
on the solo track to unsolo all of the soloed clips at once. And now
let's play this back. Well, you can hear the reverb as much because everything
is so much louder. But I can make some
adjustments from here. Now that I have my
audio track mixer open, because all of my board sounds are quite a bit lower
than everything else, what I could do is
potentially take down every other track and have my board sounds
just a bit louder. Adjusting the track volume doesn't adjust
individual tracks. So all of that work we
did with this music here with all these
volume adjustments aren't going to be affected if, say, we take this down. Now our music overall
is going to be quieter, but we're still going to
have these variations in volume that we've created
using these volume keyframes. The music is quite a bit softer, and we can hear the
board sounds better, but now the sound
effects are louder. I don't mind the music
being as loud as it was, but perhaps I want
the sound effects to not drown out
the music as much. So I can take them down by about 3 decibels and I
will copy paste them, so I can quickly do this to every track that isn't a board sound, and
I'll take a listen. And maybe the music
is still a bit loud. I could take that down
to minus three, as well. Let's hear how that sounds. M I like this. I'm sounding even better now. You can see how
these small tweaks make a lot of
difference in the mix. What I would suggest is coming
to this audio track mixer, don't mess around too much
with the tracks themselves. It's more for these
broad strokes that you want to make to a group
of selected sound effects. And now you can see why it's so important to
organize your audio. Having every kind of
different sound effect on different tracks
is extremely helpful. I didn't really follow
the high frequency, low frequency sound
organization, but I think this still works
just fine for this edit. Our sound effects aren't
that out of hand. There's not huge amount
of layers going on here, so I think we should be
okay with organization.
53. Audio Mastering Basics: One final way to really sweeten the sound of
your mix is to once again navigate up to the audio track mixer and go
to your master mix track, which is the furthest
to the right. This controls the entirety
of your timeline. You can add effects. You
can adjust the volume. But what I want to show you
here is the mastering tool. Mastering is highlights
or brings out different frequencies depending
on what your needs are. Let's take a look at
the mastering effect. We'll click on the triangle
up here on the effects Rack and then select
special Mastering. Right click to edit
this, once again, you'll see we have all of
these presets available, which are great to get something
sounding decent quickly. Let's see how
bright hype sounds. This preset is bringing out
the highs of our audio, the treble sounds, and reducing the mids and
keeping the base. So it sounds more tinny. Subtle clarity is
a fan favorite. And the reason why this
is such a great preset, it brings out the human
voice a bit better. So if you're editing
an interview and you need to be able to
hear what the person's saying, but you have music
and sound effects and tons of different
sounds going on, this is a great
preset that you can choose to bring out the voice. One that I like for a music dominated
edit is club Master, which brings out the bass or
low frequencies a bit more. Hear how different that actually sounds
and how it impacts the overall sound
quality and takes kind of a flat sounding
mix and elevates it. So this is a great, quick way to get your soundscape,
sounding a lot better. There are a lot of
different controls when it comes to mastering, so that's why I like to
stick to presets first, especially when you
don't know what all of this other stuff
is down here. Sticking to presets is
a safer way to go about getting something
that sounds good without ruining your
mix completely. It's time to shift focus now, and we're going to start
working with color.
54. Understanding LUTs: What They Are and How They Work: It's no secret that this
footage looks really flat. You've probably gotten
so used to it while editing that you might not
even notice it anymore, but your audience will, so
we need to change this. This low contrast, milky look
was actually intentional, and the reason for
that was because the footage was filmed
in what's called log. Log footage is a
way for the camera to capture a wider
dynamic range, meaning it holds more detail in the shadows and
the highlights. And the reason it was shot this not just for image quality,
it's also so that you, as the editor, get a chance to learn how to apply
what's called a lot. A lot for lookup table
is basically a file that transforms this flat washed out log footage into something
that looks normal. And in this case, converting it into the Rec seven
oh nine color space. And Rec seven oh nine is the current color
standard for video, and it helps make
sure that colors contrast brightness and shadows, they all look consistent
across different screens, whether that's a TV, a phone,
or a computer monitor. To simplify it, this
footage was filmed in log to capture as much
detail as possible. And now our job as editors, is to apply a lot, which is a file that brings the footage back to the
right contrast and color, so it looks how it's
supposed to on any display. Different cameras
and shooting modes require different lots, and usually you can
download them directly from the camera
manufacturer's website. Now that you know what a
lot is and why we use one, we're going to jump into the
next step where we'll find the right lot and apply it
to our project footage.
55. How to Work with LUTs: Now that we know we
need a t to convert this log footage into Rec seven oh nine, we just
need to locate it. This footage was shot on a
Sony camera using S log three, and there's a very specific type of let we need to
download for it. So we can head over to
Sony's official site, and I put the link in the
notes for this lesson. You'll also be able
to find this link in the class project files and in the discussion tab
of this class. That link from any one
of those locations. Once you click on that link, you're going to be directed
to this page from Sony, and you're looking for
the t that matches gamma dot c slash SS Log
three and select Download. Once downloaded, double click on the zip file to open it up, and you can copy paste this folder to your
class project folder. And normally, I create
an additional folder called Oh nine
documents for lots, scripts, anything
related to my project. I'll paste that into my folder. Let's open this folder
and take a look at it. There are four
different ut options, and they all kind of have
different weird names to them. So if you don't know
what they mean, that can be a bit confusing, and you just end up clicking
on one hoping they work. You can definitely do
that, but don't worry. We'll quickly go through
which one to use. This last one, CNI plus seven oh nine is
designed for monitoring. It's not really
for grading, so we can one that one right away. Log two to seven oh nine. This is for S Log two workflows, and since we've shot
everything in S Log three, we don't really need
to use this one. That leaves us with LC
seven oh nine and LC 709, Type A, and they're both totally fine for grading.
They're pretty similar. But Type A has slightly
less contrast. It looks a bit more filmic, and is meant to emulate
more of the airy type look. Either one or two is going to work for us
for this project. Heading back to Premiere Pro. Apply a lot. All you got to do is select one of
your clips to start. Then head over to the
lumitry color panel, usually found in the top right. And if you don't
see it, go up to Window and select lumitry
color from the menu. I'll open this up so we
can see it a bit better. The lumitry panel has
tons of color settings, which we're going
to get into later. But for now, let's focus
on the input t section. This is where you load
the t we just downloaded. Click on the dropdown menu. There's already a few
lots available loaded in, but for now, we
can select custom or browse. Doesn't
really matter. Then navigate to either Lot one or two within the lots
we've just downloaded. I'm going to select LC
seven oh nine. Lot one. And right away, you'll notice our footage looks
so much better. It has more contrast,
more saturation, it's just way more
pleasing to look at than that washed
out log footage. One quick thing, a
super common mistake when applying lots is to apply the lot within the creative tab here
within LumentaryPanel. If we twirl this
down and scroll up, you'll have a look, and a lot of people
will say, Oh, cool. I'll load up the lot into this look profile.
That's awesome. Hey, that looks great.
This is not for converting log or raw footage to Rec seven oh nine.
Meant for stylizing. This is meant for creating
a look after you've done your basic conversion
and color correction. So click on this and none. We don't want to change the
creative tab right now. So now we're getting
back to our input lt. This is where you
want to load in your conversion luts to convert from log or raw to
Rec seven oh in. But, yeah, you can use the creative let later if you want, add a certain vibe
or look or tone. Make sure that happens after
the input ut is in place. So to recap, the footage
was shot in S Log three, and we need that Sony ut
to convert it to Rec 709. The ut transforms our flat, milky log footage
into something more vibrant and contrast.
Are accurate. Download the let, save it
into your project folder, and load it up into the input let section of the umtrPanel. Not the creative tab.
In the next lesson, we're going to dive
deeper into matri panel.
56. Adjusting Color with the Lumetri Color Panel: After applying our
conversion let, it's time to move on
to color correction. It's important to color
correct before adding any kind of mood or creative
look to your footage. Color correction is
all about making the footage look accurate and consistent so it matches
across your entire edit. The first group of sliders we've got here is for white balance. White balance in video basically
means making sure that the whites and neutral colors in your shot
actually look white, so they're not tinged with
some unwanted color cast. I did have what's called
a white balance card or some sort of color accurate tool that was filmed in
the shot itself, I could have used
this eyedropper and selected it to click
on it to get a quick, accurate temperature
and tint right away. Basically saying, Hey, this is what is true white
within the image. So for example, if this gray here was true white
within the image, I can select this,
and you can see that the temperature and tin sliders automatically adjust
that selection. If I did something more extreme, like click on green
and said, Hey, this is actually true
white within the image, then you're going to
get something more wonky and it's
going to attempt to adjust the temperature and tin sliders to compensate for that. Controls Ed to
undo or I'll click on the slider itself
to reset it to zero. But the temperature slider,
as you move it left, shifts cooler, and
right shifts warmer. And then we also have
tint, which shifting left, more green, shifting
right, more magenta. And this slider is mostly
used to counteract the green or magenta tint that's often found in different
types of artificial light. What's really interesting about color correcting is a lot of the times when you're
looking at an image, if you look at it too long,
your eyes will start to adjust and you might see
your image in a certain way. For example, look at these
stairs, for example, you might not think
that these stairs have any tint to them. They don't look like they
have any color bias, but actually they
look a bit green. If I just this tint slider
just a bit to the right, let's say ten, nine. Let's do nine points. Now, if I undo this and redo it, that's what it was before.
That's what it is now. That's what it was before.
That's what it is now. I actually think that
adding a little bit of magenta into this shot looks better than
what it was before. After before, after before. After. And it's very subtle, but you got to be very careful when you're using these sliders, not to adjust it too much, or you can end up getting a
really funky looking image. And if you're looking
at it for too long, do yourself a favor and
just take a break from it. Come back to it the next day, and you might see that, Oh, you've totally
screwed up the image. Also, you're going to want
to make sure you close your blind, turn
off your lights. Don't have any
other light leaking into the room that you're
working in so that you can see truly
what the colors the luminance levels are when
you're working on color. And speaking of cool and warm, these stairs actually kind
of do look a bit cool, too, so we could even warm
them up a bit if we wanted to.
57. Adjusting Light with the Lumetri Color Panel: Next, we got our light
section or tone sliders. At the top exposure, this controls the overall
brightness of the image. Drag it up to make
the entire image brighter or down to darken it. Contrast controls how
punchy the image looks. If you crank it up, it
gives more separation between light and dark areas, and pulling it down gives
a softer, more milky look, which can, in some cases, help retain more of the
details within the image. These sliders only
go to 100 or -100, but if you select the number itself and
click and drag it, you can go up to
150 or minus 150. We've got highlights
and shadows. Highlights affect the
brightest parts of your image. This is great for
pulling out some of the blown out highlights
within your image. You could see the
rail in this shot. It's a bit blown out. It doesn't
really bug me that much. But if I really
cared about this, I could take the
highlights down and pull out those overexposed
highlights if I wanted to, I might not take it that much. Let's just try -35 or
something. Bit more subtle. Basically, it smooths out the difference
between the highest, the overexposed areas and the more accurately
exposed areas. And shadows, they do the same, but for the darkest
parts of the image, and it lifts or crushes the shadows depending on
which way you push it. And again, if I bring
these shadows up a bit, you can see we're getting a bit more detail
within those shadows. If you want to reveal more of the details
within your image, say like these sections here
with the brick details, if I pull up the shadows, you really get to
see that a bit more. Or I could pull them down to take them out
of the equation. Pulling them too much, then that affects your contrast. This looks pretty punchy. It might be too punchy
for what I want. Maybe I'll just bring this up
actually just a little bit. I tend to like something just a little bit lower contrast, so more of the details
are within the image. And then finally, we've got whites and blacks at the bottom. And these control the
absolute brightest brights and darkest darks in your
image, the extreme end. So I'd go easy on these. Don't drag them
too far because if you drag them too
far, say, the whites, then you're really
clipping the whites, which means there's no detail within these stairs anymore. You don't see anything except pure overexposed,
blasted out white. It doesn't look good.
It looks cheap, so we got to bring
this down again. You also want to
watch out. If you drag the whites too far down, then you're totally
clipping the whites again. You're not getting the true
brightness of these stairs. And the same goes with
the highlights as well, but the whites are
on the extreme side of the highlights. Bring
that back to Zero. But actually, when I'm
looking at that rail, I could even bring this down just a bit if I wanted to take out a bit of the overexposed
areas on that rail. Let's see what this looks
like. Doesn't really do. Oh, I guess it kind
of does a little bit. Yeah, that's not too bad. Okay. Same with the Blacks. If I take this up, then you're
really losing detail in the shadows and creating this
low contrast clipped look. You're clipping the
blacks at the bottom. That doesn't look like
a very rich image. I don't love that. Again, if I take this all
the way down to the left, see the graffiti on
this angled wall here completely gets erased.
You can't see it anymore. And if I slowly bring this up, you can really see
what's going on here. See that? You slowly
reveal those details. So pushing it too much, then you get that kind of
digital crush to look, which can again,
cheapen the image. We don't want to
cheapen the image. We want to retain as
much detail within the image and push it
as much as we can to create color accuracy and
luminant accuracy while also telling a story through the mood or the vibe of the
image, the tone of the image. But that look, that style comes after you do the
basic color correction. For this, I think
I'm just going to take this closer to zero.
58. Stacking Lumetri Effects: Only downside with color
correcting and setting your input lot on the
same lumitry effect is that when I select
my before and after, if I toggle this switch up
here beside basic correction, it shows the image without the input lot
and without the color. But what if I want to see specifically the
color adjustments I've made and what they look like when toggling
them on and off, but with this input
lot already in? Well, we could do that
by coming up here to our lumitry color to this drop down menu and adding another
lumitry color effect. So now on this again, we have two lumitry
color effects. The first one has the input lot and the color
correction adjustments. But what I could
do instead is use this first lumitry color
effect for the input let and use the second one
for the color adjustments. That way, we're
separating the color correction process and giving us more opportunity for flexibility when looking at it back
and making adjustments. Lumitry effect doesn't have
any adjustments on it. So what I'll do instead is clear this lumitry effect and go to my Effects Controls
panel where I can see the lumitry
effect we've applied. This has both the input lot and the color adjustments on it. What I'll do is I'll
duplicate this Control C V. And now we have
two lumitry effects with both of these adjustments. Navigating back to the
lumitary color panel. Now I can separate our input
and our color adjustments. Lumentry color one will
be just my input lot. So I'll reset all of these color adjustments below clicking on the reset button. Then once again, navigating to the luminary color
drop down menu, selecting lumitry
color effect two, and removing the input lot. Lumitry color effect one has
just the input lot in it, and lumitry color effect two has just the color adjustments. Now when I turn on and off
the basic correction toggle, we can see the work we've done with these color adjustments. Before you can see it's got that kind of green tinge to it. It's cooler in color,
toggling it on. It's warmer, lower contrast, and doesn't have as much
of a green bias to it. Before, after, before,
after before, after. You might say, Hey, actually, I kind of like how high
contrast this image is. I might want to bring
some of that back in. Now, with separating the input t and the
color adjustments, we can see that a lot clearer what you might
want to do to your image. I'll toggle this on, navigate
down to my contrast, and bring this up
just a little bit, toggle it off, to it on. Now we're closer to matching what the contrast was before. And also, our highlights are taking down quite
a bit, as well. There's not as much
overexposed areas, and that's looking
okay for me right now. Now, honestly, you
could just apply the input lot and that would
be fine for this class. Color correction and color
grading is interesting to you. I would highly
recommend checking out the other lessons
in my other class on the post production process. I go a lot deeper into that and some techniques that
I think you're going to find very valuable that you could apply to
this class project. For now, just play around with the basic correction section of the lumitry panel,
see what you can do. And if you completely
mess it up, no stress, reset and start over. Or, don't even worry about
correcting it at all. Just set your input lot and
you're off to the races. And the next I'll set, I'm
going to show you how to quickly apply the input lot and the color adjustments
we've made in this lesson to the
rest of your clips.
59. Copy Paste Attributes: So quickly apply
our input let to all the clips in our timeline.
Here's what we got to do. First, we got to
select a clip that has the adjustments we've made with our lumitry color
in the timeline. Now, right, click on the clip, copy or you can just
hit Control or Command V. Then select the rest of your clips within
your timeline. Right click and select
Paste Attributes. You're going to see
this menu pop up, and this lets you copy all kinds of effects and
properties from the clip you just copied and apply them to every
clip you've selected. List, you're going to
see lumitary color, which includes the
input we've just added, and that's probably the
only thing we want to copy. Unless you want to copy
all the color adjustments you've made to this clip
to the rest of your clips. You may not want to do that
because every clip will have slight lighting adjustments and were filmed in different
parts of this set. So for now, I'm going
to suggest that you only select lumiary color effect one, which contains
the input let only. Remember, two imitry
color two contains all the color
adjustments we've made after applying the input let. I'm not going to paste over the color adjustments I've made after applying
the input let. I'll just paste over
the input let itself. Now, I'll hit Okay,
and every clip in your timeline has
the input let applied. It's instantly transformed from flat washed out look
into Rec seven oh nine. So clicking through
all these shots, it's pretty clear that
they're not all evenly lit. They have different variations in brightness and darkness. So you might just want
to keep them as is. That's totally fine or
go ahead and adjust each clip using an ilumitary
basic correction section. If you do decide to take
this other class where I go deeper into color
correction and color grading, I would love to hear it and how you've worked it
into this project, so I can provide feedback
on that as well. So for now, finish applying the conversion let
to your footage and copying and pasting it over to the rest
of your clips. In the next lesson,
we're going to get ready to export our project.
60. Export Settings: The most exciting part,
your edit is done, and now you're ready to export. Share your creation
online as part of your class project
or your portfolio. When we're exporting our media, all that means is that we're taking everything in the
timeline and putting it into a file that can
be opened within a video player or uploaded
to the Internet for viewing. Before we hit Export, make sure that your
timeline is complete. There's no extra media at
the end of your timeline. What you can do to quickly
check this is hit home I for in and then to go to the end of your edit
and press O for out. This creates an in and out point around all of your media. So if you did have
a lone clip at the end of your timeline
for some reason, it would wrap around
that clip as well, but we don't have any rogue
clips within our timeline. So it creates an
outpoint right at the end of our sequence,
like intended. Zoom in all the way to
the outpoint and you'll notice that there is
this one blank frame. If you don't like this, you
can just click and drag the outpoint to snap directly
to the end of your edit. Now from here, you
can hit File, Export. Media. And this brings up
the export settings window. Before we change anything, click on location, navigate
to your class project. I would recommend exporting
using the Exports folder. If it's a final edit, then create a new folder called finals and
export it there. Remember, this is after all of the revisions
have been made after you know for certain that
this is your final edit. The reason you do
this is because you're definitely going
to have revisions. After you export something,
you realize, oh, man, there's a glitch in
my video or maybe there's audio missing
or something like that. There's always some first export using the exports folder, you can date the edit itself so that you know what version this edit is and have all of your drafts nicely organized, hit save, and then let's
navigate to our presets. Scroll down and select
high quality ten ADP HD. If you edit it only with four K clips and you edited
in a four K timeline, Make sure you select high
quality 21 60 p4k instead. But because I use four K
clips and HD clips and I'm exporting a
final HD sequence, I'm going to select high
quality ten EDP HD. Once you select that,
you'll notice the format automatically switches to h264, which is a video
format designed for high quality playback with
relatively low file sizes. So in simple terms, it's a great format for streaming
or uploading videos online while keeping things looking
sharp also a great format if you need to send a quick link to a client to review a draft. The small file sizes
can be quick to export and fast to upload. Let's scroll down to the
bitrate setting section. So this is where you
control the balance between video quality
and file size, and you're going to see
three options under Bitrate encoding VBR one pass, VBR two pass, and CBR. VBR stands for
variable bit rate, and that means that
the bit rate adjusts depending on what's
happening on the screen. So more detail means a higher bit rate is
going to be used, and less detail means
a lower bit rate. One pass means the
computer makes a single pass through your project to
determine the bit rate. But to pass, it
takes a bit longer, but it does a second analysis
of your edit to try and maximize the quality while maintaining a
reasonable file size. And then we have CBR, which stands for
constant bit rate. And this means that
the bit rate stays the same throughout the entire
video. It doesn't change. It's faster to export, but it's a bit less efficient
when it comes to file size. So even if the scene doesn't
need a high bit rate, say it's a still image
within your edit, it still uses a high
bit rate to encode. That portion even though
it doesn't need to. So which one should you use? Well, if you're
looking for balance between file size and quality, VBR pass is a great choice. It just takes a bit
longer to encode. But for this kind of project, because there's so much movement and quite a bit of effects, quite a bit of
things happening on the screen within a
short period of time, I think VBR pass with
a target bit rate of around 25 to 30 megabits per second is going to
work pretty well for this. So my target bit rate will be
25 and maybe instead of 30, I'll go 35, so then it has a bit more room to fluctuate when it comes to more
complex sequences. And this applies to
high definition to HD. If you're using four K, this is going to be
somewhere closer to around a target bit rate of 50. Now I'm going to throw
you a bit of a curveball. I actually use CVR
almost all the time. And that's because file size isn't really a concern for me because I've amass huge amount of hard drives over the years. So I don't mind having
a larger file size. I just want a fast export, especially when you're
working through multiple iterations
for a client. Speed and efficiency
is my top priority. I might even just hit
CBR and type in 50 if I want to crank that quality
up as much as possible. And I prefer having the highest quality output possible when it
comes to uploading to a platform like YouTube or
vimeo because those platforms will recompress the video in some way degrading the
quality of the footage. But when I say that, it's not always something that is visible to the naked eye. So don't get too hung up on everything being
perfect with this. I would say just follow those basic suggestions and
you're going to be okay. As you adjust this
bit rate slider, you're going to see, too, that the estimated file sizes changes in the bottom right
of the export window. So a higher bit rate, it results in a higher
estimated file size. And if I take this down,
it reduces the file. Choose your export
settings, then hit Export. So to keep this as
simple as possible because there are so many
settings in the export window that make negligible
visible changes for most HD projects, stick to h264 plus high
quality ten ADP and use VBR two pass at 25 target
bit rate to say 35. And that's going to get
you a solid quality to file size ratio. And if you don't mind having
a huge file size, click CBR, crank that target bit rate up
to 50 megabits per second. This point, you should
have a completed or close to completed edit, and a rough edit is fine if you want to submit that as
your class project. But if you'd like to complete
something more polished, put on your finishing touches
in my exports folder. And there it is. I
can double click on this and play it back
in my video player. I can also select this file and upload it to the Internet. And this file represents my timeline with all the
edits, special effects, music and sound effects, all in one file that I can play back or upload
to the Internet.
61. Final Thoughts: Congratulations on
getting through all the lessons in this class. It's no small feat taking
on a complex project like this and learning the
video editing process. In the early stages of your
edit, organization is key, but only as much as you
need to keep things manageable and your
workflow enjoyable. Start by choosing
your selects and bringing them into your
main editing sequence. Drop in music or
trim your track to match the intended
length of your edit. Then cut your selects down
to fit that duration. If you're going to find the purpose of your
edit early on, it will help you stay
focused and make it easier to choose the
most relevant clips. Use the what of your story,
the beginning, middle, and end to brainstorm a rough structure
and ask your what I? This avoids overthinking, it's non committal, and
it's non judgmental. This stage is all
about arranging clips and getting a rough
idea of your story. As you begin to
assemble everything, focus on how you want
the edit to feel. Tone is what guides
your audience emotionally and connects them to the purpose of your piece. You can't force results, but you can edit with purpose and use tone
to move your audience. If they feel something,
they're more likely to respond the
way you hope they would. These story elements break the process down into
manageable chunks. Once your story is in place, it's time to add sound effects, text, color, and final touches. Then export and share
your work with the world. Submit your projects, and I will provide constructive
feedback upon request. And please leave a review. Any feedback helps me do
better and serve you better. Follow my profile
for announcements, new class releases, and
occasional giveaways. If you want to learn more about filmmaking and video editing, I highly encourage
you to check out my other classes on
my Skillshare page, and you can also view
additional content on my YouTube channel. Thank you so much for
taking the class, and remember story is your
guide. I'll see you next time.