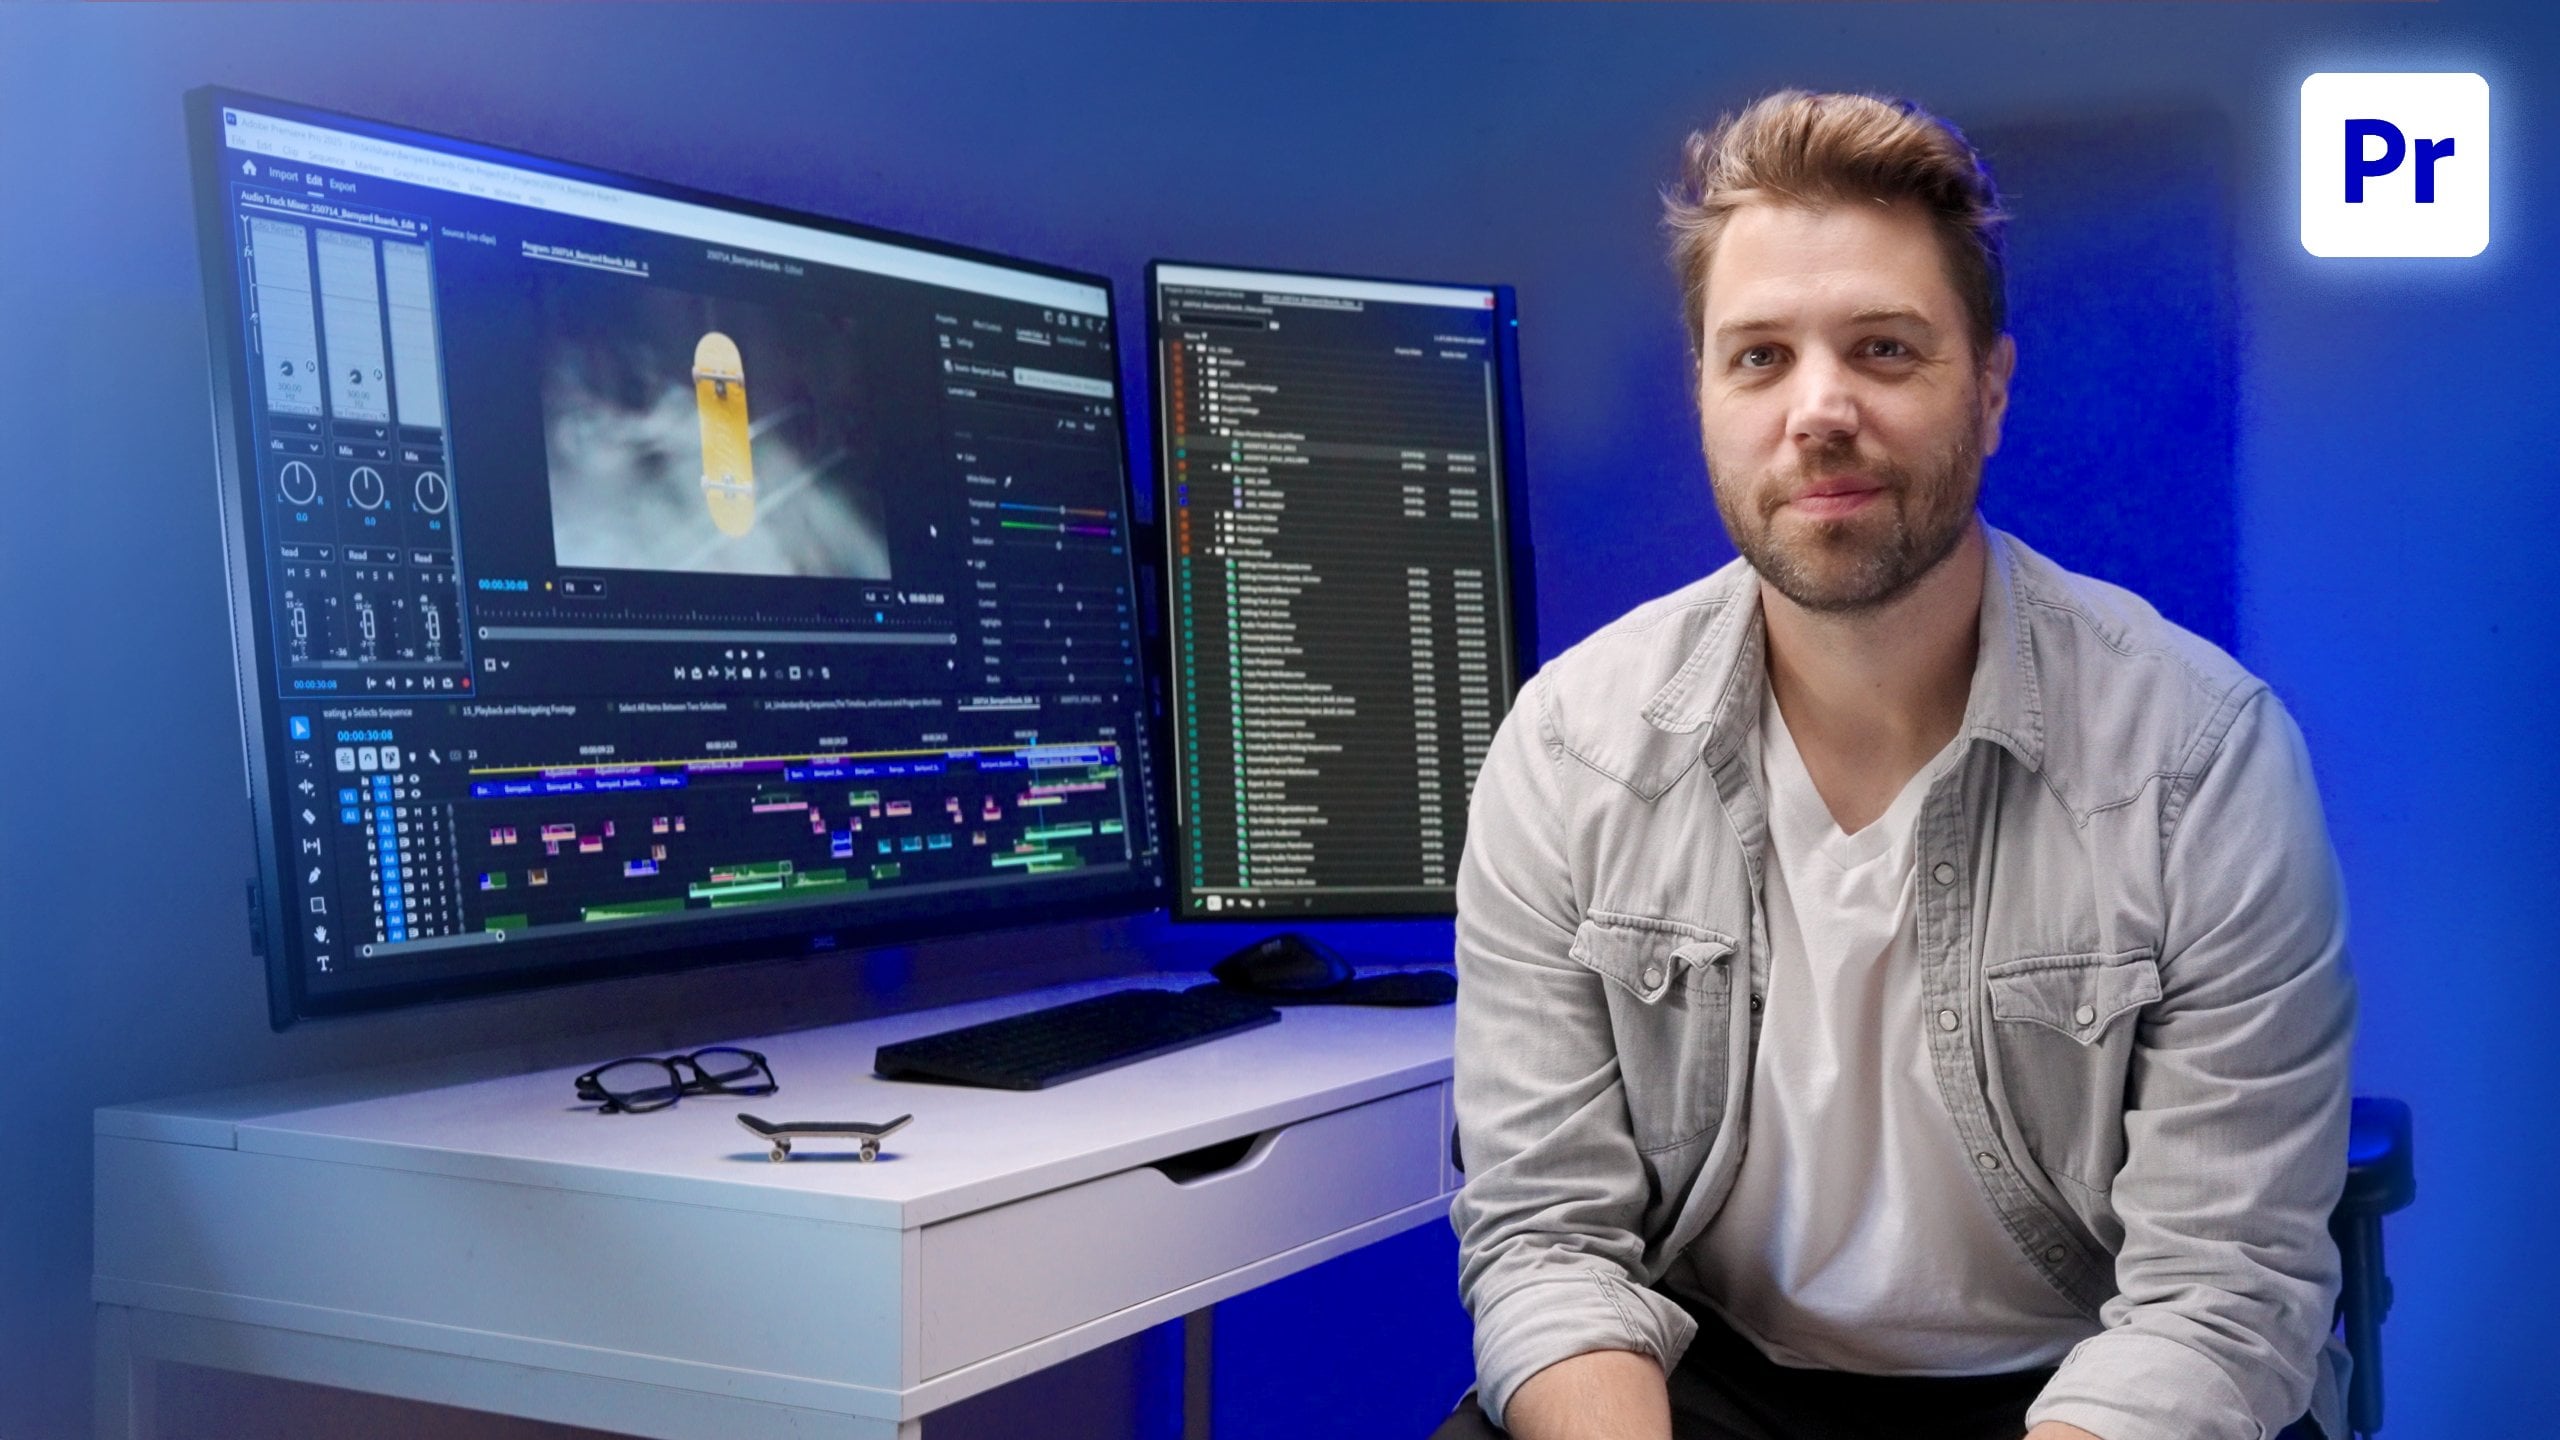
Transcripts
1. Class Introduction: Hi, I'm Sean Dykink, filmmaker and editor from Vancouver, [inaudible]. Why does this always happen? Let's try again. In this class I will demystify the technical and teach you how to optimize your video for a smooth editing experience. I got to fix this. There we go and this and just like that, perfect. Video editing involves many creative aspects but it's very easy to overlook the technical ones. They can be confusing and downright challenging to understand but when dialed in will help you spend more time on what really matters. Great story [inaudible]. Not again. Before I render, I got to change this, change these signs. Rendering and there we go. We'll explore different types of workflows for pain-free editing. You will learn how to optimize your footage for fluid editing, smooth playback, and blazing fast exports. After taking this class, you will learn which workflow is best for each project you work on and how to practically apply it. This class is for advanced users who want greater knowledge of optimization workflows and how to practically apply them from project to project. Intermediate users can also benefit from this class, especially if you're working on a project that involves more post-production steps and, or you are finding that your computer is not handling media well during the editing and exporting process. In either case, you will need access to Adobe Premiere Pro and Media Encoder along with a solid understanding of both programs. After taking this class, you'll feel more confident and comfortable creating a custom video optimization workflow for your next project. Let's export this. This is way too slow. Let's make some adjustments. There we go.
2. Determine Your Workflow: Implementing a video optimization workflow increases efficiency, speed, and makes the overall editing process that much more enjoyable. In this lesson, we're going to discuss the different video optimization workflows out there and which one is right for you. Native footage is what is recorded to your SD card or hard drive from your camera. These files aren't always suitable for editing, but rather optimized for compression. Not all NLEs can play every type of format, but native format compatibility is broadened and continues to grow. This is less of a concern. If you're working with files that are better optimized for editing or have lower bit rates you may be okay using this workflow. If you have a top of the line computer with the latest and greatest technology, you may also be fine with this workflow even if you're working with larger raw files, multiple video layers, color grades, and complex effects. Vashi Nedomansky, editor of the feature film 6 Below, had access to computers and hardware that were able to handle editing 6K Red Raw footage. He used Premiere Pro since it could also handle a number of native camera formats, including Red Raw. There wasn't a need to transcode the files or create proxies for playback. The biggest benefit of this workflow is that it saves time throughout the entire editing process. The biggest downside is that you need to have a higher-end PC, which is a lot of money. You may be working with a sufficient system for editing but then you start working with larger resolutions, higher bit rates, or you start adding effects and post color correction, color grade, then you start to realize, actually my playback is suffering because of all these added layers and effects. In this case, you may want to look at transcoding your footage. When transcoding them to a suitable codec for editing, you will find that playback will be smoother and more responsive but file sizes will dramatically increase. Transcoding your files is the process of converting your footage from one encoding to another. This can mean altering codecs or adjusting specific parameters within your footage. When comparing our native camera files to our optimized QuickTime ProRes file, you can see the difference. The native footage playback is choppy and slower to respond, whereas our optimized footage is smoother and easier to work with. The biggest downside to transcoding your footage is the time and file sizes that they create, which is why I tend to lean towards the last workflow option. If you're still finding that playback is challenging and need to save hard drive space, then a proxy workflow is for you. Technically, creating proxies is transcoding. But instead of creating a high quality optimized codec for editing and potentially for export, we are creating low quality temporary files optimized only for editing. This saves space and increases playback quality. Plus at the end of your project, you can delete your proxies, save space, and be on your way. The downside to this, the quality of proxies can be so low that it can make color grading and working with other effects quite challenging. However, since we have the ability to toggle on and off proxies very quickly, we can always toggle on our proxies when editing and toggle off our proxies accessing the native footage when color correcting and adding effects. This is my preferred workflow as it balances faster editing speed while saving space. The ''Toggle Proxy'' button and ability to create exports from our original source media makes this a convenient and flexible option. It's important to note that when adding multiple color adjustments and effects that this workflow might also become too much for your system to handle. If that's the case, you may need to transcode your native footage first then create proxies from your transcodes. This is a fine option. This is a rough idea of the workflows laid out in front of you. The way to decide which workflow works for you is by testing them out first. If you're finding you're having difficulty playing back your footage you can always go to a proxy workflow. If you're still struggling there, then transcode your files. To recap, if you're working with the Maxon computer that has no problem with playback or you aren't noticing any playback issues then that's great. This is the quickest and most efficient workflow for you. Working with transcodes requires extra time and space, but optimizes your files for both editing and finishing. Working with proxies saves a lot more space than working with transcodes. But when adding effects or color correction, color grades, the quality may not be sufficient and you will need to toggle off proxies to get a clear picture, which results in slower playback. As you can see, there are pros and cons to each workflow. But it's as easy as testing out each workflow and saying, is this smooth enough to edit with? Am I getting responsive playback? Try each workflow until you find the perfect balance between speed and editing ease. Spending less time worrying about poor playback and allowing for more space to enjoy the editing process is a must. You need to enjoy editing because there's a lot of problem solving and challenges that will come up. If they're technical, those are the most unenjoyable, challenging problems to deal with and the last thing you want to deal with especially when you're on a deadline. This is a simple introduction to the video optimization workflows out there. As the lessons progress, we will dive deeper into the details and practical steps to optimize your video. In the next lesson, we're going to further discuss the transcoding workflow.
3. Transcode Workflow: As I mentioned in the first lesson, if you aren't working with a stacked PC, working with native camera files can be very challenging. A transcode workflow may be for you. When transcoding files, we are converting one encoding to another and the purpose of doing this is to get our camera files into a codec that is optimized for video editing. In addition to optimizing your files for editing, you may also decide to reduce resolution depending on your final delivery specs. For example, you may receive files that have huge resolutions, but will not be output to that same resolution and have no need to digitally zoom in that far. You may consider instead to transcode your files to half the size for easier editing and export. When transcoding, you don't always need to choose identical specs to your source footage. If quality is of utmost importance, you can always disconnect your transcodes, relink to your source footage, and export from there. Another benefit of using transcodes is when receiving multiple file types. Let's say you receive Sony files, Red files, and Canon files. You may experience mixed results with playback. You can create transcodes and end up having consistent file types along with consistent playback after the fact. The biggest downside to creating transcodes is the time and space it takes up. Again, if you're finding any issues with the quality of your footage when transcoding, you can create transcodes and then relink to your original source footage at the end of the process. To transcode your footage, open up Media Encoder, navigate to the Media Browser and import your selected files. From here, you can select the entire queue with Control or Command A, and then select the current format to open up the Export Settings window. You're about to edit encoding settings for multiple outputs. Great, that's what we want. From here, we can adjust our format and video codec to one that is optimized for editing. In this case, I'll select QuickTime format with a Apple ProRes 422 codec, and you can also select 422 HQ if preferred, I'll explain the difference in a bit here. Select Match Source just to ensure that we're getting match settings to our native footage. Click "Okay." Back in our queue we can select where we want to save these transcodes. Saving them in a transcode folder outside of your source footage folder is recommended. One very important thing to note. If you're working with higher frame rates, you will need to make some adjustments to your footage before transcoding. We will go over this process in Lesson 6, where we talk about interpreting high frame rates. This new transcode is typically known as an intermediate codec, which is called intermediate because it comes between the original recorded codec and the final exported codec. For example, you may have your source footage, which is a H.264 codec, you might transcode that to QuickTime ProRes 422 HQ, GoPro CineForm or DNxHR or HD. Then finally, you export those transcodes for the web using an H.264 codec. My intermediate codec of choice is QuickTime ProRes 422 HQ. The reason why I choose this ProRes flavor is because it is a great codec for both editing and has high enough quality to export as well. Because you might be using these transcodes to export from rather than the native camera files, it's important that the bit rate is high enough to exceed what was shot on the camera itself. This ensures that you are maintaining the highest quality on export. Choosing ProRes 422 is perfectly fine. The only difference between ProRes 422 and 422 HQ are the data rates. The size of a 4K file with a bit rate of 228 megabits per second, ends up being 1.65 gigabytes. Transcoding this to ProRes 422 results in 2.94 gigabyte file size and even bigger transcoding to ProRes 422 HQ results in 4.74 gigabyte file size. Both ProRes 422 and 422 HQ exceed our source footage bit rate. If you do have the space to store 422 HQ, then it wouldn't hurt to use this codec rather than 422. A side note, these are variable bit rates, so the bit rates will vary from clip to clip. The file sizes are a big downside to transcoding intermediate codecs for both editing and exporting. But when it comes to performance and speed, it may be a necessary step within your workflow. If you find that storage is an issue, not to worry, you will explore a much more space efficient workflow in the next lesson. You're definitely not limited to working with Apple ProRes. There are a number of other choices. You can choose intermediate codec such as Avid's DNxHD or DNxHR, or GoPro CineForm. These are both excellent options. My biggest concern when working with intermediate codecs is ensuring I am working with the best quality possible before exporting. In a real life example, when adding layers of color correction and color grading, you may experience banning or artifacts within smooth color gradients like in this background here. Using GoPro CineForm codec with a 12-bit selection or using DNxHR with 10-bit selection are the winning codecs. But I did find that DNx had a slight edge. I'm not entirely sure why, but my guess is that, because it's a codec using a constant bit rate, it may be more effective in rendering the color gradient. Variable bit rates will try to save space by finding similarities between frames, thus using an adjusted lower bit rate. My best guess is that it might not be able to make sufficient calculations and doesn't see the intricate changes within this gradient. A constant bit rate keeps the quality consistent and does not attempt to compress similar looking pixels. Just my thought, I'm not a scientist. I'm sure the quality in some cases is unnoticeable. But if recompressing on export from your intermediate codecs is causing concern or you can see artifacting and banding. I might suggest this; add it with your intermediate codec of choice. Once you have a picture lock, disconnect your footage and reconnect your clips to your original source media. To apply what you've learned from this lesson, try exporting a single clip using each intermediate codec. Which codec do you find plays back best and looks the best? You may not notice a difference, and that's fine. The idea here is to get you acquainted with a few intermediate codec options. It can be intimidating to see lists and lists of codecs and containers but getting in there and testing a few of them out will help you feel a whole lot more confident with your chosen workflow. To recap; the purpose of transcoding is to optimize camera files for editing, and in some cases, exporting. If you are short on space, try using a lower bit rate codec like ProRes 422, but make sure it's still exceeds your original camera file bit rate. If you find that you have loads of space, then use a higher quality codec like ProRes 422 HQ or DNxHR or CineForm. Remember, keep an eye on the quality. If you notice banding or artifacts, try using a different codec. The great thing about using the transcoding workflow is that it is flexible and you always have the choice to disconnect your transcodes and relink your source footage prior to export. In the next lesson, I will show you my preferred workflow using proxies.
4. Using Proxies: Creating proxies is another great video optimization workflow, and it provides a smooth editing experience. Depending on your computer and its specs, playback can vary from clip to clip. When deciding if you need proxies for your own projects, it's really quite simple. Load your clips, and if you experience drop frames or slow response when playing back the clips, then a proxy workflow is for you. Also, don't forget that when you add effects, a color grade, you have multiple video layers, it can slow down your system even more. In our case, we have some huge 120p files which do not playback smoothly within Premiere Pro, making them very cumbersome to work with. Even the 24p files can use proxies for smoother playback and editing. We need to transcode these files into something that Premiere can playback easily. A proxy is basically a substitute for something. In the process of creating proxies from our files, what we're doing is temporarily substituting our main source files, which are much larger and difficult to edit with, for smaller files, which are much easier to work with. These files are also typically created in a different format that Premiere Pro can playback more easily. To clarify, the purpose of transcoding your files is to optimize them for editing, and in some cases, exporting as well. Creating proxies also uses the process of transcoding. However, the purpose is to create smaller files that are optimized for editing and not final export. These files can be deleted after completing your project to save space. The benefit of using proxies is that it has a very low space footprint, allows for fluid playback, and can be deleted afterwards. The downside is that, again, this does take time, although sometimes necessary, and the files aren't high enough quality for final export. In addition to this, because the files are very low-quality, they may be too difficult to use when adding effects, color correcting or color grading, but they are easy to work with. My biggest complaints about working with proxies is that often I have to toggle them off to make sure that the shot I'm editing is in-focus because sometimes the quality of the shot tricks me and it looks like it's out of focus even though it's not. The proxy creation process along with the transcoding process can be completed right up front when creating a new project. You can adjust your ingest settings with Premiere Pro's project settings tab. This allows you to copy, transcode, create proxies or copy and create proxies immediately after your files are imported. Doing this upfront is great if you have files with consistent settings, such as frame size and frame rate. I prefer to create proxies after my clips have been imported because I'm often working with multiple frame rates and need to make modifications to those high frame rate clips before I'm able to properly create proxies from them. More on this in Lesson 6. To create a proxy, we can right-click on a "Clip", click on "Proxy", "Create Proxies". The Create Proxies window will pop up, giving us a choice to choose between H.264 or QuickTime formats. We also have a number of factory presets available. As you can see, I've already created some of my own proxy presets. When you select a preset and click "Okay", Media Encoder will open up and begin transcoding the original media to our proxy preset of choice. Once completed, we can use the Toggle Proxy button located in the button bar to Toggle Proxy view on and off. When they're toggled on, we achieve smooth playback but lower-quality. Then we toggle it off and we get back our original source file. Notice again, the dropped frames indicator. Zooming into this frame, you can really see the quality degradation when toggling on proxies. When doing work with color correction or if you need to get a more detailed view of a shot to ensure that it's in-focus, toggling off proxies and viewing the original source footage is a must. Since we are now accessing the original quality files, the playback and responsiveness can become problematic. If you're finding playback is suffering too much when toggling off proxies, you may want to consider first transcoding your camera footage, then creating proxies out of your transcodes. After you've finished editing your project using those proxies attached to your transcodes, you can then select those transcode clips within the project window. Right-click "Proxy" and reconnect full resolution media. Then, select "Attach", and from here, we can now locate our source footage and reconnect. Now, we have the opportunity to export from our original source footage. One final suggestion. Try creating both transcodes and proxies from your source footage and treat your transcodes like they're proxies. What's great about Premiere Pro is that it's incredibly easy to detach proxies and reattach proxies. For editing up until picture lock, try using your attached proxies. Then upon working with more intense visual effects or color grading, detach those proxies and attach the transcodes. This way, you always have your source footage connected and all you're doing is detaching and attaching your proxies and transcodes. But I'd recommend the easiest and most convenient workflow. All I can do is offer up workflow ideas. It's up to you to decide which works best when balancing optimization and quality. To recap, we use proxies from our camera files because they are smaller in size and in a format that is easier to work with while editing. The Toggle Proxy button makes it very convenient when switching between editing proxies and viewing the original source footage. This saves time in the edit and creates an enjoyable editing experience. Now that you know the benefits of using proxies, it's time to create an ingest preset for your own editing workflow.
5. Creating Ingest Presets: What's great about ingest presets is that once they're created, you can use them for any project you're working on, making the transcode and proxy creation process that much faster. In this lesson, I will be discussing how to create an ingest preset for proxies specifically. This process can also be applied to creating ingest settings designed for transcoding footage to other intermediate codecs as well. I prefer to use my own presets over these ones here for a couple of reasons. There's no way to adjust the resolution and they do not allow for watermarked media. Reducing the resolution will give us smaller file sizes and gives us the flexibility to create higher quality proxies if preferred, while adding a watermark helps distinguish proxy to media a whole lot more than no watermark. This might not seem like a big deal, but when editing, having that watermark visible allows you to not have to think twice whether you're looking at a proxy or not, and it reassures you that your proxies are indeed connected. This also allows for different effects like adding LUTS and timecode. To create a custom preset of our own to add to this list, we first need to create an encoding preset to adjust our preferred parameters. The easiest way to do this is to right click on the clip we want to create a proxy for and click "Export Media". I like to work with QuickTime format because it's also the format I use for my sequence settings and the format I output my high resolution masters too. I would recommend this, especially in our lesson on using preview files, which will make sense when we get there. I'll select Apple ProRes proxy as this preset is designed for proxy editing. Select the Video tab, then uncheck width and the height. You could set this to 720 by 480 if you want smaller file sizes, but I prefer 1280 by 720 as it's a good balance between quality and fluid playback. The only other thing I'll change is to add an image overlay to indicate that these are in fact proxy files. Now we'll navigate to the Effects tab. Select "Image Overlay", then choose to Import an image overlay. I've created one that you can use for this project and others within the project assets folder. It's simple, it just says proxy, it's nothing fancy, but it's ready to go for you to use. Adjusting your watermark depending on project type or footage type is a great way to add an extra level of visual clarity. This is especially helpful if you're working with an editing team. I also prefer to take the opacity down to around 10-20, just so it's not so distracting. Now that we have adjusted the dimensions in watermark, we can save these settings as an encoding preset. I'll name this ProRes proxy 1280 by 720-23.976, which is the frame rate, and then watermarked. This way, it is extremely clear which settings are being used and that this encoding preset is for proxy file creation. If you want to get even more specific, you can write any code on the end as well. And that's it. Once you save your preset, it saved, we can just cancel out of this. Now that we have our encoding preset created, we need to create an ingest preset within media encoders preset window. We need to create an ingest preset because the create proxies window only allows us to add ingest presets, not encoding presets. To create an ingest preset, we need to open up Media Encoder. Then navigate to the Preset Browser. Look at that. The encoding preset we've just created is now available to use in Media Encoder. Select the plus icon, and then create ingest preset. From this window, we can now finish the ingests preset creation process. We will name this ingest preset the same as our encode preset, but add the word ingest at the end, indicate that it's an ingest preset. Under transfer, we also have copy options. But because we're not using this function to backup our footage, we can leave this unchecked. But the transcode files option will be checked. The destination at this point does not matter because when creating proxies from Premiere Pro, you'll have the option to select where your proxies will be saved when initially creating proxies. In my opinion, for most projects, they option to save your proxies in a proxy folder next to your original media is just fine because it's easy to find if you need to reattach proxies at any point. Under Format Options, ensure QuickTime is selected because this is the format in which we created our encoding preset. When selecting the preset option, we can locate our recently created preset right at the top. We don't need to make any adjustments to our metadata or rename our files. But hey, this is your presets if you want to make adjustments to tailor specifically for your project, then go ahead and do so. Click "Okay". Now we have our shiny new preset located in the Preset Browser, which can now be added to our ingest preset library. Tabbing back to Premiere, we can now add our ingest preset here. Right-click the clip, select Proxy, Create Proxies. When adding our own ingest preset, it's not the most straightforward where the preset we've just saved is. To easily locate our recently created in just preset tab back to Media Encoder, right-click on the preset within Media Encoder, then select "Reveal Preset File". For some reason my preset name got cut off. I'm guessing it's because I added a period into the 23.976 so I'll just rename it. Now you can use this information to navigate your folders, to locate your ingest preset. I know you might be thinking, wow, this is a lot of work just for one preset. Once you've finished creating this ingest preset, you can apply this to every edit you work on without having to go through the entire process all over again. Our ingest preset has been added and we can click "Okay" to create our first proxy. But we don't want to do this one by one we can batch this process, select all of your files at once. Navigate to Proxy, Create Proxies, make sure you have the right ingest preset selected, hit "Okay" and it will automatically prepare the clips for proxy creation. Tabbing back to Media Encoder we can see that the clips are starting to queue up and are being processed. If we navigate to our source footage folder, you can see that a new proxy folder has been created within the same location. When we click on that, you can see all of our proxy files populating this folder. Now that Media Encoder is done processing all our proxies, we can take a look at some of our footage within a project. When enabling proxies, we can see we have our watermark and playing back, scrubbing through and using hotkeys is so much smoother than with our source footage. But then look at this with our higher frame rates, they were also created with 23.976 frames per second proxy presets. We're getting strange playback with these higher frame rates. I know how to fix this. It's okay. I did this on purpose so that you could see that you can't use this proxy preset right out the gate for high frame rates, we need to modify them slightly before we can use them for proxy creation. The process for creating ingest presets for high-quality transcodes is the same. But instead of selecting ProRes proxy, select your intermediate codec of choice, name your preset, save it, and repeat, and then finish the ingest creation process within Media Encoder. To recap, creating your own proxy preset gives you control and flexibility over your proxies. We need to first create an encoding preset using the Export Media window and adjusting our settings as preferred. After creating this encoding preset, we can create an ingest preset by selecting our newly created encoding preset found in the preset drop-down menu. Then we'll have access to our newly created in just preset for proxy creation. In the next lesson, we're going to modify our high frame rate clips for transcode and proxy creation.
6. Modifying High Frame Rate Clips: In the last lesson, we successfully used our ingest preset with our real-time footage, but it doesn't quite work that well with our high frame rate footage. In this lesson, we're going to solve that problem. The only option to create proxies for 60 and 120P clips is to create new ingest presets with the respective frame rates. Well, this is true for 60P footage, if that's your preferred method. You can create an entirely new ingest preset and exporting as 60 frames per second. But there's no option for anything beyond 60 frames per second when exporting from Premiere Pro, the easiest way to create proxies and even intermediate codecs from high frame rate clips is to interpret your footage. Interpreting footage allows you to adjust your clips source, frame rate to any other frame rate of your choice. Normally you'd place the high frame rate clip within your timeline and make speed adjustments from there. But when interpreting footage you can batch this process and also properly prepare your high frame rate clips for transcoding. Right-click on any high frame rate file and select "Modify." Under the modify menu, select "Interpret Footage." From here we can make Premiere Pro believe that this 119.88 frames per second clip is actually 23.976 frames per second. Don't worry, you can always undo this by reflecting use frame rate from file, if you want to revert your clip back to its original state. Once we click "Okay", the file will play back at 23.976 frames per second. Because this particular source clip has a frame rate of 199.98 frames per second it plays back in slow motion. You can also batch this process. Select all your high frame rate clips, right-click, modify, interpret footage. Then assume that the frame rate is 23.976 frames per second. Because we want all of our high frame rate clips to be played back in real time so that we can make use of our 23.976 frames per second proxy preset. Now that we've interpreted our footage and it's 23.976 frames per second, we can create our proxies. But not so fast. When you right-click and you select "Create Proxy" media encoder does the proxy creation job. But what it's doing is it's creating the proxy from the source file, which are high frame rates, either 60 or 120P. We also need to ensure that we select interpret footage within media encoder itself. As you can see, media encoder is populating its queue with our proxy jobs. But makes sure after all the clips have been loaded to stop the queue from processing. No, we don't want the current file to finish exporting before stopping the queue. We also want to reset the status of this one clip so it's included and then select all of your clips, right-click, interpret footage. Do the same process we did in Premiere Pro, which is assumed that the frame rate is 23.976 frames per second. Now that we've interpreted our footage within media encoder, it's going to assume that the frame rate is 23.976 and create our proxies accordingly. After we've processed the media encoder queue, we can play back our high frame rate proxies within Premiere Pro and get smooth playback without any issues. Now that we have the ability to play back our footage smoothly, we can edit our project with ease. When creating transcodes from high frame rate clips, it's nearly the same process. Take your original source footage loaded it into media encoder. Select all interpret footage. Choose your base editing frame rate, and then run the queue. To recap, your high frame rate clips need to be interpreted at your chosen editing frame rate before using your ingest preset. In this project's case, our editing frame rate is 23.976. Interpreting the clips means that Premiere is assuming that our higher frame rate clips are actually 23.976 frames per second, and it will play back at that frame rate. Remember, when creating proxies or transcodes from high frame rate clips, they also need to be interpreted within media encoder before processing. In the next lesson, we will learn how to adjust our video previews for efficiency and quality.
7. Video Previews: In this lesson, we're going to discuss video previews, how and why to use them, and the rendering process. Understanding these concepts and knowing how to customize your previews will help you adjust your settings for efficiency and quality throughout the entire editing process. First, create a sequence. Of course, clicking and dragging a clip to the timeline, or creating a sequence from clip, is the fastest way I know of to get your sequence settings up and running quickly. Select sequence settings, and here we can make some adjustments. We have here most of our settings automatically filled out to match our clip properties. There are just a few setting changes I would recommend. Under Editing Mode, select Custom. The editing mode determines the video format used for preview files and playback. This does not necessarily determine the final output of our edit. You can use the editing mode presets if you're in a rush and you don't care to know the deeper ins and outs of sequences. But custom allows us to have control over selecting video previews, which is critical for smooth, high-quality playback and smart rendering. Video previews are created when rendering any part of a sequence. Rendering is the process of compiling different effects and other alterations and compressing those into a single file for an optimal balance of file size and media quality. After rendering any sequence or portion of sequence, you'll see the render bar turning green, indicating that it is using the recently created preview files. Anytime you render a clip and play it back, Premiere is now accessing this preview file, not the source file. In case you weren't aware, video previews by default are created within a folder name Adobe Premiere Pro Video Previews, stored in the same location as your project file. Once you make any changes to the clip, the line turns yellow and Premiere is now accessing the source clip. You render it again, it creates a new preview file, and when playing back, Premiere is once again accessing the newly-created preview file. By default, preview files are set to iframe only MPEG, which is a format optimize for editing, but not high-quality or preferable for final output. This selection is fine if you intend to only use your preview files for smooth playback when previewing clips. But for me, I prefer to change this to QuickTime format using a 422 or 422 HQ codec, the reason being is because these results in high-quality previews, which are great when you want to see the full quality of any portion of your edit. In addition to this, when selecting use previews on export, we can bypass rendering during the encoding process and increase export speeds while maintaining high quality, but there is a catch. The use previews button will not be enabled unless your sequence settings match your export settings. In the next lesson, we're going to dive into this. To recap, rendering is the process of compiling different effects and video layers into one file. This file is called the preview file. The purpose of adjusting your preview files can be to gain responsive playback, do your sequence in high quality, or to prep your sequence for faster exports or smart rendering. Smart rendering is exactly what we'll be talking about in the next lesson.
8. Enabling Smart Rendering: When exporting in addition to rendering, Media Encoder needs to transcode your source sequence from one video format to another. This takes time. We've taken care of the rendering by customizing our video previews and rendering as we go. But we can take this one step further by enabling smart rendering. Smart rendering works only if the source codec, size, frame rate, and bit rate match the export settings. This improves the speed of export because Premiere doesn't need to re-render. Smart rendering also is said to improve the quality of your export file because from my understanding, Premiere is not recompressing the source sequence to a different codec, but rather copying over those pre-rendered files into a new file of the same settings and codec. This only applies to codecs in MXF and QuickTime containers. If you are working with a codec within an MXF container, you will need to enable smart rendering in the export settings window. When working with QuickTime formats, smart rendering is automatically enabled. I've linked within the class assets to a list of compatible formats for smart rendering. You might be thinking the footage in your timeline is in H.264 codec. How are we going to achieve smart rendering with a codec that is incompatible with smart rendering. Well, that's why I love this workflow. As long as our preview files are set to match our intended export settings, we can still make use of smart rendering. After rendering our project, ensure that use previews is checked when exporting. Premiere will now compile the final export using the previews which we have set within our sequence settings. The previews are QuickTime ProRes 422. Now we can match those previews with our export settings, ensure that export and sequence settings match by selecting Match Sequence Settings at the top of the export settings window. This, again is important because smart rendering only works if the source codec, size, frame rate, and bit rate match the export settings. When comparing our source sequence and output settings, the size matches and the frame rate matches. Our previews are set to ProRes 422, matching the codec of our output file. We've obeyed all the rules of smart rendering and now we're ready to export. Here's our export speed after utilizing smart rendering sped up, of course. We end up at roughly 34 seconds. For a 2.5 minutes sequence with lots of effects, this is blazing fast. When not taking advantage of smart rendering, the final export time ends up being significantly longer at three minutes and 20 seconds. You can see the time saved when exporting projects. This is especially helpful for those longer projects and those projects at its containing many effects. Exporting H.264 files from your master export will also increase export speeds, rather than exporting directly from Premiere Pro. Larger projects will require longer encoding times. This is definitely when you want to be enabling smart rendering and exporting any additional file formats from your master export. But if you're working on smaller projects and need to submit multiple edits for review throughout your editing process, then you can skip the ProRes export for now and directly export H.264 files. It's all about finding that balance between speed and convenience. The added benefits using high-quality previews on export is the time saved throughout a projects duration. Every time you export, Premiere Pro needs to re-render every effect. Unfortunately, this is the case for any codec that is not supported by smart rendering. Yes, even if you have used previews checked and enabled, Premiere still needs to rerender the sequence. If you employ a smart rendering workflow into your project, then rendering as you go is the preferred method. Get into the habit of rendering your sequence as you get further along in a project and are nearly ready to submit and edit for review. You take a coffee break, lunch break, hit ''Render'', and you'll save yourself a lot of time later on. But be mindful. It does take up space, especially if you do choose a high-quality codec, such as ProRes 422 HQ. If you need to save space, you can always navigate to your preview files, delete them all, and re-render your entire sequence upon final export. Of course, do this during breaks so that you can maximize your time. One additional tip that might be helpful is to try adjusting your preview file settings throughout the different phases of your project edit. This is especially helpful for those longer projects that require many passes and many reviews. For example, when working on a radio edit containing a long string of interviews, I decided to adjust my sequence settings to utilize ProRes proxies and also chose dimensions much lower than my final output. Since I was already using a ProRes proxy workflow, I was able to choose between using proxies or smart rendering with my previews. Both of these options are much faster than a regular export. This sped up the export process exponentially. Because I was working with long sequences, and the quality at this point did not matter. It was purely about reviewing for story. It worked out great. Now in this case, I chose to use proxies on my export over smart rendering because the difference in export times wasn't huge. But further down in the post-production process, when I'm rendering high-quality previews, when I'm rendering a lot more effects and layers, I would definitely be employing smart rendering. To recap, smart rendering is enabled when your sequence settings match your export settings. If your video format does not match your export settings, ensure that you've selected preview files to match your final output settings. Click ''Match Settings'' and make sure previews are enabled on export. Don't be afraid to get creative with your optimization and preview workflows for export speed and editing ease throughout your edits many phases. Nice work. You've made it through all the lessons. Now it's time to revisit the main ideas of this course in our final recap.
9. Final Recap: Great job getting through all the lessons. I know this material can be complicated and confusing at times, so if you have a question, let me know, I'll get back to you as soon as I can. Now, it's time for the final recap. First, choose a workflow. If you have a high-powered PC and you can edit the native footage and export quickly with no issues whatsoever, stick to this. It's easiest and quickest. Then next, recommended workflow is a proxy workflow. The reason why I preferred this workflow over a transcode workflow is because we're creating smaller files, can easily be discarded and can easily be detached, reattached, recreated, and the ability to toggle proxies on and off is quick, plus this offers a lot of flexibility and ease when exporting our final project. We can export from our proxies for quick export and review, we can export from our source footage for high quality and no worries of any type of recompression, and we also have the ability to easily change our preview files in this workflow to match our export settings for smart rendering. Then finally, the transcode workflow. Yes, it does create larger file sizes, but if you do it right, you can edit with your intermediate codec and export from it as well and of course, you can always reconnect your full resolution media at the end of your edit. Then there's the hybrid workflow. If you're experiencing a lot of lag and slow playback, try transcoding your footage then creating proxies from those transcodes, and then reconnect to your full resolution media on final export. When you do choose to use smart rendering, make sure it's worth it. If you're working on small projects with barely any effects, you can get away with exporting pretty quickly directly from your project, but on those longer projects, you really want to be utilizing smart rendering. Find that balance and keep refining that workflow as you continue on from project to project. You don't have to use QuickTime progress, you can use Cineform or Avid's DNxHR and they're all great options to choose. Make things easy on yourself, go for simplicity. If you don't have to overcomplicate the process, then don't. Find the edge to which your computer can perform, so it's not irritating to edit. Remember, the reason why we want to make the editing process efficient, fast, easy, and enjoyable is so that we can focus on the most important aspect of editing, which is telling a great story. We want to allocate more time to tell a good story than to tear our hair out, because some technical issue is holding us back. I hope this class has helped you optimize your footage and optimize your workflow. Thank you for taking my class, and please follow my profile to stay up to date with new class releases. If you can leave a review, I'd really appreciate that. I learn a lot and I take reviews seriously and into consideration when I'm creating new classes. I do have more classes on filmmaking and editing, so go ahead and check those out. Thank you again for taking this class, I really appreciate the support. Even though this class was more technical, remember, story is your guide. I'll see you next time.
 Sean Dykink, Story is your guide