Transcripts
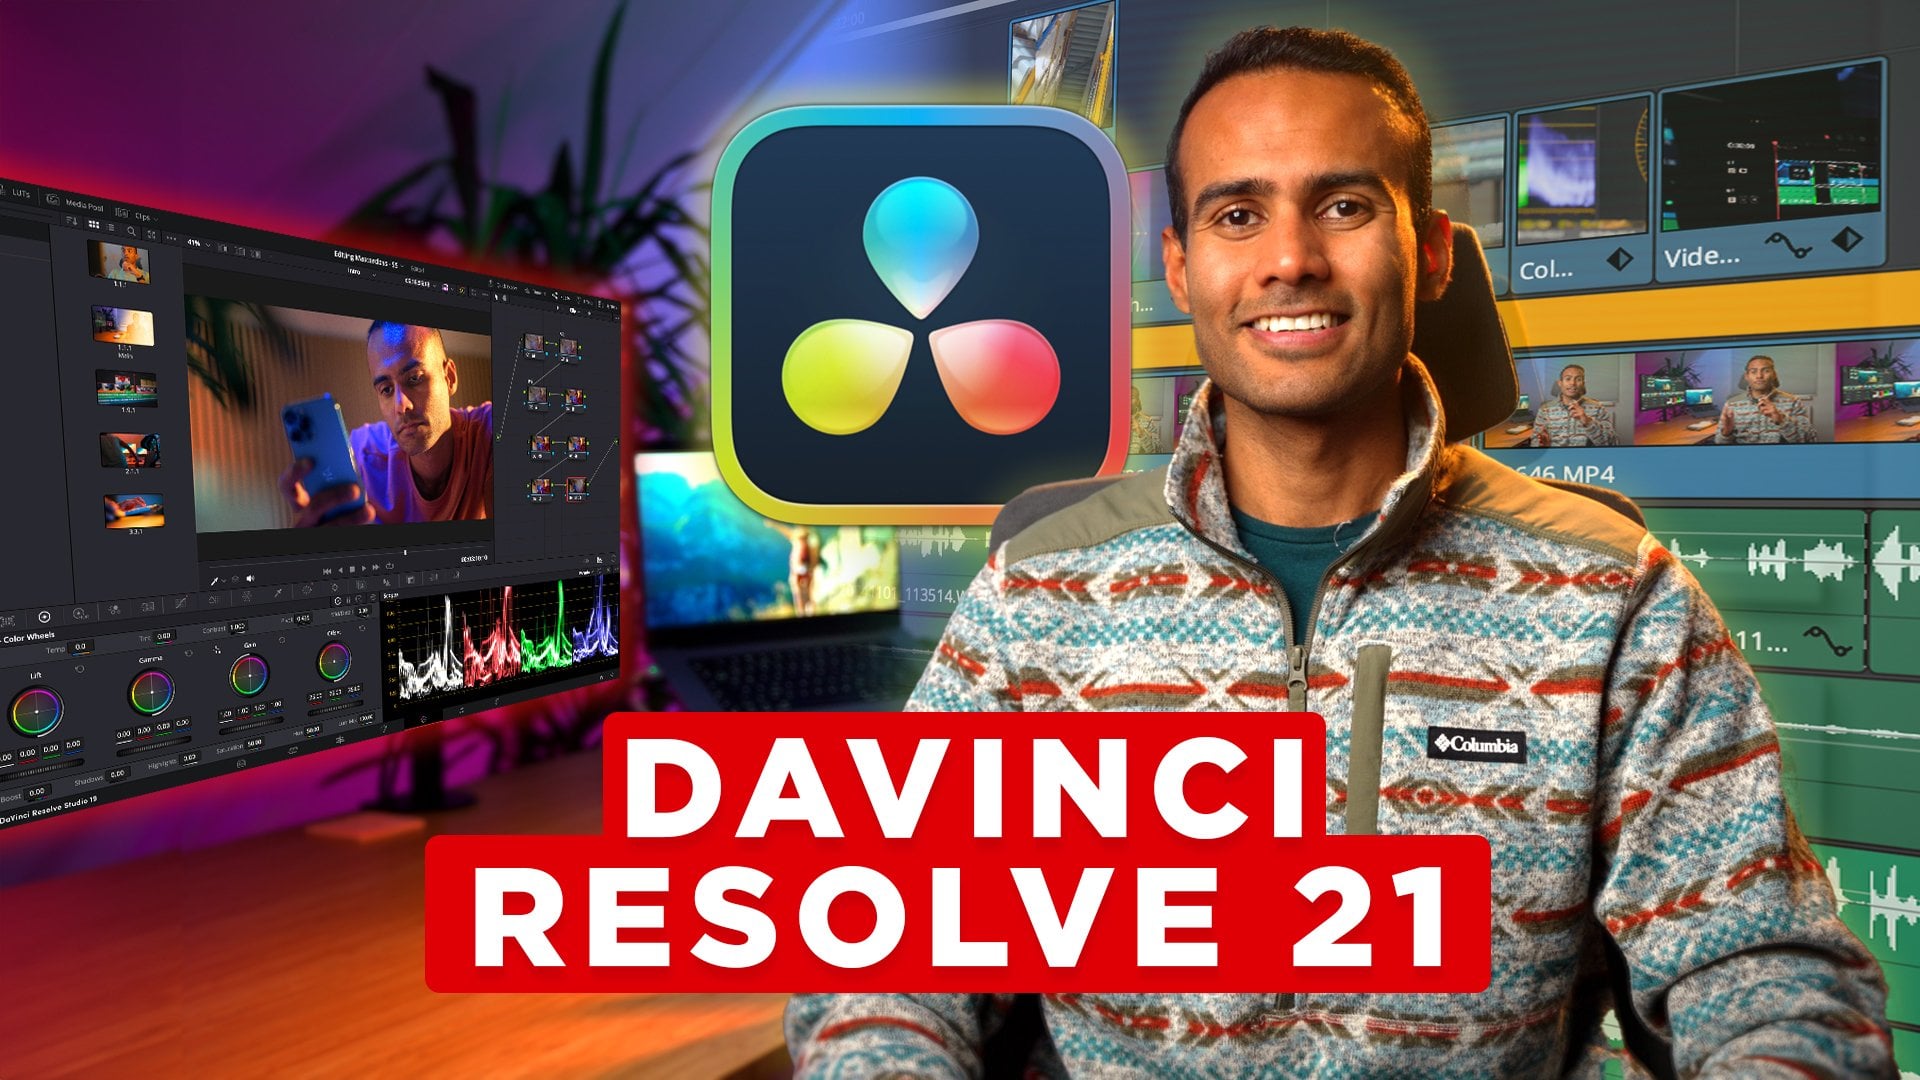
1. Introduction: The winter is always
easily one of the best video editing tools
out there, and it's free. And in this class, I'm
going to be going through my complete step by step workflow of
editing YouTube videos, a workflow that I've
refined over the years to save time without
compromising the quality. I'm a professional videographer, course creator, and a YouTuber, and I know how challenging
it could to publish YouTube videos regularly when you have so much going
on behind the scenes. And that's exactly
why I developed this efficient video editing
style that allows me to create professional looking
videos within a few hours. And sometimes,
believe it or not, it only takes 1 hour. And the best part, I have
given you all the raw footage, so you can edit with me. So if you're ready to speed up your YouTube video
editing process and create videos
that stand out, then let's get started.
2. Class Overview: Before we head further, I want to give you a class overview. Your first question would
be, who is this for? This is not a complete video editing beginners master class. If you want to
learn video editing from scratch in the
winter Resolve, then check out my
previous master class. That is like a six hour or 6.5 hours long video
editing class. And in that class,
I've gone through everything that is included
in the Winter Resolve. So yeah, if you're a
complete complete beginner, this class is not for you. This class is for
someone who has a bit of experience
of video editing in the Winter Resolve or video editing in
any other software. And they just want to
enhance their workflow. And if you want to make your
workflow more efficient, then yes, you're welcome
to take this class. Second question, where
can you get the raw file? If you go down in the description
in the resource panel, you can download everything
from my Dropbox. And for some reason,
if it doesn't work, please leave your
comments below, and I provided two
different folders. One folder is for Windows user, and another folder
is for Mac user. But if you're a Mac
user who's using Intel, not the M one chip, then you should be downloading the Windows file because
the files, what I provided, they might not work in
your the Mints off, especially if you
have the reversion. So yeah, Windows and
Mac different folders, go check that out.
Don't get confused. And one more thing,
class project. So once you finish this class, then I want you to make a minute couple of minutes
of YouTube videos from the row clips
that I provided, or you can edit the videos
from your personal logs. And I want to see the
exact same techniques, what I have shown in this class. So, yes, if you want to know more about the class project, go in the class project section. I'm really curious
to see your videos. And of course, I would
provide my feedback as well. Last thing. If you
enjoy this class, please give a review or if you think something
could have been better, please let me know, as well, because that would
help me to create more classes like
this in the future, which you actually
enjoy watching. So yes, don't forget
to give your reviews. And now, let's get started with the Intros
video editing class.
3. Project Settings: So here we're going
to be starting with actually editing
in the winter Resolve. First thing, I'll just
do it full screen. And the first thing
what you see right now is the media Pool page. If you don't see
Media Pool page, you can just come here at the bottom here
to the Media Pool page. But before we import anything
or before we do anything, we need to take care of some of the project settings so that
when you export your videos, they are in the best quality. And also when you are
playing the video, like the actual
playback while editing, it should play smooth because
if it doesn't play smooth, it would be really frustrating. So let's check out the
project settings here. So if you see the
setting button here in the corner, I'm
going to open it. And what you need to do
is you need to go to master settings and just
copy all these settings. What timeline resolution
does is that it would play the videos in high definition when you
are editing the video, but when you want to export it, then we can export in four K, eight K, whatever
resolution you want. And it doesn't matter if you have filmed
the video in four. You can just play back the video in high definition in
the winter resolve, and when you have to explore it, then do four K. And this we are just doing it
so that the video plays a little bit smoother when we are
actually doing the editing. One more thing you need
to keep an eye on is the timeline frame
rate per second. So before editing,
you really need to know what frame rates
your videos are shot at. I had a question previously,
someone was saying that, Hey, some of my videos
are 30 frames per second, some of my videos are 24. What frame rate should
I keep the project at. So whatever the
lowest frame rate is from a mixture of videos, for example, when I film
from my Sony camera, which is this one, I usually film my 24 frames per second. But sometimes when I'm
filming from an iPhone, that video is at 30
frames per second, but it's easy to
play a 30 frames per second video into 24 rather
than the other way around. So that's why I keep the
frame rates to 23.967 or 24. And also really important is that you should really determine the frame rates now
because you cannot change these frame rates
later down the line. So that's the only
thing I change here. Rest of the settings, I just
keep everything the same. And for proxy media, I would really recommend
you to check out my Dmoris of
the master class. In that master
class, I have really dedicated an entire
section to proxy media. And these are the places
where you would be exporting videos where the case files are
saved and all that. And the next most
important thing what you need to change
is the color management. So just copy these settings, and if you're a Mac user, then just do output
color space Rex 79 A. But if you're a Windows user, then you should do
Rex 79 gamma 2.4. This I have also explained
in my other Danci class. But if you don't want to
know the explanation, if you just want to have
the best video output, just copy these settings. And rest I'm not
changing anything. General options, I
don't change nothing. No. So what I would do is that if you want to save these
settings, you can save it. I didn't make any changes,
so I cannot save it. And if you want
these settings to be your default setting,
what do you need to do? You can go on the three dots. You can do save current
settings as default preset. You can also have
different presets. For example, save
current setting as a preset, then you
can just name it. And for example, if you're
making a reel or a TikTok, then you can have a
different project setting. For example, if you're
editing a reel, then you can do vertical
video resolution, like so, and then make a preset. But for YouTube videos, I just keep this and I always do save current setting
as default presets. So next time if you open
the Winter Resolve, you don't have to
change anything. All the settings
would be preserved. So I wouldn't save it because
I didn't make any changes. Let's just do cancel. And the next video settings, what do you need to change here? Go to the int resolve,
go to preferences. Here, I wouldn't
change anything. Memory, GPU, you have to do all Max so that D Minchi is using the
max amount of power, you know, when you're
editing videos. Next, the only setting I do what I change is
when you go to General. When you go to General, this is really important for Mac users, Window users, you don't
have to do anything. For Mac users, for Apple
MacBook pro users, you really need to make
sure that all these wherever I have done the
tick, it should be ticked. If it's not ticked, then the video output would
be completely different. Like, you would see a video in the Vinci resolve in
a particular way, and when you export it and
when you run in, you know, QuickTime or VLC, then the colors will be
completely different. So that's why it's
really important to check these boxes,
and that's it. So you should save it.
I would just cancel it. Yeah, those were the
few project settings, some really important
project settings that you need to change when you are editing in the
wind resolve and when you're specifically
editing for YouTube. Now let's move on to
the next chapter.
4. Importing Clips On Timeline: Here in this section,
I'm going to be importing your YouTube video. So wherever you have
saved, of course, I've given you all
the raw files, and there are raw
files, different files for Windows users and different
files for Apple users. So you really have to keep an eye on that. So what
are we going to do? I have saved it in
current projects. I go summer road
trips, then bled. So these are the
files that I need to import in the winter
so. What would I do? I would just select everything, and then I would just go to
Master here and drop it here. So now what DaVinci would
be doing is it would make the exact same folder structure as how it is in my computer. So what you can do, what I usually do when I'm
traveling is that I usually make list of folders when I'm traveling
and every evening, whatever we have filmed, I would just sort of make folders
for that specific day. For example, here,
this is another video. I have made specific
pool for drone, iPhone, photos, Sony videos. For everything, there would be drone iPhone, photos, Sony. So you really have to make
sure that you are kind of categorizing
different video clips, different soundtracks
into different folders. They're not in the same folder because when you're editing, then it's really
easy to navigate. So this is also really important that how do you
organize the folder in your computer how easily and how clearly you organize
a folder in your computer, how easy your job would
be in the winter resolve. Because now I can really just copy everything
in the winter resolve, and I'm sure that the
music would be here, all the videos and photos,
everything would be here. The photos you can see here, it's red because photos
are in raw format. So if I don't need photo, what would I do I would just go backspace or X and
you can delete it. And now what we would be
doing is we go to Edit page. I would just make
it full screen. We need to drag the
clips on the timeline. But before we drag the clips on the timeline, I
would do something. So if I go to Sony folder, I wouldn't make any changes, but if I go to iPhone videos, then what I would do,
I would just go here, select everything by
Command A or Control. A, and then I would
go right click and clip color and you can
choose any color you want. I would be doing
like you can choose anything you want to discolor. But it's really up to
you what color you want. And then all the stock videos, I would also change
the clip colors, and the thing is that later our timeline would look
something like this. So then you would
exactly know from even far away that which
video was from iPhone, which videos are stock footage, which videos are from
the Sony cameras. So that's why we do
kind of clip coloring. So if we go here,
we can see that all these ten are stock footage. So I would also do all
this the clip color. It's not tan. I
think it's brown, so there are stock footage. First step was to
import everything. The second step was to
change the clip colors. And it would all make sense
in the end now what we need to do now we need to
import everything on timeline. So if you don't know how timeline works or what
this timeline means, then I would really
recommend you to first watch my Damit resolve
class, master class, and then you should come here because here we are just talking
about the shortcuts, the easiest possible way to edit YouTube videos. Let's go. There are two ways
of doing it to cut the clip and import
on the timeline. The first way is this. But there's one
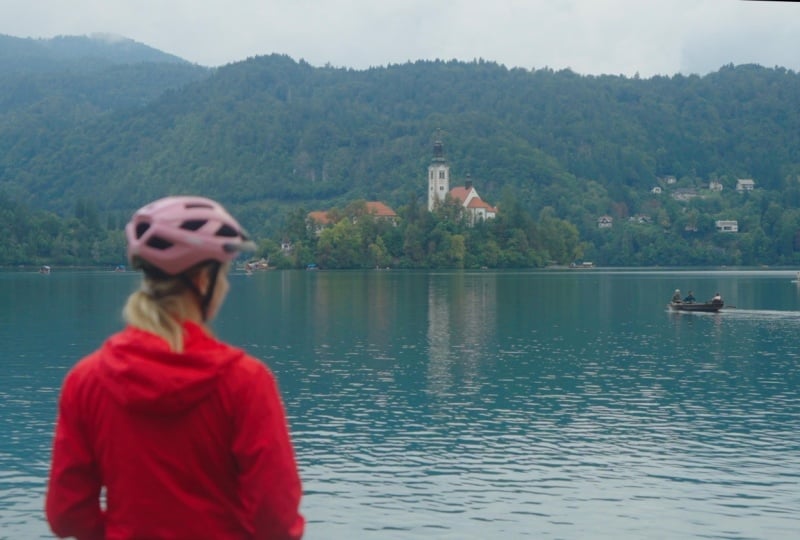
thing about bled. When I did my But there's one thing about Blet
when I did my research. So here, what you can do, we can see that there was a little error in the beginning. When I did my butt? So when she says but then
I can press in point, which is I, so you can see
that this is selected here. I was like, uh, how can we visit Slovenia without
sly hidden Java? You can judge. Is it
worth it to go or not? And when the sort of
talking part ends, then you can do O, which is
the outpoint of this clip. And then if I want to just drag this from here to
here on the timeline, I can just go to the clip here. And drag it on the timeline. But in my opinion, this
process is a bit tedious because you see you can
see the graph here. If you cannot see it, you should go to here
the three clicks, and then you should do display audio waveforms and also take display non
reflective waveforms, and then you will see the audio. And then here you can see
where the subject is talking, where the subject
is not talking. So you see what's going on here? That was one way you press in and out and then
drag on on timeline. What I do is I would
just delete it by pressing Backspace or X. What I do, I know that most of my videos were shot in Sony and they are
in the Sony folder. So then I would just
drag everything, Control A or Command and
drag it on the timeline. And now it wouldn't be
copying. I know why? Because we made a timeline, which is kind of in
the Sony folder. So what do we need to do? Drag this timeline in master. Yeah. So now the
timeline is here. Now if you select everything, now everything gets copied
on the timeline here. So here, what you can see
is you can really see where we have started talking, where we
have ended the talk. Sometimes whatever we are saying if it's not that if
we didn't do it good, then we are repeating it. So then that repeat starts here. So here you have a clear kind of overview of where
the subject is talking, what all parts should
be needed in the video. So now if you just click here, you can see the entire video. It's like a rough structure
of the entire log, right? It's here on our timeline, and later we would add music no, first thing is we
would cut everything, then later we would add some
videos, some voiceovers. Then later we would
also add stock footage, then we would add music, then
we would do some effects. So this is just the basic
structure of the entire video. And these are just
the clips, you know, there's the rock clips
just behind each other.
5. Cut - Trim Clips: And what you need to do right
now is to cut everything. So obviously, if you have
filmed your own videos, then you would have
a bit of idea, where did you mistakes, what part should be taken out. But we filmed this video
I think two months back. So I really don't remember
what all things we talked, what all things needs
to be taken out. So first step is to
just watch everything, and then you will
have a better idea of what all things
needs to be taken out. What all things has
to be trimmed or, you know, just chopped
up from the main clip. But to chop off everything, I use certain shortcuts. So how you should
import my shortcuts? Because with that
shortcut, if you see here, I'm here, if I
just do one click, everything is deleted after. If I just do one click,
everything is deleted. Like if I want to
get rid of this, just with one click,
it's deleted. If I get rid of this, with
one click, it's all deleted. And these things you cannot do easily without using
any sort of shortcut. So how do you import
the shortcut? You go to the Winter
resolve here, keyboard customization. Whatever keyboard
customization you might have, that might be the default
setting in the Winter resolve. What do you need to do? You
go here to the three clicks. You go Import preset. Wherever you have
downloaded the preset, that preset would be
in dot TXT format, and then you should
import that preset. And once you have imported it, then you would have Dsolve ID or Debit resolve underscore
ID, something like that. And that is given to you in the resource panel,
really do really, really just import the preset and load it on the
winger resolve, then we would be
on the same page. So let's watch the first video. So what I would be doing
is I would just, you know, put the original video because
we cut it out, remember? So here we are kind of trimming, and I'm just showing
you a little bit of example of trimming and, you know, cutting
down the clips. So what we would be
doing is I want to I want the audio bar to be a
bit bigger so that I know, you know, when the sounds are coming, when the sounds are not. So what I would be doing, I would do shift and scroll down, so then you can see the
audio a bit bigger. And if I want to zoom
in in the timeline, I can press S, so that zooms in. A zooms out. So I'm sure it would be a
little bit overwhelming now because it's a lot of
new keyboards buttons. But the more you edit
in the inj resolve, the easier it would
get, I promise you. So let's just watch
the first clip. But there's one thing about bled when I did my but there's
one thing about black. So we already know this
part is not going here. So what do we need to
do? You should press B. Once you press B, then we
are in trim edit mode. You can see this is selected. If I press V, then the
arrow is selected. If I press B, then you can see that this becomes a
kind of a bracket, right? And if I have to get rid of the front part of the
timeline, this part, and I also want the clip
to move to the beginning, I just need to press
Q that deletes everything in the front and
moves the clip to the left. But there's one thing about
Blet When I did my research, I read so many comments of
people saying, Don't go. It's too touristic.
Really don't go. Don't waste your time in bled. And I was like, uh. How can we visit Slovenia without
visiting Blet, you know, but will it
be a disappointment? I don't know. But
today, we're going to test it out. We're
going to explore. So here, what I want
to do I want to just get rid of this
part until here, because I think that it's
not really adding anything. So what we need to do, I would
press C. So if I press C, you can see there is a little
blade here in the timeline. And I will just cut
this video bar. And you can see that if I
just cut this video bar, just the top, the
video clip is cut. The audio clip is not cut. But at this point, whatever cut we're going
to be making anywhere, we want the audio and
video to be cut together. So what do we need
to do, we need to click the Link button here. And now, if I cut anything, you can see that the red line is already on both the
video and audio. So that's why you need
to click the link so that all the videos and audios
who are linked together, they would be getting cut
or moved anywhere together. So this part has to go. That, you know, but will it be a disappointment? I
don't know, but today. And I want this part to be out. So I'll just press I'll just go to B because now it's
in the cutting mode. You know, Blade Edit mode, I want the trim edit
mode to be selected. So you can see if I go
here to Trim Edit mode, the shortcut comes as B. So I will just go B,
and then I press Q. Without visiting, you know, but today we're going
to test it out. We're going to you can also
see that she says B here, which is already here, the B. That's why you need to
elongate the audio waveform, and I would just go a
little bit on the right. So you can see, you can
go right left by pressing the arrow key. And
then I press W. You know, but today
we're going to test it. So you can see now the
cut looks way smoother. Stick let, you know. But today, we're
going to test it out. And one more thing, you
might be thinking that the video is a little bit desaturated because that is because I filmed in raw format, and later we would do color
grading and color changes. But even if you are filming videos in a normal
format, you know, where you see the normal
colors on the video, I would also teach you how to colobrate that as
well, so don't worry. Come to explore
Around let's show you the hopefully hidden gems. And yeah, you can judge. Is it worth to go or not? So here, the talking is over, so I'll press W. So what
am I doing right now is just cutting and trimming the important parts
of the video. So of course, you have all
the video files with you. You don't have to
trim the entire log, but you can just practice for first 60 to 70 seconds
so that you get an idea of what it
is like to trim and edit because once
you start doing it, then you might run
into some problems, then you can ask
me some questions. That's why it's really important
for you to edit with me. So this is not usable. I can already see that I'm
not talking anything here. And obviously we
are on bicycles. And obviously, so we can also that I'm talking
good from here. I'm on the Trim Edit mode. I'll just press B and Q. And what I can also see and what you should be
also doing during this sculling process is
you need to make sure that the audio wave forms are on the same level. Let's see here. You can judge? Is it worth it? Here, the voice is a
little bit lower or not. And obviously, we
are on a bicycle. Here the voice is a
little bit higher. So what you can do?
You have two options. What do I do usually is
I'll just right click and normalize audio level for
YouTube specifically. So if I do normalize, then this audio goes a little bit higher, then I
can hear it again. How can we visit Slovenia
without visiting that, you know? But today
we going to test. So now DaVinci has determined that what would
be the optimum audio level? This you shouldn't
do on every clip. You should just do on one clip, and then according to the size and the height of that waveform, you can match the other clips. So I can see that the waveform, it's the same clip, so you can just copy and paste the settings from here audio to here audio. How do you do it? You do command C or control C, and then here you go option V or all V. And once you do that, then we have a paste
attribute box open. And here, if we made any
changes in the videos, everything would be ticked on whatever changes we
have made in the video. But the only change
we have made now is in the volume and if I go apply, then the volume is same as here. But if I do the same
volume, copy, you know, Command C and all we here, then the volume goes so high because here the volume
was already high. So that's why this
Control C and Control V is not applicable
to all the clips. If it's the same clip, you know, what we chopped off,
then it's applicable. Here, I can still see that I'm talking a
little bit louder, so I'll go a little
bit lower for the wave forms to look
kind of very similar. Is it work yet to go or not? And obviously we
are on bicycles. So you can see now the audio, it sounds really kind of
equal in both the clips. And obviously we are
on a bicycles I'm still doing a mistake so what I would be doing just pressing. Yeah, for the Q and
W button to work, you really need to
make sure that you are in the trim edit mode. And obviously, we are on a would be more tourists bicycle path. And here we ended talk, I think, but I can also see in
the thumbnail here that my wife is going
to be saying something. And if you don't see
the thumbnail or the clips in the video here,
what do you need to do? Go here, and then you need to go thumbnail view film strip. Then you see kind of a bit of snippets of everything
in the video. So that is also really handy
in the winter resolve. So I'm just going
to do a cut here, and then I can see
that she's saying something I do. Oh, okay. Oh, no, she didn't
say anything here, so I can just delete it. And just to delete this
individual clip, you can press X, and then you can click in
the gap in between the video and press X again if you
want to do it that way. Here, I would just reduce the volume because we don't
really need that audio. And we're going to be going in primed mode and do it
again. Prim it mode. So this is how you can actually
cut and chop the clips. And I do This is the first step. Now, this is the
second step, actually, first step was importing it, and then I go through
the entire clip. Let's say it is 24 minutes with a lot of errors and a lot
of long B roll videos. And I kind of shorten it down
to maybe 14, 15 minutes. So that's the first cut. And after the first cut, this is how my video
clips they look. It's really cool bask path that is going to bled
we're staying a bit out. So you can see here
that I have also pasted the iPhone videos because this iPhone part was
towards the end. I started filming the iPhone
part towards the end. So what I just did was I copied all the
iPhone videos here. I can see already from
the far that this is the iPhone video because
they were of discolor. That's what we changed before. So that's why coloring clips
are also really important. And I also kind of matched the audio level
throughout the video. And if I just zoom in
here to zoom in press, I have also changed the audio level of the
videos throughout the video. For example, let me give
you a good example. Here, like a little
bit, I mean, like 66. Here, we have the audio
on the same level. We can see here that the audio wave length
is of this height, and then later, it
kind of reduces down, but we want the audio wave length to be on the same height. So what do we need to do?
I'll just zoom in here. You should press Alt or option. Then you can see this red dot. I'll press Alt and option again. Then you see another red dot. And then you see this arrow, you can just
increase the height. So now you can see that the audio wave form is of the same height throughout
the video clip. Bit, I mean, like six
case on a cam site. So this also, I do. So throughout the
curing process, I also just make
sure that my audio is also levelled because
if you do it later, then it's almost double work
because then you have to rewatch the entire
raw videos again. So that's why it's important to do the audio levels as well. And then what I've also
done is that some of the clips which I thought
were really pretty, I have kind of
changed the color of those clips to
apricot or you can choose whatever color
you want because I want to use that clip in the
intro of the video. So my video intro
wouldn't start here. I'm doing some sort
of voiceover with the most beautiful clips from this video
in the beginning. That's what most YouTube
travel videos are like. So that's why I highlight
the most beautiful part of the blocks there so that I
can show that highlight real, you know, true for the audience to watch
the entire video. So I want to, I change
the color of the videos, and then I would just
drag them in the front. So yeah, this is how it looks after kind of doing
all the culling. And the other time I showed
you how big my video were. So my videos, all the video when I put them together,
it was 24 minutes. And after doing the first cut, when we just removed
all the extras, it reduced down to 15 minutes. And later when we
would add music, when we would add B rolls, then it would reduce down
more because then I would be cutting some of the clips
on the beat of the music. And also I would make
it a little bit more interesting and a bit more faster so that it's
not that boring. So yeah, our main goal should be to rewash the videos
again and again. And whatever you
think is boring, just take it out, take it out, take it out, keep taking it out. So yeah, this is how
we do the culling. Culling basically
means just trimming trimming and cutting
down all the extras.
6. Adding Voice Over: So now we have all
the videos here, and you can also see that there is a bit of
color in the video, which I have done now, but you don't really
have to do it now. I would just teach you later how to do color wedding, so
don't worry about it. You will have the video, which is just in raw format. So now we have all the videos, and we have some
B roles, B roles, I mean, just these
kind of clips, you know, in between,
and then we talk, and then you have
these kind of clips. So what I do sometimes
is that there is two ways I let
these clips play. The first way is that I
would put a voiceover to give more information to the audience that
what is going on? What am I showing them if something is not very
obvious in the video, then I would give
information as a voiceover. Most of the times I would
put music underneath the video files so that it just makes it a bit more interesting because
if you're just talking, talking, talking throughout
the entire video, that could also be boring. So people also want to see
the beauty of the play, especially in travel videos. So that's how I kind of play
the B roles in the video. Voiceover or music. What do we need to do now? We need to figure out what voiceover and when
they would come. So for example, if this is the beginning
of the video, you see? It's about that. Would it be more bicycles or would it be more tourists on
the bicycle path. So here we were kind of telling the audience that we are going to
explore this place. But then we are
not at that place. We are just cycling
somewhere in Slovenia. So here I want to
give information to the audience that
our journey started, you know, blah, blah,
blah, blah blah. Journey started at campsite, and then we cycled
to the main town. They said, Ba the audience should know what is
going on because I never told here
that where we are, where is our starting point. It's really cool bisclePath going to we're
staying a bit outside of the Bless area.
So let's find it. So I can see that yeah, there's just B rolls and we didn't really
mention anything. So what I would be doing right now is I also open Google Docs, and then I kind of do the
voiceover for the entire video. And I have already done it because I already
edited the video, and this is how the
voiceover looks. So in the voiceover, this is the intro of the entire video, what we would be placing here, here, before this
clip, you know? So there's a beautiful
montage of everything, and then there's a voiceover. And after that, we have
one or two sentences. What to write here,
you would get more idea by watching these
clips again and again, and then you can think
that what information is missing from
these B roles and what information I can
give to the audience. Sometimes you don't
have to overdo it, but it's really important to give information
to the audience. So that's what I do
that I would just watch the entire video again and then just write down
the voiceover text. Say, for example,
this text is here, here, this text comes here. So what I would be doing is we just I usually do is clip color. I just make it pink because later if I have to put
that sentence somewhere, I know exactly where
that sentence comes. And then the next Bal
spot, for example, the next B spot is not here, but I think here because here we have already
reached to the lake, and here we are saying our first look at the lake honestly took our
breath away, blah. And here I know that here
the voiceover would come. So this I do simultaneously. So I would make it pink so that I know for myself that the
voice over comes here, and then I would
write the voice over. And then I would also kind
of let my wife check it, that is the voice over correct
and what else she thinks? And then later on, I would just copy and paste the voice over. So if this is how my
timeline looks like now, have the pink, which
is the voiceovers. We have this yellow, which are the beautiful clips which
would go in the intro. And we have this really
light brown color or light yellow. You can decide
whatever color it is. That is from the iPhone. We haven't put anything
from the stock footage yet, that I would be doing
in the intro because those are the most
beautiful clips and they should go in the intro. So this is the voiceover. This is normal timeline, and this is how it looks after
I have done the voiceover. So here you can also see that I have kind of put the
voiceover everywhere. I've also given the
voice over to you. So what you should be
doing is what I usually do is I make a separate
timeline for voiceover. The voiceover I have put it in extra
Voiceover is this clip, which you would find a resource. I don't just put it here and then take out the extra
parts or the paths which are not correct on the same timeline
because if I do something here and
if I by mistake, delete something here, that
would be a big big problem. So what I do usually
is that I make a separate timeline
for voiceover, which is this. And
then what do I do? For example, also, of
course, you can see, I changed the color of the voice over clip so
that I know where it is. So I change it to me. You can change to
any color you want. In extras, there was voiceover.
I go right click here. This is just for
my voiceover file. Your voiceover could
be in any format. So I would go to clip
attributes, I would go to audio, then it was in Mono, I changed it to stereo,
channel one, channel one. And then I listen to everything, and this
is the intro part. We wanted to see it with Our day started at the ca.
So what do I do? I kind of put
everything in parts. And I also put, for example, I could have put everything
on the audio layer w, but I purposely put everything
on audio layer two, because I put the intro
part here and if I copy this and if I go to after voiceover and then
if I want to paste here, then DaVinci would be pasting the voiceover clips
in the second track. So if I just paste here, then it's kind of pasting here. Then I know that the
voiceover, this is intro. This is the first
sentence after that. So first sentence, for example, if I copy so you see
how I'm going back and forth between different
timelines, I have a fix for you. So if I go here, then I paste it here already,
the second sentence, the second voice over placement, then I know that the third
voice over placement is here, so I'll just command
copy or control copy. And then I know that the next voice over place is here, then I
would paste it here. But you see how
we're going back and forth between
different timelines, you can fix it by this. So even if you don't have
this, what do you need to do? You go here, timeline
view options. You need to do display
stacked timeline. If I get rid of it, I don't have anything here. I should
have told you before. I'm sorry. Here you should
go displace tag timeline, and then you have
different timelines here. Now, I'll show you an easy way. You can just close this
voiceover timeline here and go and click here
on this timeline arrow. And I would just reduce
the size of this. So how do you reduce it just shift and
scroll up and down. If you shift and scroll up
and down, it goes like so. So what happens here is you can open multiple
timeline in DaVinci. Here we cut the voice over time line so we can select
voice over timeline here. So voiceover us here
if I want to drag. I can see that the intro was here because
I separated them, then the first line was here. Once we pasted here, then the third line was here. So if you wanted to
copy and paste it, I could just drag
from this timeline and just drag it here. So it's going to
come here. If I want to drag here, I can drag here. If I want to drag the same files here, I could drag anywhere. Here you can easily
copy and paste between different
timelines without switching to one another
and it's such an easy way. The next voiceover was here. I can see the pink, I can
just drag and drop here. If I go scroll
through the timeline, then we have more
voice over here, which was this part then came then came this
and then in the end, we have this part as well. So yeah, that's how you can
copy and paste voiceover. And you can see that how coloring the clips makes
our life so much easier, and you can do it super quickly. And also how switching between these different timelines
that can help as well. So let's talk about
what we did so far. So first thing what we did was imported we imported
all the clips. Then we went in the timeline
and we did calling, so we cut out everything
which was extra, and we did that using shortcuts. What did we do after that
is we made some room or we kind of thought about what voiceover could
go on the video. So we also did some
writing for Intro in Google Docs or you can choose
whatever software you want. And then we also
colored the clips pink where some kind of potential
voiceovers could come. Sometimes what also happens is that I would put the voice over, I would make everything
pink, put the voice over. And then I feel that, oh, it doesn't really look
like it's necessary there, so then I just don't put it. So it's always better to have the voice overs than to not have and then re record again, and then you're
wasting your time. So yeah, in the third step, what we did was we kind of
colored the clips pink, and then decided the voice over, wrote down the voice over
what should be there, and then we actually
recorded the voice over. I usually record
with my DGI mic. And then you also do the
culling for the voice over in the exact same method as how you did culling for
these entire clips. And once we had
them, and of course, you make sure that you are doing the culling in a
separate timeline, and then you can do
the stack timelines, and then you can
just copy and paste where the voiceovers should be. So yeah, that's how
far we are until now.
7. Music: Next, what are we
going to be doing is we're going to be
adding some music. First, let's get rid
of this timeline, so I will just go
press your cross. That gets rid of the timeline, and then I will also make
this a little bit bigger. What I did in this process was that I did the
collaborating earlier, but I'll show you later
how to collaborate. Don't worry. So now let's
talk about how to put music. So I've also given you
some music tracks. So music tracks, I
usually get it from Artlist dot IO or Motion Array, and I have a subscription
on those websites, and because of
that subscription, I can put these videos on YouTube without getting
a copyright strike. You are free to use that music, but you cannot put it on
YouTube without getting a copyright strike because
you might not have the membership from
Artlist and Motion array, but feel free to
use this music or any other music. So
what do we need to do? We need to put music
tracks right now. So let's see if this music
track way. Not this one. This is for the intro. So you see here in the audio track, first audio was for the audio
from the camera originals. Second audio track is
for the voiceover. So if you want, you
can also change it. I would do Sony, and I will do voiceover. And then if I just copy
this music track here, you can do music. If I just zoom in, then you can already see the different
difference in the waveforms. You've probably seen
this place before. It's bled in Slovenia. Can also see that the
music is going higher, but I want the music on the same level from
the beginning. What I would be doing
is just option here. Option click option, click here, and then I would bring this
a little bit higher so that my music track has
the same volume. With the voice overs, you also need to make sure that
the voiceover has similar level of volume as
compared to the entire video. This is a mistake I see on a lot of YouTube videos and
even big creators, they do it is that the audio from the camera originals are completely different value and the audio from the voiceover
is completely different. And sometimes all
the whole time, I'm kind of changing the
volume of the entire video while watching on my
television or on my telephone. And same with the music.
Sometimes the music is either super
loud or super low, so you have to kind of
listen in again and again just to make sure that you yourself are not changing the volume in the video
when you're editing. So you have to really
make sure that they are all on the same level. Probably seen this place before. It's bled in Slovenia. So here I can also
see that this is going a bit higher the track, so I would just
reduce the volume because my main priority is that my audience should listen to what am I
saying in the voice over. It looks almost too
perfect to be real. A calm lake,
mountains all around, and that little island with a
church right in the middle. We wanted to see it with
our own eyes for ages, and well, we are finally here. So just when I say
we are finally here, I want this clip to be here. So I'll just copy paste,
sort of drag it here. Finally here. But there's one thing
about blood vent. And just when she starts
saying something, I would just kind of cut it
here a little bit further. I'll click it and delete it. And then I would just
drag it like this. So the music kind of
slowly fades out. You see? And now, if you listen again, you
would see the change. For ages. And well,
we're finally here. But there's one
thing about Blatt. When I did my research, I read so many calls you can see that the music slowly just fades out. And now we can also see here is that there is a
little bit of gap. So how do you reduce the gap? You just click in between
the gap, press X, and both the clips are
coming together now because we have the link
still clicked on. If we had the ink out, then if I do like this, then just my top
part would be coming together because the audio and the video are not
linked to each other. So then we have to do for
audio video separately. But if you have the link on, you can do them together. We are finally here. But there's one
thing about bled. So we put the music
here or later, we would also put some rules. Or if you want, you can
put the B rolls yourself. What do you need to do?
Go to stock footage. And now, because we have already made the
structure of this video, you can choose whatever clips which is nice or whatever
part you think is nice, you can press in and out point
and just drag them like. So here, I have already done it in and out point,
drag them like so, but it should also kind of be synced to whatever I'm
saying in the voiceover. And remember, I
chose these clips because they were really
nice to be in the intro. How do you bring
them in the front? One way is you just go
Command C, Control C, copy, and then you go here and then Command V or Control V, and then just paste here. Of course, there's over rides
on this clip, but you can. You've probably seen this place. And then you can kind of do
all the cuts how you want. You can just also
drag the clips. You've probably seen
this place before. It's bled in Slovenia. It looks almost I already
really looks nice, but putting the clips together
is really subjective, so you can do however you want. But here now we are kind of
focused on the music track. So, let's see that we also
need some music here. Our day started at the campsite about 6 kilometers away
from the lake bled. So I can feel that we
need some music here, so I'll just check the music. Mm hm. So I'll probably
put this music. But this also feel free to start with the beginning
of the original music, or you can also kind of go here and maybe start from here. So it's really up to
you. What I usually do. I just copy the music. And whenever I'm
copying something, you have to make
sure that there's nothing extra on this timeline, because if I copy
by mistake on here, then you can see that it kind of overlaps the voiceover files. So this you have to
be really careful. Let's check how our music looks. Bicycle files. Our day started at the
campsite about so, of course, the music
is a bit loud, but I also want the
audio to come a little bit later and the
music a little bit lower. Bicycle path. So here, our day started
at the campsite about six so when I say our
days out at the Cam site, I want to show the cam site, but we don't have the
video of cam site. We didn't have in Sony, but where we had it was
I think here really Oh, yeah, you see, with
one click here. So I want to show this cam site. So what do I need
to do? I need to copy this there
in the beginning. But I just need to copy
the video, not the audio. So you see if I select this, both of these things
are selected, I will just unlink it, and then I would
just copy the video. Command C, and then we go here. Here I'm saying, right? Then
Control V or Control C. So you can see that this kind of overlaps on the other clips, there is another way to copy
or duplicate the video file. What do you need to do?
You go here. Where was it? This clip because it's too long. What do you need to
do? You go option, keep pressing Option or Alt. Click on this clip and
then kind of bring it. So you can see that the
clip remains there, but the duplicate file, I have it on with my mouse. So I'll just bring it on top of this on top of these clips. So fast. Our they started I just
wanted to end here. You can also change the
height of the video here. Bicycle path. Then I can drag both of
these clips this way. So how do you select? Because now if I
select the video, both are not selected.
So you have two ways. You can select this
and also the audio, but this time you
should press command. So then both of these
clips are selected. And if I want to just
move everything they started at the camp
site I just want to. So you can just keep dragging
the clips, you know, like just here to kind of change the cut or
wherever you want the cut. That's really convenient
the Started at the cam site about 6 kilometers
away from the lake bled. That's what it is. So I'm not really biggest
fan of this clip, so I'll just delete it by X. And then if I want everything to go a bit more this
way to the left, I just click in
between X here, X. So everything goes this way. It's really cool bicycle, P So I would just move this
a little bit this way, and then I would
just drag like so. It's really cool bicycle. Pop this going to blip So you can see that this
is a little bit abrupt, the audio from this and this. It's really cob. So what do we need
to do? You need to go and click in between these two clips and add
a kind of cross fail. So now what happens is audio
from this clip goes a little bit lower and audio from this clip goes a
little bit higher. It's really cool biscol. You can see these things
you can do with, you know, kind of by adding
music and also kind of doing a smooth transition between one audio to another. And I can see there is a gap. What you can also do is if you want the entire timeline to be moving to the left or if you want to select
the entire timeline, to the left or the right,
you need to go Alt, Y. So if you go Alt or option Y, it selects everything
on the right. If I go Command or Control Y, it selects everything
on the left. So say, for example,
if I wanted to select everything on the
right, what do I need to do? Option Y or Alt, Y, and then I would
just move it like this. So then I really make sure that everything from the
timeline has moved. And that is how I add music. So I'll show you
the final product after adding music and adding
the B rolls in the intro. So this is how the video looks. So you can see that
I have done a lot of changes in the volume. So this was just by listening
over and over again. You can also see
there's a smooth fade out when my subject is talking, you can see that the
camping shot is here, then we have the bicycle. They are kind of
cut on the beat. And you can hear
you can also see there's a B roll,
music, everything. Where we started or so this is how it looks after
adding the music. So let's just hear the
intro maybe for a 62nd, and I'll show you how
it sounds and looks. You've probably seen
this place before. It's bled in Slovenia. I'll I'll just do full screen. Almost too perfect to be real. A calm lake,
mountains all around, and that little island with a
church right in the middle. We wanted to see it with
our own eyes for ages, and well, we're finally here. But there's one thing about
Blet When I did my research, I read so many comments of
people saying, Don't go. It's too touristic.
Really don't go. Don't waste your time in bled. And I was like, uh. How can we visit Slovenia without
visiting Bled? Today we're going
to test it out. We're going to explore
all around Bled show you the hopefully
hidden gems. Here, I've put a kind of clip from later part of the video just to hype
up the video a bit more. And I'm just put it on top
of the talking head show. And, yeah, you can judge. Is it worth to go or not? And obviously, we are on
a bicycle. Bicycle path. Our day started at the campsite about 6 kilometers away
from the Lake bled. So here, you see on
the bicycle path. I think the audio from the
voice is a little bit loud, so I'll just go a
little bit down. Our day started at the camp site about 6 kilometers away
from the lake bled. Oh, cool pop this
going to BlatToya, this is how it looks
after adding music, and I didn't do
anything special. You can see that here also, I've cut on the beat. Okay. And one thing also
really important, a lot of times I see people
that they kind of eliminate the audio from the
camera originals and they just put the music. In my opinion, it takes away the real feel from the video. So that's why it's
really important, at least in my opinion, that you should keep the music
from the camera originals, but just lower them so
that they are kind of playing in the background
so the audience, they have a little bit of feel that how it felt to be there. We just enjoyed the most delicious Bk Greek
stuff croissants. And then we have a
voiceover and audio here. Our first look at the lake
honestly took our breath away. We were a bit worried it
would be too crowded. And yeah, some spots
were pretty busy. But the path and the walkways
are so spread out that you can still find
those quiet corners and perfect photospots. Do you see? I have
reduced the volume of the camera original
clip because there was a lot of kind of noise from
our shoes rubbing the floor. And that would have
I'll just let it go. Quiet corners and
perfect photospots. You see, it's a
little bit annoying, so I reduced it and
later it came back. And as the volume from our
talking is coming back, I'm kind of reducing the music. So these things editors, they do so quietly
that the viewers they don't even realize that
this is happening. So this is the art what you
have to learn and it just comes with practice and just listening and
listening again and again. So at the moment we decided
to hike up to Mala So here, I didn't do any music because also the thing is that sometimes if you just put too
much music everywhere, everywhere, it kind of takes the real feel from the video. Like, I like my videos
to look beautiful, but I also want them to want my audience to feel like they were
also there, you know? So sometimes it's also just nice to just let the video play without any music and
just the ambient noise from the actual scenario. Nitza viewpoint. It's
about 685 meters high and totally
worth the climb. Oh, it's really fine. But if you think
that everything is going too fast,
you should really, really check out my DaVinci
Resolve master class because there I have explained every
step, everything in detail. And this is for
intermediate people who have watched that
class or who have a bit of knowledge of DaVinci
and who want to have a good workflow of
editing YouTube videos. So anyways, this is how it
looks after adding music, and in the next chapter, we're going to be doing
my favorite part, color grading. So let's go.
8. Color Grading: So once we added the music, now it's time to color grade. So what I usually
did in real life was I did the color grading first because I wanted
to show the text, the voice over text to my wife and she was taking so much time. So I thought, Let's do
color grading first. So that's why it's
here in number two. So you can also do it this way, or you can also do color
grading after adding music. But let's go in the
color grading timeline. Let's start the color grading, so I'll just select this clip, go to color grading here. So let's maybe select this clip. So what I do with color grading an entire project
is that I choose a neutral clip, you know, which has a good brightness
because I feel like there's so much darkness here, like shadows from the clouds. And I think this clip
is nice and bright, quite neutral in
terms of exposure. So first step is to
choose a normal clip, you know, which has
really decent exposure, then you kind of make a general color grade
according to that node, and then you paste that
setting to the entire project, or at least all the
clips from Sony, and then you color
grade, you know, change the exposure, change the wide balance of each clip. It might take a bit of time, but with time, it gets easier. Here, just for this project, I have to do first
color conversion because we have filmed
on Sony a log three. If you have a normal video like where do we have
the iPhone videos, then you don't need to color
grade because they are already on a nice colors, nice picture profile, but here we just have
to do for Sony. So let's take out
let's check this clip, and here we're going to
be color grading on that. We put two nodes
in the beginning. Yeah. And what are
we going to do? We go to ex and then we go to
color space transformation. So I'll just write
transformation, and then we do color space transformation
on both the nodes. If I just select this node. And this is where it's
really important that your color settings in the
venture itself is this. And for Windows users, it should be here
Rex 79 Gamma 2.4. Then this would work. Otherwise,
it's not going to work. So I go here, click
on the first note. Here what we are basically doing is we are bringing
the Sony clip, which is filmed in Slog three, which is kind of
like raw colors. We are bringing them into
the normal picture profile, like how the iPhone
videos are looking. So we go to EX. First
thing is we go Sony Gatt. Three CNA. And here we do Sony as lot three because it
was shot on as Loc three. Here we do the wincihiteGamet, and here we do the Vinci intermediate. Copy
these settings. If you want to know
why we're doing it, I've explained it in my DnchiRsolve class. So
don't worry about that. So I go here, and here the input color space would be the Vinci white gamet. Here would be DaVinci
intermediate, and here would be
Rex seven oh nine, and here would be
re sorry Gamma 2.4. So you see now
that if I disable, just go full screen if I
enable or disable the clip, you can see this was it before, this is after you see how nice colors we have it now, right? So let's keep it here. So this is what we have to
do in all the Sony images. So we're going to be
making more nodes, how do you make node
this option S or Alt S, and this node would be
maybe for white balance. So I can just bring
this up here. This node would be wide balance. This node would be for exposure, which would be so
white balance and exposure would be very
different for every image. We are not going to be
changing any of that now. This can be for colors. And this can be for extra. What we can also do is exposure, we can make another node
called highlight. Yeah. White balance, we are not
going to change exposure, we are not going
to change colors, maybe we can change
the colors to node label saturation and then
extra and then here, maybe we can do a lot. What do we need to do? We need
to maybe put a lot on top. I've also given you
all these lots. Don't worry. This
film standard lots. What I usually do,
I choose a lot ten. And then I can see that
it's a bit too much in my opinion because I want this video to look a
little bit neutral. So what would I do is I would just reduce the
intensity of the lot. So I would go here
and key output to, let's say, for an If a full
screen before and after. There's a bit of change. I still have to do a lot of
things with exposure, but I'm not going
to do that now. I'll just get rid of the clip, so we have a full image here, and this is our master frame, let's say, so we're going to
be changing the saturation. How do you change
the saturation? Not from here, color
boost or not from here, there is a really
professional way. So we go to color
space, you go to HS, then go to color space
again, go to Channels, select Channel one, select
Channel one and three. What did we do here
went to color space, selected HSV, then channel
unchecked one and three. Now what to do, you go to
gain and increase again. You see if I increase again all the way, the color changes. I'm not going to go that crazy. I would maybe until here, so then you can see
that there's a bit of colors in the image, which looks really pretty. So already, if you
go before and after, you can see how much
changes we did. If you selected everything
before and after, you can see how nice it looks. We're going to unselect it. Highlights, we don't
really need it, but what we would be
doing is you go here, selecting highlights, you go
to luminant, you'll like so. So what's going to happen is
anything which is brighter than this would be selected. And if it's selected, then you kind of reduce the
highlight of that area. It would all make sense when
we move to a different clip. So you just do that, just copy everything and you
should be fine. So now we have a basic color
of the entire project. We didn't change anything
with wide balance, nothing with exposure,
nothing with extra. What we did was the
color conversion, which is this and this, and then we did the lot. We increased the saturation
and we did the highlights. And this would be applicable to entire videos all the
videos from Sony. So what are we going
to do? We go right, click, you go grab still. Then we go to galleries, and this is my still
here, what we did. Now what we need to
do, you go to clips, and you need to make
sure that this is on all the Sony images. So my Sony images, they go I'm just
scrolling the mouse. So my Sony images,
they come until here. So I go Shift and
click until here. Then it's on all
the Sony images. You might have also some of
the stock videos in between. So what you need to do to
unselect that, for example, if this was a stock video, you command and click here, command and click here. So just those clips
would be unselected. We just have Sony videos, so now what we're going to do, we're going to be putting
this entire color grade on all the Sony clips. That's why it's also
really important to color the clips as well because then you
know which is from what. I go right click,
I go apply grade. Now all my clips
are color graded. But here I can already see that the sky is a little
bit too much bright. I can do the highlights here. You go to highlight, you
can maybe move this around. You can see that now
it's just selecting the sky and then if I have
to reduce the highlight, you see, I can because we already reduce
the highlights here. But here, we're going to
be changing the exposure. So I can see that these
parades are up here. They have more room
to be going up. Can push them up, not so much, then bring the If down, get a bit of contrast in the image and then
increase the shadows. This is how my image look before exposure, after exposure. And if I just want to copy this to the next clip because
that is the same clip, you just go Command C or
Control C, copy here, Command V or Control
V. We also make changes in highlight E
Command C and command V. This image looks nice, but I feel like it needs a bit more contrast,
like a bit more pop. So I'll reduce down the blacks, and it looks pretty impressive. A reduced on the gamma. So here, the exposure change, what we're doing is in
primary color wheels. So the only thing what
you need to do is the exposure change now or
white balance in some places. I go here, increase again. If you want to
increase the contrast, you just need to
increase again a little bit, reduce the lift. So the brighter areas
become brighter, the darker areas become dark. All these images are the same, I think. Let me show you here. You can see that if I
increase the brightness, everything looks fine,
but I feel that it's a little bit too yellowish. I can reduce the white balance. Change the white
balance, actually. You can go to temperature and
because it's too yellowish, you have to move a bit
more towards the blue. So I move a bit more
towards the blue, and now if you go
before and after, this is before, you can see how yellow it looks this after. And what you can also
do is that if you just want a little preset
from this part, you just go grab still. And because we have three
clips from the coffe, you can select this and go
press Shift and click here. All the three clips are selected
and then go apply grade. And that grade would
be on all these clips. So that's how you color grade. Like how easy it is, right, that you make one base color for the entire project and then you kind of do some sort of changes in all the other clips. Let's say here, I think
here would be really nice. You can push the highlights
a little bit higher. We just need to make
sure nothing is going too far up like
this just until here, and bring the lift down. I can already see that if we
did a bit more saturation, it would also look nice.
I went to saturation. But if you really
want an in depth, look, see how it is before
and after of color grading. But if you really want an in
depth color grading guide, then really check out my
Daventureol master class. I've explained
everything in detail. And now let's colorad
some iPhone videos. So let's go on this video, yeah. So if we go with our,
you know, the clip, what we color graded for Sony, if you just apply grade,
it looks like this. The only problem as white
as looking like this is because we did the color
conversion from Sony. On iPhone video, which
is not a good thing. So we're going to be just
resetting these nodes. Reset this node and
reset this node. So now, the same
kind of color grade, what we have on Sony is on the iPhone clip except
for the color conversion. So if I just select everything
and let's go full screen, let's go full screen
before and after. I also feel that maybe the
saturation is a bit too much. So let's go like so, and then you can
make a separate lot for the iPhone video. So you go grab still, and then we can see that the iPhone video
from here to here, you can select everything
and then apply gray. So it is that easy. But you still have to go on every clip just to make sure that the exposure
and everything is good. That's why I also sometimes
just filming with iPhone videos because the
colors are just so nice. You can also see that the
highlights what we did, we made sure that if anything is clipping
above a certain level, then the highlights would
reduce their brightness. You can see here. If you
check out the clouds, it's a bit of
detail coming back. I can also bring it a little
bit back so you can see, again, just check out the Cloud. This was before, this after. If we see the entire clip, that's for full spring,
this was before and after. I still think that
there might be a room to increase the contrast. I'll increase the contrast here, increase the gain, reduced lift. This I'm a bit exaggerating, increase the sharp saturation. So you see this, I'm a
little bit exaggerating, but I like this look. You can see how nice
and punchy it is. This was before, just a
normal flat iPhone image. Just with few clicks, we
didn't do anything crazy. Like, really just
with few clicks, we have achieved good look, a decent look, at least for YouTube videos and how quickly
it was, how easy it was. So that's really good. And if we also had a stock footage, I think we have it here as well. You can see that we did
the exact same thing on the stock footage as well. If I just go reset all the node, I just copy the iPhone because they're in the
same picture profile. You can see how nice it looks. So, yeah, that's how
I collaborate in the winter resolve when I
am editing YouTube videos. But with color grading is just such a massive thing in the winter resolve
is that there are so many ways to collaborate. There are so many ways to
get that cinematic look. I have taught everything, everything in crazy detail. In my other Dent
resolve classes. So if you're really
interested in collaborating or becoming a good colorist, go check out those classes. This is for anyone who
just want a quick, nice look for their
YouTube videos. And I hope it makes sense. If something doesn't
make sense, please, please let me know in the
comments or just email me with a screenshot of any
project you are working. So what did we do until now? So we took care of all
the color grading. We did the music, we
did the voiceovers. And yeah, we also put some B rolls on the top when
I'm talking about something. And yeah, this is how it looks. But now, now what we're going to be doing
is we're going to be doing some final adjustments
such as noise reduction, stabilization, maybe cutting
and trimming some clips because if I watch it now,
everything looks perfect. If I watch it tomorrow, then I would see
a lot of errors. So that's why it's also
really important that you shouldn't rush into
uploading really quickly. Just watch it the next
day and the next day. And then you would
find those small, small errors which you didn't
see on your first day. So that is really
important. So let's go.
9. Final Touches: So now we are done
with color grading. I kind of colaraded the entire video project
using the exact same method, what I showed you in the
collaborating section. And this is how my
timeline looks like now. So, of course, in the
first line of the video, there's all the videos, and
if I needed some B rolls, that is on the top
of the talking shot. Then here in the audio, I will just change it again because last time I changed it, that was in a
different timeline. So here I would just do Sony. Here is the voiceover, and here is music. And I'll just make
sure that they're all here together. So now
what are we going to do? We're going to be just reviewing the entire video and if I
need to make any changes or if I feel that sometimes if
the sound is a bit weird or any sort of final changes
I would be doing now, and it's really important to do that when you're
editing YouTube videos. Like, sometimes I find
mistakes in the editing in, like, one of the biggest biggest YouTubers
in their video. Like, that would
be for a split of a second, but it's there. So that is just so
unprofessional. So let's just watch
the video and then we can judge
how it's going. You've probably seen
this place before. It's bled in Slovenia. It looks almost too
perfect to be real. A calm lake, mountains all. So I can already
see that there is a little black bar on top of it, bottom and top and bottom. So because this is
a stock footage, it was not in the same
resolution as my timeline, I'll just zoom in a little bit. And I also see that it
can be nice to have a bit of kind of zoom in in all the shots in
the intro especially. So what I would be
doing is I would just set up some key frame. So here I would set
up a keyframe here, which is the Zoom
level this one. And then at the end of the clip, I would zoom in a
little bit more. So then the video
looks like this. So now you can see
there's a slide Zoom. Seen this place before. In this clip as well. So I would do just a keyframe here in the beginning
when I go to the end. So here you have a preview
for the next clip, but I can see that here, the brown clip is selected, which means that we're doing the keyframe changes
in that clip. So don't get confused. Before, it's pled in Slovenia. You see how nice it looks now. So if I have to copy the same setting from
this clip to this clip, what I would be doing is I would just go Command C or Control C, and then I would do option I'm
not going to do Command V, Control V. I would do
option or all three. And then what do I need to copy? What settings I need to copy
is just the Zoom settings. So I would go apply. And now what's going to happen
is the Zoom would be here from this second to this second on
this clip, you know. So because I can already see this clip is a
little bit longer, so you can see that the
Zoom would stop at a point. It looks almost too
perfect to be real. So you see, it's zooming in, but it stops at a point. So we have to make sure that the Zoom is from the
front to the end. Too perfect to be real. You can see it stops there. So if we go to the keyframe, you see here it's a
show keyframe tray. The keyframe tray opens, and you can see there's
a keyframe here, there's a Zoom keyframe
just until here. So I know we are moving
a little bit quickly, but if you're a
little bit confused, just watch this
chapter again and again because these are some
of the final changes I do. So you see I just drag the
keyframe from here to here. Nia It looks almost too perfect
to be real. A calm lake. So here we don't need because there's already so
much movement lake, mountains all around, and that little island
with a church. Here, also, there's so
much right in the middle. We wanted to see it
with our own eyes. Here can be nice because
there's not much movement. So I'll just do Command
C and alter option V. So I think here this clip is also a little
bit longer than this clip. See it with our
own eyes for ages. And well, we're finally here. You see the Zoom stops. And I also want to make
sure that this castle is in the kind of center because I see that I
feel that if I zoom in, it kind of goes
away to the corner. You can see it goes
away to the corner. So I would go here
and try to bring it as much as in the
center as possible. And then I'll open the
key frame because I think the Zoom that still
needs to go here. So if I just watch full screen, we wanted to see it with
our own eyes for ages. And well, we're finally here. But there's one thing about
bled When I did my research, I read so many comments of
people saying, Don't go. It's too I think it's
a bit low. The audio. Turisty. Really don't go. Don't waste your time in bled. And I was like, uh, and what I also hear is that there is a
bit of a background noise, which is a little bit annoying. So if you have the
Vinci studio version, you can use the AI
voice isolation, which is just really crazy thing in the vinci. Let's
just hear again. When I did my research, I read so many
comments of peoples. You see, there is, I
think I don't know, some sort of there's a machine working or something
in the background. So I would be doing
I would select the audio panel of this clip. I would go AI voice
isolation and I would set up the
amount to 11 or 12. When I did my research,
I read It's all. So many commons. So much better. So I would just copy
this whole setting and select these two
clips option V or all. Then what do I need to paste? I don't want to paste the volume because I think the
volume is a bit leveled. I just want to
paste the plug ins. We didn't do anything
changes equalizer. So if I paste the plugins, it's just going to copy
the voice isolation. Explore Around let's show you
the hopefully hidden gems. And yeah, you can judge. Is it worth to go or not? And just when you put
the voice isolation, the computer relax a little bit, but that's not a problem. And obviously, we
are on our bicycles, and you can also cycle
around the entire lake. You see how clear
the audio is now. So really curious about that, that would it be more bicycles or would it be more tourists? On the bicycle path. Our days started at the campsite about six Things a
little bit loud. Bicycle path. Our
days started at the campsite about 6 kilometers
away from the Blake bled. Oh. So I think the music is
as well also a bit loud. Or maybe I have made
the video part. Tire lake. So really
curious about that, that would it be more bicycles or would it be more tourists? On the bicycle path.
Are they started? Maybe I'll increase
the music like this. And then when I start
talking, then I would reduce. Just until here.
So I have placed four dots and line between the two dots,
this I'm reducing. Our day started at the cam site about 6 kilometers
away from them. And this audio, it's
kind of a bit abrupt, so I will just press this
fade in effect here. Cam site, about 6
kilometers away. So I'm not doing anything new. I'm only doing kind of refining the audio and
some of the videos. From the eke bled. Oh. It's really cool by scale. Puff this going to bled.
We're staying a bit out. So we're gonna be doing the same audio AI voice isolation here in both the clips because I see that we were next
to this waterfall, so I'll just go
Command C from here and then all three are option B, and then I'll just
copy the plugin. Side of the blech puff this go. You see this was before? Going to B we're staying a
bit outside of the bled area. I'm not sure if you
can hear the sound in the background, but I do. So, like, a little bit, that means six as. On the campsite, we will put down below where
we are staying, and I can already say we
really recommend staying a little bit there
because then you can enjoy this beautiful
nature round. And you're starting
with this river. I don't know. Like, there are two clips which are kind
of showing the same thing. So I would rather put this clip because that kind of shows
a bit of village vibe. The cam site, about 6 kilometers
away from the lake bled. And then what I would also do is I'll just copy this
move this one here. The lake bled. Ooh.
The lake bled. And this clip also needs
a bit of stabilization. I can see that I did
a stabilization, but I will show you again. So this is without
this stabilization. About 6 kilometers away. A little bit shaky. How
do you do stabilization? I'll just reset it.
You select the clip, go to stabilization
and stabilize. About 6 kilometers away
from the lake bled. Ooh. And then I would just bring
the talking part here, and then I'll reduce
the audio here. It's really co It's really cool basical pop this going to b
we're staying a bit. And I also think that the
music here is not needed. I want people to focus on
what the subject is talking, so I'll just delete the music. Bit outside of this
beautiful nature around. And, starting with this river. And I would just go
option Y or to Y. So which means the whole
thing is selected, and then I'll just
move it to the right. And here, what I can do is that I can just bring the
audio a little bit lower, and I would sort of
what I would do, I would just fade in the audio like this because this
is completely different. In this scene, there's no water. In this, there's water. In
this scene, there's no water. So I want the audio
of the waterfall or the river to come not so abrupt. It this river. Our bicycle trip turned out to be a bit more
adventurous than it though. So let's find an alternative. Remember, I was saying before that you don't need
music all the time. And that's what I
meant that a lot of times when I started editing videos or
making YouTube videos, I would believe that if I don't put music
under everything, the video would
look a bit boring. But a lot of times we actually have people commenting
on our videos that I really like the
entire vibe of the video. I really like the background
noise and the sounds, what you show in the video, I felt like I was there. So yeah, that made me
realize that sometimes it's just also nice to just put a clip which is
nice and peaceful, and that is kind of giving the entire feel of the ambient
of that place. So yeah. Ornative. So I think here also,
I've used stabilization. If I go without
stabilization, stabilize. How the pot of the
right going mirror? So we went to breathe off. So here, when I sing
the right going mirror. When I'm saying, how is the
bicycle ride going Mira, then people don't
really hear it, so I want to put
a subtitle here. Yeah. That's something new. So how do you put a subtitle? Like, I have whatever
thing I'm doing right now, it might be a bit too quick. But if you really want to learn about in depth about
Denture Resolve, really check out my
Dant Resolve class. But if you just want to learn enough to edit a YouTube videos, you're doing it right
now. So don't worry. So if you go to titles and then we go here there
is subtitle somewhere. Yeah, subtitle. So
I'll just put it here. Now, here, how is the
bicycle ride going Mira? So. So I don't think people
can hear when I say, how's the bicycle ride going?
So I will just type it. And I also have a
preset for this. So how can you make a preset? So you go here to track and you can choose
any font you want. You can choose any size spacing. You can choose any
color you want. You can do drop shadow. If you want drop
shadow, no drop shadow, you can choose any
background you want. And then, for example, if I wanted this to be my subtitle font and if
I wanted it to be here, and I would be using that
in all my YouTube videos. Then I would make a pre
set of that so that I don't have to do all these
settings over and over again. So to make a preset for subtitles, what
do you need to do? You go to the three dots
here in the corner, and then you do save
track as a preset. And here you can make
your own subtitle. I have YouTube here. So Lord preset, and this is the subtitle What we
use in all the videos. So we have masculine regular. And in the font case, I do all caps. So even if I have, you know, here mixed caps, here it would be all caps and font and the
shadow and everything, that look just look
that's our choice. So you can choose
anything you want. How is the voice of the
right going mirror? So we went a bit
off track because we have to go to
belt the village. Going up and up and up. Yeah,
and it's just really cute. And I also hear a lot of ambient
noise in the background. I will just do a
voice isolation. And the reason why I
don't go 100 is because I still want people to hear a little bit of
background noise. And Dabnci also makes
it a bit robotic. Tough. Really tough.
It's just like you, Oh, you just have to
get there. Just go. It's not sounding that robotic now, but sometimes it does. But now all the ambient your
heart beat goes it starts. So that's why I kind of
keep it a little bit. Yeah. Maximum I do 20. And it's just really quickly, your energy goino
there's more do we have. So I want to copy this setting on everything, so
I'll just command, C N. Control V on
all the three clips. So option B or A to, and we are just
doing the plug in. Hey. So more cakes. We'll see also the lake
without the clouds. But because I think that
mountain is pretty impressive. Let's do a little
stabilization here. Let's do a little bit clouds. I hope you will see also the
lake without the clouds. Sometimes, what happens is that when you watch it
for the first time, everything is new
for me, as well. So then I kind of keep
it for a bit longer, and then I watch the
video again and again. Then I feel like, No,
it's a bit boring. So then I kind of make it short. And that keeps the video a
bit interesting as well, because we have showed a lot
of cycling clips already, so there's nothing new. This is just showing giving the audience information that
we are going from A to B, and two clips, two
short clips is enough. Now is the time to give more new information
like the cafe. And what I can do I can
do here ripple delete. So just click in the gap, press X, click click
in the gap, press X. But what happens is
that sometimes it wouldn't move everything
now it did everything, you know, but sometimes it wouldn't move this audio
track or this audio track, the wind sheeet doesn't do it. So what I do is that I would
just go to the clip here, you know, the first
clip from the right. And then as I showed you before, I would do go option Y or why. So here we have
reached the viewpoint, and I told the name of the viewpoint in the
video in the voice over, but I don't think it's
that clear because it's a Slovenian name and their
names are a bit difficult. So I would also put the
name of the viewpoint here. So I'll just I went to text and I copied
this basic title. So here I would go to
text here, basic title. The title here, I would just
copy the name of the place. So yeah, that is the
name of the viewpoint. And what I want is I want the same font,
which is masculina. And I just reduce the size. And usually we put
it if you want, you can put it here or we put it here in most of our
YouTube videos. And unfortunately,
for these text, you cannot really make a
preset. That's a bit of bummer. And for drop shadow, what we do is that
I just drop it. So I'm just going to zoom it
here at this point, yeah. So I'm just scrolling the
mouse by pointing here, and I'll just get
rid of the effect. Here now if I want to
move the whole screen up, then I go command and
then scroll the mouse up. Then I have a clear view
of what's happening. Here I would reduce the blur. I would just bring it down
a little bit and offset. You can see what
am I doing here, I'm bringing the offset of I'm bringing the
offset of the shadow. And usually what I do is that I change the color of the
drop shadow to orange. If you want to choose some
other color, you can go here, here, here, or here, here, whatever color
you want to choose. Now if I put it orange, I can see that
it's too far away. Yeah. And now, if I want
to go to normal screen, just press, go on the
screen here and press Z. Now I'll come back with effect, and let's play it again. So now we are at a point where I'm talking about the
camping where we stayed. So if I want to have the
same font and everything, same placement, then
I can just copy the same text box to this place. I want the text box to be
here because here I'm saying. But before we go, let me
show you where we stayed. It's called The reverse Camp. So when I say three
reverse camp and glamping, then the text should come. So I would just click on this text because I know
that's the text box, then I would press Option or Alt and then I would drag it. So that would create a
duplicate text here. So you see, but that's
not Mala Sonia. There's three rivers. So I'm just gonna do it
here so you can see. It's called The rivers. So because the length of the text is a little
bit different, it moved a little
bit to the right. I will just move it to the left. Yeah. Camp and
clamping in Rodoizza. It's such a cozy
little of the trip. We are here in the most famous ice cream shop
in this little town. I got Christie, I'm not putting any music
here because I really feel that if someone has watched the video until now, like, they really enjoy the vibe
of the video and they really enjoy our journey and they feel like they're
traveling with us, so I want to keep that
authenticity still now. So yeah. Grandmother's recipe. Just do the voice
isolation here. And we are almost towards
the end of the video. It's so good. Hope you enjoyed coming along and we'll see you
in the next one. And wherever you want to end, you can just press Oh. So you see my video
reduced 1144-1136. So the more time I watch, the shorter my video becomes. And that's a good thing
because then I kind of take out all the parts which
were not necessary. So right now we are done
with the final checks. In the next section,
I'm going to be showing you how to export a YouTube video to have the best video
quality. So let's go.
10. Best Export Settings: So here we're going to be
moving to the export page. But before that, we need to make sure that this whole
timeline is selected. So if you haven't selected
it, I would press I. So that makes this
point on the timeline, and then I would go to the end. And you know how I'm
zooming in zooming out, with A and S. And
if I go to the end, then I need to press O. For example, if I press O here, the video would be
exported and there would be a black screen here. So I need to make sure that I'm here, ending the video here. This you really need to
make sure that there's not any gap and there's not any gap in between or there are not any gaps
in between the clips. So right now we have
the in and out points selected in the edit page. Now we're going to be moving
on to the Export page. This is the Export page, and for some reason, when
I go to the Export page, my Dawnci takes a
bit of time to load. You see, it's still loading. Maybe because my MacBook
pro is a bit old. It is 5-years-old, but it still works pretty good.
Dawnci works pretty good. I just had to wait
for 15 seconds. You can see again, check again. Here, also, you can
do in and out points, and here you can see it says
render in and out range, or you can do entire timeline, but here we're going to be
doing in and out range. Yeah. So let's show you what
all these things mean. So these are different
different video formats in which you can export a video. They also have a preset
for YouTube video, but I don't really do
it because I want to make sure that I choose the
setting to be exported. So let me choose that. So here we're going to
be naming the video I will just do bled
four K so that I am sure that the video
is four K and I'm telling myself that this is the final render bled is
the name of the place. And then location, you can
just put anywhere you want. What I would do, I go Exports. Then I make a folder called bled and then bled four
K should be saved here. I'll just save here. Render,
you just do single clip, render as you want the entire
video to be a single clip. Then render video, you go
check to the audio and then you should check that
Export Audio is checked, and then you go to
the video again. Then Export Video, QuickTime. Because I'm using Apple, I do Quick Time, you can
choose MP four if you want. I choose QuickTime and Codec. What happens now is that h264 is a codec that gives a little
bit bigger video size. If you choose the codec
Apple Ps that gives the biggest video size and
the best of the best quality. Dot 264 gives a moderate video
size and a decent quality. And h265, that gives the
smallest video size, and the quality is still
decent, but it's good enough. And the thing is that if you export these videos on YouTube, YouTube, they
compress it anyways. So that's why a lot of
videographers or filmmakers, they upload their work on Vmeo because Vmeo never
compresses anything, but YouTube does it anyways. So that's why I export the video in.265 so that the
exported video what I have is of
smallest file size, but still the quality
is really, really good. If I export the video in Apple Progress with the
biggest file size and four K and upload the video on YouTube and same
with SSdoor 265, if I upload both the
videos on YouTube, nobody can tell any difference. So that's why I personally
export the video on SSD 265 and then
timeline resolution. Remember, we chose the
resolution of the video of the timeline as 920 by 1080. If you want to export
in high definition, which is this resolution, you can but I would export it in four k,
which is ultraST. And if you have the paid
the winter result version, then you can export in eight k, which is not really needed. So I just go in ultra SD, which is four K and frame rate, you can do timeline frame rate or you can choose some
other frame rate, but I would just do timeline
frame rate because we have already chosen the frame rate according to how we want it. And then quality, what I do is I restrict the
quality to 50,000. Sometimes if I do automatic, there is some sort of
glitches in my videos. It's really random, but if
I do restrict to 50,000, there's no problem in the video. Rest, I don't change anything. If you don't have any of these settings selected,
do it right now. And then in advanced setting,
I don't do anything. Color space, tag,
same as project. I don't change anything, so really don't
worry about that. So I'll just close the
Advanced video setting. What I do change now
is subtitle setting. So we go Export subtitle. Don't do Export
Subtitle, remember, we made a subtitle here where I said something and it was not really audible
in the camera. So that's what we want it
to be pasted on the video. So when we click
Export subtitle, here it has an option which
says as a separate file, you don't want to do that, we want to burn it in the video, which means that the subtitle would appear as how it is now. And then add to render Q. And at high resolution,
I just click Okay, it's just showing that the
timeline reson was smaller, you're exporting it
four K, blah, blah. Then you go add, and
then you do render all, and then depending on the
capacity of your computer, it's going to render and then we'll see how
long it takes. So now it says, yeah, for four to 5 minutes because we didn't do anything
crazy in this video. Yeah, the video is rendering, and we are almost coming
to the end of the class. And if you have any questions, please let me know
in the description. If you want, you
can also book a one on one session with
me if you have a specific problem
or if you have specific questions
about YouTube because, yes, I am a full time
YouTuber as well. Also a full time videographer. So if you have questions about
anything related to either it's the business
side of the things or is it the skill
side of the thing? You can book a one on
one session with me, or if you have any questions, any doubts, just email me, and I would be really
happy to help you out. And do not forget to check
out the project section. I would really want to watch at least one to
two minute video. Of either this log
or any other flog. It can be really cool to see your personal log videos rather than just watching my
own blog again and again. So yeah, if you have any
videos or in your collection, please apply the same method. And of course, I said in the beginning it
would take you less time, which it would for sure, but you also need
a lot of practice. Like, I have found this method
of editing over the years, I have made it more
efficient, more efficient, depending on how
much time I had, depending on the types
of video I'm editing. Yeah, it takes time, but
if you don't practice, your timing would be the same. The more you practice, it's
going to improve a lot. If you have any questions, leave them down in the
discussion panel, and I'll see you
in the next class.
 Adi Singh, Videographer and Youtuber