Transcripts
1. Introduction: Very often we fast forward
through the process, through the details to
the finished product. But there's so much beauty
in the tiny details in the small actions that we take not only in our
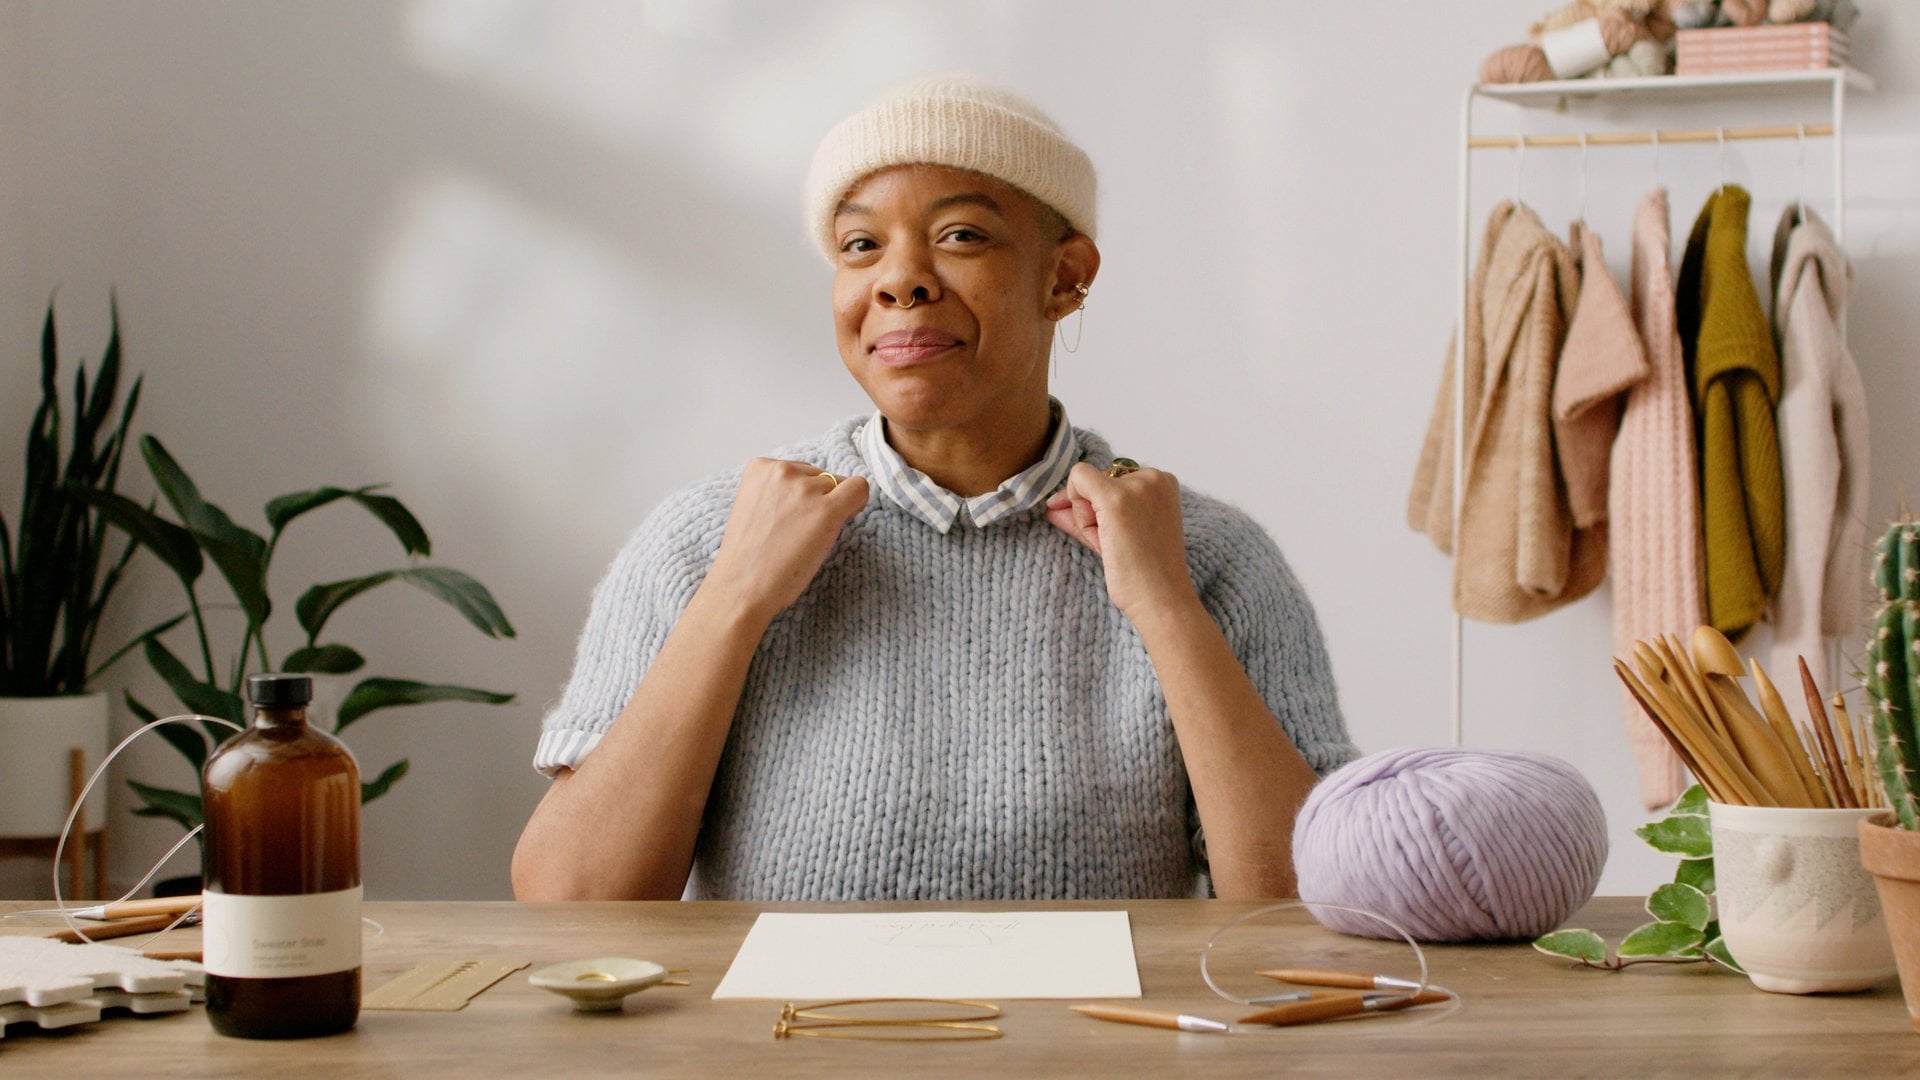
knitting practice, but in our life. I'm Brandi Cheyenne Harper. I made a knitting guide and artists living in
Brooklyn, New York. You might have seen
my name in magazines. You might have seen me on
Instagram dancing on a Real, you might have picked up my
book at your local yarn shop. I want things to look polished, I want things to look neat, and a lot of that lies
in the finishing and how your edges look and
how they come together. I'm really excited to share
those techniques because I've spent so much of
my career figuring out how to get those really
beautiful neat edges that also look really modern
and really simple. Today we're going to start
with a slip stitch edge, which is really
beginner friendly edge. Then we're going to look
at the I-chord edging. We're going to look
at I-cord cast on, I-cord selvedge,
I-cord bind off. Then we're going to look
at tubular cast on, tubular bind off, and then we're
going to dive into the knit hem and
the knit bind off. This class is really perfect
for beginners who are just learning how to maybe
knit scarves or blankets, or really simple hats, and you're looking for level of great knitting to
separate your work from like that homemade work
to their handmade work. Time to get rid of those ragged
edges. Let's get started.
2. Getting Started: To get started, you
don't really need much, just a willingness
to mess up and a few tools that you already
have in your stash. I want to encourage
you to use what you have to work through
these swatches. Grab the worksheet down in
the class resources page, and just follow along. Some basic tools you're
definitely going to need, which you might
need to purchase, is a crochet hook. We're going to use
a crochet hook to learn a provisional cast on that will help us create
I-cord cast on edge. You definitely want to use the same crochet
hook millimeter size as your knitting needle. Let's say you know
you want to use US 15 knitting needles as
your main swatching needle, then you want a 10
millimeter crochet hook as a compliment to your 10
millimeter US 15 needles. If you want to swatch with a US 6 for a millimeter needle, then you're going to want a
four millimeter crochet hook, which I believe is a G. Then you're going to need
some double pointed needles because we definitely need specifically double
pointed needles for the I-cord cast
on to make an I-cord. You're going to learn a lot
with these two needles here. Same thing, if you're using a US 15 needle for your
main body of your swatch, for your I-cord cast on, you want maybe to grab some
US 15 double pointed needles. I personally never use
straight needles ever. Straight needles are
basically knitting needles that have a little
stopper at the end, is the traditional needles
that you see people just knitting on the train and they're swinging
their arms about. I don't use those
needles at all. I don't even have a pair. I always use circular needles. If I'm going to knit
a scarf or a blanket, I use circular needles often because they're just
more versatile. I could spend $20 on
a pair of needles. It's an investment
for some of us. I can use these needles
so many different ways. If you have to pick
up a pair of needles, I would say pick up a
circular and a size that's really common in
knitting it's US 6, US 8, US 10.5, and US 15. Some of your most
commonly used needles and I will get maybe
a 16 and circular, 24 and circular have those handy or trick
needles if you prefer. You're also going to
need some little bundles of yarn, you don't need a lot. Grab your scrap,
use what you have. I will break into any new balls to swatch these techniques. This is about just
practicing and getting some little samples for
your future reference. Then I have a tapestry
needle for weaving it ends, and also sewing a really simple
seam for I-cord bind off, which we're going to need that, and a pair of scissors. This is basically all
you need to get started. Grab some scrap yarn,
grab some needles, grab the class worksheet down in the resource
panel below. I'll see you in the next lesson, the slip stitch edge.
3. Slip Stitch Edge: First we're going to learn
a really basic edge. It's the slip stitch edge, and I love this salvage
edge that you can add to the last stitch of every row or the first
stitch of every row. It's so beautiful when
combined with garter stitch. This is garter stitch, is the stitch you'll learn
when you learn how to knit. It's knitting all your stitches, knitting all your rows when
you're knitting a flat scarf. Garter stitch can
sometimes look really loose on the edge
is very subtle, but we can get rid
of that looseness in a really simple way. I'm going to show you, this is a really basic scarf with
that slip stitch edge. I want to give you just
another way to look at it, but you can see how it
looks really tight. If I stretch it, it
doesn't stretch anymore. It just looks really
good. It's very clean. I want to show you how to go about creating this
really beautiful, neat edge on garter
stitch specifically, especially if you're
a new knitter. This is going to help neaten up your scarves, your blankets, your towels, and tighten
things up a little bit. I have cast it on nine stitches. I'm using some double
pointed needles to swatch. You can use circular needles, you can use straight needles, you can use whatever you
like for this specific edge, I'm just going to use my
double pointed needles. Garter stitch is knit every
row, knit every stitch. When you are knitting
your first row, your foundation row is just
going to be a basic knit row. I'm just going to go ahead
and knit my first row. I like nine stitches, because this is not
a gauge swatch. This is about practicing
my edges so you can use any number of
stitches that works for you. I'm using nine because
it fits perfectly on my double pointed
needles and it's enough where I can see it and I get a good feel for what
it's going to look like in a larger piece. I have my first row works. Now to incorporate
this edge into an existing pattern or
into your own design work, you're going to want to
slip the first stitch of every single row knit wise. If I were just to knit this row and just keep garter stitch just
with no special edge, this is what that first
stitch will look like. I would go into my stitch, I knit it, and then I knit
the next stitch like that. It will look
something like this. If I just knit it like
I normally would. I'm going to go ahead
and take that out, I'm going to show you
what that looks like when I slip that stitch instead. Instead of knitting
it, I'm going to slip that stitch knit wise. What that means is you want
to move the switch over to your right-hand needle as
if you were going to knit. You put your needle into
your stitch as if to knit, but don't knit it,
just slip it off. Then every single time you
slip that first stitch, pull it nice and taut, because we really want to
create that really beautiful, neat salvage edge on
this garter stitch. Then I'm going to knit until I get to my end of
my round and now slip the first
stitch of that row. I'm going to knit just
about maybe an inch or two here so that you can really
see what that looks like. Your first knit always
going to look a little loose and that's okay because once we slip
that first stitch, we're going to pull that tight and then we'll just knit
to the end of the row. You can really incorporate this edge in so many
different ways. I particularly love this way of slipping the edge when
it comes to garter stitch. There's other ways
to slip stitches, but this is my preferred
method for garter stitch. Just going to do
a few more rows, we get a nice little
swatch to show you. Now this is a very
subtle change. The difference really
depend on you and how tight or loose you knit,
but it's noticeable. The difference between
regular garter stitch edges and slip stitch garter edges. I'm just going to
knit just quickly. Here we go. That is
a slip stitch edge. So simple, very
beginner friendly. If you knit your first scarfs today and you're like my
edges are looking wobbly, they're looking not cute, try to slip stitch edge.
Is going to neaten it up. is going to tighten it up. It's because we're not knitting, we're basically getting rid of 50% of the rows on that edge. Can remember, we're
not knitting it, we're just moving it over. That's why it's tighter on the edge than it is
in the body of the work, and why it looks really neat and why it looks really tight, because we're
literally just getting rid of one of the
rows on the edge. If that makes sense to you, hopefully you'll
be able to see it manifest when you
practice your own swatch. Go ahead, cast on a few stitches and practice
your slip stitch edge. I'll see you in the next class
where we're going to talk about the I-cord cast on.
4. I Cord: Cast On: Next, we're going to learn
the I-chord Cast On. Now, I absolutely
adore this cast on. It takes a lot of
effort to start, but it's just beautiful. It's this really
incredible edge down here. This is where this piece begins. This is a piece I called
the shock collar. It's a pattern that's
available on my website. But what I love so
much about it is that I'm able to create this
really incredible cast on. It looks really
finished, really clean. Then I can transition seamlessly into this
beautiful I call, salvage, which is
our next lesson. But first I'm going to
teach you how to do the I-chord cast on. We're going to begin with
our provisional cast on. What you need is just
some scrap yarn, some yarn that you
can throw away after and your crochet hook. I'm going to make a slipknot, which is a very
beginner-friendly technique. Most of us learn how to make a slipknot when we
learn how to knit, or when we learn how to crochet. Then we want to chain a few stitches because
we're going to pick up stitches from our chain. I have my tail, I'm
going to throw that to the side and I'm going to wrap the yarn around my hook. I'm just going to
use my right hand to pull my crochet hook
and let it move easily between those two
loops I have on the hook. I'm going to use my thumb and my index finger to
control my slipknot, to really have some control
over this technique. Then you'll use
your hook to pull a loop through the loop on
your hook, just like that. That is one chain stitch. If you're new to crochet, this is like learning
how to cast on, so it might take some practice. I'm going to wrap my yarn around and I'm going to pull
through another loop. You see how I'm using
my right hand to guide my hook through
and bring it through. It's from this little
provisional chain stitch, I'm going to pick
up stitches from this chain and I'm going
to make an I-chord. It's really fun and that's
a whole new technique, it's the second one
we're going to learn. Now that I have my three
chains stitches because I want to make an I-chord
that's three stitches long, I'm all set to go. I just changed a few
more for good measure. I only really need three
because I want to make a three-stitch I-chord to
build my cast on from. Once I have my chain, I'm going to just cut
how much tail I need. You just want to
give yourself like 8 to 10 inches of tail. Just enough so that
it doesn't unravel. Then I'm just going
to pull it up. I have my chain all ready to go. This is where you're going to use your double-pointed needles and your main color
or your main yarn. I'm going to grab
enough to get started. Then this is the
front of your chain, and this is the
back of your chain. We're going to pick
up stitches In the back loops of our crochet chains and we
want to pick up three. I'm going to begin
at my slipknot end, so it's over here and
work my way down. This is my first loop. This is my second loop. This is my third loop. I will say, if you accidentally pick up
in another place, it does make things
a little more difficult in the
end, you'll see why. Just try your best to identify what those
back loops look like. I'm going to show you a trick. So here's my back loop. If I want to make sure that
that's actually my backup, I'm going to flip
it to the side. What you want to see is
this V. It's your actual, the front of your chain. If that's obstructed in any way, then you know you're picking
up in the wrong place. This really very much
looks like a knit stitch. Once I've located my back loop, I'm going to bring my
needle underneath the loop, going to give myself
about 8 inches of tail. I'm just going to begin picking up stitches
in my back loop. Now if you've never
picked up stitches, this is a new technique. What you're going to
do, is you're going to wrap your yarn around your needle and
you just going to pull a loop underneath your chain and you've picked up
in it, one stitch. I'm going to do
that two more times for a total of three stitches. I'll go underneath my back loop. I'll wrap the yarn around and
I'll pull the yarn through. I knit continental. I just wanted to show you
what it will look like if you knit English and you
throw with your right hand. I'm going to take my needle, go to put it under my back loop, going to wrap that yarn around, then I'm going to pull
that loop through. I'm wrapping my yarn around
as if I were knitting. Pickup a knit is
what this is called. I look at my core. I can easily identify
all three of my chain stitches
here and I'm all set. To make an I-chord, what you're going to do is
you're going to push this through so just to the
other end of your needle, what you're going to
find is your tail is over on the left-hand side, right over here, and that's
exactly what you want. Then I'm going to get my other needle and I'm going to knit those three stitches from my left-hand needle to
my right-hand needle. You're going to see your
yarn is pulling behind. We're going to knit
those three stitches. I'm back at the end
of this needle. Now I'm going to
repeat that step. I'm going to push my three stitches to the
other tip of my needle. I'm going to knit those three
stitches and you can see. Look how I was pulling from
behind, is what you want. Knitting at I-chord is basically
knitting in the round. Because look how we're
connecting our last stitch together with our first
stitch in our needle. It's like a little
chord. It's really cool. I want to cast on nine stitches. I'm just going to keep
on going until I have a nice long I-chord. You're going to
knit your chord for as long as you want it to be. Your pattern will specify how
many rows you need to knit. If you need to count your roles, each little v counts as one row. I have 10 rows. Perfect. The next thing is we're actually going to
cast on our stitches. We're going to pick up
stitches from my I-chord. You want to pick up stitches in the top half of
your first stitch. Now to identify where that is, this is my first stitch, I need to look back here to identify because I want
to pick up stitches. I want to pick up
the top half of this first stitch
and to access it I have to go from behind my yarn. This is where I want
to pick up and that's the top half of
this first stitch. Once I identify that first loop, I'm going to insert my
needle underneath that loop, wrap the yarn around, and pull up a loop through. I'm going to keep on doing that. Here's my next loop. Here's my next one. I'm going to do a few
just so you can really see what that's supposed to
look like on the right side. This is considered
the right side, although it can be whatever
you want it to be, but generally in my patterns, we'll make this the
right side because it looks really nice
and really clean. What you should see is, here's my third stitch. Look how it was completely
unobstructed here. When you look at your
thirst, this is one, two, three, it's completely
unobstructed. If forever reason you make a mistake and you pick up
maybe in the wrong place, you'll be able to see
it really clearly here. You might not necessarily
know exactly what went wrong, but you'll know
something went wrong, in which case, you can always just take it out, back out and rip it
out and start again. I'm going to go ahead
and just pick up all of my stitches until I get to the last two
rows of my I-chord. Here's one row, here's another. The reason why you
want to get to those last two rows is because you're going
to actually lose those two rows when you remove your provisional cast on and you're going to see
what I mean right now. We want that beautiful
three stitches on our salvage edge. When I say salvage edge, I'm talking about edges
that are right at the border of a knitted garment. I want to have that same beautiful edge that I have on this side, on this side. That's why we started with
the provisional cast on. So to take it all, I'm going to just,
here's the loop. Here's my last loop. Here's my yarn. If you pull it, you'll be
able to see it's moving. I'm going to take that out. Then I'm just going
to pull it out. When you get to this point, you're going to find
that you have to un-weave the scrap yarn, which is why it's helpful to use a contrasting colors
so you can easily just pull out your loops. Be gentle here don't make any fast movements because you don't want to
drop your stitches. It can happen. It happens
to me. It's possible. If you are gently
working with your edges, you won't lose them, but it can happen. It will sometimes. The key now is to get those
three stitches on the needle. See how the yarn is coming
out of this last stitch, I like to pull that. It's completely optional. You do not have to do this. You can put these stitches on the needle with that there, but I personally
like to remove it. But if you're nervous about dropping stitches or something, you don't have to do it. I'm going to pull that
tail to the back. I have my working yarn. I'm going to bring my
working yarn to the front. Then I'm going to place those
stitches on the needle. I'm going to tell you
in the next lesson, why we're bringing that yarn to the front and you'll see why. I want to put these stitches on the needle with the
pro side facing. Now, you can't really easily
see pro-stitches here. Pro-stitches are basically
stitches that have a little bump at the
bottom of the stitch. I know that this
is my pearl side, and I could use that as my guide to putting the other
stitches on the needle. It's easy to show you this. I'm just going to show
you this instead of rather than talk you through it. To get your stitches
on the needle, you're going to bring
your yarn to the front. Then I'm going to start
with this first stitch. I'm going to put
it on my needle. I want to put it on, let's see, like that. I'm going to gently get
my tail out of my way. I'm going to go from behind. We're going from behind to pick the stitch up because
we want to make sure that it's not twisted. Then the same thing is going to happen with this last stitch. Figuring out how to get this last stitch on the
needle can be a little confusing if knitting
is very new to you. But basically, what you
want to do is you want to put the needle in
such a way that you have a little cross
at the bottom of the stitch and then you're all set up to transition
into your salvage edge. This is the I-cord cast on. I absolutely love it. Takes a lot of work
as you can see. This is worth the effort. Go ahead and grab
some scrap yarn, grab your crochet hook,
practice the I-chord cast on, and meet me in the next lesson, where I'm going to
show you how to transition from the I-chord cast on into the I-chord
salvage edge.
5. I Cord: Selvedge: We've just learned
our I-Cord cast on and now we're
going to figure out how to transition seamlessly
into I-Cord salvage. The I-Cord cast on
pretty much sets us up with three stitches on each end to work at I-Cord selvage and I love how beautiful the transition is. In order to work
the I-Cord selvage, I'm going to knit the
first three stitches of every row and slip the last three stitches of every row with
the yarn in front. That's why when we're
doing the I-Cord cast on. We need it to have this yarn in front because it will set us up for our first row where we're just
going to knit three. This is a very basic
beginner friendly stitch for your edge. I'm going to work garter stitch, so I'm just going to
knit till I get to my last three stitches
with my yarn in front. I'm just going to
bring my yarn right to the front and I'm going to slip those three
stitches pro wise. I'm slipping it pro wise, meaning going down in front as if I were to parole
because I'm going to make sure I don't twist those stitches and I'm going to keep them in the correct orientation. I'm slipping them over and
I have my yarn in front. I'm going to turn, and I'm going to
repeat that same row, knitting the first three
stitches of every row. You can work whatever
pattern around this selvage. I'm just going to knit
every single row, every single stitch between
my I-Cord selvage and just slip the last three
stitches of my row. That's going to work this
really quickly until I get a nice little sample to show you what it's supposed
to look like. Now, the one thing to keep in mind when you're working
to selvage edges, it takes an inch or two
to really see it form. One of the most commonly
asked questions or concerns and
interests have with this edge is that they
don't see it yet. It's because it
takes a little bit a while to really see it. When you look at it here, you're like, I
don't say anything. It looks terrible. Give it a few rows. Another one is people
will say, well, it looks loose to
tighten up this edge and you find that
it's really loose and it's not coming
together for you. Knit the first stitch and then pull that stitch really tight. What you'll see is like the yarn will tighten
back there for you. Remember, we're
basically knitting in the round on our edge. You can knit that first
stitch really tight. It'll help to bring the cord
together a lot tighter. Then I can repeat
that same thing that too the last three
or work your stitch pattern as instructed
in your pattern till you get to your
last three stitches. Let's do two more rows
and I think you'll be able to really see how
beautifully it comes together. If you wanted to incorporate the selvage into an
existing pattern, you need an additional
4-6 stitches. You can work the I-Cord
selvage edge with two stitches on each end or
three stitches on each end. You can technically do as
many stitches as you like, but then it won't be a cord. If you add four stitches, it's not going to look
like a rounded cord, not with two stitches either, but with two stitches,
it just looks really finished, really refined. I wouldn't go
anywhere above four, but I generally
use two to three. I say additional
stitches because the I-Cord cast on you
can see it doesn't add. It adds sometimes
maybe a quarter of an inch to your fabric. If your patterns says
you need 100 stitches, I would add an additional
four or six stitches to make it 104, 106. Then I'd work my I-Cord selvage. I wouldn't necessarily try and incorporate my
I-Cord selvage into an existing hundred stitches because you want
to make sure that your piece is big
enough and that you're following your pattern
as closely as possible. I-Cord selvages don't
contribute significantly to the width so much
that it's going to make it enormous and
it can't fit you, but it can really
shrink your piece in a way that makes your
piece too small, if that makes sense. I'm going to go
ahead and just knit one or maybe two more rows. I think you'll be able to
see what it looks like. I'm going to end with
a right side row. The right side row can be
whatever you want it to be. I personally like this as my right side row
versus this side. Where my tail is my wrong side, according to me,
you get to decide. But this is my right side. I'm going to end with
a right side row and I think I'm in a good
place to stop. This is what you're
going to see. It's just so
beautiful. I love it. You're going to see
your I-Cord cast on. You're going to see
that beautiful edge. Look at how it comes together. It is so seamless. You really start to
see it come together. You see it took me into two to really see
it come together. When I look at it on the
other side, same thing. I think it just looks really
good. It looks really neat. When I look at this, I'm like, I don't want to call
it knit-picky knitter, but anything like
that where I see any looseness and
I'm again knit. It doesn't look even
across the board. I will manually tighten them up so that it's more symmetrical because maybe I was distracted or maybe I knit really loose at that point
and that happens sometimes. I'm just going to move some of that looseness into other
areas not necessary. But if you're like me, then you want to
find a solution for that and there is your solution. Now we're all set. One thing I do want to
show you is this is a very small I-Cord selvage on a yarn that's on
a US-aid needle. You can see this is on
stock in that stitch. Stock in the stitch has
a tendency to curl. I just wanted to show you that this technique will suddenly stop your edges from curling. The bigger the yarn, it will literally get rid
of the curl altogether. The smaller the yarn you can see it's still curl in a little bit, but it's so beautiful and it turns out to be
like a really nice, neat cord, especially if
you're using a smaller yarn. Something that really have
fun with if you're using like a sport or a worse the weight yarn selvage
that are great to add to your existing patterns
and scarves and accessories. So go ahead and practice your I-Cord selvage and
meet me in the next lesson, where I'll show you how
to do the I-Cord bind off
6. I Cord: Bind Off: It's time to learn
the I-Chord Bind Off. Now, the I-Chord Bind
Off is basically the opposite of the
I-Chord Cast on, at least in the
way that it looks. I will introduce an I-Chord
Bind Off out of the blue. I wouldn't have some other edge and then I'm going to say, I'm going to use the
I-Chord Bind Off. I always use the
I-Chord Bind Off as a decorative finish
to an I-Chord salvage, but you can play around with it, see what you like. I personally don't
like the way it looks. Let's say I'm
knitting a scarf and I'm knitting all of my stitches. All of a sudden I'm like, you know what, I'm
just going to do the I-Chord Bind Off the edges and the way
it comes together, it doesn't look finished. This class is all
about beautiful, clean, modern, almost
invisible edges. I recommend transitioning out of salvage into I-Chord Bind Off. I'm going to do that. I'm going to knit the first
two stitches of my row. Then I'm going to
slip the next stitch, my last stitch of my
I-Chord as if to knit. Going to go and net wise, which means just like that. Then I'm going to drop
it off the needle. Then I'm going to
knit my next stitch. Then I'm going to spass the
slip stitch over like that. I've just bounced
off one stitch. In order to bind
off my next one, you're going to
take your stitches from your right-hand needle and move them back to your
left-hand needle. Now you want to do
this as if to parol, meaning in front this way, if you try and take them off this way is going to
twist the stitches. You want to go in from left to right into the front of the
stitch and move them over. Then I'm going to repeat
that same row again. Going to knit the
first two stitches. Going to slip the next
stitch as if to net, net one past the
slip stitch over. I'm going to take my
left hand needle, go from left to right and then drop that stitch over the
top of my right-hand needle, being careful not to drop
everything, it can happen. Drop that loop off the left-hand needle and I'll be left with
that one stitch. I'm going to repeat that row until I get to my
last three stitches. Then I'm going to
show you how to join those II core edges together really beautifully,
very seamlessly. I'm going to just
move these back over to my left-hand needle. It two, slip one, knit one, pass slip stitch over. In that look like I split
my yarn their happens when you're dealing with
really plied yarn, meaning yarn that has
multiple strands held together or loosely spun yarn. This yarn is supposed
to be careful. You're going to see it really
starts to come together on your right side, you see it really curve in
and starts to come off. What I'm going to do
is I'm just going to finish it off until I get to my last three stitches
and move a little faster. Now that we are at our
last three stitches, how are we going to
join this together? Now, I'm going to preface this technique with
a little caution. We're going to use a technique
called Kitchener stitch. This is an intermediate to an experienced seeming technique that is well worth
the effort to learn. You're never going
to memorize it after the first two
or three times. It took me years to memorize it and that
was after frequent use. But I'm going to show you
why it's so beautiful. We're going to go ahead and cut ourselves about 10 ages of tail. We want to give ourselves
enough to solve the stitches together and
enough to weave in our end. Kitchener stitches
basically knitting with a tapestry needle. I love it. It's so nice. What you're going to do
is you're going to have your wrong sides facing you. You're wrong sides for this
technique is your pro side. It's these rows here, your net sides where you see the braid it looks
are your right side. I'm going to make it so that my prosite are facing
each other like that. You can see my net sides
on both sides like that. You might knits here and
I see my knits here. I'm going to thread my needle. The first thing I want
to do is I want to join the first two stitches together, the one on the back needle and the one on the front needle. The first stitch I'm
going to go into, I'm going to go in as if to pro and leave it on my needle. I'm going to go into the
stitch on the back needle. I'm going to go into
that one as if to knit and leave it on the needle. I'm going to go into
this first stitch again as if to knit and
drop it off the needle. Set up my second stitch, go into it as if to Pearl. Then I'm going to go
into the backstitch a second time as
of two pro drop it off the needle and get my next stitch started going
into it as of to knit. Second stitch on this
needle as if to knit. Get my next stitch
started as of to pro. Go into this next stitch a
second time as if to pro. This next stitch, get it
started as if to knit. Then into this last it a second time as if
to knit drop it off the needle into this back stitch a second time as of to pro and drop
it off the needle. I have that memorized now like that motion of as if to knit
as if to pro drop it off. That's something that took, that took me some
time to memorize. I would say anytime you need
to work Kitchener stitch, revisit this little lesson. It's not the easiest technique
for sure because not as intuitive as a lot
of other techniques, but the finishes just
incredible. It's worth it. Now that I have taken my
stitches off my needle, you're going to look like
that looks terrible. I need to tighten it up. I'm just going to just look and see where it's loose and
I'm going to pull it tight. You can do this
as you're working your stitches off the needle. But I personally like to go in after the fact and
knit in and out manually with my tapestry needle and it's going to just
tighten it up here. Take your time. Find out
where the looseness says, find out where it's
giving and just pull. This little extra details, make a huge difference. We could take just a few
minutes to appreciate what feels like the tediousness of what I'm doing right now. I just know that I'll look
at it later and said, I did that and I took
my time. It looks good. I'm going to just go
ahead and quickly move this tail to the
wrong side because I want to weave this end on the wrong side of my
work right now is landing on my right
side of my work. In order to move that behind, going to thread my needle, and then just drop that tail
end somewhere back there. It doesn't really
matter just as close to the tail as possible. That is the I-Chord Bind Off. You might say, well
pretty, it's not really perfectly shaped. [LAUGHTER] Looking off. It generally will
look like this. The magic happens when
you block this swatch, when you block the scarf, when you block this blanket, if you incorporate II chord edges all the way
around the piece, knowing that there's a lot of
room to stretch into pool. When I watched this and I
take it out of the water, if I want to be more square. I'm going to go ahead and just manually create
that square look. Already you see
how much there is. You see I have so much power to make changes after the fact. There we go. You can shape it as you like. You can have it be a
little more square, you can have it be a little more rounded and that's
something that you're going to maneuver and
you're blocking process. Go ahead and practice
your I-Chord Bind Off. In the next lesson, we're going to tackle
the tubular casts on
7. Tubular: Cast on: Now it's time to tackle
the tubular cast-on. Top three techniques
in all of knitting, this is in my top three. I love this cast-on so much. What it creates is
this really beautiful, rounded edge, very clean,
very professional-looking. This is a sweater
that I designed in collaboration with Purl Soho, and I started it with
the tubular cast-on. A few things to know about tubular cast-on, it isn't easy. I rarely say this about many techniques because I think I don't want to scare people, but I would say
go into this with the expectation that
you're going to rip it out three times before you get it, just accept it, and know
that once you do get it, it's going to look gorgeous. The first thing you
need is just some yarn, it doesn't matter
what yearn you use, the one thing that does matter is the needle size you use. This cast-on consists of three steps: Getting your
loops on the needle, then there are two
following foundation rows. I recommend for
those three steps, you use two sizes smaller than your main needle
moving forward. If you were using a US
8 for your main body and your pattern or you want to incorporate the tubular
cast-on into your work, you're going to want to use US 6 at least because this
cast-on does have a tendency to spread and
flare and you want to combat that by making it
tighter than your main stitch. The first thing we're
going to do is we're going to grab
ourselves a long tail. There are many different
methods to the tubular cast-on, this is one. I like it because it's
like one and done. There are other methods that
take a little more prep, this one is a little more
complicated-looking, but it's actually
a little quicker. I need at least three
times the length of the piece I'm going to
knit in terms of my tail. Let's say I want
to make a swatch that's about this big so I need about three times the length of the little square
I want to make, and I'm going to give myself
about 10 inches more. If you're making an eight
scarf and you're like, how much tail do I need? You're going to need at least
24 inches of tail plus, I would say give yourself
an additional 10 inches, so you're going to
need about 34 inches to incorporate the tubular cast-on into your scarf project; three times the length of
the piece you want in it. Once you have your long tail, you want to have your
long tail in the back, and you're going to have
your ball yarn in the front. I'm going to set up my fingers, use it like a C as if I'm
going to touch my eyes here, and I'm going to separate one end of the yarn with my thumb and the
other with my index. With my other three fingers, I'm going to hold both strands. I want to use my index finger to secure this loop
on the needle. You can make a slip knot, I personally don't use
slip knots often in my cast-ons because it's one element of bulk I don't need and I
can get rid of it, so this is a way of doing
it without the slip knot. I am going to then bring my needle down and remember securing it
with your index finger, so this loop doesn't fall off. You're going to go up
the loop on your thumb, around the loop on your index, and then under the
loop on your thumb, and that's how you
create what is called a knit stitch in the
tubular cast-on, okay, that's a knit. Then we're going to
make a purl stitch. You're going to start doing
the opposite direction. You're going to start
with your index finger, you are going to go from behind, you're going to go in
front of your thumb, and then underneath your index. That's how you create your
purl loop on your needle. What you'll see is
what looks like a twisted knit and we're going to take care of that
in the following row, and you're going to have
what looks like a purl, and you'll see this little loop forming at the bottom
of the stitch. That is a purl stitch. Now, I'm going to
do another knit. In front of the thumb, around the index, under the sun. To create my purl, from behind an index, in front of the thumb,
underneath the index. Now, that might not
make any sense to you, like what I'm saying. Let me go ahead and be quiet
for a second [LAUGHTER] and show you a few just
to watch on your own. I'm going to work one knit, one purl, one knit, one purl. That's something to
keep in mind with the tubular cast-on, is that is a knit one, purl one foundation that you're creating for that
first initial row. The first stitch, for me, is considered a purl because
the second one is a knit. It's purl, knit, purl, knit, purl. I'm going to work a knit
for my next stitch, so it's 1, 2, 3, to purl, it's 1, 2, 3. I'm going to keep on
doing that until I have as many stitches I want. I'm going to work an
odd number of stitches, so I'm ending and beginning
with a purl stitch, but you can work
these two stitches together however you like. You can start with a knit
and end with a knit, you could start with
a purl and a purl. I would focus on
just practicing, understanding how the knit is created and then how the purl is created because then
you'll be able to start and begin in
any way you like, as long as you know
how they're created. Just go ahead and follow
the swatch instructions I have in the Resources panel, a little worksheet I call edges and practice it until
you feel good about it. Then if you still don't
feel good about it, it's very natural, [LAUGHTER] you'll get
it like the 100th time. I'm being so serious. It's worth it, but it does take a little bit of effort
at first, admittedly. I'm just going to keep on going. I'm going to do one
knit and then one purl. I just ended with a purl, and I feel good about that. You can see my tail yarn is in their front and my
ball yarn is in the back, and that's what you want to see. I'm going to turn
around and I'll already be locked in and ready to go
to start my foundation row. You'll see your
ball yarn will wrap behind and underneath your tail and you'll be ready to go. For the first foundation row, you're going to
knit in the back of all your knits and
slip all your purls, and this is what
that looks like. I'm going to knit in the
back of this loop here. At first, it is always a
little loose so you can pull your tail and
it'll tighten it up. With your yarn in front, you're going to slip your purls, and you're going to
slip them as if two purls so that they don't twist, meaning going down in
front of your stitch. Then I'm going to bring
my yarn to the back, I'm going to knit
in the back loop, and then slip with the
yarn in front of my purl. You're going to repeat
those two steps until you get to
the last stitch. Back loop, slip,
back loop, slip. Then when you get
to your last loop, it's going to look really wild. It looks so loose,
it's totally okay. You're going to knit into the front loop like
you normally would. You're going to knit
your last stitch but through the front loop, it's how you would
normally knit anyway, you're going to knit
that last stitch. That locks it in. This is what your first foundation row is
going to look like. Once you tighten up that tail, it's just going to
look so beautiful. You're going to see your knit and you're going
to see what looks like little purls down
here at the bottom. The final step is the
last foundation row. How you work your
salvage edge like this very first stitch really depends on their pattern
or what you like. I personally like to
slip that first stitch knit-wise and
incorporate the slip stitch edge at the
beginning of my tubular cast-on because I think it resembles a
purl stitch to me, and when I slip it, it just
looks really nice and tight, but it's really up to you. I'm going to slip that first
stitch edge as if to knit, pull it on, and then I'm
going to knit my knits, and again, slip my purls. But this time, I
could just knit my stitches like I normally
would through the front loop. I'm going to slip this
next stitch as if to purl, knit this next stitch, slip this stitch as if to purl, knit this next stitch, and just repeat those
two steps until I get to my last stitch. I slip my purl knit, and because I want to keep my slip stitch
salvage edge going, I am going to knit
that last loop. I personally love to purl that stitch because I think
it just looks really nice. [LAUGHTER] But it's
up to you, again, how you want to end and
begin your tubular cast-on, it really depends on you,
it depends on your pattern, but I like the end
it the first stitch with a slip stitch edge and the last stitch
with a purl one. That is the tubular cast-on. I absolutely love it. I like to transition
into one-by-one rib, into brioche stitch, into garter stitch, into
stockinette stitch. This edge looks beautiful on
so many different stitches. Incorporate it as you like. The one thing to keep
in mind if you're incorporating this
into your pattern, use whatever needles you want, I just recommend using two sizes smaller than your main needle, and at this point,
I would change to my larger needles here. Go ahead and practice
your tubular cast-on at least three times and then meet me in the
next lesson where we're going to learn
the tubular bind-off.
8. Tubular: Bind off: Now we're going to learn
the tubular bind off. Now, you can see I've worked a little bit
of a swatch here. That tubular cast on is
just looking so fantastic. It looks great on both sides. I'm going to show you how to
work the tubular bind off, working the first stitch as a knit stitch even though the first stitch
is a purl stitch. It will make sense in a second. I need three times the length
of the piece I want to sew. It's going to be 1, 2, 3. Plus I'm going to
give myself 8-10 inches more for good measure. You can never get it back, but you can always cut it away. I am going to thread
my tapestry needle. We want to begin with a knit
stitch for this bind off. If your first stitch
isn't a knit stitch, the way you would
make that happen, and you want to
keep the formation, I want to make this
the first stitch. What I'm going to do is I'm going to take my
tapestry needle, I'm going to go into that
second stitch together with the first stitch
at the same time, and I'm going to pull both of
those loops off the needle. What you're going to see is
that first stitch will hide behind the knit stitch that we wanted to be
the first stitch. The next stitch we're going
to go into is a purl stitch. We're going to go into
that stitch knit-wise. We're going to keep
it on the needle. I went to my next
stitch as if to knit. Now, I have to find a way to connect my first
knit stitch with this knit stitch so that it comes together so
beautifully this way. You see? The tubular cast on and a tubular bind off are very similar in the way
that they look, except the bind off doesn't
require any foundation roads. You could just literally just go in and start binding off. I'm going to go into
my last knit stitch, that left leg of the stitch. This stitch has two-halves. Here's the right side, here's the left side. I'm going to go into that
stitch from right to left, and I'm just going to pick it
up with my tapestry needle. Then I'm going to go
into my next knit stitch as if to purl, and I'm going to pull
the loop through. Then I'm going to go
back to my purl stitch. I'm going to go into
it as if to purl, and I'm going to
drop that stitch off the needle and pull it through. I'm going to go into this
next stitch as if to knit, and drop it off the needle. Then begin my next stitch, and go into it as if to knit. The key to a successful
tubular bind off is knowing this, you have to go into a stitch twice before it's
officially bound off. If you go into a
stitch one time, it's not officially
bound off yet, you have to go into it twice. Another thing to remember is, the first time you go into
your purl stitch every time, you're going to go into
as if to knit always. That's something easy to
remember is like, okay, if I see a purl the
first time I go into it, it's going to be a knit always. When I go into a knit stitch, the first time I go into it, it's always going to be a purl. It's the opposite, always. The second time I
go into my purl, it's going to be a purl, always. The second time I go
into a knit stitch, I'm going to go into
it knit wise, always. Once you get those
patterns memorized, you'll find that tubular
bind off is so easy for you. Let's see how that looks when we have those
notes in mind. I went into it the first time. What do we do when we go into a purl stitch the first time? We go into it knit wise. The second time is
going to be a purl. I've gone into it knit
wise, boom, it's great. Now I have to take
care of joining this last knit stitch with
this next next stitch. You go into the left
half of the stitch, and then you're going to go into that next knit stitch for the first time as if to purl, and you're going to
keep it on the needle. I'm going to go into that
stitch for the second time, it's a purl, as if to purl. These little notes
are in the worksheet, so hopefully you're
following along and it's making a little
more sense to you. I've dropped that off because I've went into it twice already. Then I'm going to drop
off my knit stitch, and get my purl stitch started. You're always going to go
into a stitch one time and then move away from it, then come back to it a
second time, it's bound off. You'll start to see a flow. Now I've gone to my purl for the first
time as if to knit, so I have to go back
and take care of joining these two
knits together. I'm going to go into that left leg as if to purl
from right to left, and then into that first
knit as if to purl, pull it through, and
back into my purl, drop it off the needle. For these last
couple of stitches, I'm going to be quiet and I'm going to just
let you watch it. You're going to treat that last stitch like all the stitches. You want to go into it twice. It's a purl. What I'm going
to do is I'm going to go into that last knit stitch
just like that. There's no knit stitch neighboring it to
connect it with, so the way you finish this off is you're going to end your
purl like you normally would. You went into it
knit the first time, as the rule says. I'm going to go into this a
second time as if to purl, and I'm going to bind it off. Pull my yarn through. This is what it's
going to look like. I'm going to go ahead
like I do normally. In most of my projects, is I'll go and neat up
anything that looks off to me for whatever reason, the cat jumped on me. I don't have cats, but cats
love jumping on people, especially when they
have yarn in their hand. [LAUGHTER] For this, I'm just going to dip it
into the back so I could weave it into my
wrong side at some point. When I'm ready to get rid of it, anything that looks off, I can use my tapestry
needle to neaten up. This is what you're
going to see. When I look at this, I love it, I know that it has
so much stretch. Tubular bind off does
have a little stretch. If that's something that
you're worried about, you can work your last two rows with a smaller
needle size so that those last two rows are really a lot more tighter than
what this looks like. But it's such a
beautiful finish. If you have to
revisit this video, definitely, I encourage
you to do so. It does take some time to learn. It can be confusing, you will mess up, and it's okay. Go ahead and practice
your tubular bind off. I'll see you in the next lesson where we're going to
learn the knit hem.
9. Knit Hem: Cast On: Now we'll learn the
knit hem cast on. It's such a beautiful cast on. It is really is. I use it often in my work. It's pretty much
like a mainstay in a lot of my designs
especially my hat patterns, because I love a
really simple hat with a really simple brim, something that I
could roll up and have a lot of fun with, nothing that is going
to stand out too much, but has its own unique style. I like hats like
this that are just basic stocking that
stitch hats with a really simple trend and the knit hem does such
a beautiful job to get these really clean edges
on stocking that stitch. This is what the knit hem
looks like when I'm just knitting just a few rows
before I join the hem. The knitted hem is basically
stocking that stitch folded in half and joined
to create a simple scene. There are a lot of
different ways to do this, and I'm going to show
you my favorite way that creates a really
seamless join. This is the knitted hem
but a much bigger version, it's a huge hem. You can also just
create a small core, it just depends on how
many rows of stocking in that stitch unit before
you fold it in half. The method I'm going
to show you creates a seam that looks like this. It just looks really
clean, just so beautiful. Let's go ahead and
learn the knitted hem. We're going to do the
little small hem and what we need is to cast on. I'm going to cast
on 10 stitches just to show this technique. I like to begin with a long tail cast on because it creates a really defined edge that makes joining your
seam much easier. Now you can use whatever
cast on you like that's a really basic simple cast
on but I like the long tail. I'm just going to quickly
get 10 stitches on my needle using that preferred
method of mine. Once I have 10 stitches on my needle I'm
just going to work three rows of stocking next stitch starting
with a purl row. I'm going to purl one row, then knit one row
then purl one row, and then I'll be
ready to join my hem. I have my 10 stitches here, I'm going to purl a row, knit a row, purl a
row, knit a row. Now if you're like, well, I want to do a wide brim, knit as many rows as you like and join whenever
you feel like it. Wonderful. I did that method and I created a wide brim for my hair bun beanie pattern which you can grab
from my website, also my easy beanie pattern, also self-published pattern
I have on my website. If these are patterns
that you're like, I want to try the
knitted hem and start with brandies
patterns, we can do that. Here I am, I'm at my last row I'm just going to
go ahead and purl it and they can work this same technique if you were knitting
in the round, so you would just
knit three rows to get stuck in that stitch
in the round and then you can work you're joining row in the same way I'm
going to show you right now. To join the hem we
want to connect this cast on edge to these
live stitches on the needle. The way we're going
to do that is, we're going to take the first stitch and
we're just going to slip it off the
needle as if to knit, meaning we're just
going to drop it off the needle like that. I'd like to just pull
that first stitch tight. Then we want to pick up a stitch from this
edge down here. Now this is a little confusing at first and
it's completely okay. I'm going to take my needle, I'm going to bring it from
behind and I'm going to pick up the cast on edge
of my first stitch. When I trail my finger down, my cast on edge for my
first stitch is somewhere over here. Maybe this is it. That looks like it
because this is my second stitch and it
corresponds to this loop. My first stitch's loop looks to be here and so
I'm going to grab it. I'm going to bring it up from behind and I'm going to place
it on my left hand needle. Now that I have it on my
needle I'm going to knit it and then I'm going to
pass the slip stitch over. I'm going to take my left
hand needle from left to right and then drop
it off the tip of my needle here and
that would join those two stitches
together, just like that. Now that first stitch
is going to look a little suspect because
the edge is really raw. Expect this edge to look a little row at
first but once you join them all together
is not going to be really crazy noticeable, especially if you're
working in the round, you're not going
to see this edge. Then I'm going to
repeat that technique again and again until all
my stitches are bound. Let me show you a
few ways to do that because it can take time because of how much dexterity it takes to move your
needle behind your work. I'm slipping this
first stitch as if to knit and then I'm going to go from behind into
the cast on edge. This is my second stitch so
when I trail my finger down, I know that this is the
loop I want to pick up. I'm going to pick
it up from behind, put it on my needle, knit it then pass the
slip stitch over, and I have two stitches joined. I'm going to show you a
way maybe to speed it up because that's
the way I teach it. It isn't necessarily
the way I do it. I could do it faster and
I'm going to show you that way because why not? You might want to
wait to speed it up. I'll slip my next stitch
as if I want to knit, same thing, but then when
I pick up this stitch, I'm just going to go ahead
and knit it right away. I'm going to pick
it up from behind, I'm not going to put it
on the left hand needle, I'm just going to
knit it from here, like that, and then pass
the slip stitch over. It's just one less thing. Now when I'm really
trying to get it done, I'll even skip an
additional step, I'll slip it as if
I normally would, I'll go from behind pick it up, but then I'll go into
both stitches at the same time and then
I'll knit them together. It's the same exact thing. You can see how you
can gradually graduate from slipping it, picking it up, placing it on the left
hand needle, knitting it, then passing the slip stitch over to potentially slipping it, picking it up from behind
like I showed you, and then going into
both stitches at the same time and
knitting them together. Whatever makes the
most sense for you, do it and keep on practicing. Now we're going to finish
off our last two stitches. I'm going to show you this
because it could look a little like what is
happening there. I'm going to slip that stitch
like I normally would. I know that I'm going to go
directly but low that stitch. Here is my next loop. I'm going to go from behind and I will say
this feels tight now. Watch this stitch
trying to fall off. This stitch is just
waiting to fly. Be careful of it because
it will come off, it has happened
to me many times. I'm going to try
and secure it with my thumb so that it doesn't slide off. Just be aware of it. Then I'm going to pick
up my bottom loop place it on my left hand needle, knit it, and then pass the slip stitch over and then at my last stitch, I'm going to slip it. This one is not always
so easy to see you. Might have to do something like this
where you're twisting, you are like, where do I go? It's quite possible. What you're going to do is, I'm going to look and say, this looks like a good
loop to pick up into. This is where you
can really fudge. Knitting is called fudging, is called making something work. Even though it seems
like it can't, you just going to fudge
it and make it happen. I think this is the loop that looks
like a good one to me. I'm going to pick it up up, and this is where you maneuver. The way I would do it is I would take my left hand needle, I'll go into that bottom
loop and then I would knit it and then pass that
last slip stitch over. That is your knitted hem. I adore this hem. Let me knit one row so you can really see what
it looks like. This is what it looks like on the wrong side or
the right side, depends on what
you're working with. In order to cooperate the
knitted hem into your pattern, you can add as many
rows as you like. You can make it a big bream, you can make it a small
little rounded edge. One thing to keep in
mind is I recommend you go down at least two
needle sizes to work this hem. If you're using a US 10, I will recommend using a
US 8 for the knitted hem, and know that it's
designed to be tight. If you're like, wow, it
feels incredibly tight, I can't stand it, look
how much it stretches. You want to account for that. You want to think about that. It stretches a lot and it's why you want to
use a tighter needle. I want you to practice
your knitted hem, follow the instructions in the worksheet, do
something small, do something simple and I'll
see you in the next lesson where we'll learn the
knit hem bind off.
10. Knit Hem: Bind Off: Now it's time to learn
the knit hem bind-off. I have my knit hem cast on here, and so I want to end with
a knit hem bind-off to compliment my swatch
and to practice. I have just some raw edges here. Depending on your pattern, depending on what your
favorite salvage edges are that might be trimmed
in a certain way. For the purposes of this
class and this swatch, I just wanted to show you
what it will look like to do the knitted hem if you were just working with plain
stock in that stitch. This is an example of
what it looks like. This is the knit hem
cast on down here and this is the knit
hem bind-off down here as well as the sleeves. The knit hem bind-off
is also the stitch I'm using for the end
of my sweater here. I love it. You can see how
clean and beautiful it looks. It's very simple. It's not rolling, it's
not totally out there. It really does blends
in really nicely with most stitches and
with your wardrobe. That's why I like
it. The knit hem is all about stock
and net stitch. The right side is the net side. I'm going to end with a knit
row and I'm going to sew my seam on the
wrong side of Rome. I want my cast on to
look like my bind-off. I have three rows and then
I joined on the fourth row. I want to fold this down so that I have
three rows and then I'm joining these live
stitches just to my fourth row in the same
way I did my cast on. But again, you can vote this down like this and create
a knitted hem bind-off. But I want to
replicate my cashflow. I'm going to identify
what my fourth row is, mark it off with a
lifeline so I can have a really good guide to
sewing this seam together. A lifeline is basically
like a little placeholder. It's like a this is what you
want to keep your eye on. I'm going to show you how
to create one of those. You're going to thread
your scrap yarn and I like to use a contrast in
color, something bright, something to really distinguish
it from the main color and I'm going to
count four rows down. It is much easier
to count one stitch in than it is to count the
edge stitch because I mean, look at that. That's
really hard to see. I see it, but if you
are a new knitter, that's going to be
difficult for you to count. I would say start
with counting down, beginning with the
second stitch. Each loop is one room. This is one row, right below the
stitch is one row, two rows is the next loop down three-year-olds and
this is the fourth row. I want to mark this entire row across with
my lifeline ad that will mark my sewing line
where I'm going to join the live stitches to
the inside of my swatch. I'm going to go ahead and go in from behind on
my first stitch, and just make sure again, I'm marking them right stitch 1, 2, 3, 4 and we're going to pull that scrap yarn through
the first stitch on my edge and then over
the second stitch, marking my fourth row. It's going to look
something like this. When I count it down again, I have 1, 2, 3, 4. Everything above
this line is my hem. When I fold it down, my hem is going to be above this lifeline and I can later
take it out when I'm ready. Then I'm going to continue
to weave this lifeline. Every other stitch, this
is one stitch right here. One full loop is a pearl stitch. It takes time to learn
how to read your work. If you don't see that
yet, that's okay. Just know that one loop
is one pro stitch, in the same way that 1V on
the right side is one stitch. The opposite of that is one
pearl loop is one stitch. I'm going to continue to
weave my lifeline in and out. Again, you might want
to check because sometimes it's very easy to get distracted and dropped down a row and not even realize it. Just keep your eye
that you're on the correct sewing line and if you have to count down one, two, three, four, knowing that your lifeline is right below that fourth row, then that's what you have to do. Anything you want, you
don't have to do anything. [LAUGHTER] This is
what I recommend. Here's my last stitch
and then boom, I have my lifeline in place. Time to sew my seam down. I need three times the
length of the piece. I'm going to sew, I'm
going to one, two, three. Give myself about eight
inches of tail [NOISE], thread my tapestry needle, and I'm going to join my first stitch to my inside
of my swatch. Now, this can be a little hard to see at first
because it's the edge. I see it clearly. If you don't, that's okay. This is how you identify it. Here's your lifeline. I'm going to want to pick
up right above my lifeline. That's for the second stitch. I'm going to try
and identify what stitches right next to this
one on my first stitch. I'm like, okay, here
it is here and it looks like the first stitch
on that row is right here. If I want to confirm that, I can count down how many rows. Here's one, here's two, here's three, here's four. [LAUGHTER] It's hard
to see on the edge, but with practice you'll get it. I pulled that through. You're going to go into
your first stitch knit wise and you're just going
to drop it off the needle. That will join that first stitch to the inside of your swatch. Then you're going to go
into the next stitch, right below the next page on the needle, which
is right here, right above my lifeline and then I'll go into my
next stitch as if to knit, drop it off the needle
and then pull my tail through to join that stitch
to the inside of the swatch. You can pull on it, try not to pull it
too tight though. You don't want your hand to buckle and I'm going
to keep on going. The next stitch is not
marked by the lifeline, but I know here it is. The next loop is
going to be this one. Now, if you're like Brandy, what if I don't want
to use a lifeline? This is what it's
going to look like. This would be the
next loop here. That's the next stage
and then this one, then this one, then this
one, and then that one. With a more experience,
I won't need a lifeline, you'll be able to work your seem really easily, really quickly. I'm going to go ahead and I'm going to pick up
a loop for my swatch, go into those, stepped
on a neural net wise, drop it off, and pull it tight. You're going to see is going to come together so beautifully there and I'm really
excited to take the lifeline so you can really
see how it joins together. These last two stitches, this is what it's
going to look like. Here's my lifeline. I know I want to go
directly above my lifeline. That's my next stitch. I go into message on a needle, drop it off and then here
we go again with that edge, which again, you
know, just it's okay. It won't be the end of
the world who go into a place that's not what
is considered correct. But let's go for it anyway. Let's see what we can do. I'm going to put it
here, right here. Because it's right
above my lifeline, is right on the edge and
that's looking good to me. I'm going to go
ahead and just go into that lasted as if to knit. I'm going to pull it
tight and that will join that last stitch to the
inside of your swatch. Now once you're done, you can just take the lifeline
and just pull it out. If you're incorporating
a knitted hem on your in an existing pattern and it's just a lot of stitches, I would recommend just cutting the lifeline of several places. It's easier to take out from different sides
instead of like trying to run one piece of
yarn through 100 stitches, cut it up and just take
it out where you can. That is the knitted him. Let's see what it looks
like on the right side. That's why I love so much
about this technique. You cannot see the
seam on either side. Now when I look at this, this ad, again, this is
why I love salvage edges. This is a raw [LAUGHTER]. I don't particularly love it. I would trim this somehow. I don't know with the guarded slip stitch
edge, I don't know, but this is all about
the knitted hems, and it's always going
to look a little messy. This is what edges do. They look a little dangly, a little raggedy for
swatches, perfect. For garment, I play
around with it. If you look at your swatch
and you're like, yeah, my hem is looking
a little busted, try and bring it down
on either sides, but also know that it's
going to really relax and the wash and if you want it
to give it an extra bit, a nice finishing, you can
steam it with an iron. I like to steam over
a pillowcase or a paper towel because
it's clean as white and sanitary and it won't damage
the colors of my fabric. But that's something
to keep in mind. Go ahead and practice your
knitted hem, have a ball. It's one of my favorites
and if you want to incorporate these techniques
into your own work, go ahead and do it, swatch
it beforehand though, and have fun with it.
11. Final Thoughts: We learned so many edges today. I am really so proud of you and excited for us and to
see y'all incorporate, these techniques into your work. It really is going
to change the game. You've made your edges just
a little less raggedy, and you're going
to make them even less raggedy as you
perfect these techniques. We covered slip-stitch edge, we covered tubular techniques, I-cord techniques, knitted
hems. We have options. So go ahead, practice
your favorite techniques. Try it with little bundles
in your stash first, so you don't have to make
any big commitments, and then create yourself a little edge dictionary and apply them to your
work in the future. When you feel inspired, when you feel inclined
to neaten them up, tighten them up, and let
me know how it goes. Definitely share your
in-progress work in the project gallery below, and drop any questions or thoughts you have in
the discussion panel, we can support each other. And I'll see you
in the next class.
 Brandi Cheyenne Harper