Transcripts
1. Class Introduction: Finding your own style easy? No. But will you find it? If you don't give up? Yes. Burgeo I'm Dona. I'm a Filipino French
artist in Spain. With no artistic background, and struggles were real in
all aspects as an artist, including finding my own style. The world is full of amazing art and it's easy to lose
your own identity. So in this class, I'm going to share to you
a lot of tips on how to become better at throwing
and finding your own style. I'm also going to share
to you my struggles, challenges, and how you
can overcome them too. I'm still learning
just like you. So I'm super excited
to invite you in this class so that we can
share and paint together. This class was created
to suit all levels. It's short but comfort and fun. If you want to improve at
rowing and find your own style, this is the first step. So
2. Materials: Hello, everyone. Welcome
to the material part, and thank you so
much for joining me. The paper, we have a six 50% watercolor paper from Space Vietnam,
is a local brand. It's a cold press and
it's very nice to work with and it's easy to use
and also very absorbent. All the materials are made available for you to
download in PDF files. Mixing palate, and this is amis, and I like the
shape because it's practical to use while
filming and of course, very easy to carry on. Palate. It's a bit catastrophic,
but I like it. This is the warm and cool
watercolor paints that I have, and you also have the list of the materials for the
paint on your PDF files. The pencil. This one is
castle and actually, you can use any
normal pencil that you have as long as
it's well pointed and sharpened when you're using
them and stab black ink pen. This is for the lines that we're going to use
for the illustration. This is not waterproof. The brushes, brush
number two and zero. That's the cheap brush
that we're going to use. Of course, your bucket of
water and your tissue paper, of course, please feel free to explore the materials
that you have already. So let's get to the painting
and sketching part.
3. Cat Sketch & Getting Better at Drawing: Thank you so much for
joining me in this class. Welcome, and I'm so
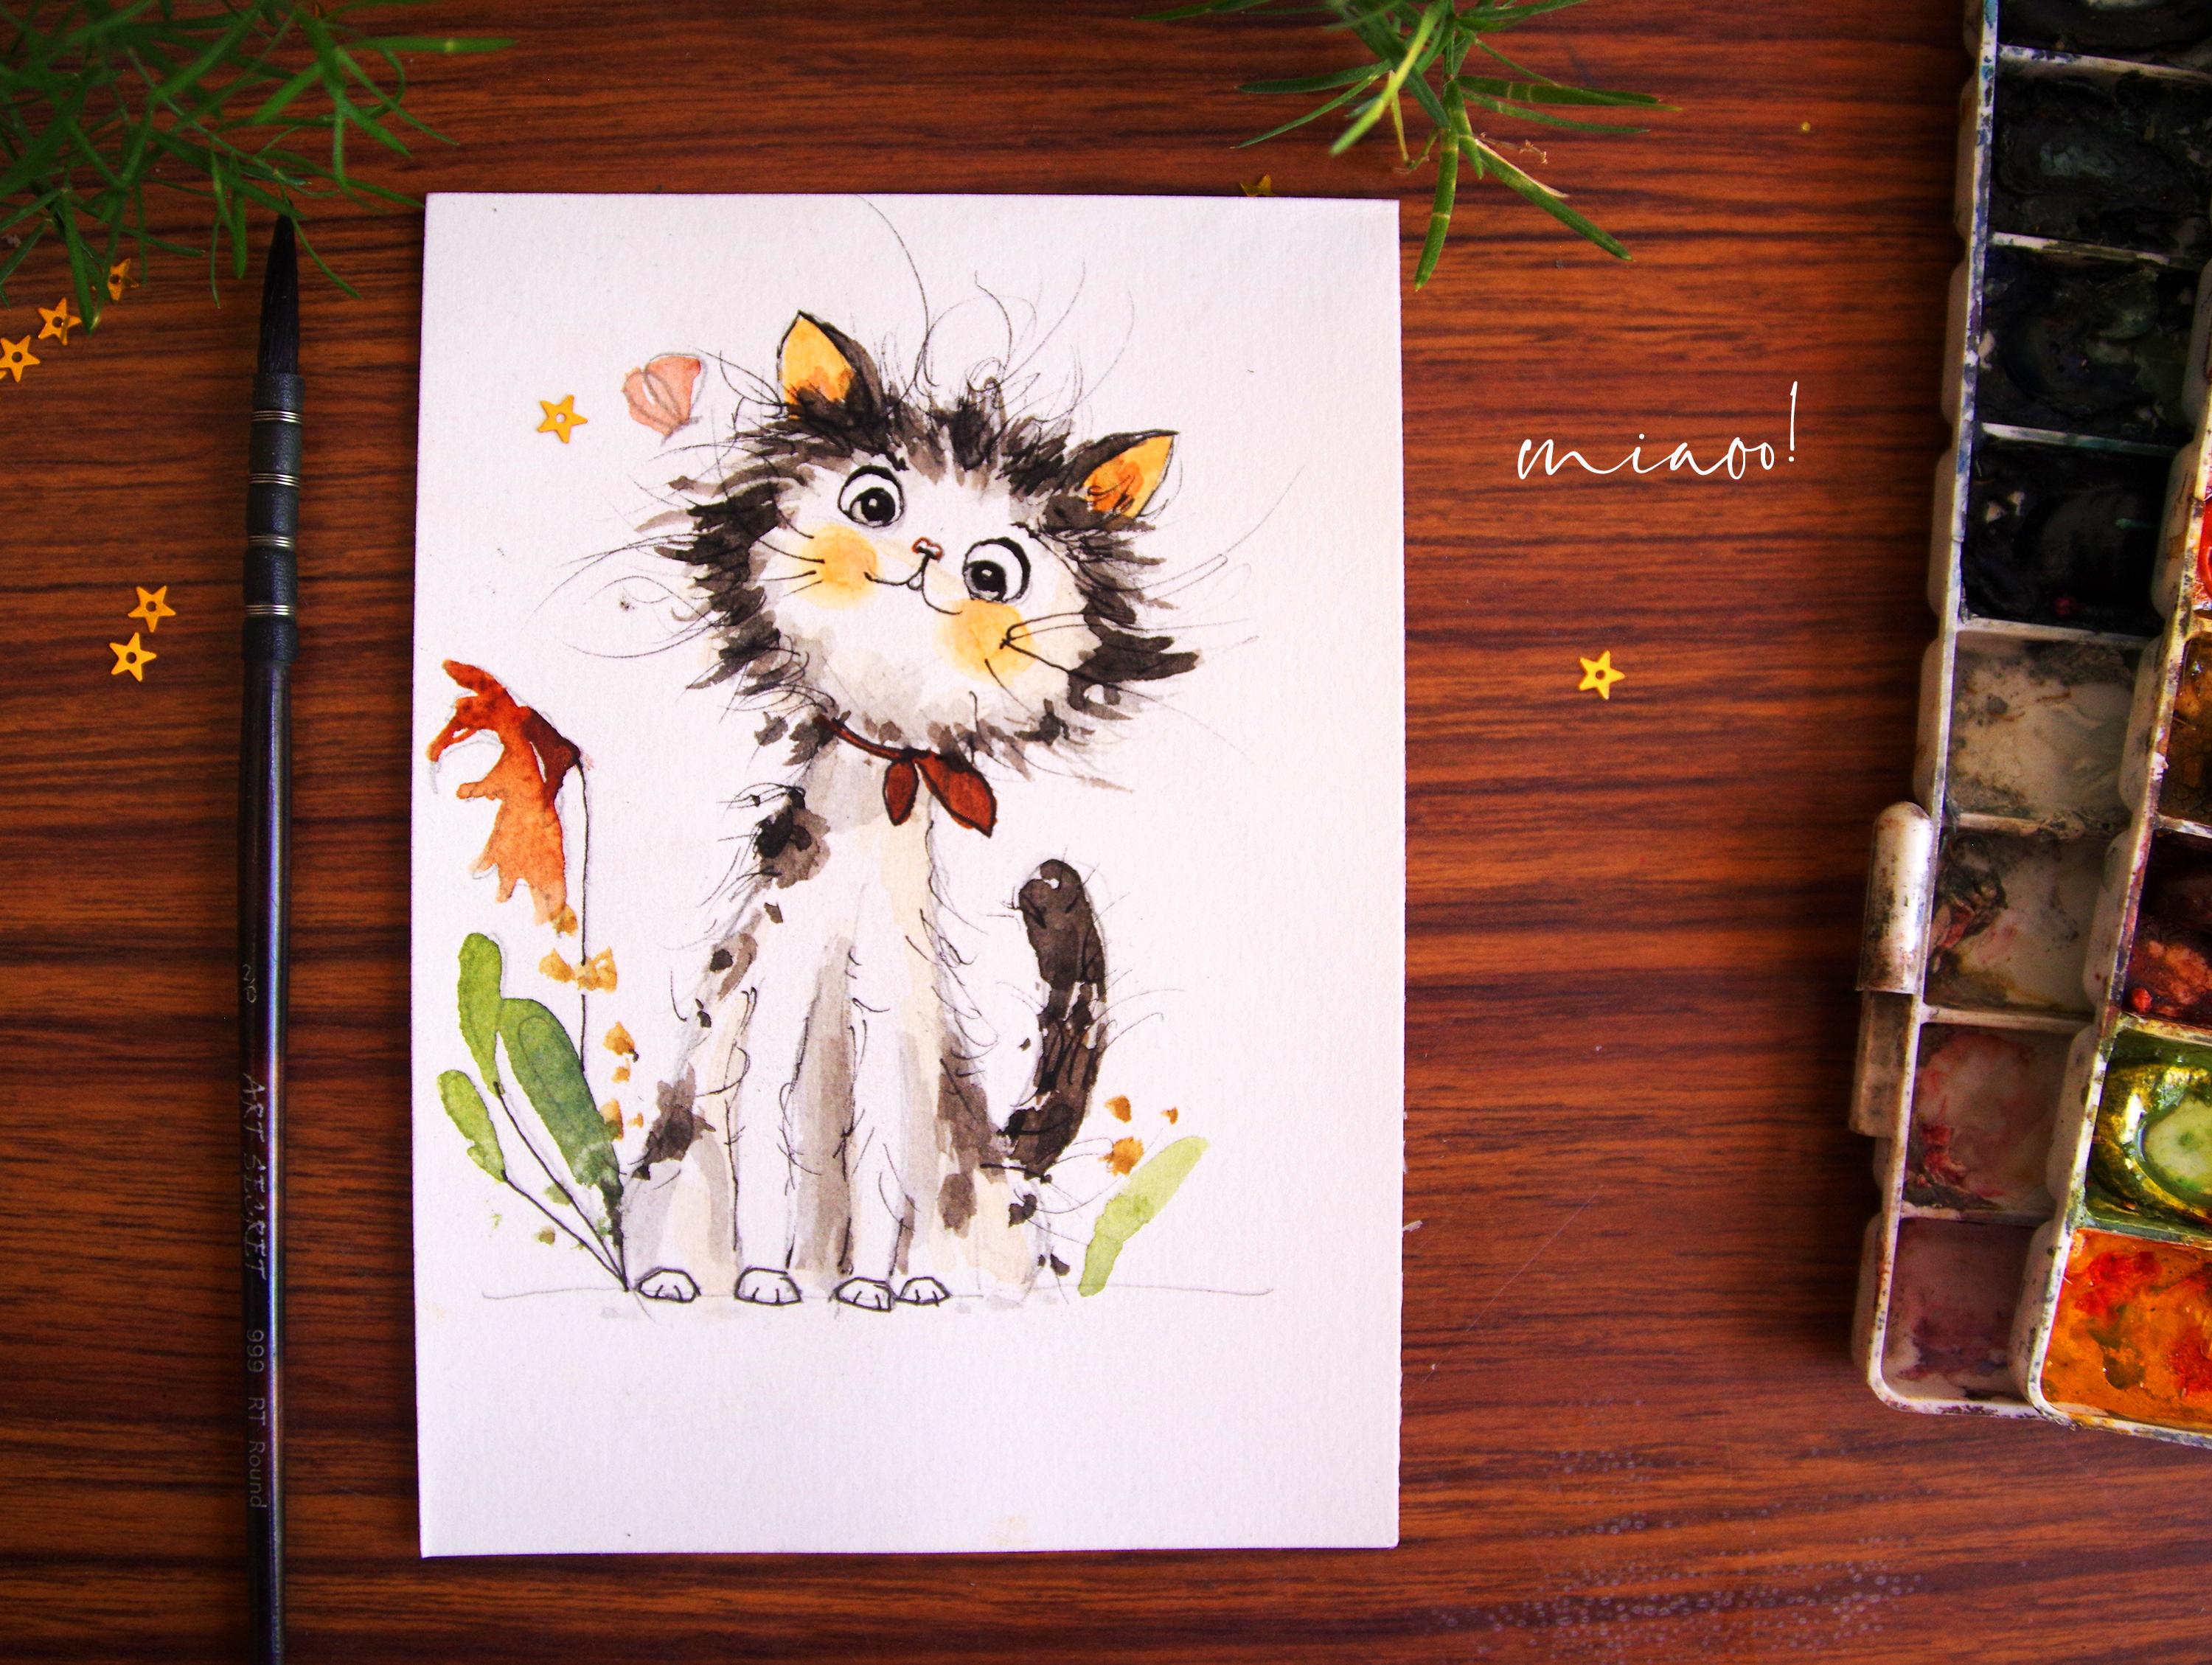
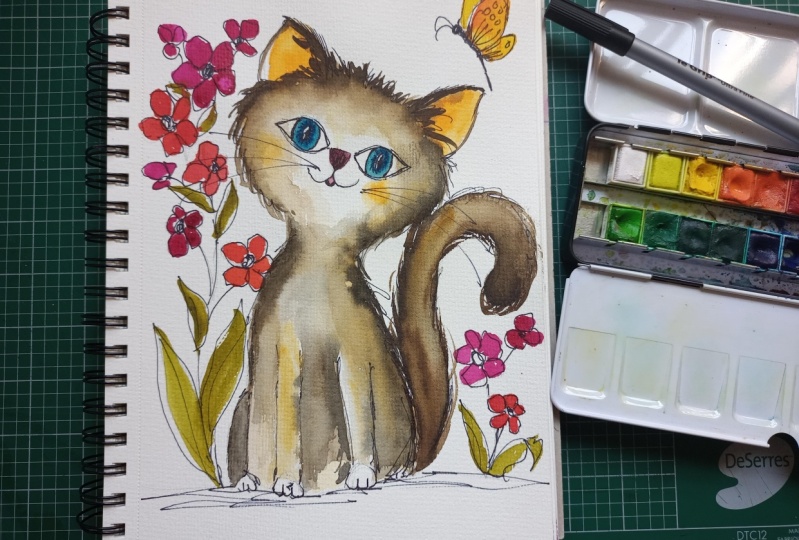
happy to have you here. Let's do the sketch of this cute illustration
of a cat and this is normal pencil and we're working
on watercolor 30% cotton. At the beginning, we
will make a circle. I'm making a circle here and it doesn't have to
be a perfect circle. Is just a rounded
shape that's enough. Or cut is tilting a little bit. We are going to add
a tilting body, and this is a rectangle, and this is the edge and the
foreground of the painting. So one of the first step that I could give you
as an advice to be a better sketcher would be
to draw repeating patterns. And I haven't done this a lot, but it's quite
interesting to do this. So this was the distance of the body and the
length of the cat. I've done this cat illustration
so many times because I think it's not that easy to illustrate a cat and any
animals for that matter. That's why it's my first video as an illustrator and
I'm so excited for this. I am learning just the same
as you. Let's learn together. Another tips I could
give you would be to draw a shape that
you find challenging. This one is true from
my own experience because I always like
challenging things, and I think when you draw interesting and
challenging things, it makes you more
eager to sketch. For me, challenging patterns
are things are the cars, the shape of the leaves, all these things I would
fill up my sketching book. Now we are going
to add the ears. This is inverted V shape, and notice the distance
of the two ears. I mean, notice the distance
between the two ears. Another tip I could give you would be to draw
ordinary things. You would go out from
your house and you would see ordinary things
like maybe a tree, some flowers, some buildings, those things that
you could see daily. Grab your sketchbook and find a perfect place to sketch
and just sketch it. Don't think too much,
don't overthink. Well, going to be nice, we're going to be perfect. No, just sketch it and
don't get intimidated. Because I myself has been through that all
the intimidation. I would I would not sketch that because it's too difficult, but I just do it anyway. And eventually, you
will get better. So now I've added some shadow in the cat's face so
that I will recognize this visualization of the final
result of the distance of the ears and eyes and the nose and how they would look like
if I would paint them. I am drawing the nose, I've drawn the nose and
now I've added the eyes. It's not a perfect circle, but it's more like oval
shape and it's big enough to be more expressive
and hopefully more cute. Another things I've
learned from other artists is that you can write
words and lyrics. I would say I would add some Bible verses or my favorite code on
my sketching books, and I think it's going to make
my pages more interesting. I haven't done this as
much as I would want to. We'll see and let's
do it together. I've added the mouse. The main idea of these
features together is I'd put them
all in the middle, close from each other
so that they will have this cute effect in
the end, hopefully. Now I'm going to add
the body of the cat. One quick line and the leg, I'm going to do the same
thing on the other side. The neck, I prefer it not
to be too small or too big, but just enough to have a little balance between the
head and the body itself. Although some
illustrator would really make it very thin or very big. Sometimes I think
exaggeration also matters. But for this, I would like it to be
just in a medium shape. Okay. So I am adding
the legs and the pals. Now. Notice the distance between the two
legs at the front. Another tip I could give you
would be to D. I haven't done that Drout but it seems to be interesting to add that on the tips on how
to be a better sketcher. I will probably do
that next week. Let's figure it
out together if we could really help us
make a better sketcher. The one thing I would personally give you as an
advice is to draw faces. This is true on my
case because I would grab and I would bring my
sketchbook everywhere I go. And I would sketch especially like old people at the
park or in the hospital, and I found their
face, it challenge me, and I think it's really cute and fun to sketch the old people. Well, for you, you discover
what interests you the most. It could be the kids. It could be just the
lady in the market. Whatever it is, you have to find that interesting subject
that motivates you. I've added the post, and as you can see, I'm erasing the lines because I wanted the heap
to be a bit more wider. For your case, just experiments, you don't have to follow
everything that I'm doing, but it's just going
to serve as a guide. This is the tail of the cat. I changed my mind. I'm going to make the tail a
bit more pointed at the end. Fill an entire journal with
letters of the alphabet. This is something new for me, and I would definitely try that. And experiment with
different drawing tools. This one, I've
started it already. I've been using color pencil, markers, and it's really
quite interesting to experiment with
those tools sketching. I've added some
flowers here and you can add more if you
like a butterfly. Just for the composition sake, try to make it
balance and simple. The focal point of this
is the phase of the cat. So I'm quite happy with
the result and I hope that you are satisfied as well and having fun
with this sketch. I hope that you
are not taking it so seriously and you just
enjoying the process. Enjoying the sketching,
and as of course, you can watch this video all
over again if you have to. I've sketched this cut so
many times so that I could give you the cut illustration
that I want to present. Just like you, I
am also learning, and practice makes
perfect, isn't it? Okay. So I've erased the lines because I don't
want those lines. I want the lines to be
defined with the first. So I'm adding some fur in here. I'm trying to make
our cut a bit more, you know, moving
and not so static. So I'm adding some
first in here, long ones instead of the lines. Drawing circles is also a good way to make you
a better sketcher. I totally agree with
this because making circles you can start
everything from circles, how big the subject is how large the painting
is, make circles, repeat it over and over again, make faces on the circles, make shapes, dogs, cat, house, everything starts
from the circle, you will see that yours, your fingers will develop this habit of
making the circles. Eventually will help you
be a better catcher. Draw every day adventures, fill a sketchbook with
free hand doodles and sit. I hope to see you in the
painting process of this cat and some tips I could
give you on how to find your own unique style. So get excited to see you
on the next painting part. Okay.
4. First Wash & Finding Your Own Style: Thank you so much for continuing joining me in this class. In this painting process, I'll be giving a lot of tips for you how to
find your own style. Let's begin painting this
beautiful cut illustration. I am using brush number two. That's a normal brush, and I am using
yellow c. We'll be using less paint and pigment in this first
part of the process. And we are painting
on wet on dry paper. So I'm just adding some warm colors on
our cat illustration. I really hope that you are going to discover your own
style very soon, one of the first steps that
I'm going to tell you how to have it is to make
a lot of art. Yes. Make a lot of art
as much as you can, and it's one of the keys
to finding your own style. I totally agree with this because I've done so
much art in the past. Some of them, I was happy, some of them, I'm
not that happy. But in the end, it's always goes to learning and experience. Okay. Now we are just adding the warm color yellow or
onto the body of the cat. I've added a little bit
of warmer pigment again, and this is cadmium orange. I am using usually two
watercolors in Cotman and Newton, but I usually switch also
from local watercolor brands. Now I am adding the cheeky round on cat and
it's til the same color. As we're painting on
dry watercolor paper, it is a bit edgy around it. I wet my watercolor brush and
made it a little bit loose. Another tip I could give you is to experiment with the medium, experiment with the
materials, and the style, different style, experiment
as much as you want to. I think in the end you will
definitely find a style that really makes you
excited and warm your heart. No matter how many
style there is. There is always one
that will stood up in every style
that you have tried. That is the own
style that you have. Find it and you can only
find it if you experiment. I've added warmer tones and
darker tones right now, and these are the
colors of any brown. I've mixed ivory, ivory black. With a lot of water with Bonana but it is
more on ivory black, and we are working on
the face of the cut and adding some first and we're
working on light tone. So we're starting
on the light tone and then we'll go
as we go along. Hello. So Now, you know, we had shades of
the pencil here, so that was useful. Now we are going to just follow all the
shades that we did. Another tip I could give
you is narrow your focus. So after you experiment and you analyze your own
walk, narrow your focus. Some shadows on the body of the cat and I'm still
using the same brush. Now that you have taken the
older walks, and lay them. Now you can take the
elements that you like. Ask yourself, which one is
that element that you wrote that stood up of
all the elements that you had and focus on them and try to really take your
time and analyze your work. Don't be too hard on yourself
on finding your own style. It's going to take a while
before you find that. But what is important is that you are learning
from it and you are always excited to experiments and learn from other artists, learn from other medium, and and your own art. That's why I always
encourage my students to share their arts
because it's not only can I help them get those
constructive criticism, but also to inspire
the other artists, I think art is another way to
help other artists as well. I'm definitely sure that
you have something to share with others and don't
be afraid to share it. I've added the Vandy
Brown on the cat. I am adding more onto the
cat and a added a cheap. I'm using a cheaper
brush that I have with pointed edge as I go along
and add more onto the cat. As you can see,
ten got a bit tar the tunnel values is a bit
tarkerth the first wash. And We also walk onto
the tails and adding some more spots onto the cat and shadows between
the two poles at the front. I'm using this ink pen. We are going to add more
darker lines onto the yes. As you can see, the
lines are not even. Some are darker,
some is thinner. This is very important
to make our cut yes just like in the
reference photo that we have. I mean, the final
painting that we have. Darker hair and
then thinner lines on the lower part
of the cat's eye. This is not perfect circle, but it's just round. There you go. I'm
happy with that. I'm going to add a
little bit more here. So this water I mean, this pen, so they are not waterproof, but that's okay because we are adding the lines
after the washes. But there are two ways
actually to make line wash. First is to draw directly
with the water fruit, ink pen, and then you do
the washes or vice versa. In this painting, we
are doing the opposite. I'm making the eyes and the eyelid eyeballs and I am leaving some
whites in the middle. Those are really two white. This is not easy for me
because it's a bit small. So another way that I found
my own style, trust me. It took me forever to find
the style that I want. But another way
that I really found that is that I created the art that I love
that really inspires me and not the art that I should be doing because
it's the art that works, and I think that's
very important element for you to find your own style. Now I'm creating
the nose and I use brown pen because I
don't want the nose to be the focus of
this illustration, I want it to be the eyes so
the eyes are a bit darker. I'm just adding even
with the line and wash, I'm adding the different
shades of the line as well. If I put it all in dark colors, I think it will become static.
5. Lines & Adding More Details: This is the most exciting
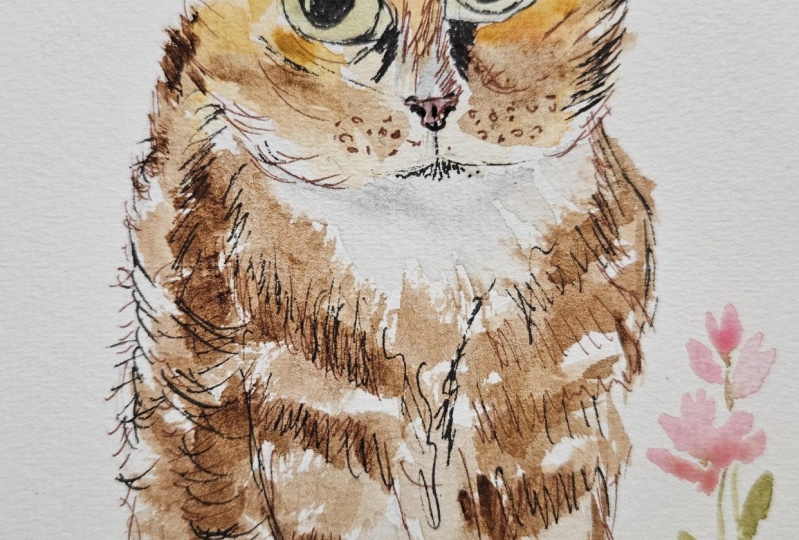
part of this illustration. I'm adding some thin hair lines first onto the cats
face and body, it's really fun
because it's just so free and I like making
small lines like this. And it's also allow and
gives us the feeling of movement and it's windy,
something like that. Embrace your inerfection. So I want to say
that every person, every artist is different. So embracing your
infection is giving yourself the time and
loving your own you. So I always compared myself to the other
artist in the end, and it was not that good because you are a different
and you are unique. Embrace your imperfection
and learn to love it. Practice regularly. Consistent practice is essential for developing your
own artistic style. Have your own sketchbook
ready with you, put it in a place where it is easy for you to grab it
and sketch right away. Your sketches doesn't have to
be bra M estra right away. But just make those lines, just repeat those circles, experiment experiments,
and of course, as I said, you will eventually learn
something from that practice. I'm adding more hair
lines here and first. Another one is study
your favorite artists. Study your artists, look at the paintings and be inspired
and studying other artists. It doesn't mean you
have to copy them, but you just take the
element that you like and the favorite one
that you have and from there you make
it your own art. We're almost finished with
this cat illustration, and I really congratulate
you for taking this course because
although this is a cat, it's always challenging
to do animals. I'm talking about for me, and I think that's also
true for other artists. Well done for this
course and let's finish this cat and we'll
see how it looked like. I'll see you in the
next class. Well done.
6. Last Details and Project: Well done. Congratulations,
everyone for finishing almost finishing
this cat illustration with me. I really hope that you enjoyed this painting with
me and of course, you have learned
something from it. I am adding a leash
on the cat's neck. I'm using born Sana on this one. Feel free to change the color of the leash and the
ribbon, if you want to. The only important thing that you should remember
is that it shouldn't take the attention from the face of the cat,
especially the eyes. So Just to share a little
bit story about me. I'm a self taught artist. I've learned from
practical practice, observing other artists from all the things that
I've shared to you. I've done that and I am
actually an English teacher. I've traveled all
over the world in many places to teach English to little children and then I've discovered watercolor when
I was teaching in Vietnam. From then on, I
never stop painting, I would paint and sketch daily. Also, I started as
an impressionist, usually landscape and escape. Then later, I've been turning myself more
into an illustrator, and this is the first project animal
illustration that I have. I'm super excited about
this and just like you, as I've said before,
I am also learning. Sharing your artwork and showing it to other people
is not only for yourself, but actually it's also to
help others and of course, and it's going to help you
improve your your technique, your style and build
that self confidence. So please share your work and we are so excited
to see that I'm sure every one of you will
have different version of this cut illustration and
I couldn't wait to see that. So please share that I'll try my best to comment
and give you feedback. Okay. I'll try to respond to
you as quick as possible. So now we're just
adding some lines, you know, to add more
details onto the pale, onto the body and the
face, and it's complete. Okay. My next class for illustration
would be the dog. We have a cat and dog and a
third one would be birds. I can't wait to make those
classes for you again. For now, I also want to tell you that I've got some classes for landscape painting and
cityscapes in loose style. If you want, if you haven't
done it yet, to check it out. Okay. So now, I am adding
details on the ears. And, you know, we're
trying to make those lines as
light as possible. Okay. Yes, it's ready
and this painting. It could be a wall
art. You can frame it. You can also make a postcard
type or a greeting card. I think nobody can say no with acute
illustration of a cat, it just works as a gift. Yes, you can do a lot of things with simple cat illustration
and try to be creative. You can also make a
bookmark with this. H. I'm also adding some butterfly, some leaves to make it look
more windy and moving. Well done for this class. I thank you from the bottom of my heart for joining
me in this class. I hope to see your comments and your review
and your project, and I'll see you hopefully
in my next classes. Goodbye. Okay.
 Dawna Mae, Author-Illustrator