Transcripts
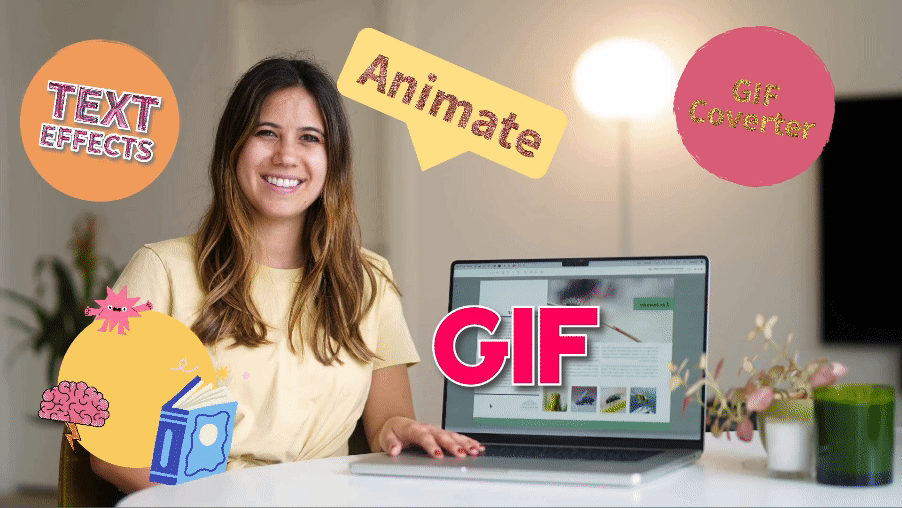
1. Introduction: Want to bring your
content to life with animation and
effortlessly remove backgrounds from
videos. Like this. Learn the easiest way to animate anything with this
Adobe Express class, whether you're a
complete beginner or an experienced designer. My name is Kate Silver, I'm an Adobe Express Ambassador and top teacher on skillshare. Together we will unlock the full creative potential
of Adobe Express. I'll teach you how to create fun and easy animations that will grab your
audience attention. We will dive into the world
of AI generated text effects, turning your static CTA's
into dynamic storytelling. Gifts are everywhere, easily convert any file
into an animated gift, making your content more
engaging than ever. Not an animator, no problem. I'll teach you how
to easily animate your Adobe CC files like
Photoshop or Illustrator. Not a designer,
also not a problem. Watch how AI texted template transforms your words
into stunning designs. Good news. There's an
Adobe Express mobile app and it's super handy. I literally designed this in 5 minutes from the
comfort of my own pole. Have a collection of video clips that need to flow as one. I'll show you the
easy way to merge multiple videos to
make it cohesive, need to make changes
to your PDF. I'll show you the
super easy way to edit existing PDFs
with Adobe Express. Say goodbye to distracting
background and choose from many dynamic backgrounds
that Adobe Express offers. And finally, I will guide
you through the process of adding all these
fantastic animations, gifts, text effects in a video. Creating content that is
truly phenomenal and perfect for Tiktok reels,
Instagram, Youtube. Are you ready to unleash
your creativity and bring your content to life and
Bola? Let's get started.
2. Goodbye Fear of Animation!: Welcome my friends. I'm thrilled to embark on this animation journey with you. If you've ever wanted
to create animations, but felt that the
options were pretty daunting and overwhelming,
You're not alone. I've always wanted to
create animations as well, and I felt pretty intimidated
by animation, to be honest, until I found this
tool that makes animation pretty
effortless and easy. I hope you'll share
in my enthusiasm. Toil, let's dive into the world of animation with Adobe Express.
3. Downloading Adobe Express: Hey guys, welcome to
the super practical, super quick and easy
Adobe Express course. So I'm going to show
you all kinds of really fun graphics to create, a gift converter, stickers, animations, just
real quick things. Now if you don't have an
Adobe Express account, then head to the link in the
description I think I wrote, Sign up to Adobe Express. It will take you to a new page where you get to choose from different memberships with
Adobe Creative Cloud. So you can either have
a whole package and have access to other Adobe
software like Photoshop, Illustrator in design,
Premier Pro, et cetera. Or you could choose to just have Adobe Express that
is Tody up to you. Now, go ahead and
create an account, create a membership and
you'll get a free trial. And without further ado, let's get started
with Adobe Express.
4. Animated Text Effects - AI: So you can click on Get
Adobe Express free. And I'm already signed
in, so I'm good to go. If you click on home, you are greeted with
the home page which has a lot of information
out there, a lot of things. We can do Instagram
flyers template here, we can do text to image, which is the new AI generated Adobe firefly
technology, which is cool. We have text effects which
is so awesome actually, which we'll do in a minute. We'll look at a whole
bunch of other stuff. Actually, if I go to my stuff, your stuff, see all
the different things I've been working on recently. This is what we'll
create right now. It's a little sticker
which is pretty cute. And it took me, I think,
less than 5 minutes to create this so easy, thanks to Adobe
Express animation. I love just a simple,
quick animation. Even though I do
know a little bit of adobic after effects
to create animation, this is just faster for
that simple purpose. I've also added this in my
newsletter substack called Control and Shift to celebrate the first one month
of my newsletter. Feel free to sign up. The link is below, but no pressure, right? So let's get back
to Adobe Express. I would like us to
go back to home. We're going to head
to Text Effects. You can either type a prompt and describe the text effect that you
would like to generate, but for now we're going
to keep it simple and we're just going to recreate
the one that I created. Because I think it's so
easy, it's so quick. And it's quite cute, isn't it? Right, we can go ahead
and click on any, I might select this yellow, shiny gold metal drip. You can choose another one. It doesn't really matter
for now. Wow, that's cool. That is very great. Now I'm going to start by making this a bit bigger and I would like us
to type something. I'm going to type like this. I might make it a
little bit bigger, so there's more space. There we go,
something like this. You get to decide
what works for you. Then I would like us to make sure that we select realistic, because the effect we'll be using, we'll need a realistic. But I love this effect, great. Now if we go to Sample Effects
and we click on View All, we'll be able to see all the really cool
effects that take a little bit of time
to load because I is generating and it's
taking a little bit of time. Wow, that's diamond glitter. Nice. Let's click on
liquid Mercury basically, have a little play, have a little look at all the
different effects that you like. Awesome carved wood. Well, that's interesting
so far, right? I would like us to scroll
down and furry dog, let's click on that T's. See what that gives
us. Oh my God, that is so creepy. Please do not use
this. Just kidding. That's quite funny actually, Let's scroll down and find the
one that we actually want, which is rose, gold, surprise. Surprise. If you've done
my courses, you know, I love, actually I
love glitter too. Yeah, I like that. Choose your own, obviously. It's up to you if you want, There are different variations of that, different samples. Pick whichever you like. Great. Now I'm going to
click on this little arrow. There's a bunch of
stuff we can play with. We can change a
font if we want to. We can reduce the size. Whoops, Make sure you
select your text first. Then we can reduce the size. Make sure it's a little
bit bigger because we're going to add a shape afterwards. And I want to make sure that
we can see the whole shape. Something like that. I think scroll up so we can see. Great. Then if you wanted, you could add an outline. But I don't really like
that that much, not for me. What I would like us to
head to is shape already. It's suggesting me a
color which is so pretty. I love this color combo because sometimes if you
struggle with colors, then Adobe Express
just helps you. Right then we can change the size of the shape
and make it bigger. Then here, if you
click on Show More, we can look at
different effects. I think I might make the shape, the size a bit smaller so
you can see a bit better. Yeah, we can change the shape. There are so many
nice shapes, right? I love these, So
cool. Just like that. You have a design
and you've done barely anything and you have
a design which is awesome. I believe this is
the one I've used. If I look at my
previous one, yes. If I wanted to, I could
go back to shape. Back to shape again.
Make the size maybe a little bit bigger. There we go, Beautiful.
I love this. I'm pretty happy with that. Then I'm going to go
back to the arrow. Whenever I'm done
with one section, I go back to that arrow, scroll down, and this is a
list of all the options. We're not going to do shadow, but we are going
to do animation. Click on animation. And this is actually my favorite part. There's so many different
ones we can use in out. I quite like looping for this. The one I used is
the first one, Bob. I think it looks great. Love that breathe
flicker, just like that. It just looks so good. I'm going to choose Bob
because I think it's great. If I click on the play, I can see my little sticker that I created,
which is awesome. Now if I wanted to save this as a PNG with a
clear background, I can go to Background Color
and select background. Then I can click on and
I can transparent PNG. But unfortunately it will
not include the animation. It will just PNG, which is fine because
I can also use this as a PNG and animated
later in another software. I'm just going to
click on downloads. Let's see, Beautiful. Now I'm going to
download it again, but this time as an MP four. With the animation, I
can choose the size. Sometimes I need to reduce
the size because sometimes some softwares or platforms don't allow for such a big size. Actually, I can do
720. Then downloads. Let's have a little look. There is my animated
sticker which is awesome. Again, I can use this
for all kinds of things like my newsletter
and it looks so cute. Feel free to have
a little play and create all kinds of animations. There's so many more
to choose from. When you're done, you
can just click on this arrow and then
go to your stuff. It should save all
the recent projects you've worked on. Nice.
5. Create a Banner Ad: Okay, let's go back to Adobe Express and create
yet another little sticker. I'm just going to go on Create. I can choose all
kinds of sizes, well, there's a lot of sizes could
select square for now. Then I can start adding
stuff from here if I wanted a template for
an Instagram post, but I would like to create
yet another sticker. If I wanted to create a sticker, I could go to Elements
and have a look at all kinds of elements
that I can create. Background, I could click on View All for
Nature, let's say. And choose a background. I love these lobsters. Actually, these
little fish are nice. Let's pop it in. Reduce the opacity
if I wanted to. And click on X. Now I would
like to add some texts. And I'm going to click on,
I can write Sign up here. What's cool now is that Adobe Express is
going to give me a bunch of recommendations, which is nice for the font. Then if I want it, I can
go to Text Effects and choose the text again. But it might be a bit much. In this case, I can go back to shape and choose a shape
that yellow again, but I think it's a bit much. I might go back to shape and I might just go for
white, plain, old white. Increase the shape size. I'm liking that so far, and change the shape. There's so much to play
with as you can see here. It's so easy to design. Well, I quit like that.
Actually heard this. I can't decide the simple one. Simple, Let's go simple. Then I might go
back to the text. I don't know if I want italic. Maybe semi bolt. There we go. So it's not italic. I wonder should change a color. If I go to Phil, I could go with the eye dropper and choose that orange. That's quite nice. If I want it, I could have a
little outline that's black, it pops up a bit more. I can increase the thickness
or reduce it or remove it. I can add a little
shadow to the text. Classic move. Lift, just to give it a more three D effect,
quite like strong. I can also customize it. Change the angle, the distance. There we go. I think
that's better. The blur and the color might make it a
little bit less dark, more like a grayish. There we go, Go back then. If I wanted I could
add an animation. Maybe. Let's look at
in. Oh, that's fun. So many fun ones. That's fun. So easy to create an animation or sticker or a call to action. It's just incredible, Love it. I might just select this
one because why not? I like it. Yeah. If
I like this again, I can download this
this time as a video. It doesn't have a
clear background. Click on download later, I'm going to show you how to convert all these videos we're saving into a gift or a. If there's debate on how to pronounce that
word, that's that. Go back here and I've got some
more stuff under my stuff, some more things to play with.
6. Animated Icon Page 1: Let's do a little bit
more sticker creation. I've personally created
a few more stickers, animated stickers
for my intro video. I want to play more and
design some more with you. Because I think
for me personally, it's the most fun part. We're going to go to plus
and we can choose square. We're going to head to elements. I'm going to type
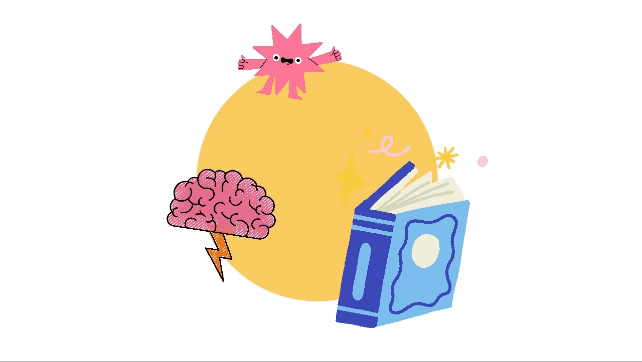
learn because I'm a teacher and it's quite
an important topic. We're going to scroll down and, ooh, I love this one already. Let's grab that and close, let's see what other
stickers we have here related to learn I used
earlier, a brain one. I'm going to try and find
that one that's so cute. Where is the brain one
that I liked earlier. This is super cute as well. Let's pop it in there close. For some of these, you might
have to have access to the pad Adobe Creative
Cloud subscription. There is my little
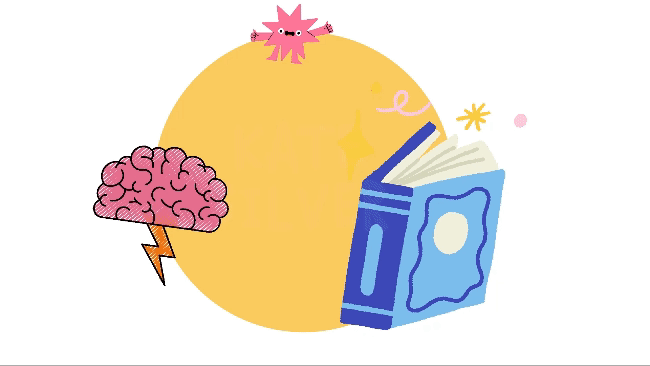
brain one, awesome. Now if I wanted, I could also add another
page and duplicate it. Now I have to, I want I can have different variations
of that I can make. This can have all of these together in one little
animated sticker. Or I can go to the second page
and one of them at a time, select this, delete,
and just have the brain and big and maybe have
some text underneath it. I have this and then change the sizes. Great. Now I'm going to add
some animation to these by just clicking
on one of the icons, scrolling down and going to animation going to
Can play with these. I'm going to go back, actually I'm going to go to looping. And honestly my
favorite one is Bob. I just think it looks good. I'm going to now
select another one. And I might also go to animation and also go to looping, I think. Let's try brief. And I'm
going to go to the book. I'm going to scroll down.
Go to Animation Looping. And I might also select Bar, because I just think
it looks so cute. Now when I press play, I have a little animation. I'm thinking maybe I could
add a circle behind it. Let's see how that
would look like. Let's go to Elements Shapes. I'm going to go for
a plain, old circle. I think I'm going
to make it bigger. What color should we go for? I'm in the yellow
vibes recently. I'm going to go to fill there is my yellow that
I've used previously. Now to move the
circle to the back, I can either use my Photoshop in design, shortcuts,
commander control, left square bracket, or I can just move it from here
in the layers fun. I think that looks really cool. I like that less press play. That looks so cool. Now I might actually change
the animation of this one. I'm going to select that, I'm
going to go to animation. I'm going to delete
the existing animation because I want it to bob
like the other ones, They're all bobbing
and they're all cohesive. Now let's press play. I'm obsessed. I am obsessed
with Adobe Express and all these little stickers and emojis that I can create, right? I can either keep it as is or I can add a little
learn words in between. I want to see what that looks
like. I'm not sure yet. Let's go to Text. And click on a Text. And there it pops straight in the middle. How easy is that? Now I'm going to
type in all caps, I'm going to select it. May make it a bit bigger, maybe a bit smaller. Actually, maybe
move it to move it, click away, and
then click again. Let's see what a Job
Express suggests. Let's click on
that. I quite like that. Let's see what else. Ooh, that's fun. But actually
I quite like the first one. I think that was kind of nice. And then I'm going
to go to Phil, because I do think I
want it to be white. Let's see what that looks like. Hmm, I'm not sure,
actually. White or black. They both look cute. Maybe
if I go for the white, then I think I want to
go for another font. Ooh, that's cute. There we go. It's more informal. I like to be informal, and more fun and playful. The world is serious
enough, right? I really like that.
It's super cute. Now let's click on play and
see that is nice. Love that. If I wanted, I could also add
an animation to my texts. If I select my texts
and I go to animation, let's see, Don't love that. I want something subtle play. I think that's all
right. Let's see how it looks like
if I learn back. If I move the learn
behind the others, apparently the book has
a little yellow thing. I'm going to move it in front
of the book behind others. O that is interesting.
I love it. I think I'm pretty happy
with all of this. Nice. The only downside so far, I think of Adobe Express, which I think Adobe
is working on it, is that I can either save
this with a clear background as a flat sticker just like
that, which is also nice. I go to click on Transparent
PNG and click Onload. Or if I wanted it to be
in animation, in a video, in animated movement,
then unfortunately, it doesn't work with a
clear background yet. But stay tuned. If I wanted to save it as an animated video
where it moves like here, then I would have to
add a white background and then I can download
it as a video. I'm a little bit
sad that I can't export as a gift or an MP four with a
clear background yet. But rest assured this
will come up soon. So I can click on Download. And there we go. Now let's
see what that looks like. There is my PNG, which looks so cute. I might use this for
my intro videos, you might recognize this. Let's see what the
MP three looks like. Oh, that is so
cute. I'm obsessed. Really great. I'm going to pop this
with all my files.
7. Animated Icon Page 2: If we go back to Adobe Express. If you remember correctly, we did have a second page. Let's start animated this one
as well, the little brain. Let's go to animation. I want to flicker perfect
like there's an actual storm. I think this is pretty great. Perhaps I might
add some text to. Let's go to Text Skills, Why not make it a bit bigger? Click away and pop
it a bit more here. And let's see what
they recommend. That's nice, actually. This time I quite
like the black. I might add a little
animation for my text. Select my text, scroll
down, go to animation. Maybe flicker as
well and see cute. Now I might select both and make them a
little bit bigger. Because if I save
it as an animation, it will save it as a square, remember with a
white background. Or I could save it as a sticker PNG with a clear background
but it doesn't move. I'm going to go
and download this. Remember you can also choose selective pages or all
pages, we have multiple. I'm going to choose selective
pages, it's just this one. I'm going to click on Download, and that's going to
be saved like this. Let's have a little look now. My movie sticker. Cute. I'm going to remove the background color and I'm going to save it as
just a flat sticker. G download. G download. Great. Now I have a big
collection of stickers. You may have some you
may not have seen that I created without you
watching. It's amazing. You can use the in
videos and newsletters and anything that is super
fun. I hope you enjoy it. And you made some really
cool stickers as well. And please show them to me, because I love them. I'm always happy to see some
colorful, cute stickers.
8. Adobe Express Mobile App: Okay guys, so well
done on creating all these little cute
animations and graphics. So if you go to your stuff, you can view all the things
you created, which is nice. Now I have some
really good news. There is an Adobe
Express mobile app, which means that you can design anywhere from your mobile
phone, which is awesome. Personally, as a
content designer that works from home alone, it can get pretty
lonely sometimes. So I love going
out and about and sitting at coffee shops for
my breaks or working there. And one of my favorite things to do is sipping on a
delicious coffee. Looking at other people to remind myself that
I'm still part of the human experience and that I'm not
alone in this world. And my computer and
design graphics on my phone with the mobile
app of Adobe Express. And that's what I did today. And I created a few
different things while sipping the
delicious coffee. So one of the graphics
I created is this, which is pretty simple, but pretty cute, isn't it? And this so easy to make. I think it took me less than
5 minutes to make this, and I was barely concentrated, barely had to think much. The app is really nice. What I did is I recorded
my mobile screen. You're welcome to
go ahead and grab your phone and download the Adobe Express mobile app in the app store or wherever
you download your apps from. If you're using an Android, just sign in with your Adobe Creative
Cloud account details. And then you can
either sit back, relax, and watch what
I'm going to show you, or you can do it with
me and we can play along and design
together simultaneously. That is totally up to you. Now let me just show
you an example. Enter full screen, and yes, it's going to be black because this is the
size of my phone. I used an iphone. I'm just going to play
this and show you a little example of the things we can do that are so easy, like animating this text. Over here, I press play and I can just
choose from a bunch of animations just for the text. This is just a little
preview to the tutorial that will together to
create this graphic. This is what will create
now this gorgeous graphic. Let me grab my phone, Open Adobe Creative Cloud, and show you the way. Okay, so I've got all my
projects here in Adobe Express, and I'm going to start
creating a new document. Click on this plus here, and I'm going to click on
More under Start From, I'm going to select Backgrounds. Great, now I'll get to
choose between Trending, Background, Stationery,
and whatnot. I'm going to choose
Organic and click on More, because it's nice, I can choose from all
different options. Let me choose warm Organic
Backgrounds and click on More. Wow, can we just appreciate how gorgeous all these backgrounds
are? Just stunning. And I feel like they're
all my favorite colors like these pastell
pinks, love those. I really like this one. I'm going to choose that one. Once you see the V,
you can click on Add One and they
will open it up. I'm going to choose
original size. And done automatically,
the text will come up. We'll start adding text so we can double click
and start editing the text type 50% of online sale. Gosh, it feels like every
banner we create is very sales. And it's not so much my vibe, but I think this is practical
for people with businesses. They often want to sell
stuff or create a call to action whatever you
feel is right for you. Okay, So we could
align it to the right, left, but actually I
quite like center. Now we're going to go
to FX and go to Shape. And already looks
gorgeous with this color. Let's see what else it
has to offer the shape. Wow, that's gorgeous. I really like that.
That's quite nice. Okay, now I can
choose the color. Maybe I'll go for a
white or the blue. What's nice is it suggests
a bunch of colors. So I don't have to
think too hard. Maybe the white was
better or the copper. The pink is nice. Maybe
a few other grays, but I don't like
these that much. Okay. I think the blue
is the way to go. The problem now is that I can't see my text because
the text is also blue. We're going to change
that in a bit. Just click on Done again. Now we can go to Color and select Text
and make it white. There we go. Click on
Done when we're happy. Actually, I want to change the text font because
I don't love it. By the way, if you go to style, you can play with
this. This is so cool. You can just scroll with your little fum while
you're sipping your coffee. And look at all these
different cool styles and wow, I quite like this style. It's quite nice. I found this very satisfying
to just scroll through this. Now let's go to Effects Shape and just add those colors
again in those graphics. Yes, that rectangle. And go to Size, and maybe
make it a little bit bigger. Let's go to Color,
Select the Shape and make that blue again.
And click on Done. There we go. Now
let's go to Spacing. Let's change the shape so it's a little bit
bigger, it's quite nice. The line is the space
between the line here. Play with the letters, then click on Done
when you're happy. If you want to, you can
change the size again. Then last but not least, my favorite part is
the animation part. You can click on animation and it will allow you
to animate the text. Oh, I like that one.
That one is nice. Once I've decided, I
can click on Done. I can click on Play. Awesome. And there is
my gorgeous graphic. I'm going to click on
this icon to save it, and I'm going to
export it as a video. Click on Downloads. There go. It's saved to my camera roll, Voila's my mobile app.
9. GIF Converter: Okay, so now we're going
to move on to one of the most exciting and
probably cool things that Adobe Express can do
is converting videos, any video, into an
animated gift or jiff, however it's pronounced, you tell me how you
pronounce it, actually. And sometimes I log into Adobe Express just
for this purpose. Take some videos and
convert them into a gift so that I can use
them for my newsletter. Again, I can show
you some examples. Let me log on to Kate Silver, Substack Control and Shift. And you'll see this is a gift that I created
from a movie, from an MP four and I
converted it in Adobe Express. Same for this one.
Same for this one. We're going to be converting
a couple of videos, grab your own videos, and grab some of the files
we've been working on, like this one or like this one. We're going to create
these MP four videos into a gift and it's super easy. Let's head back
to Adobe Express. If you go to home
and you scroll down, you'll see lots of quick
actions that are very cool. Let's just go ahead and
click Convert to Gift. This is where you can
drag or drop your videos, select your file, Maybe we'll start with one of the
stickers we created together. I'll start with this
selected click on Open, and now this video
will be a gift. Now I can choose
large, medium, small. And this will depend on the platform or the app that you're going
to publish this to. Sometimes it can have a
file size restriction. Do it accordingly, then I'm
going to click on download. It's going to take a while
it's doing its thing, it should appear in my
download now as a gift. Let's have a little look. Just going to head to download
and I will see this gift. Awesome. It's pretty. I'm just going to drag it from my downloads and pop in in here. Right. Maybe I'll make
a little folder for all my gifts and I'm going to
pop all my gifts over here. Beautiful. Let's create a
gift from, maybe this one. Again, going back
to Adobe Express. Close this again. Click on Convert to Gift. Select the file MP four. Make sure you select P four
because it has to be a video. Click on Open again, choose the size you want. The medium, large, small. Click on download
and it's converting. And there it is in my
downloads to gift file. Ooh, I love that.
That's so cool. Since it's a gift, it
means you can just add it to a website, email, newsletters, and whatnot. Right now that we've converted
these graphic designs, now I'm going to
show you that we can also do it with a simple video. I do this quite a lot because I love taking little cuts of my videos and converting
it into a gift. So I'm going to go back to this, close this Select
convert gift again, click on Adobe Express. This is where you can also
select any file you like. You can even film
yourself with your phone. Any video will work. Let me choose this one. It's me typing one of my end design files
if we wanted to, we could also change the
length and make it smaller. Maybe if I don't like this part, I just want that part. Now, I'm going to
click on downloads. There is my third gift
ready to be downloaded. Great, let's have a look
again at my downloads goods. I'm going to pop it in. The gift folder that I created, You can see are three gifts so far. You can see, I love that. It looks a bit gifty,
Like this detail. I quite like it actually. That's some gifts that you
can add to any website. Looking cool. I also created an animated
flyer with Adobe Express. Give away flyers
for competition to win a free skillshare
membership. And so I used Adobe Express
because it's so quick, it's so easy, and it looks good. Sometimes MP four doesn't work
and I need a gift version. Let's say I want to include
embedded into an e mail, into a newsletter on
certain social media. Then I would convert it
into a gift as well. Let's convert it into
a gift, shall we? One last time, I promise. Click on Convert To Gift and
click on the animated flyer. You, hopefully you will have created a few by
now because it's so fun. Click on Open and Downloads. And I'm going to go back to my downloads and it's
going to pop up here, but as a gift rather
than a video, so it works like an image
that I can pop anywhere. It's a small file, There we go. I have a few little gifts
and these are awesome. I hope you love this
tool as much as I do. I use it all the time. It just makes my
life way easier. So feel free to post any gifts that you've
created, any flyers, any animated sticker
that you created with Adobe Express and pop it in
the course project below. I would love to
have a little look. I love seeing other people's
creativity and create like a big creative
melting pot and hub.
10. Merge Videos: Since we've just
converted videos to gift. What we could also
do on that topic of quick actions and videos
is merge videos together. And I find that very useful, especially let's say you
filmed yourself or a Tiktok or reel on your phone and you would like to a
few videos together. Let's say you filmed
with a camera and you have a few that you
want to add together, or even some flyers that
you've created here. Like the ones we've created, you can just merge them
all into a single video without even having to open
any video editing software. It's pretty quick. I would still edit videos in
Adobe Premier Pro, but when I need to do a
quick thing like this, I like to use Adobe
Express files can be up to 1 gigabyte,
which is pretty big. So anyway, I'm going
to click here. Going to go back to my
Adobe Express files. If we wanted, we could clip all these three
videos together. What I'm going to do is the little clips that
I have of myself, myself setting up a tripod, and me typing again. I'm going to select
those three videos. Feel free to select three
videos of your own making. Or even then you've
collected from one of the free websites like Pia Bay, for instance, you can click on Open and click and shift
to select multiple videos. By the way, press Play Mute. Perhaps those three videos will now be glued or merged into a single
video, which is awesome. That is nice. If I wanted to, I could also add more. I could also add some of the flyers or some of those
videos, like maybe this one. Since it's another size format, it might be different, but I can drag it and move it around. That's going to be my video. It's like me typing tripod. Typing again and sign up
here or something like that. Then all I have to do is
download or even better, I can click on Open
an editor Now, I can even start adding
stuff, which is cool. Like I can even go
to my stuff now and perhaps pop the sticker
I've just created. Yes, I can add to one of
the stickers I created, Click and drag again. I can animate this and whatnot. Because I can really
animate this video. I can pop things together, I can make a collage of
literally everything we've done, and even add some
more elements and more graphics, which
is really cool. A little heart, and this one might be a bit too big. This video, I'm going to crop it down and make it a bit
smaller. Do the same for this. I can click and drag
and make things a bit smaller, more bite size. Let's see, Let's play that. That's a simplified
video editing version. Feel free to play
with this and create some really cool graphics and then post them in
the project section. I'm going to click
on download now. I'm going to download this and it's going to be one
beautiful video. I'm going to open it up in my downloads and
have a little look. That's great. I've made a
little video in no time, and it was really easy. And I got to add all
my animated stickers or some of them at least.
11. Animate CC Files: Hey guys, let's get ready for the next part of Adobe Express. That is super cool. And for me again, this is going to
be life changing. And that is to animate CC files, which means you can
quickly animate any Photoshop, Adobe
Illustrator file. Now usually let's say
you would design, or an illustration in Adobe
Illustrator or Photoshop, that normally you
would have to use Adobe After Effects
to animate them. Adobe After Effects is amazing, but it's hard to learn. It can take a little while. Adobe Express has come up with a really quick way to
animate your CC files. And that's what we're
going to do now. Now if you haven't used Adobe Photoshop or
Adobe Illustrator yet, I teach a course on that for absolute beginners really easy. But without further ado, let's go ahead and
select this quickly. Animate your CC
files and text and select upload PSD or AI file. Now I have an Adobe
Illustrator file handy, obviously shoes, since my
background is shoe design. But feel free to take any
Adobe Illustrator file that you personally have
and click on Open. It's doing its thing,
it's converting my Adobe Illustrator file
into an Adobe Express file. Okay, let's click on Open. There we go. I can
already select a shoe. I can go to Animation. I can click on any of them. Just like that, the shoe
will move, which is awesome. Wow, that's so cool. I think I'm going to go
for my best friend Bob. Again. Surprise.
Surprise. I'm going to go to looping Bob. There we go. And I'm going to apply it to all my shoes,
I want them all to. Bob. Select this,
select animation loop. And Mr. Bob, I'll do
the same for this. Perhaps I can click and shift and select those
three shoes simultaneously, so it's much faster. Then in one click, I can
go to animation looping. And Mr. Bob, if I press play, I've just animated my CC file, my Adobe Illustrator
file, which is awesome. This is just so cool. Obviously, if I wanted I
could add some elements. Can click on View All and
see what they have to offer. Just add some stuff in there. And who liquid forms? I can click on that, I can add liquid and have the shoe melt, select the liquid, pop
it in there and I could move the layer to
the back and it looks like there's a
liquid that's pretty cool. I just invented
this on the spot, so I'm not sure about that. I'm going to delete
that and press play. And I've animated my CC file. This is amazing. Gosh, I like the smelting gold drip, whatever it's called. So much so that I've
decided I'm going to add them to all
my other shoes. And I'm going to duplicate it using my gorgeous shortcuts. So I'm going to select one of the drips and I'm going to go ol option and drag
and pop it in there. Again, make sure that the layer of the gold drip is below
the layer of the shoes. Again, Alt and drag. And I'm going to pop it in here. Alt and drag and pop it
in there. That's amazing. Now currently the shoes Bob, but the gold drips, don't. I'm going to animate all the gold drips and I'm going to add a
Bob to all of them. I'm just going to click and
hold down the shift key and select all the gold pieces to animate them all in
one click altogether. I'm going to go to
animation again, my friend. I'm going to go to looping
my best friend Bob. Now I'm actually going to add a second animation to my
gold rips going to go to. I might even add bunge. If you increase the
number of bounces, it will be more apparent
if I press play. Now there's bunge and
bobbing, which is awesome. If I wanted, I could add text, I could actually
add text effects because there's a text
effect called gold drip. And I think that
would look so cool. I'm going to start typing animate CC because
that's what we're doing. And then I'm going to resize it and move it
around if I want it to now press Play,
something like that. Maybe you can design
something a little bit more cool and then post it
in a project section. Let's see what you got. Let's see your design
skills. I love this. It's amazing. I had so much fun. Have fun animating
your CC files.
12. Text to Template - AI: So at the time of the recording, suddenly lots of new
Adobe Express tools appeared, which is awesome. I love it. I get
bored very quickly. So I love when the software keeps updating
itself. Thank you. Adobe. Now, some of
them are exciting, some of them we've already
covered like text effect, which I love as you may know. But for me, the most exciting
one is text to template. Because this means
that it will make my work 100 times quicker. Instead of having to design a template and having
to scratch my brain, trying to find inspiration, trying to find the colors
at work, and whatnot. I can use AI to
convert my prompt, my text, into ready
made templates. Now it is in beta, beta, beta stages at the
time of the recording. Obviously, this will improve
as the time goes on. You also have text to image and generative fill,
which is amazing. But I have these two options as well in Adobe Photoshop
and in other platforms. I'm less excited
about these two. And I'm more excited about Text to Template, which will cover. Now let's start typing a
specific topic or occasion. I'm going to write Invitation for cat birthday, of course. And let's see what
it has to offer. Click on Generate,
Agree To Terms. Make sure you read before
agreeing as with everything. And click on Agree, Mixing
Art and Science. Very cute. I can take time at the moment. In the meantime,
take a deep breath through the nose and exhale. Might as well practice a bit of self care whilst
we're waiting. Wow, these look so cute. I can't believe it. Join us for a perfect celebration
if we want it. If we weren't happy with these, we can click on
Generate More Results, and it will give us
even more options. Wow, these are so cute. I have a hard time choosing
which one I like most. But let's say I'm
going for this one, I'm going to click on that,
the template is loading. And then I'll be
able to customize it accordingly and add
details of my cat. Could even change
the picture and add a real image of my cat. Could change everything. Really change the color
of the text and whatnot. That's awesome, obviously. Now that you know how
to use Adobe Express, thanks to this tutorial, I hope you're going to be able to design your
own card, please. Please create something super cool and posted in
the project section. I would love to see
all your designs. These are so cool.
13. Remove background of Video: O ki eyes? Are you
ready for one of the most exciting tools
of Adobe Express? And that is removing
backgrounds from videos? You heard it. Videos,
Not just photos, which you can also do an
Adobe Express, but videos. This, for me, has
been a game changer. This means that I can now
easily remove the background of any unprofessional
video that I shoot in my kitchen and even in my
bathroom if I wanted to, just like that, I can remove the background and make it look more professional or just make it look really cool and itchy. That's what we're going to do. Now. I'm going to bring
up a video that I created from a previous
Adobe Express tutorial. And I'm just going to show
you how that tool works. I'm going to go here,
start from your content. I'm going to go ahead
and select the video. Now I need to make sure that the video is under 2 minutes, otherwise, I will not be able to remove the background,
basically. If it's over 2 minutes, then this will come up. It will say unsupported
video Remove Background is only supported for
video is under 2 minutes. Make sure you trim that
down to 2 minutes. I've chosen my video and
it's less than 2 minutes, it's just a little sample. Then I'm going to
click on Create New, and choose Original
Aspect Ratio. Now it's going to load and
it might take some time. In the meantime, whilst we're waiting to remove
Background to show up, I'm going to show you a bunch of it quick edits that we can do. Even though for major
edits I personally use Adobe Premier Pro to make
high quality content. But if you're not
a video editor, if you're a complete beginner, then Adobe Express is a
great place to start. And it's quick and you have
some very simple edits. Things like you can
change the volume, you can mute it can crop, it can make it a bit faster, you can change opacity, you could add
effects, et cetera. But for now, let's
go to adjustments. If we want it, I can
play around with this, Make it add more highlights, make it a bit more
saturated, more yellow, more blue can sharpen it or blur it a bit brighter and
change the contrast perhaps. Nice. Great. Now let's go back. I can see Remove Background
is now available. That means I can click on
Remove Background again. It might take some time
while it's loading. In the meantime, we can go
ahead and go to Media and have a look at a bunch of amazing backgrounds
we can choose from. There's loads to pick from. There we go. The background
has been removed. Awesome. Now I'm going
to type maybe something like office and
see what comes up. And now I can choose any
of these and use it as a background maybe this one. Now some are available just for the paid membership
and some aren't. So have a look which are
available to you then. I'm just going to click on
it and it will appear here. I can click and drag
and make it bigger. Now I just need to move
this layer behind myself. It looks all right. It doesn't look perfect, but
it looks all right. If I wanted, I could change the adjustment of the image so it looks a bit
more realistic, or I can choose another image. Let's try changing
the adjustments. If I select myself, the subject, I can go
to adjustments again. I can play around with the saturation and maybe
make it a bit more blue. It looks more like it's
part of this image. I can also blur it a little bit. Who, not too much.
Just a tiny bit. Just so it looks a bit
more like a part of. And maybe reduce the
sharpen a little bit. That looks a little
bit more realistic. Now if I don't like that, I can go back to
media and choose, of course, another image. Maybe this one. Click and drag, Click, click and drag. Make it bigger. Now I can move this
just behind this. That's another option. Now go back to my image, my layer, and again,
change the adjustments. Because I think for this one
I maybe need to sharpen it, maybe remove the blur, maybe change of warmth. Yeah, that's pretty cool. There we go for removing
the background of a video. Now stay tuned because in the next section we're going
to learn a whole bunch of other video editing tools for beginners in Adobe Express
and it's super easy. We're going to learn how
to trim or split videos, how to add animations, how to time animations, and how to add basically all
the animations we created earlier to make a really
cool animated video.
14. TikTok Video: All in 1: Now in the next section, I will show you how to
create a super cool, super easy video that you
can add to your Tiktok, to your reels, to
your Youtube shorts. And literally, I made this, I think the whole video I made, perhaps in 20 minutes. And I'm sure you can make
it if it's a shorter video. And I'm going to show you what we're going to make it now. It's going to be
a holistic video that covers adding all
the animations we've created and placing it in a single video that
I've just filmed with my phone. Have
a little look. Hello my friends. In this
Adobe Express tutorial, we will discover the
effortless world of animating with Adobe Express. We will be creating
all the super cute and awesome animations
that you see right here. And we'll be converting any
image or video into a gift. We will discover text
effects that are AI generated and built in
Adobe and how to animate. We will be removing
the background of videos like this one. And finally, we will
learn how to merge all of these newly acquired skills together in a single
video with animations, with text effects, with removal of background,
with everything read. Then one last thing. We will
be editing existing PDF, which is super cool and
it takes zero time. Are you ready to
level up your value? Obviously, I had
to add some cats in there because I'm
a massive cat lady. Right, Let's get started. I would like you to film your own little clip of you
talking into your camera. This can be wherever you want in your bathroom, even
outside, wherever. Just make sure it's a clip
that's under 2 minutes. And let's go ahead and
open Adobe Express. Now, again, we're going to go to the home page and we're going to go to
start from your content. I would like you to pick
that video that you created. I'm going to pick
mine and click on Open Click on Create New, and click on Original
Aspect Ratio. Now it might take a
little bit of time for it to upload and it might
look a little bit weird. In the meantime,
whilst it's loading, it's currently loading,
we're going to start preparing our media and have
a look at all the stuff. We're going to add, our
branding, our elements. Let's click on your stuff. We'll see under files, all the previous Adobe
Express documents we've been working on and all the
gorgeous animations we created together. And other ones that you
probably created without me, hopefully, hopefully it
unlocked your creativity. And it was hard to stop you
from designing and creating. Well, that's what
happened to me. Anyways, later on, we'll
be clicking and dragging, and popping these in our
video, which is cool. Now, if you go to
brand and libraries, this is where you have access to other Adobe Creative
Cloud libraries. Mine are Adobe Indesign, Illustrator, and
Photoshop libraries that I've previously created. So make sure you select any of your ones or you can create a new library and make
sure that you have all your brand assets that you'll be needing
for your video. I'm going to click
on my brand and this is where I saved all the assets. Now because I'm an Adobe
Express ambassador, I have access to assets and I'm also a
skillshare, top teacher. But please use your own.
15. Splitting into Clips: Create. My video is
ready to be loaded. I'm going to select
it and I'm not going to remove the
background just yet. Let me show you what
I'm going to do. Let me show you the original
file that I created. If you look at the original
file that I created, you'll see a bunch of
little clips over here. What I've done is
I've gone ahead and split the clip
in different clips. That's because sometimes there's some pause or I lose my words
or my train or thought, or I'm breathing,
gossiping for breath. I've gone ahead and trimmed
this with trimming, you can click here and
drag and trim a clip. Or click and drag it
and make it longer. Obviously, if you regret
what you just did, you can use my favorite
best friend shortcut, undo command or control zet. You can also click here and add an additional scene
if you want to. If you want it to,
you can write, click and duplicate a scene. Now the most important
part here is split. This is what we'll do with the file that we've
been working on. I would like us to
trim wherever needed. Split as soon as
you can see here, I'm looking like a
deer in headlights. If I wanted to trim that, this is where I can right click and click on
Split or the short cut. There we go. Moving on to the next section,
somewhere over here. Right click, split again. Right click split again.
Right click split. Go ahead and split wherever
it makes sense for you. This is how I've split
mine previously.
16. Edit Layer Timings & Duration: Great, now what we're going
to do is we're going to start by popping some of
the brand assets over here. Now I'm going to go again, your stuff. My brand. And I'm going to select
this Adobe Express logo. And I'm going to click
and drop it away. Now if I accidentally
click here, oh, it did work, but
sometimes it doesn't. Sometimes it replaces the image. If that happens,
just undo anyway. I'm going to go here.
Click and drag there. Now the great thing about your stuff is that
if you go back here, you have access to all the files that you've
been previously working on. The only caveat is that
for some reason right now, it doesn't display
the animation. We can pop them in, but without the previous
animations we created. Unfortunately, we are going to have to animate this again. But no biggie, it doesn't
take a lot of time. And it's quite fun if we can select this and go to Animation. You know me, click on Looping, and my favorite is Bob. I just love that one. But feel free to choose any
to your liking. Now if I wanted I can change a speed as well if I wanted to. So it's really fast, it's less. Let's go back and click
away if we wanted to. Let's add a second acid. Go back to my brand. This time I'm going to add this and I'm going
to click and drag, and pop it over here. I'm going to click and
drag and resize this. Great. Now I'm going to add
a little animation. I'm going to go to animation
And slides, awesome. If I click on play
now this is awesome. But what I can also do
is change the timings of each asset because I don't want them all to
play at the same time. I'm going to select this, then I'm going to go here,
Show Layer Timing. That means that I can
click and drag and change the timing
of an animation. I can make this the whole time, so it's on the whole time. Or I can make it
only half the time. I can decide now it's there, now it's gone.
That's pretty fun. Let's go back to this layer, because I want that to
start a little bit later. I'm just going to
click and drag. Now if I press play, there's this Adobe
Express comes later. Now one last thing.
If I go to animation. I want a duration
to be a bit longer. That means that it will
last a bit longer. It will be a bit
slower if I want. I can also make it smooth. It's more smooth, so
let's breast play. Awesome, Great. Now the last thing
for this mini clip is I'm going to select
this background. And I'm also going
to animate this. I'm going to animation in, and I know from experience
that shrink is pretty good. I can select
SmokifeI, press Play.
17. Animated Text Effects: Okay, that's my first section. Now, in the original
one I created, I created lots of
different sections. One is where I add all the little previous
animations that we created, which is what we'll do now. Then we add a big animation that covers the whole
video, the whole screen. Which is, it's good because
it's like a separation. Then we're going to add text
effects and I generated. Then we're going to start
removing the backgrounds and creating a few different
versions of background removal. Okay, let's go to
the next section, go back to this
click and go back to files and start popping all
the animations we created. I'm going to start with this, I'm going to click and drag
and click on Add As Image. There we go. Oh, it has the white background which I don't want, doesn't
look that good. If I wanted to, I
could actually write, Click and Edit in a new window, then make sure the
background color is no background color. And then obviously
make sure I save it. Or alternatively, I can select this and just click
on Remove Background. I find this a little bit faster then obviously
I'm going to animate it. I'm going to go to
animation looping. And my favorite Bob
animation Click away. There we go. I have got my
first little animation. Let's start adding some more. I've got my gift converters. I'm going to click and drag, Add as image here, it's hiding. I'm going to click and drag
and add that over here. And then of course
if you need it to remove background, go for it. Then I'm going to go
to animation looping. And my favorite Bob friend. Okay, I press play, they're bobbing, which is fun. Let's add this animated sticker. Click and drag.
Click, Add as image. I just want to tell you that
if you accidentally did this and it replaced
your actual video, just undo and no harm done. Commander controls it, right? I'm going to pop it in
here. Add as image. Click over here and rotate it, potentially popping everything and moving
everything around. Making it really fun. As usual, I'm going to
click on Animation looping, and Bob love that. Great. Now, last but not least
for this little thing, I'm going to add my favorite
little fellow over here. Love this one. I'm going
to click and drag, I'm going to add an
image, pop it in here. Now feel free to
remove the background. If it's white again, then I'm going to
go to animation in this time and choose Tumble, because I want to make it
a little bit different. I'm also going to make
the duration longer. I'm going to play
with the rotation, so it's a bit more funky. Let's click on Play and have
a look that's really cool. If I wanted I could click on each individual layer and time it differently so
that some come up after. Great, Moving on
to the next one. And that will be a
big holistic gift or animation that
covers the whole page. We can click away, scroll down, and look for one of the
ones we've created. I'll just use this one. I'm going to click and drag
and click on Add As Image. Then I'm going to click and drag and play around
with it and make it so that it covers
the whole screen. And obviously I don't
want it to cover the whole animation.
Just a part of it. I'm going to click
and drag and just make it a little bit shorter. Great, let's add an
animation to make it fun. Click on in, I quite
like shrink again. Click on that and look
at that, how fun. Great, now we're going
to move on and we're finally going ahead
to text effects, AI generated text effects. So we're going to go to Text, we're going to click
on Add your Text and type text Effects. Obviously if you want it, you can zoom in the screen. If it's too small, I'm going
to make it a bit bigger. Click and drag pop in here. Let's see what Adobe
Express suggests. This is pretty, this one might make it a
little bit smaller. Now I'm going to scroll down and we're going to be
applying text effects, shape, and animation to it. So let's click on Text Effects. If we can select the gold drip, takes the second load. Awesome. Now let's click on
the little arrow, scroll down, and go to Shape. I want this shape, but obviously feel free
to pick your own shape. I'm going to click
on this and I'm just going to reduce the
shape size a little bit. Now I'm going to change the
color by going to shape fill. And I want to go
with something pink, because obviously I love pink. Oh, what about this one
which is recommended? A perfection.
That's what I want. I'm going to click away
and then click over here. And last but not
least for this one, I'm going to add an
animation perhaps in. I'm going to add
bungee, why not? Now if I want it, I can elongate the duration it's
floating there. That's quite fun. Can
even add more bounces. That's so fun. There we go.
I'm happy with this one. I'm going to click
away, select it again, and maybe make it a bit
shorter, the duration. Great. Now feel free to add another one in the
original one I created, I added this which
is the balloon on the pink balloon with
a yellow background. So feel free to add that as well if you want to follow me. I'm moving on to the
next section where I'm finally going to
remove a background.
18. Adding Animated Backgrounds: Let's go ahead and select this and click on Remove Background, and select all the
remaining pieces, and remove Background. Select this and
remove Background for all of them because it might take a little
bit of time to load. In the meantime,
have a few sips of coffee and I'm going to show you what we're going to do next. We're going to be
removing a background, but we're going to add these really cute smiley animations. Because I just think it looks
cute, there's a little bug. For some reason I seem
to have disappeared. My video, my face is not there, but it is there
when I export it. After that, we're going to
be adding another animation. And finally I'm
going to add a cat, because obviously I'm going
to add a cat picture, being a cat lady and everything. All right, so let's see
what is up with our video. There it is, the
background is gone. How awesome. Right,
in this section we're just going to
change the color of the background and
make it pinky winky. And add some emoji, some smiles, because I
think that's super cute. But later we're going to change
it with an actual image. Right? Let's select it and
click on Background Color. Maybe this one, that's
a little bit much. Yes, cohesive. Let's choose
this one, perfection. Now let's go to elements. I would like us to type
Smiley, obviously. Feel free to choose any icon or emoji or whatever that
you feel is good. I'm just going to choose
this cute smiley Emoji. I'm going to pop it. Whoops, not there, but there. It doesn't replace my self. I'm going to click and drag. I can resize it if I wanted to. Now I'm going to go over here
and add a little animation. My best friend bobbing Bob. And then click away
and it's going to Bob. Great. Now I'm going to show
you a shortcut that I teach all the time in all
my Adobe courses and that is for duplication. That is Alt option and drag. And now it's duplicated. Now I'm going to resize it. I'm going to a drag and
add another little one. Select this old click
here, Alt drag, and now they will all be
animated just like that. My next slide is done, let's move on to the next one. Maybe make it a
little bit bigger. We can even click
on Background and see who we could've used an
existing smiley background. That's also cool, but we can try and find a background over
here if we wanted to. Or we can go to Media and
click on videos, let's say. And click on Technology. Because I found some
really cool ones in particular this one. I loved it. We can either just click and
it will appear here. Or click and drag. And then
click and drag and resize it. Just make sure I pop
it underneath myself. And how press play
and wow, that's cool. That is cool. Cool. I am super happy
look at all these changes. Great. Let's move on
to the next one now. Obviously, feel free to
play around with all these. In my one, I combined emojis with that
special background. In the next one I
chose an office, and then I added
some more emojis. And then last but not least, I found a cat image. Of course, feel free
to type cats and see what comes up or type
anything that makes you smile and pop it
as a background. That's quite funny. Anyway,
now that you've done this, well done, Have a little
play with everything, change the animation, add
some other text effects, design some new MGs, add some new backgrounds
and make it your own. And just like Dad,
you've created your very own influencer, Tiktok Youtube short video. So you're officially
an influencer now. And that wasn't
that hard, was it? Now, Last but not least, click on download and
download it as an MP four and it will do its thing and well
done, how exciting.
19. Well Done my Friends!: Congrats my friends
on completing this Adobe Express
animation clause. I'm super happy for you. I hope this will have alleviated any uncertainty you might
have had about animation. And that it will help you unlock your creativity and bring
your content to life. Now, I would love to hear what your thoughts were
about this clause, what you would like
to learn next. What was your favorite
part of this clause? Please leave a review because
it would really help me. I love hearing from
my dear students, like you now to stay notified on class updates and
competitions I'm launching. Feel free to follow me on
Skillshare and then for even deeper connections and even more tips and
tricks and shortcuts. Subscribe to my e
mail newsletter. Control and Shift Unintended. The link is below. And
voila see you soon.
 Kate Silver, Graphic Designer & Adobe Instructor