Transcripts
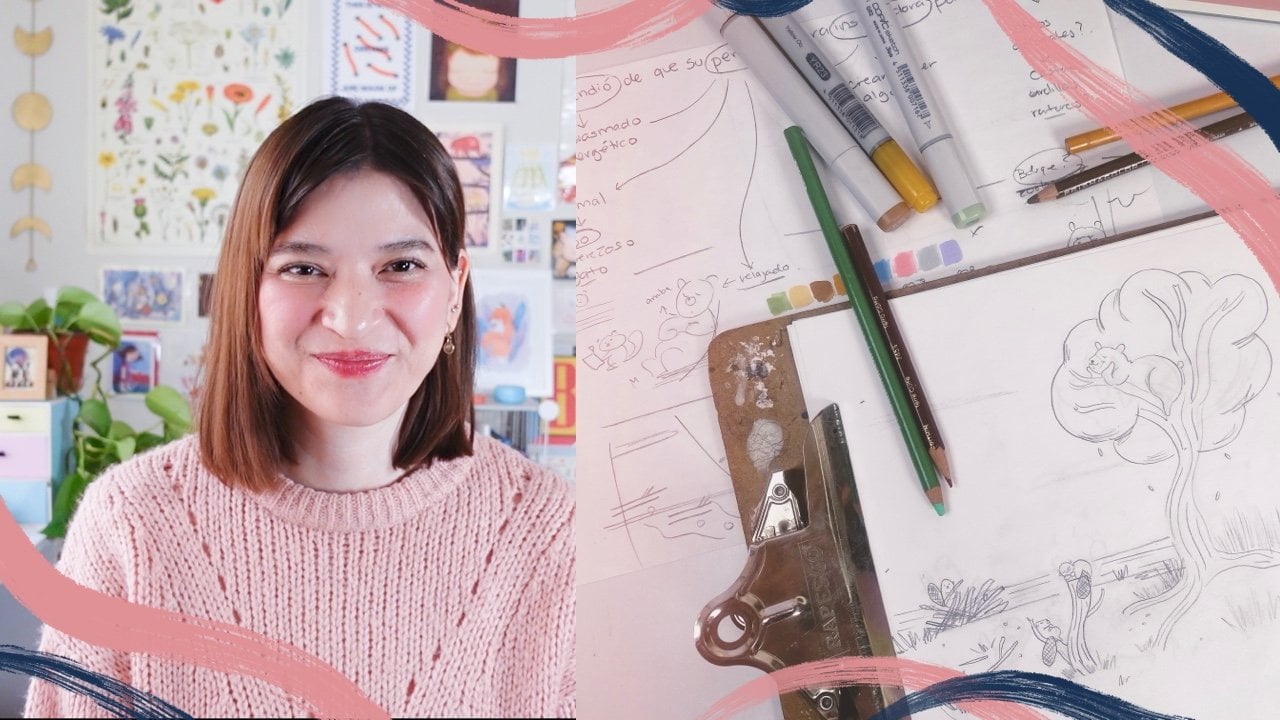
1. Welcome!: My name is Carla Kassar. I'm an Illustrator, and I mainly do editorial
and narrative work. I've always loved
to draw characters, and I remember that
one of the things that I used to be
quite scare about was to draw my characters in movement or in complex poses. A lot of the times,
they would just stand straight,
looking quite stiff. And I really wanted
my characters to look more energetic
and expressive, especially because I like to tell stories with
my illustrations. I spent years of
drawing characters and learning about gesture
drawing and line of action, and would love to
share with you in short and practical lessons
a bit of what I've learned. So you can put these concepts
into action straightaway. Also, I started to do
ballet as an adult, and I got mesmerized
by the cleanliness of the movements and how
expressive they can be. So inspired by ballet
and its beautiful ins, I would also like
for us to talk about how balance and emotion can also help us achieve a dynamic pose and even help us
communicate a story. There you want to improve
your ability to draw poses, or interested in
narrative illustration. This class will give you key
insights and techniques to get started with drawing more expressive
and dynamic poses. For this class, you'll need simple drawing materials that you'll likely already
have at home. As the class progresses, we will be creating
different poses and learning what makes
them more dynamic. I'm really excited
to start this class, and I hope you enjoy it. See you in the first lesson.
2. Project & Materials: In this class, we will be doing practical exercises
in each lesson. For these exercises, we
will need paper of choice. I will use this letter
size printer paper. On color pencil. I suggest
using a bright color. I will use this
red one. A pencil. Doesn't really matter what kind, but I would suggest
something that is not too dark or too light. Maybe an F, H, or two B. You could use an eraser, but I highly recommend
to not use one. We will be drawing two poses for each lesson. Don't worry. They're quite quick exercises, just to revise and put into
practice key concepts. Please feel free to upload these drawings as
your class project, or if you would like to
draw a more finished piece, draw at least one of the
images from the Pints board. You can find the
link in resources. Okay, so ready to start. Let's begin with
our first lesson.
3. Gesture Drawing: In order to achieve
dynamic drawings, there are four main aspects that I would like to
cover in this class. And these are gesture drawing, line of action,
balance, and emotion. I'll briefly explain
what they are and how they can help us achieve
more dynamic poses. Just a quick FYI. There will be a lot of ballet inspired poses in this class, not only because I love ballet, but also because I believe
ballet poses are very clear in their shapes and lines for analyzing the topics
we'll discuss. Okay. Let's go ahead straight
into the first key aspect, which is gesture
drawing. So what is it? Gistur drawing are sketches
that are done very quickly, and which main purpose is to capture the essence of
the object we're drawing. Gisture drawings are
usually done very quickly, usually in just a few seconds, and in a very expressive manner. That is, we don't tend to erase, and the strobes tend to be
quite loose and free flowing. This encourages the
artist to focus on the overall form rather than getting caught
up in details. Comes to gesture drawing, we don't really care about
how accurate the sketch is, but we care more about the overall shape and vive
of where we're drawing. Sometimes gesture drawings
can be used as warm ups, but gesture drawings are more of a skill
in and of itself, because they can
offer us a plethora of benefits when it comes
to our drawing practice. Some of these benefits
are helping us understand the energy of
what we're capturing. It help us to be more
aware of forms and shapes when we're drawing a spontaneity,
flow and movement. This helps to convey a sense
of liveliness and action. It can help us improve
our drawing speed. Especially if you tend
to spend a lot of time working on a piece
and end up not liking it. This is a skill to hung on in. Gesture drawing is amazing to work on abstraction
and observation, two very important skills
in any drawing practice. And overall, it can help
us feel more confident about our strokes and
drawing techniques, and as a result, create
more expressive work. We're now going to
do a quick exercise. As you grab your materials, here's a few quick points
to consider as we draw. Our sketch doesn't
have to look good. Doesn't have to
be a masterpiece, doesn't have to feel finished. Our goal with gesture
drawing is to capture the essence of
what we're looking at. Imagine that we're
taking a photo. T snappy and quick. Now, for this exercise, we will be doing gesture
drawings of two different poses. The posts we will be
working with will remain onscreen the
whole time as we drop. But in case you need to see the image in
more detail later, you can find it both
on my Pintres board, which is linked in resources. We'll have 30 seconds
for each post. Let's start with our first one. I think it's really
important to analyze the image before we
start doing anything. Whenever I'm doing
gestural drawings, I like to think shapes. So let's analyze here
what shapes we see. The head would be
oval or a circle. And I can see a triangle right here and another one right here and another one right here. And I can also see that hertroso
is a little bit square. Is not quite a rectangle, now we're going to
do the drawing. Don't think that has to be
perfect as I said before. Now, let's use our pencil, and let's start ready set go. Okay. We've got the head, but it's kind of
tilted to that side. Got the square, the arms, and this is the triangle's
telling you about. This is the other triangle, which is a little bit more Okay, Let's see there's a
big triangle here, so the leg goes like that, and the other one
goes like that. Can add a bit of detail in
gray here. Then time's up. Now, we're going to grab
our colored pencil, and what we're going to do is to clean quotation marks up
the sketch a little bit. I would like to just
do a little bit of corrections to my sketch
and add some details. And let's see if we can see the shapes. A little bit better. Now, this is my final result. I like a movement, and I could add more
details like that, like pants, if you want. Some wrinkles. And the
ear and even sun shading. Okay, this is a good start. Let's go ahead and have a
look at our second image. And let's analyze the
figure a little bit. I'll share with you what I see. I see the head that is an oval, and I see a bigger oval
right here at his hands. This is a rectangle, I think. It's like elongated. It's not quite a square. I see a triangle here and
another triangle down here, which I think it might
be a little bit tricky. Let's grab our
pencil and remember that these images are going
to be in my pint sport. If you want to have
a look at them a little bit closer later. Okay. Ready, set, and go. Now, the head is going that
way. Let's do the torso. And another oval,
I said right here, the arms a triangle
right here, I said. So and then this goes down. And this leg will
be going down here, the triangle right here. The neck and the arms. Oh, I really like the
energy of this post. And I think that one of the best things that we can
do whenever we're drawing, doing gestural drawings
or simply sketching is to have confidence
in our strokes. Because I believe
that when we're very precious about how our sketch
is going to look like, we tend to control the
movement quite a lot, and it's really
important to that go whenever we're trying
to capture movement. Grab your colored pencil, and let's do a little bit
of detailing if you want. Or corrections, which, again, we don't need to correct
anything right now because we're just doing just
doing just rule drawings. But we could add a little
bit of shading who we want. Or if there's a
line that you don't quite like and would
like to redo or do over. And I do like both. I think both share energy, but definitely I
prefer the sick. I can see that with this one, my hand is already losing up, so I'm actually pretty happy
with how this turned out.
4. Line of Action: Let's not talk about
line of action. The line of action is an imaginary line that
runs through a character. This line help us identify the flow and direction of
the pose we want to draw. In this examples, we can
see that the line of action illustrates the flow
and direction of the poste. The line of action show us where the energy of the
pose is or is going. This is a great example that shows us where the
energy is going. In the first picture, both energies are
moving upwards and the characters appear a bit stiff with little
interaction happening. In contrast in the other image, the energy has specific
direction and flow, making the punch feel much more dynamic and visually engaging. This is another
excellent example. We can see that because
the character is being pushed and
offering no resistance, the line of action
curves to the left, clearly indicating the
direction of the energy. In image B, however, the character is offering
some resistance, so we can feel that while some of the energy
is moving to the left, part of its directed to
the right to prevent the character from being completely pushed
in that direction. One common misconception that sometimes I find is
that some people imagine this line as a
spine of person or animal, which is not quite accurate. The line of action can be placed anywhere, not just the spine. Usually, there is a main
line of action that starts from the head and
ends at one of the feet. However, we can draw
several lines of action because ultimately
the purpose of these lines is to
show where the energy is flowing and in which
direction is moving. We can draw a main line
of action for the body, but we can also add lines
to the arms or legs, depending on what helps you visualize the energy
and direction the best. Let me show you a couple of
examples using my own work. In this illustration, the
girl is walking to the right, but we can see that her energy is fully directed
in that direction. Otherwise, it would
feel like she's either walking faster or trying
to catch the butterfly. At the same time, she's
reaching for the butterfly, so some of her energy is
also directed outward. Since she is moving
to the right, her back leg indicates the
direction she's headed. These lines create a sort
of skeletal structure. This guy is sitting
and relaxing. Most of his energy is
directed toward the bench. Since he's holding the boom box, he needs energy to lift it. So I drew this curved line to show where the energy
and movement flow. He's not fully leaning
against the bench, so we could even assume
he's dancing a little. Also, it's worth
mentioning that a line of action can be
applied to plants too. Animals. Anything that
is alive, basically. Let me show you a
couple of examples. This beautiful photo shows how the two different animals have
distinct lines of action. But these differences actually enhance their interaction
and provide context. With plants, it's very interesting because
some grow upwards, trying to find the sun, so their energy is
directed upward. Now, look at this sassy guy. We can see that his body
is pushing forward, but his hands are creating
a curved elegant movement, and his legs are moving
sideways as well. Back to plants. So we're just
trying to resist gravity. This one is not trying too hard. Finding the line of action
in our poses is easier when we consider the three
line of action basic types? The C, which is also
known as convex, reverse C or concave, S. Training or I is key to
cultivator during skills. So let's do a quick quiz. I'll show you a few poses, and you tell me which
line of action is, either a C, reverse C, or S. Remember,
we're going to start imagining just the main line of action from the
head downwards. Which line of action
do you see here? This is a C. How about this one? It's an S. Now, this one. This is a C, and
here's an easy one. This is a reverse C.
How about this one? It's an S. And this one is a C. Here's a tricky one. If you
set an S, that's correct. However, certain poses may have different
interpretations. Now, which one should you use? It depends on what
you're aiming for and how you want to
portray the energy. Remember that these are
just guidelines to help you find what's most suitable for your work and what feels right. If you are onshore,
try different lines of action and decide which one
looks more dynamic to you. Personally, I have
found that the S is often used when there's
some form of resistance. Remember this
example. In image A, we can see the energy
is distributed evenly, whereas in image B, the energy is going in two different directions,
representing resistance. One personal tip is
that for dynamic poses, even a straight pose will have some curve or energy to it. This example, although she's standing
completely straight, and we might say the line of at suggests the energy
is going upwards, our spines are curved to
distribute our weight. So even when a person
is standing straight, the drawing will look
more dynamic if we add some curves that imply the
energy is evenly distributed. This is why people sometimes confuse the line of
action with the spine, but let's remember
that it all depends on what you want to
achieve with your pose. Not all poses will have
the same line of action. It's time for exercise. We will draw two
different poses. We will need to find
the line of action and do a quick gestural
drawing of that pose. Two important key
things to remember, think about the movement
and flow of the pose. And keep it simple, so
it's clear and readable. These poses would also
be in my Pinter sport. Remember, we're going to
do the line of action, and then I just drawing. We don't have a time limit here, but I highly encourage
you to work quickly. Let's grab our pencil, and I'm going to be showing
you the first image. I can instantly see that it
is a reverse C right here. Let's not worry about seeing
shapes at this point. Let's just worry about
the line of action, and we're going
to be tracing it. I like to do from
the head boards, but If you find it easier
to go the other way around, it is completely up to you. As I said before, the
archers guidelines. The important thing
here is that you find a method that
works for you. Now the other way around
that you work for the method, if that makes sense. I can see another thing before
I start drawing the line, is that it is a C,
It's a reverse C, but it is an open one,
if that makes sense. It is not to like the angle is like that
and not quite like that. So we're going to
try to figure out how open or closed our C is. So I think this is,
like, kind of medium C, so we're going to start
and try to recreate that. And once again, with
lines of action, I do suggest to do
a quick movement. At this point, we can actually start thinking about shapes, b square and I do with
the gestural drawing. Now, I can see a triangle, a of square is a rectangle. And I'm going to
try that the line follows the line
of action like so. And remember, be quick. You can do a couple corrections, but don't try to overdo it because otherwise it's just
going to be really messy, and it's going to
be hard for you to figure out which line do you
want to do because we want just to train our hand to be quick and not be too precious about
what we're doing. Now, let's see, we have
the triangle right here, but it's moving in that line, so we're going to incorporate the figure into the
line of action. So we have the
triangle right here. We can phrase another
line of action like that. And now let's do the arms. There is a line that goes actually goes up
here, not right here, so. Sorry, my mistake. And this one goes like that. And this is a triangle that
I was telling you about. Now, we're going to use
Well, I'm using red, but we're going to use our
colored pencil to trace over this and to it up ale bit. I'm going to happy with
this one with this arm, I don't think if
this one ends here, it should start from here. Okay. I think that
will make more sense. But anyway, we're just want
to capture the movement. So we can see our
line of action. The other one I drew and the
ones I drew for the arms. Let's just draw some shorts. And by the Okay. This is our first line
of action sketch. Let's have a look at
our second image. Alright. This one is
very interesting. We can see that it is C. And well, once again, don't worry too much about the figures or while you're going to be drummed
for adjust for drawing, let's just focus on
the line of action, which I think it goes from
the head to the toes. And it is a little
bit more open. So, let's try to do that. Ooh. Maybe let's Okay. Alum gate the line a little bit. So it's a little bit more open. Oh. And les star drawing shapes or let's try to do
the gesture drawing. Now, I see a triangle ratio, and I see that the
torso would go here, and we are going to be trying to trees that torso that kind of matches the line of action
ratio, going upwards. Little bit downward, and here is the triangle I'm going to be drawing the hand. You feel free to draw
the line if you want. But there's another line of action here, but
I'm going to skip it. Then it goes from here to
that bit. And that bit. And let's connect this too. And this is my sketch. And let's start cleaning this up or to give
that more details. Is there any sort of, like, a belt type of thing right here? And the leg is
actually quite low. Sound like tow a bit higher up. This is my sketch,
and I do like it. I think it has that energy
that goes that way. And I'm quite happy with
what they look like. Let's just add some
shading here as. The characters jumping. Don't forget to upload yours. I'll be ally I'm looking forward
to seeing your drawings.
5. Balance: F. Let's now talk about balance. When it comes to drawing poses, we think of balance as how our pose is visually
distributed. If we want to draw a pose that
looks natural and dynamic, we need to consider
physics a little bit. So I would like us to
consider gravity and weight. Let's use this
image as reference. I'm going to remove
the background so we can focus on the pose. Let's identify a point where the body makes direct
contact with the ground. This will be where
gravity is resisted. If we draw a line
upward from that point, we can clearly see that most of our weight is
shifted to the right. This line has an in It's
called a plumb line. A plumb line is a line that has weight
attached to the end. Originally, plumb
lines were used by builders to take the
walls we straight. In this particular case, we will think of weight where gravity is being
released resisted. Let's have a look at this image. In her first drawing,
we can see that her weight is basically
sitting on her back leg. And as you can see,
this first pose looks way more balanced and
organic than the second one. And we can see where the
plumb lines are located. Usually in standing poses, the weight will
shift between legs, and sometimes we would have even distribution of
weight in both legs. In that case, we will draw the plumb line right
in the middle. In Ballet, there's always
this tension, let's say, between your energy
going upwards, but also pushing downwards. And you have to constantly
be aware of where your center of gravity
is to avoid falling. Let's talk about
center of gravity. This is the point where weight is evenly distributed interpose. In humans, it's usually located around the mid abdomen
or lower back. In cases like this one, we can locate the center of gravity and draw a
plumb line from there. Now that we have an idea of where the center of
gravity will be, we can start thinking on
how the weight would be distributed in order to
maintain set center of gravity. Let's look at this example. Since he's upright, gravity
is pushing him downward, while the upper part of his body is resisting gravity slightly. The point where these forces meet is the center of gravity, though it could be
a bit lower too. If we locate the point
where gravity is least resisted that is his foot and draw a plumb
line from there, we see it passes right through
his center of gravity, indicating that his
weight is equally distributed on either
side of the line, making the post appear balanced. One thing that
really helps me to distribute weight
italy is to think of the line of action rather than the whole shape of the person
or object that I'm drawing. In other words, the idea is to adjust the line of action in a way that it's balanced and that our object
doesn't tip off. Now, let's go back to
the previous example. We have identified the point of least resistance in
terms of gravity. Let's draw a line of action
from the head to that point. Now, let's locate the
center of gravity. Draw a some line and adjust both the line of action
and center of gravity. So the line passes
through the later. We can see that the weight is more evenly distributed now, creating a more balanced pose. This is the before and after. One version looks like stipping over slightly while
the other doesn't. Remember, you can use this tool depending on what you want
to achieve with your pose. I found a great
example that shows how adjusting the line of action can help create the
illusion of weight. It is important to
consider gravity and the energy needed to resist
it when drawing poses. Let's now do a quick exercise. I would like to show you the
previous drawing that I did, because I want to
point out a few things that balance can help us with. As you can see, the
line of action, it was a C. However, the character's energy seems
to be tilted to the right. Perhaps the character would
look a little bit more accurate if we tilt the
image a little bit. So this is how
balance can help us. So let's start with
the first image. So let's draw the ground
and our plumb line. Now, let's imagine the same lines in her
image right here. We can see that a lot of her weight is tilted
towards the right, and we can see that her leg is basically the one that
is moving to the left. We can see that her
hand right here is be lined with her foot right here, and we can see that her head is not too far away
from the plumb line. We can see that the
line of action could be could be a little S
or could be a st, depending on how you see it, and not so curved C.
I think personally, I'm going to be doing let's see. Now, the Plumlin can
also help us with the degree of openness
of our line of action. So we can see that
the head would be right here and that her
feet is right here. So our line of action is
more or less like that. And we can start drawing the it row drawings.
We can do the head. We can do the hand right here. We can do the torso, which will be like that. Look quite a square rectangle. And that goes all
the way down here. That The leg goes. The leg is actually a line
to our center of gravity. So let's try and do that. You can draw a line of
action for this one, too. And this one goes
down, goes like that. And let's draw the skirt. Well, perhaps a
little bit longer. And now let's grab our colored pencil and
start doing our sketch. M Okay, this is our second one. Let's just draw the ground
and the plumb line. So we can see that the
plumb line would go up here and that
she is a reverse. We can see that she almost
feels as if she's tilting to. So let's do that. This is the ground, and her head would
be right here. So that would be
a line of action. Now, let's do or let's
try to find the shapes. Now, we can see that her
head is actually like here. Now, her arms are
not quite doing. Well, they can be doing an oval, but this one is a
little bit straighter. So, goes like that. Her torso, it is short, so we're going to
be doing a square. How close is this line
to the plumbing line? I think it's It goes like that rather than here because it's a little
bit farther from that. Now, I can see a
triangle right here, but I can also see that it aligns with her
head a little bit, so I'm going to be doing
the triangle here. I can see that it crosses
the leg right here and goes down like that. Okay, so this is my image. Let's go ahead and trace
it with our color. Little bun she's wearing. Now, her neck is lovely,
is really elongated. But remember what
we said before, even a straight line would
have some curve to it. Her top is really cool. So let's try to
recreate that top. This is a final image. I really like it. I just
like the flow of this image. I think this is my
favorite so far. Let me show you the
first one, we drew. And here we'll have
them side by side.
6. Emotion: And finally, let's talk
about emotion, which, in my opinion, ties everything that we
have talked together. Think of emotion as the
mood your pose has. The mood in your pose will affect the overall energy of it. For example, when we
think of happy poses, the energy typically
moves upward. In other words, there's
greater resistance to gravity because there's a lot of energy pushing in
all directions, making the pose
appear very light. Set poses, on the other hand, depict energy moving downward, offering less
resistance to gravity. Cre poses are
interesting because although the energy seems
to be moving downward, there's a lot of resistance to gravity creating
tension and heaviness. So the emotion in
your pose based on its energy can help
give it context as well. And this is very important if you'd like to work
with narratives. For example,
understanding the energy and how much your character is resisting gravity can help us visualize the line of
action more clearly, and as a result,
we will be able to draw emotional
poses a bit easier. In Ballet, we think a lot of emotion in order to
communicate with the audience. And since we cannot
speak on stage, we use our body, and it's
energy to tell a story. So the main takeaway in this lesson is to think
of emotion as energy or. And to think in advance, if we want to draw a
highly energetic pose or perhaps a more subdued one. So considering the level of
energy or emotion in our pose before we start
drawing can help us create a more dynamic
and interesting pose. One little tip that I also
got from Ballet is to exaggerate the emotion a little because when
we are on stage, we may appear very
little to the audience, so we need to make
ourselves seen. So if you're having issues, whenever you're drawing
or an emotional pose, that is, if your emotion is
having issues being seen, try exaggerating
the pose a little. It may feel odd at first, but this can help us identify where we're
actually having issues. For our exercise, as usual, we're going to draw two poses. For this specific exercise, I want us to keep our
characters faceless. We want to focus just on
the energy of the post. Okay, let's do our last
exercise, which is emotion. And remember, we're
going to keep our characters faceless, so we're going to care
just about the energy. The characters or
the figures that we're going to be
drawing is projecting. Let's look at our first image, which is this one. Oh, I perhaps think this
is a very tricky one. Let's think about the energy,
the characters projecting. Okay, she seems to be
pushing to the left, but also pushing downwards. So we can see that the
whatever she is afraid of, it's coming from
here, so we want the energy to go this way. And let's start drawing
the ground plumb line. And let's just see if that
energy crosses the plumb line, feels heavy down here. So we wanted to go
pushing downwards. In the specific example, let's find her center of
gravity, which is right here. So this is where we're
going to be we're going to be drawing a line of
action passing through here. Is it too tall, perhaps, perhaps we need to draw it
a little lower because it's pushing dow. So ignore this one. Once again, we're allowed
to reconsider movement. But the reason why I don't
like to use erasers is because we tend to be too precious about whatever
we're drawing. So it is okay to reconsider, but it's not okay. Quotation marks to doubt about yourself and your
lane work too much. Okay, let's go back to the
drawing. Now, the head. So we need to think about
the head will be right here. O line of action is
an S. So it goes Wh. Now, This would
be the first leg, the first leg, this
is the one leg, and let's draw the other one. So this is our line of action, and this is our other line. The head, how far away is
it from the plumb line, and how high up is that line? So we're going to
be drawing it here. I can see a circle. I can see a red tgul
right here that actually passes a plumb line.
Oh, like that. The hand goes right here
and goes down like that. And let's see where
the plumb line is. It actually this like crosses the plumb line a little bit. Goes like that, and this one
goes a little bit farther. Let's grab our trusty colored. Remember no faces. I was about to draw the
vase, but no faces. If you were to look
at this image, what would be the emotion
that you'd be thinking of? Perhaps is the
hands that are kind of giving it away that is
trying to protect herself, perhaps is the legs. What is it about this image
that makes her look scared? Let's do our second exercise. Come on, this is our last one. Okay, so let's draw the
ground, the plumb line. Okay. Let's look at her
energy. She isn't happy. She seems pretty lifted, so the energy is going to
go up and to the side. Like her energy seems to be
going in all directions. The plumb line is right here, and it is from here
and the head goes. It's pricing the plumb
line a little bit. So we can see that
she's a reverse C, and it is a open one. So it doesn't go too far
from the plumb line. So that's the line of action. And the shapes I
see, it's a circle. I can see a square and it
goes down, and the leg, the leg does a little
triangle from the head here, so if it's going upwards, let's think like
that. And play that. Now, the arms we said they
were lifted and going up. This one is like a
straight line like that, and this one goes like, Oh, it's actually crossing
the plumb line a little bit. So this is our
character, our fear. And now let's do a
little tracy trace with our colored marker
or colored pencil. So remember no face. Again,
I was going to do it. I always sir with a face. I just like faces so much. This is the final recint. Let's look at the other image. And let's see. Do you see a
difference in the feelings or the emotions that the
sketches are portraying? How do you feel about yours? Do you think there's anything that needs or could be improved? Now, let's look at all of the sketches that
we've done so far. I love this one. This
is my favorite one. But we've got a few. And let's look at the
first ones we did. I love the energy
of this one, rate. I like the lines, and I like
how quick the gestures are. I feel that as we had
more time to draw, those lines were a
little bit more tight. So I personally do recommend
having a time limit, perhaps not very strict one, but I would recommend
definitely having that. I also think that
as we progress, there was a lot of warming up. I can see right here. I do love I love,
love, love this one. And having said that, if this is a sketch that
you particularly liked, I would encourage you
to do a finished piece, and to share with us in
the project gallery, as well, I would love to see more finished pieces
because there's one thing I love about seeing projects is the progression, how it started from
sketches and how they moved towards
something more finished. You don't have to. This
is completely optional, but I think I'm
gonna be doing that. I'm gonna be sharing a few
ones that I really loved. You can trace this
once over if you don't use any digital medium. That's the reason
why I suggested using a bright colored medium, because if you
want to trace over the drawing to do a
more finished piece, then you can actually do that. Thank you so much
for joining me in doing this exercises.
It was really fun. And once again,
ss I blow them to the Perje gallery doesn't
matter if they're just the sketches or if you want to do a more
finished piece. I just want to hear
your thoughts on your exercises, how you felt. If there's anything in
particular that you found difficult or easy.
Share with us. It's always lovely
and so inspiring to hear other artists' opinions
on the same project.
7. Extra Resources: In this section, I would
like to share with you some extra resources
in case you want to practice a little bit more
after the class is finished. They are going to be
linked in resources. I'm going to recommend you
two apps. One is POSE. This app is great for
visualizing dynamic human poses. You can easily manipulate
three D models and try out a wide range of angles and positions to get your
desired posts just right. Magic Poster, Another
excellent app for working with three D models. Magic Poster offers more
advanced customization options, including multiple
models, various props, and dynamic lighting as well. I am going to recommend
you two websites. One is quickposs.com. This site offers time to
figure drawing sessions and random post generators to help you improve your
speed and accuracy, line of action.com, a fantastic resource for practicing figure drawing
and dynamic poses. This site features various
post categories and time based sessions to simulate real life
practice environments. Pinterest. Well, it's no secret. I really love Pinterest. You can find collections of reference poses for
different body types, action poses, and
dynamic movements. It's all there. While
these tools are helpful, don't forget the value
of observing real life. Drawing from life models
or even capturing poses from people around you can dramatically enhance
your skills, practice sketching
friends or take inspiration from public spaces, or you'll find
natural dynamic poses in everyday activities. Now, remember that
these resources will be listed in resources. And now, just a few quick words before we finish the clas.
8. See You Soon: As we wrap up or class, I want to take a moment to
thank you all for being here, and I hope that you enjoyed
drawing dynamic poses. And that are four key concepts, just drawing, line
of action, balance, and emotion, help you have a better understanding of how to bring energy
into your drawings. I'm excited to see how you apply these techniques
in your work. So, please don't forget to upload your exercises
to the gallery. Drawing poses can
be a bit daunting. So please remember that
the more you draw, the better you'll become at
capturing dynamic poses. So please keep
practicing regularly. And also, very importantly,
stay inspired. This is key. Explore
different sources of inspiration,
whether it's ballet, like in my particular case or any other sport that you may
like or even daily life. Daily life is an amazing
source of inspiration. Feel free to reach out. If you have any questions. You can find me on
Instagram mainly, but I also have other socials. We'll list them here. And
please leave a review, letting me know what you enjoyed the most
about this class. This will help me
incorporate more of what you liked into
future classes. Thank you again for
joining this class. Keep drawing, and I
hope to see you in future classes. Bye for now.
 Karla Alcazar, Illustrator and Teller of Tiny Stories