Transcripts
1. Trailer: Hi, I'm Olga, Designer and Illustrator. I really like drawing with pens because it's easy and fun and you can do it almost everywhere. When you are drawing your brain is heavy, it doesn't really matter how and what you draw. What matters is that you are drawing. When I draw, my main rule is don't go crazy about being photorealistic and keep it simple. Drawing with pen is perfect in this case, it's one way thinking. You can handle most of things, you can drastically correct result issues. So at some point you realize it is just about having fun. In my Skillshare class I'm going to show you how to create some simple few drawings and if you're about to do with those steps in drawing, this class is for you. Welcome to my class, hope you will enjoy.
2. Class Project: As a class project, I suggest you do perform activities shown in the class. You can perform all activities or just one you like, drawing simple objects, drawing flora or drawing patterns. You might not be a skilled artist, designer, illustrator, rocket scientist, whatever. You only have to be the one willing to draw and have fun. Anyway, by the end of the class, you will have your own nice simple drawings. As a bonus, I've prepared a cute little drawing for you. You can print it or use it any other way you want. After your publishing project and class project gallery, I'll send it for you with pleasure. If you're stuck, I'm always here to help you. Okay. It's time to stop.
3. Supplies: First of all, let's talk about materials you will need. All materials we're going to use, you can get at your local art store. You won't need some rare, expensive or super-exclusive materials. Your favorite pens and just a regular paper will be enough to successfully complete this class. Now I will show you what materials personally I prefer to use. Paper, in the most cases, I draw just on a regular paper or in my sketchbooks. I like Canson sketchbooks, they're comfortable for me. Also, I have several absolutely ordinary and not-so-famous brand sketchbooks, which I bought in my local art store. They are very well suited for drawing with pens. Now to pens, I'm a huge fan of Sakura Micron pens. My minimal set are Micron pen number 005, 01, 03, 05 and 08. Also I have Micron brush and ordinary Sakura white gel pen. Also I like Faber-Castell Pitt Artist Pen, they are really cool. This one is gold, you can see it, and this one is silver. I really like simple STABILO pens, since they are cheap and look really cool for their price. Here I have several not-so-famous brand Gelly pens. They're even cheaper and still suitable for our purpose. Optionally, it will be great to have some colored paper. I really like to use it to diversify my drawings. As you can see, the brand of your materials really doesn't matter, and our toolkit is pretty simple. Again, your favorite pen and just several sheets of regular paper will be totally okay. By the way, if you want to digitize your drawing, you will also need a scanner or smartphone with a camera and Adobe Photoshop. If you don't have Adobe Photoshop, you can get your free trial on Adobe.com. In the next part, we will start drawing. I'll see you there.
4. Drawing usual objects: Welcome back. Now we're going to draw objects we deal with every day. As I think it's really fun because you can draw absolutely ordinary things. Well, it don't look so beautiful to draw them, but it helps you to train your eye and solves problems like, I don't know what to draw today. It could be absolutely anything. You're drawing stuff, your favorite cup, your laptop, I don't know, your house plant, for example. It can be literally anything at your arms length. Just choose three objects and you're ready to start. I chose my water brush for example, my lip balm, and here I have my son's toy. It looks so cute I think. I chose them, and let's start. I start with my water brush. The main thing I try to make here is not to make a significant disproportion. Then I let some details. Stripes on cap, tip of brush inside the cup, thread, and a little bit of shadows. To give my artwork more volume, I'll add some drops of water left inside. Something like that. Now to my lip balm. Again, I start from the main outline, and then start getting shadows. For details, I'm going to use my number 005 Micron. I add the name of my lip balm, and then these cute little flowers. Here it is. Now to my last one object, a toy cat. Again, I move from outline to details. Objects shouldn't be perfect. Don't go crazy about copying your object in detail. Our goal is just capture the feeling of all what you draw. Again, don't think too much about proportions, lines, details, photorealistic look and other boring things. Many people think, I can't draw, it's too difficult, or you should have a special education to be good in drawing, or no, I can't do this, and so on. You shouldn't think that way. First of all, drawing is about having fun, training creative side of your brain, and relaxing. Not about being perfect. Don't be afraid to do something wrong. It's just about you, how you feel and see. It's my cat. Now we have our objects drawn. Don't forget to share your process in class project gathering. Now we are ready to our next activity, drawing flower. I'll see you in the next part.
5. Drawing flora: Now, we are going to draw a simple flower. If you have been enrolled in my previous class here on Skillshare, you know that I'm obsessed with drawing flower. I think all girls like to do this. Now I'm going to draw a simple flower [inaudible] directly from my imagination. You can also find some references in the internet, or you can draw directly from nature. It's totally up to you. First, I create some outline to make it to more proportion. Next, I'm adding some details. Leafs, branches, margin outlines to highlight accents later. Something like this. Now, to give my leaves additional contrast, and improve balance and harmony, I'll make some of elements totally black and add some black [inaudible]. That's much better. Now we've got our simple flower [inaudible]. You can leave it as this or later, you can add some lettering to make it more interesting. Don't forget to share [inaudible] in class project gallery to have feedback from our community. In the next, part we'll make one of my favorite activities, drawing all over pattern. I'll see you there.
6. Drawing pattern: Now, we're going to draw simple all over pattern. I like to draw flower so my pattern will be a floral one. If you don't like to draw a flower, it's not a problem. You can create your pattern from any objects you like. I start with making similar branches, but land in different directions. My pattern will be multi-directional. But you can go one directional pattern or maybe two directional. It's totally up to you. Again, we mostly do outlines first, then come to details later to give our pattern accents we need. Drawing pattern process looks like Googling while you're talking on the phone. For me, it's like meditation. When I draw my pattern, I relax. I don't think too much about composition, proportions, scale, etc. I just keep it as it goes. Hope you will enjoy this process too. It's time to add some accents. I want to make some of my leaves full of black to make my pattern more interesting. Maybe I want to add some red berries to give more contours to it. Here it is. Simple pattern drawing with pens is a great Greek way to decorate simple white or craft envelope, or just make your napkin funny and cute for some special dinner, or you can use it in a funny way you like. Don't forget to share your projects in class project gallery. In the next part, I'll show you a great way to diversify our drawings with some black magic. I'll see you there.
7. Drawing on color paper: Welcome back. Now I'm going to show you my favorite way to play around with simple drawings and make them look more dramatic, is drawing on color paper. For example, here is jug with flowers in it, same white on black, same black on green, same golden on dark gray, and finally, silver band on drupal paper. The trick is not only to find matching color of drawing and paper, it's about to find some balance between size of elements, their amount, lines thickness, layout and composition perception, style you draw, and finally colors. For example, usually white on black drawings look more pretty than black on white. But as you can see, not in this case, overall dot pattern didn't work. Black on white still looks better but it's composition changes and did in some lettering, white on black already looks better. Yes, it will take some time to get the feel of this balance but when you get it to you will be pleased with the result. So it's time to move on. In the next part, we will talk a little bit about lettering. I'll see you there.
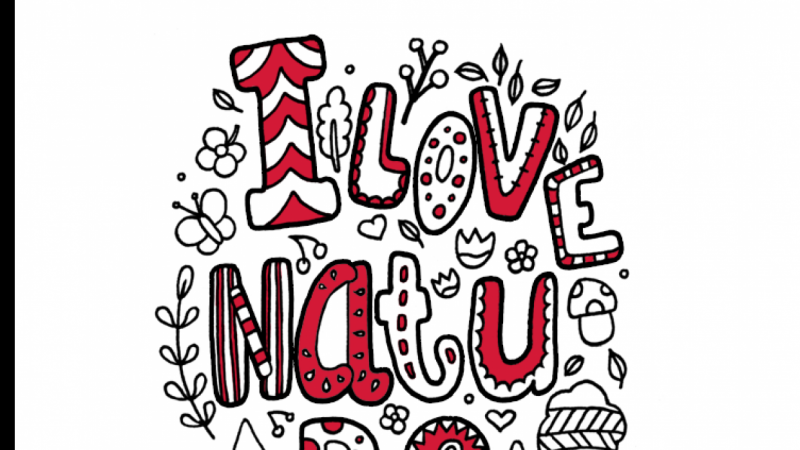
8. Adding lettering: Now, we will talk a little bit about lettering. Sometimes I like drawing letter into my simple drawings. It's a final touch like a chef to a cake. Also you can make your artwork only with lettering. It's a bit trickier and requires more efforts but it's a really good way to practice. I'm going to add some lettering to my floral wreath, for example. I think it should be something not too long and simple. Maybe a word smile would look good. To do this, I'm going to use my number 0.03 micron pen. I'm ready to start. First, I make thin outline to settle these approximate position. Then I start to add more weight to my letters to give them more warm contrast. Finally, with my thin pen, I will work on my final outline. Again, don't go crazy about perfection. In this case, it isn't necessary. Indeed, simple pen drawing serves better with simple, fine letterings. Here it is. It looks as I planned, simple and cute. Now, I'll make a piece only with one word. I choose word "Hello," for example. I'm going to use my purple paper and maybe silver pen. Here I do the same thing. Start with outline and then add weight to the letters. You can find in the Internet font you like and use it as a reference. It will make the process easier and it will be a good training. Something like this. Maybe I want to add some simple pattern of background and dots, for example. Now, I'm happy with it. In the next part, we are going to dive into scanning tips and Photoshop. I'll see you there.
9. Scanning: Welcome back. Now, I'm going to scan my artwork. Here are my personal rules of thumb for simple artworks. First one, clean scanner's surface, it will reduce your fully working Photoshop. Second one, use resolution from 300 DPI and higher. Third one, you can use only color mode because it's okay with any kind of planet paper, and the last one, save it in JPEG format, which is totally okay for our simple drawings. If you don't have scanner at hand, you can use your smartphone camera or special ScanX, it will work good too. Our next step is preparing Photoshop.
10. Preparing in Photoshop: Our artwork is scanned and now open it in Photoshop and make some adjustments. There are many different ways to do this. I'll show the way personally I use. First of all, I double click on my "Background Layers" to unlock it. Then, go to my Adjustment Pen here in the right. If you don't see it, go to the Window and make sure Adjustment option is checked. Zoom in a little bit, to do this I use shortcut Command-plus in Mac or control-plus on PC. To zoom out accordingly, Command-minus or control-minus, then I chose Levels and start playing with sliders to make my background lighter and drawings darker. Another one of my favorite ways to improve scan is curves. Curves is here in the adjustment panel near the left. Again playing with sliders until I'm happy with my results. Now, we can merge all layers in one using shortcut Command-Shift-E on Mac or Control-Shift -E on PC but if you're unsure with your adjustments always making the curve to have changed to come back to your sliders in each case. Now, we have only one layer. To clean out paper checks from background, go to select and choose "Color Range". You can see the menu. Choose select "Mount here" and click "Mask here" then click anywhere in the whitespace and click "Okay". We have our background selected, but if substance selected nodes away, you need go again to "Select, " "Color Range" and start dragging the "Fuzziness" slider and the load we need will be selected. I click "Cancel". After that, we need to make selection base. To do this, I will use shortcut Command- Shift- I on Mac or Control-Shift-I on PC or just choose "Selection" and click "Inverse". Now we have our drawing selected. Now we need to refine the edges to make our illustration more clean. Go to "Select," "Refine Edges, " and you can see the main one. Here is my personal process for refining edges. You can blend, find optimal rate your for your drawings. Click "Okay". It's pretty long process and you will need to wait sometime. Personally, I like a little bit [inaudible] to situation with some [inaudible] to craft as they look more natural and have some styling check. Why never do absolutely clean [inaudible]. Now, click the "End Layer Mask" button and voila, we have our drawings without any whitespace. Also, I prefer to create a new layer and fill it with white to make my drawings more nicer. Here we can have shallow layers and one using shortcut Command-Shift-E or Control-Shift-E then you can save your drawings for print or for further use. If you want to use your drawing for a web, for example, I will put it in your graph, then go to File, Save for Web, choose JPEG or PNG format, click "Save." You can name it. For web for example and click "Save." If you want to print your artwork, you need to have CYMK color mode. To change more, go to the image, mode and chose "CYMK". As you can see now we have CYMK color mode. You can go to File, Save As, again name it for print, for example, choose the JPEG format and click "Save". Again, click "Okay, " and then you're done. You have your own digital art piece.
11. Final thoughts: Finally, you did it. You have your own cool drawing in your hands and maybe even in Z22 version. Now you know the drawing is fun and easy, and you can do it almost everywhere. Remember, everyone can draw and you just need to start. Thank you for enrolling in my class, and I really hope you enjoy it.
 Olga Sh, Sketch Illustrator | Master Coach ICI