Transcripts
1. DRAWING GUINEA PIGS From observation illustration: Hi, my name is Holly Surplice. I'm an author and illustrator. And Guinea pig fanatic. This is Popcorn and
giving me kisses. And this is a Waffle. And today I'm going to help you do some
observational drawings, Guinea pigs, and then it
turns into character studies. And for your
illustration purposes. In the background, you
can hear DibDab. DibDab was going to model,
but she's too noisy. Hop over to the next
video and let's get started. Start squeaking. Stops squeaking. So much squeaking.
2. Why Guinea Pigs: One of the reasons that
I love using Guinea pigs as subjects within
picture books. is that they are such expressive
little creatures and they have the most
wonderful faces. They've got paws that are
like hands and lovely feet. You can, although
they spend their time like this, as an illustrator, you can make them do this
really quite easily. And it makes them really
fun if you want to anthropomorphize your
animals and just have them doing cartwheels and riding scooters and
things like that. Guinea pigs are great
for doing that. But before we can do that, I think it's really
important to know how the actual animal
is put together. And so I like to do
observational drawings first. We're going to start
by doing that. Waffle is eating
one of my pencils, I'm going to
be using pencil to draw with. And if you've got some of
these, these are fantastic. I'm using Ecoline brush pens. But any kind of brush
pen will be perfect. And paper any paper
that you like, it doesn't have to be fancy, even just copy paper is fine. I'm all about using what
you've got to hand and not worrying about using
expensive art materials. You'd be amazed how
much wonderful colour you can get from using some old concentrated
coffee or a tea bag. So don't worry if you
didn't have those things, you can still make fabulous
art. Let's get started.
3. GP refvid: Okay, So I've recorded a
little reference video and it's the same as I'm drawing from
in the next video. If you click on the link below, it will take to my website
where you can easily access the video through a
Skillshare student page, which you can only access
through this link. And then you can watch the video at full size and have it playing
along whilst you draw, or, as you watch me draw.
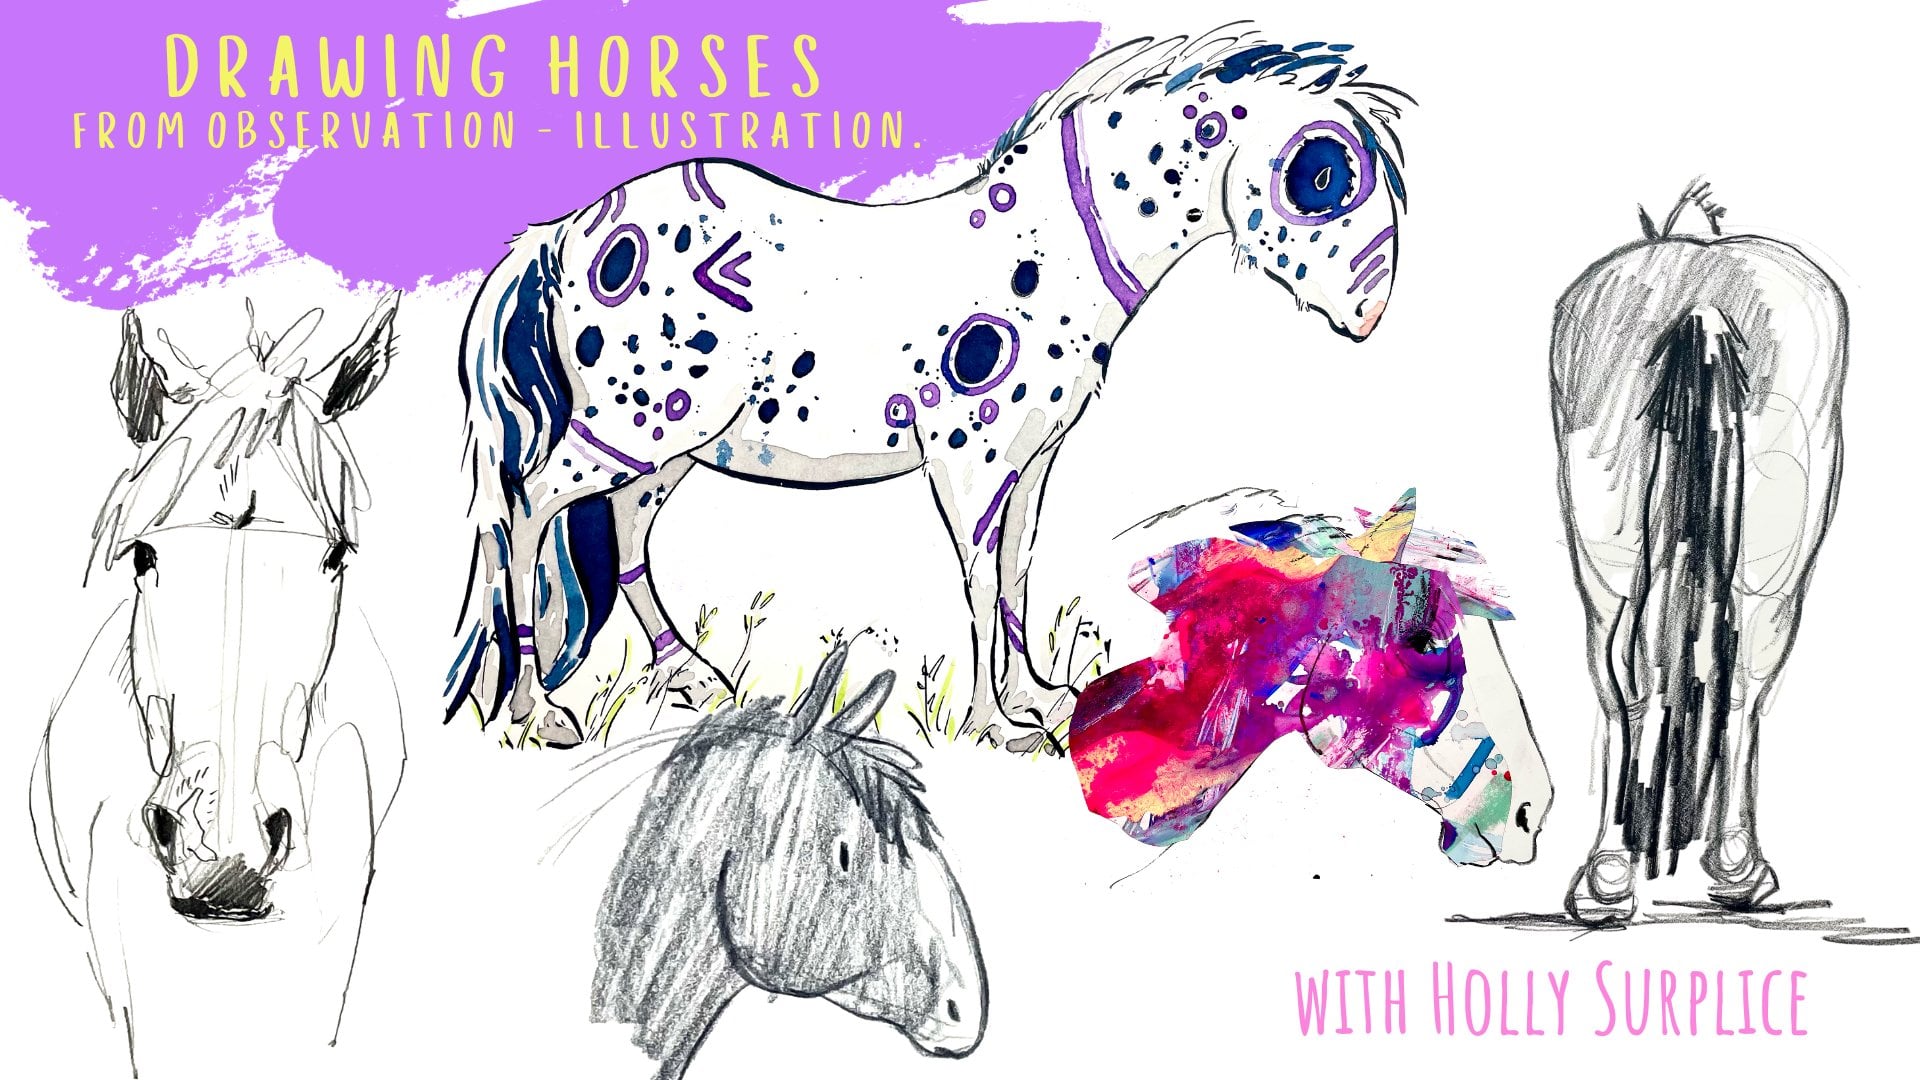
4. Let's get sketching!: Once I've swept the Guinea
pig hair off my sketch book, I am ready to go. Now, when you're drawing
anything observationally, I find one of the easiest
way to go about it is to start by looking
at really basic shapes. Now, I'm looking at popcorn. The yellow and white Guinea pig. You can see I've just
created two shapes, her bottom and her front-end, and then her ears common. I'm not looking for
perfection here at all. I'm just going about
it and I'm looking at the things that
really catches my eye. Ears are always something and
put in some this hairiness. There. She was trying to
eat my sketch books. She's made her mark on it now, which is always fun. They have this lovely chins
and their little hands. It'll cause peaking eyes. Now she's great drawer
because she's got this sticking up here and even
though she's moving, I can still look at her and
use the information that I'm seeking to helped me
to fill in the blanks, fill in what's the other areas of the drawing that
I'm not seeing her in that position
at the moment. I'm going to move
on and do waffle. And she's like,
she's like a bean. Views on pig bottom. Lovely head. They
are Guinea pigs. They kind of have like
a bit of a square into their, to their faces. And some of them are shorter, some of them are longer. They've got these oval eyes and it's lovely,
almond-shaped eyes. Ears are a bit like a wave. And a waffle isn't smooth coat, so you've not really
got any tough to bits. We can we can put
a few in there, but she does have a
wonderful double chin. I'm going to put that in. I'm looking at this little
space here where her amus. And again, I'm putting in
those little pinky toes. There's four little toes there. The backend here, and their back feet are longer and they just have three toes on the back feet. And you can use the
markings of them as well. You can always go in some, some shading if that helps you. Because you're working
in a sketchbook, you can scribble or she's
like an orangey brown, orange Brian, if I was out and about drawing
Guinea pigs in the wild, could make these notes. And we could remember, I'm drawing waffle, no popcorn. And she's got this lovely face. Again. Trying to think about those shapes
that I'm seeing. Her nose comes in there and there's a lovely
little there. Then this position, you're not really seeing a whole lot of it's all about the
spikes and those ears, those wavy ears that
come out like that. And then she's moved
but we can kind of see. So I coming back round. Okay. There's some really rough, very quick observational
drawings of Guinea pigs. They're just in
pencil, nothing fancy. Now, what we could do is
if we look at that video, again, another way we
could go about doing this is by using a brush pen. I love this for sketching
because you get down your marks very quickly. We're speeding up. I'm really just using my pen
in a similar way to pencil, but allowing it to fill in some of those colored
and tonal areas. If I'm using the brush to try and bleed that encodes a bit. But in all honesty, this is not the best sketch book I've discovered for
use in these pens. These sketches are
a little bit on the rough side and I had
to definitely quiet. And Diane, my inner
critic, because of that. It's also does a really good
thing I think to share. These are in any way my most favorite or most well done
observational drawings. But do you know
what that is? Okay. It's alright to have some scruffy ducts and
they're just keep moving on. Just don't allow yourself to get hung up on
those imperfections, as you might see them. Because all of these
drawings collectively come together to inform your
subconscious brain. Also act as a visual reminder
and a visual prompt. Prompt. I love to
go in and fill in these little small
sketchbook page with small little piggies. Once you've got your
sketchbook pages filled in, you can go on to the next video and let's look at developing some character and move these drawings towards
finished illustrations.
5. Developing Character: So how do we take our very
rough Guinea pig sketches and turn them into something
illustrative. How do we go from this to this? Well, there's several things. But I'll tell you that
all of these drawings, all of these illustrations come from a place of
just having done lots of observational
drawings of Guinea pigs and learning how
I can make their body move in different ways. So that's what we're
going to do next. Okay? Okay, so we've got to grips with withdrawing
our Guinea pig. Let's, let's start to
think about Turning your drawings
into illustrations. We're wanting to
characterise Guinea pigs. So I'm going to start with
that basic shape, simplified by two circles, a bigger one for bottom, smaller one for the head. And then coming forward, we've got our rough, rough colour Guinea pig shape. Now, as we've been drawing them, I'm sure that as
you're observing, you're starting to
think about the things. And even if you're
not aware of it, actually, if you think back, you can think about
the things that particularly appealed to
you about the Guineas. When you're developing
a character, basically, what you're wanting to
do is you're trying to exaggerate the things, the special characteristics
of that particular animal. In this case, It's
very personal to you, your character, to how you want. Which features you
want to exaggerate and emphasise is
maybe a better word. For me. I'm all about the
bum and the tum. It's why I like Guineas so much. So what I really like
to do is really kind of exaggerate that bottom. Keeping our Guinea pig
on its side still, I would just, I would
really just exaggerate. I would just make, make my Guinea
pig very full. And with that, maybe
a bigger chin. I'm just kinda going right. I'm following that,
that Guinea pig shape. I'm not really
deviating from it. But for me, big bum & tum i'm starting to think a bit more about maybe breaking
things up, maybe a few tufts of hair
happening here and there. Those are good things to
bring a bit of character to. The other thing that is really
going to help is the eyes. Now, doing the eyes is a
very particular, a very personal
illustrative trait. You'll tend to find
lots of people, illustrators have a tendency to draw eyes in a particular way. This is kind of how I do my eyes. You can see them here. They're a bit like jelly beans. Nice. It's just, it's just the
way I like doing them. But if we were to
draw this face again, let's just, let's just have
a practice. Just going to quickly draw it. But we could go, You could have a sleepy eye or that could be
like a super Smily, happy, or what
else could we do it? There's so many different ways. You could have your the circle. And then a dot The possibilities are endless
and I would really love for you to do is just spend even just five
minutes just drawing. really simple. Shapes. Maybe you want to do Just a small dots
or maybe a big dot. Drawing your eyes is one of those opportunities
to really have fun and find the character
that you're developing. It's really worthwhile
spending that time and I promise
you there'll be a moment where you
just think Yep. That's it. That's the eye. And whether it's the eye
for that character or whether it's either you just
really enjoying your thing. I want to apply that to
some other characters. You're going to find it. But it's just got to
take a little bit of practice and have fun with it. Okay, Let's go ahead now. I have a turned
our Guinea pig on its end and starting to anthropomorphise And let's have a look
at how we do that. Okay. I'm wanting to make my
Guinea pig stand up. I'm going to start with that
gorgeous bottom. And I'm just thinking that
she's turned around. She's gonna be at her side. So rather than drawing her like this where I
was then her head, we've got her bottom and then this is
going to be her back. I find it helpful to get
this circle in and then I think the front
of the hip coming in and back and then
the little legs. I imagined that my Guinea pig is stood up on its
tippy, tippy toes. There's three little toes and then the long
foot like that. And then they're gorgeous,
gorgeous bottom, and then the Tummy is counterbalancing
the gorgeous bottom. So we've got some balance there and the shoulder
would be here. And maybe issues. I don't know. Maybe let's just let's just put her hands
here for a minute. But I really want to keep
this voluptuous feeling. And so I want this curve to kind of
kick back that I'm thinking cheeks, making sure that her head
is big enough. It's coming in, then
there's all this happening. That looks like a
tiny little ear. It's not a tuft of hair. So remember the ears? Big. Then I is kinda coming
forward and I love it. and suddenly
things start to happen. And why not make the face
open a little bit. I simply follow with this smile and then
I'm just going to drop it down and give her
a little lip and then maybe some
little tufts of hair. Now, you can start to
kinda go around and add in some character for little tufts here and there's
always really lovely. Have even some marks on here. and this other foot. So she's walking,
she's going to be walking really
quite purposefully. And this other foot is
going to be up here. Because you imagine
the other hip is there and it is going on, it's kicking forward and a little bit of a
ground line in there and see the other hand coming. And maybe, maybe
we've got a flower. Here are some bearing in mind that flower
it quite nicely paired too. Guinea pig. Put some freckles and you can add your
shading as you want. But there we go. So we're starting to think of making our Guinea
pigs do something. And once you're able to
start thinking about how we can turn them onto the feet. You can do all sorts. Mean why not turn them
upside down completely? Let's have a look what
this one's gonna do. All sorts of things you can
get your guinea pig today. Just takes a little
bit of imagination and a little bit of
artistic license. And honestly, please
don't worry if things go wonky to begin with. It really, really
doesn't matter. It just doesn't matter at all. You can see here that I've
drawn things far, too far, too big there. That's okay. Because we're still
we're just sketching. And if you wanted to Take this sketch and turn into something that
was more finished. You can see, you can
copy what you've done. You could use a light box, you could even put it
up against the window. Bit tricky if you've
got sketchbook, but you can use window
or you've drawn at once, so you can draw it again. That is the general
rule of things. And maybe this guy, maybe, maybe this guy is
wearing a party hat, like a birthday crown on it. Actually, I'm not
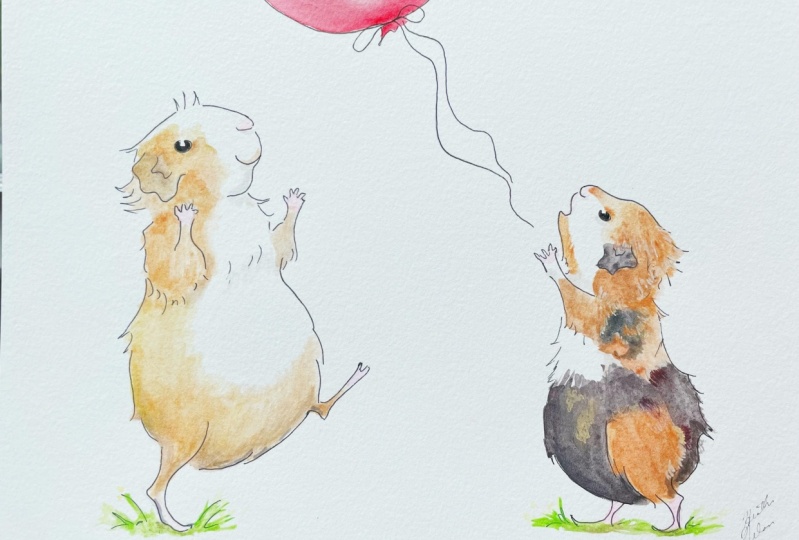
going to see that. There's all sorts of things. They can be doing, maybe he's got like a party balloon that's floating, floating off and maybe
he's going to float off. Who knows? Put your ground line down there and he
has floating off. The possibilities are endless. We really can make our Guinea
pig do whatever we want. We can just stick to
those basic rules that we've find with our shapes through our
observational drawings. And then use that
information to help us to manipulate the body
to different positions. And you'll find that
a Guinea pig is very obliging and will happily ride a scooter or wear a cape and do whatever
you like it to do. I'm starting to
bring in a little, little bit of colour here, just using some colour pencils, but you could carry on with your tonal pencil
and just use that. The main thing here
is starting to think that we can use
different types of markings to bring
additional character to our Guinea pigs. There's no limit at all. And if a quick Google
of Guinea pigs will give you an idea of the different
types of colors and markings on various
hairstyles as well that you can start to introduce to your
own characters. But really, you can go to tie and you can make
your Guinea pigs purple, neon blue, anything you want. You can have them
bouncing on a trampoline. Just don't worry. your
sketchbook is your safe space to make messes, make mistakes. Whilst you're figuring
out how to make your Guinea pig jump on
a trampoline or skydive, you're not going to
expect to get it right first time every time. So just a lie there
to be mistakes and take that as
part of the process. Don't feel anything bad about
it when you make mistakes. That's part of learning
process and it's a good thing. Life would be a bit dull if
we got it right all the time. Okay. Maybe your guinea pigs are going to have
blushing cheeks. That's another thing that
you can play about with. The color. Combinations are endless. And you can have a lot
of fun exploring that and playing with whatever
materials you've got to hand. I quite enjoyed
doing some spots and freckles on a Guinea pig. That's a good tool for
bringing out some character. This Guinea pigs. I was a
little bit mean looking, so I've kinda gone
dark for that. But added some freckles and it's softened the face just by
adding those freckles. It kind of makes him look a
little bit like a naughty, naughty little school
kids Guinea pig. I'm adding a bit of shade
on that year helps to kind of indicates that
there's a wobble in it. In the next lesson, we're going to grab some watercolor
and some pen, and we're going to create some more finished
illustrations. So hop on over and let's
have a go at that.
6. Let's create a finished Illustration!: Okay, So I really like this guy. I think I'm gonna try to convert him into something
a bit more refined. So I'm going to grab
some watercolor paper. And the stuff I like to use
is this watercolor block. The reason why I love
the watercolor blocks is that the paper is all
gummed all the way round, which means that it stays
super flat and it won't buckle at all until it's dry and then
you can take it off. I like to use hot pressed paper. So it's super, super flat
for drawing my lines. I like an ink line. You can see here, I like to use ink
and for these lines, I use these dip pens. And they just, they're dipped
in some lovely black ink. But for the purposes of this, because it takes a while for
those ink to dry, I'm going to use one
of these is a Tombow. I can never say Fudenosuke Pen and it has like the
nib is soft and moves. But when it dries, it's completely water proof. So brilliant when we're
using watercolors. Watercolors, I'm using are. But you can use anything at all. These are Kuretake, and I'll put all the list
of all the things in the, in the materials section. But these are lovely. They are nice and rich. They're very, they're
quite opaque. So I enjoy them. I enjoy the richness
of the colors. Some people like
things a bit softer. But at the moment, really enjoying this and that's
what I'm going to use. Paint brushes. My favorites are, these is called, this is
a filbert shape of brush. I love this. I like using big brushes
to lay down my water, but water and paint. This is not inexpensive brush, so this is just a
Pro Arte size 12. For finer details,
I'll use just, again, nothing expensive but
just a nice round tip. Like class. Sometimes for bigger paintings, I'll use nice big flat one. But for this purpose, I'll personally just use these two, these two paintbrushes. Okay, let's go ahead
and Let's do it. I'm gonna put this
somewhere so that I could have got
it as reference. So to begin with, getting rid of more
Guinea pig here, I'm just going to really lightly sketch using my original
drawing as reference. I'm going to sketch
out my Guinea pig. Start with that big bottom and then I'm going to
bring in that big tummy. I'm just going to
copy that sketch. I'm going quite big here, but you can go to
whatever size you like. Just so happens that
this one's coming out. As I said before, you
can use a light box. You could go into stroke
directly with your pen. You don't need to do this, but I imagined that
for some of you, you probably feel more
comfortable sketching out first. And if you do it lightly, I'm really I'm moving my hands. I'm not moving my wrist. I'm trying to make nice
sweeping pencil marks and I'm not pressing heavily because we're going
to arrays these lines once we've
got our pen down. So we don't want to make
it too hard for ourselves. I'm all about
making life easier. As good as flower here. I'm really, I'm properly roughing it in there. I do like these tufts on the
back of the head though. I think, I think we're about right with their tummy
here. So once you've got
it sketched out, we can take our pen. We can start drawing it. Again. I like to try as hard as I can to keep a looseness
to my drawing. So I don't want to become a
massive slave to perfection. I really like it when we have
line that is expressive. So sometimes that line
is a bit broken up or, or sometimes it's thicker. You don't want line that's
the same all the way around. I like to apply different
pressures to my pens as I'm drawing along because I like to get that
variety of line. Also really liked to
break up the line on my Guinea pigs with
some bits of hairs. And for here and there. When you get to this point, you can really make
corrections and edits to your original sketch by refining things with
your pen as you go. You don't have to follow
the lines completely. In fact, I urge you not to. Got it. Once you've got
your pen work done, we can go in and we can
just simply erase away. You want to make sure
your pen's nice and dry, but I mean, this dries
pretty instantly. So let's get rid of that pencil. Try and use an eraser. That's not too hard. I like these ones. I like it when there are even
softer than this, actually. I quite like the ones
where you end up with loads of your eraser
all over the page. Yeah, The great thing about these gummed watercolor pads is that the paper doesn't move
when you do this as well. So you can really raise away
until your heart's content. There we go. So it's
coming together. Let's get some color happening. Sure way. I tend to store my
painting by the ears. Just tends to be, I like to start my mix up a peachy pink on this occasion because
that's the color palette. I'm using my brush, going to add a little
bit more pink on there because it's a
little bit pale and actually the light isn't
really helping the moment. It's not really showing
the color very well. But here we go. We've got
a bit of pink coming on. I really don't mind if
it bleeds off the area. It's part of why I like
using these bigger brushes, but if you feel
uncomfortable with that, then you can use
a smaller brush. I just quite like things when your color
outside the lines. I quite like that. The pink goes on the feet and on the underside
of the hands, but you see a little
bit of the fingers there for this little guy. I'm quite generous when
I'm mixing up my paints. I use a lot of water. I get my paintbrush
really nice and wet. And then I load up a good
amount of paint on the brush, which hopefully you can't
see here, but yeah, I'm mixing some
different yellows and just loading that on. These Kuretake paints
are lovely and vibrant, which is a reason I like them. You get a really good delivery of color with them,
which is fun. Again, you can go with
your own color palette. You can keep things
natural if you want to, or you can be a
bit more vibrant. Whatever kind of floats, boats. With this daisy. I'm just putting a
little bit of shade on the side of the petals. I like to leave quite a bit of whitespace when I'm drawing. I tend to not completely
fill in areas. And in this case
where it is white, I definitely like
to leave white. I'm wanting to color my
Guinea pig quite an orangey. I want it to be
quite vibrant and ultimately it's going
to be quite orange. But I quite like laying down
a bit of yellow underneath. When you're putting
your watercolor down. You really don't
want to scrub it onto the paper because the more scrubbing or disturbance
you do of your paper, the more you're going to
break down the surface of it. The better quality your paper, the less likely it's
going to do that. But even still really
good quality paper, if you keep scrubbing away, you will rough up the surface. But one of the joyful things
about watercolor or ink is actually to let them do some
of the hard work for you. And by that, I mean, allowing it to bleed into areas. Often actually, if I'm working
with watercolor or ink, all this area that
you see, this yellow. I would perhaps go in with just water and nothing
else and then I would drop the color in
and allow it to just bleed and flood
into that area. And that's maybe
something will do on another, another class. But I'm just taking some
of that color and letting it come off into little tufts. And then i'm, I'm not gonna
do a whole heap more. I'm going to add a little
bit of a brighter orange. And then i'm, I'm very much
going to let it do its thing. Let's just be through
the remainder of this. I'm just going to
add some freckles, maybe a few little
spots here and there. Then, why not take your brush
and flick a bit of paint, get a little bit of
energy happening. This can often be just a
really fun thing to do. And just adds an
extra little bit of dynamic into the situation. If you've got a
character that is perhaps running or
scooter ring off some flicking of pain can be
a really great way of adding a feeling of movements
and dynamic action. I'm going to come in
now using my brush pen. It's just in a pale, warm gray. And it creates a little bit
of shadow here and there. On the, under the arms. Onto the tummy here. You don't need to
use a brush pen. You can use your paints. I would suggest using I
actually really enjoy using a watered-down Payne's gray
for the, for the shadows. But you can experiment
away with that yourself. I think the brush pens
are really nice way of having a little bit of control and ease
overdoing your shadows. Which is why I
wanted to show it. Because sometimes
adding in some shadows, some shadow who can sometimes feel a little bit
daunting. I don't know. Sometimes it can feel like
it's where do I put it, but you just have
to think where. In this case, the light source is above and behind
the Guinea pig. So the shadows on the
underside of that huge tummy. And in all honesty, I didn't really like
what I did with the pen. I wished I'd gone straight
in with the paint. And so I'm just adding
a bit more over here with the knowledge that
it will dry, lighter. I'm trying really hard not to
let that inner critic say, Oh, Holly you idiot,
you stuffed that up. Those thoughts come
into your head. You've got to not listen to. Just let it go. We're having fun here, and that is the main objective. Never get that impulse
and just cut off. Throw something in the bin. It's never as bad as it seems. I promise you that. And there we go. We've got our finished
illustrated Guinea pig. I'm looking forward to
seeing this wine is dry and I am really looking forward to seeing everything
that you guys do. You can put it in
the project section. I hope you've enjoyed
this tutorial and I look forward to
drawing with you again. Soon. Take care. Bye bye.
 Holly Surplice, Artist, Illustrator & Author