Transcripts
1. Introduction: Hello. In this class, I'm
going to talk to you all about drawing for painting. First, I'm going to share
a little secret with you. I don't believe that you
need to be amazing at drawing to be able to
be a great painter. I control well enough to get by. But for me, painting
is where the joy is. I prefer to keep the
drawing part quite minimal so I can get stuck
into the painting much faster. In this class, I'm
going to demonstrate three different drawing
techniques you can use. Tracing, the grid method and
freehand using plot points. I'd recommend just getting comfortable and watching
through the videos first to get a sense of the different techniques and
which might suit you best. I personally tend to choose from a mix of all three methods, depending on how
much time I have, how complex my subject is and just what I'm in
the mood for that day. By the end of this class, you will have a repertoire of
drawing techniques that you can use to create the right foundation
for your paintings. Enjoy.
2. Method 1 - Tracing: I'll begin with the easiest
method you could use, which is simply to trace. And I imagine you might
be a bit surprised by this and wonder if
it's really allowed. I personally feel that there
is nothing wrong with Tracy, especially if you're new to art and you're still
developing the skills, or if you have
limited time and just really want to dive straight
into the painting part, it isn't cheating and I
weren't frown upon it. I believe strongly in making art in whatever
way suits you. Tracing is a quick
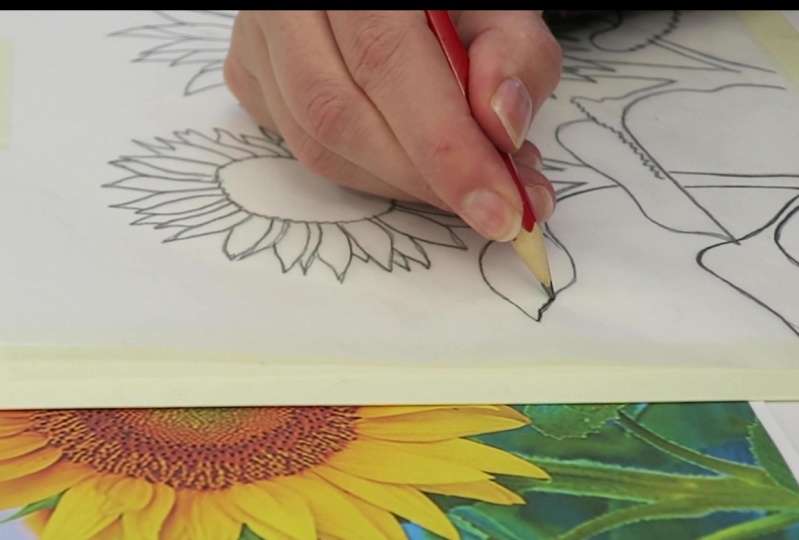
and easy method to get your proportions right and lay a good foundation for the rest of your piece. To trace, you'll need a printout of your
reference photograph. Or if you're following the
tutorial from this side, are often provide an
outline drawing like this, which will save you a
little printer ink and make it easier for you
to see the shapes. Whatever you work from, you'll need to print it out at the same size as you
want to paint it. You'll also need
some tracing paper, which is easily
available both online and in store from most
art supply shops. I find I get best results using two different
types of pencils. And I like to use a
Tooby and a for B, but you can use whatever
you have available. It's also helpful
to have a bit of tape to secure your
paper in place, plus a pencil sharpener
and Roberta hand. So here I have my
reference photograph printed out and my
tracing paper ready? I'm going to start by placing
my tracing paper over the photograph and then just using a little tape to
keep it in position. I'm using a B pencil, but that's just
personal preference. You can use a normal HB as well. Then I'm just going to
gently trace over the lines. Don't press too hard
with your pencil here. Just a soft outline. And remember, this tracing is just to give us a
guide to paint from. So you don't necessarily need to trace out all of the details. You can just draw
the main shapes and try not to make it too
complicated for yourself. Once you have your outline, you then need to set your
reference photograph aside and flip over
your tracing paper. I'd recommend doing this on top of a scrap
piece of paper, not directly onto the table because some of your
drawing will transfer. I like to do this next
part with a softer pencil, like a for B, because
it will leave more graphite on the paper
and create a stronger line. Don't worry if you only
have one pencil though, it will still work. All you need to do
now is just draw over the back of those lines
that you drew previously. So you're adding this
graphite from the pencil on the reverse side of
your tracing paper now. And it's this which
will end up being transferred to your
painting surface. You can press a little harder
with the pencil now too, so that you'll leave
a stronger mark. Now, you have that drawing
on the reverse side of your tracing paper to next, you want to flip the
tracing back over to the front and then
you'll be ready to transfer it to your
painting surface. If I'm going to paint on
this piece of paper here, I'd lay my tracing over the top, making sure it's now back
the right way around. And then taking care to
position it at the right angle. So lining up the
edges with my paper, I'm switching back to my
harder to B pencil now. And you'll want a
nice sharp point to get a crisp transfer. So if your pencil has worn down, give it a sharpened
before you begin. Now you're just going
back over those lines. You want to press down fairly firmly here because
essentially you're pressing down so that the
graphite on the back of the tracing will get
transferred onto your surface. You can see if I lift
off a corner here, how the image has
been transferred. It's not always easy to see
why you've been this point. So I recommend choosing
a start point, tracing small areas at a time so you can keep
track of what you've done. When you're finished. You can lift off the tracing
paper and then you'll be left with a nice imprint of your image with
perfect proportions. Ready for painting. You do need the extras of a printer and tracing
paper for this method. But it's a quick and
easy way for you to get that outline down so you can get stuck into
your painting, where you will then express your creativity
through your brush.
3. Method 2 - Grid: The second method I'm going to show you is the grid method. This is a great midway between tracing and drawing freehand. And it's a method I'll
often use myself if I have a more complex
subject or I need to transfer a drawing
to a larger canvas. Even the best artists in the world need a bit
of extra guidance. Sometimes this
process was used by the famous Renaissance artists
like Leonardo da Vinci. It can be a bit fiddly and it does take more
time than tracing, but it produces very
accurate results while still helping to develop the
observational and drawing skills. Pretty much drawing
freehand with this method, which is why it does
still help to build those skills in a way
that tracing does not. The grid simply helps you
to break the piece up into smaller sections so
you can focus on one area at a time
while you're drawing, which makes it more manageable. The grid will also help you to keep everything in proportion. You'll notice that on the
outline drawing I've provided, I've already added a grid. If you wanted to use this method with one of your own references, you could print off
your photograph and physically draw your
grid lines on top. But you do need to make sure you measure them
out with a ruler. So your images split
up into equal squares. If you prefer to view your reference on a
phone or a tablet, there are also certain photo
apps out there that you can use to overlay a grid
onto your image digitally. The number of squares you should use for your grid really depends on how detailed your subject is and how accurate
you need to be. If you're drawing something
with lots of detail, you'll likely going
to need to break it down into smaller sections. If your subject
is something more simple or more expansive
like a landscape, then you could use bigger
squares and fewer of them. It's all about finding what
works best for you and what's most suitable for
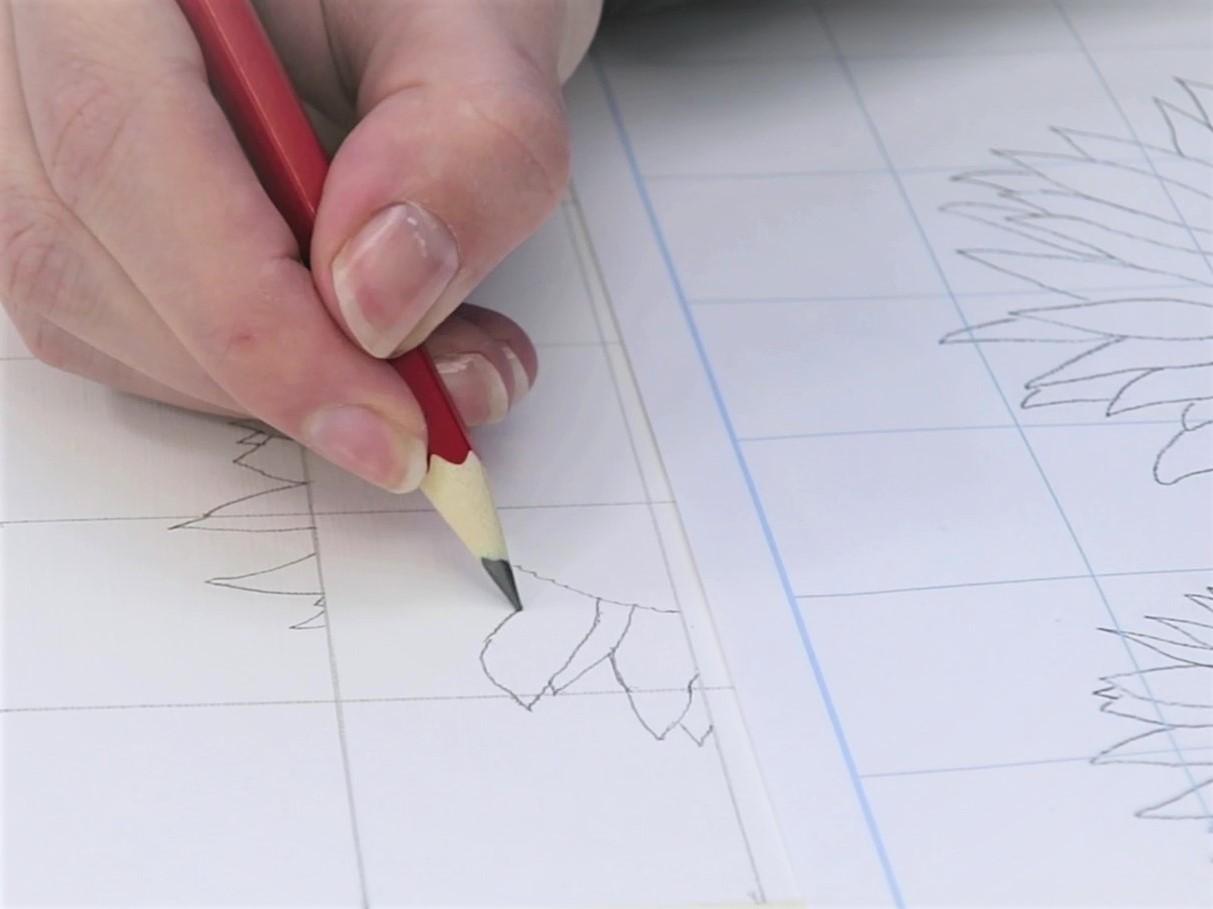
that particular painting. To sketch your image
using the grid method, you're going to need
to first measure out the grid onto your
painting surface. Bear with me here, because
although sketching out the grid can seem
complicated at first, once you've done it a few times, you'll get used to it. The most important thing to remember is that the
grid you draw on your painting surface must have the same ratios as the
grid on your reference. For our sunflowers here, I have a grid which
is eight squares across and six squares down. Which means that the
grid I draw onto my painting surface
also needs to be eight squares by six squares. It doesn't matter what
size my painting is, as long as that
ratio is the same. So I could easily use this
method to scale up and draw onto a much bigger canvas by keeping the
eight by six grid, but increasing the size of
the squares themselves. When you measure out the
grid, It's important to, to start with the
longest side first to make sure it will fit onto
your painting surface. So my longest side
here is eight squares, which means only to split
this into eight squares to measure my longest side, which here is 28 centimeters. Then I'll divide that by eight, which will give me
3.5 centimeters. So I now know that
each of my squares of my grid should measure
3.5 centimeters. I can use my ruler
to measure out those eight intervals at
3.5 centimeters long. I'll just put a small
dash with my pencil. So now that bottom
edge is nicely split up into eight
equal sections. Now, it doesn't always
work out as neat as that because it depends on what size surface
you'll be painting on. You could measure
that length and find it's an awkward
number to divide. If this is the case, just round down until you
come to a number that works. A4 sheet of paper like
this, for example, measures 29.7 centimeters, but I can round that down to 28 and it'll be easier to
divide into my grid. All it means is that I'll have a little border at
the sides here, which I can always just
mask off with some tape. So it's worth just thinking
about your measurements first and deciding how
your split your surface. And if you're going to have
any space around the edges, you can also try measuring in inches if you'd prefer that. I know that maths is
probably the last thing you want to think about when
you're feeling creative. But if you tend to always
work at similar sizes. You'll soon get comfortable
with setting up your grids. Drawing the grid itself is
the hardest part, I think. But once you've mastered the process and done
it a few times, it can be such a great help
when it comes to sketching. I'm now just adding
those 3.5 centimeter intervals to my top edge so
that it matches the bottom. Next, we'll move on
to the shortest. Now, I know this needs
to be split into six, but I don't need to measure this and divide it by six this time, because I already know that the squares measure
3.5 centimeters. So every interval on this side still needs to be
3.5 centimeters. Exactly the same as
on the longest side. It's really important that those measurements are the same. That you use perfect
squares for your grids. Otherwise things will
become distorted. Again, if you're painting
surface is slightly bigger and doesn't quite fit the ratio of
your grid exactly. That's no problem. Just leave a gap at the edges
and use it as a border. So I'm just using
little dashes to mark out those
intervals on each side. Once those intervals
are measured out, you can then use a ruler to connect those lines
and form the grid. I'm drawing my lines stronger
than I usually would, just so that you can
see them on the camera. But I'd recommend using
a HB or to be pencil and keeping them very
light so that you can easily wrap them
out afterwards. And then we have the grid copied out onto our painting surface. The ratio perfectly
matches the reference. That's the hardest
part of this method. And like I said, you will get used to it
the more that you use it. When your grid is drawn out, it's time to get sketching. Simply focus on
each of the squares individually and draw what
you see in each block. I'd recommend deciding on a route for filling
in the squares. I usually start at
the top left and work my way across and down
towards the bottom right. For each square, you
can focus in and try to copy what you see in that
square on your reference. Pay particular attention
to the edges of your square and getting
the proportions right. Because the individual squares
become quite abstract, this process is a great way
to help you draw what is really there rather than
what you think you see. Our eyes and brains often make assumptions about
what we're seeing. If you have an idea in your head of what
something looks like, this can often get in the
way of true observation. Your drawing will be
influenced by those thoughts. But when you break
it down in this way, it's much easier to notice the true shapes and
proportions of your subject. Some people find this process
to structured and rigid, but I really enjoyed them
methodical nature of it. And I find that, that I can really get into
the zone when I'm focusing on those squares and slowly seeing the
drawing come together. If you try it and it
doesn't suit you, that's no problem at all. In fact, that's why I'm showing three different drawing methods, because every artist
is different and it's important to find an approach
which works best for you. I'm just going to carry on working my way through the grid. Sum squares are going
to be more complex than others and will require a bit
more attention and focus. It's fine to rub out and make adjustments if you need
to, along the way. Once you have drawn inside
each square of your grid, give it one last check. Just looking at the
drawing as a whole. Make sure the lines match up and the proportions
look correct. Sometimes you will need to
make a few adjustments. When you're happy, you can
rub out your grid lines, leaving you with your
finished drawing.
4. Method 3 - Freehand: When you're starting
to feel more confident with your
drawing skills, you can then draw freehand. You'll also need to use the
freehand method if you're working from life rather
than reference photograph. This is a great way to really
connect with your subject. You're drawing is unlikely
to be a perfect copy, but that's no bad thing. You'll be creating your
own unique version of the subject with a
special handmade quality. But proportions are
still important. If your drawing
is in proportion, you're painting is
set up for success. That's why you don't
want to just pick a point and start
drawing because you will inevitably lose your track and your proportions will
distort as you progress. You wouldn't want to
spend ages drawing all of the petals on this
sunflower over here. And then find out
that you haven't left enough room to fit the
second one onto the paper. So my plot points method is
a way to help you plot out your key shapes and proportions before you
start to add detail. And it's the best approach
I've found to help me draw even the very
complex objects. Here, I have my painting surface and my reference photograph, which could also be viewed
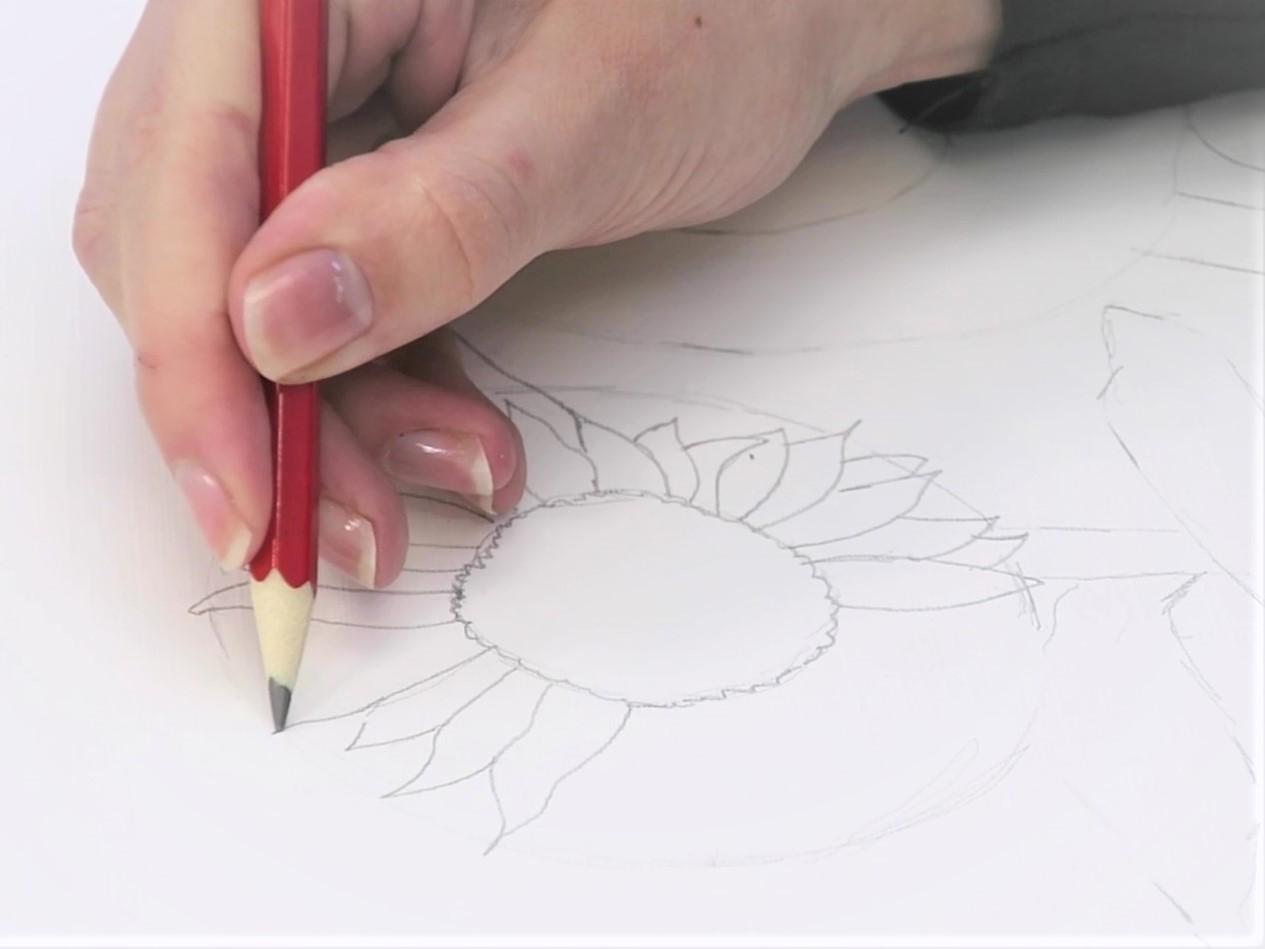
on a phone or tablet. If you don't have a printer. To begin with, you'll just
be figuring out roughly where things go and looking
at the image as a whole, breaking it into simple shapes. The sunflowers are
nice and easy to simplify as we can just
look at them as two ovals. Here. I'm going to
mark the top, bottom, and sides of the center
of the first sunflower. I'm looking at how big it is, how tall And how wide. But also at the spacing
around the shape. How far away is it
from each edge? Looking at those gaps around your subject will really help to make sure they're
positioned correctly. You'll see, I'm just making very small marks to
indicate those edges. At first, I'm not
drawing the whole shape. This is because at this stage, you want to be able
to quickly rub out and adjust things as you go. So this process
is all about just gently working things
out with your pencil. When you're happy with
the sizes and position, then you can start
to add more shape. Use very light sketchy lines, because at this stage, you're likely to still need
to make some adjustments. Now, I'm going to look at the overall shape of
the petals and making. I'm ignoring all the
detail for now and just simplifying it right
down to an oval again, it's slightly bigger
than the last. I'm looking at, how far
out those petals come. I'm not copying the
photograph exactly here. For my painting. I'm
zooming in and cropping the edges to focus
more on the flowers. So I'm drawing them
a little bigger in the frame than they
are in the reference. With this technique,
you're starting the drawing by looking
at the entire area at once rather than focusing on one individual
section at a time. This is important to help you
get your proportions right. When you don't have
a grid to guide you, you need to make sure
you're constantly cross-referencing elements
against each other. Looking at how high your object comes against
another, for example, looking again at those spaces
in-between objects two, you're looking at the bigger
shapes before any detail. This technique works
for all subjects. If you were doing more of
an expansive landscape, use perhaps plot
out the horizon and the proportions of any elements
like trees or mountains. If you were drawing a portrait, you'd break the subject
down into simpler shapes. And you use these plot points to help you map out the
facial features. For the leaf here, I'm going to look at size of it in relation to the flower. And use plot points and light marks to help me
figure out the shape. I like thinking of this method as kind of like a dot to dot, except you have to draw
the dots yourself first. Taking the time to make these guiding marks will mean when you do
draw the outlines, you can do so with confidence. When you're creating a drawing
as a base for painting, you don't need to capture
every single detail. You'll work a lot out with your brush when you
start applying color. So just think of this
drawing as a guide. I always recommend simplifying photographs a little anyway. So I'm not going to sketch
every single leaf here. I'm just picking the main shapes that I want to focus
on in my painting. You can keep on adjusting
your plot points and a loose outlines until you're
happy with the proportions, then you can start
to add detail and draw more defined outlines
if you'd like to. Sometimes I might just
leave a drawing at this loose stage and dive
straight into painting. Other times, I might
want to create a more detailed
drawing to guide me. If you're adding further detail, use your plot points and guidelines to help
you as you go. Keep on double-checking those
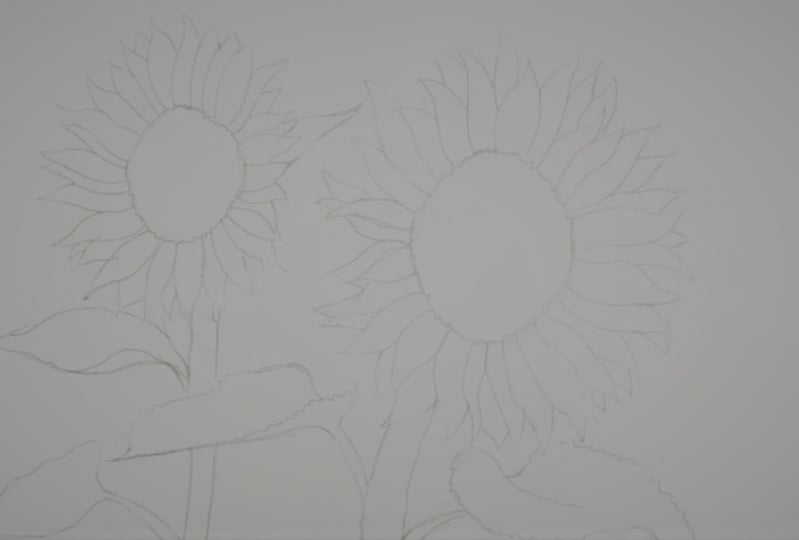
proportions and spacing, but start to fill in the gaps. When you're happy, you
can rub out any stray guidelines if you'd like to neaten up the sketch
before painting. After all that
careful observation and connection to your subject, you'll have your finished
drawing ready to paint.
5. Summary & Class Project: In this class, you've learned
three drawing methods that you can use it to set
your paintings up for success. Here's a quick
summary to help you decide which method
is best for you. Tracing is highly accurate no matter what your level
of drawing ability. It's a great choice for
beginners and a fast way to transfer an outline to
your painting surface, but it won't help to improve
your drawing skills. The grid method is also
great for accuracy, but it's more time-consuming and complex than tracing
or drawing free hand. The big advantage is
that it allows you to scale up your drawing
to a larger surface, such as a big canvas. And it will help to improve your drawing and
observational skills. During free hand is best
for improving your skills, but it's harder to achieve
accuracy if you're a beginner or if you have a
very complicated subject. But the plot points method
will help you to map out your proportions before you
dive into your details. Freehand drawing also allows
you a little more artistic license and freedom to interpret your reference
in your own way. For your class project, I'd like you to choose a
reference photograph and create an outline drawing using one of the methods
from this class. Then share a photograph
of your drawing in the class projects
section and let us know which method
you chose and why. I really hope you found
these methods helpful. And if you have any
questions at all, just let me know in the comments and I'll
be happy to help. If you enjoyed this class, please leave a review to help your fellow Skillshare
students find it to. To continue your learning. Do check out my other classes
here on Skillshare and give me a follow to know when
new classes are available. Thanks so much and see you soon.
 Kate Broadhurst, Artist / Painter / Educator