Transcripts
1. 01. Class introduction: Hello and welcome
to another drawing. At this time, it's going to be showing you how a simple game make the drawing
more fun, challenge. Most often, questions
that I got 11 years. Drawing general is out
to get back at it. When you lose the
motivation to work. How to pick yourself up
and you stop drawing for whatever reason and how
to continue drawing. But as things get tough and you feel you have no time
to spend to do it. Simply don't see
progress in Europe. In this class, I offer
valid solutions. Little game of dice. Yes, you heard me right? Dice will use, again, a challenge if you like. That might help you
whenever you feel stuck and don't know what or how to drop also will have dried demonstration inoculated to
these game and of course, project section, where
I'll invite you to join me drawing and create
a project on your own. That is the best way
to get the most part. You'll have to think about
your favorite drawing, subject matters and expand
your abilities in this area. Finally, you might
try out materials or haven't used while and
rediscovered the droid. It's up to you to decide how challenging this game will be, but we'll talk more about it in the next week before
this sounds interesting. Welcome to the class.
2. 02. How to play: Thank you for joining the class, and I hope you'll find it yours. But first, let's start with
a couple of questions. How do you push forward when things don't go as we assume, or how are other people able to achieve things that seem to
defy all of the assumptions. How can injunctive or answers
like him draw the window? If you haven't seen. Just make a quick Google
search and you'll find some it's safe to
practice and years, and years of learning. And of course there's that. But maybe something else. First of all, you have to not just look at subject to draw, but also deconstruct them
in your mind and then on paper into simple shapes that
are much easier to manage. Here are some examples
I quickly found on different devices
and again and again. But that's just
half of the puzzle. And the other one
is to make it fun. So why is that important? Well, in order to get
good at tennis subjects, you'll get, make the
learning process easier and streamlined
as possible. Got to remove the
obstacles that will make it Sure and instead, make it more fun. One way to do this would be the hero trend sessions are little of a gaming experience. I'll offer you one of those games that I've
been using for awhile. And later on in the class, I'll show you some of the work
of meat based on this game and how you can change the game in order
to serve you better. So in short, to answer the questions that I mentioned
in the introduction class, how to bet at, how to get back at it when you wish to work and how
to pick yourself up when you stop drawing for
whatever reason is to make more fun and
less obligation, you've gotta find joint work and make it feel
like it's not worth. But again, something
you do voluntarily. And I know everyone is different
and that might be much, much harder some
people than others. But consider this, taking
this class, I mean, as a first step
gamifying your journey. So let's start. This game is meant to be fun, but just like any other game, we should have some rules, maybe not proved, but rather guidelines that will
help us play the game. Paper in front of you. So you could write
it down six of your favorite subject
to draw for me, this figure drawing,
drawing portraits. He lived, landscape animals
and six hour period. I chose these because they cover a great variety subjects. And many people could relate
to at least some of them. But you might try
something more niche. For example, if you
like to draw animals, you'll make great police. Dogs, cats, rhinos, horses. In, if you like
character design, you can have a
fantasy character, sci-fi characters
that by station maybe fantasy outposts and animals
that live in the fantasies, rounding or sci-fi
month, stuff like that. It all depends on
what you monitor. All depends on the subject
that appeals to you the most. And what you wanted to
specialize in these areas, you'll get is yoga. Then you can write down
another six points, but this time, use the materials
you want to work with. Ink, pencil number 3, charcoal for
coloring brush pens, hyperscalers N6,
digital drawing. For the second list
you can use to have on you in case you don't
have all six, hold five. And if you have, for
example, just for, live the last one
out and you get five or six rows, just rewrote. Finally, if you
want to draw with just one material,
that's fine as well. You don't have to make a second, but like I said, it's about making your
drawing fun process, not making additional stress. So now handled that. We are ready to roll the dice, but that's where the
demonstration part of the class, before that, let's go class project and see some examples of what I mean using game and how you can
change it to fit your own.
3. 03. Class project: Before we go into demonstration
part of the class, it is time to talk about your project and
what you should do. By now, you should have at
least six subject matters and a list of dry materials, each represented by a number
on the dice. Roll a dice. First goal is to
determine tablet drawing. And the second one for
the material you'll use. What you can achieve
through this game is, first of all, think about what your favorite
drawing subjects are. What brings you most joy to draw as much as that seem obvious, putting stuff on paper makes makes it even
more palatable. Secondly, creating the
list and by the way, don't, you don't have to use same place over and over
again after a while. You can make differently and
use them in different ways, as I'll show you a little more. But back to our topic. By creating these trophies, you will never run
out the topics to draw and material to use. Finally, although your shortlist topics before you roll a dice, you never know what
you might get. And for me that's always the
fun part and a challenging. But the rest is for
you to follow through n many drawing based on
the role of the desk. You'll see me doing this in the next figure with
additional tips and tricks. That particular subject
and training materials. You can use game just by
high describe or mentioned, or like I mentioned earlier, you can change it up. What if you have more than six
subjects with proper time? Well, recently that
happened to me as well. So I changed the game a bit. As I watched the
Netflix or king, I fell in love with art style story characters,
the whole batch. So I made a list of characters that I wanted
to draw on benefit and the materials I
wanted to use on an up close my eyes and
with penicillin, hand hovered over first paper and wearing the pants lended character that will
be closest would be the one control first
thing with materials. This is one suggestion on
how you can rework the k. Here are some drawings
that I made so far. Other way that you
can change the game is to put your subject
on a piece of paper, cut them up, and
put them in a jar. And you want to draw
without looking, take one piece of paper out. That is what you
will be drawing. In the second job, put pieces of paper with
drawing materials on them. After that, take one piece
of paper from the car, as well as to determine what materials are
used for drawing. And that's it. These are my suggestions
on how you can play game, but based on what
they've just said, you can make your own versions
for the project class. Choose one or choose one
of the ways to play. Once again, you can use dice with six topics and materials. Use pencil to determine what to draw or cooler
topics from a drug, or simply make your own game. In the project
section of the class, you can tell us what they do. What do you doing? The end? What? Tell us what is the
favorite drawing topics or share your own games. Most importantly,
centers, you're trying. All the stock is for nothing. If you haven't started drawing, that is above all else. And that is why I really look forward to
seeing your work and discussing both mine and yours in the comments
and discussion. Now, it's time for the triangular spatially
particle de facto. See you in the next video.
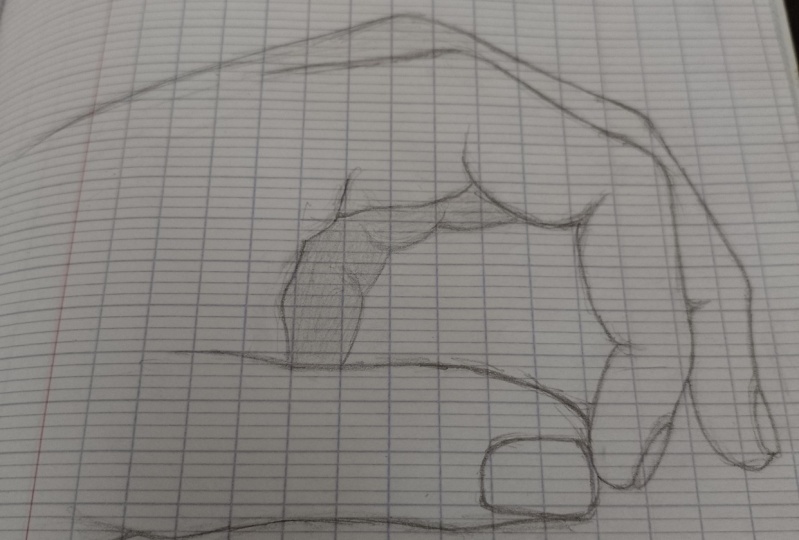
4. 04. Drawing time with some tips and tricks: Welcome to the demonstration
part of the class. Let's roll the dice and
see what we'll get. The drug. First row will be for
the topic, our drawing. And it will be animal. And the second one, the materials that
we'll be using. This case with pencils. And here you can see
what we're drawing. I decided to go with horse. That was one of my
favorite animals. And they are really fun
and challenging to draw. Let's see how I
made this drawing and give you some
additional tips and tricks on how
to go about it. So for this drawing, first thing that
you should do is to have an image that
you will work on. This case, I decided to draw an image of a horse
and it is important to observe carefully the image that you draw and
then start doing. First of all, make the big shapes not go too
much into any kind of detail. Your drawing should be
light at this stage, short the work because
you might need some erasing in order to finish
the entire drawing. So take it light and place, roughly all the major
landmarks of the body. Use simple steps
to achieve this, like squares, triangles,
circles, and stuff like that. Like you've seen me do here. I'll do quickly with a
kneaded eraser, make some, make those lines a little
bit fainter and less obvious before I go
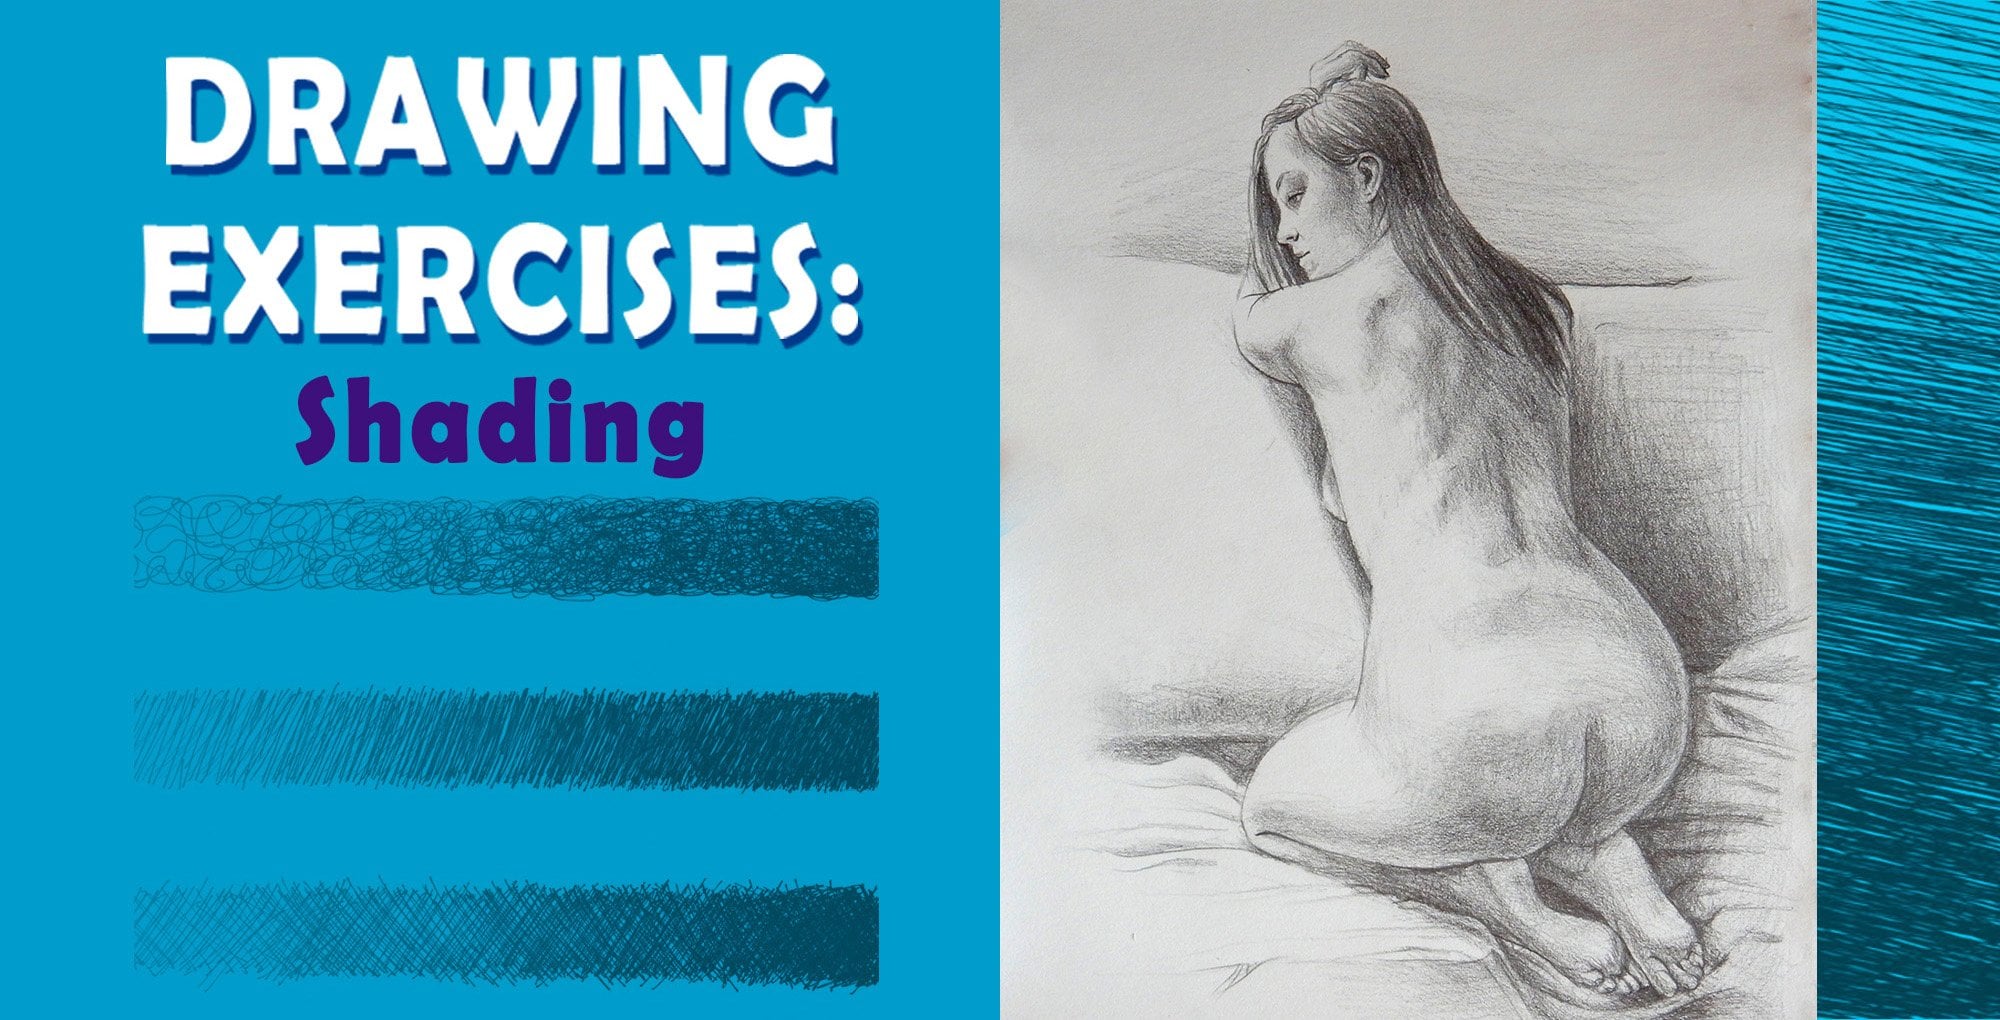
any further drawing. In this state, use drawing. After that is done, you may start some shading like you see me do
here with the head, the neck, and all of the parts of the body that
are in the shade. To determine which are, which part of the body
are in shadow and which are light squint your
eye is determined. After that. Go into some of the
details on the head, but take it slowly. Don't rush things in
drawing the drawing, observe the reference image. Constantly look at
your drawing and then look at the stuff drawing, and move on from there. Put some music, relaxing and lets the same
that drawing happen. After that. The second pass, shading focus mainly on the parts of the body that
are in the shadow. Like you see me here. Make
that on the entire part. Can also work on
background a little bit. Adding certain details,
and work your way up. It's important at this stage. Think about the shadow and light parts of the body and have those things not overlap in a
way that the lightest dark, the darker should be darker than the darkest dark and the
light part of the drawing. We have that consistency
of light and are carriers. That, that way we keep the
families of light and dark, shadows and parts of the
body in the same manner. We don't have that
abrupt shadows and lights all over the place, so that will make your
drawing more consistent. After that, you can go into some finer details
and occasionally use an erase lightly on
everything we do. Observe the image. When you have the chance, compare it to the drawing that
you have in front of you. Again. Squint your eyes and observe which shouldn't be lighter and which
should be more dark. You can now, even using
little bit of eraser, add some elements and details
on a body on the head. And also to add more depth
work on the background. When you finish the background, like see me do here. With razor, can add more
details on the neck. Other parts of the body. That is, for me, very fun thing to do is you see, I don't specialize and
don't go on details. Just one part of the body. You should try to do it across the entire figure
that you're drawing. That will make your
drawing more consistent. To give it more, let's
say, or interest. Go and add some details and texture you have on the
back side of the dog. The more further apart. The point is to slowly work on the entire
piece at the same time. And like I said, make
it more consistent. I erased a couple of
bits here because I noticed you can mistakes happen. And it is best to notice them on time
and erase what is needed. And now you can see
that I'm making some outlines and
making that parts of the drawing where the shadow is thicker and have the lines
to describe the front legs. Harder to give the drawing some more depth in order to separate and show what
is in front and behind. Work with harder pressure on the parts that
are in the front. Same thing can be said
about the shading. Work on the tail. And furthermore, to separate the figure
from the background, add some more details. Front legs, entire body, and drawing will feel
more complete also. Now it's finally time to use softer pencil to give you more details in
the darkest areas. With it. We're going to make
final path shading. Work some more on
the background with an eraser and interest
on some parts. Finally, working with
eraser some more. And you'll see me
use the eraser to make a more interesting
shape of the background. And that's basically
it for this drawing. I hope you found this interesting and got
something useful from it. So let me know your thoughts in the comments and discussions and get ready for the next video because I think it will
be even more interesting.
5. 05. Second drawing with additional tips: This drawing was made
as an afterthought and shows you what can come out from this came from this class. Because when I made the list of six drawing topics and created
the previous training, I realized I wanted to do something more challenging
for me that will be to draw car with the same materials
are used for the course. Found a reference
image that I wanted to work on and started drawing. That is exactly what
this simple game can do for you as well
and push you forward. I'm thinking on the subjects, do you haven't
worked for awhile? And that can be very beneficial or using materials we
haven't in a while. So let's now take a
look at how I made it. Start. I use comparative
measurement to determine the proportions of
the car and see how can I scale it down in order to make it fit inside
the size of my paper that I use a common measurement for a figure that tends to
be the size of the head. And you measure the
entire figure based on how many times the head
repeats in height and length. In this case, in this
case destroying it. I use the height of the front tire to make
this measurement. But be careful, small errors grow into
large ones before you know. That happens with all
forms of drawing. And it's part of the
learning to draw. What you see. Compared to measurement depends upon
the scale proportion. So each new dimension relies
on those which proceeded. That's an issue because
none notice that mistake from a few
strokes that go will negatively affect
everything that you do from then
on the solution. Those mistakes early
enough in the process to make the corrections before
the drawing falls apart. The idea, of course is to never make mistakes when scaling, but realities that we all
make mistakes and seeing them in scale format is difficult to be patient with yourself
in your skills. Observed practice. Now have a critical
eye for your own work. Also, what you can do is to work with the faintest
lines in the beginning, like you see me do here, as well as in the
previous drawing. And constantly compare
your drawing with a reference or the
model in front of you. Only then you can move on to
the next layer of drawing. Now, you can see me finishing
all the big shapes of the drawing and it
constantly checking if all things are in place, erasing and stuff like that. And when I noticed a mistake, I quickly use the
eraser to correct it. There are lots of trial
and error in this part, but this is the most
important part of the drawing and everything
must come together. So learn to be patient. It will pay off in the end. So that way you don't
have problems later on. Now, it's finally time to do some shading and adding smaller
shapes for your drawing. In the previous drawing for
start, go easy with it. Think just one or two values, light and dark forms. Then go with the first best, slightly shade the
entire dark carrier, adding smaller secondary shapes. And then go from there. Observed the reference image or your model that
you're drawing. Erase, drop, repeat
that all over again. After death, you can
go into some details, maybe add Reflection, additional shadows that are a bit
darker and slowly in layers. Push, your drawing is more
finished, look like always. Go over the entire body
and make the drawing more cohesive and not overdo on one part and then
move to the next. But work on the entire drawing. You can also look in
the previous example, work on some simple
background and make the lines follow the shape of the
object that you draw. If it's too much erased
like we see me here. You are in charge of
what to leave out and what to let remain
on your drawing. You're not a photographer. You can freely erase the
parts that are not needed or you feel that will
not be beneficial for the drawing on the entire place. Also, what I can say about
this part of the trend, that is a more relaxed part of the drawing and everything
is already set in place and you can focus your
intention on rendering the drawing to the state
you want it to be. In this case, I didn't
want to go super realistic by using
blending materials, blenders and stuff like that. I wanted to explore hatching and crosshatching and
see how much can I push this drawing with just simple lines and
they're overlapping. Little bit eraser and pencil. That is all materials that I'll be using
for this drawing. Finally, for the
darkest details, I use the software
brush to really bring on the darkest starts. Drawing even further. Go over the entire
drawing and carefully select the errors
were all use it. But still if you started
using the software pencil, you can always go back and
use the harder pencil eraser. This stage, if that
is what is needed, make the tools work for you
and get good at using them. Td is to have fun discovering
which one to use in any particular state that
both the training and have fun with this game. When you don't have to
feel applies in this case, to work with just these
materials if you want, you can use brushes, you can use blenders. Make the drawing the
way you want to do it. And like I said,
introduction of this class, it is up to you how much
you want to push this game, how challenging you
wanted to do it for you, and still making it fun. Changed the game
to fit your needs. But think about what you want to achieve with this
hand, of course, post to work in a session
so we can take a look at who work as well and
have additional comments. Also, if you have any comments about this drawing, let me know. We can all learn together
from each other. And finally, this is
the final result, the image that I
made for this class. I can previous reader hope
you'll find it useful. Before we go on, let
me say that we have only one more video before
the end of the class. So please remember
to post your work in the project gallery and
happy drawing. Susan.
6. 05. Class overview: Congratulations on
finishing the class. I hope you will use the paint I showed you in the work
and finally, tools. If you do, please
remember to live a life review is it would greatly help me make
more classes like this. Remember, main call, this class, have fun time drawing in
order to get better at it. And even if you fall
into that situation. So don't feel like
you're progressing in games that will help
you push on gamifying, your learning and growing
and finding ways to make it more fun for unexpected, but at least partially
unexpected and make more challenging
and entertaining talk. Also, let me know if you have any additional questions and
I'll try to answer them. It's only the cat
pose tumor infection. And if you'd like to see more content about
drawing, painting, take a look at profit, NC, some advice is my CPU. So have a great day drawing and see you in the project
section or some other past. Take care.
 Milan Glozić, Painter, illustrator, Designer