Transcripts
1. Lesson 1: The Human Form, Introduction: Hi everyone and welcome to the first-class
in my articles on how to draw comic book car to your own breathtaking and
professional standard. Now in this first lesson, we're going to be looking at the human figure,
how to draw it. How to illustrate various
body types and how to structure them and illustrate them from any angle
or perspective. And you'll be able to,
with enough practice, do this with minimal references. So without further
ado. Let's begin.
2. Part 1: Anatomy: Okay, so for this lesson, are you going to need is
some good quality paper, pencil and an eraser. For the paper, it's
probably best to have a sketchbook A3 size
with good quality paper. So by that, what I
mean is anything with a 150 GCM or higher. This means that the
paper is thick enough to take some rugged
tools such as inks, which we will come to
later on in the course. Again, probably best to use A3 size paper as this is going to allow you
to put in enough detail. Now for the pencil, I prefer personally to use mechanical pencil for this
kind of illustration. The detail that
often has to go into comic book does require
very sharp and fine lines. And I always just feel that mechanical pencil
gives you a fine line without it getting
thicker and you haven't keep constantly sharpening it. Finally, the eraser, which I'll might mistakenly color a rubber as we do
here in the UK. It can be any, as long as
it isn't heavily black and I'm like really
heavily used. Because you don't
want any smudging. Some people do prefer to use a potty eraser, which can do, but I find it normal
one suits me just fine. Now when it comes to
actually holding the pencil, I know that a lot of
people out there can get the purist about this. But to be honest with
you, the best way is whatever way that is
comfortable for you. Having said that, there
are some things that I think make things
a little bit easier. So you want to be holding
the pencil around two-thirds to three-quarters
of the way down. About here. This way you do have
control of the drawing end, but the way won't be off
balanced from this end. So it's not going
all over the place. Finally, be gentle with the lines that
you're putting down. It's much easier to
go back over a line that's too fine rather
than pressing too hard. And then you've got a line
that you can't fully arrays. Okay, So first we're gonna be going over some
basic anatomy. Now, having this to
memory is absolutely key to doing this kind of illustration, especially
about references. So if we draw some quick figures here just so I can show
you basic musculature. And then we'll go from there. Right now is not as strongly. Do you believe that? So I'm sure any ducts
is watching this will probably tell you that
this isn't 100% accurate. But it does illustrate all
the muscles that you need to know when you're drawing
out your figures. You don't have to be
in anatomy expert, but knowing what
each muscle does, or at least nine, all
the groups at the mask, main groups of muscles
and knowing what they do is really important. You know how to not only draw the foam, but also, you know, what muscles are tense
or relaxed depending on what the character is doing or what kind of pose your drawing. So I've highlighted
each muscle group in sort of Bolden,
shaded them slightly. So if we just go over these now, just to explain
what each one does, and then I'll turn it round and we'll look at the
back of the body. So starting from the top, we have these neck muscles here. This is really responsible
obviously for moving the head. These are not so much
important as big muscles, but these are the kind
of the main muscles within the neck. And then you'll
see various sorts small striations across here, along with the windpipe
in the middle here, which obviously doesn't check, doesn't it's not a muscle, so it doesn't get
tensed or anything. Along. Here. You have
the trap muscles, also known as the
trapezius muscles. These are responsible for
hunching the shoulders up. So they'd bring these
two points here. I'm going on the collarbone,
closer to the head. But you'll see that more closely when we look at the
back of the figure. Going further down, you've got the shoulders, which are here. Now, the shoulder, if I
quickly illustrate this, here, if we're looking at the
shoulder from the side, that's someone's arm here. I've got the elbow here. The shoulder is made
up of three heads. The shoulder itself is
called the deltoid. So you have the front delt, which is what you can see here. And that's responsible
for raising your arms from the
shoulder in front of you. You've got the middle. This one here, which is
what you can see here, that's responsible for raising
your arm out to the side. And then you have
your rear delt, which is responsible for pulling your arm back behind your torso. So those are the
deltoids coming in. You have the pectoral muscles, which is the chest. These muscles, though, love typical
comic book illustrations. These are kind of big and
important because they make characters look
quite powerful. All they're really responsible
for is bringing your arms closer together so
that your hands join. If your arms are straight out in your hands joined
together and use, you try and squeeze them. Those are these muscles that are contracting
and pulling together. So if your arms are wide out, these muscles will be stretched. If they're pushed in. If your arms are
pushed in together, these muscles will be tensed. Going down the torso, you can see the lats here. They're responsible for
bringing the arms down, but I'll, again, you can see
that more from the back-end. So I'll go through that property. When
we go through that. Then you have these
core muscles here. So you've got the six pack, which is typically known as
are the abdominal muscles. These muscles are all responsible
for curve in the spine. So when you do a sit
up kind of emotion, people do sit ups to
work in their abs. So the spine is being
curled inwards. If a character is trying to
bring their spine inwards, that's when the abs will
be the most tensed. You also have these muscles
going along the sides, which are the oblique muscles. These muscles are responsible for any twisting
motion of the torso. So anytime a character
needs to twist or bit, needs to twist or bend their torso away from where
their waste and legs are. This is what those muscles do. So anytime they're doing that, that will be when they are
tensed. Shooting to the arms. Now, you have the
Bicep at the front, which I'm sure a lot
of people know is responsible for curling the arm. And again, you'll see this more from the backend
when I draw that. You also have at the side
here the tricep muscles, which are the opposite. So they will straighten
the arm at the elbow. You also have these
forearm muscles here. This again is overly simplified. These muscles purely because
there are a lot of them. And you can't normally see them with most of the figures
that you'll be drawing. But this is all respond to
these muscles are responsible for wrist movement
and finger movement. So I'm sure if you feel
the longer arm here, you'll feel them when
you clench your fists. Moving down from here. This whole front
part of the leg. This is one big muscle
called the quadricep. Really simple. It's just responsible for straightening
the leg at well, straightening the
leg at the knee. So you've got the
four main parts, which is this inner part here. This part, which is this teardrop shape
on the inner part. This part which is similar shape with a slightly thinner on the outer
part of the leg. And this big middle
muscle here are normally the parts of the
quadriceps that you'll typically see when there's skin on top and
things like that. Then you also have the kneecap here below this or
the calf muscles, which again, you'll see
more from the backend. But also called
the gastrocnemius. These are just responsible
for straightening the toes, are pointing your feet. So anytime point out your
ties as much as you can. That is the calf
muscles working. Or if you barracks relation, if you go up on your tip toes, this will be when the
calf muscles are working. So I'm going to flip this figure around and show you the backend. You change. Canceled. Okay, so here is the back-end of the same figure that
we drew earlier. Same again, going through it. We have the trapezius muscles
that I spoke about earlier, which bring the shoulders
up closer to the head. Also pinch the shoulder
blades together. And depending on what part
of the trap is activated. As a general rule of thumb, you notice that I've
kind of draw it, shaded it with these lines. Just to illustrate
the muscle fibers. Whatever way the
muscle fiber travels, essentially is the direction
that it will pull a limb in. These going up to their head and go leading to the
shoulder points here. So it brings up the
shoulders close to the head. Again, we have the
deltoids here, the rear delt, which
like I said earlier, will bring your arm closer
to behind your back. We have these muscles overlying the shoulder
blades which help out the rear delts because
they're not huge muscles, so they do help pinch
everything back together when you're bringing
your arms back behind you. Going down the torso, we have the lattes, latissimus dorsi either
everyone just calls them that. These, like I mentioned
earlier, bring your arms. If you raise your arms, they will bring
your arms down and back around behind your waist. Moving down, we have the
butt muscles. The glutes. These essentially
do the opposite of the abdominal muscles. And that is to
essentially straighten the spine and more importantly, straighten out the legs. So if you're sitting down and you need to straighten
your legs from the hip. This is what the glutes do. Hence why squatting gives people Nussbaum's below that
you have the hamstrings. Here. This will kill
the leg at the knee. Again. That will be the
muscle that is tensed up when you when
you call your leg. And you have the calf muscles here which as mentioned earlier, straight, straighten your feet, are flexed them against the toe. So if you want to
stand on your tiptoes, that's what they do. To the arm. We have the tricep muscles here. Now the cooled the
tricep muscles because there are three parts of them. 123. However, when you see
them actually in life, if I do a quick arm sort
of from the back here. So let's say this person is like locking out that elbow here. There's less so they're
locking out their arm. You see this kind of v-shape. So that is the tricep here. And it's kind of on the
upper portion of the arm. Even though there
are three portions, you normally see this
kind of v-shape. You don't normally
see definition. All the way up here is
just this V-shape here that is the most defined when you're
looking at the tricep. And going just
below that, again, we have the forearm muscles, which I mentioned earlier. Now, obviously again, this is a massive oversimplification, um, of the muscle groups. There are a lot of
muscles beneath them and there are more complex, more things going on. But in terms of
drawing a character and illustrating
certain musculature, depending on the pose
that you're drawing. These, the ones that
you need to know. Now these muscles, everyone
has the same muscles. These are all the
same no matter what, but the size and shape
of them. They do vary. It can depend on who
you're drawing them, whether they're male or female, or someone who you
want to illustrate as being physically quite
strong or physically weak. Also, there's no hard
and fast rules to the exact shape of them because that can
depend on genetics. Generally they are
the same shape. But for example, if you're looking at the
abdominal muscles, everyone has different
shaped apps. There's no, The good
news is there's no right or wrong way
of really drawing them. As long as you have six abdominal muscles with the obliques coming
out the side, it, it doesn't matter.
That's too much.
3. Part 2: Body Differences: Okay, so now you have
basic nets, me and mine. And you know how to change things depending on what your character is in
terms of musculature. Now in terms of
actual proportions. This, but I've left
till afterwards because this is the stuff that
varies a lot more. So you have these kind of
basic proportions here. Now you notice that every single time I draw
any sort of figure, I always start with this line, which represents the spine. Because I feel like the spine is intrinsic to everything
that the body is doing. So once I have an
idea of a pose, I'll do the line for the spine
first and work from there. From there, you have the torso. Now, this can range a lot because obviously no two people will look
the same in real life. So why should they are? But generally speaking, the more masculine type body will have shoulders that
are wider than the hips. And a more feminine figure
will have hips either as wide or maybe even slightly
wider than shoulder as well. Now again, this
doesn't necessarily mean that this is how it
is for all men and women. But generally speaking,
these are the kind of proportions that illustrate a more masculine or
more feminine figure. So you can have a
play around with it. So if you want a very slight
or strong looking female, or vice versa, you can play around with the
shoulder and hip width. Now when it comes to
the actual body length, this is again, generally
the same for men and women. However long the body is. The legs will be, or at
least where the hips are. So just here. Take
that same length and that's how
long the legs are. The knees come
halfway down the leg. When it comes to the
actual arms as well. They normally come
around mid thigh. So the ends of the hands should come
around mid thigh here. Again, these proportions are not hard and fast rules
and there's not a mathematical precision to it. These are just the
general rules. I can see. I've got a feeling. I know, you know, Wendy's. Okay, So just die. A few examples here. From what you can see.
The different body types you can kind of
play around with. So this is where you can
really have a lot of fun, really thinking about what
your character is as a person. So you can have like a lean app or Acrobat
or you can have an absolute
powerhouse is capable of lifting us and with one arm. Or even someone who's not
capable of any of those things. You can also play around with how much fat character holds and how it's
actually distributed. I've got one example of
someone who carries a little bit more to love on
the right-hand side here. But this is another one where there's not
too many rules on, on an individual basis. Generally speaking, men normally carry their
fat around this midsection, around here on the
stomach and torso area. And women tend to carry it more in the lower house
and their limbs. But again, this does vary
a lot in the real-world. So it should vary a lot
with characters as well. So that's something else you
can have a play around with. Just remember that having
that extra fat will also add size to wherever you decide to
distribute the fat. When there is a lot, you'll have size as well as
fat reacting to physics. So it can overhang
or it can bunch up. And it reacts just as much as muscles do when the
character is moving. Just sort of more out the
characters kind of control. Just remember that again, it does sit in some
places more than others, but it is mostly distributed
around the body. It's just going to
look really weird. If you have a character
with a massive overhanging, got a really cool face
and really toned arms. That again, from here
you can play around with muscle size versus
fat percentage. So you can have somebody
who's working on a very lean and muscular, someone who's very
petite and SLI, or someone who's overweight
end of the spectrum. You can also have
someone who's incredibly strong with a high
amount of fat. For example, you see a lot in the strong man competitions. They do have these. For example, here you
would have bigger muscles, but also less tone
in those muscles. So that'd be less detail. That is required. We need. Okay, So another point I just wanted to touch
on here as well, is another factor you have to consider is a character's age. So the same rules apply in
terms of anatomy. In size. You've still got the
same basic proportions. So the character has one torr, so the legs are as long as the torso with the arms kind of meet in
the same sort of points. Difference. Or the
exceptions would be here, is that the younger the
character is, the bigger. I mean, it's an
oversimplification, but the bigger the head will seem in comparison to the body. So the differences between
males and females, you know, it doesn't really apply to pre-pubescent
characters. Those anatomical
differences become more apparent the more the
character kind of Ages. Generally speaking,
it's a kind of generic child's body that becomes more and more adult in its proportions
the older you get. So for example, this one
here on the right would be sort of go hit and
her sort of teenagehood. More adult proportions or starts coming into play. This one. Really it could be
a boy or a girl. Because again, those
differences don't really show themselves in
pre-pubescent characters.
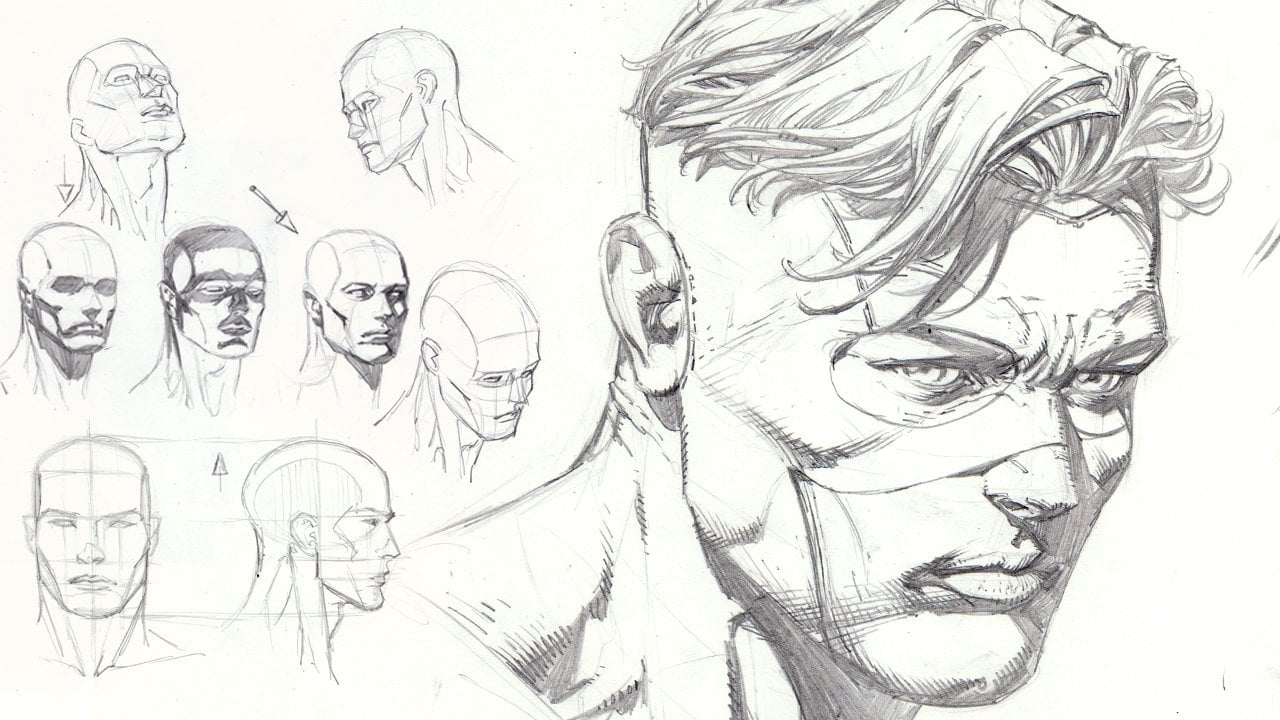
4. Part 3: Perspective: Okay, um, next up, I'm going to be covering on
this video perspective when it comes to your characters. This is something that
obviously a lot of people can often struggle with. It does cause a lot
of people grave, but there are ways around it. So obviously you have to have your character doing
certain things. But you can't stick to just
one angle all the time. One thing that did help me, or a couple of things that helped me that I'm going to show you now is again, I start off with this line
here when coming up with the character's pose that
represents the spine. So I kind of try to have
the skeleton in mind here. So I used to very much
start off drawing a really basic skeleton to
help me rub these out quickly. This is why I used to
be able to sort of start off with then draw around. Now, I've practiced enough to
not really do that anymore, but the point was
still stand here. And when I got to the joints, I do circles here. And say I want this
arm coming down here. Quite simple. Likes coming off here. We want to do
the whole thing. Quite simple. But
these circles can help with getting a
perspective on a bit of more of a difficult
angle. Obviously. Foreshortening Wendy. The arm or the leg or
wherever is coming towards or away from the camera. The circles will get
closer together. So you'd have the elbow here, then the hand joint here. And it would end up like that. If we have a hand. I'm not gonna go into
massive detail with the hands because hands and feet will be covered
in a separate lesson, but this will do for now. So I have this kinda
foreshortening going on, cut down. So the real basics. And from here, I know
that if I wanted to draw, start from here, I know
the shoulder is here. Then I know that the bicep is
somewhere along, but again, this is all foreshortened and coming more closer
together and overlapping. So you would have the
Bicep overlapping here, shortened, and then you
will have the forearm. There's also overlapping
and coming towards here. And then the rest you
can do from there. Another way that I sometimes kinda visualizer
hand if I'm having trouble, especially with the
more minute details of the anatomy and the body is not only doing this kind
of skeleton structure. So if we do another example, this may be a little
bit more tricky. Started with the spine here. And we want again, this rib cage and
pelvis, the body, if the body is coming
towards us now, we want those two
to be overlapping. And then it comes around here. The head is gonna
be sitting here. You know, the neck
will come from here. That's the line of the spine. And then the pelvis will be
behind this ribcage here. And then from here I
can decide where I want this the shoulder to be. So it can be down
here coming out to the side or it can be up here. Again. We'll have it coming towards
the camera, so to speak. Okay, so I'm just going
to rub out a couple of these lines here. Just to kind of show you
another way that can help with more advanced
perspective sides of things. So what I tried to imagine is horizontal lines
going across the body. Now, if you're looking
at it straight on, these lines will be going exactly horizontally
across the body. But then when, once we started
looking at perspective, try to imagine these lines following around the contours of the body and the muscle
groups that eventually, you hopefully have to memory. I'm finished that example, but that's kind of what
we were aiming for. So we kind of come up with the same basic
structure that we did here. Okay, so as you can see, I've used these horizontal
lines here to follow the contours of where things are raised and
depressed along the arm. So for example, here you've
got the front dough, the dough and the red dell. And you can see how those
lines console around it to form a more
circular shape. The more things are coming
towards or away from you. Saying coming all the
way down the biceps and triceps as well as the
various forearm muscles. And as you can see here, this is helps even
me to realize that this part should be coming in slightly from this
sort of angle. These lines will also help massively when it does come
to shading your pieces, which we will come on
to in a later class. As I say, these, these
horizontal lines are straight. When you're looking at
some things head on, they become more circular. The more you are looking at them coming towards
or away from you, in the same way that the
circles overlap each other. Okay, So the secret here is you may have
already guessed is to really think of your
characters as 3D objects, as obvious as it sounds. So these are the
secret to that is really what we've been looking
at here with these lines. And looking at the circles that can really
help you with that. One thing, when it comes
to foreshortening. Obviously sometimes depending on the camera angle or how close
it is to the character. While the object can appear
to be getting larger, the closer it gets
and vice versa. That is really up to you. Generally speaking, the closer something is
to the actual viewpoint, the bigger it will
end up becoming. So you can have
foreshortening here, say on my hand. And the hand doesn't appear much bigger than the
ends of my fingers, kind of like what
I've done here. Then if my hand comes closer to this viewpoint
and all of a sudden, my hand and wrist, all of a sudden much bigger
than the ends of my fingers. If you've got a
character say hand very up close to the viewpoint, is going to appear
much larger and take up more space than
the rest of the character. Versus if they're
standing further away. Foreshortening isn't going
to be quiet as impactful. So that's really something that you can have a
play around with. Okay, so those are the basics of the human figure and
character and body design. Now this is really
all you need to know when it comes to doing
this without reference. Or at least the building
blocks that you need to do in this
Vout reference. Now I haven't specified specific angles and how
to draw them because the idea is that you
build this up yourself. The rest really just
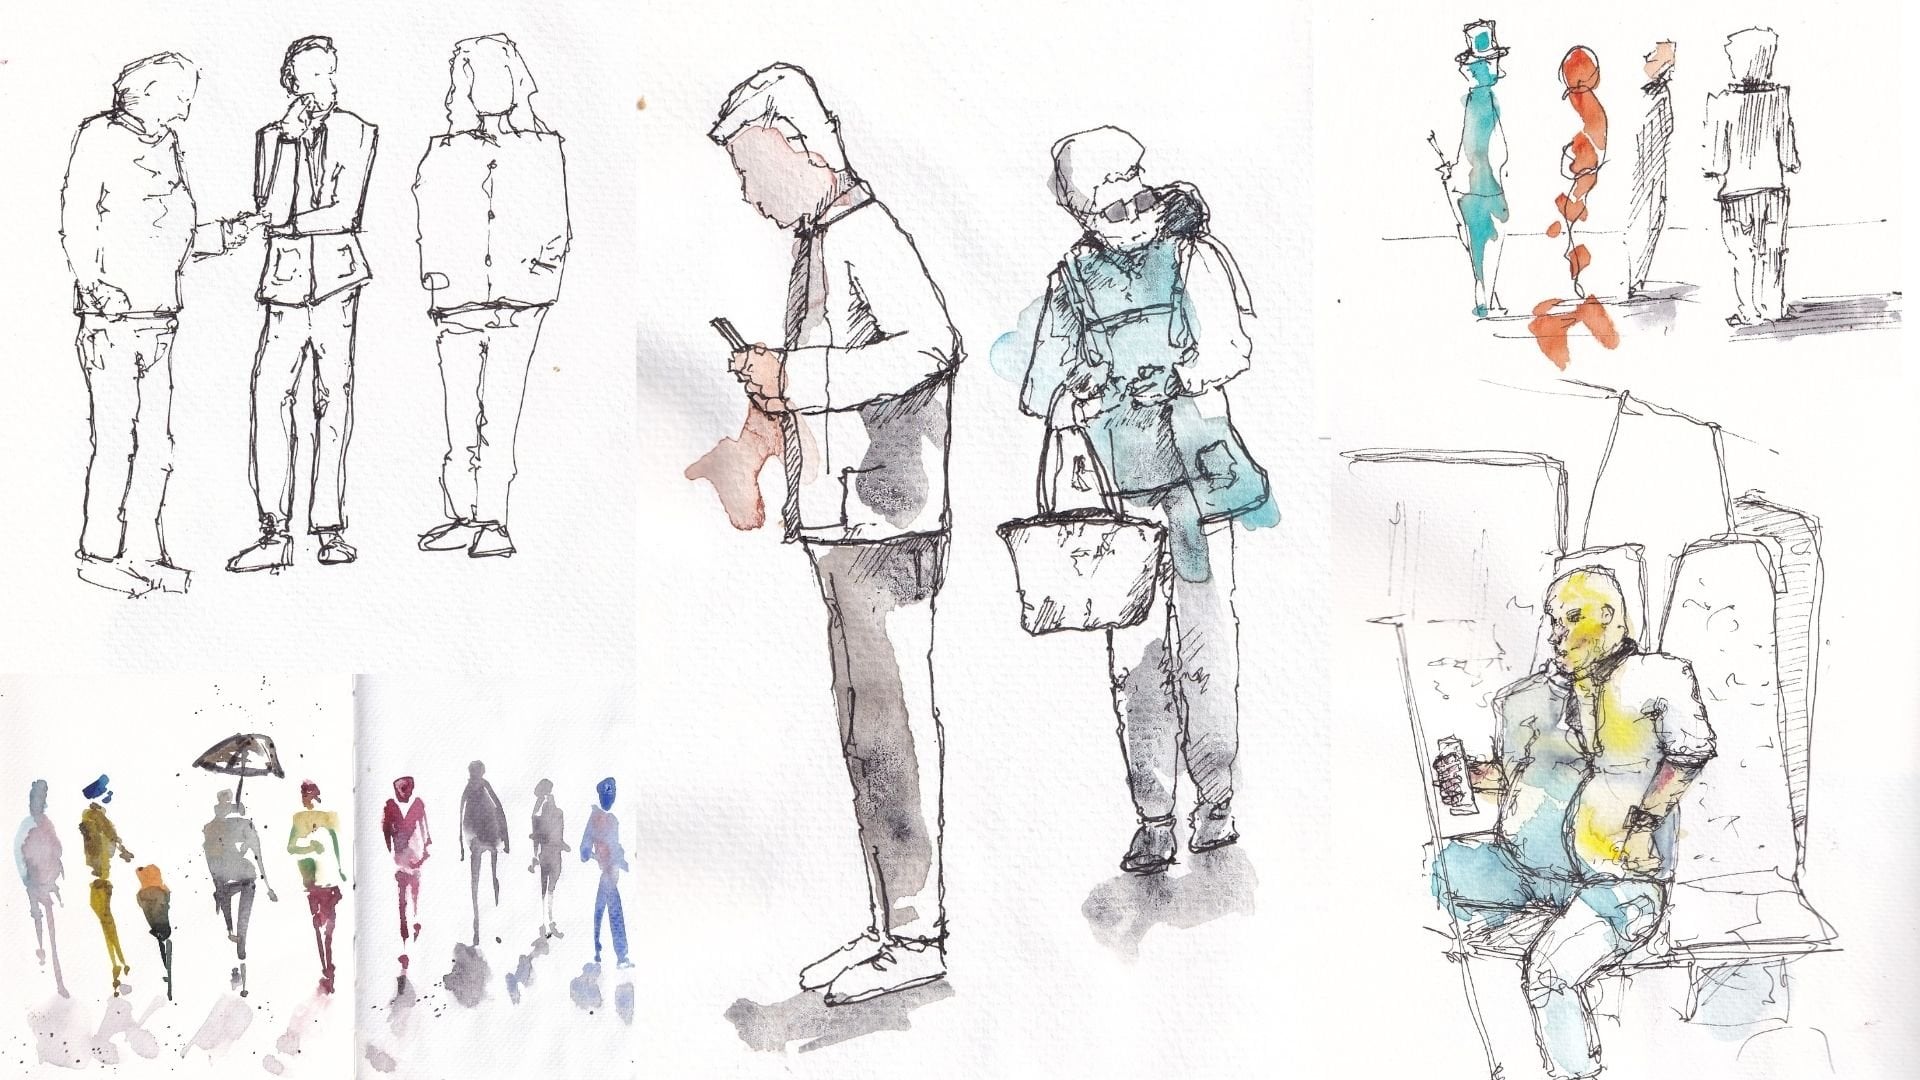
comes down to practice. Now as an assignment
for this lesson, I want you guys to
have a go at drawing some basic human forms,
doing certain things. Now, I'll leave up to you
what those things are. And I'll leave up to
you as to what kind of angle you want to
play around with. But see if you can come up with ten different poses and really
try and get creative and try as many combinations
in terms of the character, the age of the character, the gender, the physicality, the angles, things
that they're doing. Don't worry too much about
the hands and feet are the faces because
we will come on to those in different classes. Just really, really try and
push yourself with this. You can go as basic or
advanced as you'd like. But make sure you're pushing
what your limits are. Because that's really
the only way that any of us will get better. Just remember the
practice is always key. Once you're done with these, make sure you keep
a hold of them, as well as any other art that you do in the future lessons. Because we will be coming
back to them to practice things such as inking
and things like that. But we'll get into
that in later lessons. So look forward to
seeing what you guys do, and I'll look forward to
seeing you in the next lesson.
 Ryan Hughes