Transcripts
1. Intro & tools: Hi, my name is Jenna low. I'm a watercolor nature
artists and sketch for this class is about
lines, angles, and folds. This is part two, a beginner series that
I have created for beginner artists who are just
learning how to draw it. It's series that
I've developed for teaching students
in-person one-on-one. I will leave a link below
to part one of this series. Now before we get started, I want to point out that
this is a sketch in class. This is not about drawing every single tiny detail and creating really
realistic drawings. To me, sketching is more about observing what you're drawing. I really tried to understand
how to draw that object to sketching is a
really great way to quickly build up your library, improve your understanding
of the object that you're drawing and just
have a little bit of fun. Now let me tell you how this course is laid
out in the beginning, there are a few
warm up exercises that you can do to
help you loosen up your hand or help you to learn how to control
your pencil better. Then we're going to do
several drawings that are focused on straight lines. This will help you to
understand angles. After that, we're going
to get into fourths. We're going to do a few demos talking about a few
very common folds. And each demo is going to slowly progress upon each other, each getting a
little bit harder. This lesson is meant
to be a follow along, and that is how I
would like you to approach the class project. I will also add a few extra reference photos
in the project files. If you want to draw something a little bit different from me, some of the photos I've
taken personally and some of them are found
on public websites. The ones that are found
on public websites. I will leave links to them
down below in the description. Now the last part of this introduction is all about the tools that
we'll be using.
3. Pencil Control: This video is all
about pensequential. The first exercise
is pencil gradients. I've drawn out these bars, or these rows now
bling one side. I'm going to draw a gradient
starting from dark to light. Start by pushing
down on your pencil. Try to fill up this
bar with a nice shade. As we go further down the bar, we're going to ease up on that pressure and start to
make it a little bit lighter. You can see it's lighter, but it's still very obvious that line is
where it gets lighter. What I'm going to do is
go back and forth over that line to smooth it out. You're going to
be going back and forth over the pencil
that you have. Withdrawn. Don't push too hard, because if you push too hard, it's going to make
marks into the paper. And then I do the same for
4b2b and H. What you'll start to notice is that the higher number pencils are a lot softer and not
quite as sharp. You can see this two B is
quite sharp and it's a lot thinner than the
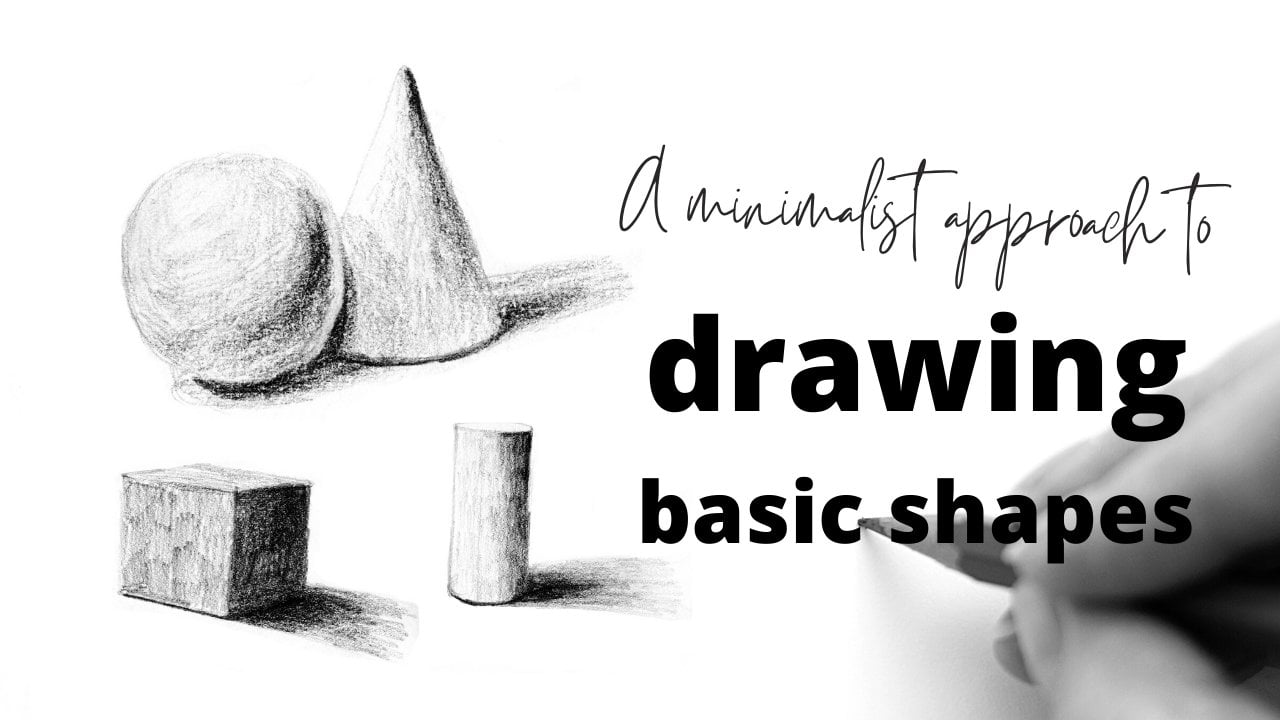
HB or the four B. Here's another exercise
that I like to do using gradients
in different shapes. So I'll draw out a rectangle, a circle or a cone or whatever. And I'll draw an arrow that indicates where
the light source. And then I'll shade it
from dark to light. For these next
couple of exercises, we're going to draw some boxes. The first is called
the pencil click. I'm using the four B. It's a little bit soft, but it's not too soft. Start by putting the pressure down and then letting
it go a little bit. This makes the side of
the line thick and then it tapers off and
gets thin at the end. The next exercise
is light too heavy. Starting very light,
or starting heavy, whichever one you
want to start first, draw the line softly and then start to put down the pressure. Every time I move over
to the left side, the line is very soft and light. Any time I move over
to the right side, it's heavier and darker. Next are little spirals. We're going to start by
putting these small, little spirals closer together. Then they're going to get
bigger and further apart, filling up the entire box. We're going to do
the same thing, but now with short lines. This is practice for different
ways that you can shade. Sometimes to create an
interesting texture, you might need a spiral line, or sometimes you might
just need a straight line. Or maybe to make
freckles on the skin, you would put in little dots. We're doing the same
thing, starting with small dots and then moving on to bigger dots and filling
up this entire square. The next one is
drawing various lines at different angles. Now for this one, the
line is a bit longer. I'm holding the pencil further
to the back so that I have more range of motion in my
arm rather than my wrist. The motion of these lines is coming from my arm
rather than my wrist. It takes a bit of
time to control, to make sure that you
don't go out of the box. Sometimes you'll go over, this is a good exercise
to control your arm when you are drawing
longer lines o.
4. Lines And Angles: In this video, I'm going
to give you an example of how I use the pens and edges of the page
to check my angle. The biggest thing that
beginner students have a problem with is using their pen to check the angle on the page or
on the reference photo, and then putting it back on
the page and getting scared that they have messed
it up or something. This is based on
reference photos. In real life, it might be
a little bit different, but for beginners,
this is a good way to practice getting better
at looking at angles. So what you can do, I'll
give you an example. Say there is something that
is slanted in this direction. I will check to see where the point is on the
edge of the page. Now that I have
those two markers, can draw a line angle. So say for example, I draw something at this angle. Okay, When I check
my reference photo, I noticed that perhaps
the way it's pointed, it's after the corner of
the page, not before it. So what I can do then is
this side is correct, but this side is incorrect. You know, maybe it's just a
little bit over here, right? Okay. So now say we have lines going out this
way from this point. How do I know that correct
Or what size should be? So what I would do is I
would use this line as my reference and I would measure it out to it's like
half the size. So I would go half the size. Maybe the point is over
here or something. I would check, does this
point go above this point, or does this point
go below the point? Okay, so we can use
this as a ruler. Now let's check
the length to make sure this way should
be about here. Then it matches up
with that line. Close it, Just draw a line. Okay, that's just a
quick overview power use the edge of the
page to check my angle. And using that line to get the length and the
angle of the next line. Of course, it's always good to quickly go back
and check with your reference photo
just to double check and make sure that
everything is sound. This is a really quick
and easy cheap that you can use when you're drawing
from reference photos.
5. Paper Folds 1: In this demo we're going
to be drawing paper folds. This is a white piece of
paper that has been folded to make two triangles
or maybe two tints. But in this case, I'm
simply going to call them triangles to make it
easier to understand. This is the first most
basic drawing and this will give us a chance to get
confident on drawing angles. The objective of this demo
is to use the edges of the paper to check our angles and make sure
that they are correct. Start by using my
pencil to check the angle of the most left side, making markers on the
edge of the page. I can use it as a reference. From here I measure
the bottom line. The next line I'm
going to draw out with the line that I have
just drawn at first. You may not be sure how
long to draw the line. Once you have two
lines drawn out, then you can use
them as reference to measure each other and see
how long each line should be. Then doing the same, I use the pencil to
check the angle, make markers on the
edge of the page, and then draw a line. I do the same for the top after I can just
close the shape. This is the first draft. Now it's important
to go back and forth between the
reference photo and your drawing to make
sure that you have the correct angles and
the correct lengths. Use what you've already drawn
as a reference point to see what is wrong and make
the right corrections. The markers at the edge
of the page really help. It will be hard to draw out the rest of this triangle
because we cannot see the back. Instead, I draw out the back
of the right triangle first. This will give me a better idea of where that point should be the follow the same for
the rest of the folded paper. Once I have the
general rough outline, I erase everything and
make clean lights. After cleaning up the outline, I noticed that the back angle
looked a little bit wrong. I fixed it up. Now I can draw the lines
of the cache shadow. There are two cache shadows, one that the entire folded paper is casting on the ground, and one that is
underneath the triangles. Using the two B, I do the base shade shading
everything in. Then I notice a cache shadow from the left triangle
onto the right. I add that in and
use H B to fill in the larger shadow because
it's very, very light. After the base shade is done, I go in four B to make those
shadows on the ground just a little bit darker and blend
some of the cast shadows. Finally, using the eight to make the small details and do a
little bit of touch ups.
6. Paper Folds 2: In this demo, we're
going to be drawing another folded paper that
is slightly more complex. This will help us to practice what we have just
learned in the previous demo. However, the objectives
of this demo are to see where the
darks and lights are. Because the shadows
that are being created are a lot more complex, I've added a value scale here. You can use this value scale to measure where the darks
and lights should be, and of course, where
are the mid tones? Before we start drawing, let's just go over and
see where the lights, mid tones, and darks are. First of all,
usually the shadows that are being cast
on the ground, where the object is very
close to the ground, are going to be quite dark. The shadow that is being cast on the right side is quite dark. However, the shadow
that is under the left side is closer to the light and further
from the ground. Although it's a
quite dark shadow, it's not as dark as
the one on the right. Then let's talk about the
shadows that are being cast onto the piece of
paper, not the ground. We can see that the shadow that is being cast on the piece of paper is in the
mid tone range. That is because they are
quite close to each other, but they are both white. The left side is not catching any light and it's casting a
shadow onto the right side. It's being lit by a ring light. Part of the light
source is closer creating that sharper shadow. And one of the light
sources is further away, which is creating that
light, longer shadow. Then as you can see
on the left side, there's a little bright
spot and that is because the white paper is
reflecting the light. Back onto the left side, you have that little
tiny bright spot. Then let's talk about
the most right side. It is dipping down. Part of it is not
catching any light. The further out it goes, it's able to catch a
little bit of light. You can see that it's making a gradient from dark to light. Okay. So now that
we've identified what values each
shadow should be, let's get into the drawing using my pencil to
check the angle I draw a line from here. I'm going to use this line
to measure the other lines. This line coming out from the top right is almost half of first
line that I've drawn. Then I pose the triangle. It seems like this
angle is wrong. I use the vertical line
on the edge of the page. Move my pencil a little
bit just to compare it, to see how steep this
line really should be. As it's not as angled as I think it's actually
more vertical. Now that this
triangle is correct, I can use this to
measure the next line. To make sure that
this line is correct, I check the angle or the shape that it's making
in the empty space. It seems like it should be
a little bit further down. I just move that point
over a little bit. Then the back line is almost
as long as the top line. I use it to measure and
draw it out from there. If everything is correct, then I don't need to
measure this line. I just need to close the shape. I quickly notice that the angle of this line is
wrong when I measure it out, and that actually this point should be higher than the other. Draw out again, and
now it's correct. Now I use this line to draw out where the point should be. This line is curving
a little bit at this point. I'm
just eyeballing it and then closing the shape. Now it's time to draw the
shadows on the ground. I draw two lines
here to represent the reflection that is
being made by the paper. I noticed that I forgot to
draw this part of the paper. I quickly draw that in because that point will tell me
where the shadow should be. Then I draw the
Casado on the table. Our outline is done. I start off with the two B
pencil and do a base shade. I leave that part out because
that is a reflection. Making a few spots if needed so that I do
not lose that line. I'm not going to
fill out this part because it's a lot
lighter than two B. Then I'm going to use the two B for the right
part of the paper. So now that the
base shade is done, we're going to start
going a little bit using the four B. I fill in the shadow that
is under the left side, just using the four B a little bit to make this part
tiny bit darker. Because these two areas
are quite close together, it's almost making a contact
shadow that just shows that these two points
are a little bit closer than the top parts, filling out the darks, filling in some of
the context shadow, but don't draw the entire line, or it will look a
little bit flat. Now I'm going to make
a gradient by using the four B over the two B. I'm only going
to fill in the part. So you can see a nice
gradient is being created. I use the eraser to
erase out a little bit. Now here I have the eight B, and I'm going to make
some of those lines a little bit darker at
the finishing touches. And then filling in the
cast shadow down here, because it is a lot very lightly. Go over here, but not make it too dark at all. Use the eraser to erase
it out a little bit more. So it looks like there's more of a gradient going
from dark to light. I'm going over with the two H, which is lighter than the H B, and filling in that shadow, using my hand to
smudge it a bit, and then just erasing
any smudges to clean up.
7. Paper Airplane: In this demo, we're going to
be drawing a paper airplane. Now the objectives of this
sketch are really just to go over the things that we have learned and put
them into practice. Once again, the form shadow on this paper airplane
is quite light. I will be using the HB as an outline pencil as well as the pencil to do the base shade. I start by checking the
angle and making sure that everything is correct
with the reference photo. In this case, I'm using a ruler because these
lines are a lot longer and it would take
less time For this sketch, I decide to draw out the overall shape first before going into
the tiny details. Now just to check and make
sure things are correct, I use the ruler to measure
each line and then measure the length across with my drawing and
my reference photo. Now that I establish
that this is correct, I can continue drawing
out the outline. I only draw half of this line because we can see that the paper
is folded over. So I decided to leave
that space open. I quickly measure to make sure that I have the correct size. Before moving on to the
next couple of lines, I realized that this
line is at a bit of an angle so that it looks
like it's being folded. Now it's time to
finish this side. I leave a little bit of space here because I want it to be clear that this line is underneath the folds
that are folded over. Now, drawing out
the cast shadows and the shadows that
are on the form, because the form
shatter is very light, everything is quite flat. I use the HB to also
do the base shade, filling up all the areas on the. Now, in this section, you can see there are some light spots, so I'm going to leave those out. And you'll see that I start to shade it in
different directions. Because I want to
give the impression that even though the
paper is smooth, it does have a little
bit of texture. The light spots help to sell the look now going over the shadow in
the inner case. For this. I put a tissue underneath my hand so
that I won't smudge. Now, the base shade
on the form is done. You've noticed
that I did not use the HB on the cache shadow, and that's because it is
a lot darker than HB. So, I don't need to use it now to build up
the second shade, I use the two H. I'm just going over and looking where are some
of the darker spots, some of the contact shadows, and filling those in. Then here on this
particular one, I want to give the impression
of a bit of texture. I put a little bit of
darks here and there with different pencil
strokes like cross hatching. Just to show that this is a
piece of paper that has made, been wrinkled a little
bit and the way the light is catching it
is giving it that texture. Now using the two B to go a little bit darker
because once again, a lot of the shades
are not that dark. It's not really pushing
all the way into the dark. I use the two pencil to
do the darks on the form. Now getting into
the cast shadow, I use the four B pencil
to do the base shade, and I will go over it
with the eight B pencil. Here we are doing a few touch
up with the 82h and eraser. Taking the eight to add in a little bit of those
context shadows will really help your drawing to just adding a few little
lines here and there. Take the eraser and erase out any of those pencil lines
that you don't need. And then using the two, again, just to add in a
little bit of detail, sharpen up any shadows that
could be a little bit darker.
8. All About Folds: Okay, in this video, we're going to go over a
few different basic folds. Just a quick overview so
that you can understand before we start to draw the
actual sketches and drawings. The first one that
I want to show you is called a pipe fold. This is usually used
for dresses, curtains, anything that's hanging and being held up by several points. Say for example, it's held up. All of these points here
say this is a curtain. Maybe it will have a couple
of lines coming down. It will start to create this Piping looks
a lot like a pipe. Where would we shade
something like this? Same as a cylinder. We would she the side, these are the cylinders
we shade on the side. Say the light is coming
from this direction, maybe a little bit over here because it doesn't have a light. Now the next one we're
going to do is a drop fold. This is usually a fold that
is created by one point, possibly there's a tow wall
that's hung up on a hook. This type of fold will
create a drop fold. It looks like an S or a zigzag. And here's the top. Now remember it needs to
come from the same point. Here's the top side
that we can see. And then the back
side would be here, also originating
from this point. Okay, so this is
mimicking a cone, right? How would you shade a cone? Let's say the lights
this direction, it would be the same shape here. The whole back side
we would shade. It really depends where
the light is coming from. If it's super bright light, light is coming from here. But then it's also
bouncing back, perhaps the form shadow would be somewhere in the middle and we would still see
light on either side. Okay, the next one I want to
show you is called a spiral. This is something
that you would find on people's clothes, or maybe like a towel is folded. Let's imagine we
have some pants, and the pants are a
little bit baggy. Could be better.
But let's just say this is person's pants. Where would you shade
something like this? Well, usually it would start from where the
contact shadow is, points where the cloth
is compressed together.
9. Hanging Towel: In this demo, we'll be
drawing a hanging towel. It has a one point tension
which is creating a drop fold. This is the most basic fold
where you'll have a piece of cloth hanging from
a single point and gravity does the
work to pull it down, making some basic folds. That is what we'll be
practicing in this demo. Just getting the folds right. In the reference photo, the light is coming
from the right, probably from a big window. That's why there
are some shadows, but they are quite
light and soft. Nothing very sharp or clear. The part of the towel in the
center is like a cone shape. The middle part is where
we see the form shadow. And since the light is bouncing from the right onto the left, we get this lighter
spot on both sides. You will see it with
every single fold. On the left side,
we have a shadow in the center and bright
on both sides. Starting off with the HB pencil, I draw out the outline first drawing the hook that the towel will
be hanging from. Then I draw out the two sides
and a line in between them. These sides look almost equal, but I just measure very
quickly to make sure that it's I drew one side a little
bit wider than the other, so I quickly correct that. Now I can start drawing in the details of the
outline on the bottom. This first fold is a common fold, you'll
see all the time, it looks like an S. The
important part here is making sure that the
vertical lines are meeting at the point at the top
where they are hanging from. That is why it is called
one point tension. Then I draw the other
fold underneath and some other little details
like the edges of the car. For this entire demo, I will only be using 2.4
B to shade the towel. Starting with two to
do the base shade, start very light shake downward, or follow the outline to show that gravity is pulling
the towel downward. Make sure you leave out those little bright spots
for the reflection here. Twist the bottom. I use a horizontal light because I'm following the
form and the outline. Then I quickly and loosely
make a cast shadow. Now I move on to the four B
pencil to put in the dark. Still going very,
so I sharpen up a few edges here
and there to make sure it's clear where
the context shadows are. I also fill in the
cache shadow to make it clear which part is the wall
and which part is the towel. Then I use the eraser
to erase out some of the outline that makes it look like the light
here is really bright. It's so bright that you cannot
see some of the outline. Last during the
finishing touch ups with two B on the right
side where there's a tiny cache shadow and now we're finished.
10. Hanging T Shirt: Mis nemo will be drawing a T
shirt hanging from a hanger. Now that we understand
one point tension, we're going to do a drawing
that has multiple points. The two most obvious
points are the sleeves, where they come off the hanger. The less obvious points are at the collar and the cloth
hanging over the sides. As we go through this demo, be aware of where each line
or drape is coming from. That is the objective
of this demo. The sleeve on the right is
also making a drop fold, as well as some
parts of the bottom, but they are less obvious. The shot also has a color, but we will not
be shading it in. We will assume that the default color is white
and just shade on top of. Let's get started, because
it's more complex, I will be doing a rough sketch
first using the HP pencil. I start by drawing the hanger. Once the hanger is correct, I can start to draw the
T shirt over the hanger. Most of the detail
is on the right, so I start with that side. I start by drawing out
the collar and use it as a measuring point
to draw out the sleeve. As I'm drawing out
the drop fold, I need to make sure that each line connects back
to the point of tension, which is the edge of the hanger. It takes a few tries
to get this right, then I use the entire sleeve to measure the rest
of the T shirt. I also check with the
width of the T shirt from shoulder to shoulder against
the length under the sleeve. Sometimes it's good to have
different comparisons to ensure that you have the
correct measurements. When I'm happy with
the right side, I move on to the left side using the part that sticks
out on the right side. With the part that sticks
out on the left side, I take my pencil and see if it's a perfect
vertical line across. Or if one side is
higher than the other, then I do the same
for the right left. This line that comes down
the middle starts from almost the middle side
of the left shoulder. Its point of tension is from
the left side of the hanger, but not the part where the
sleeve falls off the edge. Now once the rough drap is done, I go over with clean
lines and draw in the little details like
the curves of the cloth. Now that the outline is done, I'll go over with the two B
pencil to do the base shade. If you look at the
reference photo, you'll notice that the
darkest starks are around the underneath of the sleeves and the drape on the left side. However, there are
still a few wrinkles and drapes that are
around mid twin range. I will go over with the
two B pencil again to add a little bit of contrast before doing the darkest
starks. With four, I go over very lightly and start adding in some texture of
the cloth on the T shirt. Look closely at your reference
photo to notice if there are any small changes
in shade that can give you an idea of where
you can add the little marks to make it look like the T shirt has a
little bit of texture. Not doing the second shade
with a two be pencil, I go over the contact shadows or any cache shadows that are
in the mid town range. Some of these shadows
are very small, so it would be best to
have a dull sight and a sharp sight of your pencil so that you can switch
back and forth. Moving on to the four B pencil. I do the darks on the left
side color and underneath the sleeve anywhere that's a little bit darker than
our second shade. Finally, using the eight B
to do any finishing touches. Just pushing the
contrasts a little bit. Now we're done.
11. Jeans: In this demo, we'll be drawing some genes that are
creating a spiral fold. This fold is created when cloth
is wrapped around a tube, or maybe an arm or a leg. The sides are
slightly compressed, creating these folds
that look like they're wrapping
around an object. To simplify, I will only be drawing one side of the genes. Notice where each line
wraps around and draw your folds as if
they are curving around rather than
straight lines. The objective of this demo is
to understand spiral folds. To start lightly, draw out
the leg and the shoe outline. These do not need to be dark, they are simply the
base for your jeeves. Then start to draw out the
curves over the outline. They will not stick exactly to the outline
you have drawn. Leave a little space
for curves and S shapes where the bottom of the leg, the ankle gets smaller. So it makes sense that some of the curves would
curve even further. And concave more than the
top part of the gene. Now drawing out some of the
other folds that are between. Once everything is
in the right place, I erase and draw out
a clean outline. Start with two B
for the base shade. The light is coming
from the right. But any place the cloth is compressed
together will create a shadow shade in between the folds where the
clock is compressed. They are creating
context shadows. And cast shadows,
generally shading downward to show that gravity
is pulling the genes down. When I'm shading the genes, I am showing a little bit of my pencil strokes because I want to show that there is
some texture to the genes. And sometimes the
shadow is starting from the other side
that you can't see. You also want to make sure that your shadow looks like
it's wrapping around. Once the base shade is done, I go in with the four B, making those contact shadows
just a little bit darker. Mainly on the left side
where there's less light, but a little bit here
and there on the right, and leaving the
base shade visible. Finally, I use the eight
to outline and fill in some of the other just to make it clear between
the left and right. This also looks kind
of like a cast shadow. It helps to make your drawing. Then I use eight to
roughly shade in the shoe. These are some small
little details that you don't really
need to put in, but it helps the viewer to
understand what's going on.
12. Final thoughts: Congratulations, you've made
it to the end of the class. I hope you had a great time learning a little bit about
drawing angles and folds. Now remember that this
is a follow along, so please drop your projects
into the project section. I look forward to seeing them. All the files will be
in the project tab, including extra
reference photos. And of course, if you
have any questions, please leave them in
the discussion section. If you would like
more classes from me, please go onto my profile. You will see all
the classes that I've put out on
watercolor and sketchy. See you in the next class.
 Jenna, Watercolor + Sketching + Nature