Transcripts
1. intro: Hi there. My name is Rebecca Adams, and I am an illustrator. Like many artists, I love drawing people. But for a lot of artists, drawing facial features can prove difficult and daunting. In this class, you will learn how to draw lips from any angle by understanding the basic structure of lips and how to break it down. We will start by going over the basic shapes that make up lips. Then how angles can change the shapes and finally stylization. I hope you have fun in this class and are excited to learn because I definitely am.
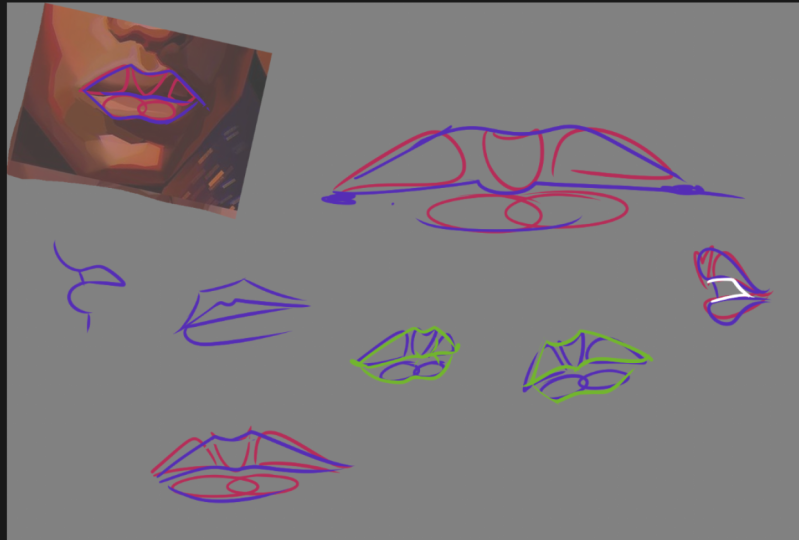
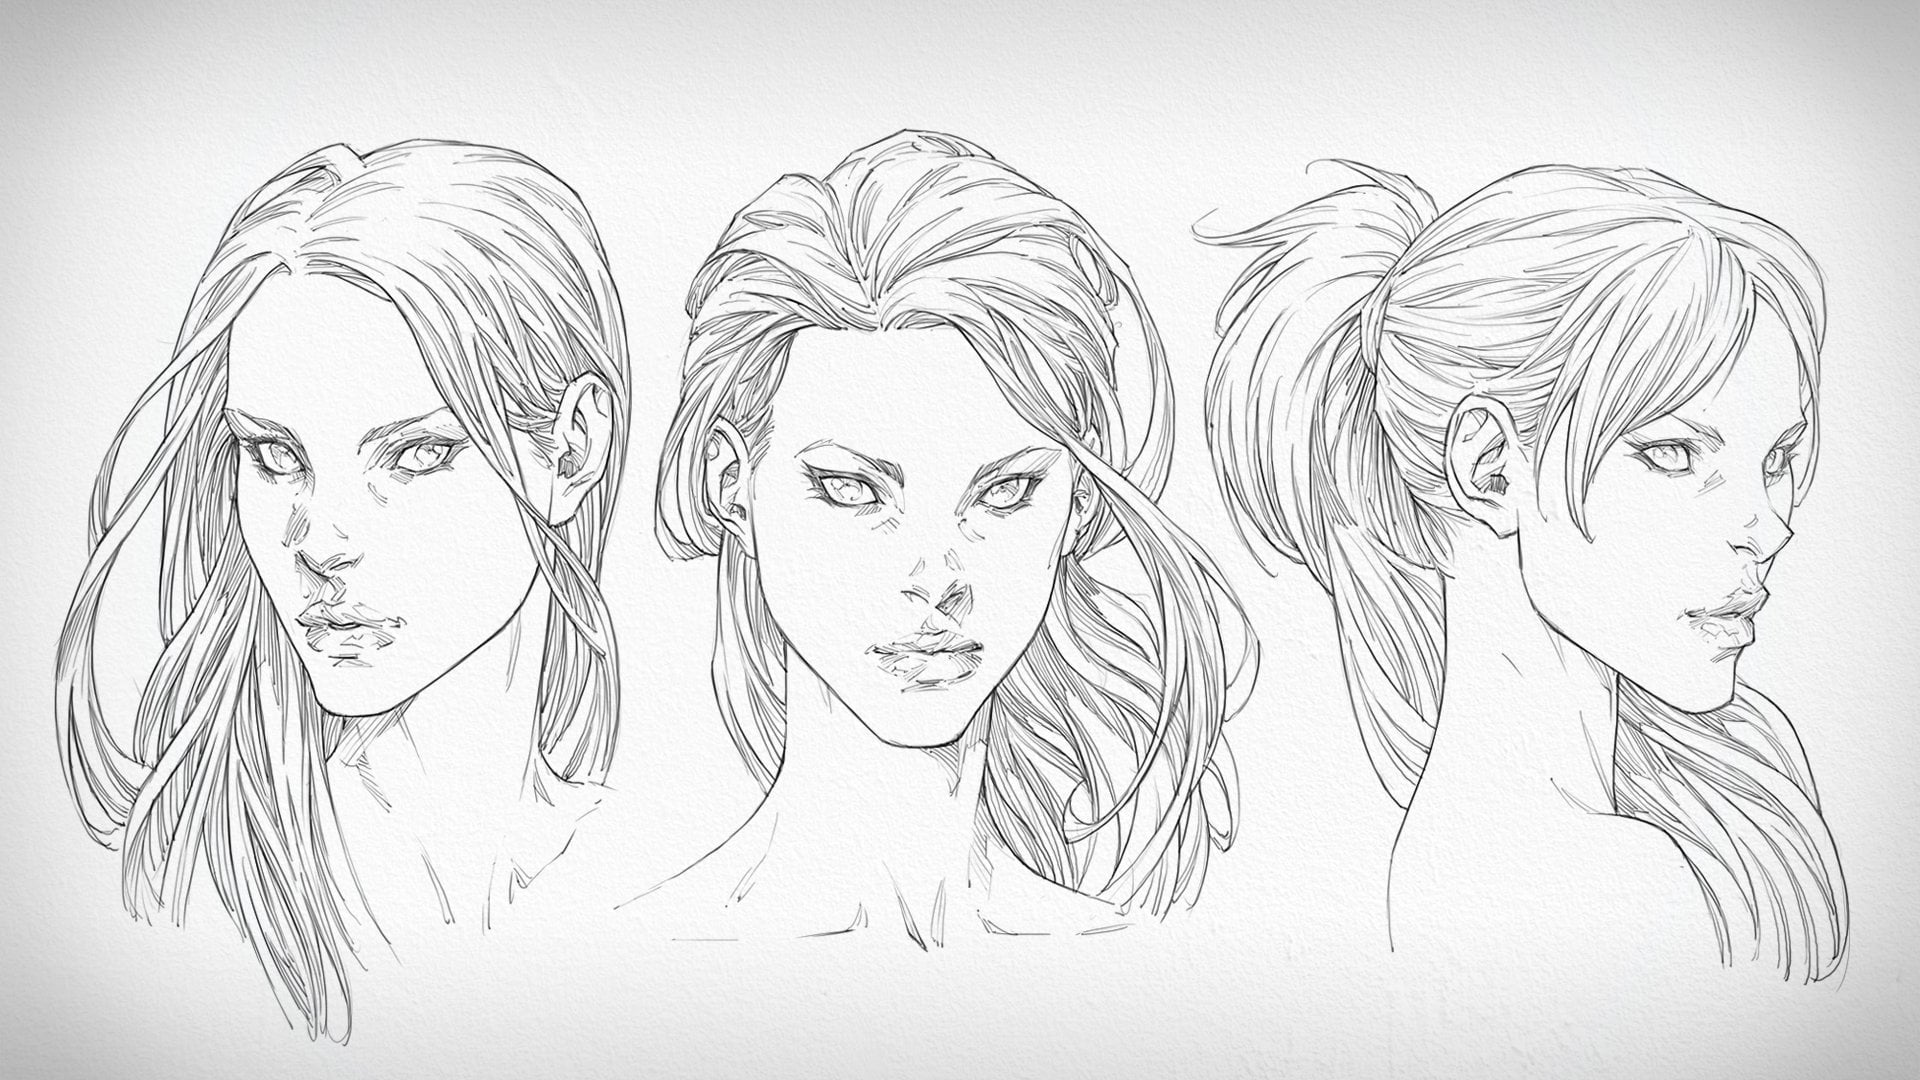
2. Basic Structure: welcome to part one of drawing lips in this part of the class. We're going to learn about the basic structure of lips and the shapes that it could be broken down into. By understanding the structure, you will be able to draw lips and any angle for all of your character needs. Lips could be broken down into three distinct shape. First is what I call it to shape. It is round at the bottom and dips at the top. This forms the classic Cupid bow shape, and we'll decide how thick your lips end up being. The taller you make it, the thicker the lip and the wider you make it. The more broad lips will seem the next part's create the top lip. These are two rounded triangles on either side of the to shape. They start at the to shape and come to a point where the edge of the lips will be used. These points to decide what type of facial expression your characters making If they're smiling, though, point more upwards. If they're frowning, appoint more downward. You can then use to ovals to make the bottom lip. The thicker they are, the more full that bottom lip will seen. Once you have these shapes down, you can draw in the final lines. I usually start with the middle line and put little dots at the ends of the lips. Then I draw on the top and the bottom lines. Now that you understand the basic structure of lips and the next class, we will go over how shape and angle changes, how the lips look.
3. Shapes and angles : Now that we have an understanding of the basic structure of lips, we need to look at how the angle will change the shape of things. We need to understand that we're putting a three D shape onto a two D space. It is important to remember how these shapes will change, depending on how we're looking at them. A good way to better understand this is to look at pictures of lips and figure out how the shapes change. When lips turn away from you, the shapes that are farther from you, the rounded triangles in the ovals will become smaller and more rounded, and there's to shape becomes thinner. I suggest gathering some pictures of lips and drawing the basic structure over them so you can get a better grass of how the shapes change. As you can see here, I've drawn a couple different lip shapes. Some are from angles, and some are complete side views, and you can see that the ovals and the point of triangles that are further from us become smaller and more rounded. And on the other hand, the parts that were closest to us will become longer and thinner. Both e rounded dry angle of the top lip on the oval of the bottom lip, and when the lips are looking up or looking down, the shapes will change again. If they're looking up the bottom, let generally becomes a bit thinner because we're seeing less of it, and it's the opposite when they're looking down. Now that you have an idea of how the angle will change the way the shapes look and thus how the lips look, I would highly suggest gathering some resource is of people's faces and drawing the structure shapes over them. So you have a better grasp of how the lips will look and how they change. Depending on the angle. In the next class, we will be going over stylistic choices.
4. Using references : Let's go ahead and take a look at how I would use a resource, Um, an image of a person to help me figure out how the shapes of the lips will change, depending on how they're looking at me. So these are images that I take from either Pinterest or on slash, but you can use whatever works best for you. I'm going to start with the to shape, which, because she's looking away from us, is a bit thinner. And then the farthest around a triangle ends up being very round fat and not quite as long . But then the one that's closest to us ends up doing the opposite and being really long and thinning out a lot. And then the ovals end up doing the same. You see how this oval ends up pointing a bit towards that corner. That's important to remember when drawing lips at an angle and then the one that's closest to us and being nice and long and then if I wanted to go ahead and draw in that shape I know have perfect outline that I just have to fill in the spaces for very simple just takes me a matter of minutes. Let's go ahead and do another one, this one. She is facing the side. And so you see, right here you can see where the Cupids boats falls. So that's where we're gonna put the tooth shape. But it's much thinner and kind of comes up at an angle like this because she's she's not only facing to the side, but she's also leaning up. And then the ground a triangle comes down. Like I said before, where are those points? End up, really adjust. What kind of expression your characters having. So this one, it comes down at an angle. And then because she's facing sideways, there's only one round the triangle and only one oval. And because of the way she's facing, it comes up to a little bit of a point here in the corner. And there you go. We've got a side facing lips. We can go ahead and do another one, but this one she's facing down a little bit. So go ahead and put in the two spot for the Cupid's bow, and then we draw in those triangles and again, you've got a look at how these shapes are changing how this oval is coming up a little bit less than this oneness and how it's much longer and more spread out. So you see, it's very simple, and it just takes you a few seconds to do each one, and I'll get you used to drawing the shapes and understanding how they work. So at some point you won't need. The resource is to be able to understand what the lips will be doing and how the shapes will be changing.
5. Stylization : now that we have an understanding of the shapes and the basic structure of lips, as well as how angles will adjust, how the lips look and how those shapes change and interact, we need to look at stylization. The stylization of lips will change how your piece looks and how your character comes across, like anything you can style eyes the lips to suit your art style or the current peace you're doing. I usually have the middle line with small dots at the edge and then the bottom and top lip lines stopping just before the corners. You can show both the top and the bottom lip, or you can Joe. Just the bottom. Let it really depends on your personal style preferences and how you want it to look. Some people only put a line for the middle and the bottom lips. Others completely get rid of the lines for the top and bottom lip and just have the middle line. You can add crease marks to make it more realistic. I like to add highlights, usually one on the top, lip two on the bottom lips. Play around with them and figure out what kind of style you like best. You could make them look more realistic, more cartoony, or even simplify them into an anime style. It is all up to you.
6. The end : congratulations. You have reached the end of my drawing lips at any angle class. I hope you enjoy the class and feel that you have come away with a better understanding of lip structure, as well as how the angles may change the way we view the shapes. And, of course, that you now feel more comfortable and confident when drawing lips. I encourage you to draw lips using the techniques and concepts you have learned in this class, and please share them to the class project section. I am excited to see what you carry as well as your own personal stylization choices. Again, Thank you for joining me.
 Crow, Illustrator