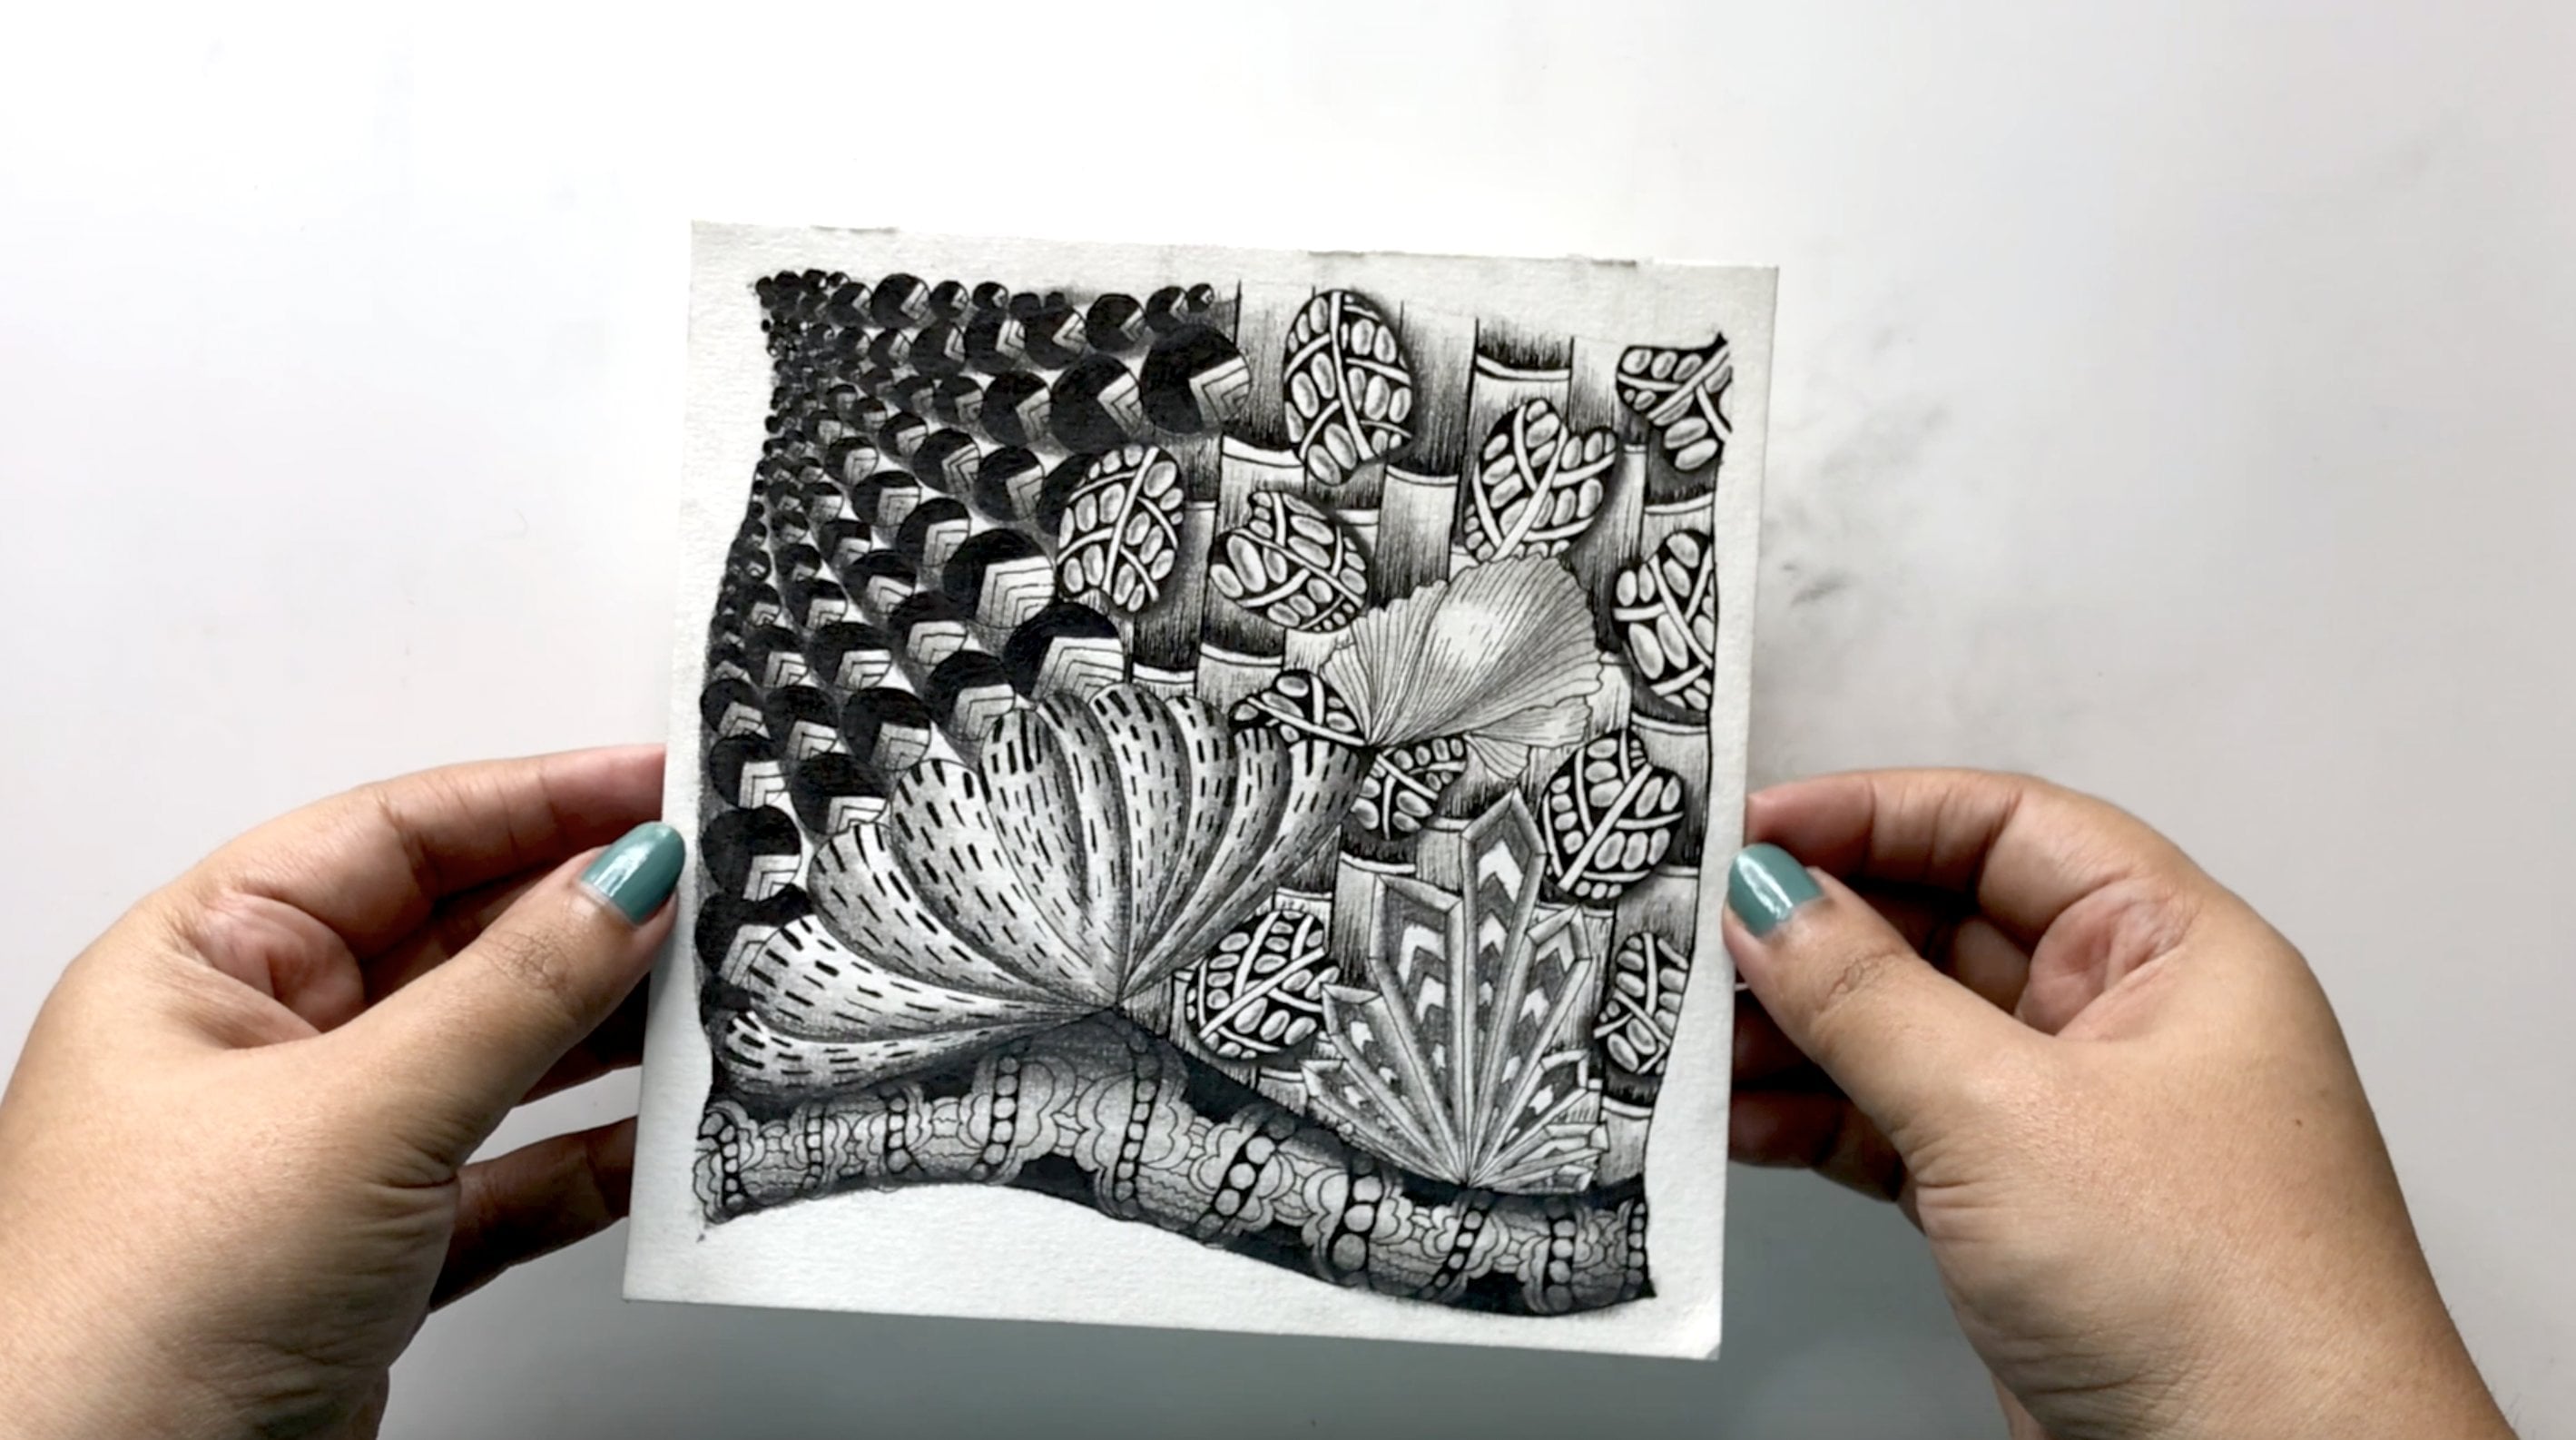
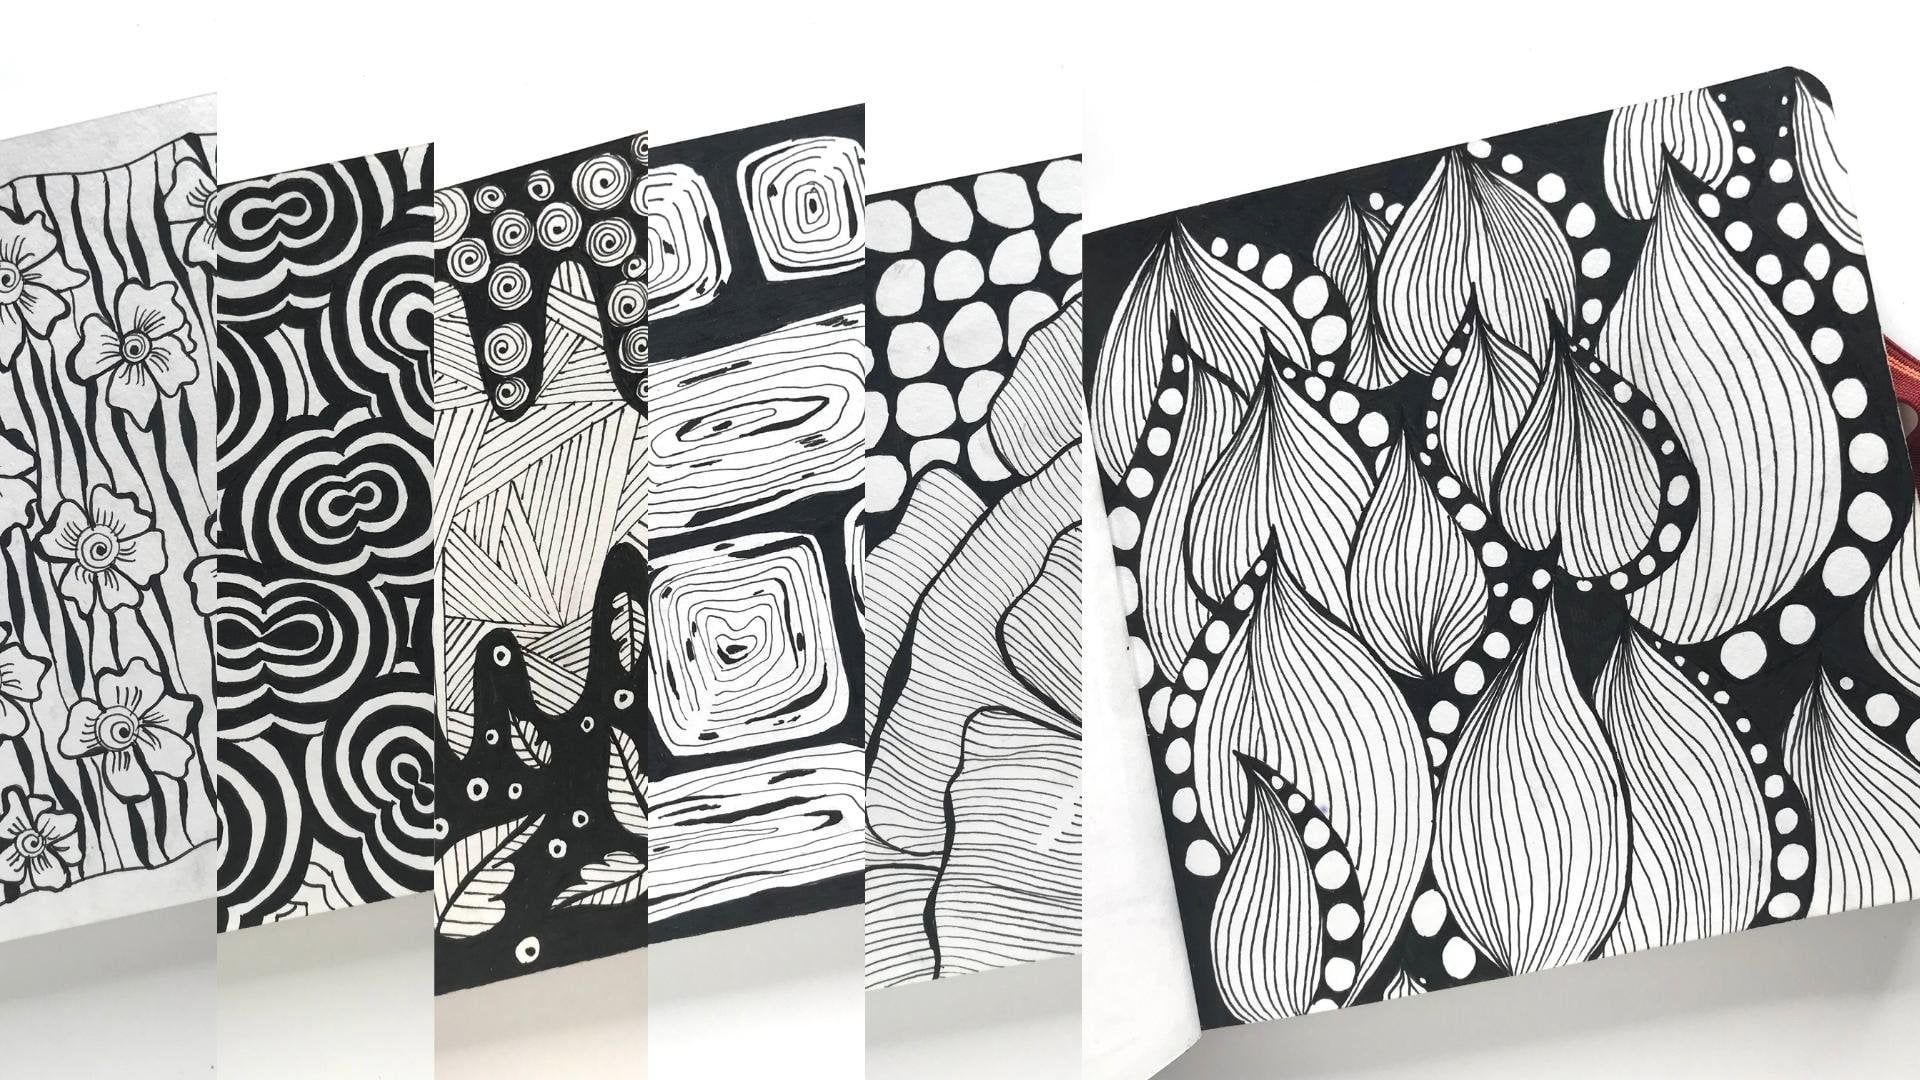
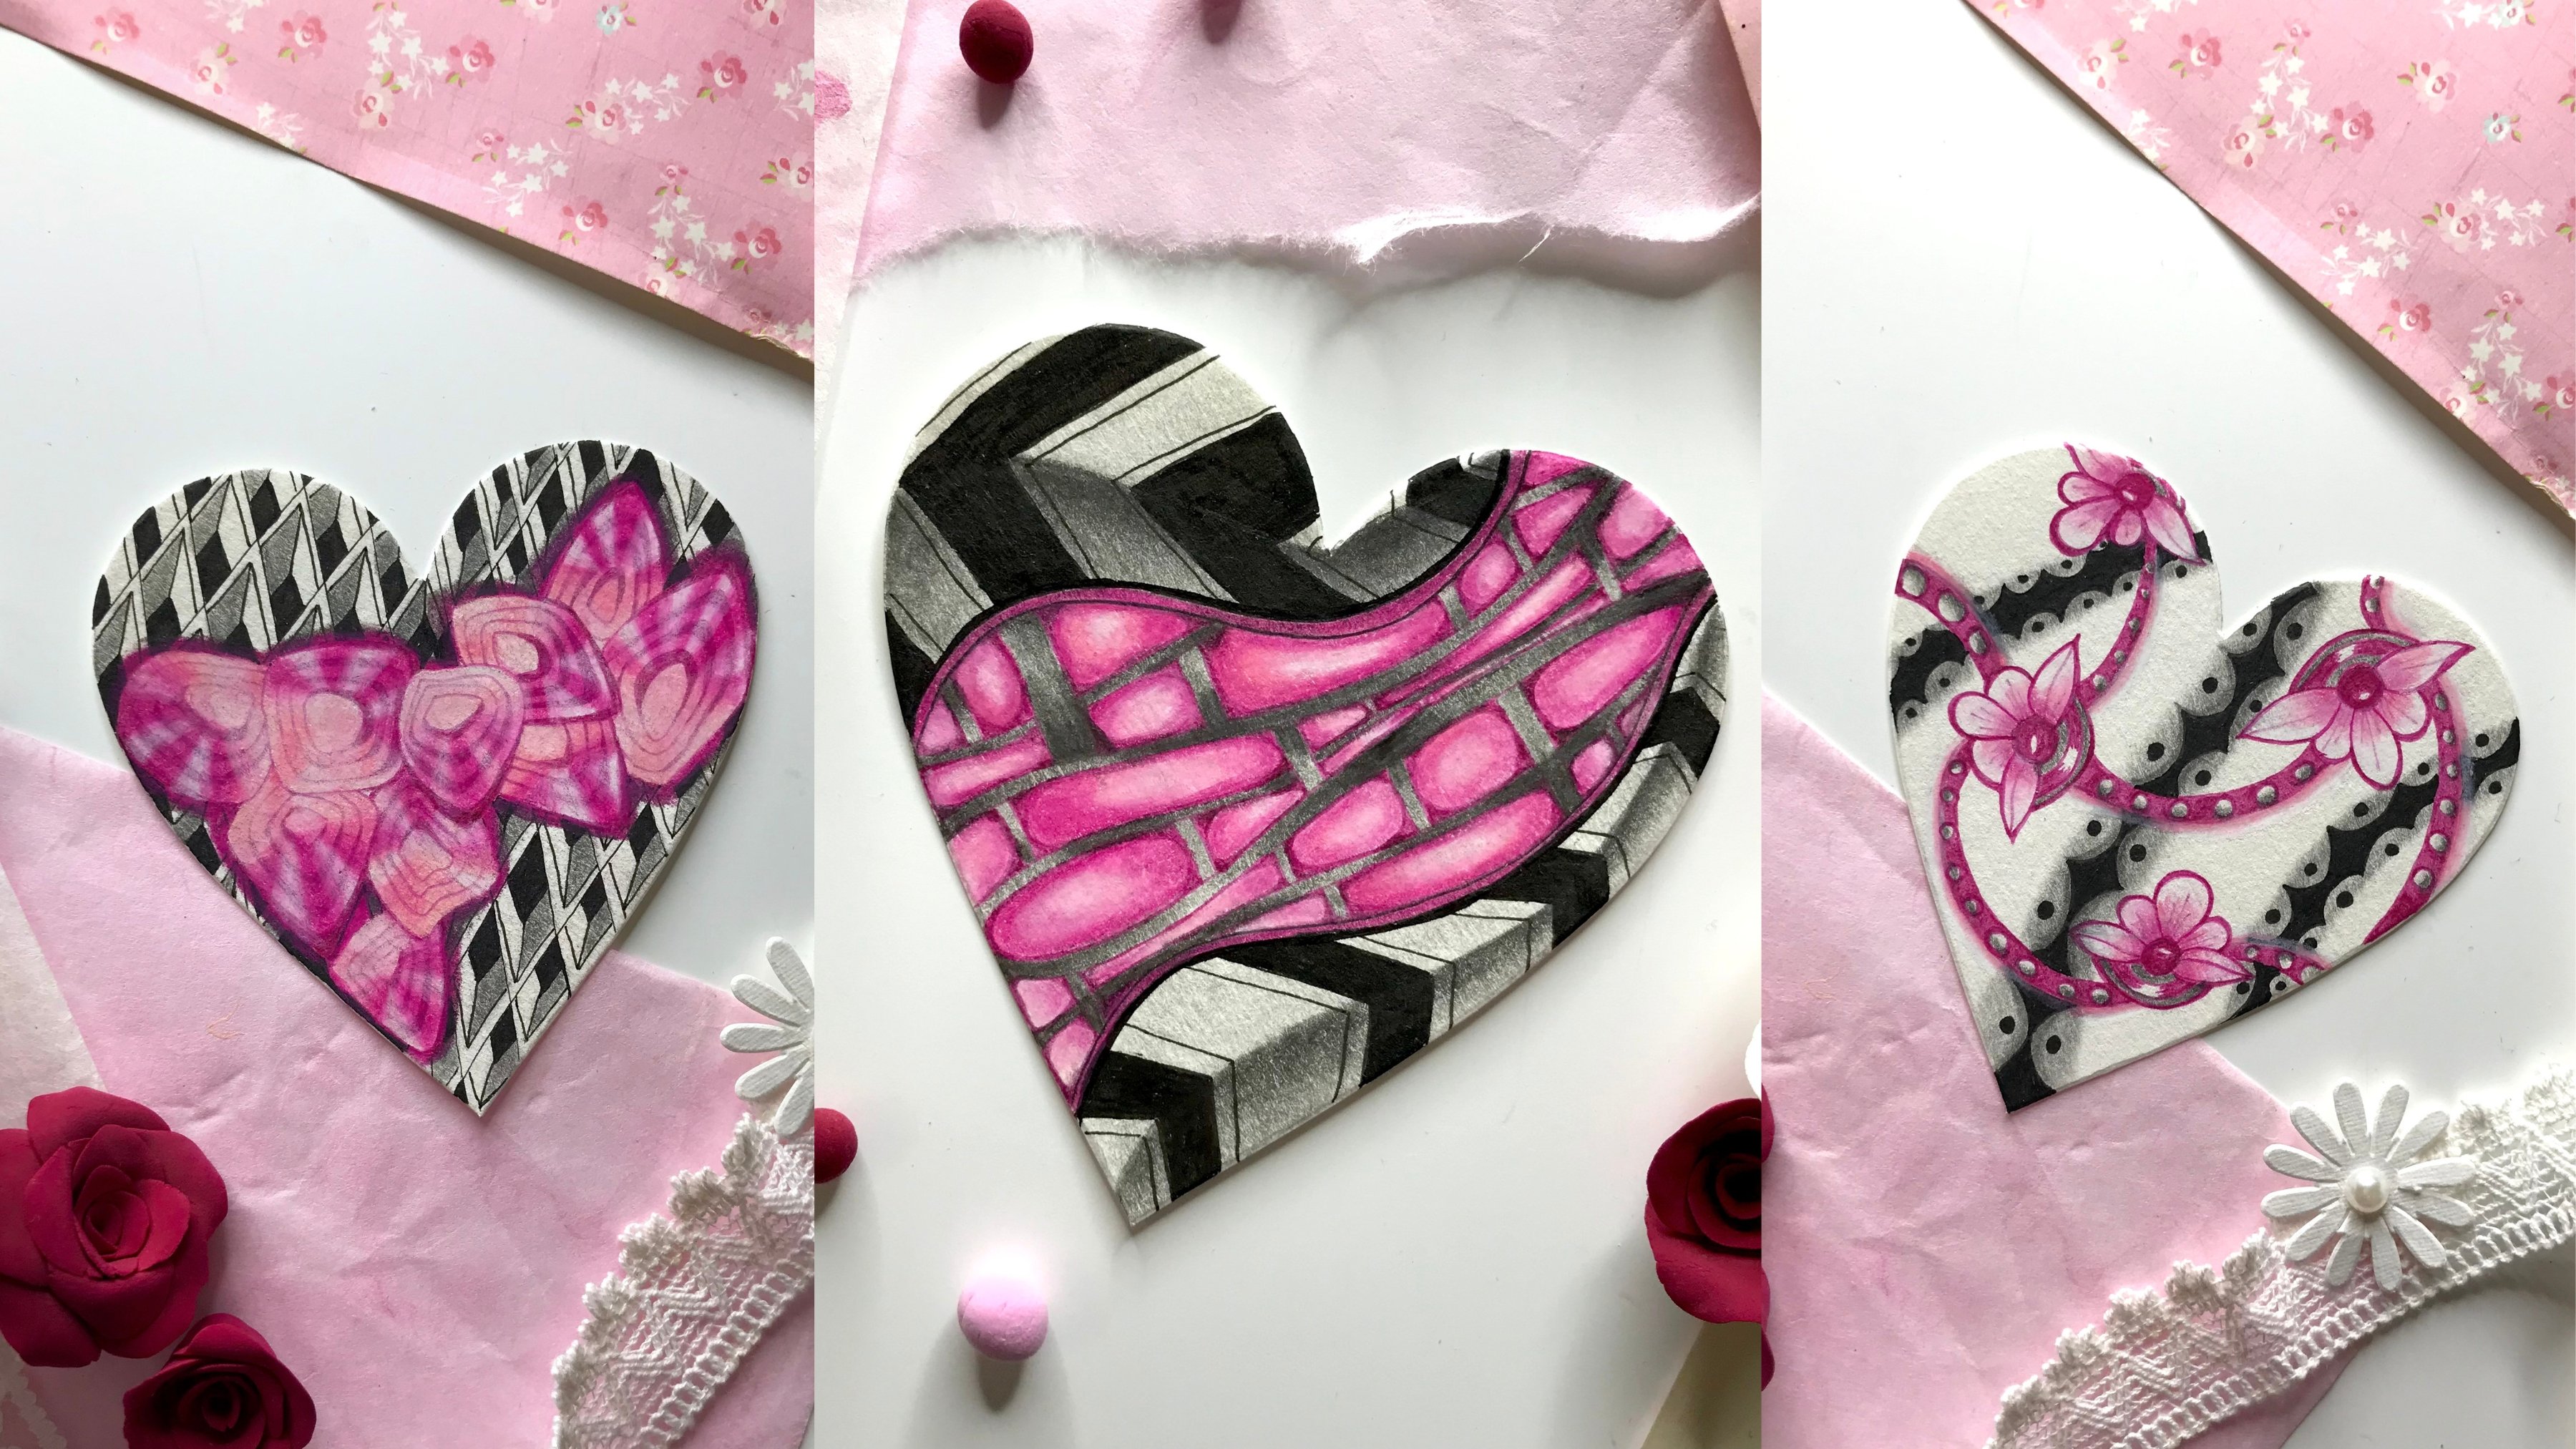
Transcripts
1. Welcome!: You know that feeling
when you're really inspired by the work
of another artist? And you really want to use that inspiration
in your own work, but you just don't know
where to get started? Well, I've been
there too and yes, it's not a great feeling. But guess what? We're
going to fix that today. Hi everyone! My name is Ridhi Rajpal and I'm a Film-maker and a Multi-disciplinary
Artist from India. I am also a Certified
Zentangle Teacher and a Certified Sculpture
Painting Artist. Now, forget about all of those certifications
because frankly speaking, I'm just like you. I'm super enthusiastic
about making art and that's exactly what we're gonna be
doing in today's class. So today we are making
abstract pattern Art inspired by one of the greatest artists of
all time, Gustav Klimt. When I first came across
Klimt's paintings, I was blown away by his work. His use of intricate
patterns, bold colors, and abstract forms is
absolutely mesmerizing. And a few years ago, as I was enjoying the beautiful sights of the
city of Vienna in Austria, the place where Klimt was born. I fell in love with his
work all over again. Even the souvenir shops over
there were filled with his paintings printed on
literally every item possible. And that's where I
also got myself, this cute little tin box. So anyway, it got me thinking, how can I use all of these creative inspiration
in my own artworks? After all, I didn't want to simply replicate or
copy Klimt's work. Instead, I wanted to use
all of this inspiration to create something that was distinctive and uniquely mine. And that's exactly
what we're gonna be doing in today's class. We are gonna be making abstract art inspired
by Klimt's style, but totally reflective of
our own creative voice. We will learn how
to utilize colors, shapes, and textures
in innovative ways. We will get to experiment and explore our own
unique creativity. But most importantly, you're going to gain confidence so that every time you are
inspired by the work of another artist or
any other source of inspiration for that matter, then you can use
that effectively in your own one-of-a-kind artworks. In other words, the techniques
that I'm sharing in today's class can be applied to multiple
sources of inspiration, not just Klimt's paintings. So that's pretty cool, right? We'll learn everything in an
easy step-by-step manner. And at the end of this class, you will have two finished
pieces of art that you can hang up on your wall and be
proud of every single day. And here's the best part. You don't need any
prior experience in art to join this class. Whether you're a seasoned
artist or a complete beginner. This class is for anyone
who wants to explore abstract pattern art in
a playful, expressive environment. So if I've done a
good job of tempting, you, meet me in class, and let's create something
stunning together.
2. Class Projects & Overview: Gustav Klimt's art is known
for its intricate patterns, bold colors, and abstract forms. For your class projects, we are going to be drawing
inspiration from Klimt's style and using it as a jumping-off point to create our own unique
abstract pattern art. In total, we're going to be
working on two class projects. But with the techniques
demonstrated in this class, you will be able to create
many more of your own. And don't worry, you're not alone in this! I'm going to be with you
every step of the way to make sure that your class project
turns out to be super stunning! To make each of
our class projects, we'll start by exploring
a few paintings by Klimt. And we'll understand how he used geometric shapes,
organic forms and ornate patterns
in his paintings. We will also be studying his
use of color and texture to understand how we can create depth and interest in
our own compositions. Once we have narrowed
down on the inspiration for each of our projects,
we'll start drawing. But it's important to
note that we won't be simply copying or
replicating Klimt's work. Instead, we're gonna
be using that as an inspiration to develop
our own creative voice. So that means throughout this class, we will be
actively engaging in making decisions that make our artwork more
unique and personal. Throughout this class,
I'll be sharing my own creative processes and techniques to help you infuse your own creative voice
in your projects. But at the same time, you're also welcome to use your own creative
processes and techniques. Processes that you
have already tried, techniques that
you already trust, and things that you
want to add into your own artwork to make it personal and unique
for yourself. In other words, you have the
freedom to totally customize and personalize
this experience for yourself in any
way that you like. So basically, no
rules over here! Once you're done with
the class projects, I encourage you to share
them in the project gallery. This way, you will get
feedback from not just me, but a very helpful and
supportive student community over here on Skillshare. Alright, so now that you
know what the class is all about, let's get started!
3. Supplies: Alright, everyone,
let's talk supplies! Now this class is all
about accessibility and keeping things
simple and flexible. Which is why I have
kept the supplies as simple and
minimal as possible. The first thing
that you are going to need is of course, paper. And you can use any kind of paper that is easily
available to you. You can also use a sketchbook
and you don't need to have loose papers like
I have over here. So basically use whatever
is easily available. Now the paper that I'm using is from the brand
called Strathmore. And they make these
gorgeous artist tiles which come in the square format. So if you've been a
regular student of mine, you know that I love
working in a square format. And so this is my personal
choice for today's project. But you are definitely welcome
to work in a rectangle, circle or any other
format that you'd like, horizontal or vertical
orientation, whatever you prefer. Now, what I like to do
with my artist tiles is that I put these washi
tape edges on the corners. And so you can also use a
regular masking tape for this. The benefit of this
is that once the drawing is finished. I can peel these off. And that nicely reveals
these crisp white edges, which creates a fake or a faux mat or a frame
around the drawing. And so I really like that look. So again, this is optional.
If you don't have a washi tape or masking
tape, that's totally fine. You can skip this step. And of course, this is
also a design preference. So if you don't want to have that border around your artwork,
then it's totally fine. Now, the next thing
that we will need is some kind of a
coloring media. So I'm gonna be using
these water-based markers, which I found from Amazon, from a brand called Ohuhu. I think I'm pronouncing that
correctly, not 100% sure! But this was a pretty
affordable brand that I found online. What I liked about these markers is that they are dual-tip. On one side, they have
a fine liner tip, which is great for
adding tiny details. But on the other side, they have a brush pen tip, which is great for
covering large areas and basically just having a nice
large application of color. So what I also like
about these brush pens is that you can actually create
these painterly effects. So for example, I can go over a certain patch and
make it darker. Then when I overlap these lines, it creates these blotches. It's basically creating this
nice painterly, raw finish. So I always like to
say that if someone was playing with their
brush pens and if they were slightly scratchy,
then they basically just give us slightly
more expressive, painterly finishes. And so basically that's
the kind of look that I'm trying to create over
here in the class today. But again, this is
totally optional. If you don't like to have this
kind of blotchy, raw finish, and if you don't want to have this painterly expressive style, then you can totally skip this and you can use some
other coloring media. So for example, you can also use these Sakura Pigma Micron pens, which are great.
And these come in various different
colors as well as various different
thickness of the nib. So you have thin and
thick variations. So these are slightly more opaque as compared to
the water-based markers. And of course, you can use
anything else as well. So for example, you can also
use alcohol-based markers. You can use color
pencils, sketch pens, acrylic paint,
gouache, you name it. So basically, I just
want you to have fun with whichever
coloring medium you choose. And it should be something
that is easily available to you and something that you are comfortable working with. Alright, now, one of the most important things
that we're going to need for today's class
is something gold. So basically, we will need gold pens or gold paint, if
that's what's available to you. And one of the gold pens
that I'm going to be using in today's class is this light, nice, shimmery gold from uni-ball, which is a gel pen. And this has a nice
shimmery finish to it. But along with this, I'm also gonna be using this
Sakura Pen-Touch marker. We need to shake it to
get the ink flowing. This one is a slightly
more antique gold and it has a slightly
more opaque finish. This is the same one that
I've also done over here. So basically this pen also comes in various different nib sizes. The one that I'm using
for today's class is an extra fine point, at 0.7 MM. But you also get these
in thicker nib sizes. So that's an option too. I'm gonna be using two different
kinds of golds just to create some more interest
and drama in the drawings. And the reason why we are specifically using
a lot of gold in the drawings is because Gustav Klimt's work is
famous for the use of gold. He used a lot of gold
leafing and also a little bit of silver
leafing in his work. And his paintings
had this sense of richness and opulence because
of that gold leafing work. So we're just taking
inspiration from that. And to replicate that effect, we are gonna be using
gold pens over here. Now, as I mentioned, you don't have to
have these gold pens. You can instead use
gold acrylic paint if that is what is
easily available to you. Another thing that I
highly recommend for today's class is
a white gel pen. And that's because it's
very useful in adding these details on top
of colored patches. You can basically create some interesting layering
effects with a white gel pen. This is again from uni-ball, the same brand from which I'm using the gold pen as well. But you can use any other
brand that you like. Again, if you don't
have a white gel pen, you can use white acrylic paint or white gouache
as a substitute. Now one more reason
why I like to use these white gel pens or white acrylic paint in my drawings is because I want
to cover up paper white. For example, you have
certain sections white in your drawing and you want
to leave negative spaces. That's totally
fine, but I highly recommend covering
them up with white. The reason for
that is that after a few months or a few years, your paper might
start to discolor. And so if you intended for certain sections of your
drawing to be white, they might start becoming
yellow or brown. So to prevent that
from happening, it's always a good idea
to use a white gel pen or a white acrylic paint
or white gouache or something white to cover
up the paper white. So that these pigments, which are basically archival
ink or acid free pigments, do the job of keeping
those white areas, white. Which means that you
are still going to have white even
after a few years. You'll see me use
this technique on the white areas of my drawing when we actually get
to the project stage. Alright, now that we have discussed the paper and
the coloring media, I also want to quickly
tell you to keep a few scrap pieces of paper
like this one handy with you, so that you can test
out your colors beforehand and create swatches before you actually get into the drawing
stage of your projects. You will also need a couple
of blank pieces of paper, which can be your regular computer printing
paper or copy paper. And that will be used for
doing some practice exercises. For those practice exercises, you will also need a pencil. And if you don't want to
use a pencil, that's fine. You can also use a
pen or a marker. It's just for practice, so you're free to use
whatever you want. So that's another thing
that you should keep. And as a couple of optional
supplies, if you like, you can keep a ruler handy, and you can also keep
an eraser handy. So these are totally optional. We won't really be using a lot of the ruler and the
eraser in the drawings. But if you'd like to
have them on standby, that's totally fine. So that's it, pretty much for
all the supplies that we are going to be
using in today's class. Now, since this class is based on observing the paintings
of another artist, we obviously need a
few reference images. For the most part of the class, I am going to be using reference
images from this book. And you don't have to
have this book with you, but it's a great one, in case you are looking for
interesting art books. So this is from a publisher
by the name of Taschen. And this is a book on Gustav
Klimt's complete works. So it's a great reference
book and it has many interesting images of
his work or where he studied, where he lived,
etcetera, etcetera. So I'm gonna be using this as the reference for building up color palettes and taking design inspiration in the class. Now I realize that some of you would like to zoom
into the details and really see the true
colors of each of the paintings and really look at the details up-close
and personal. So obviously me showing these on camera will not do the job. Which is why I have also created a Pinterest board
for your convenience. The link to the
Pinterest board is in the Class Resources document. On that board, I have put in several pictures of Klimt's
original paintings, as well as pictures of work by artists who are broadly
inspired by Klimt's style. And then some fashion
designers, accessory designers, etcetera, who have developed collections based
on Klimt's style. So basically just a good
set of reference images. And I keep adding more images
to it pretty regularly. So if you like,
you can check out that Pinterest board in
the Resources section. And, of course, I must
mention that the greatest and the
best resource for finding high
resolution pictures of Gustav Klimt's artworks
is Wikimedia Commons, where you will find a ton of pictures in the public domain, including Gustav
Klimt's paintings. So these paintings
are great if you want to download them
in high resolution and really zoom in and
look at the color palettes and look at the details
of each of the paintings. So you can use those for
reference images as well. So yeah, so that's
pretty much it for all the supplies and resources that we will need
for this class. And if you have any questions
about anything at all, you can always drop them
in the Discussions tab. And I'd be happy to help. So now we are ready to move on to the creative
stage of our class, which means in the next lesson, we are going to start finding some inspiration
for our projects. See you there!
4. Finding Inspiration: During his early years, Gustav Klimt showcased
remarkable talent and versatility as an artist. He initially trained in architectural decoration
alongside his brother Ernst. and their common
friend, Franz Matsch. Together, the three of them
also formed the "Company of Artists", creating
intricate murals and paintings for many
public buildings. A lot of Klimt's
early works reveal a strong influence of
historicism and academic Art, which was prevalent
during that time. He painted landscapes, portraits,
and allegorical themes, meticulously
capturing details by employing various
traditional techniques. However, everything
changed when Klimt joined the Vienna Secession,
a revolutionary group of artists aiming to
break free from traditional constraints and explore innovative
artistic expression. As part of the Vienna Secession, Klimt embraced a new
artistic direction. His work became increasingly experimental, characterized
by symbolism, sensuality, and a
profound exploration of human psychology
and emotions. So Klimt's Vienna Secession
period is perhaps best known for his iconic paintings featuring intricate patterns, sumptuous use of gold leaf and mesmerizing
ornate details. These works often centered
around themes of love, desire, and the female form, reflecting Klimt's
fascination with the human experience
in general. Klimt's masterpieces
from this period, such as, "The Kiss", "The Portrait of Adele Bloch-Bauer I", and the "Tree of Life" are celebrated for their
exquisite beauty, rich symbolism, and
profound exploration of the human conditions. It is believed that when
Klimt showcased his painting, "The Kiss", for the first time, he mentioned in his opening
speech that he viewed so-called "Fine Art" and
"Applied Art" as one. This idea is deeply rooted in
the concept of "gesamkunstwerk", which is a German word representing the idea of
a unified work of art. And I'm pretty sure I haven't
pronounced that correctly. My German is not
very good. Maybe a quick search on the Internet will
help you with that. Anyway, moving on
through his art, Klimt challenged
societal norms and opened the door to a new era
of artistic expression. His work within the
Vienna Secession not only influenced
his contemporaries, but continues to inspire
countless artists to this day. As we delve into Klimt's
Vienna Secession period, it's important to note that
we will primarily be studying his independent
works rather than his earlier collaborative pieces created for public buildings. This is because Klimt's
independent works are characterized by a greater utilization of intricate patterns and
opulent gold detailing, which aligns perfectly
with our focus on developing abstract pattern
art during this class. So basically, we'll be
observing those masterpieces where patterns and ornamental
details take centerstage. And we'll be observing
these details as independent elements that we can use in our own work with our own creative voice. So let's begin. Now, the first painting
that we're gonna look at closely is, "The Kiss". "The Kiss" is one
of Gustav Klimt's most iconic and
celebrated paintings from his Vienna
Secession period. It showcases a passionate
embrace between a man and a woman, enveloped in a richly patterned and
ornamental background. And we're going to look at the shapes used in
this masterpiece. One prominent shape that stands out over here is
the circular form. The circular motif is repeated
throughout the artwork, appearing as swirling
patterns in the background, and also as decorative
elements in the garments of the figures. Another prevalent shape
is the use of spirals. Spirals are intricately
woven into the patterns, embellishing the figures'
clothing, and the background. And the spirals give a sense of energy, rhythm
and transformation. Then there are these
rectangular shapes in the form of mosaic tiles. So these rectangular elements, along with the precise lines, add a sense of structure and order and balance
to the painting, which is a nice
juxtaposition with the organic and flowing shapes
present in the figures. Then we are going to look at the "Portrait of Adele
Bloch-Bauer I". And this is another
renowned painting by Klimt, which is known for its
lavish and ornate style. And again, Klimt has employed a combination of organic
and geometric shapes, creating a very visually striking and intricate
composition. So one of the dominant shapes
in this painting is again, the use of circles or ovals. And Adele Bloch-Bauer herself is portrayed within
a circular frame, surrounded by a halo like aura of golden circles and
decorative motifs. And the circular shapes
serve to emphasize Adele's presence and create
a sense of ethereal beauty. Then another significant
shape in the artwork is the use of these intricate
curvilinear patterns. So again, these decorative
patterns are very reminiscent of ornamental motifs
from Byzantine Art, which had influenced a
lot of Klimt's work. And we can see that in the dress as well as the
surrounding background. Again, these organic
and flowing shapes add a sense of opulence and femininity and sensuality
to the portrait, which reflects the elegance
and grace of Adele herself. Then, Klimt also incorporated angular and geometric shapes as contrasting elements
within this composition. So there are shapes
seen over here like mosaic tiles that
are in the background. And they provide a structured
and balanced counterpoint to the organic forms
in the foreground. So it's a very nice
juxtaposition overall. Now just as a side note, Klimt's use of shapes
in this painting actually goes beyond purely
aesthetic considerations. The carefully
chosen shapes and patterns are filled
with symbolic meaning. And they were reflective of the social and cultural
contexts of the time. Now, just like this painting, there's another portrait that we
should definitely look at, and that is the "Portrait of
Emilie Flöge". Now, again, this
portrait features various shapes that contribute to the overall composition. So again, predominantly
we can see organic shapes which are characterized by flowing
and curvilinear forms. And then we can see some
patterns in Emilie's dress, which are reminiscent of
Art Nouveau aesthetics. And additionally, the portrait
also has geometric shapes, such as the rectangular frame and the circular motifs
in the background. So again, these shapes create a very harmonious balance
within the composition. They enhance the visual
appeal of the artwork. I particularly love the use of the spirals on the
dress over here, along with these little
squares here and there. By now, you've probably
seen some amount of commonalities and
repetition appear over here. So a lot of the
shapes that Klimt has repeated in his paintings
over and over again are basic shapes
like rectangles, squares, triangles,
spirals, ovals, etcetera. But each time he has
used them differently in different contexts with different symbolism
and different meaning. Now, as one of the
exercises for this class, I want you to take a few
minutes and try to come up with a few more
variations of your own. So for example, we can do a
spiral inside an oval, or we can do a spiral inside, a square or a triangle. Then just like we saw this
oval that was split into two, we can also do a square
that is split in two, or even a triangle
that is split in two. And just like we had
these swirling spirals, we can also do some swirling
triangles or squares. So basically, look at these
shapes closely and think of different and unique ways to embellish the same outlines. And just as a reminder, you're also free to use the Pinterest board that I
have created for this class. It has additional reference
images which can be used for observing more patterns
and paintings by Klimt. And the link to that board is in the Class
Resources document, which is available in the
Projects and Resources section. So take a few minutes to
brainstorm new ideas. And once you're ready, meet me the next lesson
where we will develop a color palette for our
first piece together
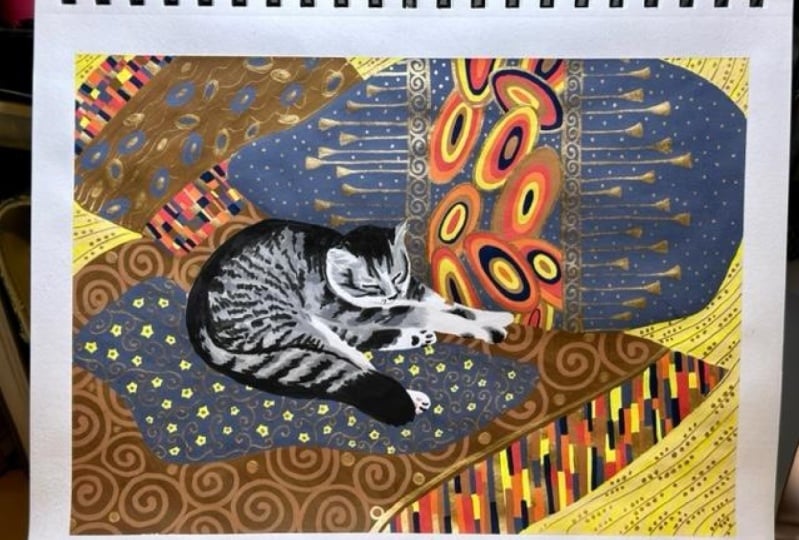
5. Project 1 - Color Palette: Alright, so we are
now going to develop a color palette for our
first project together. So my main source of
inspiration for the colors is going to be the man's
outfit from "The Kiss". Now, over here, we have a ton of these rectangular blocks which are completely covering
the man's outfit. We can see that
there are hints of yellow gold and some light
gold, orange-y gold etc. So basically just tints, tones and shades of
various types of golds. And then we have a little bit of black and silver and white. Now I want to primarily
use this color palette. But this color palette can
tend to become a little boring because there is nothing that pops
in this palette. And just to reiterate, I'm talking about the colors
only in the man's outfit. I'm not looking at the
woman's outfit as yet. So this is gonna be the
primary color palette. So now I want to add something over here
that can brighten up the palette and make it
a little more playful and joyful because that's
my personal aesthetic. Now your aesthetic can be
totally different than mine. Maybe you prefer
really muted colors and maybe you prefer
analogous color palettes. So that's totally alright. You can pick colors that
work very well for you and that go with your vision and
your tastes and preferences. But I'm just giving you
an example of the kind of color palettes that
I usually develop. Now with these gold, silvers, whites and blacks, I want to introduce a nice pop of color, which is why I'm
also going to take inspiration from another
painting by Klimt, which is titled, "Hope II". Now over here we can
see that there is a large chunk of this
orangey red in the outfit. And there are these
nice big gold ovals all over the outfit, which have these pops
of color in the middle. So we have green pops, we have blue pops, we have orange pops, etcetera, etcetera. Now I don't want to expand
the palette so much either. So that means I just want to
take a few colors from here to add to the palette that I like from the
previous painting. And basically I just
want to combine my inspiration from both
of these paintings. So I'm going to borrow the
idea of this nice bright orangey red from this
painting, which is, "Hope II". And I am also going to
borrow the idea of using a little bit of blue and a little bit of green
from this painting, from the Ovals basically. So now when I put together
all of these colors, I have a really nice
combination working for me. We have some really
nice muted colors, but we also have something
that can break the monotony of those muted colors and
add a little bit of pop. Now based on this color palette, I am going to swatch
out the supplies. Now keep in mind that
colors on a monitor or on a computer screen
are usually not the most accurate
representation of a pigment. So it doesn't
matter if you don't have the exact same colors
that you'll see on the screen. You can try to match
the colors with whatever closest supplies that you have available with you. So even in my case, even though I have a really
large set of brush pens, which has around 100 or I
think 112 different colors. But even then, I
won't really have the exact same shade or the exact same tone that
I see in a painting. I'm just going to try and match to whatever the
closest color I find. That's how I am going
to swatch my palette. Now, once I have
Swatched these colors, one of the things that I
really like to do is to click a picture of my palette and convert it into
black and white. The reason why I like to do
that is because I want to develop a color palette that has colors of different values. Just to give you a quick insight, color value actually refers to the relative lightness
or darkness of a color. So it's a very important
aspect of color perception. And it's essential to know about values because they help you to develop interesting
color palettes. Now, when you're looking
at your color palette, you don't want everything
to be of the same value. You'll definitely want to
have some dark elements, some light elements, and
some medium elements. Now, if you're a beginner in art or in color
theory in general, then it can be a
little tricky to just simply look at a color
and guess its value. That is why I recommend using
this trick where you can convert your color palette into a black and white picture. Once you convert it
into black and white, you can very easily see the
different types of gray. And with this, you
can actually make out which ones are
your darker colors and which ones are
your lighter colors. In other words, you can easily make out the value
of these colors. So my pro tip is to develop a color palette which has
a nice mix of these dark, medium and light values. And the reason for
that is that you want to build contrast
in your drawings. And contrast plays a
very important role in creating visual interest
and drama in your drawing. And it helps to guide the viewer's eye
within a composition. If you end up having
too many light colors, then there will be nothing that stands out in your painting
or in your drawing. And at the same time, if everything is
of really dark values, then your composition is going to end up looking very flat. So there will be nothing
that stands out to break the monotony
of the dark colors. So that's why it's always a good idea to check
your color palette. So as of now, I think I'm pretty happy with the palette
that I have developed. Now, of course, these colors
are not set in stone. You can always change or rework your decisions as you go along and progress
in your drawing. So you can always
add another color or decide not to use a
couple of colors later on. So nothing is set in stone. And in fact, for me, I might not even
use the blue color. I might only end up
using green because that works as a nice
complimentary color to red. So red, green and a
lot of gold and black and white will do the job of making the composition
look nice. And I won't really need blue. But at the same
time, it's always a good idea to just make these swatch cards and keep them handy just in case I
want to use them later. So I encourage you to
look at a couple of paintings and develop a
color palette for yourself. Again, you can look at as many reference
images as you like. You can look at as many
different pictures as you like. And just extract the
colors and test out the values and see what kind of color palette is
working best for you. And on the other hand, if you feel like you want to do the exact same color
palette as me, you are totally free
to do that as well. So I will put a picture of this color palette in the
Class Resources document. And you can have that as a handy little
reference when you are comparing your colors
to the swatch card. And hopefully that will help you in picking your
colors easily. Once you've got all
your colors ready, meet me in the next lesson
where we'll begin drawing.
6. Project 1 - String & Structure: Alright, so
welcome everyone to this lesson where we're going to start working on our project. And as I mentioned earlier, I've got my paper covered with the washi
tape on the edges. You can also use a regular
masking tape instead of this. But as I mentioned earlier, this is totally optional, and if you're someone
who likes to have your designs and
your compositions going all the way to the
edges of your paper, then you can totally
skip this tape. Now, moving to the first basic
step of our composition, I'm just going to lay down
a single-loop string. And for those of you who are unfamiliar with the
concept of strings, I just want to give you a
quick overview of what they are and how they help us
in our abstract drawings. So the concept of strings
is something that I've actually borrowed
from the Zentangle method. And essentially, a string is an unplanned pencil guideline
on a blank piece of paper. So the string is actually laid down without any prior
intentional thought. We just simply make an abstract gestural
stroke on the paper. And it's almost as if you take a piece of thread
and you drop it down on a flat surface, then the thread is just
basically going to take a shape of its own. And the sections that the
thread creates is basically the sections that
you're going to use to fill up your drawings
or your patterns. And the string
basically takes away this whole overwhelming
feeling of having a big blank
paper in front of you. So it gives you
small sections and small little areas of
focus in your drawing. And you can fill
them up one-by-one. So this is basically to make
the process a lot easier for those of us who experience creative
blocks very often, or for those of
us who are new to this whole idea of making
abstract compositions. Now, I talk a lot more in
detail about strings and the entire Zentangle method and the philosophy and the
origin, etcetera, etcetera in my other two classes
over here on Skillshare, which are dedicated to solidifying your knowledge
about the Zentangle method. But now coming back to our abstract
composition for today, we are gonna be using
a single-loop string. And basically, this is just a freehand
gestural stroke in which we create this
abstract loop-like shape. And we just want to create
one of these loops, which is why the stroke is
called a "single-loop string". Now, the next thing
that I'm going to do is switch over to my pen. And I'm going to start laying
down some ovals over here, which are inspired by
the pattern that we saw on the painting
titled, "Hope II". And you can actually
see these orbs or circular structures in a lot of other work
by Klimt as well. And I'm just going to
basically lay this down freehand on
top of my string. Now, coming to the top
section over here, I actually want to draw a pattern over here
which is inspired by the man's outfit in the
painting titled, "The Kiss". And I want to incorporate those kinds of details over here
in this section. But to make it
easier for myself, I'm actually going
to take the help of a tangle from the
Zentangle method. And this tangle is
actually called "Rome". So it starts off with
these wavy lines. And we just basically create lines parallel to
the original wavy lines. Like creating these ribbons
which are free-flowing. And then we draw these
perpendicular lines, pretty much like pillars, which are connecting
these ribbons. And then once we have a
few of these pillars, we're just going to
repeat the process. So once again, we
make the ribbons. And this time we're
just going to take them behind the
pillars that we drew. And then I'm just going to create a few more
pillars, like so. Basically I'm just
creating a guideline over here or like an
overall structure, which is going to be helpful for us once we start
adding in the details. Alright, now, coming to this
bottom section over here, I'm going to start filling
this up with triangles. And I'm going to start placing these triangles very randomly. Again, triangular elements
is something that we see a lot in many of
Klimt's paintings. For example, we
definitely see a trail of triangles at the bottom of
the painting, "The Kiss". Then we also see some
triangular elements in the painting titled,
"Hope II". There's also a wonderful
use of triangles in another painting, which is titled the "Three Ages of Woman". Now, as you can probably tell, I'm not trying to replicate the pattern exactly
the same way as I saw in any of the paintings that I'm showing over
here as a reference. Instead, I'm just
actually trying to extract some of these
shapes and some of these forms that I'm seeing as repeated patterns or
repeated elements in multiple paintings
by Klimt. And I'm just trying to extract some general style
elements from all of his work and using that in a playful manner in
our own composition. And now in the same way, I'm just adding a few
spirals over here. Some really long, nice
elongated spirals. Again, something that we can see repeating a lot in Klimt's work. So there are multiple paintings in which we see the
spirals reappearing. And this is sort of like, I think, a signature
Klimt pattern, so to say. Now, just to make things a little bit more
fun and interesting, I'm just going to
add a large triangle behind these spirals. So again, this is just
basically laying down an overall structure or a guideline of where we want
our patterns to go. Sort of like creating a
skeleton or a framework. And in the same way, I'm just going to add
a few large ovals behind these triangles as well. So I'm basically just trying
to break the monotony of these patterns and just trying to mix and match them a
little bit here and there. And keeping things
playful and interesting. Alright, with that, we've got a basic structure ready
for our composition. And we can now start
working on the details that we want to add inside of these little shapes
that we have drawn. So you can take a quick break. And then I'm going to see you in the next lesson where we'll start adding color to all of these beautiful shapes
that we have just drawn.
7. Project 1 - Squares & Rectangles: Alright, so it's
time to start adding some details into this
composition that we have created. And I'm going to start off on the top-left corner where I want to create a pattern which is broadly inspired
by the clothes that the man is wearing in the
painting titled, "The Kiss". So if you look at the pattern, we can see that it basically has these rectangular
and square blocks. And these are blocks of color. And we can see these
black blocks which are appearing in contrast
to the gold blocks. And of course, there are
different shades of gold. So we can see some light golds and some yellowish golds,
some antique golds. And then there are
these little splashes of light orange-gold as well. So the idea is that
we're going to create smaller sections into this pattern that we
have already created. So as you probably remember
from the previous lesson, we basically created a tangle
over here called "Rome". And now what I'm basically
going to do is switch between the different colors of brush pens and ink
pens that I have. And I'm just going to keep shuffling the
order of these pens. And with them, I'm going to create smaller
blocks of color, or smaller chunks of color
in these large sections. So for example, over here, I've added the black and then a little bit of
the red and the gold. Then the same way, I'm just gonna keep
adding more details. So here, for example, I'm just going to
add a little bit of this brownish color on the edge. Then I'm just going
to bring in my white. And once we remove
the masking tape, you will actually be able to see the beautiful but
subtle difference between the gel pen white
and the white of the paper. So it's a very
subtle difference, but it creates this
beautiful, sort of artistic, painterly effect. And this is one of the
reasons why I like to use white gel pens heavily
on my abstract drawings. To create this
beautiful layering effect... And that's something that we're going to see in this
drawing as well. So now here again, I'm just adding a little bit of the red and then
different shades of golds and browns that
we're going to play with. As I'm playing around with
these colors, and you know, as I'm consciously switching
the order of these pens, I'm also consciously trying to create blocks in
different orientations. So what I mean is that
I'm trying to create a balance between vertical
blocks and horizontal blocks. So some of the
sections that you'll see over here are squares, and the others are vertical
rectangles and the others are
horizontal rectangles and so on and so forth. So sometimes I'm going inside them to add smaller details. And other times I am going around the shapes
to create outlines. So just basically playing
around and adding bars and blocks and squares and rectangles of
various different colors. Now, one of the things that
I'm also doing over here consciously is to not use
a lot of the red color. So I only want pops
of red over here, in contrast to all the browns and yellows and the golds
that I'm using over here. And I actually want to
use majority of the red in one of the larger sections on the composition later on. So that's just a
quick design decision that I'm doing right now. And I just want to
use little pops of red peeping through here
and there, in this pattern. Now at this stage, I would really encourage
you to try and not copy the exact same
steps that I'm doing. But instead focus
on the general idea and the general theme of what we're trying
to do over here. So as you've probably
understood by now, the general idea
that we're going for is taking these larger sections and then breaking them down into smaller subsections which
we are filling with color. Once you've understood
that general idea, you can play around with
the order of the colors. And of course, you
can play around in terms of scale as
well as repetition. So that could actually mean something different and
unique for each of you. So some of you might like to
have larger chunks of color, while there might be others who enjoy adding really
small and tiny details. Then there might be some of
you who want to add probably a little bit more white
or a little bit more gold as compared to what
I'm doing over here. So really just basically play around with
squares and rectangles. Those are the general shapes
that we're going for. And once you've understood
those shapes and once you've understood the
technique and the process, really take the time to customize the experience
for yourself. Now, after a point, the steps in this pattern
get pretty repetitive. So I'm going to
speed up the video a little bit for you
to see my progress. But I do want to quickly
mention that you should not feel overwhelmed by the speed
of this time-lapse video. And instead, if you feel like you need a
little bit more time, you can always hit
the pause button, work at your own pace, and then come back and
play the video again. And I also want to
quickly mention that these Sakura gold pens sometimes don't flow very
easily in the first go. So you might benefit from keeping a scrap
piece of paper on the side where you can just quickly draw
a couple of lines, get that ink flowing, and just create a little
bit of friction between the nib and the paper. And then once you have
that ink flowing, you can then come back to your composition and
start adding the gold. So I'm using the more
shiny chrome like Sakura gold on the original
borders that we had created. The wavy lines and the pillars. Whereas all the
other colors have gone inside in the
inner sections. So I have created
small boxes and small rectangles and small
squares here and there. And I basically
just try to create a variety in the placement
of these little details. And really, this is something
where nobody ever goes wrong because honestly there is no right or wrong
way to do this. You can play around with as
many colors as you like. You can play around in terms of the thickness or
thinness of the lines. And of course,
we're playing with the same shape in
different orientations. So it's all very
harmonious in itself. And as I mentioned, there is no wrong
way to do this. So feel free to have fun. Alright, now with that, we're done with the top-left
corner of our composition. And now in the next lesson, we're gonna get started on
the other areas as well.
8. Project 1 - Background Blocking: Alright everyone, welcome
back to the class. And now we are going
to start adding some color into
the background of these large sections that we
had left empty earlier on. I'm going to start off with the top-right corner
of the composition, where we had created this large triangle
and a few spirals. So I'm gonna go into the
background and I'm going to use my brush pen to add
a background layer. And for this, I'm actually
using this color which is very similar to a bister-brown color. And here's a fun fact. Bister is actually a pigment
which is made from soot. So historically speaking,
it was actually created by burning
down beechwood. And of course, now
you have a lot of the artificial pigments
which are similar to that. So you do find a lot of tints and
shades of the same color. And you can actually
spot this color a lot in paintings
by old masters. So they used it to create
washes in their paintings. And it has this beautiful
yellowish cast to it, which makes it really fun to pair with different
kinds of golds and browns. But at the same time, it also works really well with colors like
green and orange. And I especially like the
combination of using this with olive green and
a rust orange color. So that's also something that you can try experimenting
with maybe later on. Yeah, basically, I
quite like this color! And as you can see, the beauty of brush
pens is that you can layer them and create these
really painterly effects. I'm purposely going
back-and-forth on some sections to create these dark patches and light patches, almost like
an uneven painted wall. So for example, if you
just get a painter, like a wall painter, and they do a really bad
job of painting your wall, and it has this funny way of
creating washes on the wall... well then that's the
effect that we're going for, in this particular
piece, at least! Okay, and now in the same way, I'm going to add red to the bottom section
of the drawing. And now over here,
if you remember, we had actually created this
loop as part of the string. But I'm actually going
to ignore that now. And I'm just going
to cover it up completely with the red color. And this is simply because, as I mentioned earlier, a string is simply a guideline. You don't have to force
yourself to follow the exact same shapes
that the string creates. It's just a way
for us to warm up and just get rid
of a blank paper. And basically just get
rid of our anxiety and overwhelming feeling of having a blank paper in front of us. So with that, the string simply just
acts as a guideline. And then later on you
can totally feel free to ignore the string altogether. So that's exactly what I'm
doing over here right now. I'm ignoring the
string and I'm merging two sections to create this red patch over
here in the background. So I'm just adding
that all over... behind my triangles and the large
ovals that we had created. Of course, if you're going very close to the outlines
of the triangles, then you can switch to the
other side of the brush pen, which is the fine liner tip, which gives you a slightly more precise application
of the color. And then, when you want to create
some painterly effects, then you can switch to the
brush side of the brush pen. And you can use
that tip to create these beautiful painterly
wash effects over here. And with that, we've got the color application
done for our background. And in the next lesson, we're going to start
working on top of these backgrounds to create
even more beautiful details.
9. Project 1 - Swirls & Spirals: Alright everyone,
welcome back. We are now ready to move forward with the details
on our composition. And I'm going to start off
with the top-right corner, where we are going
to add some spirals. So again, spirals and swirls is a pattern that you'll see in
a lot of Klimt's paintings. And sometimes you'll
see it in color, whereas other times you'll
see it with gold and silver. So just taking
inspiration from that and adding in some swirling, spiraling elements over
here on this section. Now, you can always draw
all of these elements first and then go back in with
your pen to color them in. Or you can do them one by one. Whatever is easier. But one tip that I
definitely want to mention over here is to keep rotating your paper with your left hand and keep
drawing with your right hand. Or the opposite, if your dominant drawing
hand is your left hand. So then the opposite works. Now the reason for that is because you want to
keep your wrist at a comfortable position
and you want to keep drawing with the
same muscle movement or the same muscle memory, so to say. It's best
to keep your hand stable on the table or on the platform on
which you're working. And then use the other hand
to keep rotating your paper. This way, not only do you get a comfortable angle to draw, but at the same time you can ensure variety in your drawing. So what I mean by
that is that you can draw these spirals in
different directions. And so they won't all be
facing in the same direction. And this way you can create
a lot more complex design. So, yeah, so that's just
a tip that will help you draw easily and
more comfortably. So of course, if you
have a thicker pen, you can use that to
color in the Spirals. And if you like to have more
color in your compositions, then you can definitely do the spirals in multiple
different colors. But for me, I wanted to create a balanced composition where I definitely wanted to add
a little bit more black, because we've used a
little bit of that on the top-left corner
of the composition. So that's the reason why I'm creating these spirals
with the black color. Now, this is a fairly simple and
fairly repetitive step. And depending on the size of the paper that
you're working with, you might get done faster or might need more
time as compared to me. So it's all relative and
it's all subjective. So I'm just gonna
speed this up a little bit for you
to see my progress. But one thing that I
wanted to show you over here is the subtle difference between the spirals
that I had drawn in the beginning versus the
spirals that I drew later on. So you can see that the spirals that are drawn in the beginning
are slightly faded out. And the black over
here is a slightly more faded black as compared
to the other spirals. And the reason for
that is because I had to switch pens midway. So my Sakura Pigma
Micron pen got over. The ink got finished. And so I had to switch to the Artline brand
somewhere in the middle. And it's actually a
good thing that this happened because now I can show you that just because a brand says that their
pen is black in color, that does not
necessarily mean that the black shade or
the black color will match the black
of another brand. So this is a good example
to show you that the black from Sakura Pigma Micron is
different from the black that Artline has. Different brands, might have the same names for the colors, but they might just
create different effects. But for me it's not
a big deal right now because I can
actually go back into those initial spirals and I can just go over them
with the Artline pen. So now, they all look the same. And I'm pretty happy
with the result because now the black
is the same all over. So yeah, so with that, we've got all the spirals done over here. And in the next lesson, we're going to continue adding more details into
our composition
10. Project 1 - Ovals & Triangles: Okay, so now it's time
to start dealing with these ovals and triangles that
we had left empty earlier. And I'm going to start
tackling the ovals first. So these large ovals
in the bottom section, were largely inspired
by the ovals that we saw in the painting that
was titled, "Hope II". And even though the
original painting had hints of blue
and purple as well, along with the
green and the gold, I have actually decided to
skip the blue pen altogether. So just like I was
thinking in the beginning, I don't think I want to
use my blue pen over here. And instead, I'm going to just outline these ovals
with the black pen. And that will just help to make them stand out a bit more against the red background. Then once I have
these black outlines, then I'm going to go
in and add more color. Now, one of the things
to keep in mind in abstract
compositions like these is to really focus on varying the thickness
of your lines. So you don't want
everything to be of the same thickness. So over here, I've got my black outlines
to be slightly thinner than the green sections inside and the gold
sections inside. So I'm basically aiming for variety in the thickness
of these lines. And that just helps to make the whole pattern a
lot more interesting. Now of course, if
you're working at a different scale
as compared to me, then you might have to make some adjustments
to this pattern. So for example, if your ovals are smaller
as compared to me, then maybe you might
not be able to add three such outlines. And maybe you're just able to
squeeze in two ovals or maybe just one other oval
inside the existing outline. And at the same time, if your ovals are bigger
as compared to mine, then you can also
go back in with another color and maybe
add a few more details. So you could probably add a
few spirals inside the ovals. Or maybe you could add
a few semi-circles or squares inspired by the top-left corner
of the composition. So basically, depending on the scale that
you're working with, feel free to customise
the process. Okay, now coming to
these triangles, I just realized I had missed
a spot of red over there. So just quickly fixing that. And now I'm going
to start adding details inside the triangles. I want to make sure
that the triangles feel as if they're part of
the same design family. So I'm not going to go radically different inside the triangles. I'm going to try and
follow the same approach of adding smaller shapes
inside the bigger shapes. So that means just like we did with the ovals
and the squares, I'm going to add in
smaller triangles inside these outlines
that we have created. And again, I'm using a combination of two or three
different colors over here. And sometimes I have white outlines with
black triangles inside. Other times I have
black outlines with a white or a golden
triangle inside. So just adding a triangle inside another triangle inside
another triangle. And sort of just creating these triangular details
and patterns inside. This way, we know that it's the same design language or
the same design grammar, so to say, and it all feels very homogeneous and it all feels very connected
to each other. And that helps to
bring harmony in your design because you are following the same design
principles over here. I'm also just adding a few smaller black triangles
here and there. And you can actually do this
with gold and white as well. But for now, I feel like I have enough gold on this
bottom section, so I'm just using
the black ones. And then just finishing up
all the other triangles. Now, I want to create an
effect over here where it feels as if there is a pattern
on top of another pattern. Sort of like creating
a layering effect. And to achieve that, I'm just going to go in
with my gold pen and add a few wavy lines behind
these ovals and triangles. They're not exactly
completely wavy, as in they don't
resemble ocean waves, but they're just not
completely straight either. So basically just
fluid freehand lines. Then I'm just going to
go in with my white pen and just add a few of those as well between
the gold lines. Once I have these lines, I'm going to come in
with my other gold pen, which is the Sakura gold pen. And now I'm going to add
smaller dots, over here, behind the
triangles and the ovals, but they're gonna be overlapping the fluid lines
that we just drew. I absolutely love working
with this gold pen. And I definitely can't have enough of these gold
dots over here. So I'm just trying to create a really dense pattern because everything around it is pretty airy and
pretty spaced out. So again, this is also an interesting way
to create contrast in your drawings,
where you have a really dense pattern with elements closely stuck
together in the background. Then on the top you have
this overlapping pattern, which is more airy
and more spaced out. Now, as I lift my drawing
facing the light, you can really see that
gold shining nicely. Literally looks like real gold
leafing effect over here. I think Klimt would
be very proud of us right now if he
saw as drawing these. So just continuing now... on the large triangle
over here. Again, I'm going with the
same design language, which means I'm creating smaller triangles inside
the bigger triangles. But I am varying the
thickness of the lines. So I'm going to do them in
thick and thin variations. And just playing with
the same color palette, making sure that each color is sort of evenly spaced
out in the drawing. And I want to make sure
that there's not too much of one color
happening in one section. So I just want to break
that monotony by adding in other colors and creating
a visual break, so to say. Okay, and now that this
large triangle is done, I'm going to come in with
my Sakura gold pen again. And this time I'm
just going to cover the Spirals that we had
left empty earlier on. And one of the reasons
why I'm specifically using this leafing
style gold pen for this is because I really
want the spirals to pop against the other colors that are there in
the background. And against the light, this gold really
shines beautifully. So it's definitely going
to create a nice contrast. And it really lifts up that area and it gives a nice cool
pop to the drawing. Okay. And now we come to
these smaller ovals. And again, I want to maintain
design harmony over here. So I'm going to try to match these ovals to the larger ovals. But that doesn't mean
that I'm going to follow the exact same style. It means that I'm going to
follow something similar, where I am going to
create smaller ovals inside these larger
ovals outside, and I'm going to vary
the color slightly. And sometimes I'm going to have gold on the edges
and green inside. Whereas other times I might
have green on the borders. And then I might
have gold or black inside. So using the same colors, but trying to use them
in a different order. And this is also one of
the reasons why I didn't use the green colour
anywhere else in my drawing, because I wanted only the
ovals to have this green pop. And so basically this was again a conscious design decision so that the ovals all feel
part of one family, that we can have spread out nicely in this composition. This is also partly
the reason why I decided to skip
the blue altogether. Because the ovals are already feeling quite
interconnected. And they're doing a
great job of having this green contrast
with the red and the golds and all other
colors around it. So adding the blue over here, would just make the whole
composition very busy. And it wouldn't do a very good job of being
in the same family. So that's why I decided to
skip the blue altogether. And I'm just sticking with
the greens and the blacks and the golds for these ovals. Alright, now that
the ovals are done, we just have to add a few
more finishing touches. And that's exactly
what we'll be doing in our next lesson.
See you there!
11. Project 1 - Finishing Touches: It's time to add finishing
touches to our drawing. And I'm going to
start by outlining all these tiny spirals
and swirls that we had drawn on the top-right
corner of our composition. And I'm using the
Sakura gold pen for this because that one has a slightly richer pigment and it's going to stand out better
against the black spirals. So I'm just going in and giving
each of them an outline. Now, this is completely
personal and optional. If you feel like you already
have a lot of gold in your drawing and you don't want to add further pops of gold, then you can totally
skip this step. But the reason why I'm
adding gold over here on the outlines is because the gold stands out really well
against the black. And it also reflects very
beautifully in the light. So I'm just adding a few
outlines here and there and I'm also going to add a few gold outlines to the ovals over here
that we had drawn. So again, just to make them
pop a little bit more against the other two patterns that we have drawn on the top
half of our drawing. Alright, and now once
I have that done, I'm just going to observe
my drawing closely and just look for areas that need
a little bit more finesse. So I'm just going to
bring in my black pen to neaten up the lines or to do some touch ups here and there, especially on the triangles. And I'm gonna do the same thing with my white pen
and my gold pen. So basically, once you're
done with the entire drawing, just observe it for a few minutes
to look for spots or areas that could use a little bit more
improvement, so to say. And if you feel like
you want to just touch up the outlines to certain
sections here and there, then this is the time to do it. Okay. Now it looks like
we've covered everything. And in case you want to do
a few more adjustments, you're obviously free
to do that later on as well. But for now I think it's time to start removing
the washi tape. And we're just going to
remove it one-by-one. Gradually, very
gently, very slowly. And oh my God, look at that. This is the best part
of making the drawing, I think... when you get
to see these beautiful, neat, crisp white edges.
I love this part! Okay. So we have this gorgeous
frame on the piece. And yeah, I'm not going to shy away from saying that
this is something I love. And I'm sure you feel the same way about
your piece as well. This has obviously turned
out to be great for me and I hope it's
been the same for you. So really take a moment to appreciate your
drawing and go shout out from the rooftops that you've finished this
beautiful drawing! And yes, of course, don't forget to share a picture
of your project with me in the Projects and Resources
section of the class. And I'd be more than happy to look at your work
and give you feedback. And now that we are done gloating and feeling
happy about our project, let's move on to
our next project where we'll get to practice our
skills a little bit more.
12. Project 2 - Color Palette: Alright, so let's build
our second color palette. Now, my main source
of inspiration for this project's color
palette is going to be the "Portrait of Emilie Flöge". And so when you look
at the picture, obviously Emilie stands out very beautifully
against the background. And that is mostly because of the colors that
are used in her dress. So there are interesting blues and greens which are
used all over her dress. And there's a little
bit of use of purple and magenta
and a fuchsia pink, which is very subtle, but it's definitely there, adding interest on the dress. So I want to use similar
colors for my project. But I want to brighten
up the palette a little bit and make
it more playful. Again, this is my personal
choice because I like to have a burst of colors in my illustrations and in
my drawings in general. And I basically
love colors a lot! So I'm just going to brighten
up the palette a little bit. So I am going to intentionally brighten up the blue and green in my palette. The ones that we see
on the portrait, or slightly more subtle. But I'm purposely going for slightly more brighter
colors over here. So a bright blue, a nice, bright green, and a nice fuchsia, which is somewhere between
fuchsia and magenta actually. And then we of
course have golds. And also I am going
to use a really nice dark purple as the color, which is going to provide
relative darkness or a darker value as compared to the other colors over
here in my palette. So I'm going to skip the use of black in this color palette. So the dark purple is
going to do that job. And so of course, we
have white as well, which we can play with. So these are going to be my colors for this
particular project. And you can use the same colors, or you can also check out other color palettes in the
Class Resources document. Or you can build a color
palette completely from scratch by looking at some
other inspiration pictures. So feel free to develop a
color palette that best suits your aesthetic and whatever is reflective of your
own creative voice. And once you have your
colors figured out, meet me in the next lesson where we'll start to develop
our second drawing.
13. Project 2 - Checkered Details: Alright, it's time to start working on our second project. So for this, once again, I'm going to
start off by making a string. The string for this is
gonna be very similar to how we used to draw birds
when we were little kids. So basically just two
curvy lines like so. And then I'm going to
turn the paper around and make another bird like so. And again, if your string is looking slightly
different than mine, then there's
no need to worry. Because at the end of the day, strings are only
supposed to give us these sections to work on. And they're not rigid
boundaries in any way. So it's totally alright if your string is not
the same as mine. Alright, now once the string is in place, I'm going to start
off with one of the sections over
here at the bottom. And over here, I'm going to
create a checkered pattern, which is inspired by
the pattern that I saw on the "Portrait of
Adele Bloch-Bauer". And this pattern is on the neck line of the
dress that she's wearing. So it's sort of like a
checkerboard pattern. But within these blocks there is also a little
bit of detailing. So over here, I'm
first going to create my Checkered pattern
using the purple pen. And so as you can see, it's not exactly straight lines. Instead, I'm trying to follow
the outlines of the shape. So the outlines that are produced as a result of us
drawing the string. That's exactly what
I'm following. So I'm just replicating that and making this sort of curvy,
wavy checkered pattern. Once I'm done with
the grid outline, then I'm going to
bring in my gold pen. And I'm going to start
coloring in these blocks. So very similar to the
pattern that we saw, I'm just going to leave three blocks between each
of these gold blocks. So I'm gonna make
one gold block. Then I'm going to leave three empty and then do
another gold block. And then on the row above that, I'm just going to
find the center point between these two gold blocks. So basically the middle one and then the
one on top of that. So then again, we want to count three to the left,
and, three to the right. But over here there's
obviously not enough space. So we're just gonna go
ahead on the next row. And once again, we're just going to color in the blocks like so. So basically instead of
going alternate like a regular chess board or
a regular checkered pattern, we are leaving three blocks in the middle and then creating
this repetitive grid. Now again, it's
totally your decision, if you want to stick
to the pattern exactly the same way as you
saw it in the painting. Or if you want to
deviate a little bit. So if you feel like
you want to have a regular checkered pattern
with lots and lots of gold, then you're totally
free to do that. And if you want to use other
colors instead of gold, then you're also
free to do that. So basically, just
experiment, have fun, and go with whatever
feels easy to you, whatever comes to you naturally and whatever is most
intuitive to you. Alright, so once I have the
gold blocks colored in, I'm bringing my purple
pen once again. And now I'm going
to start adding smaller lines inside of
these empty squares. And I'm basically just going
to create smaller bars, very similar to the rectangular
and square pattern that we did in our
first project as well. And I'm going to
intersperse this with a little bit of
green details as well. So for example, I'm
just going to add a few green sections here. And now, just to save
myself from the hassle of constantly switching
between these two pens, I'll first finish off
all the purple details. So I'm just going to add a
few lines here and there. And once I'm done with
all the purple bits, that's when I'll switch
to the green pen. So as you can see, I'm basically varying the
thickness of the lines. Very similar to how we did
it in our first project. And sometimes I'm
adding thicker bars. Sometimes I'm adding
thinner bars. And just basically playing around with the
outlines over here. Alright, so that finishes
up all the purple bits. Now I'm going to bring in my green pen as well
as my blue pen. And I'm going to start adding some details in this pattern. So basically, I'm just going to leave a few of
the spaces white, but I'm going to
color in with blue and green on some of
the other empty spaces. And I'm really not following any specific pattern over here. I'm just going very random. I'm not consciously
counting and leaving the gaps the way we did it in the very beginning
of the pattern. And just basically going
very random here and there. Again, I'm only sticking to the green and the blue
over here right now, along with the
purple and the gold. Because I don't want to add too much color right away,
in the beginning itself. So I'm probably going to use
the other colors later on. Right now, I'm just starting off with a very limited palette. And we'll expand it a bit more as we move on to the other
sections of the drawing. Okay. Now that I have all of these blue and green
sections filled in, I'm bringing in my
Sakura gold pen. And I'm just going to
use this to add small, tiny lines here and there. So these are gonna be
even thinner lines, which will help us to break
down the blocks even further. And once again, we're just going to add them here
and there randomly. Okay. So with that, we finish the first
section of our drawing. And now in the next lesson, we will continue to work
further on this composition
14. Project 2 - Floating Ovals: Okay, so now it's time to add some ovals into
this composition. And I'm gonna be using my
uni-ball gold pen for this. So I'm gonna be adding
the ovals over here in this section at the
bottom of my paper. And honestly in these
abstract compositions, there is no top and
bottom because you can rotate this artwork
in any direction. And you can actually
frame it or hang it up in literally any
orientation that you like. And it would still end
up looking very good. And again, this is a
technique or a learning rather which I have borrowed
from the Zentangle method. Because in the Zentangle
method as well, there is no up and
down orientation. And usually the artworks are made on a square
piece of paper. And you can rotate it around in any direction
that you like. And the artwork would
still look finished. And in that sense, the artwork becomes
truly abstract. So now one of the
things that I'm going to do over here is that I'm purposely going to draw over
my washi tape on the edges. And that's because I want
to create this illusion of the design continuing further beyond the boundary or
the edge of the paper. Of course, once we remove
the washi tape later on, we will have a
crisp, clean edge. But right now I'm just
going to draw over it because it's just
going to help me draw a lot more comfortably. And I'm just going to have
a better hand movement with drawing the full shape rather than trying to the
cut it in the middle. So I'm just going to draw over my washi tape in
certain sections. And of course we can
peel this off later. In the same way, I'm just
going to continue adding more ovals and fill
up this section. Once again, I'm going to ignore the string because
I'm overlapping it. And I'm not really
trying to contain my ovals inside the
string section, which has been created by the pencil string
that we did earlier. So I'm crossing the string and just trying to place my ovals very randomly
here and there. Now, once I have these in place, I'm going to bring
in my colored pens. And I'm just going to color the insides of just
a few of the ovals. I'm not going to color all of them because I want to leave some room for adding
different colors later on. Right now, I'm just going to
add the blue and the green. And maybe later we'll add
some other colors as well. And with that, I'm
done with the ovals. And once you've
completed this stage, meet me in the next lesson, where we're going
to continue adding more details on the top
section of this composition.
15. Project 2 - Grid Detailing: Alright, it's time
to start working on the top sections
of this composition. And the first thing that
I'm going to do over here is create a grid using my ruler. And I'm not going to
be measuring this. So I'm not exactly trying to make all of these squares equal, but roughly just trying to keep them as squares
of the same size. And just creating
these straight lines with the help of a ruler. Now, if you're someone who likes organic patterns more than
grid-based geometric patterns, then you're totally
welcome to skip this step. And in fact, you also have the option of drawing
this grid freehand. But I'm using a ruler over here just for the sake of a
little bit of convenience. And just to make sure that
my lines are all straight. And like I mentioned, I'm not really
measuring the grid, but just trying to keep them
somewhat of the same size. Now, I'm going to
bring in my gold pen, and I'm just going to add a few more overlapping
ovals over here, just to give an illusion of the pattern continuing
even on the grids. And again, the idea
over here is to juxtapose or overlap
different patterns on top of each other. And this will help us to
create a nice layering effect. So I'm just going to add these right in the
beginning to remind myself that all the grid patterns
are going to go in the background while the ovals are going to stay on the top. Now, I'm going to bring in my colored pens and I'm going to start adding a different kind of detail into each
of these sections. So the idea over here is that I'm going to play
with the same shapes, which means I'm still going
to play with triangles, rectangles, squares,
lines, and even spirals. But I'm going to play with the orientation
and the thickness of each of these elements. So for example, over
here I'm going to start off with a nice large
triangle in the middle. Then on the section below that, I'm just going to create
a square outline. Again, I'm not really measuring
each of these elements, but just trying to draw them as accurately as possible
with my hand. And this is something that I
highly recommend because it helps the viewer to understand that this is a
handmade piece of art. And so these little
imperfections or little inaccuracies
here and there... they just are kind of a nod that the artwork is hand
painted or handmade. And it has that
human touch to it. Now, in the same way, I'm just basically adding different kinds of details
to each of these blocks. And sometimes I'm going to
add vertical rectangles. Sometimes I'm going to
add horizontal lines. Sometimes they're going
to be diagonal elements. And other times I will also
add triangles, spirals etc. And so basically, I'm
just going to play with the exact same elements that we used in the pattern
earlier as well. But I'm just trying
to use each of them differently and in
a unique manner in each of these grids. So that just helps to
create a certain amount of variety in the design,
and at the same time, it keeps everything
harmonious because it's the same elements that are being used in a different
manner each time. So in this manner, the detailing of
this grid is totally open to your own interpretation. And you can use all kinds of colors and all
kinds of tools over here to make this grid really a reflection of
your own creative voice. And you can do this in a very intuitive and playful manner. Now at this stage,
I'm also going to bring in a little bit
of the pink color. And I'm going to try to
add that in the grid. But at the same time, because I want to maintain a harmonious look in my artwork, I'm going to use a little bit of that pink in the ovals as well. And that's the primary reason why I left some of the ovals empty so that I could add
these pink details later on. And that's what we're
doing right now. And then in the same way, I'm just going to
continue adding the details onto the grid. I'm going to try and do
the bottom sections first. And that's because
I want to create this rigid outline for
the bottom section, where I want to color
the entire chunk at the bottom with the purple
color that we have. And again, this is just
going to help in creating that overlapping
look where it will seem as if there is a purple
section at the bottom. But the ovals are
sort of going beyond that purple section
and crawling into the space where the
grid has been created. So again, this is an
intentional design decision where even though the grid
and the purple section at the bottom are meeting
each other in the background, the ovals are standing a little more prominently
in the foreground. The shiny gold ovals
are standing out really beautifully against
the dark purple background. I quite like the way
this is turning out. Now I'm just going to add a few more details
here and there. Now, I definitely want
to add a couple of nice gold chunky blocks here
and there in this pattern. So that it's a nod to the checkered pattern
that we had done earlier. And the gold blocks
over here will match the family of the gold blocks that we have in the
checkered pattern. So again, these are just little steps that
we can do to make sure that the design looks
unified and harmonious. And we can always borrow design cues or ideas from
patterns that we have already placed on our drawing and use them in the newer
sections of the composition. And then in the same way, I'm just going to
continue adding the details for the
rest of the grid. I'm going to try and place
the patterns as randomly as possible so that there is no obvious repetition of
the shapes and forms. And at the same time, I'm just going to play with
the thickness of the strokes. And I'm going to play
with different colors over here so as to break
the monotony of the pattern. And just basically
treating this like a little kid, happy
in a candy store, trying to place all kinds
of colors here and there, and just basically
having a lot of fun! Now, this entire
process of detailing the grid took me around 90
minutes, more or less. So I'm going to speed
up the video even more for you to see a
little bit of my progress. And if you feel like
you are stuck at a certain point
or you don't know what kind of shapes
to add over here, then you can definitely
look at my artwork and borrow some ideas from
what I'm doing over here. And hopefully the details
that I'm adding over here will help you
and inspire you. And that way you can
complete your grid easily. But at the same time, I definitely encourage you to try and finish
this up on your own so that you can really
do this in an intuitive, playful manner and really let your own creative
voice shine. You're free to use as
many colors as you like and try out as many
design ideas as you like. And you are definitely free to take as much time as you'd like. So don't be in a
hurry and really enjoy yourself while
making this grid. Once you've completed this
stage of your drawing, then you can join me in
the next lesson where we'll be adding some more
details on top of this. If you're someone who enjoys watching these
time-lapse videos, or if you would just like to see how my drawing
is shaping up, then you can continue watching a few more minutes of my
process in this lesson. And hopefully you'll enjoy it.
16. Project 2 - Spirals & Finishing: Alright, so we're now at the last stage of finishing
up this composition. And I'm going to be adding a few spirals in this
section over here. And I'm going to have the
Spirals branching out or blooming out of wavy lines to make them look like
a creeper plant. So pretty much like a vine or a money plant or any
other creeping plant. I'm just going to
have the wavy lines acting as the base or the stems. And then the spirals
are going to look like leaves coming out of the stem. So to make the process
easier for myself, I'm going to start
with the wavy lines, which are going to
act as the base or the stem from which the
spirals are going to come out. Now, again, I want to
keep these equidistant, but I'm not going to measure
them strictly with a ruler. Instead, I'm just going to
eyeball the distance and just try to space them out
as equally as possible. Now, once I have these
wavy lines in place, I'm going to start
adding the spirals. And just like I
mentioned earlier, I'm going to add the spirals as if they are leaves
blooming out or growing out of the stems. And so I'm just basically going to keep rotating my paper. And I'm just going to
add the spirals at different angles with a
different thickness each time. Once again, you can always have some spirals going
outside your paper edge, which means you can
draw on the washi tape. So that later on, once we remove the tape, it's going to give
an illusion of the design continuing even
beyond the border. And that just helps to give your painting a slightly more
finished and polished look. Rather than trying to squish or morph the shapes
within the outline... Alright, and now once all of
these spirals are in place, the next thing that
I'm going to do is bring in each of my colors one-by-one and use them to
fill up the background. So I'm just going to bring in all my colors except
for the dark purple. And that's because I want this
area to look very bright. Again, because I'm using
a marker over here, I can create these beautiful
painterly effects. And I can overlap
some sections here and there to give this raw feel. Alright with that done, it's time to do
some final checks. So I'm going to bring in
my uni-ball gold pen. And I'm just going to go over some areas where the
gold is not looking saturated or where I feel that the paper white
is still showing through. So it's always a good
practice to look for spots where the paper white is showing up and then cover them up. Because that just helps to make your artwork look a little
more polished and finished. And of course you can do that with the other colors as well. And maybe a few hours later I'm going to
look at this with a fresh pair of eyes and do some other touch ups
here and there. But for now, I'm
just going to fix these gold sections that I can see are not completely done. Now on second thoughts, I feel like I need to add just a little bit of pink
on the checkered pattern. And that's because I
feel that this section lacks a little bit of connection to the rest of the drawing. So just to make it look
a little more cohesive, I'm going to add a few
pops of the pink in there on the checkered
section as well. And again, these are very
personal choices and decisions. If you prefer for your artwork to not have these pops
of color, then, that's totally alright.
So basically just do whatever comes to you
intuitively and naturally. Okay. And now that I have
added these pinks, I am going to start
removing the washi tape. And as always, this
is my favorite part. I am always looking
forward to these white, crisp, clean edges. I absolutely love the look of a finished drawing with
these white borders. Alright, with that, we are done with our second
project as well. And this has also turned
out to be super beautiful. And I'm sure that yours is
looking equally gorgeous. So make sure that
you post a picture of it in the Projects
and Resources section. And I'll see you over there to offer my feedback and to answer any questions that
you have about this class or anything
else in general.
17. Wrap Up: Alright, so congratulations
on making it to the end of the class and finishing
up your beautiful projects! I truly hope that this class was useful for you in finding your confidence when
it comes to using inspiration in your
artworks effectively. I truly encourage you to keep practicing this
technique further. The more you practice, the more improvement you
will see in your work. And to that end if you've found this
class to be helpful for you, then may I please
request you to drop a review about it
under the reviews tab? Your reviews make sure that all my classes and my
presence on Skillshare continues going
forward and that I can keep building more
valuable content for you. Skillshare is truly a
student driven platform, So I value your opinion
above everything else. If you have any
suggestions or feedback, please drop that in
the Discussions tab. The Discussions tab is also
open for you to ask me any questions about this class or exchange ideas in general. I also recommend that you hit the Follow button
on my profile on Skillshare so that you are subscribed to all my notifications
over here. This way, you will
be the first to know whenever I launch a new
class or a bonus lesson, or when I plan a
giveaway or have other exciting
announcements to make. Basically, it's an easy
peasy way to stay in touch. And in case you haven't
already done this, I want to give you
a quick reminder to post your projects
in the project gallery. I reply to all the
projects posted over here. And this will be a
great way for you to receive
personalized feedback. In the same tab,
you will also find the Class Resources document which is available
for you to download. It contains some additional
reference images and color palettes
for you to try. And finally, don't forget to connect with me on social media. I've created a small
hashtag community on Instagram where you can find students from all my classes posting
their wonderful artworks. This way, we can all give and receive endless Inspiration. So thanks a lot for joining me
today and until next time, take care and keep creating!
 Ridhi Rajpal, Artist + Film-Maker + Educator