Transcripts
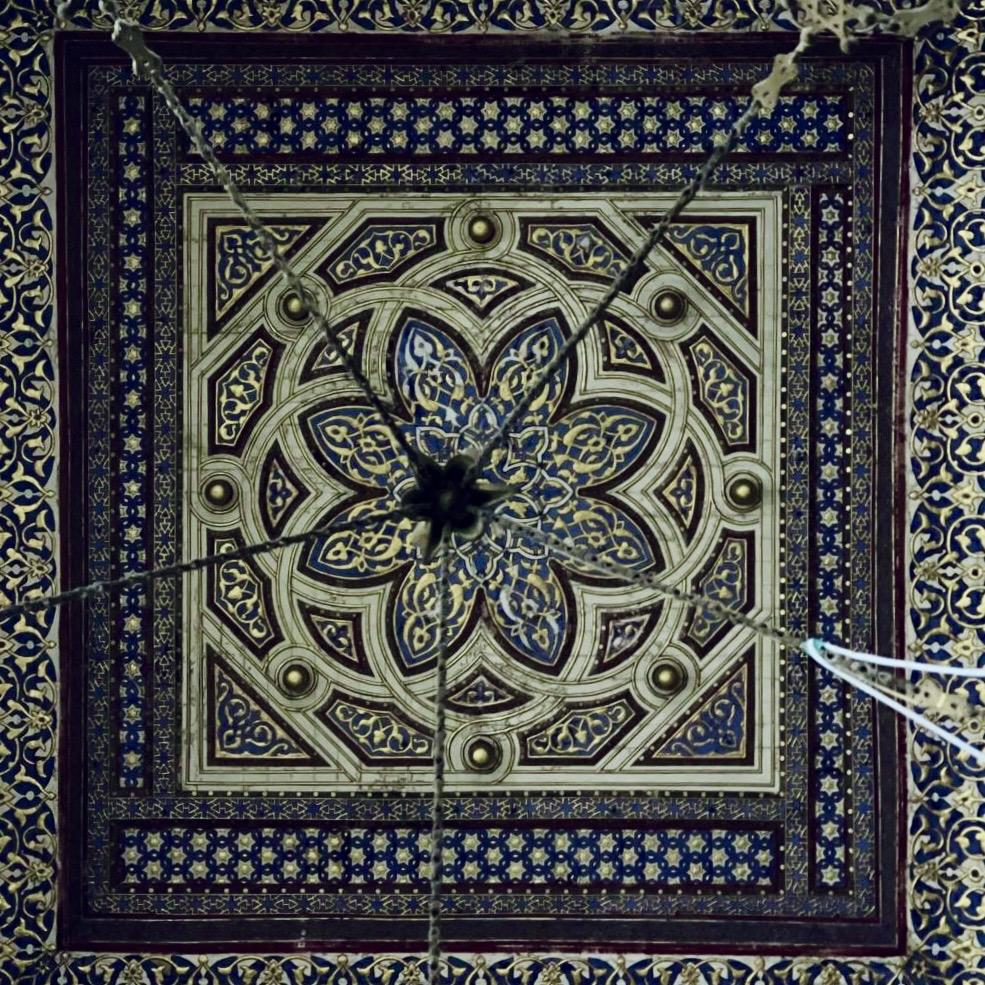
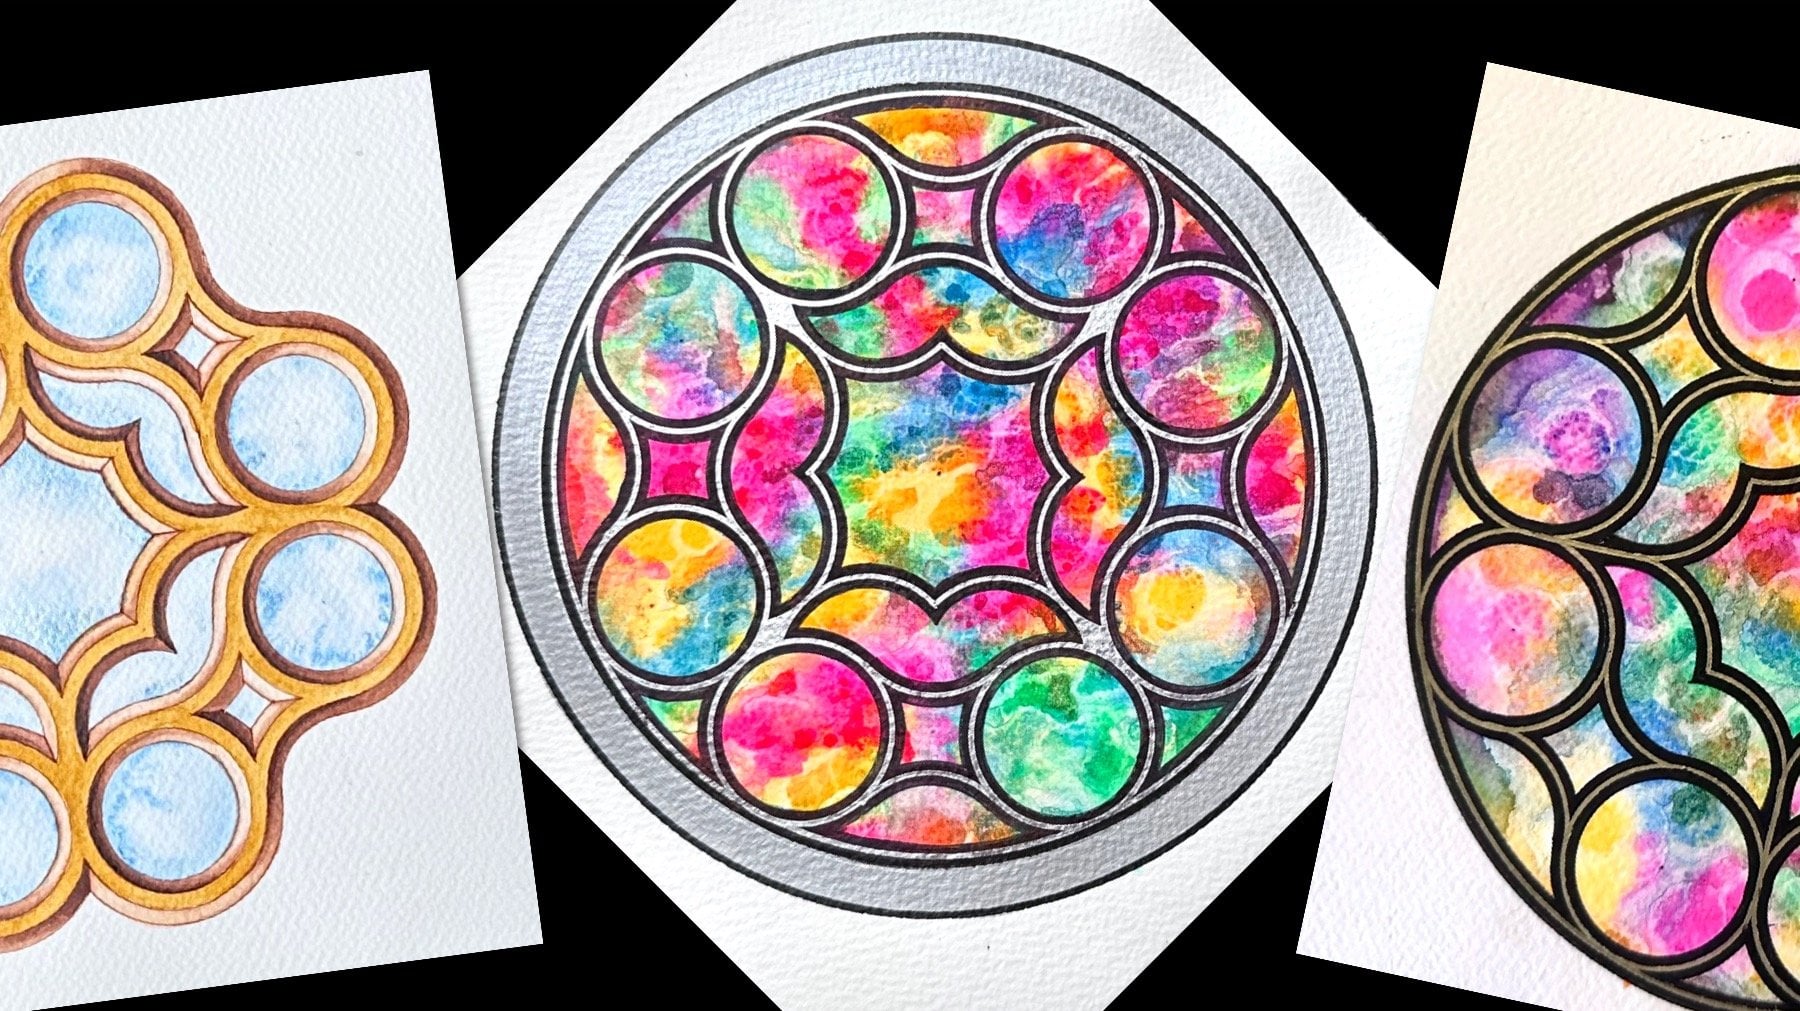
1. Introduction: Oh. In this tutorial, you will learn how to draw this weaved curved
octagonal rosette found on the ceiling
of a mosque in cairo. I will teach you
how to construct a basic octagon grid using a compass and find the proportions of the
overlapping circles. Then you will learn how to
draw the circular arcs and interweave them to create the continuous loop
effect on the design. I will also demonstrate
how to outline the weaved pattern along with a fun and easy painting style. This class comes with a step
by step visual instructions, making this pattern
accessible to anyone interested in
geometric art. Enjoy
2. Project & Materials: Here we go. This is the
beautiful chiro ceiling curve froze we're going to recreate with this simple construction. We don't need some paper. I've used both square paper or a four card or
watercolor paper. It's the same width
and we really only are concerned with
the shortest width. We need a ruler, a
good compass that has the pen attachment
and pencil attachment. Ideally you want a good
mechanical pencil that is precise and it has a
good rubber at the back. You may use a separate in
zero eraser rubber as well. If you have one,
I like using one. We're going to need a waterproof fine liner of some kind or permanent pen that's
thin enough to outline and any
colors that you like. To create this,
we're first going to draw a square grid as a base, and then we're going to turn
that into an octagonal base, and then we will
be ready to find the correct proportions
to draw these circles. Some of those circles appear in several different
places in the design. Once we have those proportions, we're going to draw the
bigger circle rosette, and then we're going
to draw the smaller circles, the trickier ones. Then we're going to construct the frame using the same
proportions as these circles. This is where the radius and the compass come
in really handy. Once we've done
that, we will erase strategically some
of the marks to give that illusion of a
weave or three D idea. Even if you don't
have that extra gap here with the shading, it will look three D
because of the weave. Once we've done that, we'll
carefully outline each of the arcs in the correct places
with a permanent marker. And then we can decorate it, however, we can paint
different parts of it. We can paint the ribbon, we
can leave the ribbon blank. Any colors that we
like, we can mix different colors in
the different parts, and of course,
whether or not we add some shading to create
that extra three d depth. Again, that could be an option. We'll discuss those
later in the decoration and finishing touches
part. Let's go.
3. Constructing the Grid: Okay, let's start
first by finding the center of the page so that we can find the
horizontal line. We're going to work on a four and find halfway down the page. It's about 29.75 0.8. I mark it at 14.8 or whatever your size might
be slightly different. Take the page and mark the same distance
on the other side. We're going to join this with a horizontal line and the shorter side of
the A four is 21, so I mark it at 10.5
for our center. Now we're going to use a circle of 8 centimeters that fits perfectly on an A four. Okay. Final version of this design
will be only slightly wider because of
adding that frame. As long as you make sure your
circle fits on your paper. Now we're going to
find the vertical, the perpendicular
line going down. To do this, we're going
to draw a couple of arcs from the intersections between the circle and
the horizontal line. But we must extend that beyond
halfway from the center. The reason for this is so that the arc is long enough to cross. We're going to do this above and below roughly above the center. Do the same with
the same radius. The radius here is arbitrary, but it must be the
same on both sides. Bottom. Here we go. This is where we know how to find our central
line going vertically. Join these two intersections. It should go through the center. Here we go. Now,
these distances, the radius here is
the same as that. We're going to go back to
the eight centimeter radius. You can either measure
it with a ruler, or I actually advise measuring the current circle that we
have using our compass. Now we're going to
draw half circles, slightly over a half, going from all four
intersections of our current circle with
the axis that we've drawn. Just over half a circle, long enough for the
corners to cross, and these will be the corners of an imaginary square that goes around the circle that
we've drawn initially. In the last one. If the arcs are not
long enough to cross, just go back and extend them. We have now the
basis of our square. What we need now is the two
diagonals of that square. We're going to join
the intersections at those corners where the arcs
cross from one to the other, of course, going through the
center again and extend. Same on the other side. Now, where are these diagonals, the new lines we just drew, where they cross the circle, this is another four points. Again, with the same
radius of eight, we're going to draw
another four half circles. This time, I just need to make sure they go inside the circle. We don't need to
extend it beyond. We just need to make
sure these cross here within the circle. Just make sure they are long enough to fill the space
inside your circle. Another diagonal.
And the last one. This is what makes
this design go from square to an octagon. Now we have eight
equally spaced leaves. What we're going
to do next is use these eight smaller
leaves where they intersect is going to be halfway between the ones
we've already made. We're going to draw straight
lines from where the tops of the new small leaves crossed here to here going
through the center and extend. Make sure you extend past here so we want these lines to later on cross
the frames as well. Let's do each opposing
pair. This one here. Here. Going through the center, again, extend a bit. This one here, and
the final one. Now we have our space cut with eight lines in between each one.
4. Drawing the Big Circles: Right, we have now
all the lines on the grid that we're ready to start constructing
some circles. We're going to start with
the bigger circles that go on the inner
side of the design. Now, first, we need to locate where the centers of
the circles will go. To do that, we need a
line that will join. Imagine this point here from the starting circle on the left that intersected
the horizontal line. Imagine going west
and join that with the opposite top right corner
of where these arcs cross. If you imagine that
this is a square, we want the top right
vertex of that square. These two points, we're
going to align them. You can draw a full
line here if you like. You could do it
with a dash line, you could do a full line. I don't want to have to
delete that line later. All I'm interested in is
where not the vertical axis, but the one to the left of that. Is being crossed when
that line crosses. Now, this point shows us the radius of the
circle that we want. The circle here
is just to locate all the centers of the arcs
that we're looking for. Make sure it goes through
there and make a full circle. I'm going to start from the
north line here and I'm going to pre puncture these to show you where
we're going to go. We're going to go here
and every other line. Jump over the leaf, the next one and the next one
and the next one. In the next one, there
should be eight in total. All of them start from in between the small leaves.
So there they are. Now, the big circles that we need to draw now don't
have the same radius as this. To find the new radius we want for all eight
of those circles, we want to look
at the diagonals, see the four corners of
that imaginary square. Where does that touch
the original circle? If we puncture
those four corners and measure the distance
from each corner, look, it's actually
smaller than we need until it touches the
original circle here. Here and so on. You can measure
all four. In fact, let's draw these four
circles now because we're going to need them as
part of the frame later. Let's draw those circles. The circles, they're a
tangent and don't worry if they don't fully fit on the page because we don't
actually need that full circle. We just need to make
sure the circle cuts through that leaf, the big leaf here at the corner. We need to make sure
it cuts through there, that is enough. We can just do semicircles. One here, one here,
and one more. These are just for now, we're using them for the proportion that we
need on the inside. Quite often in these patterns, proportions remain the same or alternate between the big circle and the space in between. There is another
way you can check this radius if you
start from the edge of the big circle and it should go to the two intersections
of these two small leaves. That's the same measurement. Right. Now let's construct the eight bigger
ribbons inside of the rosette using the pre punctured points
that we did earlier. We want full circles here, and you should
notice two things. The circle goes beyond
those intersections. This is correct. And also
the circle should be tangent to some of these
lines that we've drawn. It should touch, it doesn't go all the way into the center, but it does go into the lines. So as I continue to do this, you will see more and more
tangent where this circle. All the circles we draw in here will be touching
some of the lines. So nearer lines,
some further lines. Repeat all eight circles here. Don't worry if there's a slight
inaccuracy at this point, like mine here is
slightly further out. It's okay. Doesn't spoil the symmetry of the design
or the idea behind it. Notice how when we
cross these circles, the newly formed petals all lie on the axis in between,
which is great. Now, we need to draw
the inner part of the same big circle because
they're thick ribbons. This is the outer edge. Now we need the
inner edge of that. That's quite a simple one. We just want the same points, but we want to go
as far as instead of touching this axis, we wanted to touch the axis
before, which is here. This is the narrowest
you can go. If you go any further in, your circles will not cross and they will not
form those tethered edges. You make sure you
don't go beyond this. You can measure that by joining these two points across with a line and see
exactly where it cuts, or you can just see
where it touches. Now if I make a full circle, you should touch on the
other side as well. That's close enough, so
I'm going to continue. If you're not sure,
make your radius slightly wider because if
you make it slightly wider, you're ensuring
everything will cross. If they are a bit
too wide at the end, once we start outlining
with a permanent pen, like here, they're not
quite wide enough. But once we start outlining
with a permanent pen, we can make it that
little bit wider. Repeat those eight circles. And he's now done.
5. Drawing the Small Circles: Next, we need to locate where
to put the small circles. These are trickier to find
the centers of and they are trickier to draw because
the smaller the circle with the compass, the trickier. However, these four circles that we drew earlier
are very helpful. See notice where
our edge circles, the corner circles cross
each of the long petals. These are the points we
need and with a ruler, we're going to join each pair of points where these
really big petals, the leaves crossing
the corner circles. Here and here, draw
a line and extend. We're going to do this
on all four sides. Now on that side here, I'm looking for this
point and this point. Big petal, corner circle, line these two, and
draw another line. This will be the inner line of those ribbons for the frame. See how they're creating
these points that cross here on these corner axis. Now at the top,
there's the leaf, big leaf, corner circle, this one, and it's opposite. At this point you
might want to rotate the paper to see it more clear. This should also cross
over here, which it did. Finally, on the side,
this is where these two arcs cross and here as well, here and here you can see that they should also
cross these two corners here. Now, why did we do this?
We did it because where these four lines of our frame cross the two original
axes that is here. Here, here and here, this is where the center
of the smaller circle goes and the smaller circle come out a bit more and give
you that extra thickness. However, we have the other four, which we can recreate
this easily. To make it simpler, we're
going to draw circle, a circle that goes through
those four points of the frame that circle is just to show us where the centers of
the small circles go. Once we know where
all the centers go, there go see perfect
here. Here here and here. But now we know where all eight circles are
going to go around. Just as before, I'm going
to pre puncture this. Starting at the top north and this is where
this line goes. Now, so we don't get confused, we're just going to follow
this new circle with it, and we're doing it at the top
of each of the big circles. There's no big circle here. We skip this, we go to the next at the top of
the big circle. Just here and follow the
circle all the way around. Here we already did. Here. Here. We're done with those circles. Now let's measure how
big the circles are. Now these are much
smaller. Make sure your pencil and your pin
are quite well aligned. If I put the pin on the center, I want this to perfectly match with the inner circle
of our big curves, this one, here, this
one, here, and so on. They will vary slightly. I'm going to go with that. Again, we can adjust later. This is the circle. Add the top of each
of the previous ones. And just follow the punctures
that we've just created. Mine are slightly too
big in some places, bit far away in other places. Like I said, once we outline this with a thicker
pen and weave it, it will be much
neater, that's fine. It's always a working progress. We do all eight at the top of the existing eight bigger
circles now very importantly, with the same radius,
we're going to measure out four other
ones in the corners. That will help us
with the frame later. It measures the same
width of the ribbons. So we need them to be in those four corners
we created when we did these four lines. Same distance. That distance needs to be the same as here. Again, where these three
lines cross, same radius. This is helping with the frame. It's nice when every step has a different function,
more than one function. Here we go. This is the outer
width of the small circles. Now, now we need the inner
width of the small circles, which is much harder to draw
and you may have guessed it, we need to ensure that
that now is reduced until it gets to just to touch the outer edge
of that circle. Now this is much harder to draw and quite
often this can come out just like this because
one side is top heavy, it can come out of
the page and so on. Either make sure that
you might want to be holding some weight on
where the sharp pin is, so it doesn't jump out
and keep your compass nice and straight because
sometimes the weight, if it leans too much, it
can make it jump out. Now, I have a good compass. Some compasses are
trickier to do this. I'm going to show you
something that always works if this
technique is too hard. Sometimes I'll just
put the pin down and instead of
rotating the compass, you can just rotate the paper. Because at this
point, the weight, the control is in the same
place, that's not moving. All you have to do is
turn your paper around. It's up to you how you do it. Try both ways, see what works. This may work, but if it doesn't rotate your paper and
make sure you put weight enough on the sharp pin. The most important
thing is that the sharp pin doesn't move position, doesn't jump out of
its little hole. Make sure to puncture it.
Feel free to puncture. You know, don't
worry that the paper gets punctured. That's
what it's there for. And this is another reason why I really like thick
card paper to construct on. We need to repeat the
same in the four corners. Again, for the same reason, we need to be able to align that distance here with those. That will help us
build the frame to be the exact same width as what we need
everything else to be. And there we have
that part done.
6. Drawing the Frame: Because we constructed
everything else with the same radius, that's always a good technique. Use up all the same
radius all at once, even if you don't need
some aspects immediately. We didn't need these immediately
as part of the design, but now we have everything
we need to build the frame around it in
the exact correct place. What we want now is to align the outer intersections
of those circles. See if you only have
one in the middle, you don't know how to align it. When we have three
or at least two, we can make a definitive
straight line. We're aligning those
three intersections of the vertical lines with
the outer corner circles. I'm going to spend this little
This is the outer edge. I'm going to rotate here
so I can see better, and this is my preferred method. Again, three vertical lines, look at the most southern
part of those three circles. It should go through the bottom of the middle
one if you are not sure. That is the outermost edge
of our complete design. I'm going to just rotate
and repeat the other two. This is the outer
edge and of course, the inner edge of the frame. We need to ignore those
lines we already have there. They were just part
of something else. We need the thickness to match the thickness
of the circle. This is the width. This is why we drew the smaller circles. Now we do exactly the same, aligning the bottom of
the three smaller circles at their intersections with
the vertical three lines. This is that
thickness. This will blend seamlessly with the
circle and its radius. Rotate and repeat
three more times. Now, those four parts of the frame are
perfectly finished. But if you remember, this
looks like an octagon, so we need four more ribbons
to create here diagonally. For this, we don't
need any circles. Luckily, we just need
the intersections of those middle lines that we created all the way
back in the start. Where they cross those frames, both the inner and the outer edge of that,
this is what we need. It's these in between
diagonal axis that we have. Okay, so I'll start at the top right where one of
those joins one of those. You will see that that will
go right past the circle. It goes right on top of
this circle just like this. And you don't need
to extend here because we have
the final version. I'm going to do the one
here on the bottom. So where these two lines
cross the out edge, and you will see
how that sits at the bottom of the
diagonal circle. That should always be the case
with these. And two more. Final step now is to do the same on the inner
corner of this wear the same axis cross the inner edge of the frame
we've already created, from here to here and it will go right
past the smaller circle. So it's parallel to
what we already drew. Now you're just
going a bit further in and past the smaller circle. So we have the outer edge. We're moving up to this point
and past the inner circle. Si repeat two more times. That is it. Notice
in some places I didn't extend in some I did,
it doesn't matter later. We can add or take
away some of these. But this is now fully
created, fully constructed.
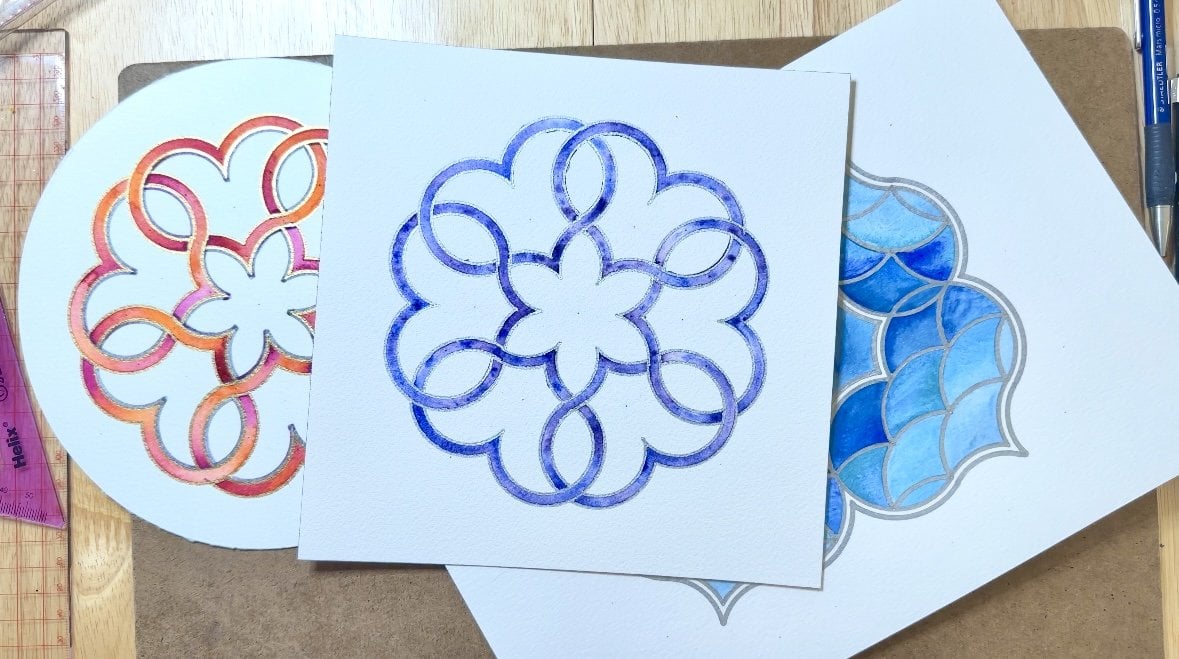
7. Weaving the Ribbons: Before we need to outline the final design
ready for decoration, we must first weave the ribbons. What I'm going to do
is delete parts of these circles that we don't
want to create that overlap. When you delete
part of the lines, it creates that
illusion of weave. What I'm going to
do is do one aspect at a time and rotate. At the top here that circle, what we want is this
circle to blend in with that horizontal
part on the right of it. In other words, we don't want the edge
of the circle here. We want this straight line
to join into the circle. Then that circle
goes all the way in until it reaches the
lower arc, that big arc. So can you see it? It starts from here, it curves down and it
stops because we do want that to hide
behind this ribbon. I'm going to do this
part. For all eight, I'm going to rotate
and do the same thing. I want this part of
the circle to go away. I want all of this free until it reaches this large
arc underneath. Potato again. Okay, so this part is now done. This is going in and it stops. Since we want you to stop
behind this arc here, what we're going to do now is the one that comes
out underneath. This part goes on top, but this bit of
the small circle, we want that to come from
under this horizontal line. We want this to appear
from under here and go on top of that bigger circle
going down and stop here. So we want it to come
from under this line. Anything from under
this line goes away, we get rid of this arc here of the larger circle because
that is now going on top. And then it's also
going on top of these two. We delete these two. Notice it starts
from under here, do not delete that arc
because that's what separates this ribbon
from that ribbon. If you delete this
arc, it will look like just one full circle again,
but we want to split it. That was there. Now we're
starting from below, curve it this way and we
stop where we see this one, we're not going to do anymore. We're just going to recreate this little curve
on all the others. Again, it comes from
under that line. Delete this way, this
way, and stop there. You have that curve and interrupted and
repeat all the others. Okay. This part
is now also done. So this goes over here. This goes from under
and over here and it stops at this curve. Now we want that curve to go
over the one we just did. This one stops here and we
want to skip from underneath. This here needs to go because that curve
goes down to here. Now, these join here together, but we don't need to delete
these at this point. We just join them here because
here it's not a weave, they're just one
continuous ribbon. We just need to
delete this bit here. If we rotate this that
goes under stops, we delete this bit here. All the curves now
are weaved correctly. They meet all the way up to
here and go back up again. The only thing left now to
weave is the actual frame. We have the four
sides of the square, but then we have those shorter
segments of the octagon. What we want to do is, if
I start at the top left, we want one open ribbon all the way until we
meet that circle. This here, this whole thing
here needs to be empty. That's one ribbon. We
didn't need this part. All the way there. Then of
course it tugs under here. But this one, what
happens here is that circle that we started with goes up to here and stops, but it joins together with this. This is one continuous
ribbon here. Even though it goes
around the corner. You can improvise here, it can be in a slightly
different way. You can even tuck that under that and have several
different ones, but I prefer only two at
any one intersection. This one bends down
on the same level, but this one underneath
continues to the corner. From under here to the end
is another single ribbon. A full ribbon there, then that circular one goes
on top and it curves, and then this one
goes underneath. Go to repeat on all
four sides before worrying about the
diagonals of the octagon. I The four corners are correct. Now for these diagonals, I'm going to start
at the top left. We want this ribbon here to come from under that long one. So we want it to
come from under that and join in with that circle
that we've already done. That's basically the
one at the start. Then this one here, it's already joined with
that one on the corner. T, let's do it
again. This is it. This is all the ribbons weaved. The next step is the
most crucial because we have to outline all this
correctly with a permanent mark.
8. Outlining the Pattern: Okay, let's outline
nice and carefully. If we make a mistake,
don't panic, I'll show you some ways
how we can disguise it. But I'm using a waterproof
fine liner, thin one. It's okay if you go
for a thicker one, it suits the design anyway, and thicker lines are
easier to merge together. But I'm using this one
before decoration. Then I can always add
extra lines afterwards. Now, this will be tricky
and I'm thinking that we start with the trickiest
part of the smallest circles. But also, they're
full circles so we can outline the entire circle
without having to lift off. This is another reason
why I want to start with. Make sure once you've
changed your pen, remeasure your radius in
a few different places. I'm okay with that. I'm going to attempt to do it
fully like this. But again, if this
doesn't work for you because the
compass is wobbly, then try my strategy with
rotating the paper instead. Few. Done. Now
these are so cute, the ones they pop out so nicely. We may have to do
this one more time if we decide then to add
metallics later on. But these are out
the way for now. Now, the rest of all the arcs,
all of them are partial. We have to be careful
not to get carried away and create a full circle because then the
weaving has gone. I'm going to measure the
next biggest radius, the outer edge of
the small circles. Again, you can use a
few different places to make sure it reaches
as far as you want it to. Okay, I'm going to
go at the bottom with two arcs and then repeat them in eight places
by rotating the paper. The perspective we're
looking at is the same. There are two arcs
for this circle. I'm going to put my point there. It goes there from
where that line is into the middle where the
vertical axis is and stop. It looks as if we can continue, but now the next part will be
to continue the other arc, which is part of a
different circle with a different center. In fact, let's do this 18
more times because it's exactly the same.
I love this part. It's where the design is
starting to look like something is actually
shaping up, taking part. Now, because I prefer
working that way, I'm going to move
to the top one. Now we want this arc
that comes from under the big ribbon on
the left and it goes again to the center. It's very similar,
slightly longer. This is what we're
after. We stop because that ribbon will be part
of a straight line rotate. Okay, little circles are done. Now we're going to
the bigger circles, which are slightly easier to do, again, because they are larger. Let's do the inner circles because they're
the next in size, it should go from here to perfectly match this point here. You can just dab down
and see where it lands. I've measured my, I'm
going to go for it. Now there are two parts to this. The first part is
to start from where the two circles
cross on this axis here and stop at the first
ribbon and then skip. Then for the rest of
the arc behind here, we go all the way
down to the bottom of where we anticipate that
to match the next one. I think mine should be a bit thicker because that will
come a bit short here, but that's the point and then we wanted that to perfectly
blend with that. This is what it's
about, the arcs merging in and splitting off. Let's rotate and do it and don't worry if there's a
little bit of a gap. From roughly where we see the two circles touching
on the axis, stop under that ribbon. The flower petals now are going to help us with this, jump over, continue, and stop where we anticipate that
much the next one. Now we're going to do
the outer circles, measure such that the radius
will touch the lower end of these small circles because
this is where they're merging and there's a few
extra jumps to consider here. First, we will start
from where these meet here and stop from under. We're trying to
replicate, obviously, that's one ribbon, so
there'll be parallel. Jump over here and pick
up from the middle of that line and stop where you touch the
circle at the bottom, because then we jump over
the small circle now and go until that will cross
the next circle here. Under that ribbon,
jump over here, jump under, and then continue.
Let's do it one more time. From that intersection
here to the ribbon ribbon, jump over, take off there, and to the bottom of the circle, then from the side
of that circle, to make sure you stop where you anticipate the next
circle to reach, which is why we're looking
at the underlying arcs. Here you go. Now
there's a few ways we can fix this issue here
if you have the same one. It's quite a common one. We can repeat the ribbons
with a thicker pen. It's exactly the same outline and the thicker pen
will join in together. We could do this or later when
we're ready to decorate or after we've painted when you
want to tidy up the corners. Another way though, if
it bothers you right now is just manually just join in a little triangle in between each of those just
to finish them off. Okay. Now we have just
a few straight lines to add and those lines are just
to finish off the frame. I'm going to concentrate
on that inner corner, the the brushes underneath
the small circle. We need to start
from this corner here where the two
inner lines crossed. Stop here. That's a good idea to put dots on where you
want to lift off your pen. Then we pick up again from
over that corner ribbon, we go all the way
into the circle because that will be
going over the circle. Then on the other
side, of course, we come under the
circle and that goes all the way to
the inner corner. There are three
segments with this. Let's align this and
do it carefully. So from here, to the first diagonal ribbon over the ribbon to the
middle of that circle. My ruler seems a
bit bumpy because now this is blending
in this ribbon. Then on the other side is just one continuous ribbon
from here to there. Now I'm going to repeat
the four sides before worrying about the diagonals
because remember the frame, these four are
slightly different. Now for the diagonals, we just have two segments. One that goes from the
corner to the bottom of the circle and then one that goes from the
other one and joins. Nothing crosses here,
just from this corner, bottom of the circle, then from the other side of the circle to this corner, just like this. Repeat three more times. Now we have the outer edges. Now the outer edge
of the four square is four lines, very easy. We don't have to
think about those because they just don't
interrupt anywhere, just from corner to corner, making sure to blend in with
that circle at the bottom. Perfect. Then repeat
three more times. Now the diagonals. The
diagonals go on the left, from under the
ribbon on the left, but it goes all the
way to the corner, the outer corner on the right. It gives the illusion
that that will go on top of this one here,
just like this. It's one straight line, but it starts from under here, but it goes to the edge, and it blends with the circle
on the bottom as before. Now that looks like it
comes from under here, goes there, and
then this one looks like it's separate, it
comes from under here. Three more of those lines. There we have it
fully constructed, fully completed, outlined,
weaved correctly. Now, all we need to do
is rub off those marks, pencil marks, and
it's ready to paint.
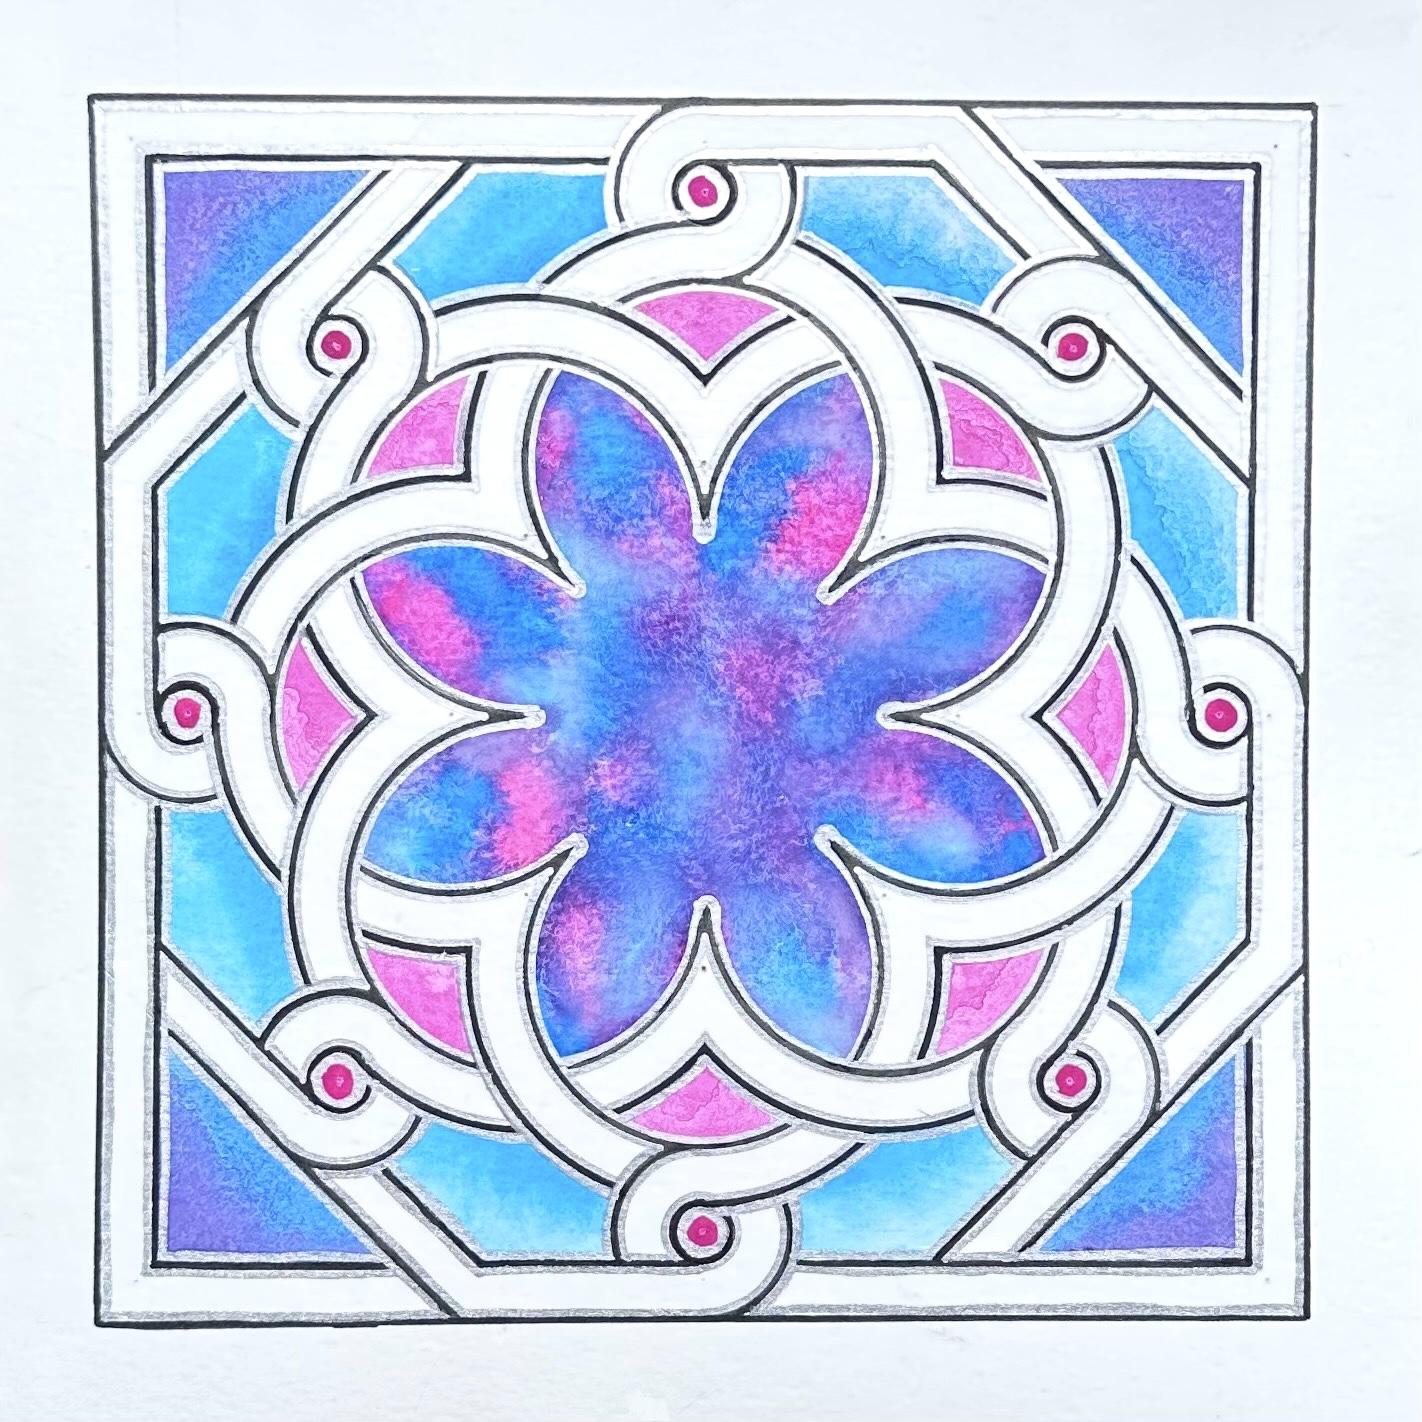
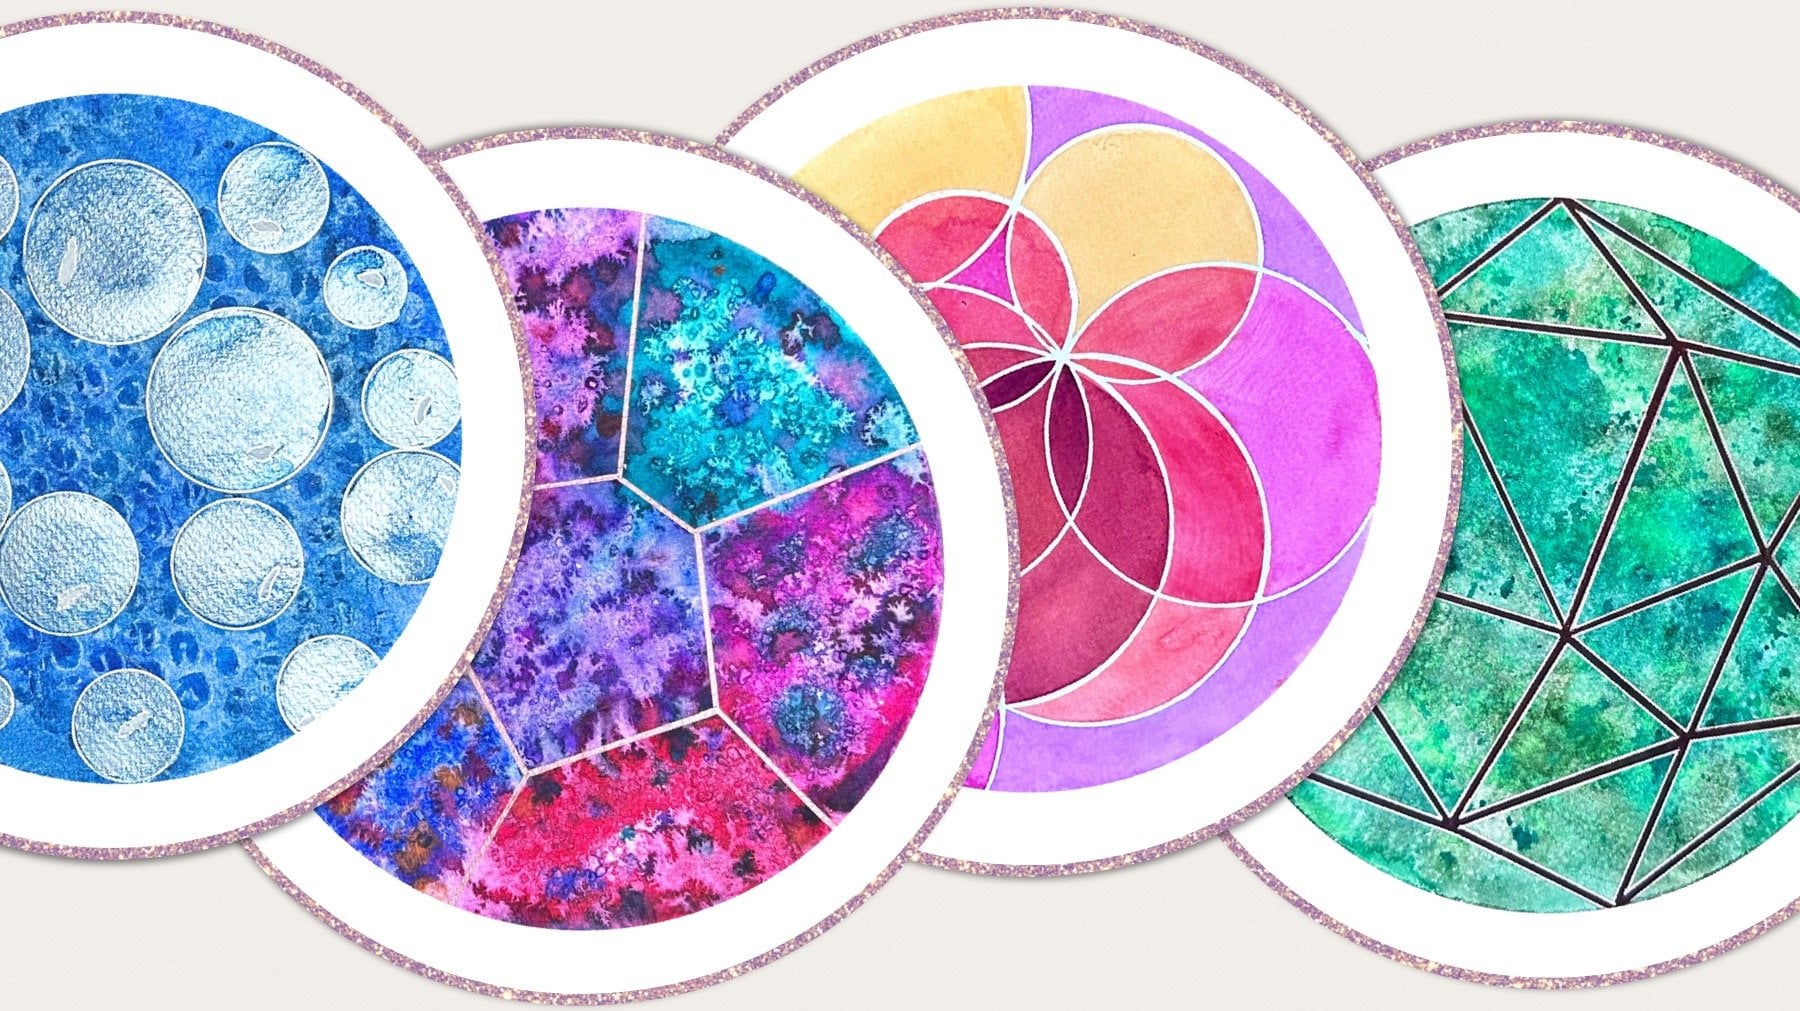
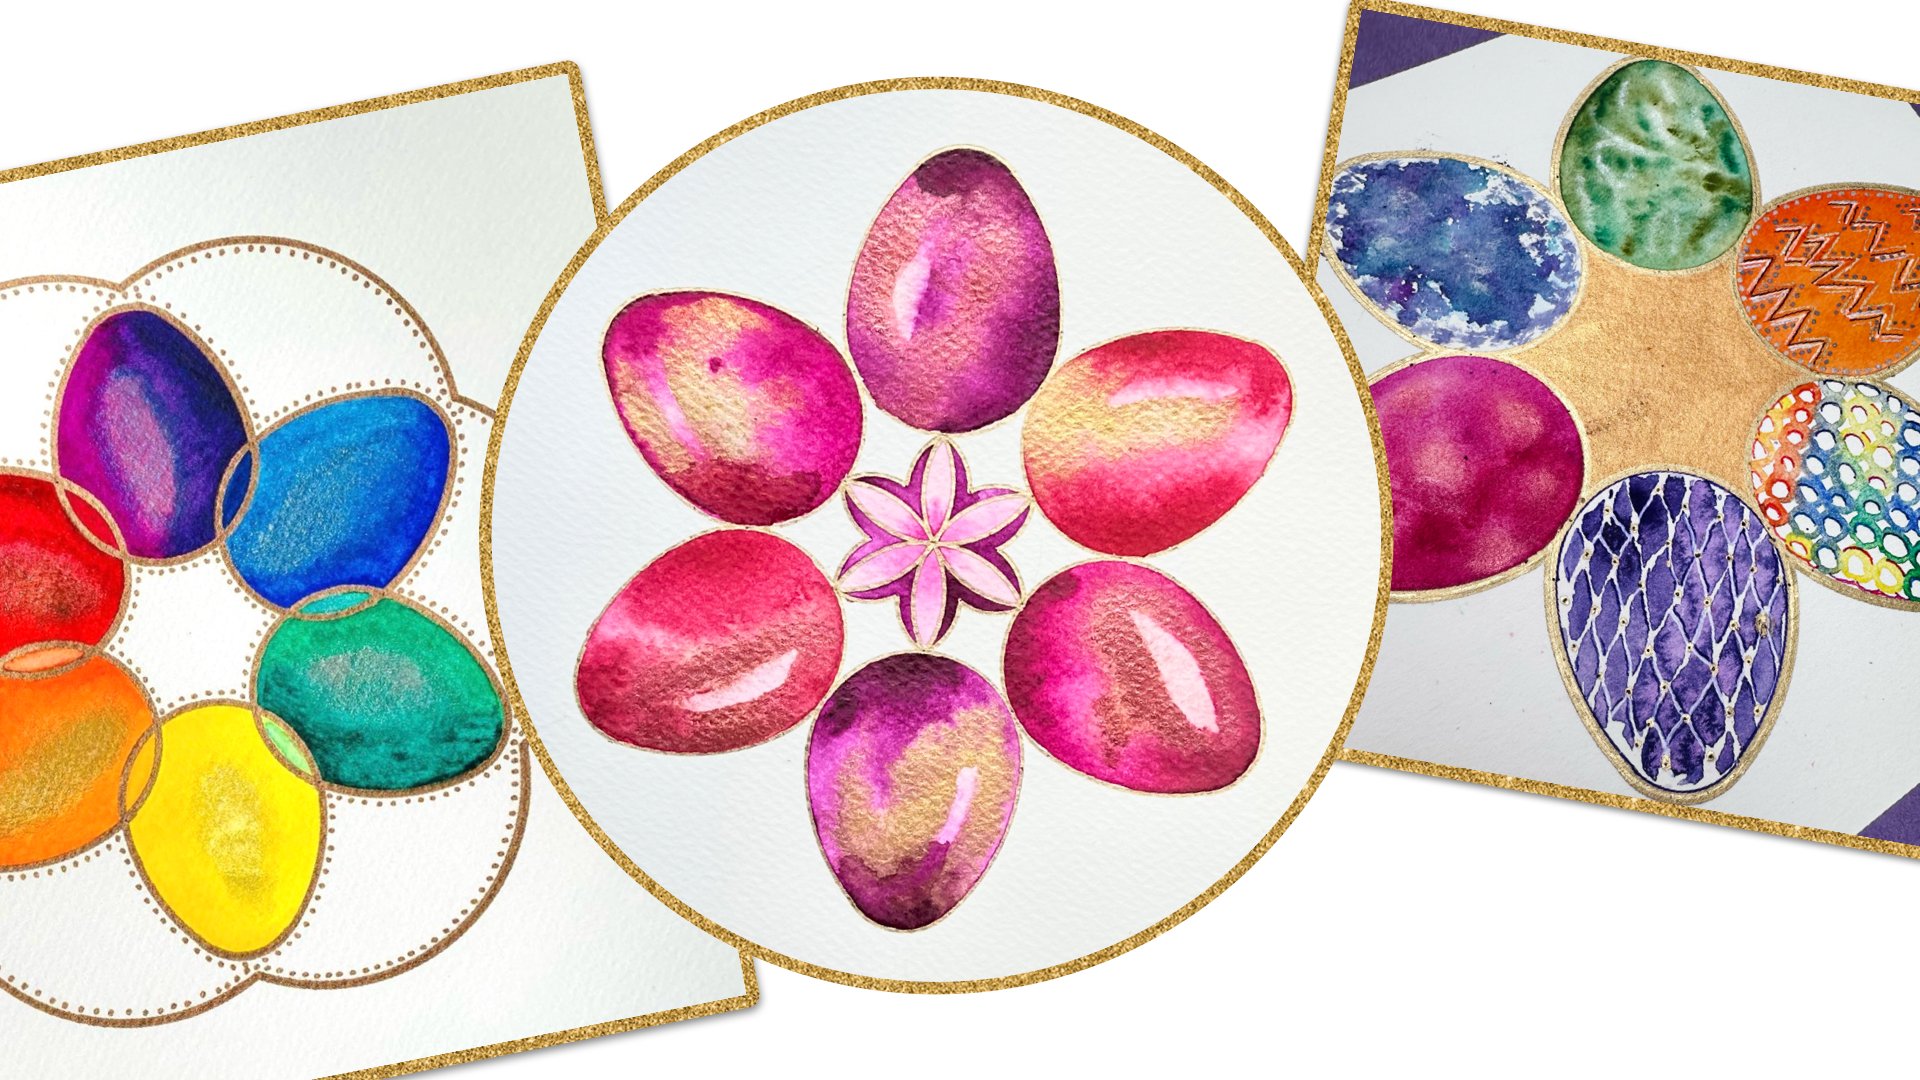
9. Painting the Rosette: Okay, let's paint. Now, you could do
so much with this, lots of different varieties of how you'd like this because I've already made a
couple of variations where my focus was
on the ribbons. With this one, I'd
like to focus on the spaces in between
the negative spaces. I see this amazing looking beautiful flower in the middle. I've used a few different of my favorite colors
and then I'm going to just blend them
randomly together. Right now, I've got the
paint mixed quite watery, but I'm not putting water on
the paper because I still want that good
amount of pigment. I'm just spreading this
completely randomly. Just be careful at the
edges and eventually all colors will blend and we can then just drop a few extra accents
here and there. I do want to try and keep the
ribbon, white, of course, if that doesn't
work out, it will be very easy to fix
by just adding color. I'm going to put some blue now. See how watery I've kept it. I usually do like to
paint on wet paper, but I don't think this needs it. As I want to see how the paint just mixes up
together on its own. Still plenty of water there. Mixed up a bit of
purple, but this will actually create
its own purple. Then I like to drop color into a color and
see how they blend. Very nice. You can go
with a thick brush here, see how the water
carries the color. But it's not spreading
it beyond where you need it to be it gives that extra little
bit of control. Going to drop a few darker bits. I like how abstract
this is becoming. We are, of course,
going to tidy up the edges a bit more
carefully soon. But for now, just adding
accents here and there, creating that unexpected
effect, quite abstract. To go with a bit of dark blue, even though that's very watery. See if I can define
some of the edges. See how this blue is
blooming into the pink. Amazing. I love that. Now here, you might want to
go with a thinner brush, see how you feel unless
yours is well pointed. Bit unpredictable here. But
I would just go for it. If you're not happy with it,
just take a little bit of tissue paper and you can pick up some of the pigment and then
layer on some more. I think I'm happy with
the amount of pigment. I don't want to lift
any off just yet. Also, you must be very
careful when you pick up some pigment off the page that it doesn't
actually smudge it beyond where you are
trying to paint. Now, I don't want it
to be too mixed up. I do want distinct
colors with this. So I am trying to achieve that. So now just carefully with
the sharp edge of the brush, you need to tidy those up. Now you don't have to
add any more color. At this point, there is already a lot of pigment on there. So you can even do it with
just a clean brush and just transport the
color to the edges. You can either blend it or
let it create those blooms. I prefer the blooms. Once I've spread this and if
it gets a bit too blended, what I'm going to do is add few extra blobs of
color here and there. This part is quite pink. I'm going to just add a
little blue, the edge. Yeah. I like every other one. So blended more and some
are very nice and distinct. I enjoy seeing both types.
This one's blending in. Don't worry about the edges. I think I'm definitely
going to re outline this. I always do. I feel it's an important
finishing touch in geometric art to
redo the outline. Whether we redo it in black again is slightly
thicker black, all the same or metallic color. Not yet decided whether
to put the metallic right next to the paint or in between
the black and the paint. If you leave black and then gold or silver on the other
side, that black will create. First, it will create
a nice crisp edge, which emphasizes the geometry. But it will also create depth because the black in between the light
metallic and the paint, it will give it almost like
a three D depth effect. So the distinct colors here aren't as distinct
in some places. But it's important to spread this to the edges before it's completely set because the edges have the least amount
of water and paint, so they will dry the quickest. So now I'm quite happy with the amount of paint
on the edges almost. Once you're happy
with your edges. Also, don't worry if it spills over slightly because remember, we can actually make those
ribbons slightly go inwards. Now, just try not to
add too much water, just a little bit of
pigment and literally drop a you random
blooms here and there. Somewhere there's
already that color, somewhere there's
a different color. Somewhere it's already trying to come through from underneath. Just make sure it doesn't
spill off so I see how my paper will curl up
a bit for a while. Even though this is
I'm using for this, I'm using the smooth
watercolor paper, which isn't amazing with
a huge amount of water, which is why I didn't want
to do petunmet in this case. But still, there will be the ot puddle. Here
I see a puddle. I don't want you to
spill out. So I'm going to make sure
it dries this way. The other thing I might
do is just dot this carefully and just wash
off some of that paint. Lift off some of the paint. See? This might blend it
a bit too much as well, but I'm going to now add, I think some blues, distinct
looking blues I want. Here and there. So some of them. They just have their own
character, don't they? I just like that. It's a bit more blue. Not much of the light blue
has remained at this point. Maybe you can try and emphasize the light blue a
little bit more. It's peeking through in places, very faintly, very gently. This is the one. See if we can maybe strengthen
it in places. But I like that
kind of painting. It's literally dabbing paint onto each other and
just see what happens. Yeah, very nice. That side
is a bit darker, isn't it? I think this is a good
distribution of color now. Now what I like to do is
once it's dry or even almost dry or fully dry with a very thin brush
just with water, you can go over these edges again and it does
fill up the gaps, just like this if you notice the old gap because
the water will contract forwards inwards and you might notice a few more white
patches than we see now. I'm going to let this dry before I do anything
extra with it. Now what I'm going to do
is focus on the pinks, just on those small areas
because I don't feel they're big enough to create a
variety of colors in there. Go with a small brush,
already pre mixed color, just use up the
color that you have. Drop a little bit more here
in the corner. And repeat. On the sides now, I'm going
to go with the blues, start with the lightest blue and see supplement it with some of the
other blues, I think. With a V, I'm going to
go blue and purple. Some more of a gradient here. Okay. Now in the little circles, I think I'm going to go
for nice bright pink.
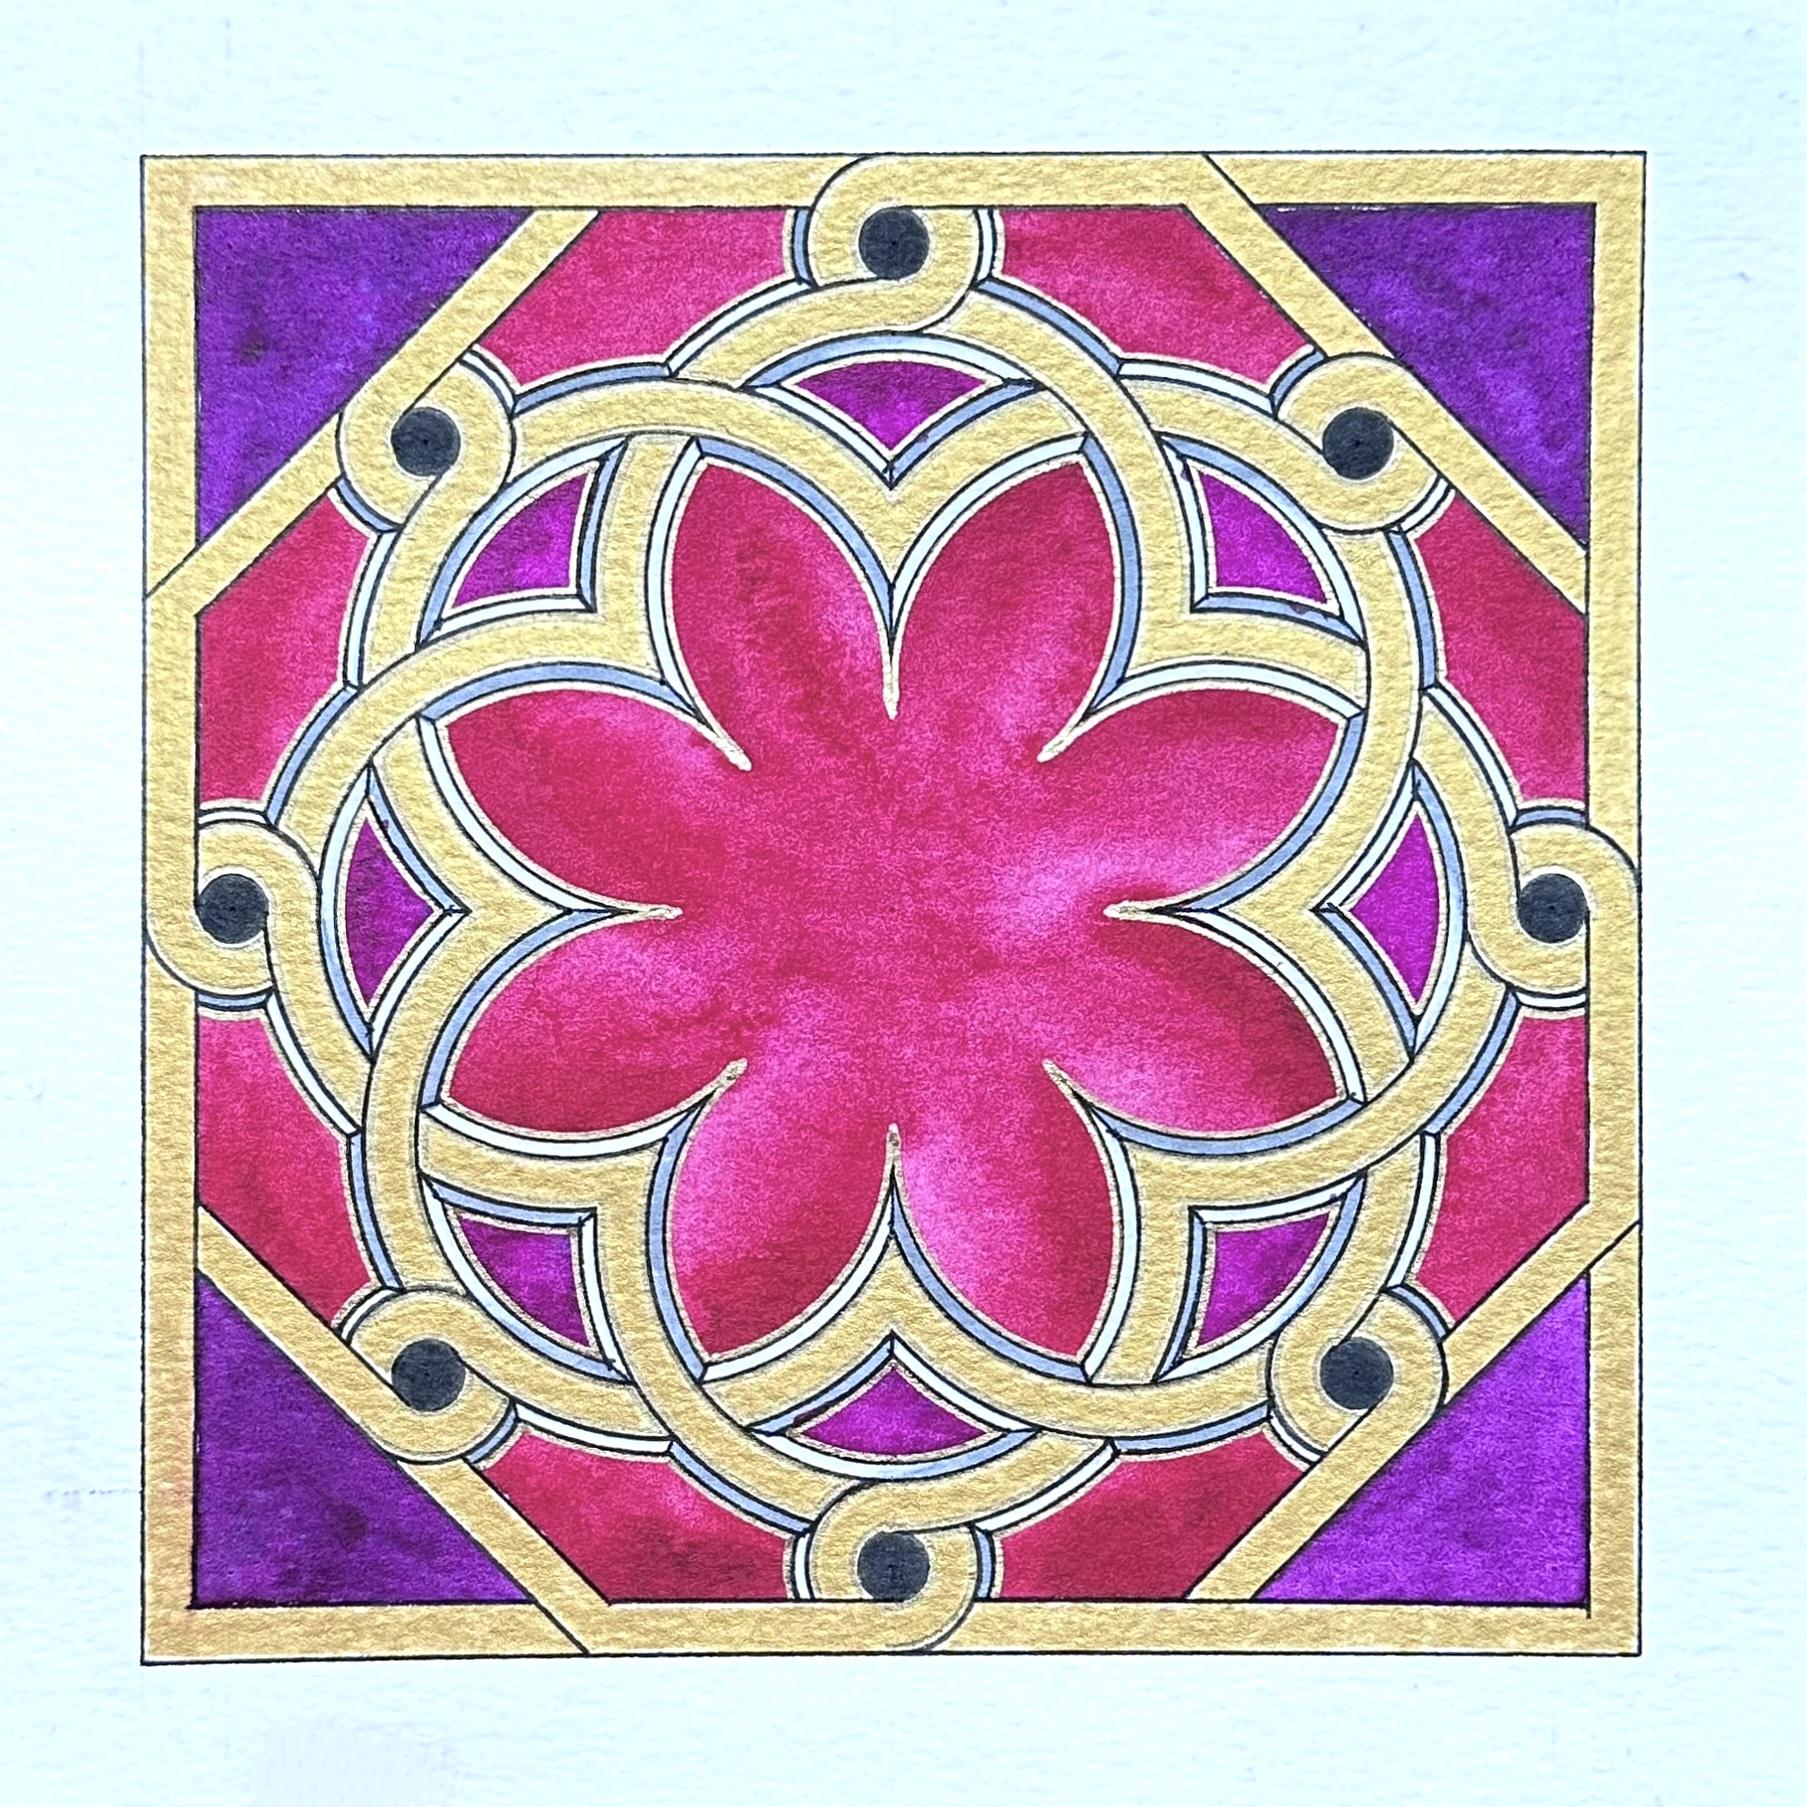
10. Conclusion: So here is the final product
all dry and beautiful. You could see the texture
of these paints that we did together in the middle and then the gradients came
through really well, slight variations of pigment. As you can see, the only
thing I added was to put some fairly thick silver pen on either side of the black. That tied up the edges,
so I didn't have to worry about
finalizing the edges. I thought that that made
it pop enough so that the white stood out without
needing extra color. I think the contrast
between the white ribbon and the colorful
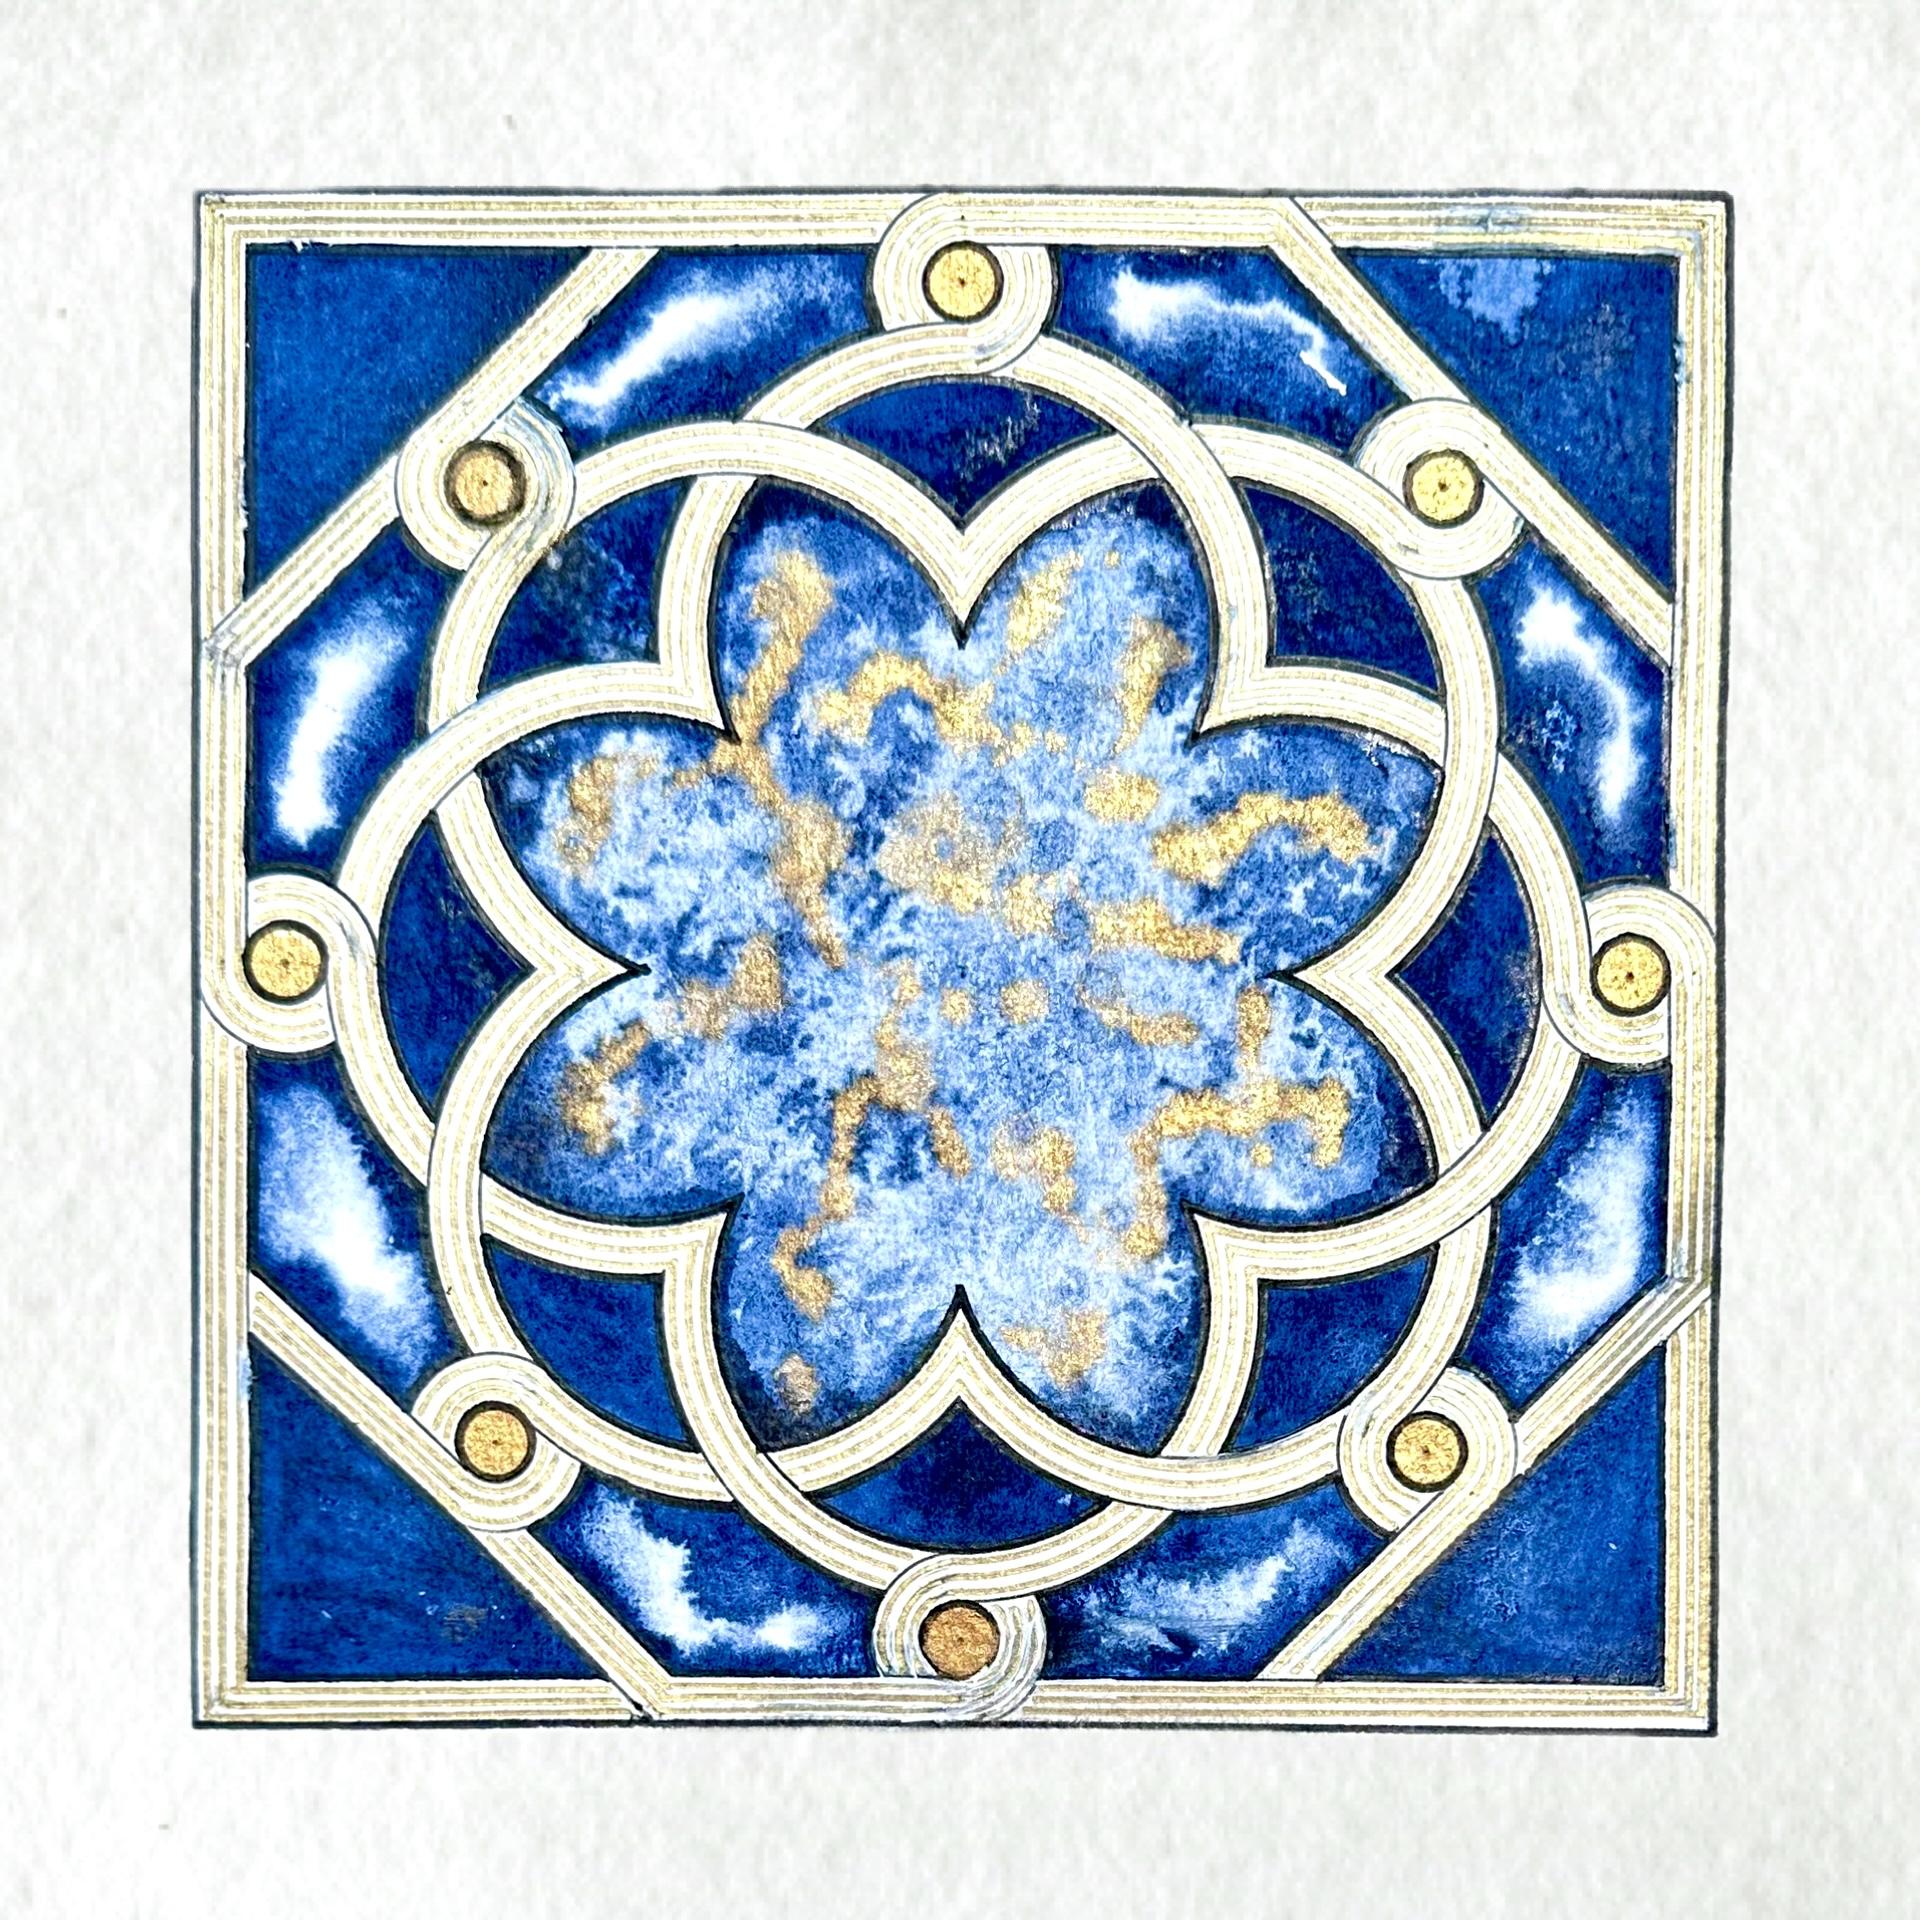
center really works. As you can see from my
previous variation, I made the weave all golden and then the
spaces added here, where here they're
flat and weaved. Here, I double shaded them in a way to create the
three D effect. It's almost like a
raised beveled edge for the weave itself. But that gave a good separation between the gold and the colors. Otherwise, I think there
wouldn't have been space in between and I felt
like it needed a contrast. Thank you so much again
for joining me on yet another geometric art
course where I'm teaching you an actual pattern from
an architectural building, a real place in the world. As soon as I saw this pattern, I had to analyze it
and share it with you. I really hope you've enjoyed it. I cannot wait to see
what you created. I get so inspired and proud and joyful seeing anyone
else's creations. So please share with me
and tag me on Instagram so I can share and admire and enjoy your work for
everyone to see. I hope to see you
in my next course.
 Diana Reeves, Geometric Artist & Educator