Transcripts
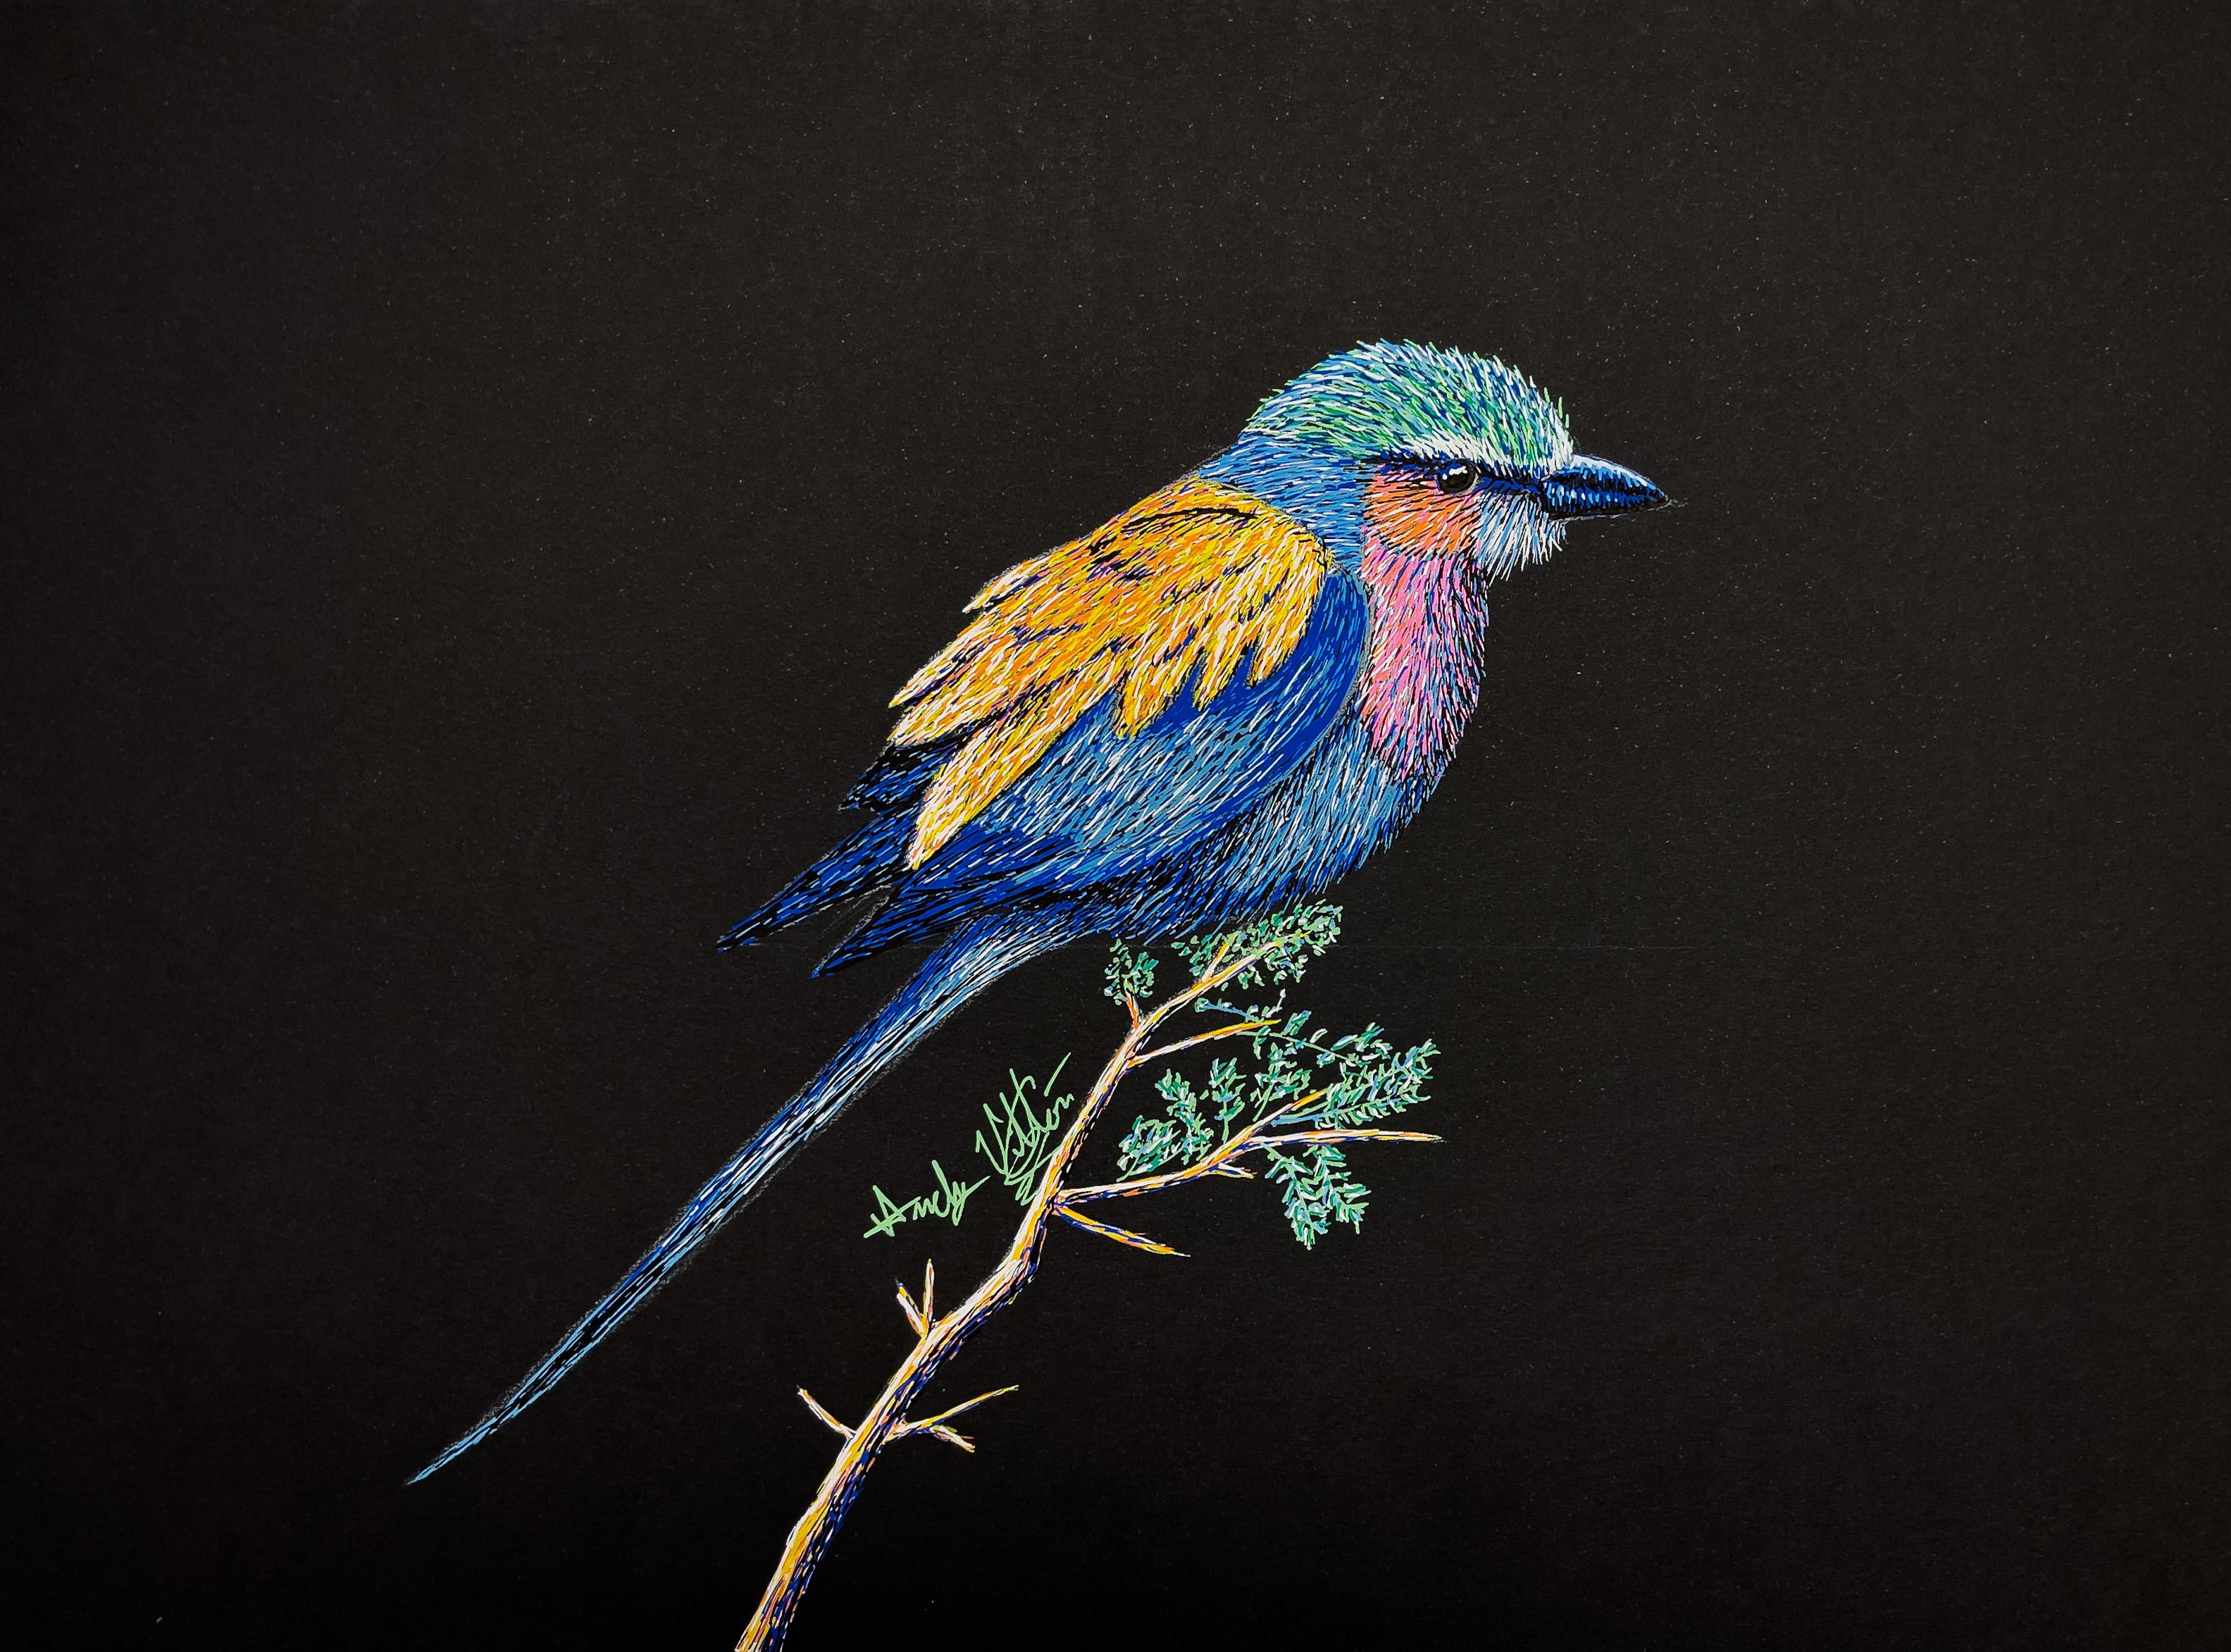
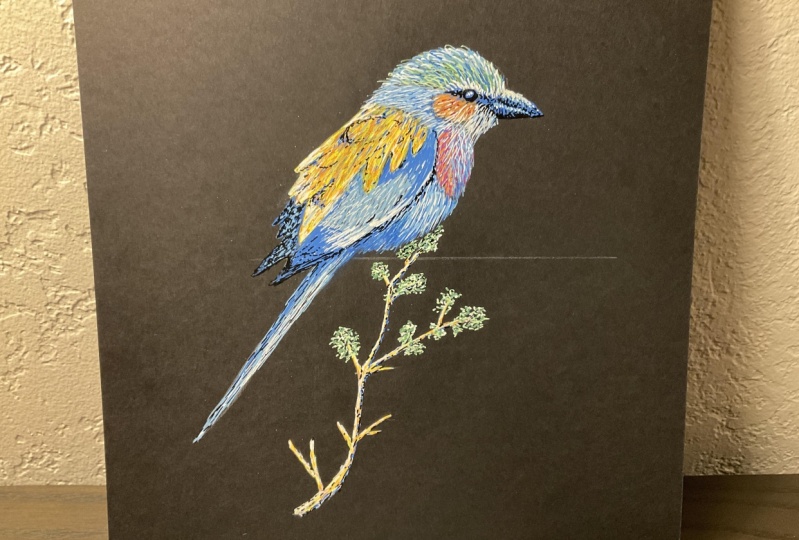
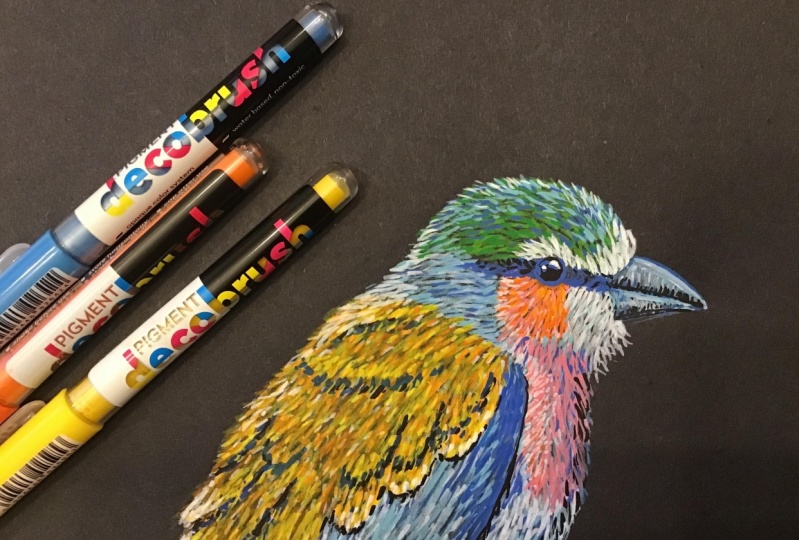
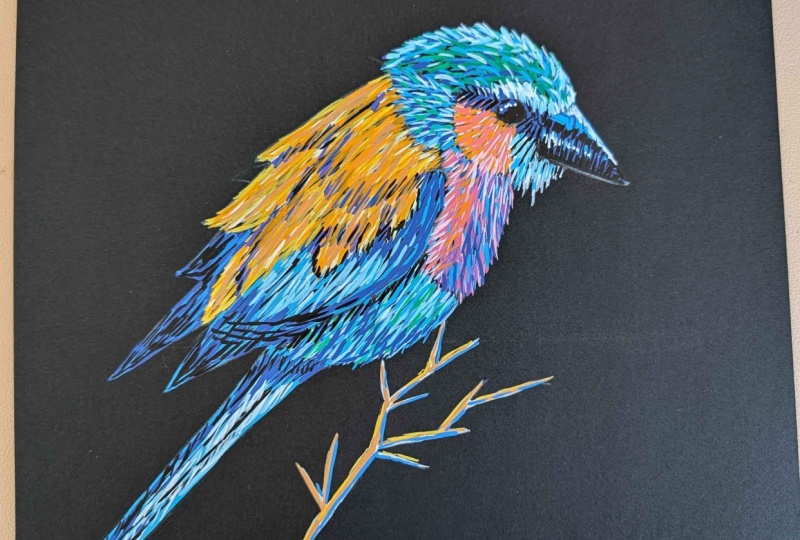
1. Welcome to Class!: Hey, how are you? My name is Andy ion. I'm a fine artist. Welcome to the class. Today we'll be using Posca markers to draw a
lilac breasted roller. That's a beautiful and
colorful bird from Africa. I want you to leave this class, having an understanding
of how to draw feathers using paska markers. And you can apply
this technique when drawing with markers and
even colored pencils. So we'll start out
this class by going over a few key points
I'm going to show you. I'll be doing this in my
tablet in the next video. And then we will be throwing the animal using
our pasta markers. So really excited
to have you here. Let's start with a class.
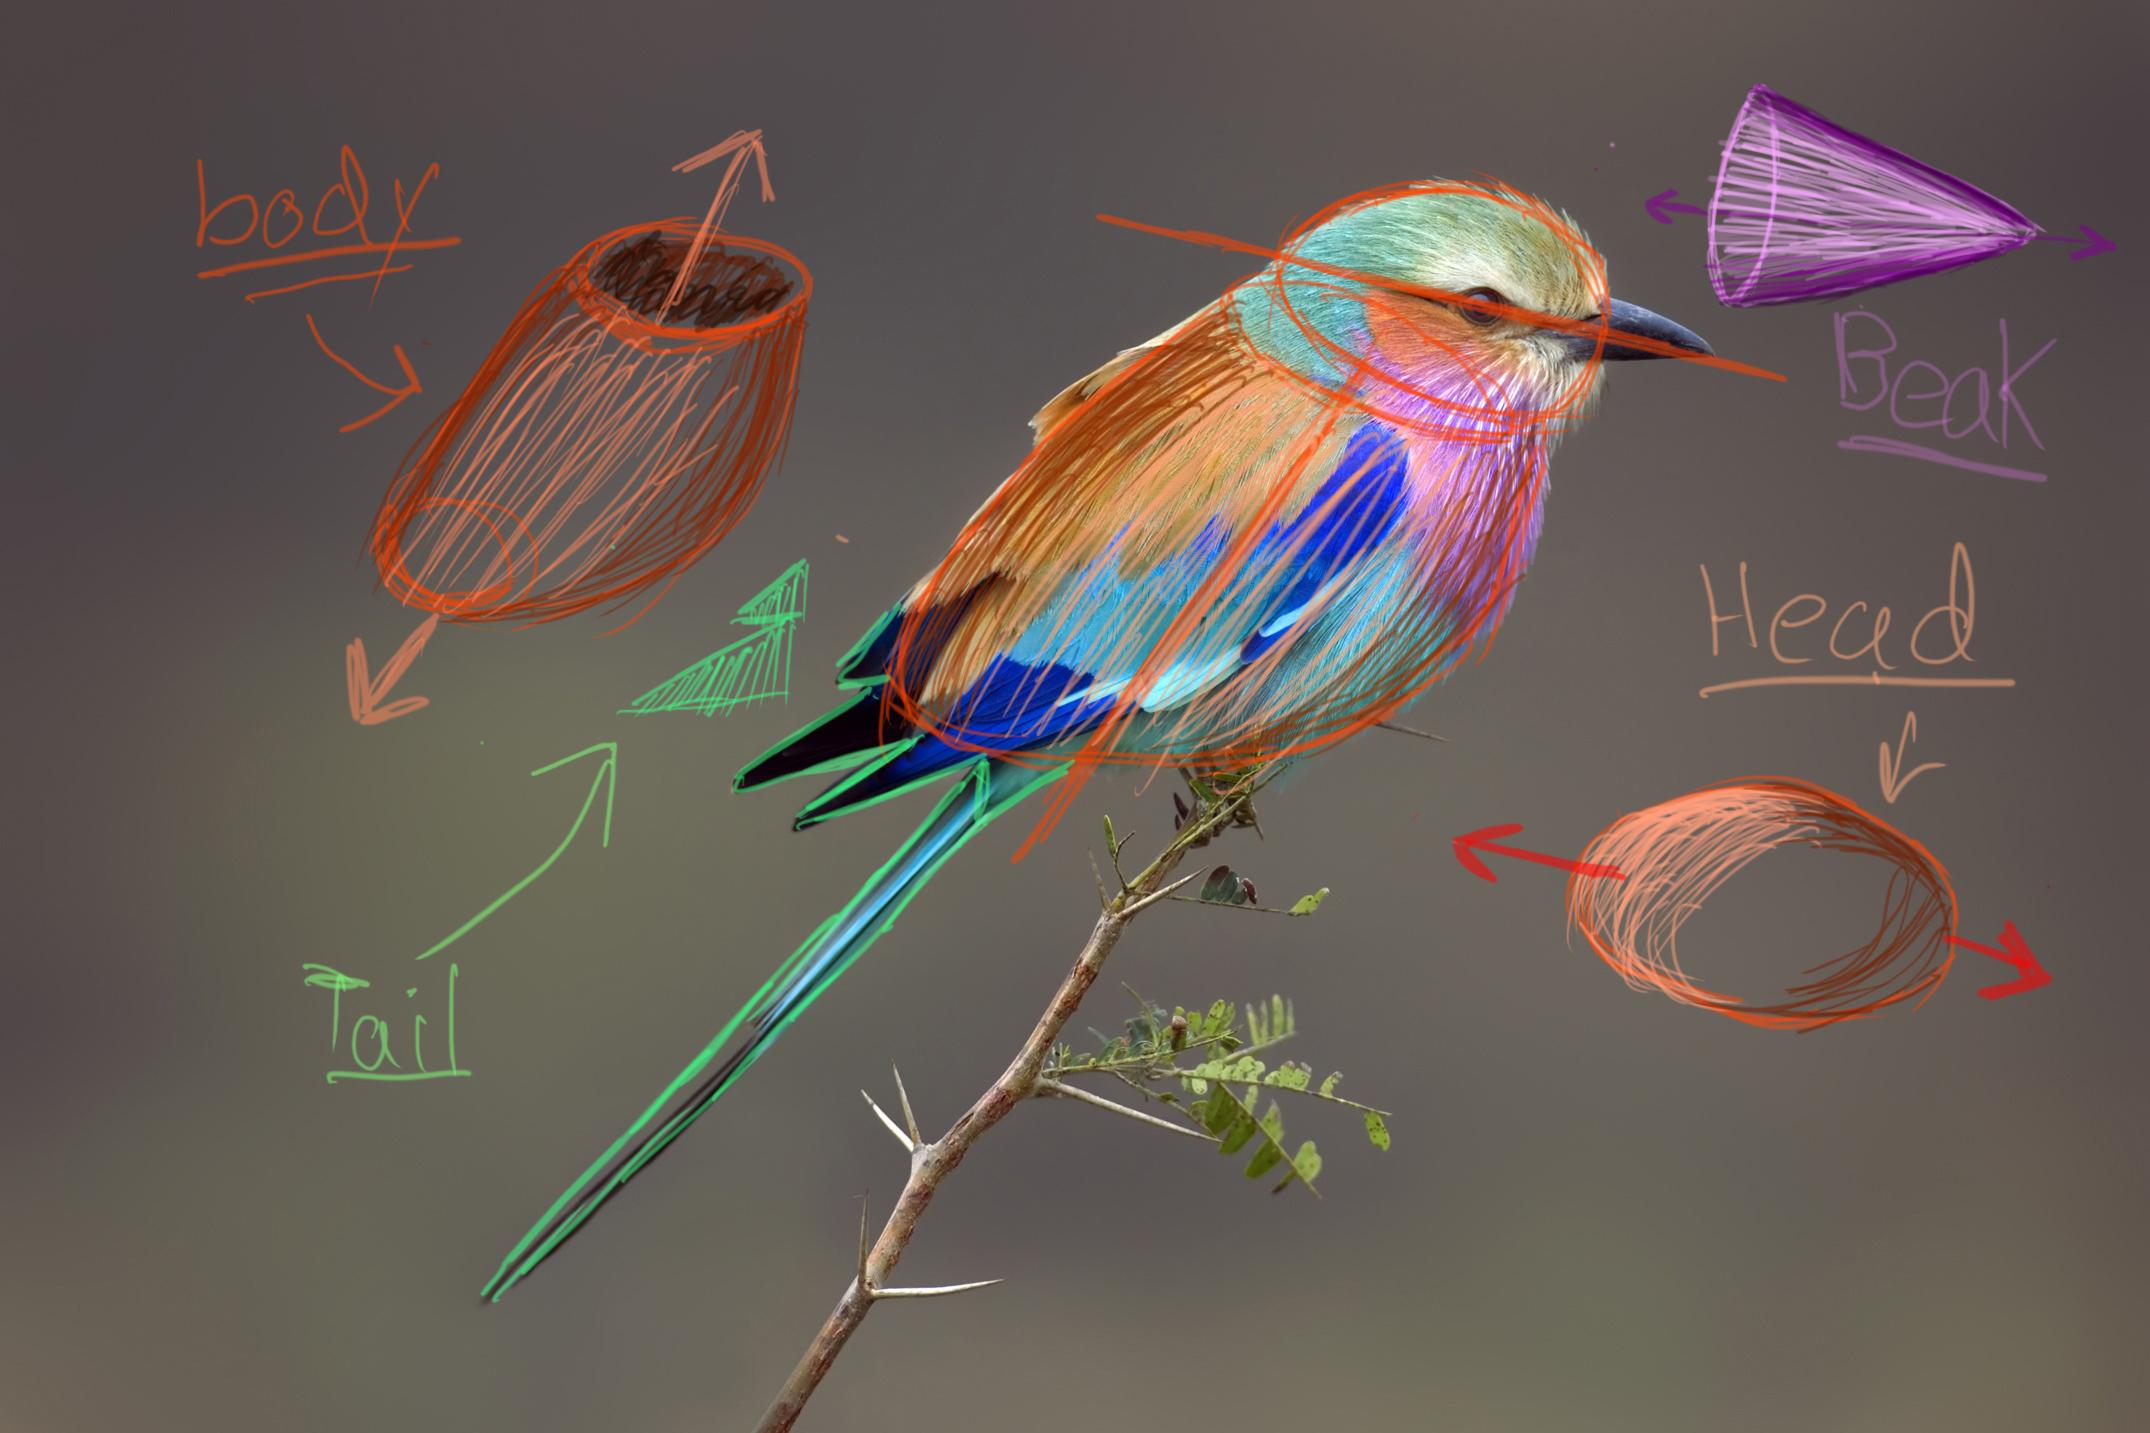
2. Study of Bird: So before we start the actual drawing, I were going to go over a few key aspects of how you as the artist and learn to draw. And in particular thing and ranging carrier animals that in your drawing or whatever else and range I mentioned. So I'm going to start out doing is drawing axes in the head and shoulders embody. And this helps rebuild how and build up everything around the head, around the body. Similar interface, my structure on. And so now I'm going to draw the head and I'm trying to simplify it to its basic form. I'm not thinking about a neck or anything else. I'm just thinking about how the head, and basically it involves bit of an oval shape as I'm drawing right now. And now I'm going to work on the body drawing a simple outline and simplicity, simplifying form to its basic structure. Swarms destroying a quick outline, have the bottling ad. I want you to try to think about this forum or the verge body as a barrel. And think about lines. The pieces of worry of the barrel go along its side and the metal bars that will round it, how they wrap. Really try to think in 3D, picture the emergent by the wrapping around our lives fairly similar and how the bars wrap around the barrel to keep the word HIM place. And here on the upper left-hand and see me doing that how I am trying to visualize it and kinda take a solution. And it inverts Barney and I have removed the head and a tail. And so I'm just trying to picture a authentic transparent barring kind of combination or the verge of party and the barrel that we see in photos. Try and visualize the structure and our flowers are firms around in a cylindrical shape. And with that drawn out how I'm going to add the axes similar to what we have in the bird, just to give you an idea of what I'm picturing. And then we're going to prove to the right and work on the head for a robot. And again, we want to think of the head has a oval, has a var. And we really want to think of how the paint is flowing over it and how it might have shade. On one side. This is imagining the Hannah's have Internet, have any feathers on it. And again, we're going to draw those axes. And this also gives us an idea of what way the head is pointing, are facing. And we're trying to simplify our structure, trying to not think of it as a bird, but just think of it as a potential different shapes. And they have a combined together to Hindenburg showing, without being said, we're going to look at our tail feathers and how they form various, various triangles of various sizes. Some short somehow and just simplified to its basic form. So for make, we're going to simply apply it to its basic form. And we can finish as a cone at the ones you see beside Construction. And just as a simple code and divide it in half. That's what I see when I looked at this big and it's very simple form basic. And we're also going to picture this as if they were an axis going through the middle of this week. And we're just going to shade it in. And one is shaded in the day 100 upper and lower side and enlightened narrow and the metadata highlight to give it a nice 3D broke. All right, So I'll feel like a feel-good times harder it is able to understand and better visualize the structure of this word. And now we're going to step over and work on the actual drawing. So we'll need our materials are harsh and bankers and our roller and our console by Raul sale in the next video. See you then.
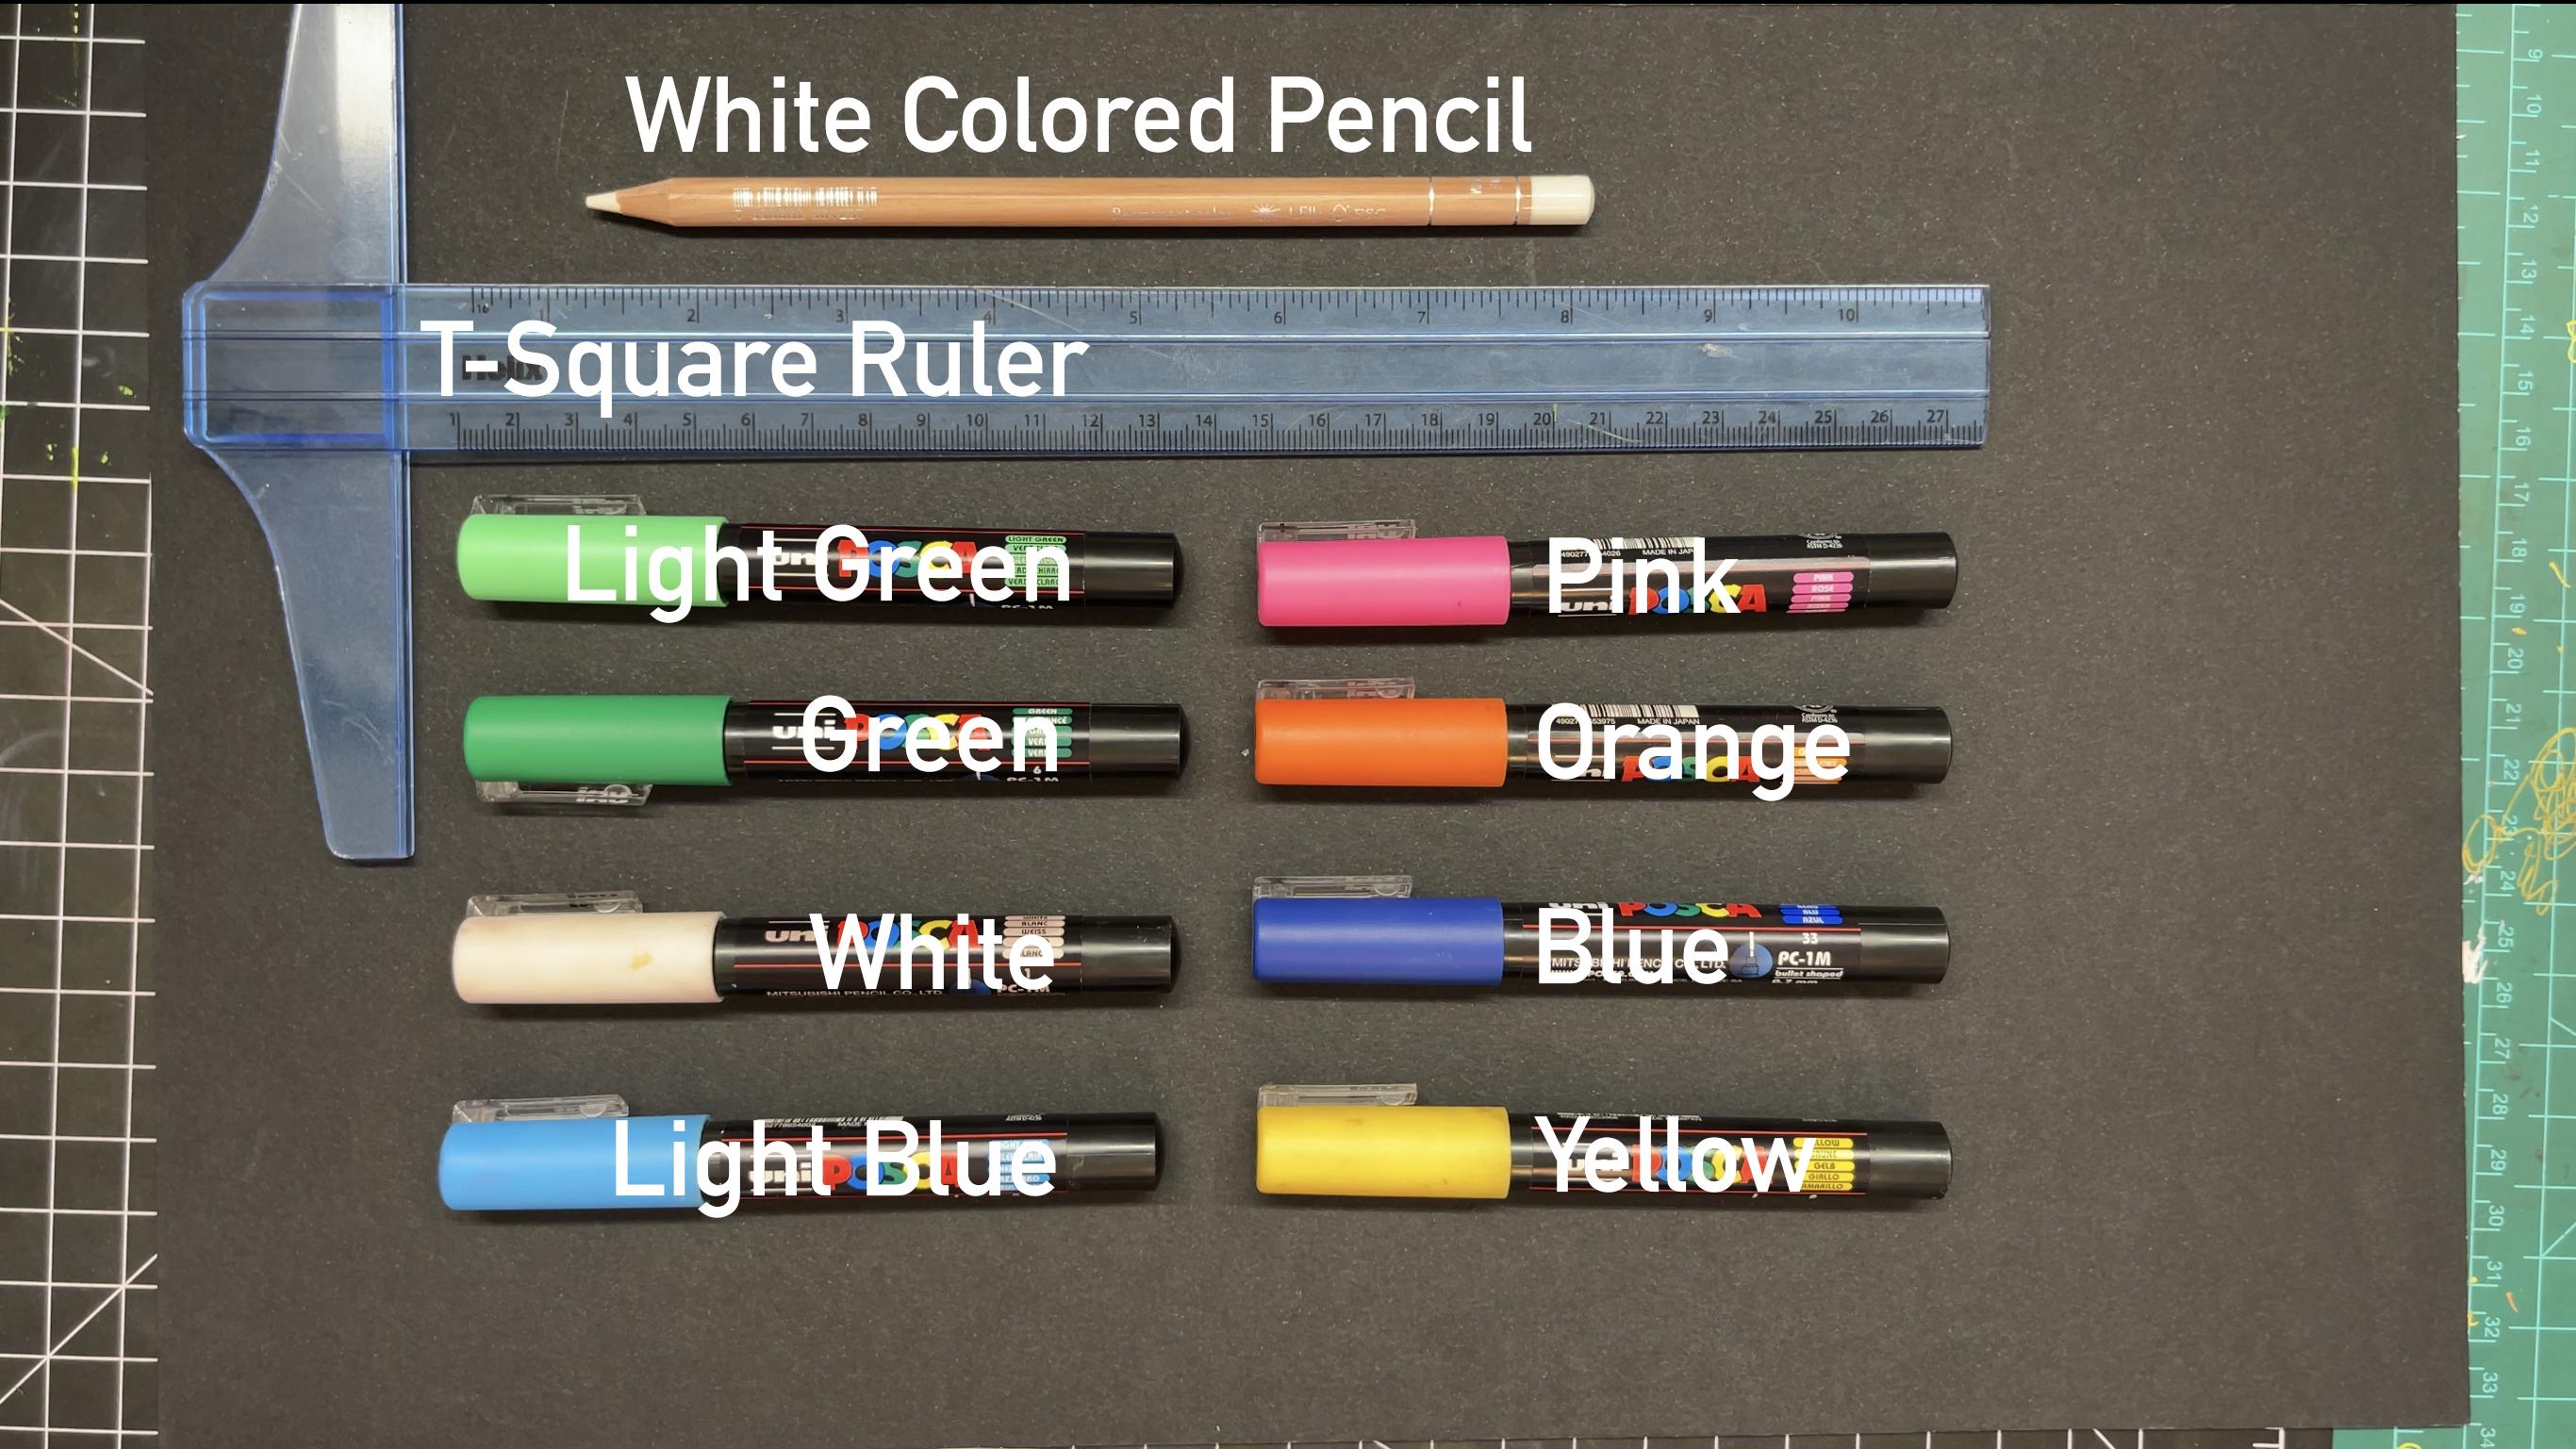
3. Initial Sketch: Head: And welcome back everyone. So excited to be here, we're about to start our drawing, our lilac press at rotor. And in this episode will vary during the initial sketch using some adolescents and ideas that we learned in our previous videos. And they really haven't found it yet at the reference photo wherever in from as available, heavy rectangular projects and race versus tab. And then under resources that area find are the images needed for this class. Okay, So right now are struggling off and I'm using my T-square as well as my white current as ruminants covered console. And now the T square is not completely necessary for this project. But it's what I hadn't on hand and was easy to work with half the time. Now, if you are working on a black background that I'm doing in this drawing, you will need a white pencil because that's what vast for sketching or to try and well show up and may add frames and outlines. And now what you saw me to just now with a ruler was actually a horizontal line. And this helps me establish a pace or area I can work from to ground line drawing. And now what I'm going to do is draw this line at an angle as well as a second line at an angle. And these two lines represent and they enter frame haven't burned picture. This has the inner columns of a building. What holds the building up, supports everything that goes around. So by drawing these two lines gives me something to work around and to be able to convert on. Okay, so now I'm going to start showing the head of the bird. And to do that, um, minute Fisher, this angle line that you see pointed out here as the axis have an oval. So I'm trying this circle or oval, I should say, around this line. And I want you to try really hard to picture this not as a 2D line or over that as a three dimensional hover, selling and trading converge head is rating. And that's how I want you to try to push it. Okay? So this curved line I'm drawing right now is supposed to represent the neck of the inverter because we're trying to picture this in 3D. And so we're seeing through the Head of them were, and were pressuring its neck. And now I want to see, throw it in with say, an opening for the neck. And right now on the screen you can see that an example of how we're thinking of our cat with the cup and the amounts of it as similar to the net Epsilon pair that we just drew. And this clip isn't really necessary by that help you visualize, have invert and its form and better. Now I'm going to draw a fin indicator lines and the head to represent the angle or corn fracture of the head. And they insert Schrodinger. If we're automatic drawing that I can help you think about this NMR regiments way. And here's a quick example of an egg with Times who turned on it in a similar angle to what we have drawn on the board. And there's an LPN picture things better in three-dimensions and can be a great exercise to do, to take everyday objects and draw them and drinking.
4. Initial Sketch: Body: All right, welcome back guys. So in this segment we're going to work on the party of the bird. And I want you to think of this shape. Have the body has a red arrow and our image up on the screen for you to see. And if you notice on this barrel at as a metal pieces going around it. And this can help us think of this shape and three-dimensions, how the metal parts snow around the barrel. And you may look at this and saying, Brandy, strike a oval or a circle. And yes, that is true. But we are trying to picture this and three-dimensions. We're trying to aim at volume and mass and weight. And if we've learned anything from this, I want you to learn that an artist so many lives as drawing and sketching must learn to think that what they're drawing, not as a 2D plane, but it is a three limits unchecked. And so now a see me drawing in these guidelines and valleys similar to how we did on the end. And these are just to give me an idea. And division eyes and the curvature of the veining on plane. Hitler can write certain on one and start working on the wane and laying it in. And now we're ready to notice that I'm not just guesstimating are doing this willy-nilly. Instead, I'm looking at my reference and comparing outer edge of the rim is and where the outer edge of the implant is, Sir, using this method helps me, or faces or nine have the weight and the red location comparing two points of the body's harder edge and there was a range Eldridge, I'm able to determine where the line should go. So for these two tips, have the wings have broken them down and I'm setting myself okay. And a similar triangles. So I just draw a triangle varying its length. And that's what the method I use. Stem too, is breaking down complex objects in the fundamental and easy to work with. Shapes such as triangles, circles, squares, and so on. Okay, so now we want to add a few more details before we finish up this initial sketch. And so we're going to start out by adding the pre-comps and birth and as an NP given environment down. And think about it in its simplest form, heat is basically a cone. And so that's how I try to picture it, has a cone or maybe even just a triangle. All right, and then the I is very small on this Federal Soil and I imagine it has a, he just had that our job at F sharp because they add. Okay, so now what we're doing is we were going to add a few little details and think of this as taking notes. They are really necessary for tail you later on in whatever you're doing. So right now what I'm doing is I'm looking at my reference image and just say how a, this feather about here and the Pfeffer extends to note here. And just having that in mind and try and that uncover later on. I've got to add these details. Howard a Maynard in. I've said turnover thinking simplify these shapes and these nines in the very simple forms. And just try to think of them as hyaline or as it had the curve as AC sale. Hey, this slide again, you notice snaky C or whatever. It may be simplified and use that to sketch out these more complex unit client. And to finish this off, we're going to add in the tail of the murders that Round Hill. And you can either use a ruler or do it free hand. Like I'm doing it right now. And I invited. But think of this as a long extended triangle.
5. Initial Sketch: Tree Branch: All right, welcome back guys. So now we're going to quickly draw out the tree branch. Now many times have you seen people trying trays or limbs? And the way they do it is a very curvy line with curves and a no edges. And the way I like to think of Troy and trays as a collection of small lines. And you can see that's what I'm doing now. I'm not ensuring trying one single line. Instead handwriting and other small lines join to make up a tree. So how venture smart ions making up the mass have the tray. And so right now I'm drawing some of the thorns and some of the other secondary and branches off of the main branch that compared to sitting on. And we were looking at the reference photo that goes around with this picture here, notice that there are themes around the upper part of the branch. I'm not going to draw those in with pencil because I don't want to have now raise that this print source of it harder to erase. Basically, I know where those leaves grow. Hannah, do them as I progress, click the drawing. Right. So that does it for the sketch. I hope you enjoyed and rainwater and get some ideas. And it was input and benefit you. So next to a very, moving on to the fun part, and I really like adding curves. So we'll be working with our posca murderers, 0.7 millimeter markers. And we're going to have a great time adding colors and really building those out and making this a very pretty. So. See you in the next video. Bye for now.
6. Adding Colors: Head: All right, welcome back. So now we've gotten as a client, we love venule empower to this is that raised the myofiber park and it hadn't curves and resonated, started using our classical marker, clever night brain, a very beautiful shade of green and regarded start focusing on the head. The way I tend to draw feathers, for the most part. This may not apply to every part, however, but for the most part. And draw them similar to how I will draw. For another words, trying airs strands of hair and building that up layer by layer. And so now looking at our reference, we say that these hairs on the top as a head coach and a hampered direction. And then they curve around and remanent keep in mind, curvature. The head when drawing these feathers and how they felt his feathers and heirs forever over the head. And if we look closely at the image, they basically originated near the front of the peak. So they go from the front of that big up and over head towards the back and a flow outward. N one thing allergy to do is try not to draw each line, represent Netherland, the input random about it. And tried to not be that soldiers on a level field and the past standing one beside each other, try to 1 over lapping never. And then one angling of it more downward and everyone hamper and so on. Keep in mind, these birds having to spend to a greater surrounded Beverly Hills, show the hairs of pet growing here and there no, there are not going away throwing in the same direction like somebody with our beautiful curved arrows. They're going to be even more free and bit more RAM. Certainties. Keep that in mind. And now what I'm doing as I'm trying to add a second layer, but I'm not trying to make it a toothache. And other words, Hadrian wanted to cover them for lack of a canvas faintly, how wanted to still show, show and there will be black now chambers him behind grain. Okay, so now when is this rain to add a second layer to the head? And how we add in the hair's going in the same direction as that. First coat, the light green. And adding this range just adds another layer and more color and more depth to the head. And now I use some dark blue to add some more depths, more layers. That's the K and destroying as converting our power layers. Okay, So now if CM going in with a right below and with this one, I'm going to focus more on the outer edge of the head, going around the outer part of it and adding that. And then I had a few strands with this light will hair to the rest of the head pinatas say as I was doing with the markers. And now that's a bluish dry, I'm going to do the same thing with this white marker, focusing on the outer edge if you've met that rounded area. Okay, So if we look at the reference image, we see this white hair right around, add a bit of a guide rail, you might say, and extended those have poverty I, and hang of it around. And then 10, Fred are part of the week. So are we adding that in letter might work very well. Alright, so now we're going to use our marker and we want to shade in the eye as well as the bay. And we'll add that first pair and then that texture or a dry. And then we'll go on from there.
7. Adding Colors: Beak, Chin & Neck Part 1: All right, welcome back. So we're going to start out with our black marker and we're going to have a bit of shadow to the eye and maybe even into a more rounded than we see in our reference image. And so for the V, and we're going to concentrate on adding black shadow which has a volume of it. And also to the midline where they feed vague and lower half. And so you can see I'm not having a straight line. I'm giving it an edge rid of uneven age to get it to blend into the grill and read more. Add know what I'm doing is adding a cross hatching effect. And so the blue stones show thrill as a Black Planet snap shot at the edge of it crash hatched. I'm gonna to need it in a crossways and we're doing it vertical lines, but it's the same idea. Now I'm going to start off my highlight area using the item blue marker. And we add in why today Iran for this Fitzmyer after that start and tightening up the upper part of the D. And I also had some in the midsection, however, be part of their lower peak. So now I don't want to do is have the white around the very edge of my peak area, giving them even a writer how reflected light have parents? And I just turned the very edge. And then as you can see on line 2, transient down a bit into the lower part of the body. All right, so I'm going to use my orange marker and start off this Marion regarding AI. And we had a ingesting first coat and base layer and Curran and again, I'm doing many strokes. Nice hair similar to what I did on the head. And just trying those out originating from the eye and working my way out in current word storage. One thing I want to mention when drawing animals, birds in this case, is that the hairs and the feathers and hairs grow out of the high, in a way they've blown away from nine now around the head. And that's really it. You know, when you try and sketch a quick reference drawing or not, even the same. Okay, where the hairs fell, they don't just go in any direction that takes out from the high hand away and around the head. All right, so we're going to jump over and get our pink mercury now and add a layer of that to this area. And I had read up on it, it'll kill sick. Later. We're going to cover the orange completely. We just went ahead and writable layer have pink to this orange majority data. And to keep building up our layers of an add white. So this area, and we're going to do that in struggling from now inwards.
8. Adding Colors: Beak, Chin & Neck Part 2: And now to finish up this area, I'm going to add a bit of orange over there, showered in pink and my area. And just want to bring veg orange and make it more prominent. All right, so now add some white marker. We're going to add a chain area. When you make a car than pleasure that cotinine of the bird. Enriched when organic hardware direction and managing, employers poke around in harder inner part of the beak and we're going to work out from there. All right, So men needed to take notice of this area around the eye occurs in fresh ways, motion, and it appears to be a bit of an indentation on vertebrae, sunken area, hardhead. Ensure we're going to add that in. Struggling that are real marker and adding a bit of a shadow area. Here. Rounding I'm between the eye and the beak, non-linear so to the left or the week. Already sorrow but don't want to charge then this blue pen and sharpening to make this white area under the chin and which unless braid and less wide and just run it over the sharing real quick. And I obtained with his grill the form of a line to the Black. And they're coming up next shadow. We added a premise three minutes to though we're seeing real. And of course we don't add too much black in May. It made the MLU just where. We just want to add a few that are strokes and read 200 phenomena that shadow right there. There are 1001 to do, as with my co-worker, and a few strands here and shadow to the chain area that have a marble tabs look to it. And the entertainment zone 1 and grab my white marker. And I want to add a highlight to have i. And tau is a very important part of trying means having a nice highlight that banks style alive and vibrant and non guide and tear and learn some high that it is, right? And now I'm switching back to the light blue marker and when a start on the net carrier and had any first coat have Peru going in a right to left direction. And now we're going to go over it with a blue marker and add in some more color to it. Given markups, giving more vibrancy and current are right, circular ramp and Chevron when ADH and better white to get that reflected light color to it, some of that high lightness. Then we went to add to that. And then when we mount. And so you've enjoyed this video and had a good time magazine. In the next video, I'll be working on the chest as well as some of them belly, and then we'll move on from there. See you in the next video.
9. Adding Colors: Chest: All right, So welcome back. We're going to start off with our light blue marker and we'll be working on the chest area this time. And if we look at our reference image, we'll notice that the feathers are hairs, as we may think about him, are flowing in a downward direction on down and around, over the chest of the bird. So we went to replicate that on our drawing. Alright, pink marker and add a layer that aim. Setting up our layers. At Uber was my light blue and I'm going to add in that hover to the outer part of the chest. And we're going to gradually build up this area. Two main tracker, as we can see in our reference image, exhibit a tracker and the inside and the outside and rider on the inside. How much closer to the Wing Sue will gradually data. And that's exactly what I'm going to do with my white marker right now. What's happening is you're getting Claire or a highlight effect from our light source. And so that appears a bit later. Okay, so now we're going to step back and use our pink and again, and you see how we're really building up these colors. We're getting a nice blend of a medium blue with white and pink and around we'll add some more blue shade. And when we're getting a nice combination of factors, when well together, then we get a nice shine to them. Alright, so we're going to skip over to our blue marker. And this time, again, we're going to concentrate on the right-hand side. Now, we're going to take this shade has a way to the weighing, whether they be good or bad. This space in-between the wing and the blue. You see that in a minute. And they now have extracted with a syringe marker and add a bit of a shade around the wing area and the chest right outside of the wing at a beautiful shade of orange in there, just an uptrend cover bit. So we're going to wrap up this area by adding one more layer of pink, has one as one where light blue, I'm going to heavy with a purchased had a nice night. There have these two factors. Hello.
10. Adding Colors: Belly: All right, So here we are again, are going to start drawing the very part and adding to that area. So we'll start with our light blue, adding in some shades of that color. So if we look at this area, will notice that the feathers and go in a downward and to the left direction. We want to simulate or reproduce that on our drawing, covering in that same direction, starting from Hamburg and then moving down in a downward direction. And one thing I wanna point out to you, when I'm doing these feathers, I'm struggling with my marker faced firmly on the paper and I'm dragging it down and out, so way from the paper. And this is to get a feathery end to the feather and have it be nice and soft and pointing at one end and hard at the other end. Of course, this is done in a very split second. You don't see it happening in slow motion. But that's the motion or the movement I go through to reproduce each feather. All right, so we're going to hop over and darker middle marker and then you just show me new. We went to always ensure that the layer we just faint down and nice and dry. And Clinton and now namely 2 and 3, five minutes for it to dry and ending on the humidity in your home. Then we want to be sure that first layer as well tried and I'm not going to smudge at all. And I now have the following is going to be a bit repetitive, but I just want to emphasize it in this room. Understand, when adding this bilayer and the common ones then layer on top of this, we're going the same direction, pushing our mercury down, growing more joined up To down. And now we're going to go back to our white and add any layer that covering the shoulder and tire belly area with white. We're just trying to build up, get a nice blend of white and dark blue and light blue nicely blended together. And later on we'll add more colors in some areas to give this very more of a rounded form to it. And here the n, We're going to add another layer of our line item. Blue marker is impelling areas. I'm not going to like are there but just stay right relative bringing back some glue and they're going back and forth between right. And then returned to her covers. Nice and even. And they don't combination on the thyroid. And now to finish off this area or line and focus on this area right here I'm indicating with my finger to try and shade this in to make it a bit closer to that shadow, to it, to make the valley have a more rounded.
11. Adding Colors: Lower Wing: Okay, welcome back. So we're gonna start off with doing the lower part of the Wayne. There's time. And we're going to start by shading it in with our light blue marker. And we went our Stroke Studio. And this shame downward and to the laughter interaction similar to what we did and the valley after birth. To continue, we're going to switch to our manager and we're going to shade in the upper part and remember part of the lane. And even though we're going to focus on the chamfer and never proud of this lower section of the brain. They are going to add color to the entire part of the wing. And looking at our reference image, we see now it has this nice rage. Another part of the Wayne around Neptune, nice hard, Blue Ridge type. We're trying to reproduce how gray. So now we're going to switch to a black and a nice shadow under the wing where the brain meets comparing. And a nice shadow around you. They're driving, blending it out and the rest of the body. And now we're going to jump back to white and add in a few feathers. Now too many that are reflecting light and appear to be lighter than the bill. So we're going to add that in too many, just reveal enough to make it visible. Okay, So if we were enjoying doing this, trying so far and having a good time in the class and show or about generalization area of the brain. And then shorts telecom player Wayne and get that show. Well, see you in the next video. See you then.
12. Adding Colors: Upper Wing: Okay. So we're going to turn on the upper part of the wing by adding a layer of yellow, we can push combinators and similar to how we did on the lower wing or under our progress Alain, we're going in a downward direction with our mark and previous remainder when uncovered a plaque completely and generally went around some of the canvas to show through. Okay, so right about now add emitted an edge then hand program to a core part of the video where I had at the orange to this upper wing showing your face for me. Right now. What I'm doing is adding some white highlights to have a newer camera trying now to that hamper part of the lane. Okay. And now they're yellow and after we get that in there, trash providing a pioneer of orange. So first we have yellow and then add orange curves combined. Very nice fan growing up. And now we're going to use our marker to add a shadow areas in the rain and the shopper wing phrase taken out where we don't want to cover this entire area with blue. Just want to make a few areas of good character using, right now are blue. So I'm just going to focus on a few key areas as you can see me doing now. And we're going to do is look at the inverse image elements merge and take note plan the upper wing where there are some dark patches and shadow, where the feathers form small shadows and cramps. And then because the curve and F11 add in more shadows, Let's drag nano mean, hear me, interrelated contrast and shadows really deep. And then to finish this up, I'm going to go back and add some more yellow and orange, suggest her brain goes out more and make them more vibrant.
13. Adding Colors: Wing Tip: Okay, Here we are again. So we're going to add moose have different kinds as well as that tethers area. Right now I'm adding my standard GRU kind of a name email. And then we're going to do is read it up a bit with similar day and night row with the one that's more of a moraine Caribbean Grill. And then we'll follow it up by adding some more shadows and darker areas. So basically what we're doing is we're adding the base curve, hump Abril and then they NINR level and then making a turn going in. And doing our guys have hours to get this nice, pretty clever than in mind to have a shadow of a car. Brilliant and no, to implement them. Arabism point where I want my friends tell me chain the appropriate color and the desired effect. And science. Work. Wow. And now to finish out this area, I'm going to add a little bit below just to bring that weight back in a few scratch hundreds lower part of the wing tip, Tristan Parrish so carefully how grand, in fact, giving it a bit of a highlight to it. And that will complete our firing handling. I haven't numbered. And as a no-brainer, moving on to the tail and then branch. So see you in the next one.
14. Adding Colors: Tail: Okay, So we're going sort of the tail. I add a light blue layer as our base layer. And we're going to do this tail simmer down. We did a chest or the many I should say, have the verb. Then this time we're going to add strokes, again, going in a downward and to the left direction or thinner way down to the very bottom and a nice solid layer and not completely solid there to the tail. So to take note how you see that there is a shadow on the furthest part of a shadow, more prominent in that area. And turn tail and in the highlight area. And then printing this out even more and one add some notes. Think. Hi. Okay, and the last thing I wanna do have some black shadow area to really push back and push it away. And we just want to make shadows mentioned. So now that we're done with an invert and we're going to finish off the train branch pretty soon. I encourage you to read a 100 projects in the project section of this course. And please be sure to share with you guys now I'd really love to see it and many discussing with each other about it. And I hope you enjoy it is, and how many of you are enjoying this class?
15. Adding Colors: Tree Branch: Okay, so we're going to wrap this drawing up by working on the tray wrench and finish that off. And we're gonna wanna do is focus on not using exact curves. So I'm going to end the photo will be using some white right now, and then oranges and yellows and blues. But we're not trying to do it. Just said we did divert and do it exactly like the photo, but a bit different. So it's unique and a challenge and then ran. Now what we're doing is just trying to get and pays for their white town to establish some color. And in our term for that, or how much on average centers and having this white squamous have a nice space cloud cover bit memoir environment. Okay, Now that nice white his town and dry on my orange. And add a layer that in. Okay. And now I'll add some yellow to that. And I'm combining the scrubbers I wanted to kind of be seen through a chapter to wait for orange and the yellow. And when the ugliness and joined the team blended together. But instead I want them to be there. And the three colors present and combined. Alright, so now we're going to use our bloomer. Good, add some shadow to this twig. And we're going to add it to the right-hand side of this, similar to the French family, there's a bit of a curve and this branch is metal pole or it's curved. And I said cylinder. So we went to imitate that and we're going to shatter. So on the left side how I wanted to be in brighter and more of a highlight area. And try to use my white posca pen, of course, to add that to where they, they ended up not going and having a complete solid layer much just having a hand weight to read data to make that area stand out and have a nice highlight. And then switching back to my shadow, even darker side of the stick. My head, I'm some trumps flask and there are too many just enough to add to that hint. And then using this beard or for red green marker, I like that nice names to our twig. And we're doing this by adding just general dots here and there to give that impression or hint, have leaves with them. Another complicated, although in P1P2 go for it. But what we wanna do is give the hint, the idea of little clumps of leaves here and there. And we want to make them second out. To me if you saw that mass, our area heavily, pretend we know when to do too much and over power, power outage. See now our drawing. Okay, three letters will be using our light blue, white, and green. And we're going to be adding those to our leaves, shifting you in a amaze combination of vectors. And the blue is because sometimes leaves him, have him, they have a nice blue highlighted area to them. And then the white is to bring those highlights out even more. And then the dark green is to really strengthen them shadows. Some of those areas where we have an shadows taken under the bird and some other places just to give a nice combination, a primate and scatter. And then just to finish this off now and go back to the weighing today after Wayne and add some tweaks to it, add some highlight some of those areas you can see I'm working on right now. Helps inhibit someone form some more movement and absent a nice round look to it that I want. Alright, so it's hard to have been set and then we're finished with her trying of our right leg, press if roller. And I really hope you enjoyed doing this, trying right now, I'm going to sign it, do the best thing. And so I really hope you enjoyed this tutorial in this class. And if you did, please leave a review and a force over a joint over the project in the next video. So measuring over that. And please feel free to share with you 10. And when you do our early when it's heated and we would talk about it with you. So see you in the next one.
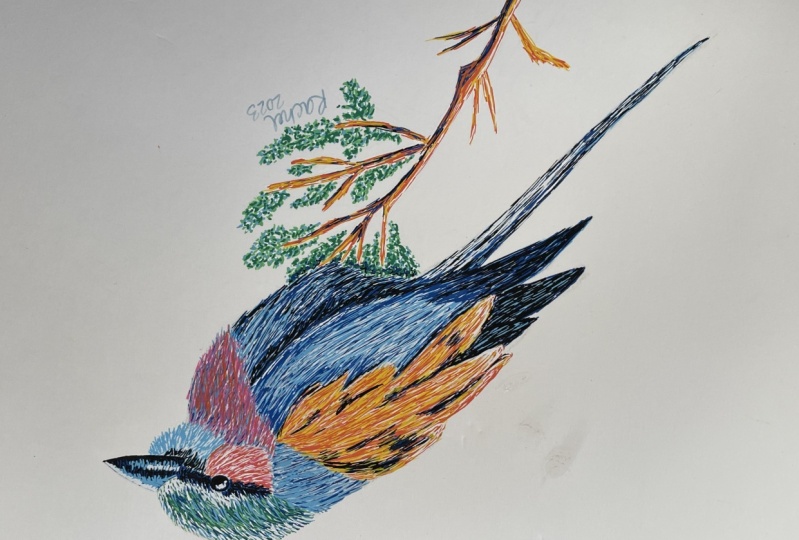
16. Class Project: All right guys, welcome back. Now I want to shine and
they crash projects. For the first part. Or whatever you wanna do
is find the picturing won't work with this bird. I can be anything
you wanted to be. Scenery of a mountain. Anything, a person, anything
you can do is the following. First, he didn't
present Photoshop doing around tracing and understanding each party understanding
form and how It's really that try
to do this study. Now if you don't have Photoshop or of actions
rather how to use it. Here's what you can find. Papers such as tracing paper or tissue paper,
very thin paint, and print out your scene where wherever you want
to draw or you can put on your tablet or your computer
and then trace over it. Then you have a nice
outline of what the animals structure
is re, right. And you can work from there. So that's what I would
recommend you do. For the second part, you need to find a
reference photo. So they never really have a
passion for and really wanted to draw baby to pet person, whoever it is. It
doesn't matter. But find someone you can really spend some time on and it really passionate about
in order to have a motivation to
finish the piece, then just start
plowing through it, harping on one area. Had a time, I'm going
to start with pay me in the head and one party or
one bar and finishing there. And then knowing on
to the second part, That's how I like to work. And you do that. And then I do ask that you please be sure to
share whatever you do with me so that I can
see and we cannot benefit from what do you turn and we can discuss it at great enough to
see what you do. Or do you learn from my class?
17. Thanks for Watching!: Thank you so much for watching. I really hope you enjoyed this class and we're able
to learn something from it. Please feel free to post a
picture of your drawing below this class so that
all of us here on Sco chair can see what you did. If you have any questions, don't hesitate to start a discussion in the discussions
tab below this video, and I will be happy to
answer your questions. Well, if you would
like to support me, please check out my website at www.andartitude.com
And feel free to visit me on Instagram and
Facebook where you can see daily updates of my artwork
at Andy's attitude. Stick around here on
Skillshare and follow me because in the coming weeks I will be uploading
more classes. That's been it for now. I hope you have a wonderful day. See you in the next class.
 Andy Villon, Fine Artist