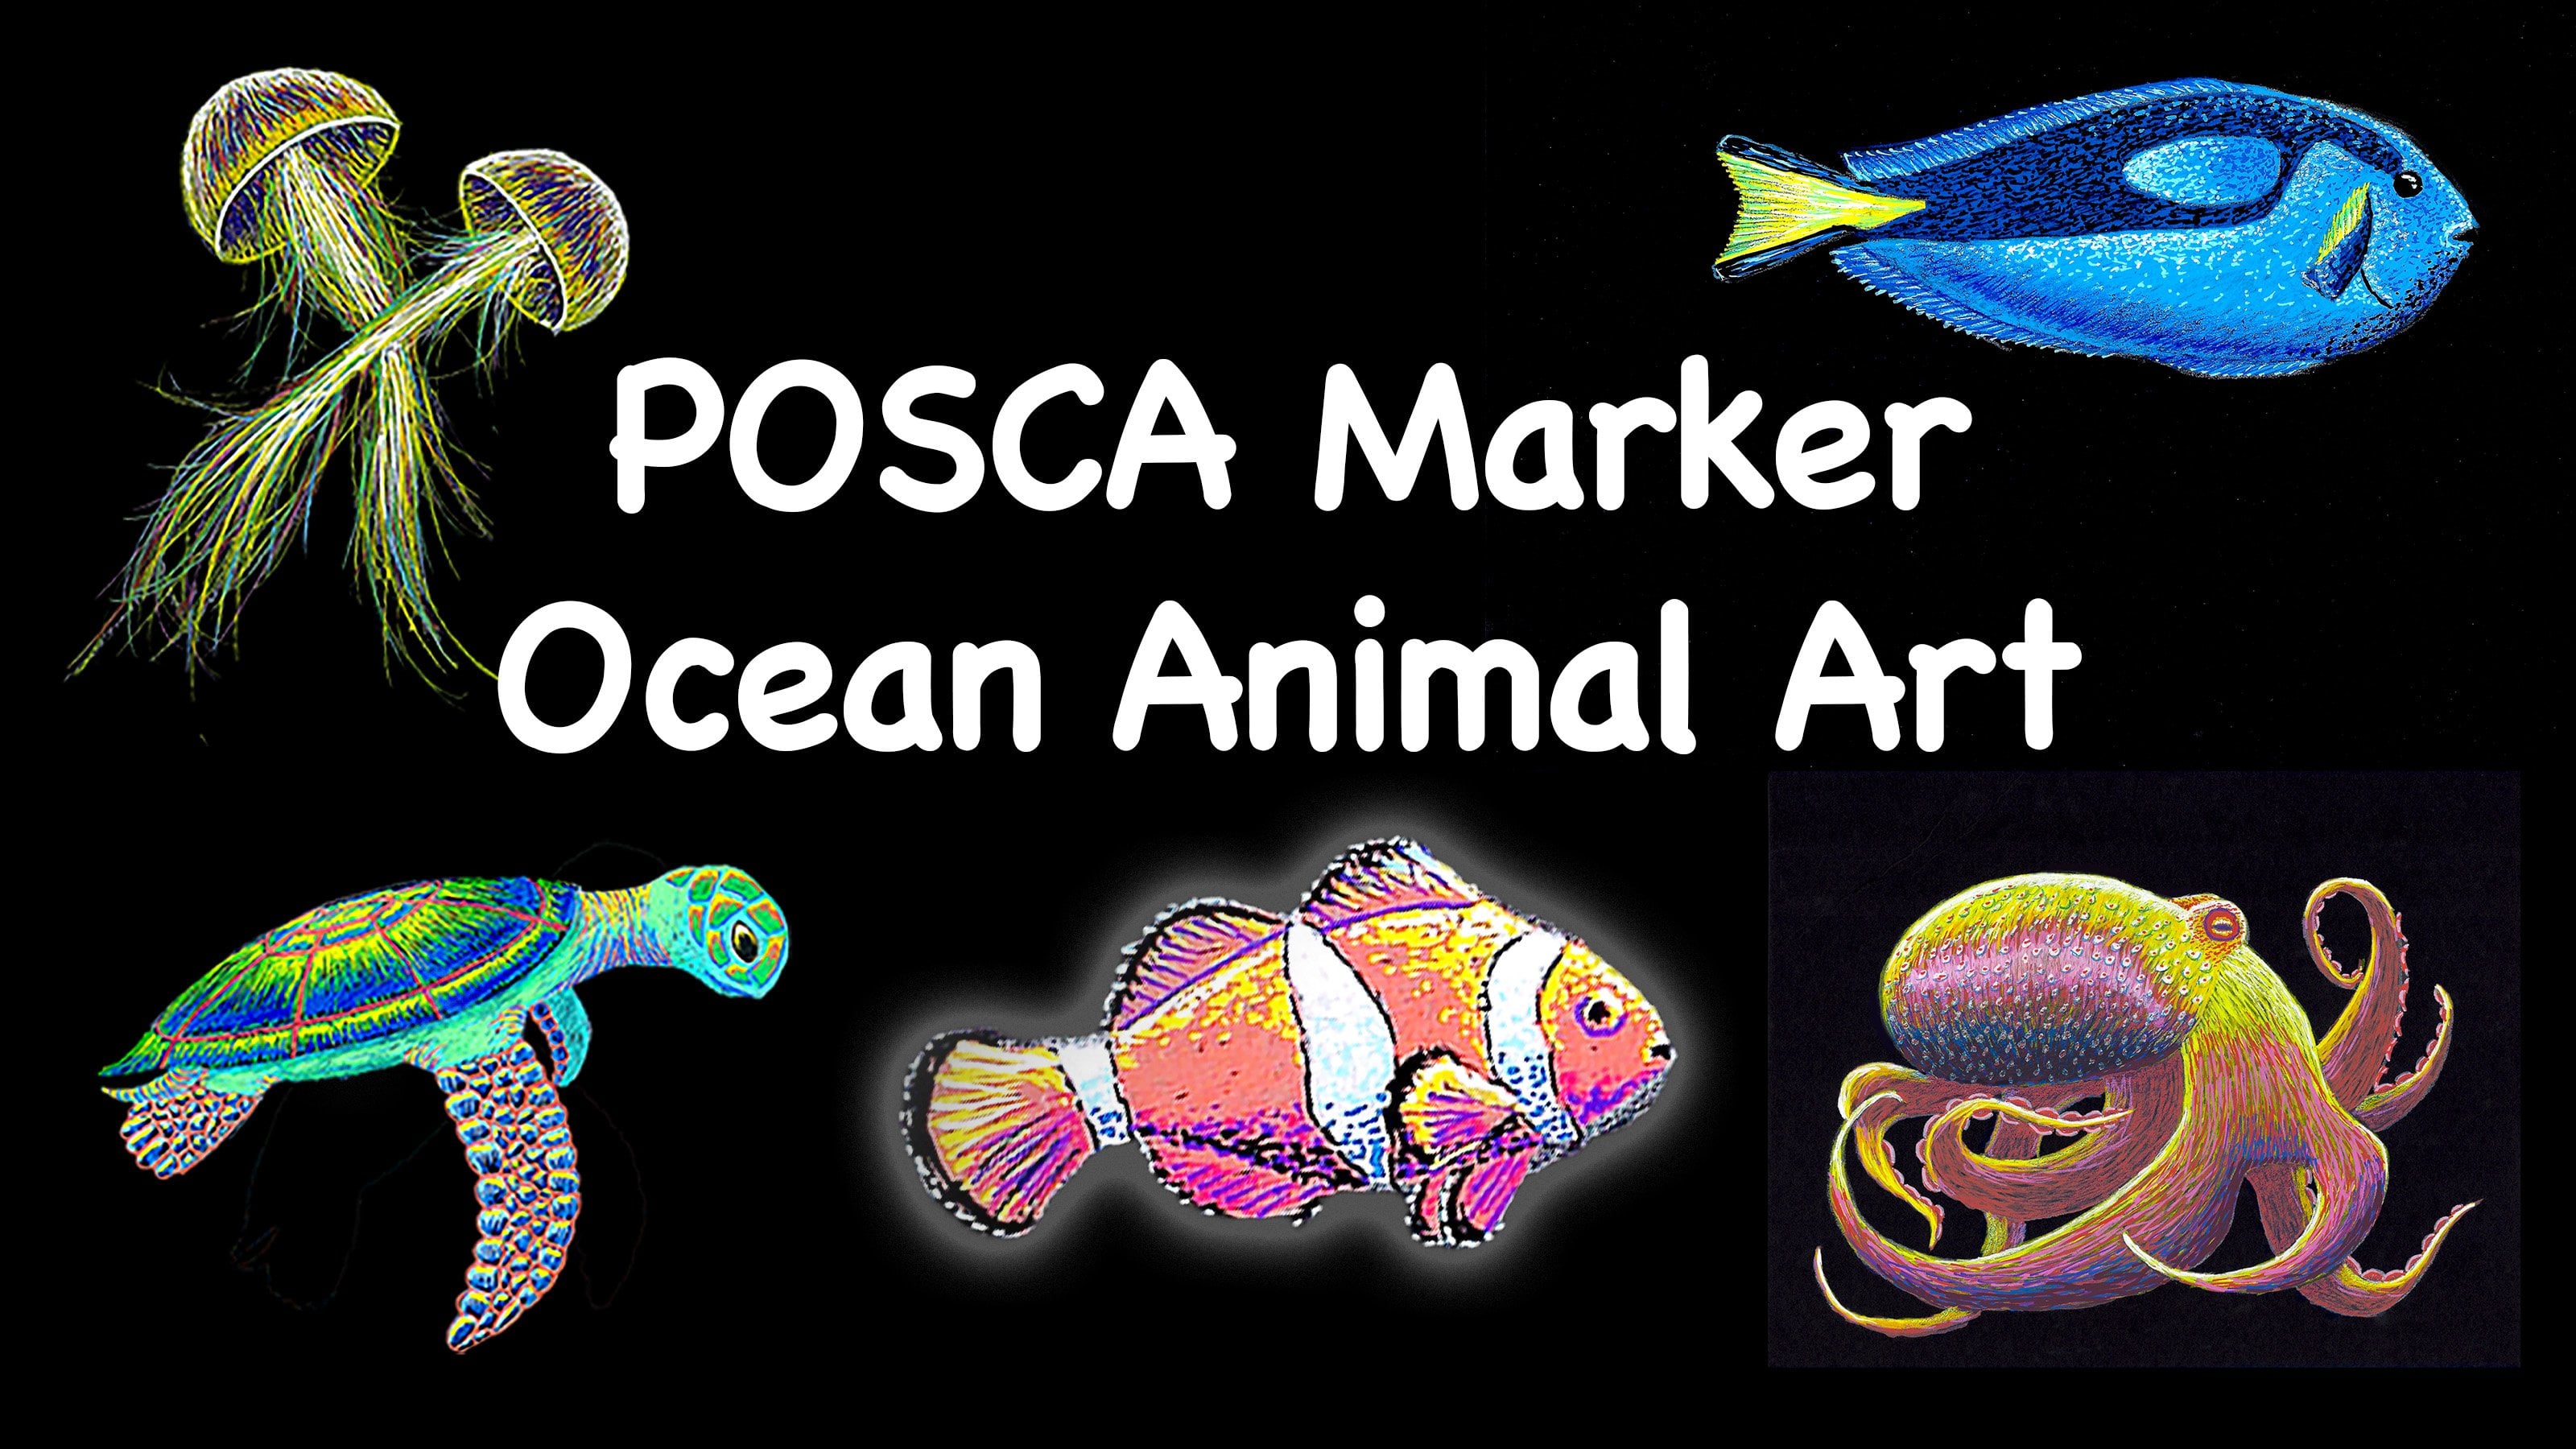
Marine Jellyfish Drawing with POSCA Markers on Black Paper (Acrylic Paint Markers) | Ocean Animal
 Andy Villon, Fine Artist
Watch this class and thousands more
Watch this class and thousands more
Lessons in This Class
-
-
1.
Welcome to Class!
0:47
-
2.
Initial Sketch
3:16
-
3.
First Layer of Marker
4:42
-
4.
Layers of Color
7:14
-
5.
More Colors
4:35
-
6.
More Layers and More Yellow
5:31
-
7.
Making it Glow
4:06
-
8.
First Layer of Tentacles
2:49
-
9.
Layers of the Tentacles
3:41
-
10.
Glowing Tentacles
4:19
-
11.
Thanks for Watching!
1:13
-
-
- --
- Beginner level
- Intermediate level
- Advanced level
- All levels
Community Generated
The level is determined by a majority opinion of students who have reviewed this class. The teacher's recommendation is shown until at least 5 student responses are collected.
84
Students
11
Projects
About This Class
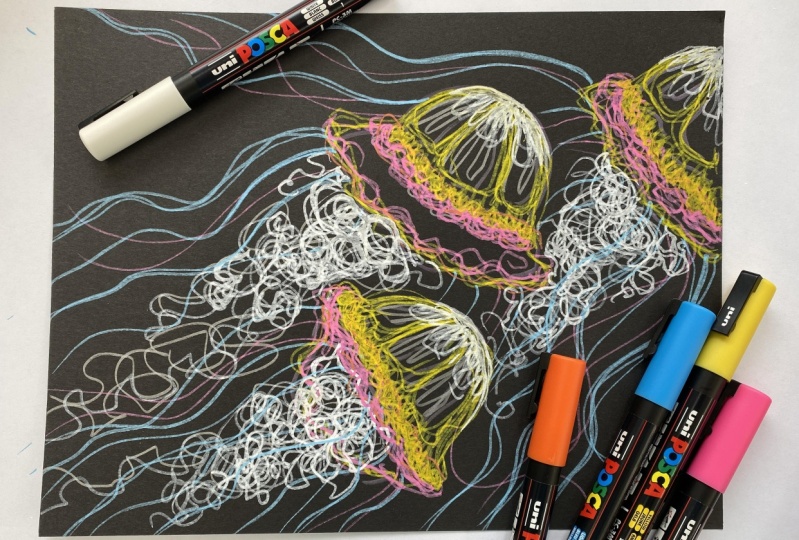
Are you an ocean animal lover? In this step-by-step class, we’ll draw and color a pair of jellyfish using acrylic paint markers (Uni POSCA markers). You’ll learn a simple process for sketching the basic shapes, layering color, and using highlights and contrast to give your jellyfish a soft, glowing look.
I’ve become a huge fan of acrylic paint pens because they’re bold, vibrant, and easy to control—perfect for beginners and fun for experienced artists too. By the end of class, you’ll have a finished jellyfish drawing and a better understanding of how to color with paint markers in a clean, polished way.

This class is for you if you want to:
-
Learn POSCA marker drawing in a beginner-friendly way
-
Practice simple drawing and coloring techniques with acrylic markers
-
Create bright, colorful ocean art with a finished look
References
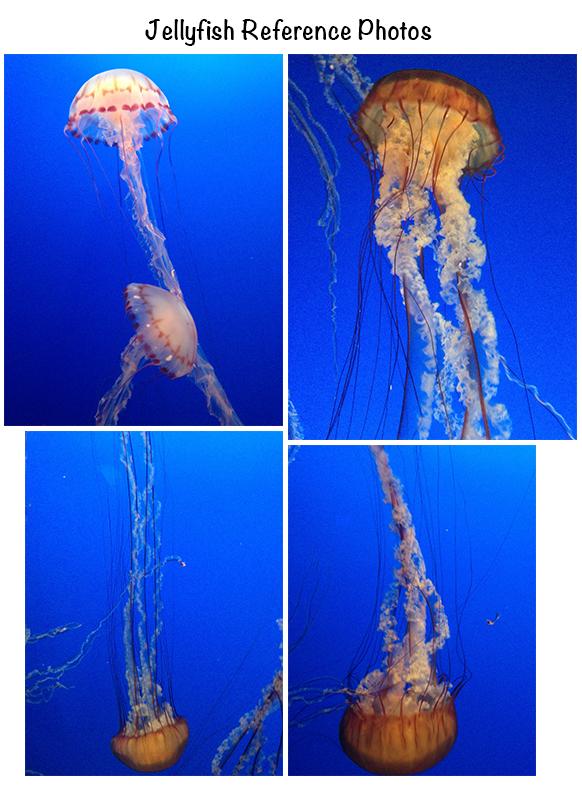
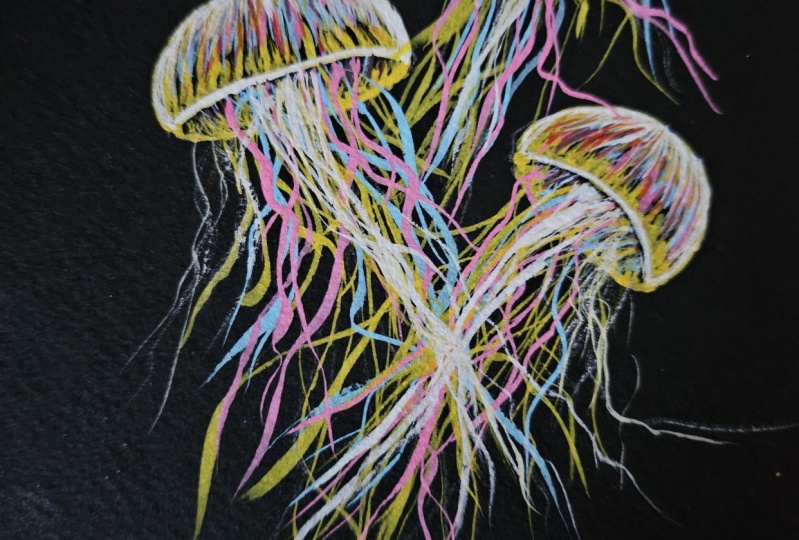
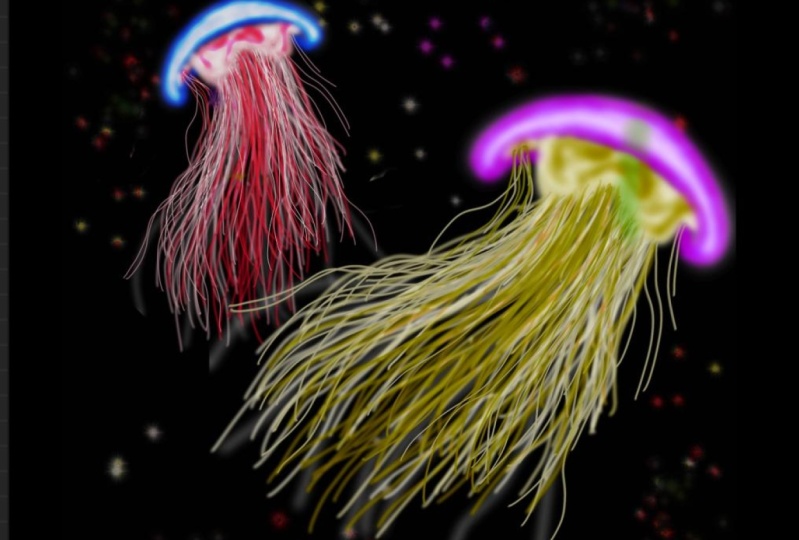
I’ve included four jellyfish reference photos plus a scan of my initial sketch to help you follow along.
Materials
Use what you have—POSCA markers or any acrylic paint marker brand works.
I’ll be using:
-
Black illustration board (or any dark surface)
-
White colored pencil (for the initial sketch)
-
Uni POSCA Extra Fine (PC-1MC, 0.7 mm) markers
-
For marker I’ll use Extra Fine Point (PC-1MC - 0.7 mm) Posca paint markers. Here is a list of the marker colors I will use:

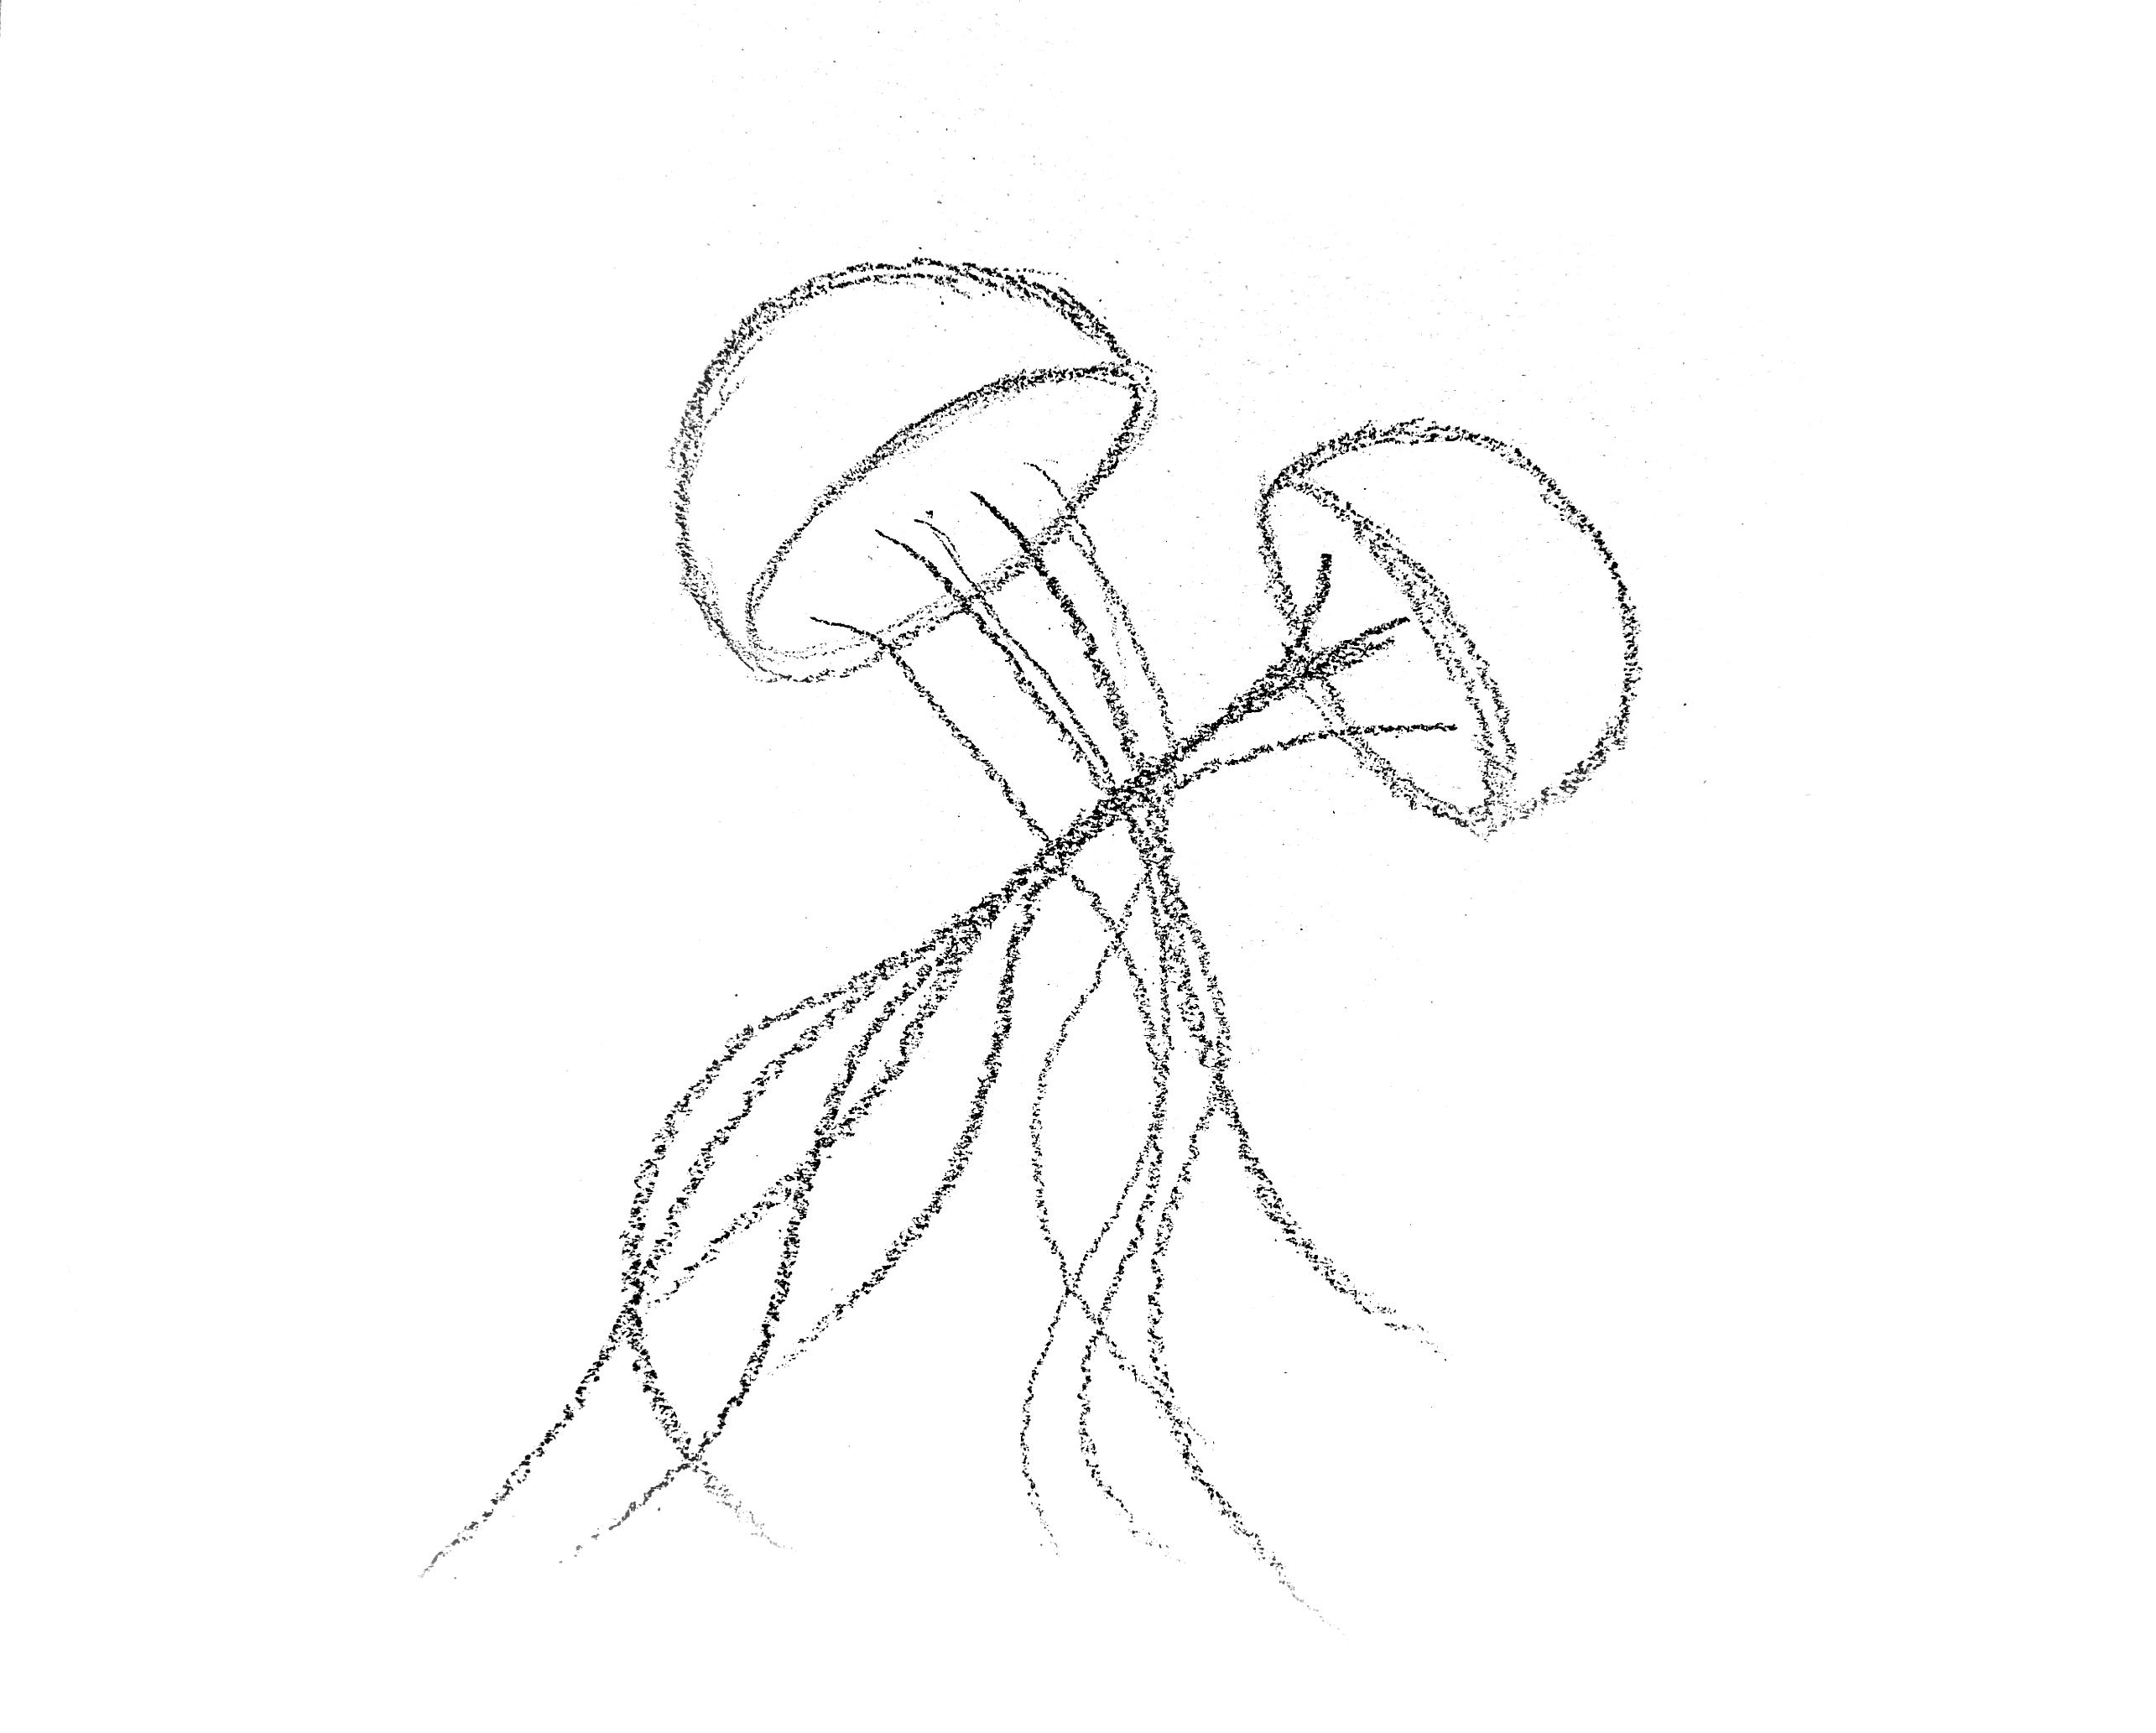
My Jellyfish sketch:
I also would love it if you visit my Etsy Shop where I offer prints of my artwork and other handicrafts: AndysARTtitude
Be sure to check my pages out on Instagram and Facebook where I post updates of my art and I announce when there are new SkillShare classes.
- acrylic paint markers
- paint pen drawing
- marker illustration
- beginner marker art
- step-by-step drawing class
- drawing and coloring techniques
- layering with markers
- blending with paint markers
- Fish art
- ocean animal art
- ocean animal drawing
- sea creatures drawing
- marine animals art
- marine life illustration
- under the sea art
- underwater wildlife art
- ocean life drawing
- aquatic animals drawing
- sea life art tutorial
- coastal / ocean themed art
- reef animals drawing
- tropical fish drawing
- sea turtle drawing
- dolphin drawing
- shark drawing
- octopus drawing
- whale drawing
- stingray drawing
- seahorse drawing
Meet Your Teacher

I'm a fine artist and Skillshare teacher specializing in colorful, realistic animal and floral art using Posca markers, acrylic paint, watercolors, and mixed media. I've been working as a professional artist since 2013 and teaching art since 2021, helping beginners and growing artists build confidence through clear, step-by-step instruction.
My classes are beginner-friendly and project-focused, designed to help you create vibrant artwork while learning practical skills like shading, layering, texture, and color control. I'm especially known for teaching realistic animals, glowing effects, and eye-catching florals, inspired by bold color palettes and what I like to call Instagram-style art -- bright, expressive, and visua... See full profile
Hands-on Class Project
Draw along with me as we sketch and color a pair of jellyfish step by step. I’ve included four jellyfish reference photos in the Project & Resources tab—download those before you begin.
Start with a few quick practice sketches on scrap paper. Try the jellyfish in different angles and positions until you find a layout you like.
When you’re ready, draw your final sketch on a black illustration board (or any dark surface), then begin coloring with your acrylic markers.
Color choice: You can use my exact colors or make it your own. If you change the palette, choose one bright main color(like orange, pink, light green, or light blue) and then add a few secondary colors on top for glow and depth.
Please share your finished jellyfish drawing here on Skillshare—I’d love to see it. If you have any questions, feel free to start a discussion and I’ll help you out.
Class Ratings
Why Join Skillshare?
Take award-winning Skillshare Original Classes
Each class has short lessons, hands-on projects
Your membership supports Skillshare teachers
Learn From Anywhere
Take classes on the go with the Skillshare app. Stream or download to watch on the plane, the subway, or wherever you learn best.