Transcripts
1. Introduction: Welcome to this class, where we're going to
learn to paint dogs in this beautiful, loose style. We're going to paint two
models, Lily and Marco. That will let us paint both a hairy and smooth coated dog. For those that would like to. I hope you then go on
and use the techniques that we've learned to
paint your own dog. Don't worry if this all
sounds a bit daunting. After the main doggy subjects, there's an extra lesson for you that will help
you to achieve this. I'll show you some
examples of how I tackle other breed types and how to get the best photo and how to
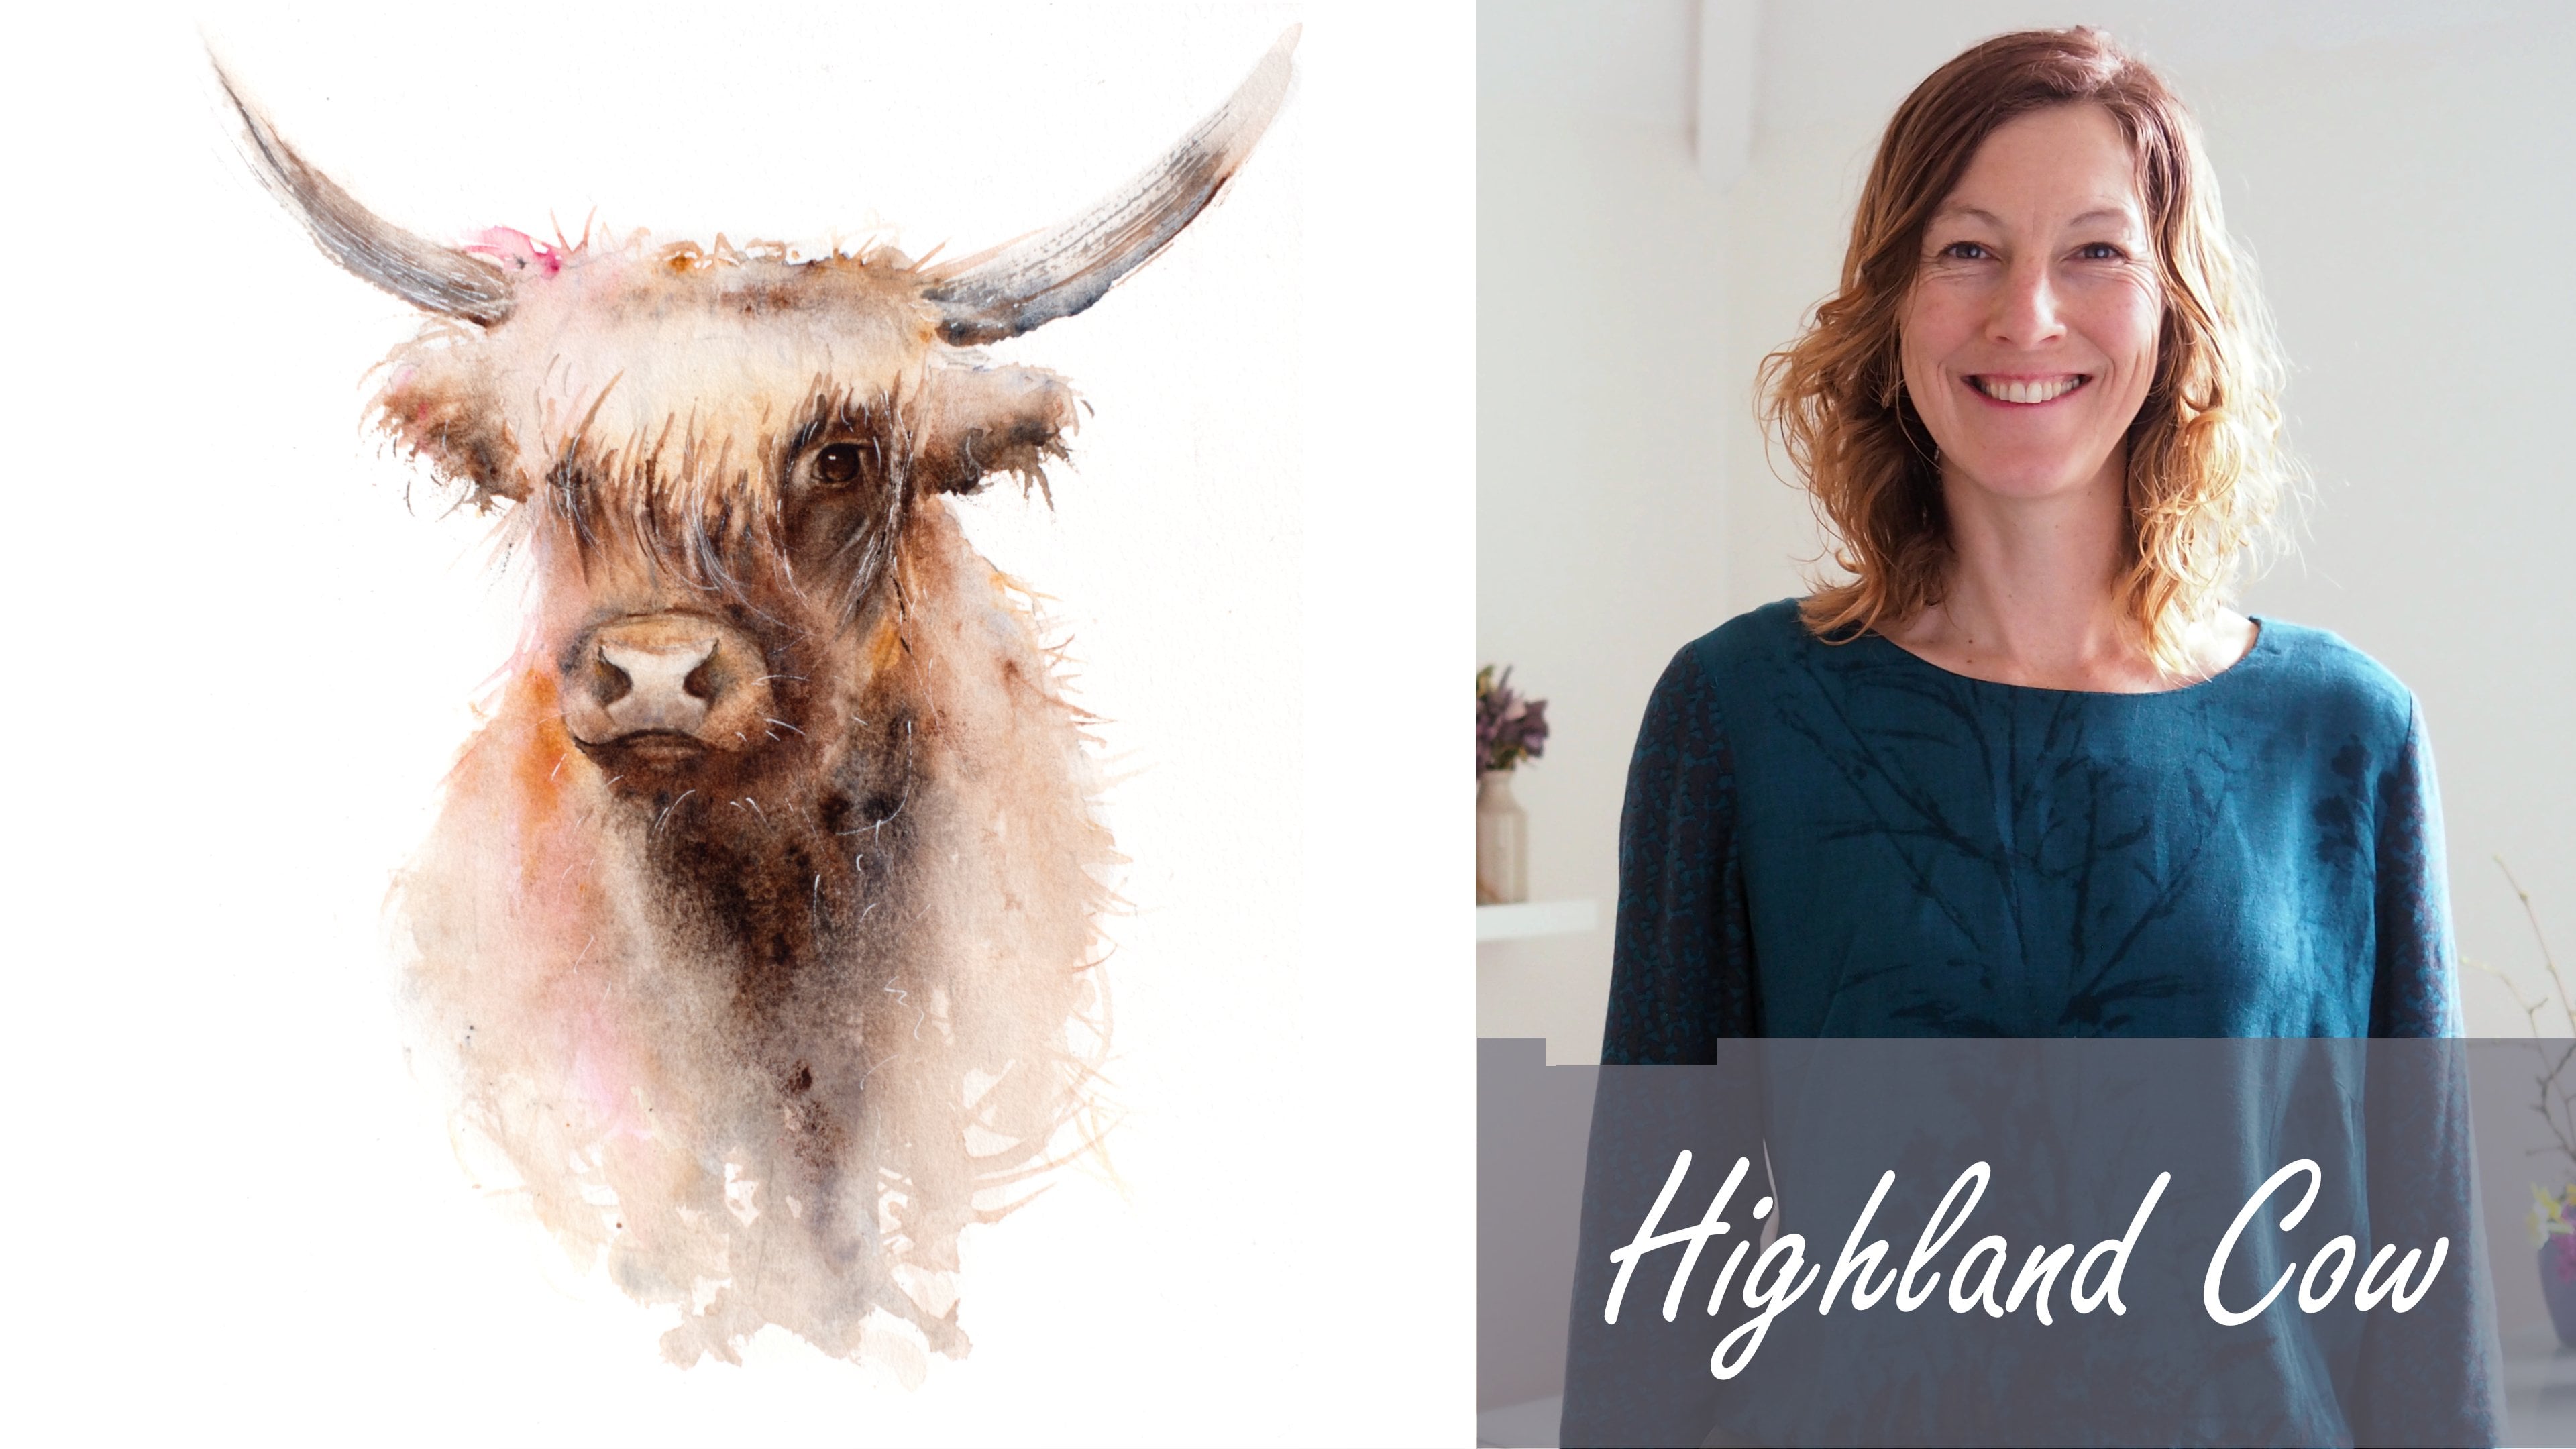
greet some your workout. I'm Jane Davis. I live, paint, teach and walk my
lovely spaniels in the beautiful South Downs
National Park, England. Over the last 15 years, I've taught myself the
free flow technique that you see today. Not having been to art school, finding my own way has been
fun and sometimes daunting, but it has allowed me to
develop my own style. This has led me to
teach the others, either on a one-to-one
basis or as part of a group in a wonderful studio in the heart of the South Downs. Also run a successful
commission-based business, painting pet portraits and wildlife art in my
own homes, GDP. In all my classes, you will follow
along in real-time. I can guide you to
keeping your work loose and fresh
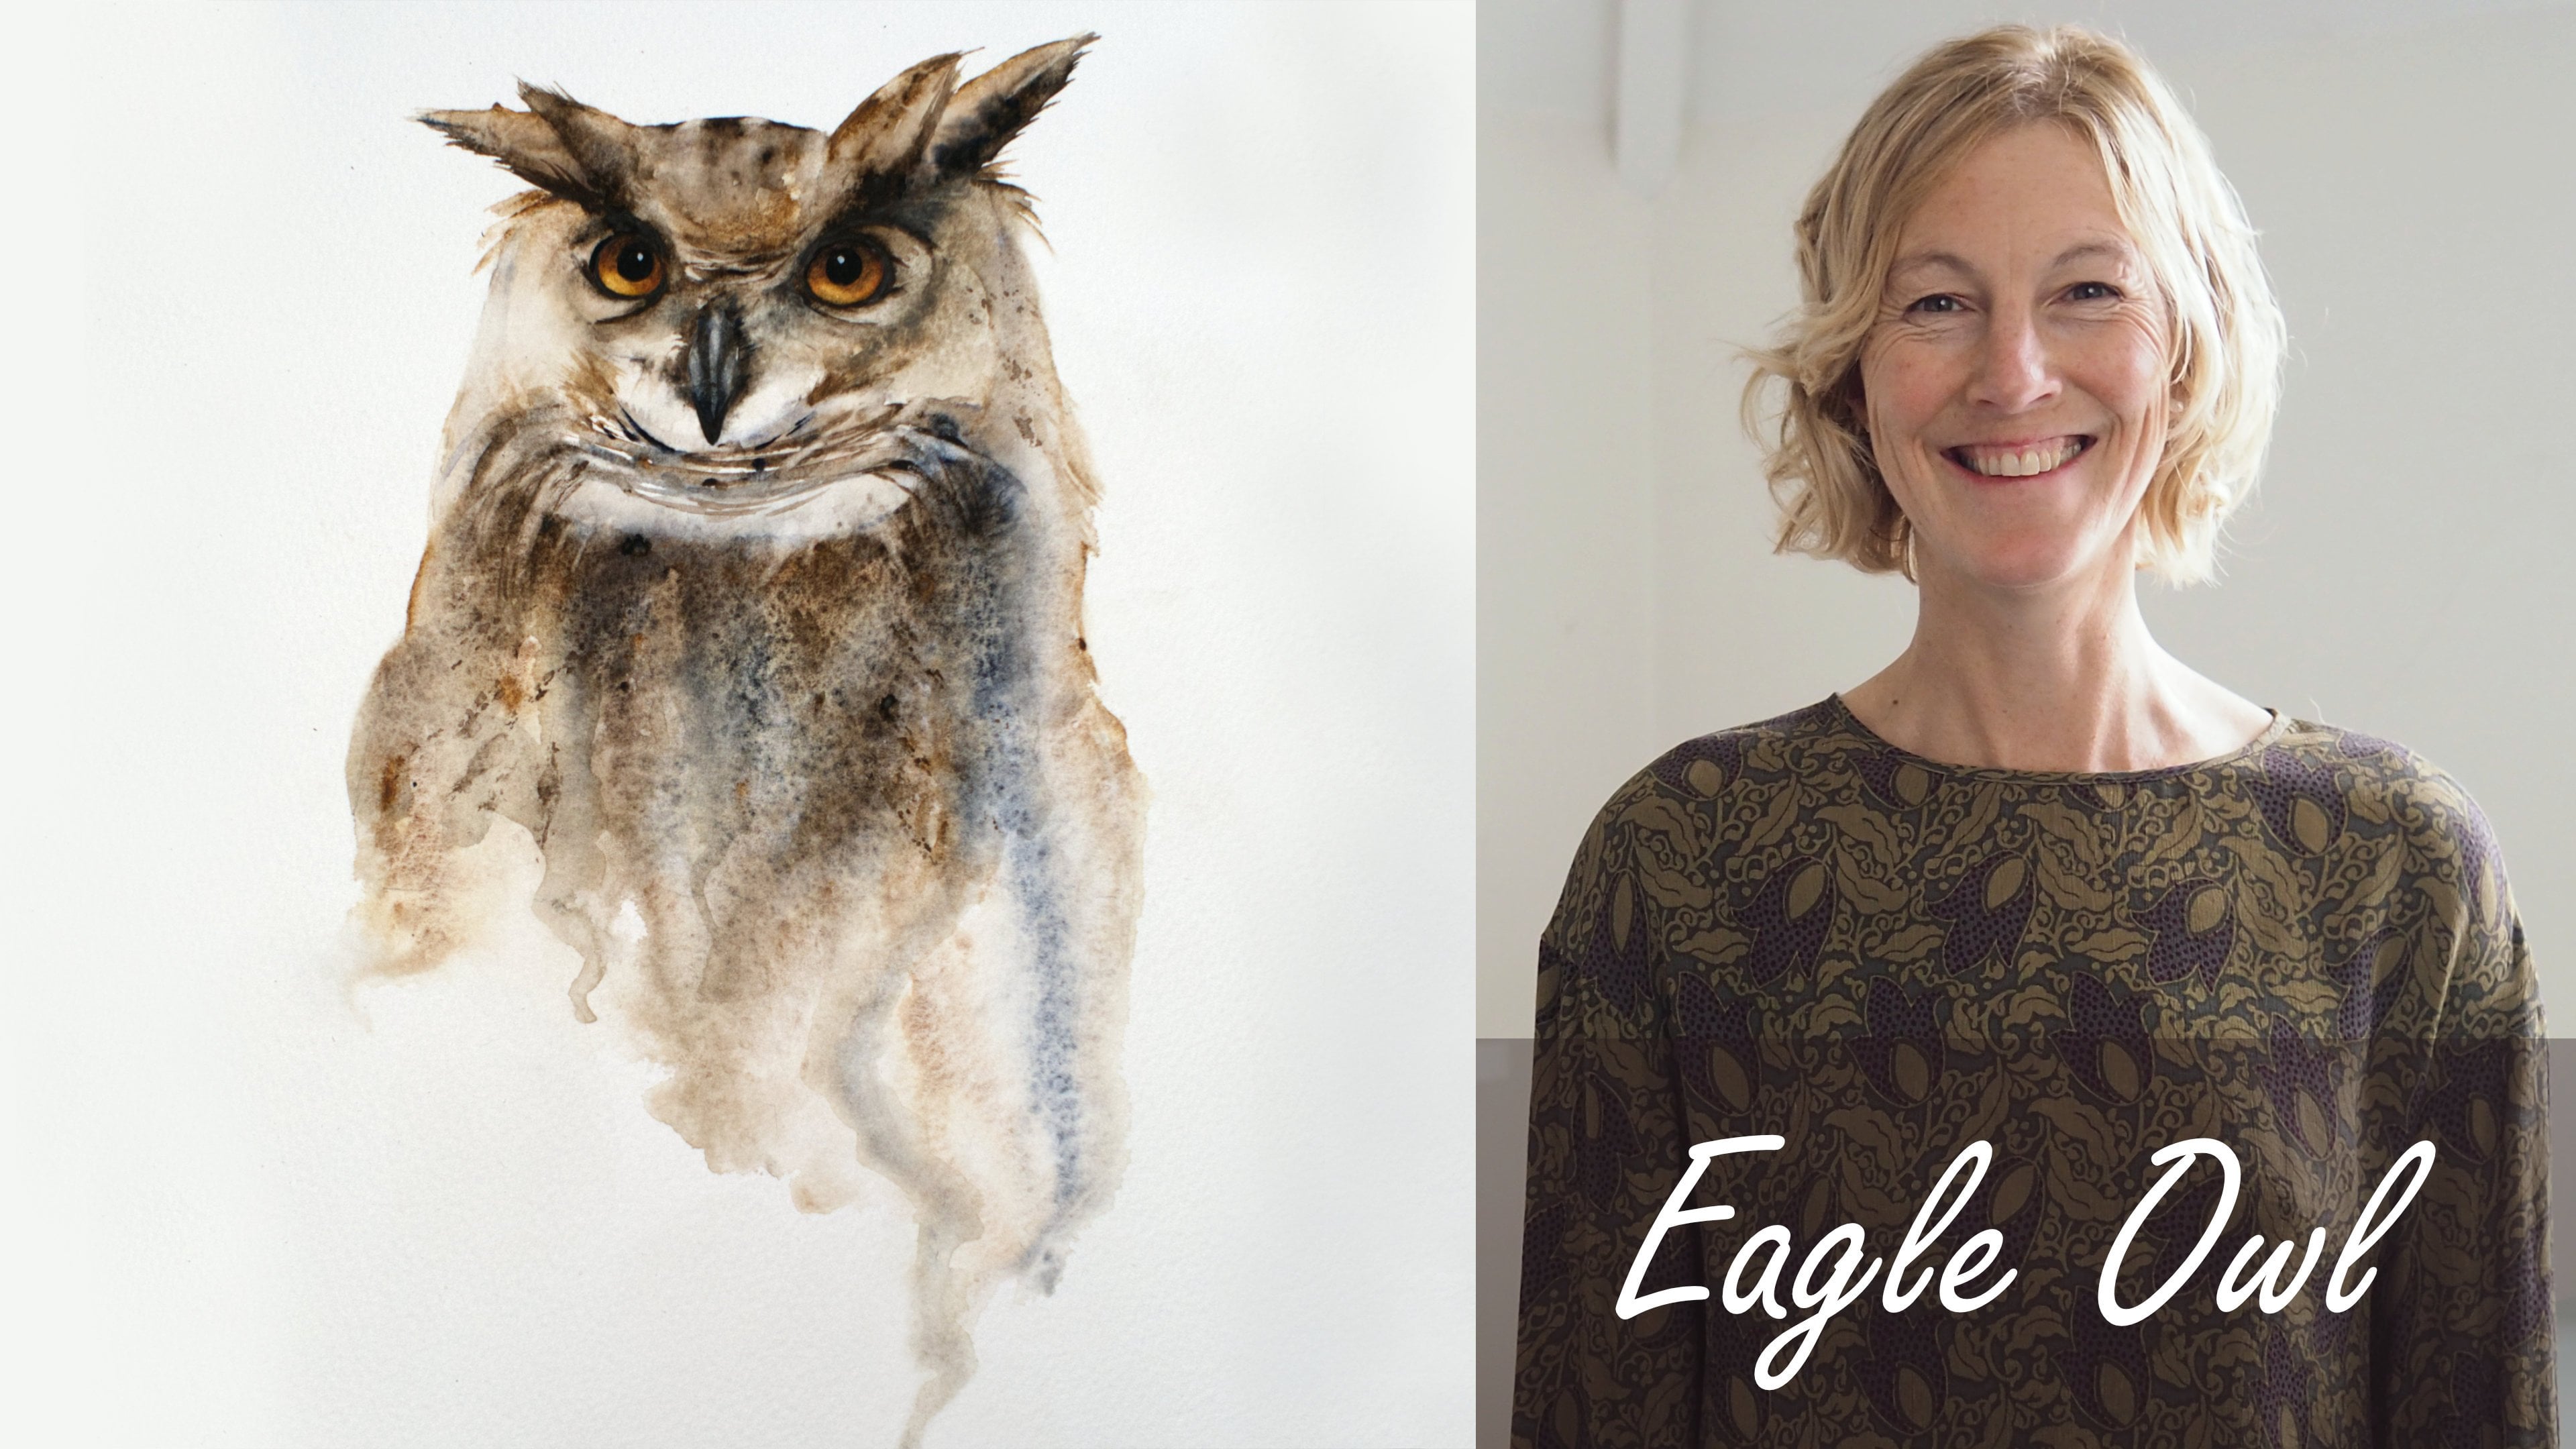
without over fasting. I have over 20 classes
available on Skillshare. Now, if you're
just starting out, my three beginner
classes will guide you. Then you'll find over
20 masterclasses covering a wide range
of beautiful subjects. In each one, I shared the techniques that I use in
my own professional work. We have a lot of fun together and you'll gain the
understanding and confidence to
incorporate everything you learned into your own work. Plus our share a few of my tips and tricks
along the way too. I provided you with two beautiful reference photos of the modal dogs along
with their templates. Templates give you a
stress-free drawing so you can just concentrate
on the painting. I'll be demonstrating that simply placing paint
onto wet paper, you're achieved this beautiful, light-filled portrait
without too much fussing. I'll also show you how to
create some beautiful eyes using two layers which
will capture your dogs. All important character. Of course, our share many of my professional tips,
tricks and usings. As we work our way
through these two dogs. This is going to be an
amazing class for you. If you'd like to learn more
about me, all my work, please pop over to my website at Jane Davis watercolors.co.UK. This can be found
on my profile page, along with links to my
Instagram and Facebook pages. I'm very active on my
social media pages. I love sharing my art, especially on stories
with many ideas, works in progress and
tales of student life. I really hope you will share all your paintings on the
projects and resources pages. As I love senior most PCs. And don't forget,
I'm here to help if you get stuck or
have any questions. I want you to experience
that buzz of painting in his liberating wet on
wet, loose style. So come and join me.
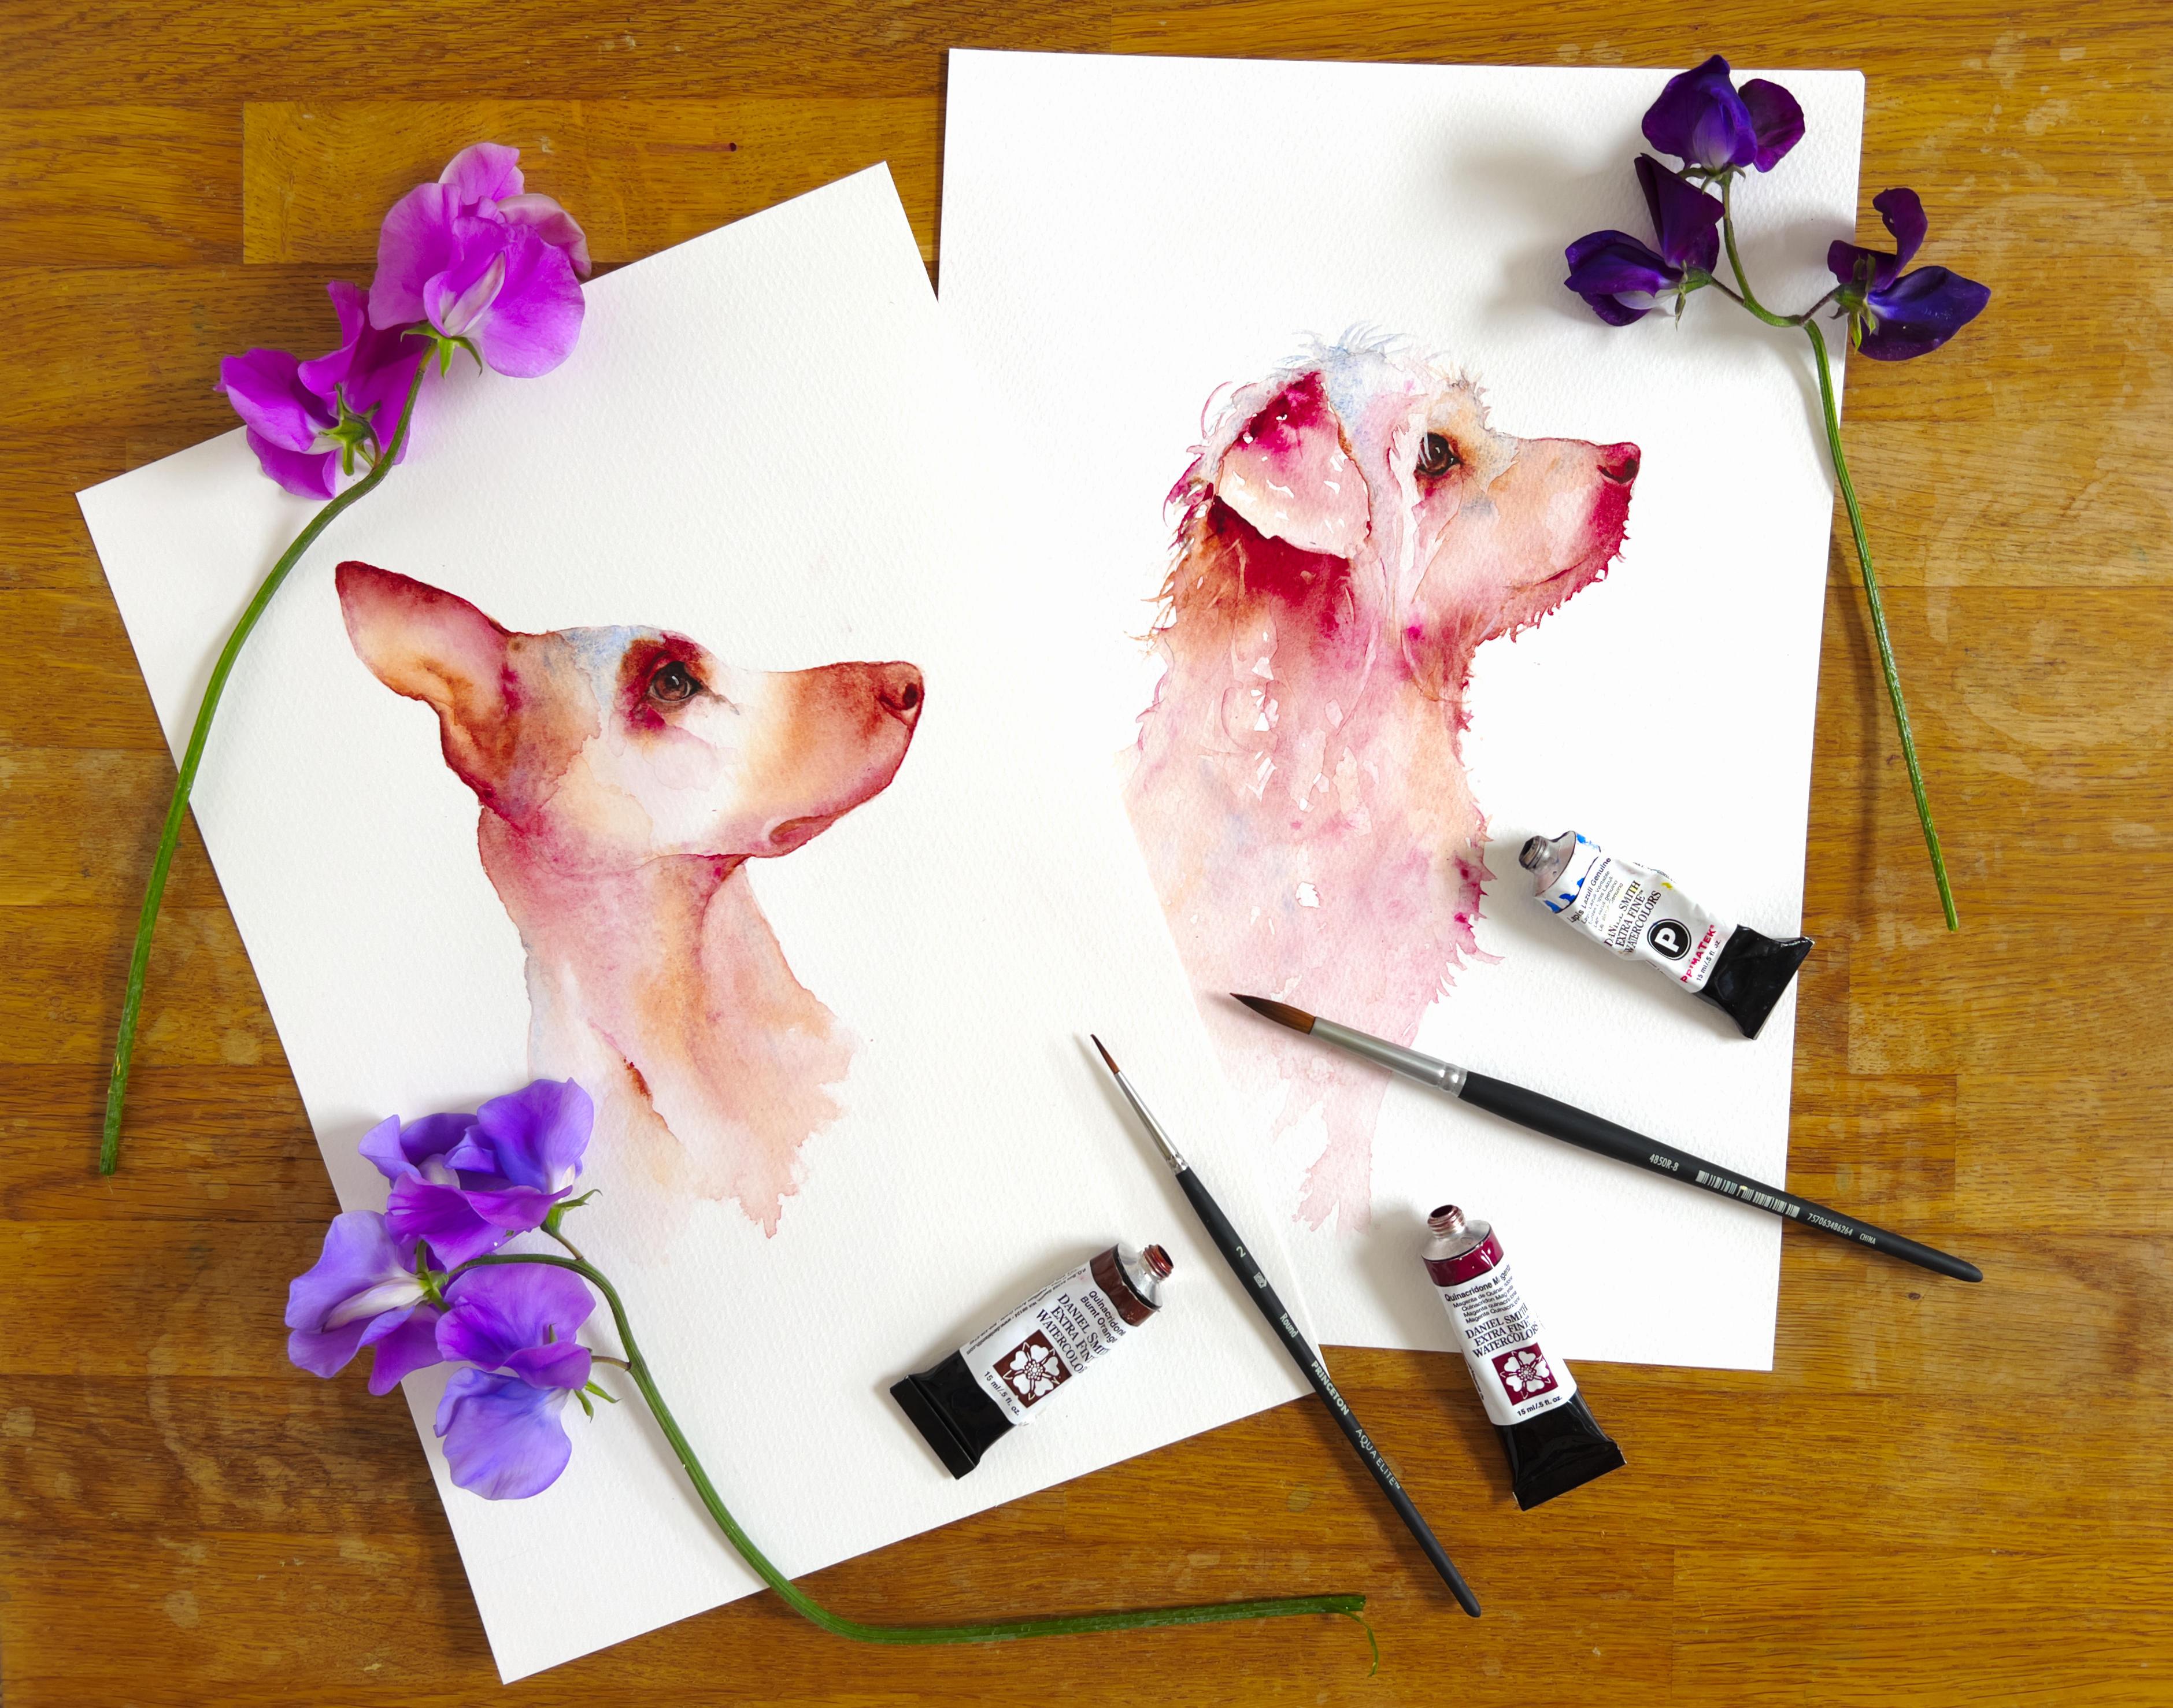
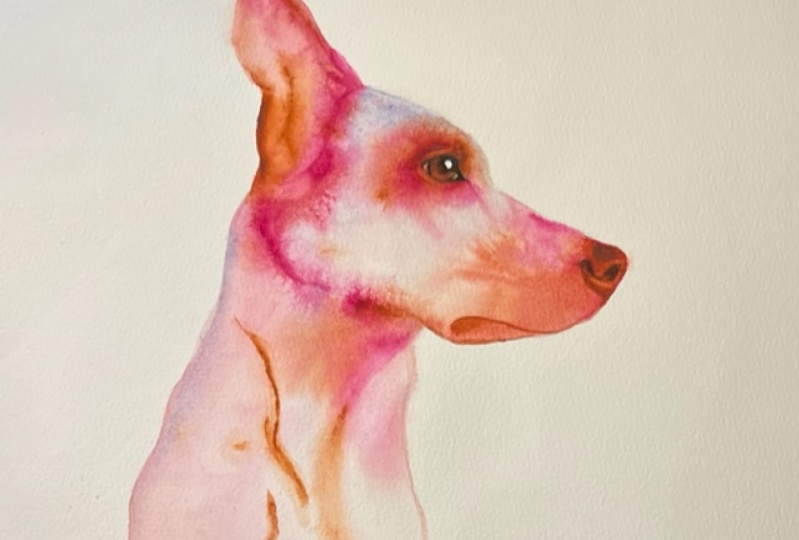
2. Smooth Dog Materials: So welcome along to this
rather exciting class. It's, it's been really fun to
put together this for you. So yeah, I hope you're
going to enjoy it. So before I start
waffling to let let me run through all the
materials I'm using today. So I'm going to start
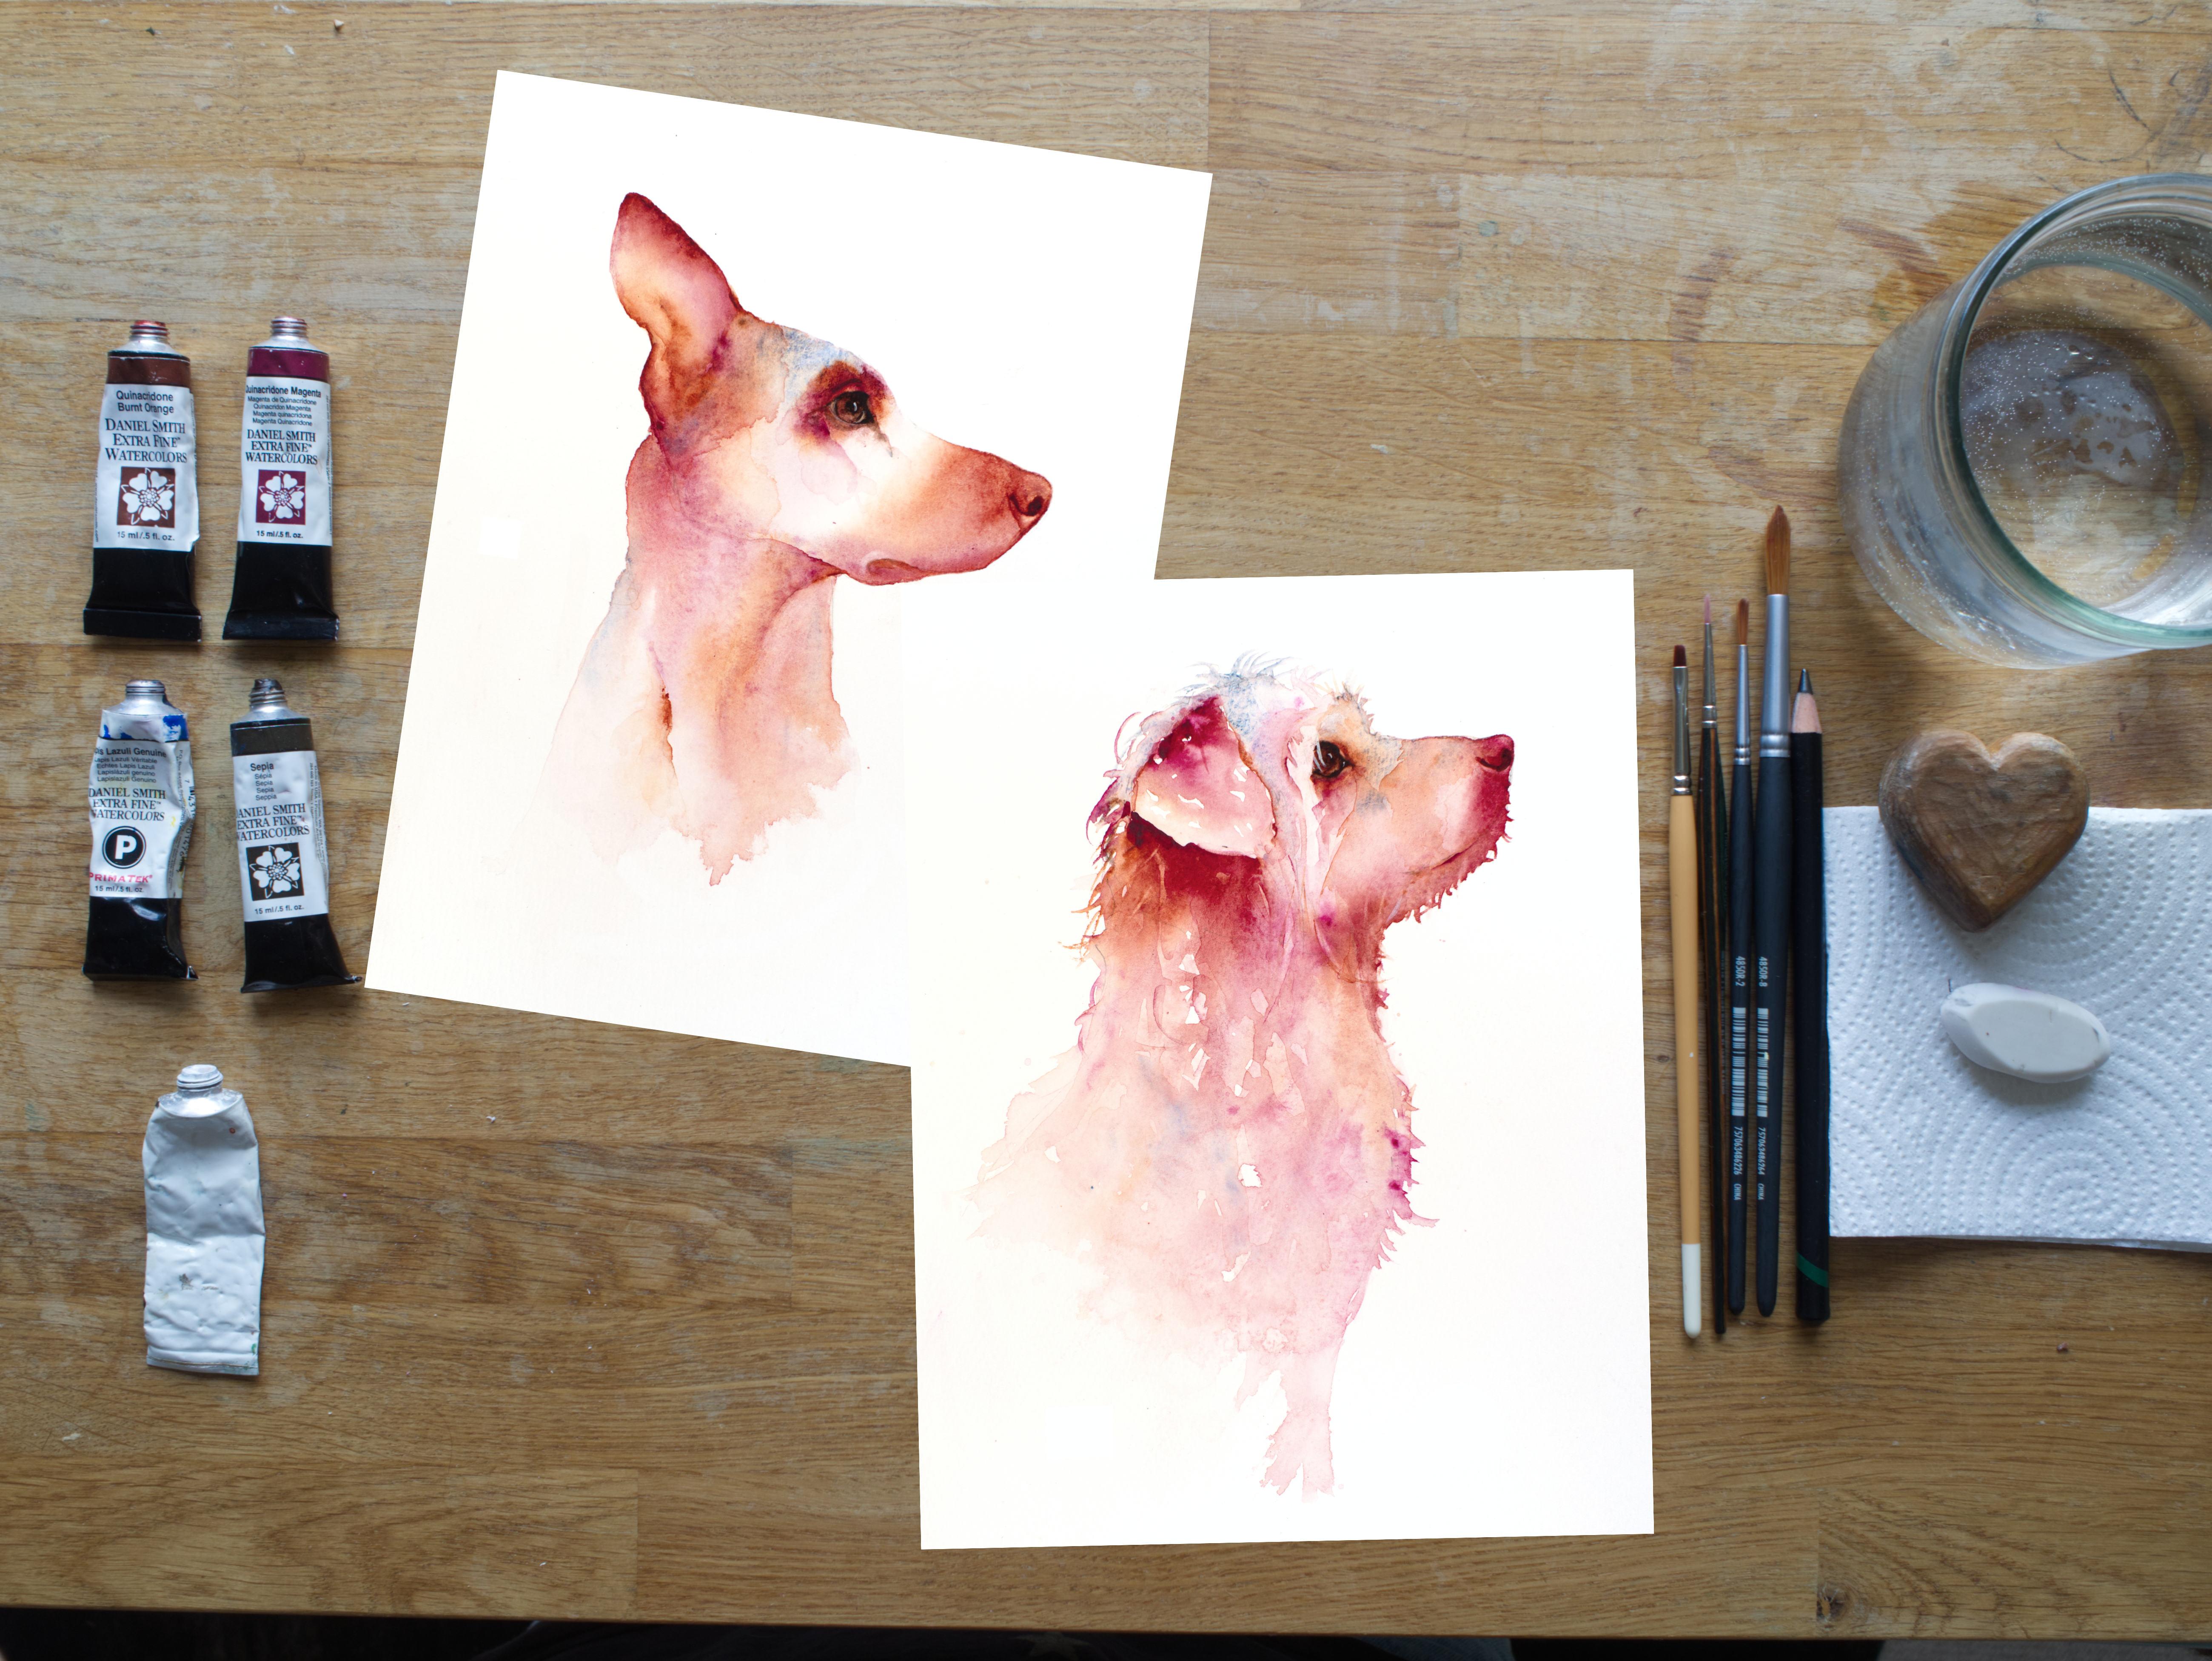
with my paints. I've got collection
of Daniel Smith's. Quinacridone, orange. Burnt orange, quinacridone,
burnt orange, quinacridone, magenta, lop-sided lazurite, genuine CPA, and a little bit
of white gouache. Now I tend to use the
orange and the magenta, mainly little bit elapse eyes, you can see little
hints of blue. Better than my main two. Cp is wonderful. To get those really strong. Detailing around the eye. I like CPU. It's good. When I pop it onto wet paper, it doesn't move too much
a little with control. So if you haven't got a CPAs, it's well worth
investing in one BP. Haven't got one. A dark brown will
be absolutely fine. Now I appreciate you
might not have these. You might not like the
colors I've chosen. So don't feel you have
to stick to these. This portrait will
work with any color, any three color combinations. Obviously, this isn't
a natural colored dog, as you can, as you can see. So don't feel tied to those. You may be painting this. You may be going on to
paint your own dog and you want to pop it into a
little room or something, can use a color combination
you particularly like so There's a blue, your blue, we would tie in very
well with that room, then use that, or maybe you're doing this for a friend and
she has got a favorite color. So I think those
examples are endless. Don't, don't panic if the, if you haven't got these
colors and you're wanting to paint it, right? My paper is blocking food
and it's a £140 naught. And it has been stretched. Now if you can't be bothered to stretch it or you
haven't got time, then it doesn't matter. I've done lots of examples
and lots of practice. Pts, some offset in the
garden is all being on unstretched paper and they
turned out absolutely fine. And in some ways where
the paper has buckled, it's the paper, the paint to run and lift some unusual marks. So it's, it's actually quite, it's actually quite
nice and it's a little bit more freeing
sometimes, isn't it? Just to paint on a
piece of paper out and painful than waiting
for a stretched piece. But I did stretch it
because I was just gave me a little bit more confidence than when I came to
paint it and teach it. So it has been stretched. We've got a little pot of water. I've got the hop size me here, but it's not needed
for this class. It's a hairy dog class. I've got a paper towel, rubber, I've got my pencil, I've got my brushes, which I will pick up. I can run through them. So I've got a I've got
a number eight round. Number two. That's for doing small
details like the nose. Just, just sometimes
you feel like you have a little bit more control
with the number two and say, it's not a big painting
as you can see my hand. So if you want upsides this then obviously you've got besides your brushes, I have got another note
That's for doing the eyes. And then I've got my trusty
little eradicated brush. And if you haven't got one
of these ys are amazing. I'm just takes out light
really beautifully. Particularly, particularly good for the hairy dog as well. So that down. I've also got my template. Then that can be, that can
be found in the projects and resources pages along with a list of all of
these materials. So it's all there for you. And this is a printable PDF. So if you're feeling a bit overwhelmed with having to draw, draw her out, don't feel the template is cheating is just kick this about painting. We're not more snow
during exercise. So again, if you're not
confident, use a template. I I have got a
hairdryer beside me. It's not not
necessarily helpful. Probably that's not
very helpful for you. But I think it's
nice to allow these, these little dogs to
dry on their own. We're relying on a
lot of color just to blend and just draw in its own time and leave
us a nice patterns. It's just helpful occasionally just the things begin to join. You want to move on the eye. You might be waiting for
the layers to dry and you, Jessie, it's going
off in a hairdryers. Sometimes quite handy
to speed the process. But if you haven't got one, it might actually be
helpful for you not to have one because it's always
tempting, isn't it? To width over hairdryer
and you're like, Oh, I wish I hadn't done that. So I'm, I'm looking
around Sufism, Elsa think I've explained, I think I've told you
all of the materials, so I think we ought to sketch her out and
get painting her.
3. Smooth Dog Sketching Out: Okay, now I've already
sketched out the very beautiful lilly
using the template. Now if you've
joined me hoping to do your own dog portrait, I would suggest making these two dogs really
nice and simple. Don't worry too much
about the drawing. Because I'd like
you to be familiar with the technique of
putting this color down. But equally, if
you're feeling brave, you can either hand or her, or you can use a technique that I go through in
the gridding out. But this class is important. I have used digital template that I provided and that's all in the projects and
resources pages. Now, the thing with going
round of templates, you can end up with
some rounded edges. So he had a UTI template. Once you taking away, Take your time going round the edges disk because it
can leave you with a blunt, sort of rather looking outline. And especially with
a smooth coated dog, you're really relying on these lovely shapes
that we've managed to take our time with the taking photos and getting
the right dog model, etc. So you need to really
make, take your time, get this lovely and
crisp and how you, you're happy with it. It might even be a K2, draw it, step away and you come back, have a look at it
again with fresh eyes. Because I can't
emphasize enough how important the outline is. I say, especially with a
smooth coated dog because this technique really relies on that outline and it's
just we're adding colors. So there's not going
to be a lot of definition in this color, it comes from your outline. So say Take your time. Again, make sure your
eyes in the right place because that's obviously going
to be a rural focal point. So get that spot on. And I would suggest
you can see she's got some lovely
sort of eye makeup. Include that I make up in your drawing if
that makes sense. So that includes the dark room. And again, little
bit on the nose. Just, you can just
sketch out this. Just a little mouth crease. I've sketched this out
because that's a would be sectioning certain
areas off and there's a nice line that runs from her. Just this one here. Because suggest again, just
gently put that in again, no heavy pencil marks because ideally you want built
above those out. I'm might've gone a bit heavy. Just see you can
see what I'm doing. Is there anything else
I need to mention? Looking at her, I'm looking at the reference photo.
I don't think so. I can't emphasize enough
how important it is at this stage to get
the drawing right. Then we can get on
with the fun bit and get some paint down.
4. Smooth Dog Ear: Let's pick up your bigger brush. And really we're
only going to use the magenta and the
orange. Mainly. Obviously we're going
to use a bit of blue, but it's the state. These are the two main colors. So get your brush nice and wet. And wet the inside of the year. Just the year. And again, we've taken the time
to go around these. Make sure your silhouettes
lovely and neat. So make sure you stay within
the nice silhouette as well, because it's a bit
annoying when you've taken the time to get it
right and then you go out it or you drop a drip. It's my favorite
technique, isn't it? So I get a lovely and wet so
you can see not paddling. You don't want to
send your puddles, but you want that
paper nice and wet, so it's really good
and saturated. Then we've got two colors. Whatever you fancy,
maybe a bit of both. And we're just going to
sum up skewing a painting. We're just going to double that along the edge and
say take your time, get it nice and white. And you'll be amazed
with this technique. We're not going to put
a lot of color down. We're really relying
on just a hint and it keeps it very magical
and loose and light. So be patient if it
doesn't look like enough. You've added a
little bit of water, just added a bit more there, just to encourage
it and you'll be surprised how much
it, it does move. And I'm going to
add a little bit, probably the orange,
but a little bit She's got quite a dark
area here, hasn't she? Add a little bit there? And
we're just going to allow that to work its magic
and not do it anymore. She says with some confidence. Because we've got another layer. We can just add little
bits and pieces, but I really want to keep this beautiful, loose and light. And by, just by not
adding so much color, we will hopefully achieve that. So that is your ear. So you just need to let
that completely dry. Again, you can use a hairdryer. I want it starts
to go a bit tacky but but don't do
it while it's wet. Definitely at this
stage of dryness because you're because we're
allowing that to move. You can put the hairdryer, you're just push it all around and places you don't
want it to go. So let me try to be patient. I know it's hard, but just take a step away and
gametes have come ti, just go and do something for
five-minutes and let it dry.
5. Smooth Dog First Layer: Isn't it amazing how they, how that changes is that
dries and how it moves. And it has pretty much
filled up that whole ear. So it just goes to
show you don't need a lot and just allow the, allow it the time to do it. And now we've got the
one little part done. Partly why I like doing an EFS is you've got a little bit done. You can have broken
the back of it. And it feels less scary and wants a little bit
it's done, doesn't it? Okay, so pick up
your bigger brush again and we're going
to wet their head down. We're gonna go around the eye
and we're going to follow this jaw line to all
needs to be wet, so don't let don't leave any. It'll dry patches. You can do. If you duck your
head up and down, it'll say bob your
head up and down. You can see if there's
any dry patches? Usually go around. I
first, I was just walking. I know it's nice and wet. And again, go really carefully. But to right up to
the ear and if any of the color leaks from the ear into this
as absolutely fine, we're going to wet that
down in a minute anyway. Not quite it. Say Take your time. No. No hurry. This
wetting down stage. You could spend as
long as you like, so make sure you
got it all nice. Right around the nose. So pulling those lines, I would generally say people don't have the paper wet enough. I mean, you may he may be
you might be an outlier. You may have it really
wet, but generally, people don't seem
to wet the paper as much as it will make it a lot harder for the paint to then move if your
paper is wet enough. So an equally the
brush actually, if your brush is very dry, when you apply the paint, you'll find the paint
won't move as much. So I'll just pause there for a minute and I
thought I'd just drop to splurge or water. I haven't. Okay. If you have taken
your time wetting it down, just say bob your head up, make sure the parts you started
with answers aren't into dry summer here in
the UK at the moment, it's quite warm in the studio. So I'm gonna just re-wet that. I see All that. All my
edges are nice and neat. I gotta pick up my
magenta and my orange. I'm going to start on the nose. I give it, give a little
bit of a squeeze to talk that paint right up
the top of the surface. Now taking the excess
moisture off my brush, it's not not too
wet at this stage. We're going to have a
nice, good old Dibble. I'm just going to plunk
it down on the nose. I like to use very technical
terms like plunking. And we're just going to work
our way along the jaw line. I'm not gonna go too
much into the center because I just want
like the year, I just want that
paint to move really. It's very easy to do too much
in you find you've got it, covered it all and
you haven't got any, any white reserved. And I think it's the beauty with this very easy technique
and very simple technique. It's just so nice and fresh. And if you put too much down, you find you've lost that. So just try to relax, be loose. And we're going to discontinue. We're not going to
worry about colors or any of her lovely shadow. She's got to almost ignore that. Just look at the
outline. One up to here. Are going to try to resist
adding too much color. Just want to point it out and see how much that he's moving. Sure. That's nice and
neat round there. I'm gay numb. Like to get a little bit nearer
to that because I can see my outlines a bit
ragged D, but equally, you don't want to see
the top of my head, so I might just
tidy that up just as it as it starts to dry, but that's that's me. So make sure you note
outlines and nice and neat. I'm going to pick
up the left thigh. Squeeze. I'm going to
focus a little bit of the top of the head and
just again allow that to move down and it will be
here and squint your eyes. I think that's
looking really nice. I can see that we're going to run some more paint
down in a minute. But I think at the moment
that's looking really nice. A little bit heavier here. Okay, clean your brush, you got your water's. Your brush is nice and clean. And we're going to touch the edge of this and
this is where it all starts to run and
we're going to run down. But you just have to find
some sort of natural lines. And there's a nice, nice long natural line that
runs down here, doesn't it? When that down for a minute, you can see obviously
the paint has now that's sucked it down to
this area here, and we're going to lose some of that strength we put
down on the jaw line. So we're just gonna go back and just tap in some more color. And if you squint, you can see where the
darker areas are. Just very gently, just
everything's loose. Just tapping a little
bit more color. And if you find, I have had this couple of times, people ask me if you find it little areas and starting
to draw on you and you still wanting to
work as long as it's all dry or dry or wet. As long as it's all wet, you can just tap a little
bit more water in there. It just gives you
a bit more time if you're struggling
with it drawing on you. Yeah. Makes sure it's everything
is lovely and wet still. You'll find dm. Some odd things happening. One parts drawing, one
parts wet to make sure it's all nice and lovely. She's looking good. I'm going to continue now just to pull
some of that color. So it's nice clean brush. And we're just going to
run that down again. I might leave tiny
little white line. You see where there's
a nice arc there. Again, make sure
these shapes are loving your foreknown
blobby shapes. Okay, I'm going to
pop a little bit of blue on the back here. So sometimes if you're using slightly different colors
and mean, just try. It's lovely to stand if you have the confidence or the
ability to stand, that's really nice because you can get away from your work a little bit on DC at
school, a little bit there. Um, you can, you can kinda see where you think
colors may be helpful to beef up my
kinda makes sense. So try to be guided by your instinctively
think something needs to go there and then pop it
there and put a little bit of a bet on top of the blue, the orange, and making
it a little bit green. I think she's looking good. Of course, you could do this hundreds and hundreds of times. Every single one will
be slightly different, but that's the, that's
the joy of watercolor. Just going to fill that in. I'm not sure if I
like that in there. You can do with a
spare cleaner piece of kitchen roll now, it's just a little light. If you've done that hummingbird, he's not a dissimilar
sort of technique, just going to pull
some of that and dry. See how again, that's, that's
pulling that color down. Just we end up with a lovely
sort of loose disappearing, sort of Lost and Found edges. And that's just done
by just pulling. Really. I like sometimes you
just have a little look, see how it's going. So you have the lines are following how the,
how it's drying, how you've watercolor
can be a little bit of go with how it's going to go with the flow of go with
what you see in front of you. I know that's not
always that helpful, but she's looking nice. I'm pleased with that. I don't
want to touch it anymore, but what I do need to do is I'm going to fill in this ear again. So I'm just going to
re-wet the ear down. Gave carefully
following those lines. My intention with this
OR thinking with this is we hopefully will get
away from that hard line. I don't really want a line here. So if there's something that
needs adjusting our ear, maybe you felt a
little bit wishy washy or something wasn't
strong enough. You can add a little
bit of color. Now, I'm not going to do too much because I like
what I've got there. But in theory you can
add a little bit more. But a little bit
of strength here. Just because he's got a nice, if you squint your eyes
is a really dark area because the ear join and that
will hopefully just that will soften any line that's
naturally a dry line that we would've created
by separating those two. There is always if
I section areas of a will generally re-wet them
so they all join up again. That really like to
see those joint. But it's really helpful
when you're painting it. It's nice at the
end of this stage to join them up again
by wetting, rewetting. I can see she joined
quite nicely and I say I love how this is
sort of flowed down. I don't want to touch that. I think with this technique, the less you can do the better, because it just relying
on the paint making some nice patterns and
your lovely crisp outline. But what I would do want to go round will be a
bit too wet brush. Number two, just want to
put a little bit of color. I don't want to do too much
of markings necessarily, but I do want to she's obviously
got a lovely eye patch, so we kinda wanna
get some of that in, but I'm not gonna get too
hung up on the shape of it. But this is just starting
to dry or drying. It's got a nice tacky stage. My hopefully my paint
shouldn't move as much. So that's a lovely
way to control. Way how quickly
your paint flows. If you just hang on a little
minute and let things dry, you'll find hardly moving. So I'm just tapping. I can oh, I could almost
get that shaping sort of correctly because that's just
giving me a little bit of blood or blended edge. I'm flicking my eyes
back and forth. You don't want to get
your brush to wet either. Because again, if adding too
much water at this stage, push pigment around again. So you want your brush nice and dry and you pay not
too wet either. If you're working on pans,
make sure they're quiet. You're picking up the
color like dry amount. Trying to see from where I am. Little bit of too far away. Really. Just going to say I'm just
trying to make that patch. And this is sometimes just
something that's pleasing. That's looking nice. Say Her lovely makeup will be
done mainly inside the eye. So that was important to
include that in the eye. I like that. I think it's looking nice. I just want to like I could
still see you that joined. Just going to have another
drip going on here. B stage. I could quite a dark area. Dennis, if I squint,
I can see a kind of a using both colors here. Same time. I can see there's a
line there, isn't it? I don't want to do
too much detail, just want I just want this
to be so lovely and light. Pop a little bit here. I'm just going to
pop that down and then pick up my bigger brush. Although I don't want
to get too carried away we doing shadows, but there is this lovely
light here she's got. So that will just very gently taking some excess
color off my brush. My brush is just falling on
the paper but no pressure. Very carefully. Again, everything is very light. I just wanted to take
a tiny hint out too, so I can kind of get that. All lines. It's a lovely She's
got some lovely aligned. I'm going to take them
to get too much out. So say, I like the eye at this stage because
it's starting to dry. I can get a little bit of detail in just by just
tapping too much. And so you don't get it very easy to put too
much paint on this one. I'm on the stars had
to go very, very easy. I like how she's
has his drawing, so I've just stepped
away a little bit so I can see a bit little
bit more on top of her. I'm going to leave her as she
is she is and let her dry. Because I want to keep this
lovely white reserved. And if I keep fiddling,
what happened? It start disappearing. So the minute you look, you look at your
piece and think, oh, that's looking quite nice, as nice and fresh. And try to resist over fiddling. So I'm just going to see
some water sitting here. Just gently second and
write down your brush, let that completely dry. And then we can do the AI.
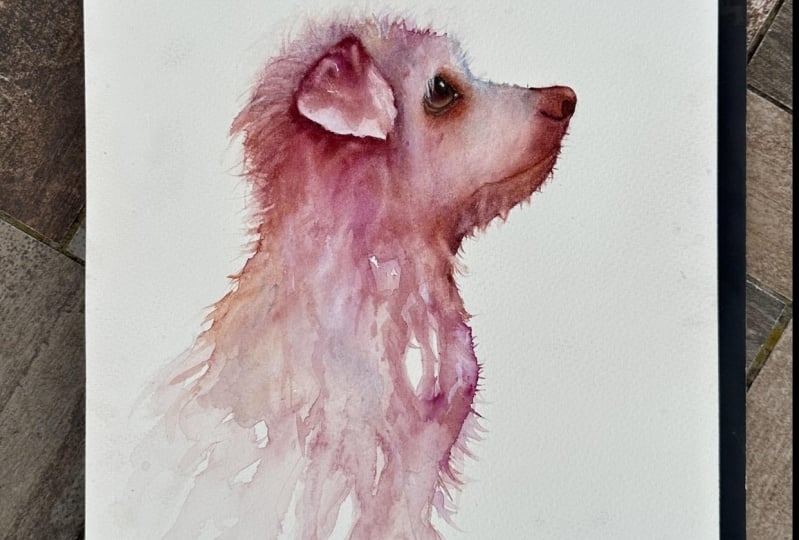
6. Smooth Dog Eye: She dried beautifully and
it still amazes me how little you need to do and how gentle you can be and still create something
so beautiful. So it's a really good, It's pretty good learning
experience for me just doing this so simply. And you can see by
getting a good outline, we've almost got
ourselves a dog. We just need to do the eye. And obviously we're
gonna do it a little bit of minor detailing. But when you step back, nearly a little dog, ****. Yeah. I'm following a
waffle on it anymore, but make sure it's not
being dry before you start with the eye because it's
very easy to me when you're doing the little details
and if anything, it's still a bit wet specially
two bits that are set. I can knows it's very
easy to pull out and I'm painting a bit
disappointing light. Okay? I'm not normally a
great one for mixing, but I really wanted to keep this color palette nice and simple. I didn't want to
start adding lots of different browns in, so we can obviously
make them quite easily. So I've got just a
little tile here. Just a little towel. What we're gonna do say, obviously depends
if you may have some lovely browns that
you've got, you can use. So obviously use those if you're familiar with
some browns you've got, but I'm going to do
a bit of mixing. Forgotten Vitamix, sepia. I've got a bit of
the pink obviously. Unless you've got
exactly the same color, they're all going to be slightly different how they mix better, get a nice shade of brown
and I'm sure you're equally knowledgeable
on how to mix those up. So say I'm not a great mixer, so I'm not that familiar
with mixing colors up. I'm gonna get a brown. I like looking quite good. Yeah, that's a nice,
kinda nice, rich color, isn't she's got some lovely
sort of CPOE, obviously. Some burnt sienna
color that will be lovely if you've
got a burnt sienna, I'll probably go
for that butter. Say, I'm trying to, trying to keep my paints to a minimum on this single class. Okay, and what we're
going to do is you can see I've got that
pupil line there, so it's worth you
haven't sketched that in just getting that pupil
line because you can see she's got a lovely makeup
that goes around Hawaii, which we will include in the
eye and also the eyeball. So make sure you've
got the eyeball kind of drawn in as well. And you will see is a
little bit here isn't a light pencil down. Town cons I need to touch me. Don't need to touch my paper like a security blanket
as I normally do. You see those a bit messy
you don't make but that way. Okay. Right. I'm just going to pull
my balls of water. Just going to wet that. Now it's got a pink
below the pink in. It. Doesn't really matter. I'm just going to wet
the eyeball and again, make sure you stay
within the lines. Try not to go outside. I'm gonna do my best I can
for my little distance I am. Okay. And then you'd literally just going
to tap that coloring. Nothing fancy. Just tap it in. Make sure you nicely edges. Make sure you're
saying, make sure you stay within the eyeball. It's very easy to woman
started to do it here. When you wet, you stop, you almost make the
eyeball sort of fall out of the socket.
So we see this. This is the socket here. And that's it. I bought. It's very easy to overlay the, I bought over the
socket and new. Probably one of those things
I would do quite often. I might not write about it. And it was a little, little, tiny little
thing I was doing. As you go along, you
you learn these don't. Okay, It's a nice bit of color there and
we're going to pick up C Piano might actually switches
quite a small painting as they could have made
this a little larger. But just for the sake of how I got my filming set up,
She's a little bit small. So I've got a very dinky
little number not going to do. There's always a
bit of shadowing as well as their makeup, but there's always
a little bit of darkness underneath the eyelid. And that makes a big
difference if you put that in. I'm just going to drop that in. And as it begins to
dry, we're going to, to the, she's got a lovely
dark part to the pupil. We're going to put
that in a minute, but I just need that to let
that dry a little bit more, I think because I've mixed my colors aren't as strong
as they normally are. So used to just mixing lock. Can't get enough color up. Now, I wanted to put more
more strength in there. Again, keep your
brush nice and dry. If you're doing
very detailed bits, we don't want your
paint to move too much. Keep your brush nice and dry in your paint
nice and thick. Vice versa, if you
want it to move. Especially keep your brush nice and wet and your paperwork. But we don't want
too much wetness going on now with the eye. So very carefully in the eyeball will be a
lovely place to be sitting. But I'm not. Go outline that. Lovely dark areas
she's got there. We're going to tiny little bit in the front there and
we're going to get, let the rest of that dry and we'll do another
layer over that. So the best thing really is
to let it dry naturally. You can use a hairdryer over, but again, just be careful, make sure it's just
got that tacky stage, which just the last little
bit to drawing off. And then we can
add the next layer to give it a bit more depth.
7. Smooth Dog Eye Second Layer: Okay, I've done a little bit more mixing there
so you don't have to watch me mixed my colors up. And what we're gonna do, we're going to
rewet the eyeball. I'm going to keep them my little brush because
I just feel I have a little bit more control and try to avoid
doing a nasty drip. Often run I don't know if you
can see it runs along here. Okay. So vary because you've already got
a layer down here. Go very gently, just tap it in. You don't want a
rustle that nicely. You've already got
underneath there. Because you have to tap it in. You quite often find you
end up with a little bit of a bubble of water
and a bowl of water. You don't ideally
don't want that. I've managed to
avoid doing that. But if you have the NDA
little bit of kitchen roll, just a little corner of it and just pop it on top of
the bulb when you'll see the bubble suck up the kitchen roll and then
you've got something that's workable rather than a big
bubble and if you have, they needed the paint
just sits on top. I'm all about
getting the wetness. Just write sine because
it was a bit wishy-washy. I'm going to tap a little
bit more color in there. Again, I'm going to
emphasize along the top, underneath the eye lid. Obviously, we've got
to put that in a very dark makeup on as well. As good as a mini, mini you like something, stop. It's very easy to keep
fiddling around butter. Minute you look away and go. Good. Stop. Okay, so I've got
picked up my sepia for competent now I've gotta get
a cheaper paint in my hand. I'm going to keep a lovely so gloopy and thick. And I'm
going to keep an eye. That's an eye. There's a pond somewhere. I'm going to keep
an eye on this. I just want it and it's
probably little bit too wet and just see if I put it, put that CPU will now
though I've got it quite tacky and quite thick, it will just run a
little bit too much. It will be six seconds between
being a little bit too wet and a little bit too
dry, so it's catching. It is quite good. Now, let's go ahead.
I want to do. You can see when you're
in that reference O2, she's got that nice dark
eye makeup, isn't she? So inside of the eye as well. We know actually
I make up inside. Just going to keep adding
but it don't try not to. When you put the paint down. Obviously only go so far
as they don't keep trying to move the same little
bit of paint around. Add a bit more. Just go over here a little bit. And it runs down to this
corner here doesn't weaken, soften this in the next layer, or the outside of the
eye can be softened against if it looks
like it's stuck on at the moment which you
will do will be rectified. Just want to get that just concentrating on the I read it. It tucks, just goes over, doesn't it just
keeps her I love as a poor your brush back. Look at it and say, it's literally to flicking
your eye back and forth to that reference photo and
getting that shape, just write. Just worth taking the time. Let's bit better, isn't it? That don't want to make it? Because either it sometimes it's nice just to
leave a little bit. So you just put a
little bit of color. That's a sort of make sure that eyeballs
popped back in into the eye rather than sitting
on top of the socket, if that makes sense, Like
I was saying earlier. If I outline the whole lot, it can look a little bit
childish into stock, so I'm just going
to keep it at that, even though you may
have a darker area. If you step away and
look at it and it looks nice to stop somebody, you have to just
be a guide of what looks nice and don't be too
much of a slave to the photo. If you caught something
in the course, next question you like, then excellent, don't just stop. Immediately, stop. So again, that's just wet enough to
put an eyeball in again, you just want it a
little bit tacky. Popular watch off. But not wet. Just going to start in
the middle and move out. And this is where
it always go and quite often go a
little bit freaky. Bear with it. Just tapping these dots in the middle
and kind of workout. You should get something
here. That white. Okay, I think for that, that is about as
much as I can do. So. Pull a little bit
of a light out. So that's where
the dry brush I'm just dragging a little bit out. Just just, just take a little bit out of the light
out and it's quite nice, at least stage it
won't leave such a harsh if you wait too, it's completely dry and
tight. Take it out. You can leave a little
bit of a hard line, but that looks
quite good to meet. Again, you can do a third layer. If you feel you haven't
got enough debts, you're going to let that dry, go back over and tweak. But if it's starting
to dry and it's mind, I can see mine's already
to a critical stage. It's some bits as
beginning to dry it and It's best to let it completely
dry and restart again. I'm not restart, but
just add another layer. Rather than keep
playing with it. You can get, we'll get a
little bit messy quickly. If you're unsure about it. It's best to stop, step away. Go make a cup of tea. Just sometimes you can look
at a subject or a little bit you're working on
so much you almost don't notice what your painting. So, um, yeah, let
that completely dry and we'll we'll finish off the last little
tweaks to it. I'm pleased to have that's
dried because okay. So the last little
bits we need to do, just to quite stark
white at the moment, those little bits
which we've reserved. So I'm gonna do a
tiny little brush. I'm just going to go in
and I'm going to wet it. And just by wetting it, I'm gonna be touching some of those other colors either
side of that white area. And they're just blending.
That this stage. Almost if you can. If your eyes, if you feel your eyes got a little shapes,
you can cheer us. Jenny, Sculpt if need
be unwise to, right? But they said, not a
bad stage to do that. Again, a little bit
the same here as well. Just a little bit too stark. Gupta. A palpable of
water in that saved it. You see how that's
just just soften, didn't, hadn't made it look
a little more natural. Now, again, if this is moved, i've I've managed to take
enough light out of there. I'm quite pleased
with how that's done. But if you're if you feel your
eye color has moved in and you've lost a little bit of light to reach I take out
and the last layer again, you can just very gently
just almost lifting the paint brush on the paper and just
gently wipe it away. The rest of that is
looking alright, um, I'll say, I'm pleased, I
don't want to fiddle anymore. We need to do a little
of white to catch light. But I'm again, as I said, if you felt something
gone a little messy or you didn't feel there was enough strength in
there, you could then, before I would suggest having
done the little white bits, you could rewet that down
again and just tap in a little bit more
strength or a little bit heaviness and
underneath that eyeball, um, but that's, that's
looking alright. So I'm gonna go pick up
my little bit of white, get a nice creamy mixture
going on in here. And light can fall on, on, um, she's got a nice light source, but sometimes light sources can be in different directions. So I tend to ignore where the light source is a lot of
the time I will normally, whichever way the dogs looking, I will put a little
white catch light, which is the catch light
is just a little white dot in the direction she's looking. So she's obviously kind of
looking at it this way. So I'm just going to
put C That got me. I'm just going to put
a little white dot. And that makes all
the difference. That really does make
it come to life. And it's quite a
nice at this stage, although we haven't
finished her. I feel like she's she's
here she's here with us. And any outside, it'll be it's that
can eating green overseas got a little bit
more make-up around here, which will be done
on the next layer. But that's looking, looking
nice at the moment. It looks a little bit stuck on. But that's to be
expected at the moment because we haven't really
soften anything else down. So don't panic if it looks like you've got this
sort of stereo, weird. I it's all part of the process. Make sure that's nice and dry. And then we will do
the last little layer.
8. Smooth Dog Adding Subtle Structure: Okay, so onto the last futile to inquiry bits and say
it's not quite a layer, but it's just going to
put some watery areas of paint down just
to sort of bring up a little bit of
bone structure in the nose and a little
bit of the mouth. At this stage, if faced with more than one of my pet
portraits that take me hours and hours to do this would have been
the first layer and I would just wet and
keep building that. This is slightly different. We're not going to do
something so labor-intensive and I wonder whether
it's lovely, keeps it a lot fresher. So this is, this is going
to be the last little bit. Pick up your big brush. I've just changed my water
because it is nicer workmen, nice freshwater especially with we don't want anything
tainted on this. If you've got a
very colored water, it will give you a color. Although Raphael, week one. So what we're going
to do, I'm going to first probably addressed this. I although I like it, we're gonna put the little
makeup bits around that. So I'm just going to swap brushes, tool,
it's a bit chunky. If a brush feels a bit
chunky or not, write, swap around, have a play with a, something that
feels comfortable. So we're just going to wet
round the I just want to get some that make up a
little bit soft, softened. And also there's a little
line that goes over here. Just very Jenny's is
the wash is very, very weak, so it's not, it's not a lot of color. It's just almost whetting.
And then allowing. Got a little line at
kinda wondering here. Go back to my big brush,
suddenly feels a bit small. She's got a nice
little cheek bone. I'm just using the pink. But you can use whatever which uses the two colors or a
bit of blue if you feel you haven't added enough
blue, just re-wet. If you pop a little
line of color there, you can just re-wet the edge. So all softens down. Back to my little brush again, I'm going to pick up a sepia, just want to get
an eye makeup on. Dry, just a touch now. Proper, which is just a
little bit of a double. Save. Anything I feel like needs just tucking
in a little bit. You can just gently
adjust or she's almost like chiseling and I'm sculpting tiny little bit
more on the edge of the eye. We will take a little
bit of color out. We'll do that in
the next lesson, but there's gonna be a little bit of color
taken out there. But there's a nice thin line that I've just give her a
little bit of character states. Because this painting
is very loosened, minimal, you're gonna
be drawn to the eyes. So it's worth getting the eye and the areas around the eye. Just right. Okay, let's go
and go back down to the nose. We're going to wet the
area where the nose is. Almost. If you've got a lot of
color and the AND or knows, I haven't, but if you have, that can almost be enough. It would just section in
area off and give you a line between the dry and the wet. Mine's a little wishy-washy, so I'm going to use I don't want to use CPT much you
want to any any of this. But from around that, I said I'm gonna go back to my
two colorful colors. I'm just going to put a bit of strength in that underneath. Usually generally
that'll be under the under the nose and the
light will be on the top. I'm going to see she's got that. Just her mouth coming down here. Just see by just putting a
tiny lines in how it makes changes the whole picture in the whole kind of expression. Don't need to do a lot. It's just the tiniest
little marks. And that is probably enough, I say because this is so loose you don't want
nothing needs to be too intense or too obvious. Now I still like that nice
line running down there. So I might do going
keeping more, not adding too much color. Just almost painting that
little V in their wet my brush. I'm just going to
pull and then I can I can then try
and get obviously, you know, we we wetted
that area and we did the face and then we
pulled further down. I can almost forget that
jaw line back in again. I don't want to make
it too obvious, um, and I don't want to put lots
of color underneath that, that jaw line, but
that will be enough, especially from a distance
you're viewing it. Um, it can almost feels
like it's a bit too much, then just, just just wet it. And you can use. Kitchen roll off camera. You can just use a little bit of kitchen roll if you
feel like you've got a little bit too
too much going on, that'll be too much wet. Just soften it with your
fingers. Always great. It's always good to
play around a bit. Again, look at you, look
at your reference photo. I'm gonna keep an eye
on that nose as well. I don't want it to be too
harsh or too sort of lining. So I might even just soften. They're the top edge. Just pull it out again. And can you use your finger? Put the nostril when
in a little minute? Um, it's a locative watching, seeing how things dry, pouncing on it just
at the right time. Again. It's about right actually again, it's a little bit with
the eye getting getting the just the right wetness. So I'm going to try
and get a little bit of strength on there,
the two colors. And just get that Nostoi. Again, we can take some
of the light out in a last little section,
classic lesson. And this is the joy we
doing a profile image. You not having to say today, you're not having to worry
about the nose of angles and it makes it a lot easier. That's why I kind of
follow me on Instagram, the model competition
twice stress high end. Obviously, if you're taking
a picture of your own dog, why I stressed that
it needs to be a profile because it
makes it a lot easier. I'm whispering that one, like it's a secret.
Write that down. There's a nice it's still that nice crease and I know I put it a little bit
of color on there, but I'm just going to that's
a little bit more obvious. So careful, I'm
probably working as I do randomly around the
picture, but just be careful. Now we're going over to the ear. You don't put your
hand on the nose. You can still see me. I'm just gonna put a
little line down there. Very watery amount on my
brushes, hardly anything there. But you can see that's just
giving us a line and we can then soften that
line out if need be. I don't although she's got a very obvious line down there, I don't want to meet
you too strong. I think it's going to make it look a little bit disjointed. So sometimes say you have to look at your
own reference photo or, or make it up, but leave some things out
if you think it doesn't, he's not going to look right. I'm saying this is just a loose sort of
impression of her. Let's see. It's trying to
add the bits that make, make E term give her character, but not, not everything. You don't have to be a
slave to all the detail. I'm just going to see
where her neck comes here. I'm just going to pull this down just a
little bit further. So her ear sits in her body a little
bit more so it's not quite sitting on the edge. Soften that edge down again. Again, almost a mini ease. You think you've
got something new like it's well-worth stopping
and looking at mine. She's obviously got
a patch over here. So what I might do is
we're going to wet roughly where that patches
and I don't want to get to slavery that her colors are, I'm going to put tiny
amount of paint. Don't put the orange in there. I'm literally doubling the two. I'm not being too worried
which color I've picked up. So that should give us just an idea that is a patch
of color which is a tiny, and just the fact that we've
wet something down there, b over two, a watery line. Just like you see how that's
how that's dried now. And you can see
there's a little align the tricky when you're looking at shades and you're
also looking at color, It's just deciding what to pick really, what's
irrelevant, gain. She's got a nice sort
of jaw line here. And again, I'm running into subtle shadows now
more than color, but just add that in. At this stage, you
can keep going on and not make it any better. I'm stepping away
and having a look. This line here is nice. So I might try and get that in. Very similar thing.
We're just going to put everything loose. Just tapping, tapping it
will wind down in there. Clean your brush on the edge and we're just
going to soften that out. Don't, don't, don't write you don't have to run
it all the way up. It does include it all. I think she's looking I
think she's looking nice. I'm only a little bit and
this is always a bit alike. Is this, there's always a lovely curve and I've just lost that a little bit
when I put that in, we did that little triangle. Just going to put that back in. Bank, fill that in. I particularly love
it when horses is just a lovely curve. A lot, lot of it is just shapes that are
pleasing, isn't it? I think once the pencil
marks are rubbed out, I really like her. I think she's she's
come together. Well, we will take a
little bit of light out. I can't see anything obvious at this stage that I can't rectify be taking a
little bit of light out. So I am going to downpours
and we're going to let any of these little
fine layers dry. And then we do the tiny loss
bits are finishing off.
9. Smooth Dog Finishing Off: Okay, to the very
final little bits, I'm going to do a little
bit of rubbing out. So any pencil marks
you might have put on, Rob those out now. But make sure your
painting is really dry. Because that's not good. When you get to write
to the end and you find you're rubbing and
then the paint's still wet. I like this a little
bit. It's kinda reveals and a bit more because you you take out any lines that are
holding them in somehow. So all we're gonna do
now to finish her off completely is we're
just going to take a little bit of color
out here and there not a lot. So let's try and be
methodical and we'll work around the top
of the year first. I'm quite pleased with that. That's worked well,
although she's got a very obvious line that goes round and a little tattoo look. I've put in the reference and the projects
will be referencing. So there's a little
story about her, um, well worth having a read. She's, she's had quite a
journey. She has Walesa. Okay, so there's a little
bit more light here. Again, very gently. Don't take up too much because
we've only got one layer. It'd be very easy to
take too much out. Let's say if you can possibly
stand at this stage, it's really helpful
because you're you're not looking at it too closely. I'm going
to take just that. You're going to lose that line
there where it just a tiny bit here that's
working my way round. It's always nice to take a little bit off the
top of the nose. I'm not using my finger
for that squeegee. And then my tiny little
eradicated brush. I'm going to go see she's
got a nice chunk under here. I'm just going to take that out. See the tiny little things
really make a difference. Quite often, a little
triangle that sits underneath there knows better. Quite often you see
this one sitting, it goes over the top of
that nostril, doesn't it? So you can get that out. Nice thing about these Daniel
Smith paints generally. They lift out quite
nicely as well. For my nostrils maybe
slipped a little bit now because I might have just
been a bit heavy handed that. So I'm just going to put just going to put
it back in again. Just going to very
carefully just tap while that's still a little
bit tacky because I've had that
little damp arrays, a brush there. That's better. Working my way around. If you've got any very
strong watermarks, I haven't really does demonstrate with probably
that to see where the edge has met the
dry, dry, clean paper. And you'll paint paper. And you're, you're,
you're painting. You can demonstrate
only sick of it. You can just very gently
just rub out that line. You say you don't need a lot, lot because it's only one layer. It should come out
really easily. But just take your time.
Don't get heavy handy. Don't try and go. Just very gently is no hurry. You've got absolutely
no time pressure there. Don't think I want to take
any light out of there. Quite often. They will have kinda
see it, can't you? But they will often put this in, even though it's not
that obvious on here. The little crease, a light here, that this is a subtle firm
mouth what draws back. And that's, that's a
great kept teller. If they're sort
of green or green to pull your mouth back in, the further you back, back, you take them out, then all
of a greeting and submissive. So that's there'll be, there'll be lots of little
lines will line up. Generally the eye
sits above the top, top line and the
top of the muzzle. And this is another line, lines up, probably
diverting around. We took that little bit
of light out there. I don't want to take too much more
personally out of there because I managed
to get rid of that on that first layer we did. But if you feel you got a little bit too
much color there, you can gain very gently. Just very gently with your
kitchen roll as well. If you don't want to take too much out,
that's probably enough. Say step away and
see how that looks. Don't don't try and don't
rely on if you're sitting. Quite often, you can't see
how much you've taken out. I don't know if
that makes sense, but step away, just have a look. Hold you grab hold
your painting and just even hold it at arm's length and you'll get
a better impression of it. Working way round. There is that sort
of light there. I don't think I want
to take that out. C. C, Well, I mean, I've probably, it's probably just there, but something tells me
not to take it out, so I'm not going to
so some of that yeah. You'd have to trust you. You're indistinct sometimes and see how you feel about that. What were around then
the only little bit, I don't think there's
any other light. Again, my lovely little bit light that runs
just on the edge. It taken out with kitchen roll. You can see sits right
on the edge and you can put that in with
the white goulash, but it can look a little bit
stuck if you're not careful. That's probably, that's better. Um, and there's also this
little bit of light here. Eyelid again, careful if you
looks like it's too much, he's going to come out to squish it a little
bit with your finger. It doesn't lift as
much. Paint off. I think we're about there. Maybe just a little bit here. Probably needs to come out. Make sure you can
think in your fingers. If you've been dabbling
with your fingers. Debord, devote a
bit of painting. I just wanted to see if I can if I need to, I can't quite see my
C quite clear enough, but I feel I need to bring
that down a little bit more. Yeah, that's better. Sometimes. Can be the tiny, tiny little bit of
paint you put on any I O made it better. I like her. I think she's
she's done as ever. It's worth, again to stepping
away from your pizza. Take for gametes,
half cup of tea. I drink a lot too. You can tell, can you take a break from it? Go walk your dog. If you've got dogs, go and whatever you fancy for
an hour or so and come back and have a look
because something glaringly obvious may jump out at you and you something a little bit you can adjust and the same with me. Obviously, I've worked on
this for the whole time. So I might get off camera
and look at it and go, Oh, that's not quite right. Or that could have been
altered a little bit. So yeah, it's nice
to step away and, and, um, look at it with
fresh pair of eyes. So I'm stepping back from mine
and see if I can show you anything glaringly obvious that that springs to mind on y. But at the moment, I'm do wonder whether it's
a little bit this angle of the eye might hear
when I come back, just take a tiny bit out. I don't know. Again, I will need to step away and have a look with
a fresh pair of eyes. And again, it might come
I might come back and go, nope, nope, that is right. Or I might go, Oh no, that does need
adjusting and you can, you can tinker with these
little tiny adjustments, but it's worth doing it. When you're sure. I think at this stage, I don't think you can be
sure because we've been painting here for so of
an hour or so together. So yeah. That is dog. Smooth dog, Liddy. I hope you enjoyed her
and I hope you go on to painting the old hairy
dog because he's a, he's a lot of fun as well.
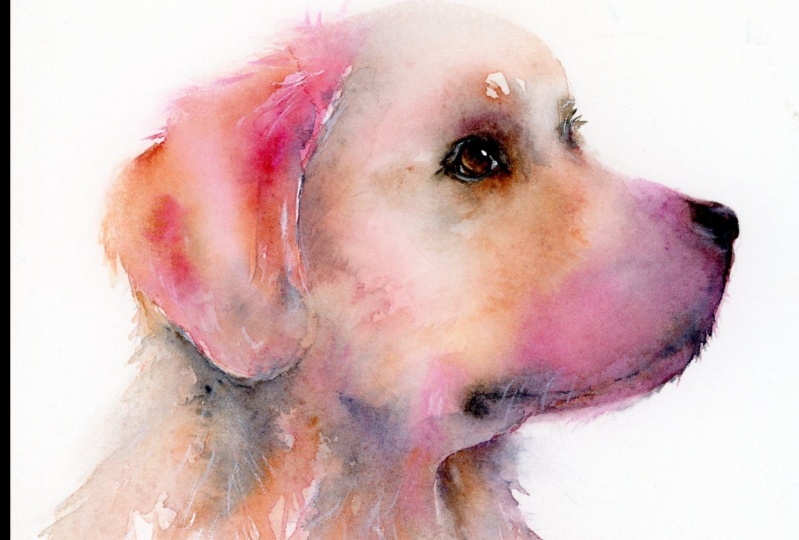
10. Hairy Dog Materials: Okay, now onto our little
hairy, hairy chap. So I have a lovely collection
of Daniel Smith paint. And I've got, I've
got quinacridone, burnt orange,
quinacridone, magenta. That psi lazurite, genuine CPA, and a little bit
of white gouache. Now I tend to only use, mainly, I use the
orange and the magenta. There's obviously a
little hint to the lab, so I lazurite, but they're
my two main colors. And the sepia is a really good, rich brown that kind of holds its position
well on wet paper. So that's well-worth. If you haven't got a CPU, it's well-worth getting one and I use it quite a
lot in my own work. Again, if you haven't got these colors and
you're panicking, please don't choose three
colors you're drawn to. If there's a particular
combination you like was, say, maybe you're painting this. You're going to go on and
maybe paint a pet portrait. Your own dog. You
may have a room, you want to put it into another color combination
you'd like to incorporate. Or maybe you're going to give this to a friend and you know, they like a particular
color and they say that the examples go on to. So please don't panic
if you're thinking, Oh my goodness, I haven't
got any of those. Then. Have a look, see what
you've got and use those. The joy is, I think painting, release, it, Hafiz the
colors, isn't it there? If you like a particular
combination of colors, you're going to find
it more joyful. So if you're thinking, Well, I'm not sure
if I like those. Pick your own. Okay. The paper I've got blocking food and that's a £140 or not. And it has been stretched. But again, if you can't be
bothered to stretch it, we haven't got time to find
a piece of paper or time to go and stretch it and leave
it for 24 hours to dry. Then don't worry. All my little example
pieces I've done have been on unstretched paper. I've logged in and they sat
in the garden and done them. And almost the
buckling has added to the characters are paints
all flowed into the dip. So, so don't worry if you can't be can't be bothered
to stretch your paper. I just, I just felt a bit more confident with it stretched
and I'm teaching it. So obviously got my
little pot of water. I've got a little
my little hearts and that's about an inch high. And I use it just to tilt the paper in various directions
throughout this class. So something that's
an inch high, that's not going to wobble too much on your on your
Baldry pizza paper. Of course, you can
just hold it up. I've got my paper towel, kitchen roll, call
a little rubber. And then I've got my
pencil, sketching them out. Then I've got my brushes. I've got I should go
in order, should know. I've got to do that 1 first. So I've got my
number eight round. And I've got a number two. I've got number note. Quite small, but
it's just to doing tiny little detailing
around the eye. It's quite handy. And actually some
of the flexor quite nice in a little brush. Just to wrap up, differ
the size in your brush. Brushes. And I've also got
little eradicated, which is a brilliant
little brush and I use it a huge amount. And that's for taking color out. And this is
particularly handy for the rough dog or hairy
dog because you can, as you can see, you can see
the marks I've taken out. So if you haven't got one of
those, well worth investing. And I've also got
a template of him. You can go around
him and not worry about having to
draw him yourself. So don't, don't be
afraid of using these. I think a lot of this is in the painting style
or not the drawing. So don't feel you're
really cheating by using these and all those. So a can be found along
with your template in the projects and
resources pages. And template is a printable PDF so you can print them
out and cut around him. I use a hairdryer. Do I use a hairdryer
a little bit, as I probably said in
the last materials. If you haven't got
one, I wouldn't worry. I'd almost say don't use
one because the joy, but this is just allow
that paint to dry on its own and query
those lovely sort of marks and patterns. You use a hairdryer too quickly. It can blow things
around and you'll just lose that lovely
sort of sensor looseness. So handy if it's just us going off and you just
want to just get going, you can see it a
little bit tacky, but otherwise, if you haven't
got one, don't worry. I think that's it
and I'm looking around if there's
anything I've missed, but come on, let's
go and painting.
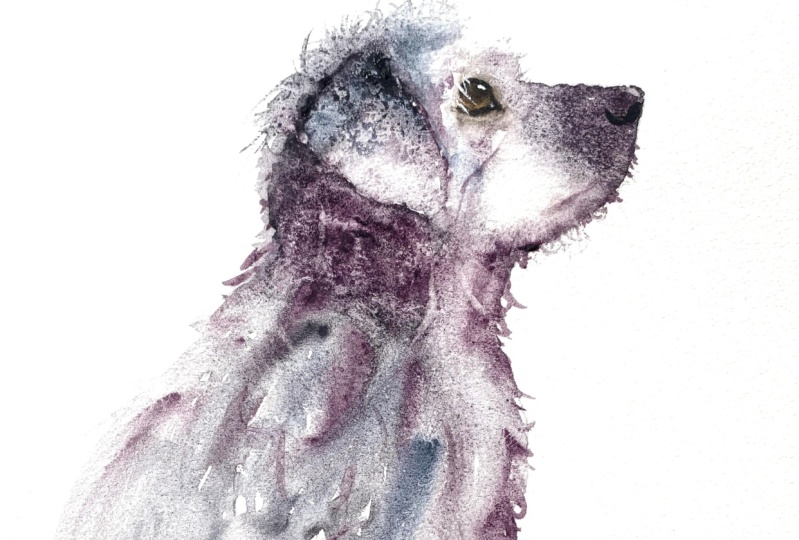
11. Hairy Dog Sketching Out: Okay, here's my little
Marco already sketched out. I'm probably haven't got that nice Italian twang
to his name, butter. I'm not even going to
try how I've used. I've sketched him out
using the template, which if you haven't watched
the smooth dog class, this can be found in the
projects and resources pages. So it's well-worth using that and just getting
familiar with this technique before you plunge into having to sketch
them out perfectly. So again, some
little tips which I think you'll find handy
for sketching them out. Again. The template does tend to give you
other blunt outlined. So as with the smooth dog, it's worth going
around because there's some it's not as important to get the lines right because
obviously he's hairy. So you haven't got those
very precise lines which obviously make them up
because the hair changes, changes shape with the wind and however they've sat
with a head lying. So it's not as important, but it's still nice
to get in the nose in and look at the portrait
ellipsoid the painting. So I get again, look at the photo you have
in front of you. Again, get those shapes right. There's a nice little swing
around and he's leg here. Nice positioning of the ear. And always very important is to get the I in
the right place. It's well worth taking
the time and getting a shape because he's got a little bit of
the hair hanging. I've only done the
front portion. This mouth. Again, the mouth is quite important that make it
swing back too far. The mouth gives the dog quite
a lot of character and how, how he'd probably feeling. Because obviously
I've probably read, might be repeating
some of these things. Because if you've
watched a smooth dog, but if the mouse drawn back, It's often they're a
little bit worried, they're submissive. So it will give you a
sense of how the dog is feeling with the
mouth, positioning. Is there any other tips
or way so we're going to be sectioning certain areas off. So I've put a very
light, light line there. And there's a light line
here where we're going to be secreting certain
certain areas off. But again, keep the
pencil marks light. I've probably done a
little bit heavier just so you can see the pencil marks, but ideally you want to
go to rub them out so you can't see an atoll. The finished painting. So I think that's it. So let's go and get some paint. I'm going to get some
paint on this paper.
12. Hairy Dog Ear: As with all my dogs, I always start with the ear. I think it just gives it starts the painting and it's a
less scary area to start. So you feel like you're
kind of getting there. You've got something
on the paper. It's not that scary blankness. So we're going to start
off the same way, again to slightly different way. So we're going to actually
put a line using, again, similar, similar way. I will use the magenta and
the orange predominantly and just little hint
to the blue of as it gets a little bit
too, too colorful. Give these a bit of a switch. And we're going to
put, say I'm not, I'm not particularly fussy which paint I pick
up or I'm quite often put a selection of both colors on my brush
at the same time. So we're gonna do a little line, not too much paint. I might have just got a little
bit carried away there. So I'm just going to I'm
going to add anymore, Let's say the painting
isn't overly launch. I'm a lot less to do with how we fill meet and how it's
sort of sits on my desk. So anyway, that's a
that's another a boring, a boring side to side note. You probably don't
need to know that. So because I love the
line of paint and we're just going to nice wet
brush, nice and lights. I'm not clinging to it. And we just kinda do a
bit of a rustle, really. Ideally be quite nice to leave. A little bit of white, drop a little bit
of water in there. Almost use He's got
very soft silky ears. You always want a line
and what I might do now, my trusty little heart, we might just give
them a little tilt. Still. Haven't taken off the camera. And what we do, I'm
going to clean my brush, take the excess moisture off. I'm just going to suck
up some of that paint. You see how that's drawing
some of that down. Now I'm not going to do. He's always got quite a hairy I'm hair
running down there. I'm not doing that.
I'm just doing the what would be the
ear either there. So I'm not doing the hair value. We have uracil get
some of that moving. The mini, you've
got something that looks kind of interesting. It is just interesting really. I wouldn't worry about trying to get all the light in there on any particular
strands of hair is just an impression that will give you that
lovely, loose Look. If you start to get overly conscious of trying to do hairs, um, you'll find you'll
get a very stiff, rigid piece of work. So that's it. It just needs to dry and it almost seems too
simple, doesn't it? But I wouldn't do it anymore. And that will dry beautifully
with a little bit of rough and give us what we need. So again, that needs to dry. I say I would say
ideally on its own. Once it starts it goes hacky. You can put a hairdryer over it, but be careful not
to do it too soon. And you can take continuous. I can see now because
we've got this on a tilt. I've got a bit of pool of water. You can stand here or sit
wherever you're doing and monitor that a bit and
just keep dragging it. Just stacking up, which will drag this paint at the top down. So I hope that makes sense. So yeah, just let it dry.
13. Hairy Dog First Layer Muzzle: Look at that ear. Just a little drop
of color and leave. Okay, so it's onto the
next sectioning off. Now, I have made a little pencil error and telling you to put a pencil
mark in the wrong place. So before we start any further, this pencil, this
pencil mark here, needs to be rubbed
out and goes here. So rub that out before you, before we start and then we
got the right a little bit. Okay. So pick up your big brush. Nice source of water,
and we're going to wet all this down here. So you're gonna go
around the eye, top of the nose and say, we've made a nice efforts
to get those shapes nice. So take your time and
make sure you keep within your line is not
as important as I said. With digital off dog. Still nice to get right. And only wet. This is used to
catch me out again, it's a little, little thing. Use Catch Me If you obviously
got smooth nodes here, but he's a little
bit rough here. So be careful you don't wet to the edge of the hair
if that makes sense to you. Your lines drawn out lines ideally needs to be where
the actual jaw would be, not wear their hair would be. I hope that kinda makes sense. So when we flick it out, where flicking hair
out at the right, from the right place,
we're not flicking from the edge of the
hair and then going out. Hope that made sense. So yeah, wet down. What would be his actual
physical jaw line and physical obviously applies
all the way round as well. So just he's not overly hairy. Some very hairy dogs better. Probably down the neck. You can see there's a dark
line, isn't it? We want to probably go address
that when we get to it. Let's concentrate on
this one layer here. I'll put a, put a dog hair they're attached
to get rid of that one. Okay. So he's nice and it
needs to be nice and wet. Um, I think the common mistake is a lot of people don't
have it wet enough, so make sure it's only paddling. You want it nice and wet otherwise your paint won't
move and you'll be like, oh, it's not quite
moving like yours is. And then we're going
to pick up the orange and the magenta. And very similar, if
you'd done smooth dog, we're going to put two colors on my brush
at the same time. And we're going to start at
the nose and we're just going to say the ball, and we're going to
allow that to run and say it doesn't look like
it's gonna go very far. But trust me, it does. And I think that's what, that's what we'll
keep that lovely looseness about this painting. Just around here. Add a little bit
more color in looks. It's very easy to
do too much and you lose that lovely
freshness of this painting. So go easy. I'm sure I've just run a
little bit down here as well, just to help us break up
that very solid line. I'm gonna put that,
put that down. Pick up my blue. Again. We're going to pop a
little bit of blue on top. Clean my brush off for
you thoroughly read it. I just tap everything
nice and light. We might just doing a bit of
a sticky there, isn't it? So again, don't be shy if
he is really sticking. I'm just going to just tilted.
See that in the camera. I just told you my ball
a little bit and just allowed that to
run back this way. So that's tilted
toward this end. I'm just going to lay
it flat again because I don't want you to
cover too much. And then fairly quickly pick up the number two and we wanted to freak
out some of those. You might, might actually be
worth having both brushes. So while this is
lobbying and wet, and I think this
is a common error, some people lead this
a little bit too long, so then the coat looks
like it's stuck on. So you want to do all
your flicks while this is lovely and wet and
you'll get it that it looks like it's all natural, then make sure you get a
nice shape around the nose. My nose is a little
bit misshapen. And say keep it all lovely and loose and you can start
a little bit further in. So then that gives you
a little bit more of a, if you start here, it's very, very easy to
get a little bit. I'm getting a bit too long, but if you start a
little bit further in, then your your stroke
starting further back, sir. Don't be, don't be a slave
to that exact hairs. He's got just flick them
out because, you know, he he could turn around, give them a little
Russell will know all that hair would
change shape. So don't get too
worried about trying to do individual hairs because one, you'll lose their spontaneous
spontaneity of it. And to say, the hair
would move so quickly. I'm going to do
say mind drawing. We're wanting to be a nice
thing to have a slight tilt. It seems to be tilting
this way and this has dried or drying. So a trick with it
if you still want to continue working and as long
as everything is still damp, this is just fancy or you can just add a
little bit more water, then you can continue,
continue on. I'm just kind of a little uracil here to sound a bit reluctant
to move in too much. But say I, for some reason, I've called it a bit
of a tilt going on. It pooling at the bottom. Don't want to put a
don't want to really use my little trustee hearts. I think it's gonna give
me too much of a tilt. I'm going to put those down. I just want to put a
little bit of color. Um, he's got some lovely
I make up his knee and a little bit like the other
little dog, smooth dog, Lily. Going to put this is just beginning to drive and I added that little bit
more water there. I can see it's
still quite techie. And I know if I put
color down there, it's not going to
move very much. So we're just just
putting that it's not even leaving the eye makeup
like Lilly had as much. It's the actual outside
of the eye, isn't it? Tap a little bit of that in just a few clicks on this
little section, haven't we? So just click a
little bit out here. Again, be careful not to get
too carried away with it. Most of it is in the
layer, isn't it? So I don't want to do
too much like that. That really nice to
just draw on its own. Now, again, don't, don't be tempted to
use your hairdryer. I think because of
this style is very much dependent on it
drawing on its own, finding its own weight
at home pattern. I think if you had if I was to hairdryer that now this
color here would just move all the way up here
and you would get a kind of a splurge of just
monotone colors. So allow your, um, your painting to dry naturally. As I'm standing here
watching this dry, I'm just pulling a little bit too much to
deal with that bottom, so I'm just gonna
give it a tilt. I think that might be
helpful for you to see how we can get a little bit more movement back in my even I'm going to
leave my little heart. I'm going to contrary
to what I said earlier, you have to judge each piece
is it is it goes really. I'm going to leave that
to dry a little bit on a tilt and you can
see how hopefully that will move that pigment
up a little bit more. If I find it, again, I might just watch
it for a little bit. If I find that's
moving too much, I'll just take the heart away and let that drop again to say, he's always sometimes worth
watching if you're unsure on how it's going to end up, it's worth watching it for
a little bit and seeing how, how it progresses. We'll see how that dries.
14. Hairy Dog First Layer Head and Neck: Once this is lovely
and dry and we can pick up the
bigger brush again. Brush nice and wet. And then we're going to
wet when we put this line in around the ear and
destroying the back there. So again, bear in mind about the flicks and how far you need to go out with
your wet brush. Just gonna put a line in there. And it doesn't matter if you
touch the top of this ear. Countries with hiding the
painting with my arm, if we touched the
very top of your ear, you've probably got a nice strong amount of paint in there. You'll find that we'll
just bleed slightly and that's perfect. Around the ear. I wouldn't doubt. It is hard. It's thought that one gate, if you're doing these little dog, I wouldn't do any smaller than this because we need to
allow your paint to run. Move around. Then it's quite hard if you, if you're doing it smaller
because it just doesn't have the scope to do it with
a short head breathe. Quite so reliant on tilting. And actually I laid
this flat in the enter. We had it tilted, didn't wait. Why did I did late flight
quite, quite soon afterwards. I think I was worrying
unnecessarily. Okay. I can see that it's nice and wet again to rub over your
head up and down. We are going to use my little
heart underneath my board. Three color, a little
bit of a tilt going on. Going to drop the color. I went a little
bit to the pinkie, so I'm going to try and go
a little bit heavier on the orange on this bit better. That's that's just me. So have a look again. Have
a look at your own pizza. Just going to go up very light and see how that's
running beautifully. Now, we want to try and
keep this little section down here without
too much paint on because that will give
us a little bit of light that you can see that's falling from here
all the way down. And then we're picking
up that ear hair. Joy to colors on my
brush at the same time, I'm going to go quite
heavy underneath here. You sort of go in first
layer around a little bit. It's quite smooth ears
has nice smooth shape, should say so I
shouldn't be russell them too much in better. Get that nice sweeping the almost have to then
look for the year, if that makes sense to you, to get how the ear shape would be. It's all starting to puddle
there at the bottom here. But don't worry
because we're going to pull that down in a minute. So here we want a nice amount
of sort of heavy paint. Just going to pick up my
blue again and tap the top. I'm going to tap it
just a little bit. Be on top of that year. We gotta keep mindful it is we don't want this
to dry too quickly while we're concentrating on putting this down
because we need to get those flicks out a little
bit too soon at the moment. So bear in mind, we need to, you need
to watch out for that. Paints down. Nice, clean your
brush, nice and clean. And we're just going to go down to touch this down to here. You see how that's moving? My lovely. Again, you can
kind of be a bit rusty. You can join that little section up there so we can
get I get a bit of a because he's got a rough coat just we're not doing individual
hairs little bit though. The ear just let loose and let it kind of move around and don't
try not to overthink it. You can then add a little bit
more strength back up here. Again because we've
got that on a tilt. That's just start running again. When I say we need to keep
an eye on that and it's probably getting to the stage of needing to be flipped out. A little bit more
color up there. A little bit about timing, really, getting it right. I'm trying to avoid putting too much paint on this
little section here, but we need a little bit. Maybe not that much. But I can just add some water. Get that running. Suck some of that up. A little bit too much
peak there. Yeah. Sometimes. Look quite nice, so you just have to roll
with it sometimes. And that's now added a
lot of water up there. So I'm going to flick out because I think that's the stage you will be at. I'm going to find
my little brush. I'm a little brush,
it disappeared underneath my leaf aboard. If I'm gonna start with
a slightly bigger one, game, keep it loose, keep you would hold it too
far up then do like to, but probably lose a little
bit too much control. And he just going to flick. See that work this way around a little
bit more so you can see if you feel it's not picking up enough because
that will upside lazurite, quite not very punchy. You can always put a
little bit on your brush, but just make sure this is still wet though, when
you pull these out. To be a lovely
little natural look. I have to go films
obscuring the painting, need a few that way as well. Chris, cross them
over trying to say, I know you can't
close your eyes, but you want to just get the
randomness going down here. Don't worry if you drop a
little bit too much water. I think the joy with
a loose, with a toy, with a rough dog doesn't matter too much there
any marks you make, it just adds to the
interests, I think. So just like that pink was probably a little
bit of an error, but actually that's here,
that's worked well. So don't panic if thinking
things don't quite go. Maybe as I've explained it, and you do something
slightly different. That makes sense, That was good, then don't worry too much. A little bit of a bend in there. I think I've done enough flicks. I don't think we should
refer back to your painting. Maybe it looks a
little bit too thin. It could be a little
bit thicker here, so I'm just going to keep
going out a little bit more. Cleaning on to that website and have a little bit of pink. You can come in here if you just want to fill the whole lot. Just keep the momentum. That's enough to go
join this arm off. Okay, Now we're going to again test what
this further down. Again, just try to say to me, let your brush or move around and try to fill that roughness. Colored shaggy dog. Pizza disappearing
underneath these bold. Picked up the magenta, just gave you just do some
movements. Change your brush. Slightly different brush sizes. You to be careful when
you're working across. He don't wanting to run
into the wet paint now. I think he's looking quite good. I'm just going to pop
that back down because he might have brushes escaped
underneath on board again. I'm guessing because
I love this. It will leg position, so I'm
just going to wet brush. I'm just gonna run that down. Just so we get a little idea that lake could do
anymore than that. It's just an impression
that leg down there. Say the more you
wet further down, the more that's going to drag
this paint further down. And again, you could not
necessarily he needs it, but you can always
tilt your board at a slightly different angle, then that will
encourage the paint wants to run a slightly
different angle. So you could get to this stage. Water in there and
you see that starts to run to the back and that will give them a slightly
different direction. What we want to do. A bit of kitchen roll. Again. That's pretty my pocket tilt tried to manage
too many things here. You that way little
friend. Just going to suck up some of this here. And just slightly pull
and pull and say, we want to keep
face would like to keep this leg so
you don't get rid of that as well.
Nice clean brush. Get you that nice. Lost and found disappearing. This. We're not going to be worried about coat colors and stuff. It's just an impression of him. Game, which will go the same as if you go on
to paint your own dog. It's just an impression
of your own dog. We're not going to get
carried away with trying to do colors and coats. The actual difference in colors where they
meet, end and meet. Okay. I just had a little stop talking Jane and
had a little look. And that's the King. Alright. Okay, before this
completely dries up here, what I wanna do is just to join up like we did
with the smooth dog ear. I'm not going to think I'm
going to join that year up. If you think it looks a little
bit distinctive on yours, then by all means,
just join it up. I'm just going to just stop anything looking a
little bit too harsh. Soften, nudge some that line out since it doesn't
look so distinctive. And that's hopefully
the joy of keeping this little area a
little bit fresher. Queen. You think I need to? Again another step back. My output. I just feel a lot of my
lines are going down. I feel like even that's
busy has got a gray code. And you're going
into why I just feel my eyes just dropping
down the page. I just felt I wanted to
go across a little bit. So I'm just going to pick
up my, um, either color. It wouldn't have mattered
to enlist do both. Just put something in here, just feels like
it's dropping down. Doesn't need to be a lot. Say, the joy with a rough dog, does it if you get some sort
of watermarks or dribbles, I think that's just adds to the whole whole character
of its screening. I step away. Yeah. I think that looks okay. I need to let that dry because obviously we've
got another layer. We can add some little
flicks and bits and pieces and a little
bit of interests. But I think for the time being, I think he's going to
dry well and you can keep it's imperative you
don't keep fiddling too much. I can see this has
started to dry. It almost dry actually. And if I start fiddling too
much now, we'll wind up. We'd run the risk of getting
a little bit too messy. So actually, I'm going
to let mine drop. Can be a little bit of
Judge of yours if it feels like it's
stuck a little bit, just allow it to
let it dry, tilted. If you feel like minds feels
like it's running a lot, then you can just lay it flat. You can lay it flat at anytime. And that's sort of control. You could like we did earlier, if you felt like it's
running too much and you can just let it dry that way up. So it's tilting. So that's a nice
thing of gravity. It kinda gives you a
little bit of control. Like I feel I'm waffling. So I'm going to let this completely dry and
we can do the AI.
15. Hairy Dog Eye: Once it's lovely and dry, we can start on that. I know again, you can
see he's got a nice bit of darkness like It's probably actually not quite as i e to the inside of the eye, but we're going to
paint that is a very strong little bit
like the smooth dog. I'm Lily. She's he's got a nice little bit of probably I make up onto we're
going to wet that down. She's not showing any white
of the eye easy at all. So just going to knock. So we can either go to one
of two ways as frozen, generally, I will
paint in any flicks, so I'm going to do
January what I, I used to doing. But you can reserve
that little bit of white that of the white hair of the little hair
getting caught his eye. I'm not going to I'm going
to wet the whole lockdown. It just allows the paint to move all around this
eyeball instead of sort of knocking up against that white
line I've reserved. So I would probably
do it this way. But if you're used to reserving areas like that, then please do. Use me as a bit of a guide. If you're confident of doing
things another way then do. Okay, so I've dropped a nice
amount of water in there. And again, we've dropping
lots of water in there, you can end up with a
little bit of a bubble. So if you have one mind
actually worked, okay, you can just suck
it up a little bit, so it's nice and
wet but it's not a water's not sitting
in a little puddle. I've already mixed up a
little bit of paint here, and I've used mainly the orange and the blue and a
little bit of the sepia. I'm not a great one
for mixing normally, but I really wanted to keep
this palette nice and simple. There's obviously a lot
going on in this class, so I've mixed a two. But if you've got
a nice combination used to using on eyes, I quite often use. Burnt sienna is quite nice and he can't quite make out
the color of his eyes, but I'm sure most dogs generally have sort of
brownie brown eyes. So we're going to assume
he had brown eyes anyway. So yes, I'm just so
we're just going to literally tap that coloring. Nothing more tricky than that. There's always a little
bit of shadowing, even though it's not it doesn't because of that
a little bit of hair, we lose a lot of the I. But there's generally
a little bit of shadowing underneath the eyelid. And of course we've got
that dark line to put in. She won't do on this layer. But it's worth putting
the heavier colour, little bit, little bit more
at the top than the bottom. That is the first layer really, it's nothing more
complicated than that and just
putting color down, um, and we've just got
to let it dry again, definitely with the eyes. It's best not to hairdryer. Let it dry naturally, avoid you. You just blow pigment
around in it. It mixes. So if you just let it dry, once that delay is nice and dry, we are going to re-wet it again. Exactly the same area. So including the black
or dark eye makeup. Just go gently because you don't want to try and lift too much of that paint you've already put down and I have
just done that. I'm just going to
amongst this layer, I'm just going to what
I was going to say. We've just strengthening anyway, so I'm just going to tap
that color back in again. I don't want to add any more
color to this bottom area. Again, is probably something
you you can get used to. It's nice to have
this area lighter in. Sometimes you just have
to not necessarily a look at the photo in the obviously you need to
take reference in the photo, but it isn't nice have this, this light at the bottom because light sources and coming
in at different angles. And it never worked
quite as well as just, just keeping to that
formula of having the darker underneath the
ion in the lighter part, then it generally works. The light can come in from different sources
and confuse it. I'm going to pick up
my very little brush. I'm gonna pick up sepia. I'm just kinda keep it on it. It needs to dry a little bit. It's a little bit too wet. If I put the CPU down now, it will mix two. It will run too much. I just wanted to just so it
looks like it's about to go off and then we can put that
I make up in our pupil. But if I put it in too
soon, it will run too much. I've taught a twiddle my
fingers for a little minute, little bit on patient
in patient to do. Right, and Jesse, that's just
about to, about perfect. Genki it keep your little
brush quite dry, not dry, but you don't want it
lots of water on it and you want this
quite nice and thick. Just so you don't want
to add too much water at this stage because we've just waited a while for it to dry. So adding more water would
make it more complicated. Bit too sticky to be a nice,
nice, creamy consistency. Same way. Just painting in. Do you can, you can tap rather
than actually draw a line because you don't want to do is sort of upset
too much that nice. Laser already put down. If you if you paint, you can drag other colors
down to I would usually tap coming round, isn't
USA just tap that and feel that little area, nasdaq, a little v,
isn't a scientist. Working a little
bit away from this, I'm struggling a
little to see his or you don't want
to see my my head, but hopefully I'm heading
in the right direction. If you like, in your
magnifying glass from well, before
I'm positioned, basically, are you tapping
this in the pudding? They seem to say
you got that little V there, pulling it out, call me back up a step away that it's looking as we can get actually going to add
a little bit of that. We'll get a little bit at Brown. There's a CPU again, I'm going to pop the eyeball
when that needs to go in. To again, while that's
still too tacky, don't want it completely
dry over the eyeball. Look very stark and so stuck on. Always looks a bit
weird. Start with. So just tap work. You start from the middle
and just work your way out. It will blend up fake little drop of water there. Just seeing. If I can get that a little
bit darker at the top. You need to keep applying. Don't, don't keep dragging
paint that's already there. You need to get some add paint that we just say keep
picky paint on your brush. Don't, don't try and rely
too much on pulling. Putting paint that's
already there. You need to add more paint to know that's looking right and say I'm a little
way away from it. So if we wanted, this layer has dried and I will you come
back and it looks a slightly different
shape is because I've being able to get a
little bit closer to it. But that's the
general thing is you, you're going round filling
in that little triangle and background and popping that pupil in just as
it starts to go up. I like that from what I can see, I think it's worked quite well. If for any reason you've lost
that little bit of light, this is a quite a nice time. Take it out because it hasn't wanted to dry
completely seal. You'll find it's
quite nice and soft. We just take out a
little bit of light out. I know it's not necessarily it's not obvious on that painting. Not have we shown that photo, but it's always nice to put in it makes such a difference. So I'm going to
leave that to dry because I know if I
fiddled too much, I'm going to completely ruin it. Likewise, if you're struggling a little bit and it's all going
a little bit pear-shaped. It's always best to, especially I can see that
styling you'd go off, it's starting to dry. Stop. Take a breath. Come back in a five-minutes, have
a look at it again. You can always probably
won't do with this, but you can always re-wet
exactly what we've just done and just tinker
a little bit more. At this stage, if you're
starting to panic and you're starting to look a
bit odd to stop, stop and, and clicks
yourself again and you can go back in and do another different
layer if need be. I'm really pleased with
how that has dried, so I don't want to
do another layer. But as I say, if you're
not confident with it, you're not pleased with
the strength of it. You can just you can either rewet and include the makeup or you can just do the eyeball depending on what
needs strengthening. Really happy with how
strong that I make copies. Then just do the eyeball
and strengthened. Because I was just way
away from the camera. Ideally, I need a little
bit of this taking out, but I will do that in the next layer where I
can work on the outside. So I'll just just the
tiniest little bit of a little bit thick there. And that will make
all the difference. I just took the iron but I'm pleased with
the inside of it. But the only thing
that needs doing is that little catch light
and there's a tiny, little, tiny little bit
of light there, isn't it? It might be liked and it might even be, and we know each light. It could be a little
bit of white eye, but it's some thank you. Just a little bit of light. So I've got my white gouache and I'll make that nice
and thick and creamy. And we're just going to say, there's not an obvious
catch light there, but I've always tried to put them where dogs looking
and obviously he's looking up to the corner here is Nissan and he's looking up
at the top of the owner, just going to pop it in there. I love that. I love the little
catch like this, the tiniest little
bit of light there. Perfect. I think that's all we
need to do for that. Um, and that should be clear. I've done, as I say, I will think with the outside
of that. In the next layer.
16. Hairy Dog Second Layer: Okay, This is a fun bit. This is where we put some
little bit of coat texture in. You can do a few little bits. And I'm going to say
tinker with LED lights. So I'm actually going
to do that I bit first because I think
that will help me. It's nice when the
painting looks like it's coming along and
in the expression, if something's not
a little bit right, it can make you feel a little bit disheartened
or a little bit down to. So if there's anything that you think can be tinkered with, sometimes it will help. Just lift your morale again. Do just, just going in
with just a tiny bit. See that the fraction with my finger and that's just bought that little
curve in there. Perfect. I think that's
all we need to do. To do yours is probably perfect. Right? Big brush you to
do three colors. So I didn't really put a
lot of blue down there. So you can either, if you've got a lot of flow
already, then leave it flat. If you feel you want a bit
more flow coming down, or maybe you want it a little
bit more flow that away. I hope that makes sense. So it's the paint tool
flowing that way or vice versa, explore, flowing forward. Then that's a really
lovely way to get hairy dogs and get
some movement in here. He dogs, he just allow
that paint to run, which will give you
that nice flow. But we're just not wetting
the whole lockdown. I'm just doing little
bits and it's going to be very, very fine. I'm very little
paint on my brush. So we're just we're just
going to I've got quiet. If you haven't got
this strong enough, a few of my little paintings, I've done many of these
as you can imagine, summertime, this
wasn't that heavy, so you could, for instance, put a nice amount of paint
under here, your brush. And then you could do some
nice little flicks down here. So try to keep everything loose. So I've kept my bowl, I kept my ball flat and I don't think I need
much more movement. I'm getting you can kind of add a little
bit of blue there and do some soften the edges
and just pull it down. Again. You can change brushes. Do a few more flicks out there. Almost look at your own pace. If you feel this wet
area, it needs darkening. Much put put a little bit of a line here because
here you can see these, these are obviously his
eyebrows coming in here. To this one. We can do some flicks out, see them showing up down there. Naturally. He's got I might just
tilt this for a second. This away. See if I can get a little
bit of a thicker brush. I'm gonna use it. Put a blue down. Organized. Jane got my
two orange and magenta. Little bit like the ear. I'm just gonna put a
little bit of color just here to see if I can
get something to eat. And I'm going to come across that where we
section that area. I'm just going to come
across that section. We can make that look a lot. You soften that
sort of area there. And he's also got a little bit obvious sort of
marking here, isn't it? I don't really want
to get too involved with markings that yeah. Now that's looking
nice, some sort of step away from it. Let's
have a little look. Alright. Again, this is, this is section here. Just needs a little
bit of strength here. Yeah, that's better. I think I'm almost there. I don't want to get I know. It's very easy to carry
on fill it and you lose that nice freshness
that we've, we've kept. Again, at this point, you could rewet the ear. I quite like the ear as it is. I don't want to join
it back up again. Um, but you could wet that. If it looks like it's
a little bit stuck on. I'm quite happy with mine, but there's again, another option. Another option if you're hearing you come to paint your own dog, I'm going go into that a little bit more on
the other lessons, so I won't waffle about that. Just watching any bubbles
here because I've got it on a slight tilt which I can pour
be dropped now that tilt, it's laying flat now. So if you have something like a tilt and you've led a
lot of water run down, you will end up with
little puddles here. So the best thing
when you drop it, it's got a little bit of
kitchen roll and just suck up those little puddles because you they can then run backup. Always leave you the best marks. Okay, so we're going to go here still
clinging onto these, onto pick up my little brush. I'm just going to
section the nose off. So we're going to the nose. Lovely little button nose. Must be a little bit of
terror like to know the mix. Actually, she did find out. I know a little bit
more about lily, but not so much about Marco. Terry's often have quite
a button nose and that's a real character to them. So I'm, I'm just putting a little hump talking
about mockup. Just putting a little
bit of strength under here just to
give a bit of weight, um, and we'll take
a little bit of light out in the next chapter. I don't think there's
anything else that needs doing on this. I'm really pleased with that. I know if I will continue, I will make it look a little bit messy because it's because we put we haven't wet
the whole lockdown. They're sort of marks. It's very easy to get
it looking very messy. So I'm going to stop. And if you're following me
and you're carrying on, then I would just step away from it for
a minute and think, do I need to really do anymore
or I'm happy with this. So probably going to be a
year. No, this is good. So just let it dry and then we can do the last
little fiddly bits.
17. Hairy Dog Finishing Off: Okay, Onto the nice little,
little fiddly bits. So first off, I'm just gonna
put these little mouth, one that could have been
done on the earlier lesson. But I felt because I've
wet this little area down, I didn't want it
to get too messy. So again, let's do the oranges because I use quite a lot of
pink in that area. So I'm just going to put
a tiny little line there. Not too much because it
will look really obvious and you don't want it
to stick out too much. Hopefully, maybe not,
maybe not enough. Now, let's put a little brush, a little bit more control there. Sometimes it might be just
a little line some way, it might not be
all the way along. Sometimes it's quite nice. Break, break it up. It starts from up
here, doesn't it? Might be enough. Soften that down. Yeah, Now that's enough. And again, little bit
with their nostril. Let's paint that in. Up here. You always have a profile, say anything that's not a
profile is a lot harder because you're working in 3D rather
than just two-dimensional, which is this cute. So it's a lot of, it is just taking little
bits of light out really and little bits
of flicks of coat. So this little eradicated
brush is perfect for that. We'd obviously got
these lovely sort of flicks of his ears
or hair vizier. So we can do some of those
scrubbed little bits out. I need a I need a clean
piece of kitchen roll. Okay. You see that care for you and take too much
out because they say, because we've only
done one layer for the joys of anything. One layer, we will maybe two in certain places is the color
will lift out really easily. Let me know. I, I probably lost some of that nice roundness or actually just take
a little bit out and gotten a nice source
shape there to that, Becky. Becky, only Jenny,
you got the money. We've got a little bit of hair. Cut me off. You can do this
as white gouache, but I just never find it. Leave it looks like you've
just put tip X on it. It looks a bit weird. If I'm dating myself
with the word tip X was a white stuff used to build
to put over your mistakes. When you wrote? Yes, it can look a little
bit gummy and gooey. Say, I always find, I find this eradicated brush
or a little small brush. This is brilliant
because it really does take it out quite well. Little bit down here,
these little beard. Just little bits and pieces. Just draw your glory lie but don't say don't
get too carried away. And what? This line
looks a little bit just a bit of
a hard line here. And we were keen on hard lines. Just trying to soften
that little bit in this squat that that
little bit of her away. That's better. A little
bit out of here as well. Sorry, I'm being random,
aren't I should be going round working
methodically. I'm not very good at
working methodically. This little bit here, It's probably come to a bit of
a blunt end, isn't it? So I might just scrub
that a little bit. I might actually put a
little bit of hair just to break that line
up and to take a little bit out
then flick a bit. Course we've got this
little white lines, but you can do it the brush, little eradicated brush bits
quietly briefing to do so, even though I'm not going
to have a go at doing that, but you can, um, but yeah, you'd be
feeling brave to do that. We will do it vertical
bit of white paint. Okay. I'm not sure if I want to say much
more out of there. Um, we'll get a little
bit to try and to say, just to eat, if you
do too many of these, it just looks a
little bit weird. But we do need to take this little Oscar out and
as long as that's dried, normally OID a good. It's quite often are helical
V runs under the dark. Sleep. Again little bit out of the top. Just use my finger for that. Lawfully. If he left with any sort of
where we've been quite doesn't quite watery. I'm the watery layers. Second, I trying to say
these little lines here. Sometimes if they're right
up against the edge, sometimes you can
just swap those out. I haven't, haven't
got any obvious to show you because it
hasn't really done it. But if you're left with
a tide mark almost, that can be a little bit there. You can just gently
soften those little if they if it looks like
it's sort of restricting, the pencil marks are
holding in a bit. And that's actually what we probably what I
should have done before we started wetting
little bits down. He's too about the pencil marks, but if you're at this stage, following along with
me, I would hang on because we've obviously
done little bits of wet. But once it's dry,
take the pencil marks out because that's what
makes the difference. Like let me put that down. Yes. Pick up my white. Good question. Ever get that nice and creamy? We're going to do those
little feet because I have a deep breath moment. Don't worry about getting exact. So don't panic. It's not
quite exactly the same. And you can join, test it out a little bit
somewhere if you want to, before you commit. Make sure it's a nice texture. Okay, deep breath. So I would start, don't stop right at the edge because literally
like the flicks, it can go a little bit too far. So I would probably start
somewhere there and the breadth going down. That's it. Sometimes if you lower
it keep going lower, lower, lower, low in and
it hits hits the paper. That's probably enough. Then it's probably, it's
always usually a little, which would take them out
with the eradicated brush. Usually. He's got it a little
bit of light. That's nice and squared off. A light. She asked here. It can be done with a
little bit of white. You can take it out like this. Coming out. Concentration or calm, quiet. That's done it. Take a tiny
little bit too much out. So we wiped off the brush. Just almost full backfill that
a little bit too much out. That's better. Just soften that down. You find it. If your
brown looks a little, we've done this a
little bit already. But if, if I've done that bit because I didn't
make the shape quite right. But if your brown looks a
little bit stuck, I'm sorry. If your eye looks a
little bit stuck and the very dark sepia
could do with softening. Just go round with a
tiny little brush. Just touch the edge
of that sepia. And you're just wetting round
just this little area here. If you just touch the edge
of that, that should soften. You don't get such
as sort of stuck. Looking. Very handsome chap, isn't he? Alright. Just tiny little bit. Eskimo almost lost that
a little bit too much. Again. You can always go
back just like that. Somebody I quite often put
little bits there and go, alright, and then take
it back off again. So having a look, trying to get away
from it a little bit. And I think he
looks pretty good. Again. A little like the
smooth dog can explain to your probably go away from this and come back maybe
the next day and go. Yeah, that's maybe that could
do a little bit and think, Oh, that's not quite
the right shape. It's really rather than persisting now with it and
trying to get something like that maybe
doesn't look quite right. Leave it for the day. I would even believe it yet. Leave it for today,
come back the next day and look at it again
because you're either C, C it, and it will look
right or you will know what needs altering. Because we spent quite a lot an hour, hour-and-a-half
painting. You'd often don't see it. But another little tip, which I wouldn't I
wouldn't recommend even if you take a photo
now acting on it. But if you'd like, if you take a photo
of your work, since trying to get a
photo at bizarrely, I can see errors on my,
when I take the photo, I can see the arrows on my photo rather than actually looking
at my actual painting. But again, even if
you do take a photo, I would I would step
away from it for a day, come back to it and
alter it then better. Yeah, He's been he's
been lovely to paint. If you are now wanting
to paint your own pet, there be lessons further down which you can
then follow along. There's some examples
of some other breeds that might explain some different ear
positions have to cope with slightly
different coat textures, although these kind of cover it. I show you explain how
to take a good photo and how actually grid
my own workouts. So if you're taking this class with the intention
of painting own pet, then follow along on. Otherwise. I hope you've enjoyed
painting these lovely pair. And I would, I would
sincerely love to see them in the projects
and resources pages. And I'm quite sure
the owners of these two would love to
see your work too. So please please do share. Because it'd be fantastic
to see the work and thank you for joining me.
18. Your Dog Taking a Good Photo: Now here's the fun bit. Taking a photo of your own dog needs to
be a profile side shot. Otherwise you're going to
find the class a lot harder. I've got lots of
information on my website. So I would strongly
suggest having a good look before you head
out where your camera. There's a handy link
to the relevant bit in the assignment section of the Projects and Resources page. So now you have your beautiful
image sat in front of you. I'm just going to show
you on my iPad how I just tinker with the immediate little bit
in the editing section. You obviously may
not have an iPad, but most devices will
have a way of editing. So obviously I'm going
to show you on my iPad. So I go to the Edit
button, tap on there. And that brings up that
little menu there. And I'm just going
to concentrate here on the right-hand side. Now as she's a darker dog, this is why I picked
our young spaniel. You can see, I've lost
some of this detail here. I could just can't
see it clearly. This will help. And sometimes these will
automatic button will help. I tend to not use that. But there's also
a few selections here and there's
exposure, brilliants. I don't find those as useful, but I like shadow. And if I open this up and down, you can see that's
almost enough. I probably don't need to
do anymore with her image, but I will just say you could contrast is
often quite nice as well, and you can see how that
affects it as well. That's a little bit too much. And it's nice to get
the eye because quite often the I gets a
little bit hidden. So that's a nice point
to try and look for. And also some of
these heaviness and the here brightnesses
sometimes useful. Again, you just have to find your own sweet spot for
your own image, um, and it's just a case and you're, I just scroll up and down
and find what I think is right sort of image. And that's nice, that
looks, looks nice to me. Obviously, you can go on and do this black point saturation. None of those are really
relevant for, for what we need. So then we just put the done. And you can see that's
that's enhanced her. And she's all ready to go
for our reference photo.
19. Your Dog Gridding Out: Now I'm going to show you
how to grid out your work. I do use this quite a lot in
my own professional work, especially commissions,
because there's obviously imperative things are in the right place for
a particular dog. Especially things
like the eye, nose, in any sort of distinguishing
features they may have. So it's a it's a very,
very handy tool. I agreed it and then I always drop the pencil
marks out because I feel it restricts me and
hold to my painting in. But it's useful to get your, your painting in the right, everything in the right place. Especially I think the looser
the piece of work is and more reliant on particularly
distinguishing features. So there's plenty of apps out there that you can
download and find. I personally use
one called copy it. And I've used it
for a long time. So I haven't looked
elsewhere, but, um, I do have a little
search and there's lots, lots you can use. So if I run through
how I go about getting my little
squares on the page, that will probably
be useful for you. And obviously it's a
great tool to obviously downside you're painting
or make them larger, depending how big squares are. So the larger the square,
the bigger the dog. So it's a handy tool to upsides you're
painting or downsize it. So I just use a ruler
and obviously mark out how you measure
the squares and say, you can see on here, she's got she's got 12345. She sits amongst
five little square. So you you position your five squares out
and it's good to, before you start
getting carried away, haven't checked that down. 123456 squares all fit into your piece of
paper because it got off and I get Kampala, they all fit and then forget that they won't necessarily
fit the length as well. So yeah, that's a little tip I use
to use the full fell off. Then you obviously
greeted her workout. Each square goes
down, marked out, but keep your pencil marks as
light as you possibly can. I've put mine a little bit stronger just so you
can hopefully see her. But what you don't want to see, those pencil marks
went to Europe, the reverb them out. And equally, you don't
want to be rubbing the watercolor
paper a lot because that will take the
surface of the paper off. So go really lovely and light. So once that squares, once you take a grid
this down and then you obviously greeting your dog. So you use I tend to start
at the top of the head. It's just a starting point. And you, obviously, you fill in the squares as you go around. And sometimes very
important it'll areas. I will often do another little
orphan freehand actually. You see there. And that's just so I
make sure that's really, really bang on the right, in the right position. And angles are quite useful. So obviously, you've got the
grid to help you anyway. But I find, if I imagine that's a clock that going down to every 11 o'clock
or five o'clock. So that's quite, I find
that quite useful to get, get the angles right. And with a fluffy dog, she's obviously not
particularly fluffy, but she even be a scholar, a little bit of hair on her ear. Try to sketch out what
would be just like here. I know she's had a beard. Pull it a little bit on
my poor little spaniel. You don't want to
draw the bid out. You want to try
and get if you can see where the actual physical bodies rather
than the fluff. Because I think I probably
said this in the hairy dog. If you've watched that. If you grid that out and then
you pull the fluff out, you're obviously
your dog is gonna go look quite misshapen. So be careful of that one. Say, little top lights I caught, I will quite often
put the fluff on. So she's gotten a little
bit on top of her head off, sometimes sketch that in. So just to remind myself, I think that's probably all you need to know
about gridding out. I think the rest of it is fairly straightforward and makes sense. I'd say just rub
those grids out. If you've got a occasional
will leave a grid on very, very occasionally if it's
a very complex picture and I need to refer back, I will say leave
maybe a few lines, or occasionally I will put
the dots on the very edge. And then I know I can, with my ruler wants those marks. Once I've rubbed the
physical squares out, I can refer back and just line something up if it's got if
you've got a lot of paint, say like a black Labrador, and you reliant on some of those shadows
being in the right place. It's sometimes
nice to refer back to that greed and go,
Oh yeah, that's right. I am right. Just to have something to boost your confidence that
you are correct. I think that's really a
gridding out and say, I think you're ready to start painting once
he's all gridded out.
20. Your Dog Tips: Okay, Now you have
your beautiful dog already and sketched out
and waited to be painted. I'm just gonna give you a few general tips
to get you going. And then I will run through just a little
handful of breeds that are hopefully
capture some of the different coat
textures and ear length. I hope you can appreciate
there's obviously a huge variety of breeds. Anything from your
ball breeds to the beautiful sight hound
with their long noses, coat length, ear type. So, um, there's a general, the general pattern to this. So they don't get to keep
the formula Nice and simple. Really. This little painting,
she'd only take actually painting time
30 to 45 minutes. So it's a quickie
really and it's just a little
capture of your dog. Not the detailed it
we're not going into for textures and aren't going to put those
in individually. It's just a little snapshot, a nice quick
paintings from afar. You're like, oh,
that's beautiful. It's a lovely loose and it's
just captured that dog in a, in a quick loose style. So before I carry
on waffling away, I've called it the
little, little hints. I have them all written
down on a piece of paper, so I work my way through them. As I say, don't get
caught up with detailed, don't try to do all the
individual little hairs. It will just result in a
very overworked piece. You've just got to
have the courage to put that pain down, allow it to move and give it
time to move is a biggie. And even I was a
bit of a culprit of that and panicking that
it hadn't moved enough, but it will serve to
have, have faced. Look for dividing lines. My lovely pop here. Obviously she's got
rather large ears. So I obviously start,
start with a year. It's always a nice
starting point. You've you've got something
down, you've started. It's not a blank piece of paper. So that's obviously
a nice, nice divide. Then I did her head,
then I did a body, but more of that
in a minute before I start telling you
how I went about it. But say with every
breed look of it, look for a divide where
you can section areas up. Don't put cooked details. Even in my own professional
pet portraits, which takes me a
vast amount of time. I never putting
individual coat texture, so I won't do little tiny hairs. The best thing to do if you want examples is either have
a look on my website. There's a few examples there, or Instagram or Facebook, or you may be familiar
with them anyway, but it's worth having a quick look back
and just seeing that I don't do any of
those very precise, precise work, it's
all very loose. Turning over my page, I will suggest cutting out
a template if your dog, because then you can
do multiple dogs. You can have a go with that, that technique during that
time didn't quite work. You could try again, or maybe you want to try a slightly different
variation or different sectioning off area. Anyway, it's quite handy to
have a template, I think. Okay, so I'm firstly going
to run to my little puppy here and give you some
advice on a longer ear dog. Like she is so very
similar to the hairy dog. I put a lot of color here and
I just ran it further down. There's no difference.
I tilted it. She had a little bit of a a flow because if you
look at the photo, there's a natural sense of movement down there and
that tilting is good. Um, so it's, it's, it's it's better on
a long-haired dog. You that you can then
always follow the line of the coating gives you
a nice sense of flow. Anything special with a
spaniel that, um, again, she's got little
She's a little bit of a mix between
a either a hair, it you always smooth ER
the sheets smooth round her muzzle and she's got some hairy little bits on
top of a top knot, no ear. So she's a little
bit in-between, but a same rules apply to us. There's nothing different there. Again, just a little
wording on the coloration. As you can see,
she's very heavily, she's very dark on the top and I've almost switched
the colors round. But to me that's still my dog. So don't get too hung up. If you've got a liker
a colored dog that has she's got a black top and
she's got a brown muzzle. Try your hardest.
It's hard when you're looking at two because
you want to capture that. And that's one of
the reasons we did some colorful colors rather than the natural dog
colors is it stops. It stops. You. Trying to put color in it because we've got unnatural
colors as it were. You can concentrate on where
you're putting the paint, not trying to concentrate
on the colors. So I think she's a good example of if
you've got a breed that has different colors in
her head or his head, then don't, don't
worry about that. I would say I say
with a smooth dog, we did the little patches and we can do to the light layers. But if you'd like
this, Lucas say, I haven't followed her
colors at all but yet, I still think this
looks like her. I think that's all I need
to say on this little one. So I will move on to we have a little aka
*** kind of air. So it all these have been
painted on non stretched papers that are a little
bit little bit bowed. Again, that didn't
matter if I'm honest. If you can't be
bothered to stretch your paper because these are so natural and loose
if you get watermarks, I think that all sort of almost
adds to the joy of them. So I've used a little
bit of salt to try and create that texture of a
very curly coated dogs. If you've got a poodle or Kaku
has a total of tight coat, maybe it's been clipped then. As we drag that color down, I just hope you can
see I've just put, it'll salt just brings
with it along that line. Leiloni ear, say don't, don't worry too much
where it all goes better. It just gives her a
little bit of texture. And the other, the other
little thing we'll see I did the ear first as normal and
I did a dividing line here. Little bit like our hairy dog. So I did the model and eye area first and then carried on down the body very much
like the hair you on, um, and then pulled out
little twisty bits. And again, that will give you an impression of
what the coach is like. It's the outside, is the
little bits that stick out. They will, that will give the viewer or you an idea of what their coaches
like as well as doing, trying to do little
bits of texture. And just a word with
when you actually sketch out a hairy dog, try to put the line of
their actual physical body, not the line of the hair. Because what you would
do if you do the line of the hair and then you
flick out your dog suddenly gets fat or
larger or in a miss shaped looking looking hound and it was a thing I used
to fall, fall, fall off. So a good tip, that one. Then we go onto this
was actually one of the finalists of the
hairy dog competition. She was beautiful and I
just felt I needed to. It was a good example of a quite a long coated dog I thought might be handy for you. So again, she had a he I'm not sure if the
he or she of her money, so I'm sorry if this
is your dog that got remember we did the ear first and then just as
the ear was drying, I just pulled all this down and kept adding color to
the top so it flowed. And obviously she would have
been on a good color Chic. She looks like she on a tilt and ran and I just flipped out
as had one layer over it. I haven't even done
any second layer. I'm fiddling. I don't think even on again, that was divided off. This was left to dry. Then I wet this area down
and painted that into this. There's actually no second
layer there with any sort of structural sort of structure
to put in just the eye. And done. I think she's really pretty
like that. It's so easy. I think we always
have this idea. If the painting has
got to be good, you've got to put the time in. I think there's always like, Why can't possibly be take me 30 minutes to 40 minutes.
That's not long enough. It must take longer, but quite often I think it's
a trap we all fall into, is that it has to take
a long time to be good. And I think this one
proves you can do an AVI like lovely light piece and
have an attractive painting. So I think that's all I know. I was going to say. I'm for her. She used a rigger brush, which I'm using here is a bit of a pointer because that's
got a nice point. And then it holds a
little bit more water. And again, it's quite nice to very brush sizes just
to get the difference. Coach. You see that's quite a
big brush there yet. I've done a little,
little brush there on the ears to pick out
the very fine here. Again, she's a little bit
of an example of my puppy. She's a quite a dark
colored dog, yet. There's no I hadn't
picked that out in there. She's just it looks like I hope I haven't done the
color as such. Okay. So our next little zone
pore is a Labrador. How could I not do a Labrador? Obviously, that's a smooth
coated dog and that's always I find smooth coated
dogs are better laid flat without any tilting. Because obviously
you're not trying to follow a coat line or get any sense of
movement necessarily. Get just Obviously when we did the
normal ear drop color, divide, pull a lot of color
here and I drag that down. That's actually given
a sense of movement without necessarily tilting it. So just by adding
lots of color here, wetting it down and pulling, dragging it right off the page. That will give a little
sense of sort of movement. And I've actually sprinkled
little salt in it, taught entirely sure why. But again, it just given
a little bit of texture. I'm a flat ear is painted very much like the
right ear is not, uh, not, not anything different. I pull a lot of color here. I'm sorry. I went to the whole ear down and put a lot of
color here now again, allow that to move. This did I haven't even done, done a huge amount
of sort of second, second layer on, on this one. I just don't think it
necessarily needed it. Again, it's these you've
just got to look at your own piece and judge, where you think you need to
put a second layer on there. Some little bits of
the year would have been I could have done. But I think again,
that's given you a nice little fresh piece. I'm glancing down at my notes. I haven't been able to get
that line out very well at Labrador or flat flat eat dogs. Dogs were dropped two
ears quite often have a lovely line and light here
and I love taking it out. So that's a nice little
hint and that can divide an ear if it looks like it's
running into the body, it can just lift it out
so you can see the year. So that's a nice tip with a flat and a droopy, droopy ear. You know what I mean?
An ear like this. And last but no means
least, a ball breed. And there, they are fantastic
to brush, to paint. I love painting the
ball breeds. Again. You've got a lovely sense. You can do a lot of dividing, either with dividing the areas up and wetting them
down or using the dividing dividing
these little parts up with those second wet layers. So just putting a
tiny little bit of paint on here and
then wetting back. And yet that will create
these lovely folds. I can remember this was divided. I would have done
the year first. Wet or this down. Again applied same thing, drop color, color,
color, color on top. Like that. Then just drawing, pull that down to this, then pull it down further down. But this was done. Once everything has dried, I then put this
little area into that divide the pop a little
bit of salt in there. Again, it's just
for a little bit of, just a bit of interest. You could try cling film, which I haven't done
any on any of these. But that might be
quite interesting on a sort of a hairy coated dog have done in the past
a long time ago for a commission on it
that work quite well. Actually steady the chest hair and things because
you can almost manipulate that film
into the shapes. And yet it gives you a
nice silver natural look. I don't think there's
much more to say about this lovely, lovely one. Better. Ball breeds are lovely. So if you find yourself a bulldog and you haven't
got a dog, maybe. You want to just try a
bulldog or a ball breed. It's well-worth doing because
they are very satisfying. Satisfying indeed. So I think that's my
examples taken care of, and I hope this has given you a little insight and giving
you a little bit more, some more tips to carry forward And have the
courage to do your own dog. Because it's, it's amazing if you suddenly
look down and go, Oh my goodness, I've
just painted my own dog. That's fantastic. Sort of analogy I suppose is I like to think I've
given you a box. And in that box is a
loaded techniques. So you have to rummage
in that box and I have pulled out the ones you think
are relevant to your dogs. You may put some of
those back in and pause and other ones out and do a couple of paintings and see which ones resonate with you. You may like a certain
style of a certain look. Yeah, I hope this has
given you some tools and has inspired you
and just opened, cracked open the
door for you to sort of jump through and have a play, just, just don't, don't
be too worried about it. So I think that's why it's
nice having a stencil. Because you could do multiples, you could even do
multiples together. So it takes that
pressure of doing one, that one has to be perfect. So go forth and have fun.
21. Final Thoughts: I hope you enjoyed
this class and you plucked up the courage
to paint your own dog. Watson achievement. Isn't it amazing that by
placing paint onto wet paper, you can create such magic. But remember to keep
everything light, your hand, your brush, and the amount of paint you use. I hope adding the subtle layers
to form structure helped. Again, remember to keep
these lovely and light too. If you feel you've lost
your way at any point, remember, is better to step
away for an hour or so, rather than plugging away, trying to correct things, you'll be amazed at what a
fresh pair of eyes will see. So we look forward to seeing
you in the next class.
 Jane Davies, Professional Artist and Teacher