Transcripts
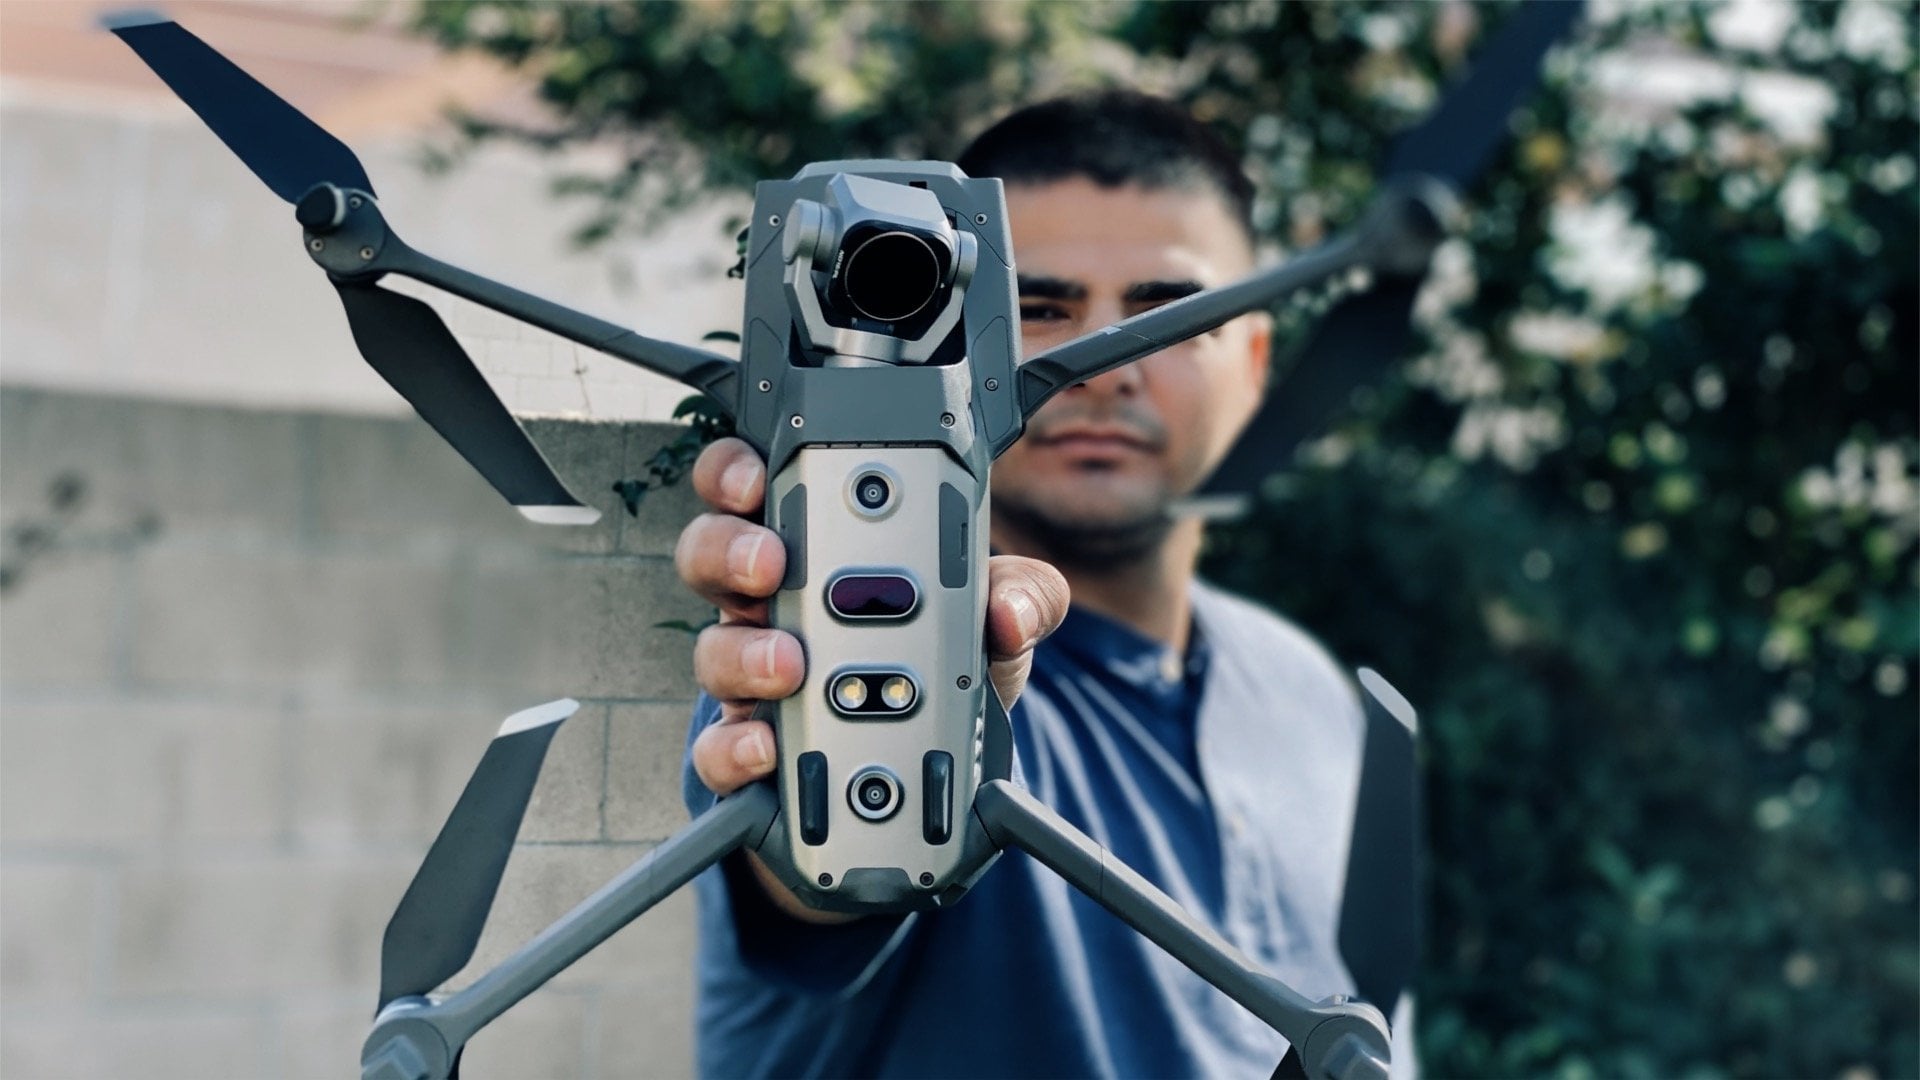
1. 0 - Intro: What's up, everyone? My name is Brian Garcia I from weddings and real estate videos. You'll get comfortable with a DJI Ronan s, So you can get more smooth cinematic camera movements. It's easier to carry something that's more mobile and you can travel with this Gimbel. In this course, I'll go over the technical aspects so you can get more familiar with it. And I'll mix it up with some of the creative aspects. I'll give you exercises so you can learn by doing things on your own. I'm sure you've got this Gimbal so you can start filming some of your own smooth shots. It will take a little bit of work and that can help you get there. We'll go over the assembly process and how to balance the Gimbal. You'll also need to download the DJ I run an app after your first exercise, will go over some of the creative ways I felt my projects. I'm ready to dive into this course whenever you are ready. So let's get started.
2. 1 - Assemble the DJI Ronin S: Okay, We're going to assemble the deejay Ronin s together, and I'm going to use one of my DSLR cameras. The first thing you're gonna do is touch the feet to the battery. Once you got that screwed in, go ahead and spread the legs out and standing on a flat surface, insert the gimbal into the battery over here. Once it's in all the way. Go ahead and turn the knob over here. So it's locked. Now we got this part down. We're gonna go ahead, amount the plate and the camera onto the gimbal. This riser play is optional. You don't have to use one If you don't have one, you can just mount your camera right on the plate. Just make sure you have a coin ready and your camera attached the riser plate to the camera . You can start off by using your fingers to screw it in and then get a screwdriver or coin to tighten it up. If you aren't using a rising plate, then you'll add an additional camera screwed to the plate. You'll see a big opening in the back where you can add it in. Make sure when you insert the plate that this arrow is facing the front of the lens. Once again, I'll start using my fingers, tighten up the screws, and then I'll grab a coin or a screwdriver to make a little bit tighter. Now you'll go ahead and screw in the land support. You can start off by screwing it in first, and then you can adjust it, so it's supporting the lens. Now we're gonna attach to play onto the mounting base. Remember all the mounting base. This air over here is showing you which way the lens is going to face. You're going to slide backwards into the mountain base, rocket back and forth a little bit so you can have a good balance. It tells the recommended that you take out the lens cap so it helps you with proper balancing. I personally think it's easier to bring the tilt motor all the way down just to start off with the balancing. This will be adjusted later, and once you have a nok belt, let's go ahead and turn the knob to lock it. We just assemble the main parts of the camera and the gimbal, so now we're going to balance it
3. 2 - Balancing tilt axis: all right. The first thing we're gonna dio we're gonna balance the vertical till Texas first. Make sure all the knobs hero locked. Rotate the tilt access so that the cameras pointing up hold the tilt access motor and check of the cameras. Top or bottom heavy. Go ahead and losing the knob so you can start adjusting that tilt axis. Keep making adjustments to the camera until the lens is facing up. When do you have a balance? Pretty good to go ahead and lock knob. If the knob get stuck, you can also pull it up and just move it around. No, we'll be balancing death for the tilt axis. The camera should stay still when rotating the tilt. Alex is 45 degrees upwards or downwards, so unlocked a lever and adjust to play until you can get the camera to stay still at a 45 degree angle. - Sometimes small details will make a difference, so you got to see if you need to move with just a tiny bit up or tiny bit down. Don't forget to keep locking the knob. This may take a few attempts, but check that your camera is staying still at a 45 degree angle. Also, the camera should be staying still facing up or forward once you got the till Texas all figure it out and let's move on to the role access.
4. 3 - Balancing roll & pan axis: If you release the motor, you're gonna see which way your cameras rolling over. So now we're gonna balance the role access. Now, go ahead and loosen the knob on the roll axis and we're gonna justice left or right until the role excesses balance. Just a quick tip. The DJ I wrote and does show some measurements over here. These are showing centimeters and millimeters. So just remember, as you're getting closer to balancing, every millimeter will account. If you're dealing with heavier cameras might also need to adjust the plate when I use my canon one DX and move this all way towards all right because it put so much weight towards the left, you can see over here. And now that it's almost balance, I'm trying to be very careful. So every slight millimeter that I move, it doesn't make a difference. Once it looks like it's balance. I'm gonna go ahead and look the now, but I'm not done yet. When you feel like the cameras balance, go ahead and adjust the camera so it's facing straight ahead. Then roll the camera 45 degrees on each side and it should be standing still. If it's still rolling over. Then go ahead and adjust the cam a little bit more so you can balance it. It might be a little bit frustrating when you're starting off, so don't be so hard on yourself. Here's an example of me messing up before this tutorial. This over here looks good enough, so we'll start working on the pan access. So to check the pan axis, just grab the grip and move. The rodent s sideways and you'll see if there's any movement going along. If the camera's panning around like this, then that means we need to balance the pan axis. Listen up the knob to make adjustments to the pan axis and go ahead with us around until you couldn't get it right. Remember that every time you're going to tilt the grip, make sure the camera's looking straight ahead. - Once you have the camera to stay still, every time you told it over, that means a pan accesses balance pretty good. So by now you should have the tilt axis, the role access and the pen access all balanced together. Now we're gonna move on to the next step
5. 4 - Charge & activate: okay, We're gonna go over a couple parts. So you know what I'm talking about throughout the next few videos, The bottom part here is the extended a grip or the tripod. I hear a lot of filmmakers call it the Feet, which is kind of stuck to me now. So I call it that this here is the grip, or some people call it the battery grip. And on top of that is the gimbal that has a pan role in tilt motors. Okay, the first thing we're gonna do is charge the grip with the U. S. B C cable and connect the other end to an out leads. The's battery level indicators will light up, and when it's fully charged, the lights will stop appearing, the better. It could last a whole day without needing to recharge. Before we turn on the gimbal, make sure it is fully balanced, or you may damage the motors. Once you have a fully charged go ahead and press the power button. Once it's on the grip, thin press and hold a gimbal power button until you hear the beep. Now that we have the Gimbel turned on, always remember you want the joystick to be facing you and you can press the trigger but in twice to re center, the gimbal. I always need to re center all the time, So this will come in handy for you. Now we'll turn it off and I'm going to turn this around so you can see what I'm doing. Press and hold a gimbal power. But until the green lights turn off, I'll go ahead and show you how to turn off the battery grip. Press the grip power button once, then press again for two seconds until the green battery level indicators turn off, all right, and that's how you properly turn it on and off before we move on to the next step. Download the deejay, wrote an app enabled Bluetooth on your phone and follow the on screen instructions to sign in.
6. 5 - Firmware update: Now I'm gonna show you how to update the firmware. Sometimes the stabilizer will have a few bugs that need fixing, and they will need an update. Go ahead and download the deejay Wrote an app for your phone. You will be prompted to log in with an account. So feel free to set that up. I'll show you where you can see what version you have turned on your gimbal and connected to your phone. I just turned my non. So now is connecting. You're gimble should come up over here under device list. Once you have yours connected, you click those three horizontal lines on the top left of your screen on this next page. Go ahead and tap on. From where? Over here. In the firmware version will show up the current version. I have given a few minutes to come up. This is the latest version that is out today. So I will show you where to go if you need to update it. So go to your computer and launch DJ I ronin Pro Assistant Voronin. You could do a simple Google search. Once you see the link from DJ, I go ahead and click on it. You can see on the sidebar. I'm in DJ High Pro Assistant for O'Nan. I'm going to download the software. I'm using a Mac saw. Go ahead and delegates package over here. I'm going to save you time from calling customer support, because when I double click on this package, a warning will come up. If you tried opening up your software and this comes up, go ahead and click. OK, we're going to fix that right now if you're using a Mac ahead and click on the apple, But here on the top left and select system preferences now click on security and privacy. Make sure you have the general tab selected over here. I'll say, allow APS down litter from I'm going to click open. Anyway, it's just taking safety measures because you're delegating this from the internet. Well, then I'll see if you're sure you want to open it, that I'm gonna click open. All right. I should have the installation open. I'm holding command and pressing tab as a keyboard shortcut to get to the installation box . I'm here in this dialog box. Just make sure to follow all the steps to insult open it up. This part is pretty self explanatory. I just need to put in my password. So my computer allows the installation. Okay. Was successful. I'll close this and move into the trash. All right, Now I'm gonna go to my applications to go ahead and search for it. I see the software for a D. I a pro assistant for road, and I'm gonna select it and drag it to my doc. Okay, Let's go ahead and open that up. You could read the terms of use. If you want. I'm gonna go ahead and click. Agree? I'll click next. I'm not sure if I want them to collect data, So this is optional for you. Now, once you pass all those steps, go ahead and log in with your account information. I'll go ahead and put in my email that my password and it's gonna ask for a verification code. I'll select I have read and agree the terms of use and sign in. Now we need to make sure my deejay rodent has turned on plug in the USB type C cable into the ronin and the other end, which is the USB connection into the computer Now that Ronan s is showing up over here, I'm gonna go ahead and select it on the top of the firmware lists. It will show up the latest version to download, and I will just say refresh because it is up to date. Yours will probably say download. So go ahead and click on it to properly download. Just make sure your computer is connected to the Internet. The device is powered on and it's connected to the computer. Whenever you're ready, going in, select start up date. When it says update complete, then you're all done. Feel free to close it or go back whenever you're ready. Let's go on to the next lesson.
7. 6 - Balance test & auto tune: Now make sure you have the running app open and your rodent as turned on thistle will keep updating. So expected to change over time. Over here already have my app open. I'm gonna turn on my d I ronin and they're gonna connect. Now you're going to see if you did a good job balancing the ronin. Click here where it says balance tests. You'll tell the ronin about 15 degrees. This will show you the current status. So when it's tilted hit, begin test. Once this is done, you'll get your results for the Tilt Roland Pan axis minus showing all excellent over here . If you're not getting the same results, go ahead and read you the balance. I'll go back to the main screen so I can show you how to attitude. Now we will now control the stiffness of the motors, so let's go ahead and click on motor parameters. This stiffness allows you to adjust amount of power that is applied by the motors. This will help stabilize the camera. Select auto tuned to automatically calibrate the motors. This will automatically work out the results based on the weight of the camera. Auto tune is preparing to start. I just tapped okay, based on the weight, that's automatically calibrate so the stiffness works in most situations. I personally wouldn't recommend adjusting this unless it gets too shaky. They don't be the stiffness down a little bit, and that's it for this lesson. So whenever you're ready, go ahead and move onto the next video.
8. 7 - Exercise: Film in tight spaces: All right, So now I'm gonna give you guys a challenge to go out there and practice filming with the D . G. I. Ronan. But start off those places that have tight spaces like hallways or maybe indoor, maybe a real estate kind of style video. If you can do something outside, that would be great. But if you're in tighter spaces, you can see movement a lot more easier. The wider the space is, the harder it is to see that movement. But let's start this off by showing you guys the joystick over here. You can see over here if I could move this left and right up and down. And these were sent to the profiles, that road and already has set up a clique em, it goes to number two. You can see over here That was setting is more like a roll over here, and three has his own setting, so I'm gonna put it back to one. If you've already used editorials and kind of mess with controls, I'm gonna show you how to reset that. So let's go to our phone. I am gonna pull this up, and here we go. So before I go into that? I want to go ahead and show you user profile. Yep. M one M two and M three. These are already said You could always adjust things and I'll go over these later. I go back to M one. That's basically what I was showing you over here and one M two and M three. Now go to status. Restore gimbals Set up. This is going to reset everything in case you've already messed with this. So let's go ahead and click that restore Gimble parameters. Restoring Gimble parameters will reset all problem parameters to the default value and cannot be in debt. Are you sure you want to restore parameters? Click OK, and it's already done. No, if you keep this over here on user profile one, you're gonna go left, right, uh, and down. And you can bring this up. If you've been moving the joystick around the law, you need to re center it. Just remember, you can always double tap the trigger button, which is what I do all the time. That's gonna center it. Watch as I move this tilt up. Let's go in double tap the trigger, But in and There you go. Now, let's talk about your body posture because you don't want to wear it Your back. You don't want to wear your arms because a lot of people are gonna do this and, yeah, that will tire you out. But you can do whatever is best for you. This is what held me. I've been my knees. Keep my back straight, elbows closer to my body as much as possible. And then you can get your shots. You can push in and go get sideways. Member filming in tight spaces so you can get a lot more movement. Now sometimes you got to break the rules to get a certain shot. So there are times I'm gonna take my arms out to do something, But I'm not gonna do that the majority of the time. So do what you gotta do to get your shots. Remember? Think about your posture. You wanna wear your back so young and, uh, let's see what you can film. Show us what you got and I'm looking forward to seeing your projects. Bam!
9. 8 - Self Critique: All right, So now I'm gonna go over some of the mistakes that I made when I was first using the deejay Ronan s. And here's one of my early real estate videos and just a heads up. I'm not showing you the entire real estate video to show you the shots, like feel like is important for this lesson. Let's first talk about the blames that I use. I use a 28 millimeter prime lands, and I probably should have gone whiter for this may be down to 18 millimeter prime lands. If I'm showing a tight space like a house, I want to show how spacious this house is. Also going wide gives me more room to move around and get more cushion shots. Okay, We're gonna go back cause I want to show you the original show. I want you to see when I first started off, not everything was steady. I ended up taking this to aftereffects Night stabilizer. From there you can see how wildly it is over here. And here it is against stabilized using aftereffects. This shot over here happened by accident. I press that m but in ones and went to user profile to and when I was trying to pan it was rolling. I'll go over the controls later, but I did like the way this turned out for your exercise. I did recommend that issued in type places and the reason why I did recommend that because you're gonna see over here I'm shooting in a wife space backyard. It was harder to keep it steady for so long. I wanted to get more movement, but the longer I kept my shot more, I started to struggle. It was much better to shoot in shorter time frames because I was able to cut out two different shots before he was getting too shaky over here. I was a little bit tired, maybe too lazy, because when I was trying to move sideways, the gimbal was tilting down too much. I had to readjust my posture to get the smooth shot. So after I fix, my posture was able to stabilize this much better. You can see that the shots look a lot more clean. Also for me to get that smooth cinematic look. I had a record everything at 60 frames per second and the playback speed was 23.98 frames per second. You can see it's in slow motion over here. This helps my shots look a little bit more steady over time, you'll get better using the joystick You can see over here as I'm moving, I'm walking and turning the joystick as well. This will also take some practice that you're gonna have to justice to find what best fits your needs. All right. I showed you my bad takes my good takes and the stuff that I learned from. And that's my own self critique of my own shots. I'm just like you always improving. This is my earlier days using the deejay Ronan s feel free to show your project with us. Let us know how you're doing. You're going to keep improving and gonna keep practicing to get better. Whenever you're ready, let's go ahead and move on to the next lesson.
10. 9 - Trigger button: all right. Now, I'll show you how to operate the camera using the trigger button when you press and hold the trigger. But in the green lights and the profile will start blinking. And this will lock the camera orientation. As you can see, when I move in the camera around, it's always facing the same direction. This helps me get those smooth pan shots. But remember, your hands still needs to be steady in this shot. Over here, I was holding the trigger, but into quite right with the leaves, I didn't need to stabilize its anymore during post production. The only thing I did was record. This is 60 frames per second and the playback speed and post was 23.98 frames per second to get in slow motion. I didn't cover this next part in a previous lesson, but in case anyone skipped it, here it is again if you double tap the trigger, but and you can center the gimbal and this is something I use all the time. Well, filming every time I need to reset to get the 3 60 rotation, I'm going to send her the camera here, press and hold the trigger button and tilt the camera down, so it's facing straight ahead of me. Now you're in flashlight mode. If you need to re center it, go ahead and double tap the trigger. But and again, let go of the trigger button and go to user profile to, and you can roll the camera with the joystick. From here. Another typist uses well, tilting down at a subject. In this case, I'll have the camera look straight ahead, hold the trigger. But until down, while the camera orientation is still locked, here's a wedding video example. I personally don't like to get. Why shell to the wedding dress? I'd like to get closer to get more detail and movement. In this case, I'm up close and tilting down while holding the trigger. But if I set up my camera to focus on a subject, all press and hold the trigger button so it's locked, and I can either push in or out of that subject, triple tapping the trigger. But it will turn the camera to a selfie position. If you're having a hard time re centering the gimbal, it's happened to me many times. Just press and hold the power button to turn off because he don't want to damage the motors while you're manually adjusting it. Once it's off, you can manually adjust it. When you're done, just go ahead and press and hold the power button to turn it back on. If the gimbal tends to drift, you can calibrate the gimbal on the running app. It's real simple. You go to status and press system calibration, but another alternative is depressed the trigger, but in four times and hold. Rotate the joint six several times. Wait a couple of seconds until the green light of the user profile stops. Blinking Delight should turn someone green when it's done. If the light blinks, read that you need to read. Do the calibration. Go to the ronin app. Click on user profile Attempted control button. All the challenge should be set to zero. If any access is not centered, re calibrate the joystick. Now we'll go over the joysticks a little bit later. I should you earlier How to auto tune through the AB. Another alternative toe attitude is by pressing and hold the M, but an end trigger button. At the same time, we'll cover the trigger, but in a bit more in later lessons. Go ahead and play with this and let me know if you have any questions.
11. 10 - Strength: now we're gonna cover strength, which makes a huge difference on the flow of your movement. If you haven't followed my previous lessons, I highly recommend that you balance the gimbal and restore gimbals set up to follow along. And just in case you forgot which motor you're working with, this is the pan. This is the role. And here is a tilt axis which will be adjusting right now with the Gimbel turned on. Open up the road in app. I did show you how to attitude before, but I'll do it Quick recap Go to motor parameters and click Auto tune. Remember that this will work out the results based on the way. Sit up. The stiffness allows you to fine tune the amount of power that is applied to the motors. You shouldn't have to touch this too much unless you become more familiar with it. If I were to mount this onto a car, I'll bring the surface up. Also, if I'm using a zoom lens all just that tilts a little bit higher. So it's a little bit more stiff keeping money. If you bring the syphon step too much, you'll see that start to shake, so try to avoid bring it up too high. Now let's go to the advance tab and click on Strength DJ. I will recommend leaving these settings alone before I make any adjustments, all pants so you can see the movement of the gimbal before I start making some changes with the pants said to 10 you can see the strength of the movement. That tilt is set to 20 and the strength is a bit higher for the tilt movement. Now I'll bring the pen down so you can see the difference of the movement. You can see when I push the joystick. It's not so abrupt, a little bit more smooth. This will be good for weddings. But if you're doing something like sports, I would bring the street a little bit higher. Now I bring the strength that tilt down a little bit so you can see the difference you get sees a little bit more slower, which is also good for weddings. I'll go ahead and double tap to center it. Now go ahead and show you the role access, so go ahead and click am to go to status. Profile to the role is set to 10. So go ahead and move the joystick, left or right to roll the camera so you can see the movement of the strength. I'll bring the roll down to one, and now the movement is a little bit more slower and steady. This is how I was able to get that steady swing movement of the fish of the wall is working on that real estate video that I showed you guys earlier. And here's how they able to do the same thing with wedding video. And now I'm gonna go back to user profile one. Here's the difference when I move the panda to fit the and if you go higher, Italy is more of its strength. This will be good for a lot of fast movement like ours outdoor activities or people playing in the yard or sports. Like I mentioned earlier. That's about it. For now, you can see how useful this could be for different events and apply what you learn. Even at home. Let me know if you have any questions. Whenever you're ready, let's move on to the next lesson
12. 11- Exercise: Creating Depth: one of the type of compositions that I like to use. His death may have said it kind of weird, but I'm referring to D E E P T H. Now you can try this exercise in a film in spaces where you can separate the foreground and background. Based on the information I provided in the last few videos, you should create glide shots with death and create cinematic movements. When I went over myself critique, I mentioned how using a wide angle lens may have been better for a real estate video. This time, I'm showing you a normal 50 millimeter lens when I'm glad to the left or right and making a two dimensional image look more three dimensional. You can also see creating death moves of background slower than the foreground. And here's a tip. If you are able to space out the foreground and background, the more movement you'll see on camera. Same thing if you're also closer to the subject or zoomed in. Just remember that death is a certain type of composition gliding, left or right. It's a type of camera movement. You can also try different movements, like rotating the camera if you want to do something a bit different based on what you learned. Feel free to break the rules. You can get close to a subject that doesn't have much of a background and great movement up close to make it satisfying. Sean. So find a location and tried this exercise. Let me know if you have any questions and have fun filming.
13. 12- Underslug Mode & Sports Mode: Okay, So now if you want to get some low angle shots, I'm gonna show you the under slug mode. First thing I'm gonna do is Senator the camera by double tapping the trigger button, pull the trigger button and turn it upside down. If you need to go ahead and double tap the trigger button and you're gonna notice that the cameras facing the same direction as a joystick, you can see how I'm holding onto the legs with one hand and my other hand was holding onto the battery grip with my thumb on the joystick. It's easier to have the joystick facing away from you so you can have controlled the movement with their thumb and still have that trigger finger available. And if you press the trigger brought in three times, the camera's going to round face you in selfie mode. I don't think you'll need this. I don't see myself using this. Getting that low. I'll double tap turn around because that was getting kind of awkward to bring this back up . I'm going to hold the trigger bun and face to gimble up Now. Another way to do this is by turning off the power to the grip entering the gimbal upside down, and you could just manually center the camera. And when it's done, you power. But turn it back on and vice first so you can turn the grip off and raise again. Blub. If you need to capture fast movie subjects, press and hold the MBA and the indicator will turn yellow. As you're holding the MBA and the gimbal respond quickly as you're turning. This is called sports mode. Sports moved and underselling mode are both useful for similar activities. I use them both when I'm getting a lot of action, like dancing at the wedding or even outdoor activities. You can also lock sports motor by holding the M button and double tapping the trigger by it . The green light indicators will stay yellow. Even with sports motor log. You can still control the gimbal with the joystick. This will definitely be helpful for quick moving subjects to unlock sports mode, hold the M button and double tap the sugar. But again, the light indicators will turn green. So go ahead and mess with this a little bit. Have fun. If you have any questions, feel free to let me know
14. 13 - User Profile: Camera follow settings: Now we're getting started with user profile from the home screen on your own and app. Click on the user profile, but I'll quickly show you the speed. When I move the camera pan or tilt, the camera will slowly follow. The speed determines how fast the camera will travel well, translating the movement. You can see how slowly the camera will follow the movement. As I'm tilting up and down, I can click the job down menu and change the speed right now will change it too high, and you could see the camera will quickly follow the movement. As I move the camera around, I'll go over the smooth truck parameters in a different lesson. But for now, I'm keeping this too high this way. I can easily show you how to change the camera movement. If you have this set to pan until follow, the camera will follow your movement when you pan or tilt. Now, go ahead and tilt and you can see that it's following the movement. Now. If I roll, it will not follow the role movement because it's not set to that. You can see that the cameras keeping its role orientation the image. Over here, we'll show you which accesses following your movement. I'll click on this job down and changes to pan follow. Now the camera only follow my pan movements. It will keep the tilt and the role access at the same position, depending what's more comfortable for you. Sometimes people might feel like holding the trigger button is good enough to hold its orientation. And here's a roll access again. You can see that it's not following the movement. Now. Press the job done again and click F PV. This time, the pan tilt animal access will all follow. I'll start with the pan you could see is following along as I make the movement. Then we'll do the tilt and it's following along with my tilt movement. Now we'll try the role, and you could see as I moved to the side of the role accesses following along. Now let's go back to the drop down menu and change it to three D roll 3 60 No matter where you move the camera, it will stay in this position. You can do it 3 60 movement on something below or above without having to worry about using the trigger button to make these changes. - I'll go ahead and changes back to Penn until follow, and I want the camera speed to stay low so it looks smooth during the turns and tilts. Remember when you click the em, but it'll change to a different user profile. You can also switch on your phone. You can click on em, too, and you'll see the default is showing F PV, and you can always change that click on M three, and the speed is already set too high. It will only look like this. If you restore the gimbals set up in one of my earlier lessons, you can save your prefer settings, however, best fits what you're doing. If you want to reset it back to its default settings, go back to my earlier lesson to restore Gimble set up. Go ahead and play with this a bit. Let me know if you have any questions, and whenever you're ready, let's move on to the next lesson.
15. 14- Parallax Effect: all right, that parallax effect. This is what most filmmakers want to do to create that space between the foreground and background, moving at a different pace. I'll go over the settings I used and the different lenses. If you follow my previous lessons, I think it would make this video easier to understand, because I'm gonna have some of the similar settings that I showed you before. So just a quick recap. I'll go to my rodent s app. Auto Tune the device by going into motor parameters. When it's done, it'll top the advanced tab, select strength and bring the pan role until down. The tilt is usually a little bit higher, so leave it out. Five. Remember that this will only control the strength of the joy. Six. So now let's move back home. Tap on user profile so we can adjust the smooth track parameters. For now, I'm going to set the motors to pan and tilt follow. I'll go back and change that later. If you go to the job down menu under speed, I really set this too low, so when I turn the gimbal, that camera follows very slowly and it's steady. Movement the first example show you is when you walk past your subject and use your joystick to slowly move the pan so the camera is still following your subject. I'll center the camera by double tapping the sugar. But as I walked straight ahead, I'm turning the joystick so the camera follows the subject. I'm just walking forward as my cameras. During the turning, I'll show you another example. Now let's circle around the subject double tepid sugar but into center the camera. That subject is a little bit lower, so I'm going till down a little bit with the joystick. It's easier for me to walk backwards, and the camera was slowly followed. The movement. If I walk sideways, I won't be able to keep moving smoothly. So I'm not touching the joystick at all during this movement. If you notice during my footsteps that cameras kind of bouncing up and down, just pay attention somewhere close to the frame. That's also because we said it to Penn and tilt follow. Change the settings to pan follow and until won't be moving around so much. The longer the focal length, the more movement you'll see in the background. I'm using a 28 millimeter lands with this shop, I'll share the difference with the 85 millimeter lens. I prefer to zoom in, but you gotta have steady hand for this. Sometimes it's better to start wide and eventually work your way to closer shots. Go ahead and practice this at home. Let me know if you have any questions. And whenever you're ready. L see you in the next video.
16. 15 - Auto Roll 360: All right. I'm going to show you how to use the auto 3-6 steamroll using the DJI wrote an s. But the problem I had when I first started doing this is having it stopped right when it's centered. And you can see as soon as I let go, that joystick over u here it is not centered at exactly how I want it to be. In the app. I'll go to User Profile three. You can see over here I have 3G rolled 360 selected in the drop-down menu. Now go to flashlight mode and stringing the Gimbal. Instead of pressing and holding the joystick to get the role, I'll go ahead and double tap the joystick left or right, so it can have a continuous roll without stopping. The Gimbal will rotate continuously without needing to hold the joystick, press the trigger button twice so it can stop precisely at the start position. So now I don't have to worry about letting go of the joystick right exactly at the center. This is something that I mostly use during the open dance floor at a wedding. I wouldn't show you some more examples, but don't know if it's really appropriate for me to post right now. Alright, there's a quick woman additive for you, and I'll see you at the next video.
17. 16 - Tilt & Push: Now we're gonna tilt and push towards a subject. This is a good way to show the environment and ease down without having a cut. As you can see that a uses all the time during wedding receptions, during the dances. Now here's a quick tip of how I achieved this shot. I have my user profile to set to pan and tilt follow. The follow speed is set to slow dead bands add medium. I don't know if that's gonna really matter in this case. And the sensitivity is set to medium. And you can have these settings however you'd like. Everything really depends on the movement of your arm and how you want the gimble to follow as you tilt down. I start off by having the camera facing upwards almost like I have an axonal bottle, slam it to the ground and you can see my knees are bent over here. Keep your back straight as you walk forward, you want to be moving at a steady pace. As I walk forward, I'm gonna slowly tilt down, keep my body posture consistent, and move into the subject. And sometimes it will take me a couple of weeks to get it right, but that's it for now. Hope you got something out of this lesson and I'll see you on the next one.
18. 17 - Virtual Joystick: Hey, what's up? I'm gonna show you how to use the virtual joystick. Basically what that does is that it controls the Gimbal through your phone. I don't see it being useful for my line of work because I felt weddings and real estate, I needed to be fully hands-on. But you can probably uses for commercials or maybe bloggers or anything else that you find useful. So we'll go ahead and get started. Basically, you just need to have your gimballed turned on. Make sure you have the app open. And I am going to click on the Create button. Under the Create section, you'll see virtual joystick before I get into that, all those other options use C over here, active trek pro force mobile panorama, time-lapse track will go over, giving control some other time. Just hold off on that. Basically, you need to have your gimble connected to your camera. And you gotta make sure you find the right connection when you look it up, makes sure it is connected to the camera that you're using. I have this one right over here, which is my one dx mark two, I have that stored away somewhere. I have the 5D Mark three on my gamble, which is the camera that I use when I'm filming real estate videos. So I'll be able to show you through virtual joystick because you do not need it connected to use virtual joystick. So just my, I'm going to edit that part out. So once again, just make sure you're looking for the compatible core that goes into your camera, into your the Gimbal. And there are only a few bucks. Let's go ahead and click on virtual joystick. Now you can see the settings that the app gave me. Those are the normal settings that I got over here. If I move this towards the left, it's gonna move left. If I move this stick to the right. If it's gonna move towards right. Same thing. If I go up or down, and let's go down. I fill it will vibrate whenever, every time I do that, it looks kinda weird. Now that I've done that, there is the recenter button over here. If I want to recenter it. And you can see above over here, you get the speed and the smoothness. And you can change the settings for the pan tilt and enroll. So for the speed, right now it is set to 40. And you saw how it was moving during this setting at 40. Now, I'm going to bring this down to 0. It's not gonna move at all watching Sal, you see, I'm moving right to left. It is not moving at all. Just bring this up a little bit up to eight, right over here, I want to move left and right. Moving left, right now. And it's moving very slowly because I wrote the numbers down on the species section. Now let's bring this speed all the way up to a 100 right here for this, check this out. Wow, look at that. Again. It goes fast, goes fast. Okay, so that's the speed. Now let's check the smoothness. Let's click over here on the smoothness. Well, actually, let me bring this back down to o, bring it down 3031. Okay, now let's click on the smoothness. And I'm gonna bring the smoothness down to to as low as I could possibly do it. So it's not very smooth. There you go. There's bring the smoothest up to 30. C. It was like a little bit of a delay. Every time I turn this. You can see the difference and bring it up and down. You guys can go out and play with it. See what works for you. Maybe if you're making some awesome video out there, I just move the spec to speed and I'm going to recenter this. So the only time you'll need chord for your Kermode if you're going to report it to your phone, this button, this red button right over here. It's the record by N and I don't have a connected, so I'm just going to record it manually, which is what I normally do when I'm filming at weddings. But if you want to report it to your phone and just make sure you connect it. And that's about it. We're done for this video. Alright, peace out.
19. 18 - Active Track: All right, as my lens wide enough because I'm going to move around a little bit and I want you to be able to see everything. Now, first off, active track, basically what it does is it follows you, it follows the subject, you select the subject and the camera will follow that subject. If you want to give a demonstration like I'm doing and have the camera follow you as you move around. That'd be great. But apparently, I have this camera here on the tripod. So I can't really show you from that camera because I want to show you the symbol for this demonstration. And you can see the cannon one dx is connected to the Gimbal. Just make sure you find the right chord that is compatible with your camera. And I do have a melt over here from my phone. And that's what I'm going to use to track me. And basically just go ahead and open up your app, your digital wrote an app. Click on the Create by n, go to active track. And I needed to select my face. So I am going to connect this camera onto this melt. See if I had another partner here with me. I can be behind the camera as I show this, but I think it's kinda good that I'm able to show you this if you're by yourself. Alright. I apologize. I had to cut the camera because he saw it was shaken when I was talking and that was because my phone was not centered. And now it's looking like it's fine now. So I am going to put my face in front of the camera. Okay? You select your face and the camera will follow. Si Isn't that like magic right there? Cool. So I can give you a whole demonstration and I can just let my camera, my camera operator with the Gimbal as well. So on there you can actually change the speed because sometimes you might be moving really fast and then we'll be able to keep up. You see, I'm moving around. Won't be able to keep up with you. But you can go ahead and play with it yourself, check out the other stuff that you have on there. And that's about it. That's probably enough for today. Have some fun. Alright, have a good one.
20. 19 - Force Mobile: Hey, what's going on? I'm going to show you how to use force mobile is very similar to the virtual joystick, but instead of controlling it through the little knobs on your phone, you are controlling your gimbal by moving your phone. And this would, might be useful if you're doing vlogs or maybe documentaries or commercial when you're interviewing somebody, you want to adjust your gimbal without actually touching it. But we'll go ahead and get started. I do want to mention that I do have the Canon 5D Mark three connected to my gimbal. You do not need to do that. The only reason why I'm doing that is so I can record it through my iPhone because there will be a record button on here as well. So let's get started. And here it is. I am going to open up the app and click the create by n. From there you are going to go ahead and click on Forest Mobile. And you can see enabled force mobile is disabled. Before I start doing that, I'm going to go ahead and click the Record button at the bottom. I got to turn on my camera because a massage to the auto shut down while I was setting everything up. Okay. So it is on. I'm going to go ahead and click the record button. There we go. It is recording. Now, I am going to go ahead and select Enable force mobile. As you can see, I am able to move my camera. And now you're getting a close-up of my face. Now you're able to see the background of my office with this view as well. But as I'm turning it, the camera is turning. I do want to mention that if you are turning it the same way I'm doing it, and it is, it's not turning the direction you wanted to. You may want to try turning your phone around and see what works best for you. That's what I had to do the first somebody uses because the very first time I did this, my phone was like that and it was not working, so I had to move my phone over here in portrait mode. So let's say I want to get my face in the shot. Let's turn over here. I don't want you to see too much of my office. I don't want to use the mess over there, so I'm going to try to get myself set to center myself as much as possible. And once I feel like I got myself position, I can go ahead and disable the enabled for SNL mole, but it is disabled because I got to where I wanted it to be. Now, the stuff that I've seen, the stuff that I've researched, a lot of people are going to recommend using a tripod and turning it with the tripod. I personally don't want to use that. I want less equipment as possible. I think what a lot of them what they would recommend as you put it on the tripod and you set it and you just leave your phone alone, don't touch it. I personally feel like you can just turn it and angle at the way you want it and then de-select force mobile and you don't have to worry about, you know, your camera going off the subject as well. Now, I want to show you the button at the bottom right, it is re-center. So you can always recenter that if you need to. And I'm gonna go ahead and click on Enable force mobile. You see over here are the top two tabs. You see speed is smoothness. So speed is basically how fast it's going to be moving when you turn. So I have my self-centered, I'm going to de-select force mobile. I'm going to bring the numbers on smooth speed. I'm going to be the number is high, we can up to a 100. You're going to see the huge difference of how facet is. Any kind of movement is going to make it move very quick. And depending on what you want, you can also bring the numbers down low. I'm going to disable this real quick. Bring the numbers down to maybe 14, 15, to something below 20, somewhere around there, 560 on the pan and tilt. I am moving and it is very, very slow. I'm kinda like turning my camera with my phone. Little too slow for me. Okay, I'm going to disable that. So you've got to see the difference on a speed. I'm going to move those back up to around 50, 52, 53. Okay, now click on the smoothness tab and you can see it is extremely smooth that I have it up to 30 and I am going to bring the numbers down to a single digit number, 2, 5, and 5. Let's enable that. See how quick it is. It is very quick. Disable. Now I'm going to bring the numbers, maybe in the middle, I'll bring up to 15 because I did not need it at 30. You saw how was it 30 times always practicing the speed. So here it is at 15. I think that's pretty much good. It's not super fast. I can control it a little bit better. Let me go up. Try to get my face. Don't try not to get zoom in on your computer screen looking at my face. Okay, disable the counter, moved k. Let's do that again. Let's go ahead and bring it up real quick. Disable this a little. There we go. All right, so that's basically how you use it and if you need to recenter it, go ahead and do that. And I'm gonna go ahead and stop recording. Re-center. Cool. That's about it. Have a good one, Take care.
21. Conclusion: All right, congratulations, you made it this far and that was a lot of information over here. There's always so much more I can go over, but I highly recommend that you take it one step at a time and start playing with your gamble. That's how you really improve by going out there and start filming. Don't forget to turn in your work in the projects gallery here so we can look at your work. We went over a lot of technical stuff and that should be enough to get you started. Feel free to follow my skill share page and keep up with my other courses. Take care, have a good time filming. And that's about a piece out.
 Brian Garcia, Wedding, commercial & real estate films