Transcripts
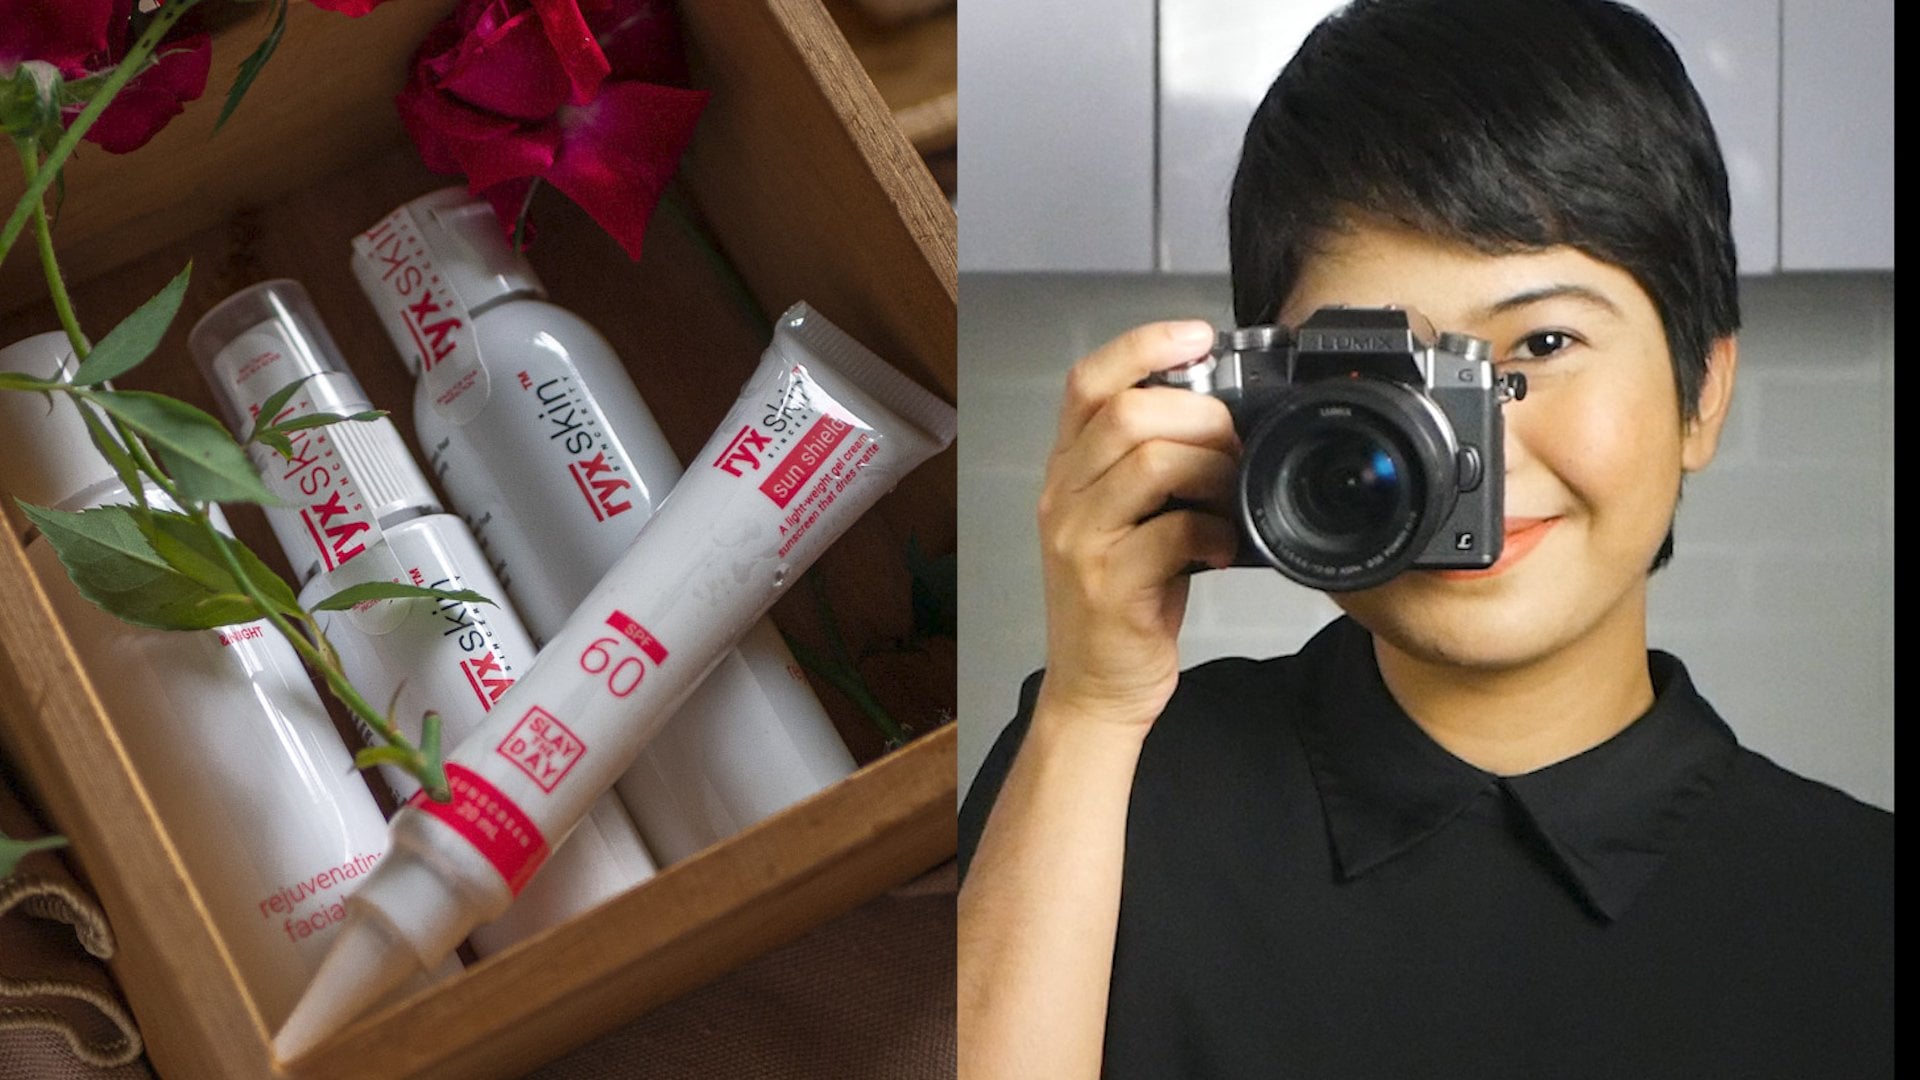
1. Class Introduction: Hi there, my name is Rose. I am a food and product
photographer from the Philippines and a
Skillshare Top Teacher. Photography started
as a hobby for me and my husband, but overtime, free photo sessions turned into paid gigs and eventually grew to be a real
business for us. Apart from taking photos of products to help local
businesses increase sales and improve
online presence. We also conduct workshops for online sellers who want to
DIY their product photoshoot. One of the pain points that
was shared with me is not having access to a
professional DSLR camera. And what I would always
tell my clients is that taking beautiful
product photos. It's not just about the gear, but following
photography principles, and that is what I have
for you in this class, we will kick off with setting
up a DIY home studio, followed by lighting
tips and techniques. Then we will dig deep into
iPhone camera settings to create stunning and scroll
stopping product photos. I will also share my personal experiences
when selecting props. And you will see me stage a
scene and do actual styling. I will end the class
by showing you a photo editing
demo on the iPhone for that professional
final look, basically you will see my entire process of
shooting a product, but instead of using
my DSLR camera, I will be using my iPhone. If you will follow along, you will have three
photos of your product. One on a plain
sweep background, another one with
a prop or props. One with products styling. Anyone can join the class
and no prior skills needed. May it be for your business,
for your blog, for your social media, or as a favor to a friend. As long as you want to create beautiful product photos using your iPhone or your smartphone, then this class is
perfect for you. So go get your iPhone
and let's get started.
2. Class Project: Before we jump into the class, Let's talk about
your class project. You will be needing just
a couple of things. First, a light source. It could be natural
light from the sun or artificial lighting from
lamps and LED lights. Next is a flat
surface where you can set up your background
and shoot your products. Speaking of backgrounds,
this could be as simple as a white poster paper which I will be using in
most of the demos. It could also be a white
fabric or a PVC backdrop. Of course, you will be
needing a product to photograph and your
iPhone for the camera. Optional materials
are reflectors, props and a tripod. This steps and techniques that I will share with
you in this class can help you create three
types of product photos. One on a sweep or
seamless background, one with props and one
with products styling, don't worry, I will try my
best to give as many examples as I can to help and guide you in creating your class project. I also recommend taking this class with a
friend or with family for that extra boost of
motivation and accountability. Plus you have more people
to celebrate with. There is no pressure here, but once you're finished
with your photoshoot, please upload your photos in the class project gallery so we can see it and
give it some love. I hope you're as
excited as I am. In the next lesson, we will officially start by
setting up a DIY home studio.
3. Setting up a DIY Home Studio: In this video, I will show you how I will be setting
up my home studio. This is going to be
a very basic setup, so you can definitely
follow along. Plus I will be using
materials and things that can easily be accessible
at home or in your office. The first step when setting up your studio is finding
the best lighting. Lighting is the main ingredient
when creating a photo. When there is no lighting, there is no photograph. Imagine if I close
this curtain or if I close this window and I close all the
lighting in this house, it will be just pitch
black, but with light, you can see me
somehow I look like a three-dimensional
image to you. And that is because of shadows
and the effect of light. So that is why it's
very important in your product photoshoot. It's like in bread. When there's no flour, there is no bread, in music when there's no rhythm,
There's no music. I would love to give them
more cheesy example, but you get the point. So without lighting,
There's no photo. This is our guest room that we turned into a studio
and into an office. So this is a multipurpose room. And the room where in we have this nice window and I can get lighting from outside. My next step is to set up
the base for my photo shoot. As promised, I
wanted to give you as many examples as I can. So I will be showing you
how I will set it up using a chair and a table. So let's start with a chair. In my case, I don't
have a flat surface, so I will be using additional material to
make a flat surface. So this is how it looks like. I need to position this
chair in this area. Because if I move it just a little bit closer to the window, I am getting some shadows in my setup and we don't want that. So I'm putting it right here, so I'm finding the
best spot where in I don't get shadows and I get the most balanced
lighting from my window. And for me, this is that spot. Okay So we have our chair,
we have our base. Next is our background
or our backdrop. This is a poster paper that
I got from a bookstore. how much is this? This is less than a
dollar this is just 19 peso. It's very cheap,
but I love that It's thick and it
has a sturdy texture. So this is going to be our
background and our backdrop. So we are creating a sweep. That means we're creating
a seamless background. Alright, Next I have this tape. this is pretty much sturdy, but I wanted to support it. And then adding
tape at the bottom. to support this part. And that is it. We already have our background, we have our base, and we
have a seamless backdrop, which is very flattering when it comes to product photos
that you will be uploading on e-commerce
websites wherein you have this nice white background without any distraction and you're just focused
on your product. So now that we have
our light source, so we have our setup here, we have a base, we
have our background. So next, our camera, which is the iPhone. For our product photoshoot, I will be using an
iPhone 11 Pro Max. So we have those three
cameras at the back. If you will be using an earlier version of
iPhone, that's totally fine. These photos are taken
using an iPhone 8. You may need to purchase an additional lens just
to get rid of distortion. But you can still
capture great, product photos
using those phones. You can definitely
start with that. But if you have iPhone
11 12 13 and so on, It's going to be
better because we have the telephoto or what
I call the macro lens, which is best when
shooting product photos, especially products that
are smaller in size. Now when shooting
using your phone, you might want to
use a tripod so that something is holding your camera and to avoid camera shakes, you can also use this. This is a cheaper one. You can also use this
as a selfie stick. I'm just showing you this to encourage you that
you can start with very basic materials,
with things that are most accessible to
you, affordable ones. So this is a multipurpose tripod that I also use with my DSLR. Now to be able to use
my iPhone with it. I just got this extra
adapter for smartphones. But this quick release plate, it came with a tripod. So what I'll do is just connect this adapter to the
quick release plate. So i will be just using this making sure it's tight. Now that's done. You can
now put your iPhone now that you have your quick release plate,
you have your adapter, you have your phone,
you can now put it in your tripod I can just slide it in and
then use this to lock it. And I now have my iPhone all set up and I can now do whatever
I want on my setup here. Alright, so now that we have our iPhone properly
set up on a tripod, It's now time to take some
test shots of our product. Let's start with
our sunblock here. I have a habit of
doing a test shot before going all-in into a photo session so I can address exposure and
lighting issues right away. I find it helpful and efficient
instead of going into the whole photoshoot
and finding out my mistakes, 30 photos later. Next, for bigger products, you may want to use a table
like this instead of a chair. For this setup, I am
using a T Stand to hold this PVC material
dual sided backdrop. These clamps came with a T
stand and same with the chair. I am using tapes to
secure the backdrop. This is my upgraded setup, using a table, perfect for
shooting bigger products. In the next lesson, I will share some more
lighting tips and techniques. See you there.
4. Lighting Tips and Mistakes to Avoid: Welcome to this lesson. So from our test shot, I was able to see that
we're getting a lot of shadows and our scene is a bit dark. I wanted to make a bright
and airy looking photo, because we're photographing
a beauty product, we want it to look light and inviting and well-lit and pleasant. And I'm not just getting
that with our test shot, so that's why it's important. So before you dig deep into
your long photo session, It's good to see a test shot. You know how you can
make adjustments. In this lesson, I will show you some more lighting
tips and techniques that can help level up your product photoshoot
using just your iPhone. So it doesn't matter what gear or what
camera you are using. If you don't pay attention to basic photography principles, especially lighting
principles, you may not end up taking professional and
beautiful looking photos. That is what I will be sharing
with you in this lesson. So first to get rid
of the shadows, we can use a reflector. Reflector is anything
white that you can use to bounce light from your light source
back to your subject. So this is the effect of it. So this is with a reflector. I'm going to use this one. So this is with a reflector. As you can see. We're getting a brighter image
and we're getting rid of those shadows here without the reflector and
with the reflector. And again, it can be anything white that you can find at home. It can be this styro chunk
that I got here at home. It could be this
illustration board. Then you also have this
side if you want to add more shadow into your scene, or if you want to use it
as your black background. I also have a
professional one here. So this is a more fancy one that I use for my portrait
photoshoots. but it definitely
just acts the same thing as the styro and illustration board
that I showed earlier. So anything white
that can bounce light from your light source
back to your subject, you can use a reflector. So that's tip number one. Lighting tip number
two or should I say lighting mistake that you
should avoid is color casting. Since we are using
a white background, white is a pure color and
can easily be contaminated. If you'll notice I'm also
wearing white to kind of help bounce light
back into my scene. Now, what if I'm not wearing white and I'm wearing
something bright? This bright colored shirt
can affect my overall photo. So let's say I'm not too careful and I move
closer to my scene, I will get a bit
of color casting. Let me show you next lighting mistake that you
should avoid is mixed lighting. So right now the setup
that we have here, we're only getting
light from this window. Now, here's how it looks like if we turn on the room light. So as you can see
from our photo here, now that we have the
room light turned on, we have additional shadows here because our light is
above our subject. So you are getting a lot
of shadows and this can result to our camera being confused with
the white balance. So to avoid this altogether, turn off all the
other light sources in your house or in
your home studio. Make sure that
whatever you choose as your light source to light
your products or your subject, that's the only light source
that you are getting. Sorry, there's a lot of
light in that sentence. But again, turn off all
the other light source in your setup and we're back
to just one light source, and this is how it looks like. Finally, my last
lighting tip for you is the quality of lighting. I am lucky right now that it's
a bit of an overcast day. It's actually raining outside. So I'm not getting harsh or hard light onto my subject here. But if in case you are doing a photo session and direct sunlight is touching
your subject and you don't like that. You can soften it using a cloth, a white curtain
that you can place on your window or on your door. You can even use baking sheets. Anything thin and white, just to soften the
light will greatly help soften the overall
look of your photo. And that is it for lighting. Basically, you just
need to remember that lighting is the main ingredient
in taking product photos. That is how you compose a
well-lit, balanced photo. It takes practice.
It takes time. But the more you take photos, the more you practice, the more you will
discover techniques that can really
brighten up your photo. Plus if you really get into it, if you study lighting, you can even create
dark and moody photos, whatever it is, you can
control the overall look or you can achieve the vision
that you have in mind. So what I shared are just basic tips and basic mistakes to avoid that can
get you started. In the next lesson, we're going to dig deep into some iPhone settings
to maximize it, in taking great product
photos. See you there.
5. iPhone Camera Lenses: Welcome back. In this lesson, we're
going to dig deep into the iPhone settings
that we can adjust and use to bring up its full potential and
create great product photos. So first, let's talk about
those three cameras that you see at the back of
this iPhone 11 pro. Most iPhone nowadays have the same three cameras
set up at the back. If you have the non Pro iPhones, you will only have two. So you will only get
wide and ultra wide. For this demo, we're
going to focus on the iPhone that have
the three lenses. So the first lens that you
have is the ultra wide. So this is a 13 millimeter
focal length lens. This is best for wide shots. You can see my hands here, you can see the reflector. So this is not very flattering when it comes
to product photos, but you can use the wide
lens when capturing landscape photos or
travel photos because it is best for
capturing large spaces, as you can see from
my example here, it almost captured
the entire room, which is not what
I intended to do. Next is the wide lens. So this a 26
millimeter focal length. This is tighter
than the ultra wide lens, so I will be using it later
on maybe for flat lays, but still I'm not satisfied
with how it looks. So let's move on to what Apple
calls the telephoto lens. The focal length of this
lens is 52 millimeters. So it's like having
a macro lens, which is quite expensive
if you have a DSLR camera. So it's amazing
that you can have this feature using
just your iPhone. So you have your phone, you have all these nice cameras, plus you get a telephoto lens. So That's awesome. So this is how it looks
like with a telephoto lens. As you can see,
there's no distortion compared to the ultra wide lens. The appearance of the
product looks correct. I love that. It looks bigger. I think that's very
effective when it comes to selling products on
e-commerce websites. This is helpful, especially
if you are shooting smaller sizes products,
specifically beauty products. So that's it for the lenses. Let's now move on to the
camera settings that we can adjust to really
maximize our iPhone.
6. iPhone Camera Settings: So the first thing that
you can see here is the format, for capturing
product photos. Or if you're doing DIY
product photoshoot, I would recommend to use the most compatible
format on your iPhone because high
efficiency is actually a smaller file size format, but since it's smaller in size, it actually compromises
the image quality. So we don't want that. I want to edit my
product photos a bit, so I want to use the most compatible instead of
the high efficiency. Later on, I will show
you how you can also capture photos in RAW
using your iPhone. So we're done with the format. So next, let's move on to grid. You will see this
under composition. Obviously this will greatly
help in your composition. So when you turn this on, let me just show you. So without the grid, this is
how your camera looks like. Now, if we turn on the grid, this is how it looks like. So you have those lines guiding you in
composing your shot. This is extremely helpful, especially when you have horizontal lines or lines on
your photo in making sure, especially when you're styling, which I will show you later on. That is it for the grid. Smart HDR, I would
suggest that you turn it on because HDR means
high dynamic range. So if your iPhone detects that, you need to capture
the highlight details, the midtone details,
the shadow details, then it will "smartly"
is that a word? Do that. But then I always turn it on just to
make sure that I get the high dynamic range version of my photos as
much as possible. That really helps, especially
in the editing room. So those are the
settings that you need to take note of under
the camera settings. Now, let's move on to
the camera app itself. So from here you
will see the .5, 1x and the 2x versions. So as you can see, we will be using the 2x version a lot. Next, you can adjust
your exposure here. So when you press this button, there's an arrow
pointing upwards button. So when you press that, you will see all these
options here at the bottom. So you have your flash, which I don't use because this is what you get
when you use your flash. So when you turn that on
and you take a photo, this is the effect. And I just don't
like the shadow, the harsh shadow that
it created at the back. So it looks a little
blown out to me. I love the effect of
side lighting on a photo because it gives that
three-dimensional effect. It add texture and depth, which is really nice
when it comes to product photos and in
all other photographs. So make sure to
turn off a flash. So next live photo, I also turn it off
because we are photographing a
still life subject. And since we are using a tripod, There's absolutely no camera
shake, no camera movement. So you can just turn off
live photo to save memory. Live photo is
best for capturing motion and moving subjects.
for your product photo shoot, I recommend turning it off. So that's off. Okay, Moving on to
our aspect ratio, I would like to stick
with 4x3 If I want to make changes, I can just crop it
in post-processing. We also have this
feature where we can adjust the
exposure manually. So right now, especially
it's getting darker, so it's around five
in the afternoon, so I'm not getting much light. So if I go to exposure and add brightness,
as you can see, I can do that here so you
can definitely use it if you feel like you're
lighting is not adequate. But of course, as
I told you before, if you can get the correct
lighting as much as possible, I'd recommend you do that, but then this is an
additional tool that could help a lighten
up your overall scene. And if you want, of course, on the other end, if
you want more shadows, then you can also do that
here and reduce the exposure. So you can play with the exposure settings
on your iPhone. So again, you can just press
on this icon to go back. And again, let me just show you this is the icon
for the exposure. And if you can't see these
options right here, you can just press on this arrow for you to get these options. So next is the timer
which I won't be using because I want to
take photos in real-time, but I might use it later
on if I will be adding human touch and if i will be the model or if I will be
using my hands as model, I might be using the timer. But later on we will find out
if we're going to use that. But that's how you
can access it. And these are filters. The last icon are filters. And I don't think I'll be using any of it for our
product photoshoots. I'll stick with original. Again, I'll just press
this icon to go back. And then if I want to hide it, I'll just press this arrow. Another feature that I'd like
to share with you that is available on most iPhone
is the portrait mode. As you can see
here, portrait can blur the surroundings
of your subject. You also have options here
for different light setup. So you have your studio light. So if you want a
studio light effect on your product photos, you can definitely use that. You also have other
options here like contour, lighting, stage, light. And you can make the adjustment. So you can definitely explore
all of these settings here, see which one is
most applicable or which one helps you capture
the best product photo. But for me, I'll stick with natural lights is right now I'm still using natural
light in my setup. So going back to our
main camera setup, now I'm sure you've
heard about RAW photos, where in photographers
would capture photos in RAW format so they
can do heavy editing on it. Can you do that using your
iPhone? The answer is yes. There are a lot of third
party applications that can enable you to capture RAW
images using your iPhone. One is Lightroom for mobile. So I already have Lightroom
installed on my iPhone, so I'll just go there
now. So Lightroom. And then you have the
camera option here. So you just press that. And then at the top here, you can select the file
format if you want it to be JPEG or JPG. DNG is the raw format. Raw saves a lot of details or most of the details
on to your image. So when you do heavy
editing on it, you won't be
destroying the image. But honestly, I don't do heavy editing when it
comes to product photos. I just adjust the exposure and some colors and add clarity. But of course, I'm
just sharing you that option just in case you
want to go that route. You also have other
camera options here. So you have automatic, you have high dynamic range, and you have professional. With professional, you can
also adjust the exposure. You have the shutter speed, you have your ISO, you
have your white balance. You can also do auto and if
you don't like the settings, you can just click on Reset. That's just a quick run
through of what you can do with your iPhone camera. There are a lot of features, additional applications,
so you can get the best out of
your iPhone camera. And it's amazing the kind of photos that you
can create with it. So basically you just need to be patient with the
settings, explore it, and really study the photography
principles so they can work together in helping you capture great
product photos. And finally, before we move
on to our next lesson, it is a non-technical, non feature related tip. When it comes to iPhone, have a habit of wiping
your camera lens. I always carry this soft cloth
with me because I want to have clean lens whenever I
want to use my iPhone camera. The thing is, our iPhones
are multi-purpose. We use it as our calendar, we use it for phone calls, we use it for social
media, because we're using it all the time and we're putting it in
different places. It can accumulate smudge
on your camera lens. That can be the reason why sometimes you get
surprised that you're using an expensive
iPhone and yet you get blurry or smudgy images. The reason behind it
can be your dirty lens. So have a habit of wiping your camera lens
with a soft cloth. Just make sure it's
soft and it won't scratch it or
anything like that. But that's another
tip for you to get nice sharp images
using your iPhone. In the next lesson, I will
show you how adding a prop or props can make a huge
difference on your overall photo. See you there.
7. The Power of Props: Welcome back. In this lesson, we're
going to talk about props. You will notice that I
have a different setup. What change is my light source, so it's already nighttime, so I don't have
light from the sun. So that's a quick
note right there. If you will be using natural light as your
main light source, make sure to plan out your photo shoot because
you cannot control it. You cannot control
the appearance. It could be an overcast day, it could be really
sunny, it could rain. Just a note there
when dealing and working with natural lighting. Now, if you will be doing a lot of photo shoot and
if you don't want the light source or
natural light to limit your photography or
your product photography. I would recommend getting a more professional
artificial lighting. What I have now is a GODOX SL60W I use it for photo and video. So it's versatile and
it's multipurpose for me because I create
classes like this as well, so I use it for that too. But of course you can check out other artificial
lighting that will suit your needs and your budget. Now, moving on to props. So what are props? Props are objects that you
can add to your scene to support and add more meaning
to your overall photo. The keyword there is
support, not overpower. So when you're adding
props to your scene, make sure that it
support your product, that your product
is still the star. You also want to check out
the color of your props, making sure that you
have a balanced photo. We will talk more about
that as I show you how I will add props
into my scene here. So my first step is to start small and start
with minimal props. For example, I have this cute little
shopping cart that I got from a department
store. I think. So. I love to use it when I'm photographing beauty
products for clients. Because for me, a
shopping cart suggests a "buying me" message
into a photograph. So let's see the effect. So first let me just
show you a photo of these two products without
the shopping cart. So this is how it looks like. It's good. It's well lit. You have your white background,
it's non-distracting, but observe what
happens when we add just one prop into our scene. So here's our shopping cart. And then I will be
adding our products. I'll be just adding my reflector because I'm seeing
a lot of shadows. And let me take a photo. As you can see, I am using my grid to guide me
through the composition. So I want everything
in the middle. So I'm using these lines
to make sure that I have all the important elements on those lines are
along those lines, as you can see from this photo, just by adding one
prop into our scene, it conveys a different message. Now, I can use this photo
or my client can use this photo whenever
she has sale, whenever she has promos, and she can post this
on her social media. And I feel like this will suggest shopping into
the buyer's mind. It will help to convince
them to buy this product. I also love that It's so cute
and I love the pink handle. So that's another tip. When you're selecting props, you have to be careful with the colors and with
the size of it. Makes sure that again, I'm very repetitive
when it comes to not overpowering your product
or the main subject. So that is it for our
tiny shopping cart. Now I also have
other props here. Again, these are just
suggestions and examples to get your creative
juices flowing. But of course, you
can use things that you have at home
that you have access to or stuff that you see on thrift
shops or dollar stores. The main goal here is to make your photo
look interesting, more beautiful,
pleasant, inviting, and of course to help sell the product you
are photographing. Next, I'll be showing you some other props that I
have in my collection. So I have these blocks. So it'll be just
putting it here. So I have different sizes. Now we will try and use it on this product that we're
photographing for this demo. So my favorite way is using
this two blocks right here. So why do I do it? Because it helps add depth, texture and more
interests into our scene. I also love that we are using this seamless
white background. And if we add more white
props, I love that It looks clinical,
it looks clean, it looks minimalist, but
still it looks stylish. So I'll just be
adjusting my camera. We're now photographing in landscape mode or
landscape orientation. More of that later. Okay, I'm just making
adjustments here, so I'm adjusting my
tripod and then I'll be adjusting these blocks
or these cubes. So as you can see, I started with just one prop, which
is the shopping cart. Now I'm moving on to two. This is to show you that as
we build up more props, we're creating a different look. So next I'll be putting in our vitamin C gel
serum, put it here. And then our tea tree, sorry, this lemon tea whitening. of course let's not
forget my reflector. So you can see it's removing
all those dark shadows. We also have this
feature on the iPhone that I forgot to mention
in the iPhone settings. It's the manual focus
where you can just tap your finger to wherever you
want to focus on your scene. So whenever you see this box, this square box, that means
that is where it is focused. Now the iPhone 11 Pro has 1.8 aperture for
the telephoto lens. So it helps to get that
subtle, blurry background. So if ever you notice that you, your main subject or your
product is not in-focus, just make sure to tap on it, to manually focus or to
manually adjust the focus. Now when I say props, It's not limited to just objects that you
can add to your scene. Props also include your
backdrops and your background. For example, these photos I took using a black poster paper. And as you can see, it
has a different effect. It looks elegant, there
are more shadows. It also helps to
focus on the product. So when you're doing your very
own product photo session or your product photoshoot, you can explore and
experiment with different colors of
backgrounds, poster, paper, anything that
you have at home or the nearest
bookstore to really help put your vision
to life and help create that stunning
product photo. Now, the next lesson
is even more exciting. We're going to add
more props to create an aesthetic and more
interesting photograph. See you there.
8. Product Styling: Welcome back. In this lesson, we're going to talk
about product styling. So what is product styling? It is simply arranging elements or arranging
props in your scene so you can create a more
aesthetically pleasing image to make it more interesting, to tell a story, to convey a message. It's like you're staging
your photoshoot. You're going to be adding
more props or anything any element to help you tell the story or to bring that
vision that you have in mind. My very first step when it comes to styling is to get inspired. When I was just starting out, I had a hard time with styling because I did not want to
copy other people's work. But over time, I realized that copying and getting inspired
are two different things. So you can definitely do that. You can get inspired by
other people's work, your favorite
photographer's work, for example, for
this photo shoot, here are the photos that
I saved from Pinterest to help get my
creative juice flowing, my next step is to use color and composition to guide
in styling your scene. When you check out
the color that best compliments yellow, it's purple. And I'm lucky because we have a front yard filled
with flowers. And I have this
flower which I can use as a prop to my scene. So I'm just continuing
on my setup earlier. I'm just adding these
flowers to my scene. And of course my
magic reflector. How could I forget?
Take a photo.. And what's helping me position
or arrange my setup here are composition guides that I learned through the years and through countless photo shoots. So composition is how you arrange the elements in a photo. For me, the most important
composition tool that you can use is
visual weight. For example, you look
at this photograph, you can visualize whether
it's heavy on this side or this side, if it looks awkward and you can
just go from there. So whenever you look at photos, you know what's pleasing, you know what's a bit awkward. So you can use that in setting
up your very own styling. my tip, so you
can get better at styling is to really look
at other people's work, study their styling, study what colors
they're using. What's the direction of lighting.
learn to read images so it will help you once you
are styling your images, you have to kind of
get obsessed with photography and with looking
at other people's photos, or with practicing so that you can develop your very
own photography. So another composition rule that I applied here is
the rule of odds. So I have three flowers. So rule of odds means using odd numbers in choosing the
number of your props, your product, or the
elements in your scene. Another composition
guide that I used in this styling is
the rule of thirds. Rule of thirds is putting elements or
important elements in your photo on the third
intersection or the third line. So as you can see here,
the vitamin C gel serum is on my rule of thirds. For me, it looks pleasant,
it looks balanced, so I'm just putting out my
magic reflector as well, and I'm gonna be taking a photo. Now. I feel like this is nice. I love the combination
of purple and yellow. I loved that they
complement each other, but I feel like
I'm still lacking something because these are
organic beauty products. I wanted for it to look natural and clean
at the same time. So what I'm thinking is adding more leaves into
my styling and see if that will give me
the photo that I have envisioned when I was planning
for this photo shoot, we were not able to really
dig deep into planning and the nitty-gritty
of props and styling. I have another class for that, so make sure to follow
me here on Skillshare. But I just want to give
you a quick note here that it is important that before you go into a photoshoot, you take notes, you really decide what is your goal
for your photo shoot. What message you want to convey, what is the product
you are shooting. A very great tip or technique that helps me
whenever I choose props and style my scene is using the product adjective
cheat sheet that I will be attaching in the project and resources part of this class. So from there you will
see different adjectives. Look out for at least
three adjectives that best describes the
product you are shooting. And then use it as
a guide when you select props and when
you style your scene. For example, for my
styled set up here, I want it to look natural,
organic, inviting. That's why I'm using leaves, I'm using flowers, I'm
using white props. Maximize that when you're in the planning stage of
your photo shoots. So going back to our scene here, so I'll be just adding
this one last leaves. And as you can see here, the visual weight, it's
heavy on this side. So we're getting a bit
of negative space here. But you know why It's okay? Because the client
can use this space, this negative space
here for text for adding promo
sale or anything. So for me that's okay. But of course, if you
will be uploading, or sharing this photo as is, I will be removing
this pile of leaves here to make it more balanced. So we are forming this
triangle or this pyramid. So for me, this looks more
balanced and pleasant. And of course, Let's get
this magic reflector here, my magic reflector, to remove the shadows
and take a photo. My final tip when it comes to styling and selecting props is using the ingredients of the product you are
shooting as props This way it helps tell your
audience or your viewers what the product is made of or what is the main ingredient
of the product So with just one look,
they already know. And I also love those
photos that you can smell, photos that you can taste
for this photo shoot, I visited our fresh produce
market and got these lemons when selecting
props, make sure to select the photogenic ones, make sure that they will
look good on camera. For the next lesson, I will be using this
lemons to style our next scene and
to show you how I will be setting up a flatly. So I'll see you there.
9. Shooting Flat Lay for a Beautiful Bird’s-Eye View: Welcome back. In this lesson, we're going to talk
about a flat lays. I will show you more
styling techniques, but this time we're using the flatly or the top view angle. More of that later. But let me first show
you how I will do that or how I will
set up my iPhone. I'm just adjusting my tripod. Now. I need it to be taller because we will be
photographing this way. Alright, so this is our
setup for the flat lay. I love this tripod because it can give me this capability. So you saw earlier that I
was able to shoot straight on now I can in top
view or in flat lay. And I loved that it's sturdy It can really hold your camera. If you will be doing
a lot of flat lays, I strongly recommend a tripod or anything that can hold your
camera like this securely. So now that we have our
camera or iPhone setup, Let's now cut our lemons. Okay, so my knife is
not doing very well. So that's another tip
when it comes to styling, make sure you have a sharp knife and make
sure that you know basic knife skills because it will really help
in your styling. So my next prop is this
glass baking tray. So again, you can definitely maximize things that
you have at home. So this is used for
cooking or baking, but I'm going to use it as my
base or as my other layer. That's another styling
technique you can use, layering. So my first layer is
our backdrop here. And then our second layer
is this glass baking tray. And then our lemons
for our next layer. And then reflector. Because I'm getting
a lot of shadows. That's nice. So here's our product. Oops. Okay, it looks nice, but I think I'm
going to add water. So good thing I have that
prepared because I feel like I'm gonna be needing
it because, you know, our adjective is fresh, natural. Okay. Again, using my manual focus
here and taking the shot. Let me try adding the
leaves into this setup. That's why I love having a
tripod so you can arrange your setup while looking at
it on your camera screen. So adding more lemons
then take a photo. Let me see if I can also
include our toner because it's also made of lemons. So lemon tea. So that is it for this style. Now I want to explore
on the other ideas that I have on my
Pinterest mood board. So I'm just cleaning
this up and I'll be trying different a
different background, a different style. So just stay tuned. I'm back. So I wanted to try
a different style this time. So I will be just
changing our backdrop or our background from this plain
white background to this. I love the design and the
overall look of this backdrop. It looks like a bathroom scene. And I love this line from the
upper left hand going here. So for me it will add to
that diagonal composition, which is another composition
guide that you can use in your product photography. Here's our base. So again, this is just
an affordable, cheap, double-sided backdrop
that I got online. So I'll try to include all the things or
all the materials, gears that are used on this photo shoot and attach it as a PDF
guide on this class. So. Check that out. The lemons are back! when
life gives you lemons, use them for styling. On a serious note, this is my other favorite
thing about styling and photography because you create
something from nothing. You create your own style, you create your own setup. And for me it's just fun. It, it inspires me. It gets me into that good mood whenever you have envisioned
something and you were able to bring it to
life and really create a photograph that looks exactly
what you have imagined. But of course, if, for example, you don't get the image that
you pictured, it's okay. You can just try again. You keep practicing and continue being inspired
by other people's work. So let me get the leaves. It's like an art
project which I love. But then of course you don't
style without guidance or without following any
composition rules or guides. They're there to make
your life easier, to make your photography easier. So make sure to check them out. Follow them as guide at first
and then as you go along, as you discover your style, as you discover and
cultivate your skill. Of course, you don't have to go back to styling and
composition guides. You can definitely
just go with the flow, but it's nice to use them as a guide when
you're just starting out. So I'm just using some
leading lines here. More flowers here. That's cool. Then
let's add the lemons. So again, diagonal composition. Or actually, I'll just put it
wherever and then I'll just put something that I can place our product here like this. And diagonal composition. I'll be using this other lemon. You're seeing me style
as in real time, which is super cool. I hope this is helping you a lot in planning for
your next photo shoot. You can see I'm just
going with the flow, whatever I see is,
balanced and pleasant, but then I have composition
tools and guides in mind whenever I arrange elements
on my image or my setup. So as you can see, I
still have the product in the middle and on a diagonal. I'm just adding more
lemons into our scene. Some are peaking into
the frame to give that illusion or that feeling that there's more
outside of this frame. So that's a nice
styling technique when you want to leave the rest into your viewer's imagination. Something like that. This kind of styling
for me or this kind of composition where some items, or some elements in the frame are just peaking in
through or are cropped, it gives that illusion that there's more
outside the frame, there's more happening and
it gets them curious and it adds interests and
drama to your photographs. To me, it's a successful image. When you get your
viewer interested and curious and when their eyeballs are glued on your photograph, that's two thumbs up. So I'm happy with
how this looks, but I'm seeing a lot
of shadows here. Again. Our reflector here, magic reflector. Let me take a photo using the manual focus on our iPhone with just
a tap of a finger. And boom. And that is it for our
styling and flat lays. Now, before I show you how I edited all the photos that
I've been showing you all throughout this class using a third party app called
Lightroom for mobile. I wanted to just quickly show you the orientations and angles that you can maximize when photographing products
using your iPhone. See you in the next lesson.
10. Shooting Angles and Orientation: We are almost done. In this lesson, I will share tips about
shooting angles and orientation to help create the best product photos
using your iPhone. First step is to identify the purpose of your
product photos. Will you be using it
for Instagram ads or for stories, for Facebook
ads or your website. From there you can plan in
advance what are the angles, orientation, as well as
the crop of your images. Most platforms will
automatically crop your photo to fit a
supported ratio. Please check out projects
and resources for the social media Image
Size cheat sheet. Now to show you how we apply
this in my photo shoot, Let's go back to our products
for the vitamin C gel serum, since it's a bottled
product and it looks tall, it is best to be
photographed using the straight on or eye level angle. So as you can see, this
is how it looks like. Now, if you want it
to look straighter, there is this hack where in, you can turn your phone upside down and it
will look like this. Next for our sunblock. So it has a different
characteristic, it has a different shape. So I don't think this
will be flattering to be photographed straight on because this is how it will look like. And you can't see the logo. So this is when you can use the 45 degrees to
75 degrees angle. And this is how it looks like. Now, the next shooting angle
is the overview, top view or what is more
popularly known as the flat lay. For our
sunblock here. I don't think it's very
flattering photographed at the top view angle because
this is how it looks like. Yeah, it's nice. You can see that there's a container,
There's the logo, but then you can't really see
how thick the container is. You can't see the texture or the characteristics
of the product. So this is still best
photographed at this angle, which is the 45 to
75 degrees angle. That is why you have to really explore and
experiment with your products and
with your styling to see what shooting angle is best, to really capture the
characteristics, the texture, and which shooting angle is more flattering
for your product. Now, moving on to orientation. So as you can see, I've been
photographing this way. This is portrait orientation. So this is best for a bigger
real estate, a bigger space. So much space here where
in you can put text. But then if we photograph, let's say these three products, it looks a bit crowded. But if we do it like this, so we have more space. So this is the
landscape orientation. And as you can see from
our previous lessons, I used the landscape
orientation for my staged setup. So you can do the same thing. Find out which orientation is best for your product photos. And as you take photos on
different orientations, plan out the crop in advance. For example, for this photo, you have more space
to cut it into an Instagram post to a
1x1 dimension. So really take time to experiment
and explore and really work on bringing out the best on your iPhone and on
your product photos. Because at the end of
the day we want to sell these products using
the photos we took, and that is it for
orientation and angles. In the next lesson, I will show my workflow in
editing photos I took using the iPhone for that fabulous
professional final look. See you there.
11. Photo Editing: Why do I edit my photos? Because I believe it's a crucial part of
the creation process and it's my chance to correct even tiny mistakes I made
during the photo shoot. For example, these are the original photos of
the vitamin C gel serum. And these are the edited ones. Let's be honest. The edited ones look better, look more professional
and inviting. The best part is it took
me just a couple of clicks and adjustments to
achieve that final look. I use Adobe Lightroom for both work and personal
photo editing. For photos I took
using my iPhone. I use Lightroom for mobile. It is a free app that
can give you more than enough options to edit and
transform your photos. Of course, you can opt to use a different app if you are more comfortable or used to it. For this demo, I will be
using Lightroom for mobile. So the first step is to import
the photos from my camera roll to Lightroom. Then I will choose
one photo to edit. My usual workflow is to crop, adjust the exposure
and the color, add effects and export. So let's start with the crop. For example, I will be uploading this product photo on Instagram. So the best crop
will be 1x1 So this is the square crop. So I'll just adjust it to
make sure it's in the middle. And then check. Then next I want to adjust the exposure so I want a brighter
looking image. So what I can do is
to add exposure. I can also add contrast and
then add more highlights. And to make it look
even brighter, I can remove the shadows just a bit because I still
want for it to look three-dimensional.
Maybe just 15. And then add more whites do it. So as you can see, just adjusting the
exposure or the light setting here on
Lightroom for mobile, we're already getting
a different image. So next I want to
adjust the color. The first thing I want to
correct is the white balance. I can see that it's
a bit yellowish. So let's see if pointing
here will make a difference. How about here? Or here? Let's see. Yeah, that's better,
but I want to make it a bit cooler so I can
adjust the temperature. It's like manually adjusting
the white balance. So let's go to temperature. So this is cool and warm, so I want it to be a bit cooler. So I think this is a more correct white
balance for this photo. As you can see, this is
the before and this is after the light and white
balance adjustment. Now, I want it to be
a bit more colorful, so I will be adding
vibrance, just 20. I won't be using saturation
because I feel like the colors are too much. And for me it doesn't
look real and it's not flattering when it
comes to product photos. So if you want a
more saturated look, I will recommend to use
vibrance instead of saturation. But of course, if you
see a need for it, then you can definitely
go for saturation. But I'm just sharing with you my very personal experience
with editing products. So next, what if I want to desaturate the
red a bit on this photo. So I can just go to mix. Then I can adjust
individual colors in here. So in this photo we only
have red and yellow. So as you can see,
if I desaturate red, it's doing definitely that. It is desaturating it. But of course, if
we saturate it, then that is what will happen. But of course I want
to desaturate that. So negative 15, I think is the right spot. And then for the yellow, we can also saturate it if
we want or desaturated. For this photo. Maybe we just
leave it as it is. And I am done with the
color adjustments. So next I want to add effects. So I wanted to add clarity. Maybe just ten and a bit of
texture. I'm happy with this. I won't be adding vignetting because this
is how it will look like. So I don't want that. So I'm skipping vignetting.
for the detail Yes, I want to add sharpening, so maybe just 50. But I don't want to sharpen noise or the highlight
areas of this photo. So I will do masking. What masking we'll do is sharpen just the one or just the detail
of the photo with lines. I think it's a smart
way to do that and adding sharpness
to the detail as well. Maybe just 40. Okay. So let me see if enabling lens correction
will make a difference. Not really because we're
already using a telephoto lens, which removes distortion
on a photo. If you are using the
ultra wide lens, then you might need it. And this is our
before and after. As you can see, this is a
brighter looking image. For me, it looks more
professional, it's prettier, and the good part is whatever changes I made
on this photograph, I can copy to the other photos
I took, as you can see, I took different photos with
different styling. So instead of me doing
everything all over again, I can just copy
the settings here. So Copy Settings. I want to copy the color,
light, color effects detail, not the crop because it might be different
for the other photos. I'm pressing check and I will be going to the photos I want
to copy the settings to. So for example, this
one with the blocks. So you just need to press the circle icon with
the three dots. And then this will
be the options. So just click on Paste Settings. And voila, this is
our before and after. And this is just with a few clicks. So from here I can
adjust the crop. So for this one, I want to unlock it and
make the adjustment myself. I don't want to use the pre-installed or the
pre added crops. I'm happy with that. Moving on to the other photos. So the same thing, I can just click on the three dots icon and
then paste settings. And for this photo I can
just add more light, more highlights, more whites, and maybe some more texture. And this is our
before and after. I can just do the same
thing with all of the photos and I will
get the same result. So as you can see, just a few clicks, we're getting a more
professional brighter and prettier image. So my final step with photo
editing is exporting it for whatever purpose I have
intended for the photo. So to export you just press on the Share icon and then
either export to camera, roll or "export as" so you can adjust some of
the export settings. So for Instagram, the
best image size or the best dimension
is 1080 or 1080 pixels. And then image quality
you can leave at 100. And from here you can
also include a watermark. But I won't be doing
that for this photo, but then I can just
click on check. Once I'm done, then
I can just go on my Instagram and upload
that edited photo. That is it for photo
editing, as you can see, just a couple of clicks
made a huge difference. This is why I encourage you to never skip this
step and make that photo as fabulous as you
see you in the next video.
12. Final Thoughts: And that is it for this class. To summarize. You can set up a
home studio with simple and accessible
materials such as chairs, tables, poster papers,
curtains, and styro chunks. You can add more interest and meaning to your
photos using props. You can even go all
out by staging a scene and styling
your product. You can maximize
your photos by using effective shooting
angles and orientation. You can make it even better
by applying basic editing. And finally, you can do all
this using just your iPhone. If you have questions, feel free to start a discussion and I will answer
as soon as I can. You can also follow me
here on Skillshare, so you will be notified
when I publish more classes about DIY
product photography, composition, lighting,
and styling. I hope you found this class
valuable, but either way, please leave a review
so you can help other students in deciding if
this is the class for them. Thank you so much for sticking
around and choosing this class to learn more about iPhone and product photography. I will be waiting for
your class projects. So have fun and
I'll see you soon. Bye.
 Rose Nene, Photographer & Videographer