Transcripts
1. Class Introduction: Hi there, and welcome to
photography masterclass Part 1. I am so glad that you're
here and you took that very important
step to taking your photography skills
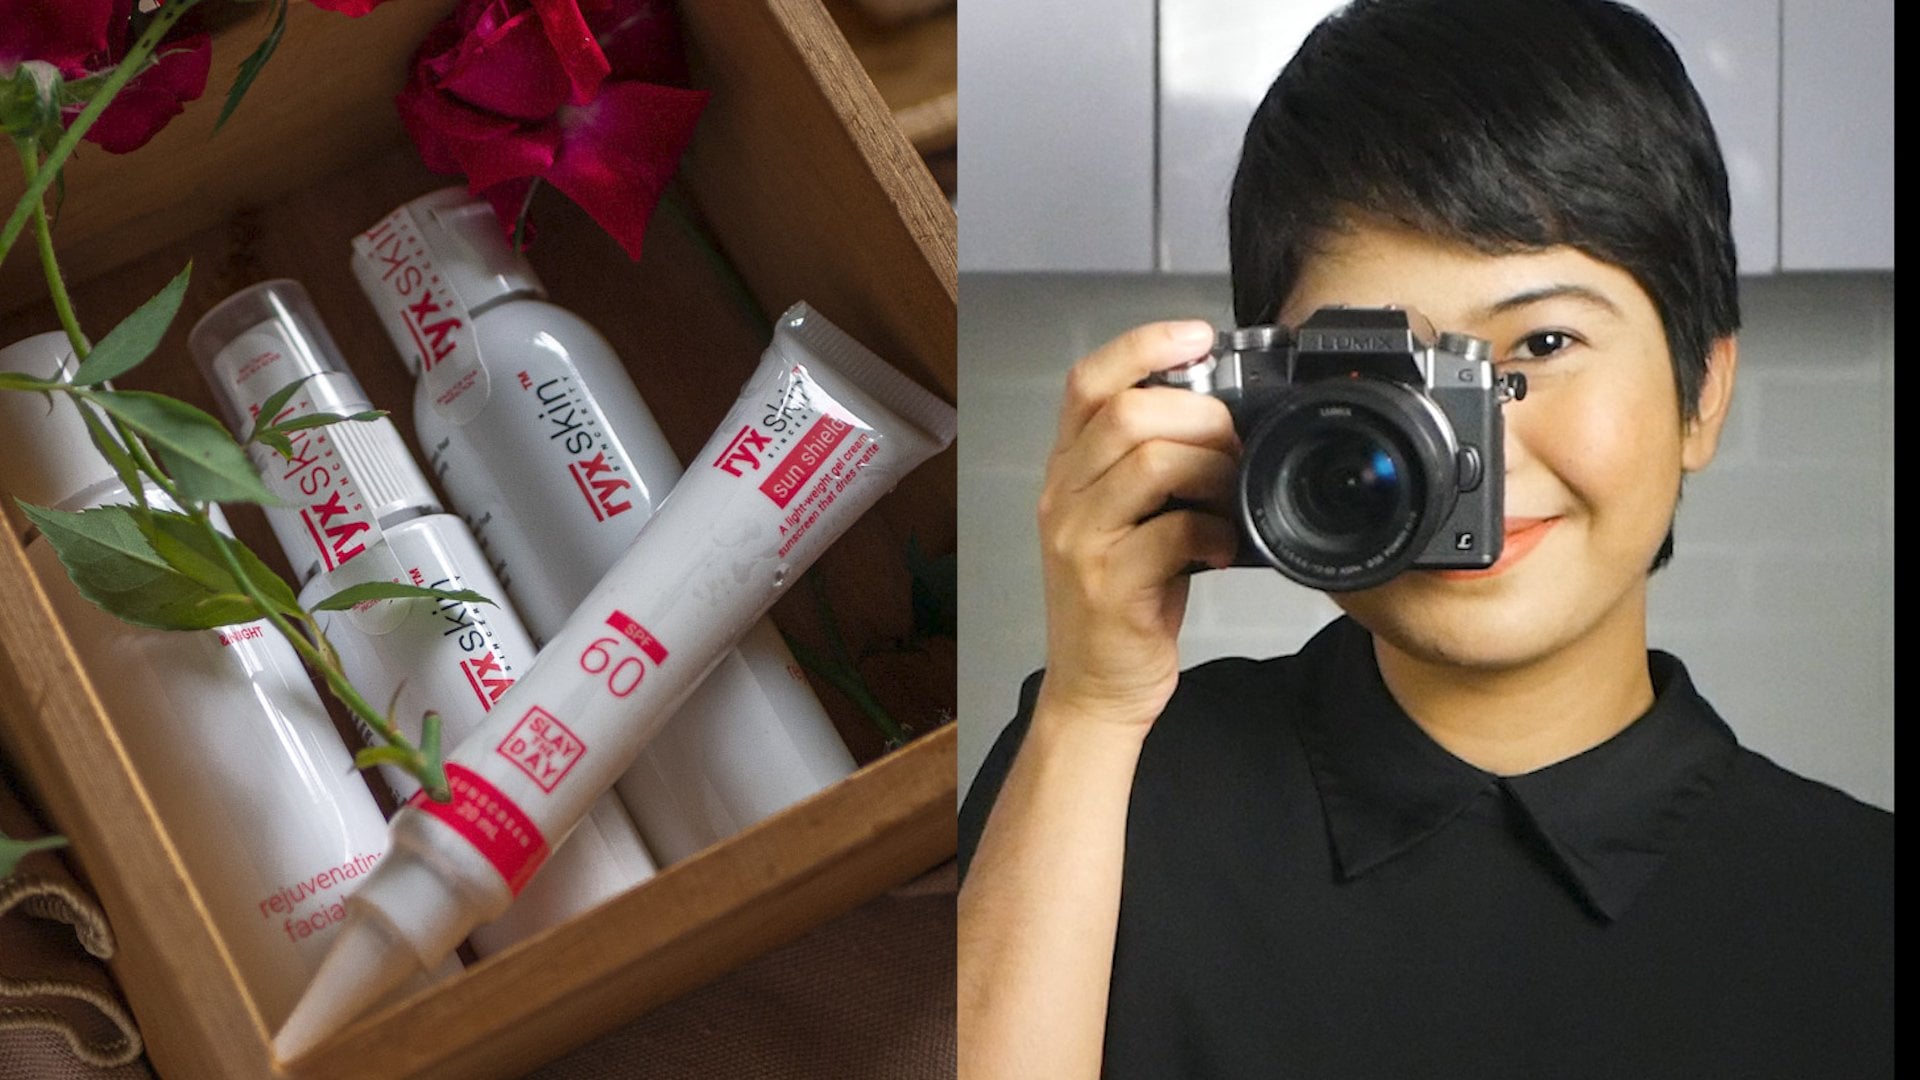
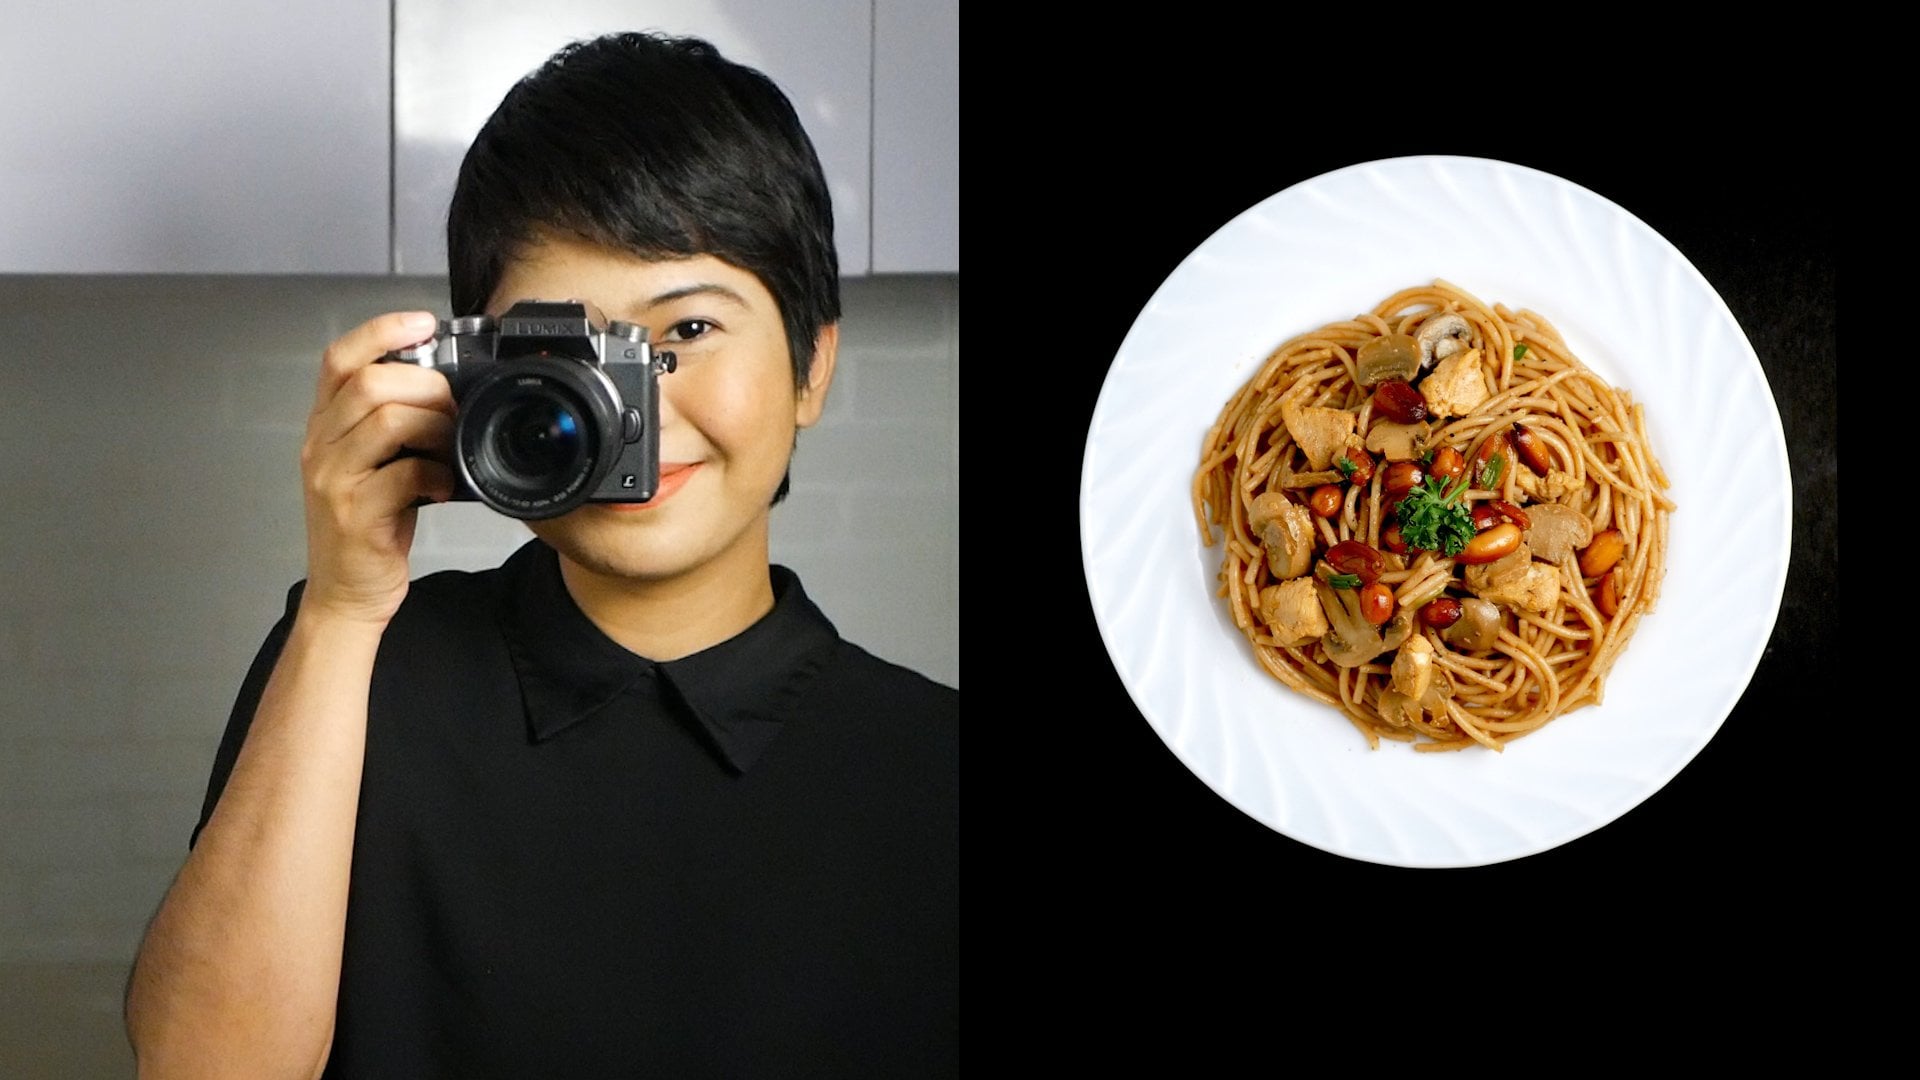
to the next level. My name is Rose, I am a photographer
and videographer, and I will be your instructor for this course or this class. Eight years ago, my husband
and I saw ourselves in a nicely edited
highlights video of a team building activity
that we attended. From that moment, we
got obsessed with capturing moments through
photos and videos. We got so into it
that we ended up editing videos for our
friends and family. People loved our work, and they encouraged us to
turn it into a business. Four years ago, we finally did. But guess what? We started our business with a borrowed camera because we lacked gear and
technical execution. We did our best in
the creative part. We made sure we captured
real stories and emotions, and that became our trademark. Today, we have a complete
gear and our own studio. But what we learned is that
lack of gear should not limit your creativity and you wanting to reach your
goal and serve others. We also learned that
creativity comes first. You can have the most
expensive camera and not the compelling photos, if you don't know the
creative part of photography. On the other hand,
you can create a stunning photo even with
the most basic camera, if you know and practice the fundamentals and creative
part of photography. That is exactly what we
will cover in this class. The art and creative
side of photography. This class is
especially made for aspiring photographers,
for beginners, for camera owners who want
to take better photos, and for anyone who
wants to learn something new and exciting. By the end of this class, you will learn composition,
storytelling through photos, proper lighting, plus there will be actual demos on portrait, food, and landscape photography. If you're someone who really
wants to master photography, if you're like me before, who had a camera for years, but don't really
know how to use it, if you're someone
who loves taking pictures and wants to take
it to the next level, if you want to tell stories
through your photos, or you just want to learn
something new and exciting, then this course is
especially made for you. If you want to know
the things that I've discovered in my
years of events, photography, and countless
food and product photoshoots, if you want to know my mistakes, so you won't have
to go through them, if you want to accelerate your photography
skills and career, if you want to get real results and see
your photos transform, I will be honored to guide you through making it
an easier journey. So head onto the next
videos to get started.
2. Why Photography?: Welcome to Lesson 1. In this lesson, we're going
to explore why photography. Let's be honest, photography requires
a lot of studying, investing in gears,
trial and error, practice, and hard work. So before we jump
into the course or into the nitty-gritty
of the course, let's pause and imagine
what you really want. Are you a hobbyist? Are you doing this
as a side hustle? Do you love photography and want to turn it into a career? Do you like capturing
moments and have decided you want to go for it and
go to the next level? Whatever your reason may be, I want you to really
think about it and imagine yourself
succeeding in photography. I want you to visualize your
life one year from now. Don't think about how, just think about you
being successful. What does that look like? Are you photographing
famous brands and people? Are you selling your photos
for thousands of dollars? Are you traveling
for free to take photos of exotic places? Do you have a million
Instagram followers? Whatever success
looks like to you, just picture it for a minute. Close your eyes and see
yourself in that scenario. Really feel it and visualize it. [MUSIC] Now, if you can write that
big photography goal in your notebook or journal, that will be great. There will be times that even after you
completed this course, your creative journey
will have low moments. I want you to go back to
your notes and imagine yourself in that magical
beautiful moment of success. If you can do it every
day, that's even better. Photography is a
high-value skill. It can lead you to many,
many opportunities. More than that, you can take beautiful photos of your life, your family, your kids,
and your friends. You can take and keep
memories for a lifetime. When was the last time
that you saw a photo? Probably, minutes ago. That is why photographers
are in demand, and photography is such
a great starting point for a creative career. Photography has a
lot of promise, but it requires actually
doing the work. So with that, I hope
that you are ready. Take one last look at your successful cell
from the future, ready your notes, and let's get started. Your turn. Write
down reasons why you want to learn
photography and what success looks like
to you in one year. [MUSIC]
3. Class Project: [MUSIC] Before we
jump into the class, I encourage you to participate
in the class project. A principle from the book, Ultra Learning says,
test to learn. Testing isn't simply a way
of assessing knowledge, but a way of creating it. Learn by doing. You will be surprised
how actually doing and practicing a skill can double
your rate of improvement. The biggest mistake
that you will make in this class is not doing. I wouldn't be where
I'm today if I did not man up and took a shot of my
first food [MUSIC] photo. I took one photo, then another, then 100. The next thing I know, I was further than where
I thought I would be. That is exactly how you
will improve and be an expert to apply everything
that you will learn here, one lesson at a time, one practice shoot at a time, one step at a time. To participate in
the class project, make sure to do the
activities at the end of each lesson and upload your work in the project section
of this class. I guarantee you can make the most out of
this class by simply doing the activities
and participating in the class project. Good luck.
4. What is Photography?: Welcome to Lesson 2. What is photography? The word "photography" was created from the Greek
roots, "photos", which means light, and "graphe", which is representation by
means of lines or drawing. Together, it means
drawing with light. As photographers, our
main challenge is light. The way light
touches are subject gives a different
feel and composition. Photography is using
light to help us create the image that
we have envisioned. When you are starting out, it is more than okay to
take photos of everything. That is how we
learn and improve. But as you go along, you will realize
that you like taking photos of a specific
subject matter, a specific composition,
and you edit the same way. Once you have developed
your personal style, your way of taking
photos will change. You will eventually make conscious decisions
when you take photos. Going back to the definition of photography, drawing with light, it is safe to say
that lighting is the most important
element in photography. With that, let's dig deeper into lighting in the next lesson. [MUSIC]
5. What is the most important element in Photography?: We learned about the
definition of photography, but how can we practically
apply it in taking photos? First, let's talk about the two kinds of
lighting in photography. We have natural and artificial. Natural light is
light from the sun. It's the light that you
see in landscape photos, travel photos, and
outdoor photos. It can also be used in indoor photos by allowing light to enter through a window. Artificial light are
light from flash, continuous light, lamp
light, ring light, etc. I'd recommend that you try
practicing using both, especially if you are doing
photography commercially. To show the difference, let me show you how
I shot food photos using natural light from
a window of a restaurant, and artificial
light in my studio. [MUSIC] If you are just starting out, it is best to practice and get better using
natural lighting. This is by placing your subject near the window if
shooting indoors, or shooting during golden
hours if shooting outdoors. Here are five key tips when
shooting using natural light. Natural light
changes every hour, so observe what time of day produces the best
lighting for you. It is best to shoot
during golden hours. That is within one hour after sunrise and within one
hour before sunset. During these hours, the light
is in lateral direction, which will be discussed
further in the later lesson. Noon sun is best when shooting
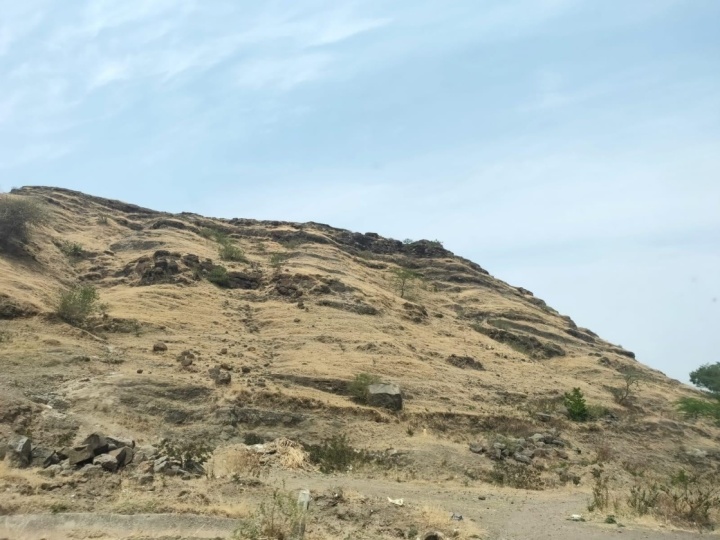
ocean or bodies of water. If you want to achieve that
blue-green watercolor, best to shoot it when the sun
is out and up in the sky. You can get a blue watercolor in your photos
during golden hours. This is Taal Lake
near our house. Observe the color of the lake. I shot this at around
2:00 PM when the sun is bright and creating
that nice reflection and color in the water. If shooting indoors, using natural light
from a window, use a light diffuser such as a white blanket or a curtain to soften the
light touching your subject. Additional accessories
that you can use to balance the
lighting in your subject, as well as to make sure your subject is well
lit, is a reflector. It can be a plain white
cardboard or a folder. This will reflect the light from your light source back
into the subject. We are going to talk more
about the tips for setting up artificial lighting in the technical part
of this masterclass. Next is the four
direction of light. Now that we understand
and know more about the different light sources
and how to use them, let's move on to the
direction of light. Notice I am really building
up to you lighting because skill with lighting
in photography is going to be your
most powerful tool. When you get lighting right, after this lesson, even if you haven't finished the entire course and
you take pictures, I assure you that your
photos will improve a lot. Really consider lighting the
next time you take photos. Use it to your advantage. Now, let's study what are the four different directions of light that we can
use in photography. We have front light, lateral, diagonal,
and back light. Lateral light is light coming from the side
of the subject. It could be from nine o'clock or three o'clock of the subject. It is best to create
that 3D look. Photos are 2D, but
with proper lighting, we can create an almost
3D looking image. Lateral lighting helps separate your subject from
the background. Let's take a look
at this example. [MUSIC] Back light is light coming from the
back of the subject. It is best to
create silhouettes. When using this direction, make sure that your subject is directly blocking
the light source. Let me show you an example. Next, diagonal; this is light coming from 11 o'clock or one
o'clock of the subject, creating a diagonal
light effect. Our eyes naturally
love diagonal, so it helps in composition. Let me show you a
couple of examples. Front light is light
coming from the front. This is common with
built-in flashes. This is okay with portraits, or when you are in
a Zoom meeting, but it's not very appealing
when photographing food and other still-life
subjects because it creates a flat looking image. Let me show you some examples. [MUSIC] Before we move on to my favorite
photography lesson, which is composition,
let's quickly go over three lighting mistakes
that you should avoid the next time
you take pictures. Number 1, mixed lighting. This is common when you
are shooting indoors. I remember when I
was just starting out and I know nothing
about lighting, I would always take pictures of my cooking in our dining area. It looks awful. I was frustrated
because in my eyes, my dish looks great, but why is it not being
captured by my camera? My major mistake was lighting. My window light is
touching the food, as well as the dining
room's fluorescent light, creating an off white
balance in my photo. To correct this, make sure you only have one light source. If you are shooting
near a window, make sure to turn
off the room light. Next is color cast
or color casting. This is the reflection
of a strong color or strong colors
to your subject. For example, you're
photographing food and you're wearing
a bright colored shirt, the color of your shirt will be touched by the light and
bounce to your subject, adding an off-color
to your photo. To avoid this, wear something
neutral when taking photos, especially indoors,
and remove anything with a strong color
surrounding your subject. Finally, harsh light. This is light from the light source directly
touching your subject. This is okay if this
is intentional and is part of your art
and composition, but if you want soft
light on your photos, make sure to use
light diffusers, such as white curtains or white blankets if
shooting near a window, or a soft box or other light diffuser when shooting
using artificial light. [MUSIC] It's your turn. Are you ready to have fun while you master
lighting in photography? Photograph your
most favorite thing at home near a window. Photograph it with
mixed lighting, then a single light, and then different
light directions, then observe the difference. Choose the best light
source and direction that you will use in
the next activities.
6. Introduction to Storytelling: Welcome to the creative part of our Photography Masterclass. Have you experienced searching
online about how to take good photos and search results kept talking about
telling a story, then you are stuck there holding a boring subject
and could not come up with a story to tell through your photos or
through that subject? You are not alone.
I have tried many times to come up
with a story first, then take photos only to end up frustrated and discouraged. I have learned by
experience that telling a story through
photos is simple. I just over complicated
the process, and that is why I
ended up frustrated. What I will share with
you in this lesson are tools that will help you tell stories through
your photos. Now, please don't make
the same mistakes I did. Don't over complicate things. You don't have to use all the tools that I
will share with you. You can actually start with
one, then try another, then another until you discover your favorite
and build on it. Do you want to know
the four story telling tools that will
level up your photos? Head on to the next
videos and find out. [MUSIC]
7. Storytelling: First is perspective. The way you hold your
camera and position yourself helps tell a
story through your photos. When you position yourself or your camera lower
than your subject, you can get a child's
perspective or a low angle shot, which tell a story that
it's a big world out there. If you were
photographing a person, it's helps for aim her to
look taller and mightier. On the contrary, the
high angle perspective, it gives your subject
an inferior look. When you're photographing
a landscape, you can make it look like
you can conquer the world. You can achieve
this by positioning your camera or yourself
higher than the subject. You may use a stool or use anything in your surroundings
to achieve this. Finally, the point of view, you can do this by an
over the shoulder shot, or using the famous Instagram
point of view shot. [MUSIC] Your next door is using mood and emotions. Through your photos, you can
tell a story of sadness, happiness, isolation,
celebration, love, friendship, warmth,
miracle, excitement, confusion, courage,
unity, and many more. The way you capture an edit your photos
contributes to this. A single-subject can mostly tell a story of isolation
and loneliness. On the contrary, a
group of subject and smiling faces tell
a different story. Body language when
photographing people can also help create a
mood and emotion. In the next video, you'll find out how
color can add to this.
8. Storytelling through color and the actual story: Your third tool is
colors or using colors. When you see bright
colors in a photo, what do you normally feel? Your mood may change
in an instant. How about when you see a
black and white photo? Because there are no colors, you are more focused on the
subject and their emotions. Black and white allows you
to focus on the composition. You focus on the subject
instead of distracting colors, bright colors are just
story of happiness, excitement, energy,
and celebration. Muted colors can convey a
totally different story. If you are editing photos, you can also use colors
to emphasize your story. Finally, your fourth tool in storytelling, the actual story. Let's say you are eating
alone by yourself, you can tell that story by photographing a single
serving of food. When you show multiple
glasses and plates, it tells a different story. When you are in an event, capturing real-time
moments as it happens is the actual story. It's your turn, choose one storytelling tool and try to use it
in taking photos. It can be as simple as taking a photo of your
favorite subject, the one that I told
you before to take photos using different
light sources. You can use the same subject
and this time choose at least one storytelling
tool and go tell your stories through your photos [MUSIC].
9. Intro to Composition: [MUSIC] Now, that you have an idea on how to tell
stories through your photos, the next question is, how do you arrange the subject in other elements
in your photos? Do you remember being in
a nice place and taking photos only to look at
it and get discouraged? I've been there many times. I'm traveling, and see many beautiful places,
then take photos, then I would look at my
photos and say to myself, "This is really a nice place, I have good lighting, but there's something
off with my photos." Then I would drool over other
photographers' photos and catch myself staring at them
for long periods of time. I also want to take
photos like that. I want people to stop
and look at my photos. Finally, I found out that I was really messing up
with composition. If you want your photos to
look nice and balanced, composition is [NOISE]
another tool for you to get pleasant and
eye-catching photos. Composition is what guides our eyes through
a photograph and gives importance to the subject in relation to the
rest of the photo. This is how the elements
are arranged in a photo to make it
balanced and pleasant. For example, for this shoot, I need to take photos
of this product. I have these props. If this is my final photo, it looks messy and unappealing. But if I arrange the
props and follow composition tools this
is the final photo. [MUSIC] From those examples, you'll see how
important it is to properly compose your photos. Let me share with you 10 composition tools I learned
from years of experience. [MUSIC]
10. Composition Techniques PART 1: Please listen carefully
and have a feel of which one or two will
appeal to you the most. Because at the end
of this lesson, I will ask you to
take photos using your two favorite
composition tools. Number 1, rule of thirds. The rule of thirds is dividing your frame into nine
equal rectangles, then the subject
should be placed along these lines or their
intersections. This creates a more dynamic and pleasing
composition since it gives more emphasis to your subject and
their environment. Using this composition technique can make your photos more interesting than
when the subject is placed in the
middle of the photo. But there are times when it's good to break the
rule of thirds. That is when using negative
space and using symmetry. Now, this is very subjective. Other photographers
prefer filling the frame with different
elements, but for some, a photo is much more realistic, pleasant to look at and
tells more of a story if you back up a bit and create some negative space
in a picture. Next is symmetry or also
known as formal balance. This is achieved when both sides of the image hold equal weight. Your skills will
improve and you'll have fun trying to find symmetry
in your surroundings. Symmetrical photos stand out because they're
attractive to the eye. Humans are drawn to
visual perfection and compositions that
work in harmony. There's a certain comfort in photos that are almost perfect. This is when it makes sense
to break the rule of thirds. But before you do, study the rule of thirds first and apply it
in your photos. Remember to follow
Picasso's advice to learn the rules like a pro so you can break them like an artist. Number 3, layering. This technique involves
using foreground, subject and background
so that all layers of the images work together to help tell a comprehensive story. Taking a three-dimensional
world and trying to put it into a two-dimensional
photograph can be challenging. But there are many ways to
this challenge and that is to layer the objects and
subjects in your composition. For example, in this photo, the trees right here
infront is your foreground, then the big, I think this is a rice terraces mountain
is your subject. As you can see, the background in blur is your background creating
an almost 3D image. Another way to use
layering is by using props and other
elements in your photo. For example, in this photo, your table is the first layer, the second layer
is the tablecloth, and then the third
layer is the plate, and then the fourth
layer is the food. These layers add
more texture and interest to the overall photo. Number 4, rule of odds. Our next composition
technique is one of my favorites because it helps
with my decision-making. I shoot a lot of food and product photos and in
most cases I use props. To help me decide how
many props I will be using is the rule of odds. This is using odd numbers
to compose your scene. Odd numbers create a sense
of balance and harmony. It also provides a resting
point of our eyes. An even number of
objects can divide our attention and
compete with each other. The next time you
go in a photoshoot, look for odd numbers and see how it will affect your composition. Number 5, leading
lines and shapes. Leading lines is an image
composition technique that can be used to
create powerful photos. It is a composition
technique that features lines shapes like a road or a river to draw the viewer's eye to the
intended subject of the photo. Now this looks great
in landscape photos, but in food, you have to be careful when using
straight lines. Straight lines can make a
photo look a bit stagnant. It interferes with
the flow in a photo. The diagonal lines
on the contrary, will let the viewers eyes walk through the image in
a more natural way. Basically, when taking photos, maximize the lines and shapes in your surroundings if photographing
landscape and people, then in props and food when photographing food and products. When shooting, always take
time in examining your scene. Look for lines and shapes
that you can use to lead your viewer's eyes to the subject and don't
ever feel limited. When I say lines, it could be a curved line, a diagonal line, horizontal
and vertical lines. Do this in every shoot
and you will slowly train your eyes to automatically
see lines in every scene. [MUSIC]
11. Composition Techniques PART 2: Number 6, framing and
positioning of the subject. Framing refers to
using elements of AC to create a frame
within your frame. Look for angles that give you
a window to shoot through. It can either be a natural frame that you
see in your surroundings, it could be in the background
elements of your subject. Whatever it is,
your main goal is to draw the eye
into a photograph. Positioning your subject is also a great composition tool. There are photographers who like their subject always epicenter, some at the bottom or
at the bottom center, and in the corners. Wherever you position
your subject, make sure to consider
visual weight and balance. At the end of the day, it
should be balanced looking. If not, then the story that you tell through
your photo should be so strong that it compensates for the
balance in other rules. Number 7, minimalist. In this composition technique, you focus solely on the smallest number of
objects in the scene. This composition is distinguished
by extreme simplicity. Minimalist composition
shows the viewer that less is more, and challenges both
the viewer and the photographer to view
things in a different light. This is both exciting
and challenging. You can use colors,
backgrounds, texture, and strong lines to help you in doing a minimalist composition. Although it has a
lot of limitations, practicing minimalist
composition can really stir up your creativity. Just remember that your
main goal here is to tell a story with as few
elements as possible. Number 8, contrast. You can use this
technique by using color, texture, and
conceptual contrast. Contrast simply
means difference. We love adventure and
seeing unusual things. Contrast in colors and other elements are
simply attractive. Before I knew about this, I would stare at a
photo for a long time, not knowing what drew
me to that photo. Most often, it is the contrast. It could be color contrast,
texture contrast, or conceptual contrast, like
old and new in a photo, big and small, etc. [MUSIC] Number 9, rule of golden triangle. In this composition technique, the frame is divided into four triangles of
two different sizes. Done by drawing one diagonal
from one corner to another, and then two lines
from the other corners touching the first
at 90-degree angles. There are a couple
of ways this can be used in photography
or in composition. Number 1 is feeling one of the triangles
with the subject. Number 2, is aligning some
diagonal subject matter with at least one of the
diagonal golden triangles or triangle lines. Painters and photographers
maximize the visual drama of triangular structures
because they add impact and lead the eye. By incorporating triangles and the golden triangle rule
into your compositions, you can create dynamic
and eye-catching photos. Finally, the golden ratio, or some people call
it Fibonacci spiral, golden spiral, Phi grid,
or divine proportion. You may have heard
about the golden ratio in art or architecture. It's a compositional principle of ordering the
elements in a work in such a way that the end result is aesthetically
pleasing to the viewer. However, the origin of
this rule is mathematical. The golden ratio is 1.618-1, and it is based on
the spirals seen in nature from DNA to ocean waves. But how do we use
this in composition? First common way is
using the Phi grid. It is like an improved version
of the rule of thirds. This is how the grid looks like, but you still place
your subject in the intersection
or the third line. Another way is by using
the Fibonacci spiral. Imagine placing the
squares within a frame. If you draw arcs from opposite
corners of each square, you will end up with a curve reassembling the
shape of a spiral. This is a pattern that
appears everywhere in nature and resembles the
shell of a nautilus. The current flows
through the frame and leads your eye
around the picture. To effectively use this
in your composition, position the element
with the most details or the subjects in the
smallest box of the coil. I intended to put this
composition technique last because it can be
confusing and overwhelming. My advice is to practice one composition
technique at a time and find out which appeals to you the most and
grow from there. If you're using Adobe Lightroom, this tool will help you
recognize composition rules that you accidentally followed when creating your images, and it's your turn. [MUSIC]
12. Planning for a Photoshoot: Finally, planning. You might be wondering why is planning at the end
of the creative part. Because I don't want this important step to get in the way of you
taking photos first. I know I am like a
broken record with, I'm I go and take
picture statements, but I do it because of all the secrets and
techniques in this course. Practice is the real secret. I intentionally put
the planning lesson here because I don't want you
to get stuck in planning. I want you to move, take pictures, and
get out there. If you have done all that, then we can proceed
with planning. Planning for your
next photoshoot. How do we get those
creative juice flowing? One great way, it's
looking for inspiration, online or in photo books. This is a lifesaver in my
career as a photographer. Actually not just
in photography, but in almost all aspects
of my life planning. In the planning stage, what I do is decide what are the final photos I
want to achieve, to help me decide, for example, if I'm
working with a client, I would ask them what
theme or mood they want or if they have a particular
request or peg in mind. If I am shooting a product, I would research the
brand and their slogans. If I am shooting a landscape, I will check for photos of that landscape online or
photos of it online first. Another great way to find
inspiration is Instagram. You can simply type hashtag and the image that you
are planning to create, or the place where
you are going. Seeing other people's
photos can help spark an idea and
inspiration in you. Finally, make a shortlist, whatever photoshoot
you will be doing, write down as many shot
ideas as possible. I remember how this was
a lifesaver for me. I was shooting different flavors
of a pizza for a client. I prepared my props and studio, then the pizza came. I started taking pictures. Then I noticed the longer
I am taking pictures, the appearance of the
pizza is slowly changing. I panicked. I didn't
know what to do next. I didn't know what
the next shot was. Good thing, I have my shot list. That shot list literally
saved that photoshoot. My client was very
happy with the outcome. The next time you will be doing a photo shoot or even
just a personal trip. Try making a plan and a shot
list and see how it will make a happier and more
relaxed experience for you. I know that was a lot. Right now I want you
to sit back and relax, take a few deep breaths, [NOISE] and then smile. If you reach this point and you are still
hungry for more, I want to congratulate you. You have completed the
first part of this course. In the creative part, you learned about writing, storytelling, composition,
color theory, and planning. If you did the activities
and got your hands dirty, then you are ready to level up and move to the technical
part of photography. But before we get all
techie and savvy, I have prepared an actual
photoshoot that will show you most of the things I talked about in the
previous lesson. If you want to see how I
did portrait, landscape, and food photography
in one location, check out the following videos.
13. Introduction to Portrait Photography: Do you want to take better
[NOISE] photos of people? Humans or people
are probably the best and most exciting
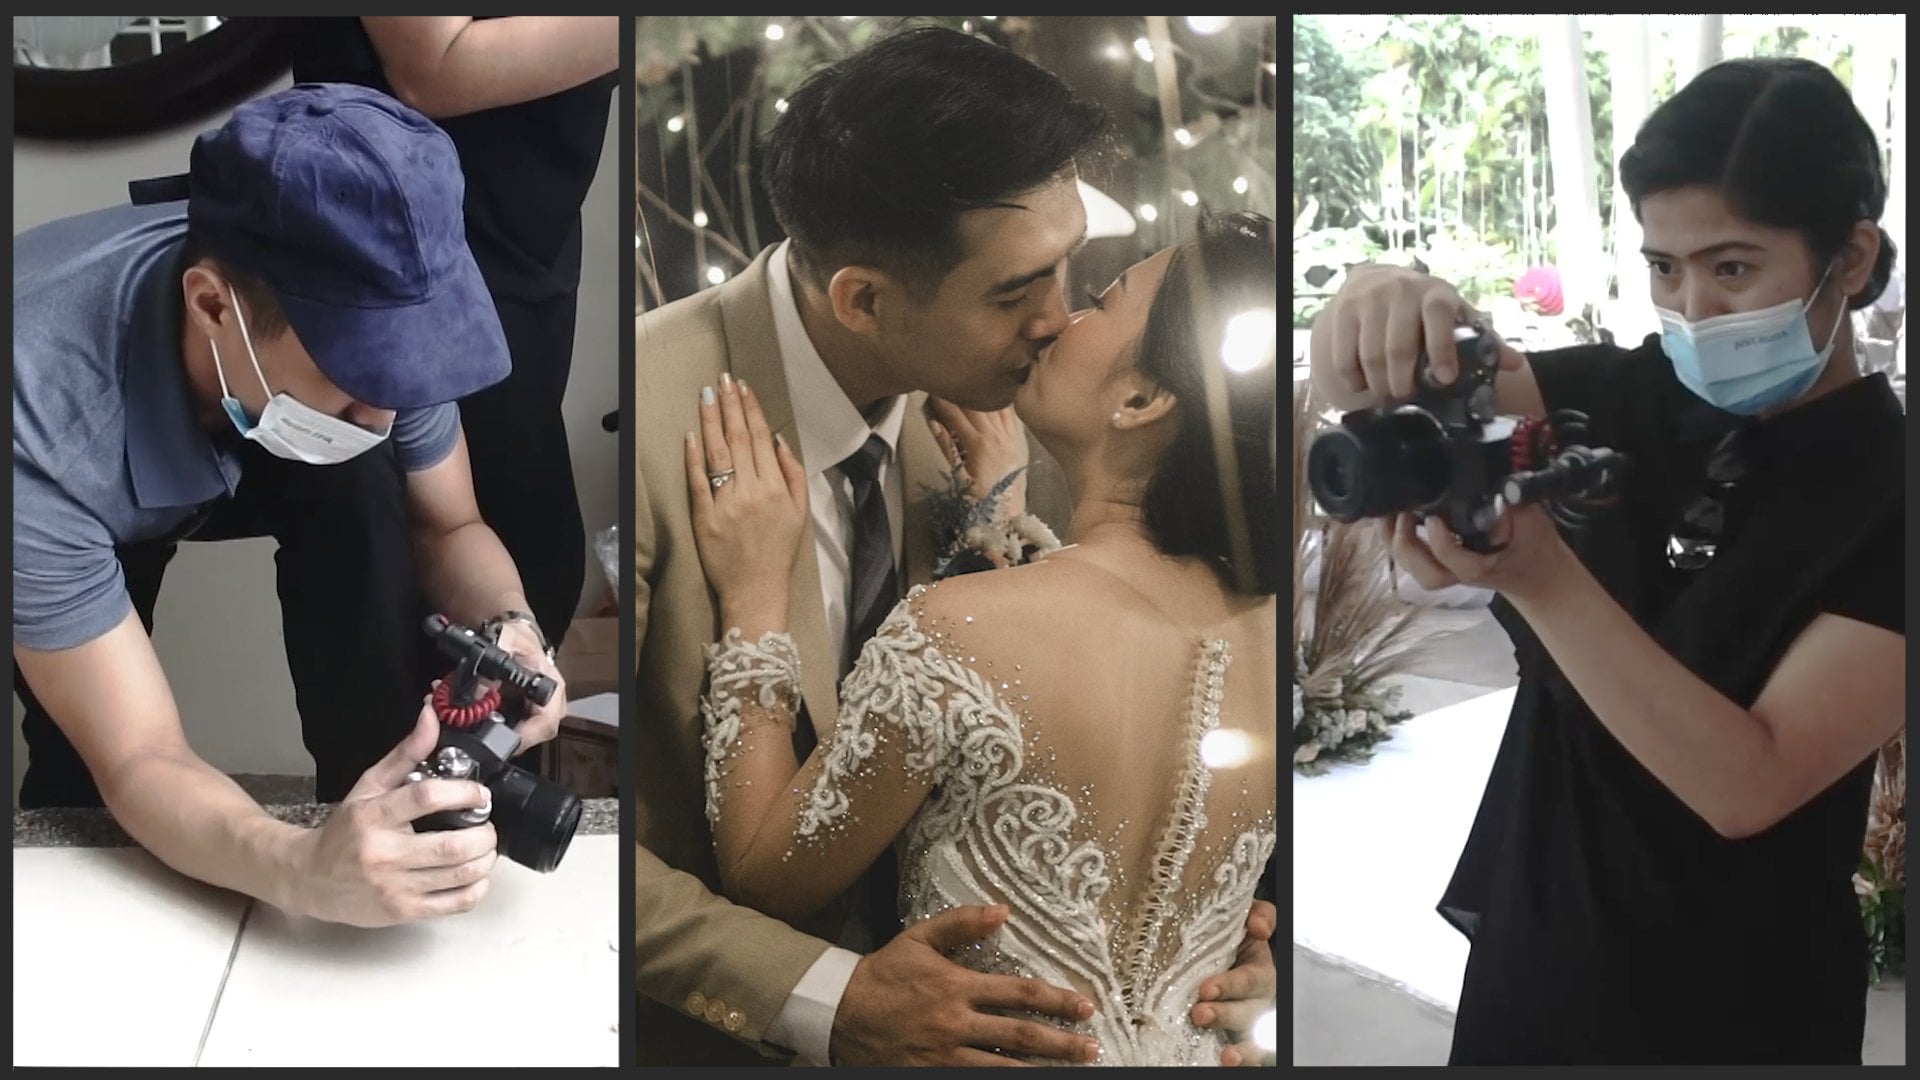
subject to photograph. My husband and I
started our photo and video business photographing and recording people on video, on special events like birthdays, weddings,
anniversaries, etc. It's actually easier
because you don't have to tell people
to smile or project. They are naturally happy because they are
celebrating something. With my years of
interacting with subjects, I have learned a couple of
techniques that will help bring out the beauty in
people, in photographs. Do you want to know the
four powerful techniques when photographing people? Head-on to the next
video to find out.
14. Portrait Photography Demo: [MUSIC] Hi, welcome to this lesson. Today we're going to do
portrait photography. These are my two
models/assistant. When I'm photographing
the other person, someone is holding
the reflector, and the other way around. She's Cindy and she's Vanessa, they are actually my cousins
who are kind enough to say yes to this lesson
to do this video. I will be photographing
them in different location of this beautiful
hotel and restaurant. In portrait photography,
one of the main thing is to make your models or
your subject comfortable. Before we got here,
we already hang out, we did a lot of talking,
we did briefing. When you're doing
portrait photography, you don't just shoot
and shoot and shoot people when they're
no longer relaxed. If they are no
longer comfortable, you need to stop, ask
them how they are, and just make sure
to make them feel comfortable during the shoot. Make them enjoy the shoot, hangout with them,
make them laugh. Really help them to
enjoy the shoot, and bring up that
unique personality that each of them has. In portrait photography, one of the main thing is light. Actually, you know this already, I say it a lot, but
light is very important. When we do portrait photography, we're going to choose location
that has beautiful light, that has different
light effects. The key is light, how light will help our
subjects stand out, how will it draw our subject, or how can we draw with light? Also, another key thing
is the background. We are in a hotel and
this is very beautiful, it has beautiful interior, it has beautiful gardens. It has a beautiful view, so we are going to explore
different locations. I am going to take
you with us as we do our portrait shoot
in this beautiful hotel, so beautiful. That's
another thing. Make sure to compliment
your subject. If they're doing a good job, if they're doing a good
pose compliment them, make them comfortable, make
them happy. [MUSIC] [NOISE] I am kneeling down because I
want my subject to look tall. That's one way that you can make your subject look
tall and superior, is by doing a low
angle perspective, so her legs will look
longer, a bit thinner. Let me show you the effect
if I will do it another way, if I will be on top
of her or above her, giving her a high
angle. Let's do that. [MUSIC] [NOISE]. We're going to
move on to our next model. We'll try to do a
different poses as well. Now we have Cindy to give us a different feel,
a different theme. Earlier I showed you the low angle perspective and
the high angle perspective, and how to interact
with your subject. This time we're going
to try and tell stories through our photos
through different emotions. Let's see what we can get. [NOISE] With her face, she's giving me this
a bit of sad emotion, so that's the good thing. You can also play
around with that when your subject has
different eye emotion, it gives you a
different dynamic. The look that she's giving me, I think I will need to do a higher angle so
she will look more inferior and look
more sad or lonely. Let me just change location. [NOISE] I love the eyes, she has really beautiful eyes, so it's nice to photograph, especially with this
kind of emotion. When you're photographing
portrait as well, make sure that you
focus your camera. Make sure that the auto
focus is on the eyes. Make sure that the
eyes is always crispy and in sharp focus. [NOISE] We found this beautiful spot in this hotel where and
you can see the mountains, you can see the volcano, and then you have this
nice balcony in here. We're going to do our
portrait photography here as well. It's perfect. [NOISE]. Very good, it's perfect. [NOISE] Well, I hope you enjoyed that, and I hope you are
able to get tips and techniques that you can apply
on your next photoshoot. Just a reminder that this
is a stage photoshoot. When you do it, expect
that your subject will feel a bit
uncomfortable at first. But as you start shooting and as you chat
with your subject, they will eventually be
relaxed and be able to show their real personality
and real smile. Also, I use a 50 millimeter
lens for this shoot. When photographing
people, it is best to use a 50 to 85 millimeter lens, more of that in the technical
part of the course. When doing a
portrait photoshoot, expect to get tons of images, then just choose the best ones. The light from the sun is also a bit harsh during
our photo shoot, so I had to work with what I have and use that to
create good photos. It was really tiring as well, so make sure you have breaks
and water to hydrate. Honestly, events photography
where you can take photos of people in an event while it's happening is still my favorite. But it's nice to try portrait photography outdoors
because it contributes and it cultivates my heel and helps me to learn and
discover something new. Now, it is your turn. Go ahead and plan for an
outdoor portrait photoshoot. Or if there is a small event
happening this weekend, go ahead and photograph it. Experiment with light
and background. Hang out and have fun
with your subject, and remember to focus
on their eyes when setting up manual or auto
focus in your camera. No need to worry
about the settings, you can use auto. In the meantime. Our main goal is for you
to start taking photos and explore the creative elements
of portrait photography. Have fun. [MUSIC]
15. Introduction to Food Photography: Did you know that according
to a YouGov poll, half of Americans take
photos of their food? Another survey says
that 69 percent of millennials take photos of
their food before eating it. That is a lot of people. Now, how can you
stand out from that? Simple, by knowing the fundamentals and creative elements of
food photography. In the next videos, I will show you a
live demo of how I did restaurant food
photography. [MUSIC]
16. Restaurant Food Photography: [MUSIC] In this lesson, we're going to do
restaurant food photography [MUSIC] We are now at the Villa Ibarra, Tagaytay. This is the restaurant
that we chose because it has a very
ancient look to it. Everything looks so rich. It has a personality and
the food here aside from, it tastes really good, it's also very photogenic. When you are doing a
restaurant food photography, makes sure to research
the restaurant first. Research if there are good windows that provide
natural lighting. Because in food photography, especially when you're doing food photography
in a restaurant, you don't want to use mixed lighting or artificial
light as much as possible. If it's going to
be natural light, stick to natural light. First thing that
I do, of course, you do your research, you
do your ocular visits. Yesterday we were here, we were trying to
check the place, we checked the food as well. Of course, you want to
make sure that the staff, the people are welcoming
and all of that, you don't want to be
disturbing anybody. Make sure to go on lean hours. It could be just you and your friends or it
could be less people. Then first thing I do, I scan the restaurant. I look for, of course, the place where there
is natural lighting. Then I look for patterns, I look for anything that can contribute to the composition. You know all about composition. You will understand every
decision that I will be making on shooting my food. It matters where
you put your food, the shapes, the colors,
everything matters. Next, after I scan the room, I scanned the
restaurant and I found the perfect spot to
photograph my food. Next is you want to
examine the table. This is a really
nice looking table, so it's made of marble. When you're photographing food, let's say there are
already a spoon and fork or anything
on the table, make sure to clear that out, so you will really see the
characteristics of the table. If it's not a
good-looking table, you want to check other tables or you might want to
put something in it. But for me I'm happy with
how this table looks. I'm excited to see the food
and start photographing. We are done ordering. Tips when ordering food. You can ask the
staff, the waiters, waitress, to see which
dish looks good on camera. But, of course, they
need to taste good as well because we will be
eating it afterwards. Now, while waiting for the food, because for most restaurants,
after you order, it could take around 15 minutes before your food is ready. What I normally do
is try to capture non-food items or
non-food things in the restaurant
to add to the vibe. Because you don't want to
just photograph the food. You want to
photograph the place, the things that you see in that restaurant that you
may not see somewhere else. Anything that adds
to the ambience to the atmosphere of the restaurant.
We're going to do that. I took a photograph of
this area because I love how those vertical lines. I love how this art piece contrasts with the
color of the chair. Look for something like that. Thinks that contrasts or
thinks that compliments. That's what photography
is all about. Finding things that contrast or compliment and you make
a story out of it. You use colors and lines
to compose your shots. In this area, I love
the symmetry between the two chairs and
the centerpiece. Centerpiece it's in the middle. That's why it's called
the centerpiece. Just look for
something like that. I love that, when you photograph it empty, it tells a story of
mystery or loneliness, isolation [NOISE] [MUSIC] Then you can also change your angle. You can move positions. You can bend down. If you have a stool,
you can step on a stool to really show you
different perspective. That's the thing. I think that's one of beginner mistakes. When you have your camera, you have your camera and you would just
hold it like this, and then you shoot
at this angle, at this perspective,
at this level. But with photography, the exciting part is
you can really move. You can kneel, you can even lay down. Our drinks has arrived. We are going to
take photos of it. Here's our drink. I love it. It's so green. It's so exciting to photograph. I'm just trying to figure out where on the table can
we place this drink. That's the good thing and that's a very helpful
tip in photography. Feel free to experiment. Put your food, your drinks
in different places. See how the effect or
your shot will change as the light touches your food and give you different effects. I'm going to move
around this drink. I'm going to put it
in different places and then I will show
you the effects. You'll see that
changing the location, changing how the light
is touching the food, changing the background, you can see how it
affects a photo. I love this light [NOISE] If you will see here, I love the contrast
between this, the chair. The division between
the chair and the wall, and then you have your
subject in the middle. To me that looks exciting. That's a good
composition for me. We'll take another one [MUSIC] I'm not really happy
with this in here. I'll just put it there. It's a good thing I
am using a kit lens. This lens goes from 12
millimeter to 60 millimeter. That can give me flexibility. I can do wide angle shot, I can do tight shots, I can do close up. I didn't have a macro lens. I'm happy with the effect
of the 16 millimeter. Let me show you [MUSIC] You can see the sunlight or the sun rays from
behind our drink. You can play with that [MUSIC] I'm also using the straw to help
in the composition. It's a leading line. This straw is leading your
eyes to the drink [MUSIC] [NOISE] Let's see you
in the change location. If there's anywhere else
that we can place our drink. Of course, let's put
it back before we change locations. [MUSIC] [NOISE]
17. Photographing Food (Pasta): [MUSIC] Our salad and pasta have arrived and
they are picture-perfect. They look amazing, they present a
different character, they have different colors, and so we're going to
proceed with shooting. In shooting angles, we have overhead or top view, wherein you place your
camera on top of the food. That's a famous
Instagram composition. We have eye, wherein you level your
camera or your lens, you level it with the food. We have 45 degrees, wherein you form
a 45-degree angle from the camera and the food, and of course, we have our
artistic or our details, wherein we get to really
come close or we can really get up close to our food to show the details of
the ingredients. Let's start shooting our pasta. I love this restaurant. The people here are so
welcoming and so supportive. They provided us
different place mats. The plating on this food, it's absolutely stunning, it's gorgeous, it's the best, and so, I just love it here. That's one of the
bonuses when you are doing food photography
in restaurants, when the people are
welcoming and supportive, and they're just there for you, they're with you in all the
things, all your requests. Let's start shooting. Let's begin with the pasta. [MUSIC] They provided me this white place mat
and it added layer. We have our marble table, we have our place mat, we have this holder, and we have this pretty, I think this is a sizzling pot, and it's just beautiful. We have how many layers? We have the table, we have our placement, we have this holder,
we have the pot, we have our food, and we
have all the toppings. That gives us texture, a lot of layer. Let's start shooting. [MUSIC] I'm adjusting my lens to 60 millimeters to do the
artistic or the detail shot. [MUSIC] You see how
I change location, how I change angles, how I change my position, so it's very important
to also wear comfortable clothes when
shooting, especially outside. We're done with the pasta. Next, we're going
to shoot the salad. [MUSIC]
18. Photographing Food (Salad): [MUSIC] I found in this area of the
restaurant that there is this beautiful chair that
gives me this frame. As you can see, there's a hole in
the chair and what I did is to put the food here. I will be shooting from this
direction so my light is coming here so I have lateral light so my
food is well lit. At the same time when they go
here and start shooting it, it will create this amazing
frame for me. Let's try that. [NOISE] I also love the
prints on the chair. What I want to do is to take
a photo of the salad and the chair as well in the background so it gives
us that nice contrast. [NOISE] I love that. Just look for all of that, work with everything that
you have in the restaurant, the tables, the chairs, the food, work with the colors. I will also take the top view and other
angles of our salad. [NOISE] We're done with the salad. Finally, for our food, I want to bring them all
together in a table. I chose this table right here. This is a small round table, so it will look a bit cramped. That's also important
with composition. You can either use
negative space or the other spaces
that doesn't have food and props or you can
make it look cramped. That's what I'm going to do. I'm just letting a bit of
natural light in there. [NOISE] Did you enjoy that? I did, especially the eating
part after the shoot. Just a quick recap. When shooting food, take note of number 1, lighting, number 2, shooting angles,
number 3, composition, and number 4, experiment, explore, and practice. Now, these are lessons
mostly on the creative side. We're still trying to
get your creative juice not just flowing,
but overflowing. Our goal again is to start practicing and take it
one lesson at a time. In Part 2 of this Masterclass, we will dig deep in the
camera settings and the nitty-gritty of the
camera lenses and exposure. In the next lesson, we will explore
landscape photography.
19. Intro to Landscape Photography: Do you want to know a secret? Landscape photography is my least favorite
type of photography, but that is not the real secret. The secret that I want
to share with you is the three techniques
I learned that will make your landscape
photos standout. Imagine this, landscapes
are still-life subject. They don't move and
change location. Mount Everest, the Taj Mahal, the Sydney Opera House, the Eiffel Tower, they're there all year round. But why do professional
photographers photos differ from the rest? I will tell you why. Head onto the next
video to find out. [MUSIC]
20. Landscape photography demo: [MUSIC] Now for landscape photography, the key is finding
light and patterns. Basically, when
you're on a location, you try to find out
how can you showcase the landscape on the
best composition and the best life possible. To do that, find
patterns and then make sure to shoot during
golden hours. But of course, depending
on the landscape, because earlier I shot this same view when
the sun is still up, and just the reflection
on the water, the blue-green effect of water, you can only get that during
noon or a bit of afternoon, but you won't get that
during the magic hours. It depends on what look, what is your vision. If you want warm, you can shoot at sunset, if you want the effect
of the morning sun, you can do that too. If you want to shoot the ocean or water and you want
that blue-green effect, you should do it noon
or when the sun is out, making that reflection
on the water. Let me just show you how I composed and how I shot
for this location. [MUSIC] In this composition, I am using the stone
railings to frame my shot. I am trying to put the
volcano at the center. When you're shooting, try to
find something that can be used as a natural frame
for your composition. [MUSIC] If you want to get a different perspective, you can either go low or you
can use a stool or a chair. You can also step on it to give you a different
angle and perspective. [MUSIC] This is where I showed you, or this is what I told
you about the frame. You can see the
leaves is making that framing and our subject, which is [inaudible] volcano
is in the rule of thirds. [MUSIC] That's how I did landscape photography or the famous [inaudible]
volcano here in our town. Again, the three
techniques that will make your landscape
photo standout, number 1, plan and shoot when there is
the best lighting. If you want warmer
colors in your photos, it is best to shoot
during golden hour, which is within one hour after sunrise and within one
hour before sunset. But if you want the
effect of noon sign, especially when getting
the blue-green effect on ocean or other
bodies of water, you can get that during the noon time or when the
sun is up in the sky. Number 2 look for a pattern, lines, shapes, and natural
frames in your surroundings. Walk around and experiment. Find out how a common
landscape can be unique and remarkable
through your camera lens. Finally, number 3, wait for the right moment. This will require
a lot of patients, but I can tell you that
this will all be worth it. Nothing is worth doing unless you're really
serious about it. In landscape photography,
you are paid to be lucky, to be the only person
standing at the right place, at the right moment and
it can only happen once. Take advantage of that. Let's say you're in front of a beautiful landscape and
the clouds cover the sun, making remarkable lighting
and shadows. Take that shot. For example, in this
landscape photography demo, I actually got lucky. This is [inaudible] volcano. There have been
countless photographs taken in this place, but it's only today that
the sky looked at this way. I stand at the back of
this pillar and it is dividing the scene into two and the best part
is on the right, it looks like it's going to rain and it's bright and
sunny on the other side. Next in this photo, I was standing for 15 minutes and a bird flew
and luckily I was able to capture it with a perfect composition
of the volcano. Wait and look for
something similar when you do landscape
photography. Be patient and wait for the perfect and once in
a lifetime moment. Look for good lighting patterns, lines, shapes, and frames
to compose your shots. Be creative and experiment
and do the editing later, and most importantly,
have lots of fun. [MUSIC]
21. Congratulations!: Well, if you have
reached this point, I'd like to congratulate you. Number one, for taking
that step to grow your photography skills and really take it to
the next level. Number two, for sticking around and finishing
what you started. But it does not end here. This is just the beginning. Actually, there is still a
part 2 of this masterclass. If you enjoy the
creative part of photography and you
want to continually promote yourself to being an expert and professional
photographer, check out Photography Masterclass
Part 2 under my class, and I will see you there. [MUSIC]
 Rose Nene, Photographer & Videographer