Transcripts
1. Intro: You have about a
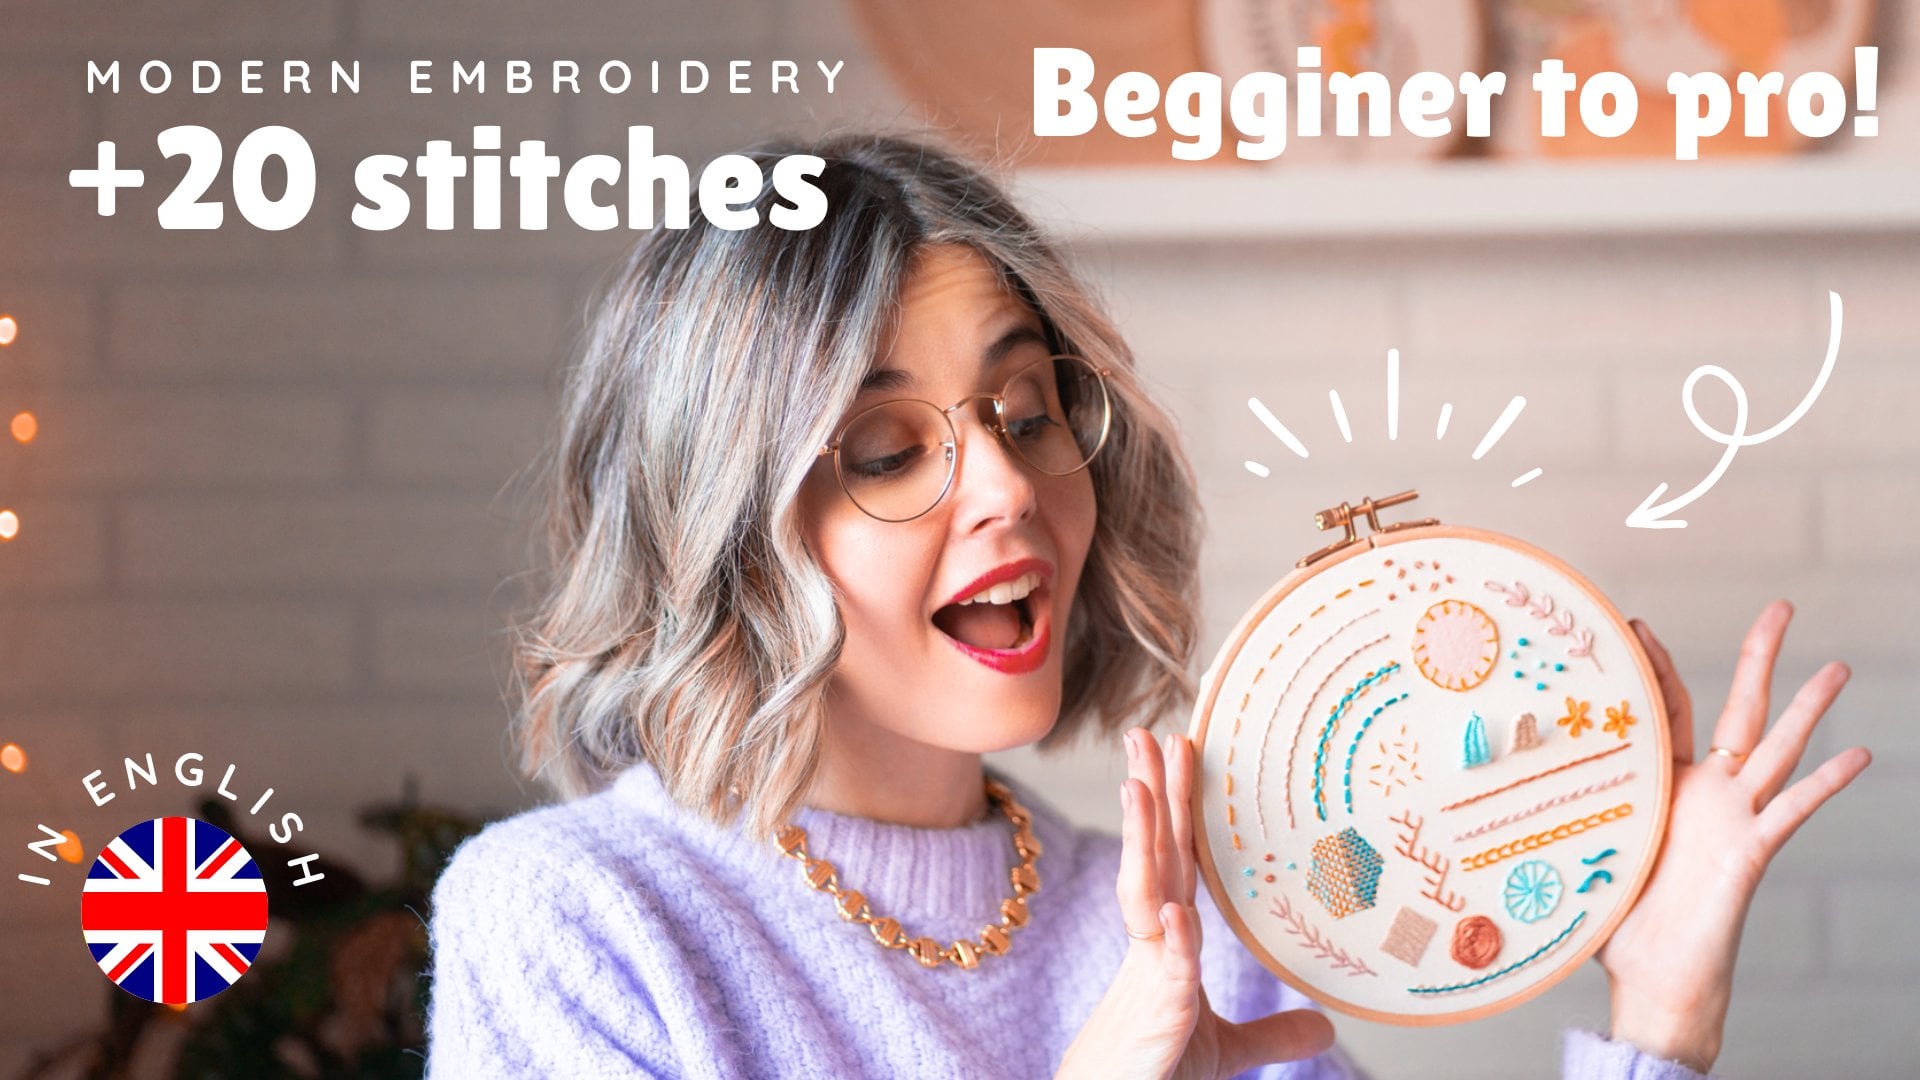
few meter or thread. You have this!, Hi, I am Ginny, a textil artist. and addicted to create the
beautiful and cute things. Maybe you already know me from my exciting
embroidery class, but I dive into over 21 unique stitches to do you into a true
embroidery master. But today I want to take, due to a new creative work, the wonderful universe
of macrame knots. And together we are going
to give a second life to those yards or bottles you
have around the house. In this class, I'm going
to show you the power of macrame knots to create a
lovely hanging planter flight. There are so cute. Yes. I will also
teach you how to add golden touches that will give personality and it's
tied to your creations. Together, we will learn buzzy
macrame knots and how to create a perfect hung up for
Plant and flowers. Don't worry, you don't need
complicating materials. You can recycle a simple
hardware glass bottle with very few elements I PROMISE, you will achieve
amazing results. Create unique Home Decor piece easily and with
very few materials, you will be surprise
and how easy is to create this one there
with your own house. Okay, let's get started.
2. The Project: The Project. This class, you will live into the wonderful
world of macrame knots. You will learn to create two different models
or hanger for vases. We, this hanger, you
can decorate your home. This bread, your most
beautiful flowers, or may I special, unique give full of personality. We definitely will have robe and using only a few magic knots, we will achieve an
incredible result. But wait, there's more. I will also teach you how to read your creations to live and decorate them with
gold beads with will add personality
and unit touch. Okay, I confess. I said with adding golden
tied to all my project, I just love this sophisticated
Thoughts and then wow, it fed, it brings to migration. So in this class, I will share my trace with you. How to add these lovely
attempt to your pieces. We've made two different
types of hangers and I will show you PO2 may be ration, an alternative to personalize your hanger to the max
according to your preferences. I will also show you how to add that to feed your
best perfectly. I excited to get started
with this class. I promise you that
you will enjoy, eat, and fall in
love with the result
3. Materials: For this class, you will need just a few materials and a big dose of
creative excitement. Let's start with the basic. The start of the show
is macrame core. There are different
types of Cord and thicknesses that we've chained
who your project looks, depending on what you pick. For some pair here you can
see drops of various color, different shapes, and even
different thicknesses like this still go on here. For this project, I recommend that you send three
millimeter core. It's a popular
thinness in macrame. And I think it's just
right for lots of Project. Not too thin to thick. There are three types of three or Ropes there
are more recommended. And Wally using macrame right now because they
are made for it. Although there are a wide
range of color available, the most common one
is a natural tone, similar to the
ones you see here. Too. Again, I will show you
the twisted macrame row. This row is a classic. It's made by twisty in three. A string in a spiral is
very easy to work with. So it's great for beginner. You can untwist the srand
to get cute Fringes. It really strong. Another very common
and very huge rope is the macrame string, also called single twist, is made by twisting codon three it into a
single restaurant. Is very easy to fray
and calm due to its shape is perfect for Fluffy Fringes making
macrame feeders, I will leave because it phrase easily is not the best
choice for beginners. It's estrus off, but not
as strong as other core. For last, here you can
see the breakdown. Macrame Cord is the
simplest to handle. So it's great for
starting with Macrame. You will get well-defined one, knots, which is important
while learning. It's not. By discord
can be phrased, so it's not good for
Fringes or leaf. Also, it's a bit strategic. For this class, I
recommend using a three millimeter to
send macrame rope. It easy war width and we can untwist it to make
beautiful Fringes. In addition to the row, you will need one or more buses. You can choose one you like. But it's important
that it has a bit of Felipe to Paul,
our macrame grip. You can either recycled glass
bottle or a soda bottle. It will look yes, as beautiful. And you will give them a second life for your
comfort while working. Having a hook and
a place to hide your pins can be very helpful. This book are easy to find because they are used
for many things. You can look on Amazon
idea or a local store. I go this one for Ikea. There are quite pretty. And I even used in a phone to have migration as decoration. I also use an idea, clothes hanger to have my macrame project is very economical and
worth ready with. The site is perfect. You can find it under
the name Molly. You will also need Caesar. Any part that cuts a
where we find obscenely, you will need macrame bits, ladies, golden tubes
in different site. Is my round bits. You prefer. You can use them
beats or any of you like. Try to add your unique that they possibilities
are analysed. Lastly, you will
also need macrame. Good wins. There
are easy to find at any graph or
macrame supply store. We will use bend to
break the hanger. And I almost forgot
having washi tape or something similar
will be useful. I will share some helpful
tips using it in the class. That's all you need
for the class. So colleague your materials and you will be
ready to get started
4. Hanging Ropes: Let's start by making the
hanging S3 for our hangers. To do this, we need
to cut to a swing of 340 millimeter for it hanger. Then we will fall
in half flavors. For this initial part, it will be much easier to work vertically to come behind
your macrame project. For an R code hawk, there are no poor
a clothes rack. The first step is to set up your macrame space for these taker golden rain
and place it on a Hanger. They want to strain a tie E to the rain using a light hand nut, which is simply folding
the Sweeney have, passing it behind The Rain on closing the end through
it to secure eight. Repeat the same process
with the second string. Pass the stream behind The Rain. Grows the end
through in this way. Now, do you have for
a string, right? The minimum is three are
called Philae Cord and we will time not other
than the outer 3M, are they working Cord, the ones we will use to
create the macrame knots. Let's start by learning how
to do the spiral state when the left core or whether to center core and under
the right Cord. Bring the right Cord under the two center core and
over the left core. Pull on the core to tie them, not trying to do these evenly, keeping the same amount of
pressure on both sides. Now we have completed our
first half is square naught. Let's do it again. Remember, please,
the left score over the two center core and under the right core path,
the right Cord. And they're the two center
core and over the left core. Pull the court
generally too tight. It did not place if ripeness
to the previous knots. Let's go again. You can hold the filler core IV
to put them properly. You will see that the
knots start to twist, not worry is normal and needs
the Fed we want to achieve. Let the Corp rotate. The first time, might
seem quite hard, but I promise that after
you have done a few, it will become much easier. Let's pray find knots. 1,234.5. It's time to add our first golden beet, Athens to do these. Thick as mine size
golden tooth and three it onto one of
the working chords. Here is at week, grab the end of the core
and some washi tape. The tape around the core, which will make it
easier to his lie, that golden beet on. Insert the beat on the
slide it up to the top. Now, tie the knot in
the same way as before. When you tighten the knot, you will see the bead
settling into this place. Continue in the same way
and create Phi more knots. Now it's time to add
another golden beet. Do eat the same way. Thread the golden tooth
onto the core and slide it up to the
top. Leafy there. Then tie a knot slide
you have been doing. You born, you will see the tube feeding easily into its place. Remember to let the core
rotate as you work. Keep tiny knots. For every find knots, insert our new volume, be using the washi
tape is optional, but believe me, it will make
the task Matisse, Yeah. Continue tying knots until you've wait the desired length. For this one, it's
18 centimeter. In my case, I make it to
size one for each hanger. Assured there were of about 18 centimeter and a
longer one of 26 centimeter
5. First Design: Let's start with the first
Design for our flower Hanger. Remember the base or hard, you choose to have a leaf that allows you to hand
the macrame Hanger. The first thing
you need to do is cut rope that at 30-meter long. I use a flexible Meta, which is very convenient. We are going to tie it
around the nasal for where base is a need to make
as strong not yes. Loved the rope around
a beat to hold. This will be the feel occur. And we will cut piece of rope. There are 40 centimeter loans. You can use that as a reference to cut the
rest of the threats. We are going to
fall the threads in half and placed over
the Philae core using the large heads not we learned
fall this training high. Passing E behind the
core from above. And crows DNS through
it to secure it. Gently pull and push Citium than not less, Do it again. For the roping had
proceed from the BAP. And three DNS through
to pray thee not in the field Decor, move
a lot or is challenging, you can tie a stronger
knot to secure it. Keep placing more
Ropes all around. The idea is to feed
the complete control. Keep in mind that the number
of road you will need, the bends of the side
of the water or bass. Heighten the batch rope
and take job Pro X. Continue placing more. We are almost done. I need a few more Ropes, so I'm going to cut some more. And we're keep placing
day in the same way A thing, a couple of
more will be enough. Once I have filled it up, I check to see if it is enough. It's okay if there is as Malaga as we need
to play the hanger, we review and arrange them nicely to me then as
even as possible. Let's add that the
hanging a strip to do these play than not that far in front of you under the node. I'll leave it like that. For convenience, you can tie the two end on the field Decor. Take this trip we made, in this case, the longer one. Please eat for war. I'm past the four Ropes
behind The free Decor. To connect it a star by
taking the leftmost rope. Now we will create a horizontal clove heat
not on the film Decor, thread Decor down under the Philae core and over
itself to the left. Poor, the working Core tightly to the upper
left of the film Decor. This makes half of a
full closed hips not repeat the same process
with the same working for two NADH per working core
may want clove hits. Not. The fear is not is the trickiest
because either move along. Now onto the second thing, the nice rope to the right layer before go behind the filler Cord and gone over
in cell to the left. Repeat this movement
one more time with their same row
to complete the not. Continue with the same
movement for all four Ropes. And now pull on the ends
on the filler rope. I'm wondering, is
perfectly secure. Taken row at centimeters long? Start from the bag, locate the sequence string of the grip and pick the
three on the far-right. Plays the role of Judea scat. This will be our feel occur leaving an N of
about 20 centimetre, roughly the same lane and
the rest of the Fringes. We are going to repeat
the non-Greek use in the first par to do these thread Decor down
under the feet Decor. Nobody is saying
to the left, pull. Repeat the same process one more time with the same working Cord
to complete the not. Continue making these
same knots over the feeder Decor with all the extra until you
complete the counter. Keep the tension causes tank
to make the knots look even. As long as you maintain
the same thing shown, the powder will look uniform. Kim walking in the same
way until the end. You can see why
making the NADH in not only pulling
the working poor, but also keeping dense
you in the field occur. This **** is per Citium. They're not currently. Also you can press the core
in place when your finger. In doing the phenol naught, aligning it with the first one. We finished by UC
our hands to a yes. Every scene and lead to
fit the shape of our bus. We are almost there
6. First Design - Fringes: Now let's create the Fringes. Is time to wherever the Caesar decide how long you
want a Fringes. It's up to your preference. I'm going to cut it around here. I prefer to leave it
longer and then train eat. Now I will cut all the
Fringes to the same level. Now, little by little, we will start unraveling, eats color to gray the Fringes. He are, you will need
a lot of patients. They this opportunity to relax, play your favorite music in the background and
enjoy the process. You can use a calm to finish
unraveling the Fringes. You can also get
rid of these corn. You see an IR is trade Turner, is convenient and easy. Once we had the Fringes calmed, is time to decide on
the phenylalanine. I'm going to cut and been more. And there you have it. Now. It's time to add a
spit yet I'm personal touch
7. First Design - Gold Accents: Let's add that is petiole and
unique tout to our piece, giving it life and personality. To achieve this, we will
incorporate lovely decoration. I'm pretty golden, Athens, a star by taking a
piece of macrame core. As you know, the score is
made up of multiple threads. Whoever this time we would
use a single thread, one M with one hand. With the other hand, keep a firm grip on
the rest of the core. Poor, poor, poor. It's separate from the group. Fall the thread in half and connect the two end like this. Now, add the bits you want
to use for the curation. In my case, I will choose
to come in a woodland, meet with to golden
beet of different size. I will start with a golden beet. Insert it like this. Next, I will follow the same process with
our Gold limits, inserting in a similar way. Lastly, I will add
as molar Rome bit. These lovely sales will
be Cong, our Decor. It is pinned down. Now, you need to tie a knot
to secure the beads in place. This is how we look at the opposite end.
We'll have a loop. We will attach it to
our flower Hanger, ladies in sarah, the pendant through one
of the space from above. That's like we did
in the law, had not. We will pass the Beatles
part through the loop. Generally poor. Now the PSI on the lender one. For example, we want
to be at this height. We will tie a new node at that
point to secure the bits. We can adjust if we prefer dependent to be higher or lower. My case I want it here. I will not even here like this. One. Look at how it's look SME 3D. Now I suggest creating
Sarah Beadle pendent. I'm placing then around the contour of your
flower hanger. For my Maze, I will add five, be the Pentagon, Living
equal spaces between them. You can use the upper
naught as a guide to ensure you maintain similar distances
between each decoration. Explore your own combination
of color and style. Without allowed. This is mine. The tides will
make a difference. I assure you. There you go. We
just need to add some beautiful fresh flowers
to complete the loop.
8. Second Design: Let's move on. The second Design. I have chosen these baths. Remember, once again, it's
important for your boss to have a suitable lead to
hold our macrame hanger. We will start with a
90 centimeter rope. Similar to what we did
with our first Hanger. Wrap it around the neck of
your butter or bars and tie. Identical, not next cut piece of rope there
at centimeter long. Keep in mind and they've
your bottle is for you will need to
live longer pieces. Once fallen in half. They should cover the
head of the Battelle, another about 15
centimeter extra. Following the technique
from their first Design, we will follow the trading
half and place then over the filler rope using
the head not we learned. So fall the fried in
half passive behind the row from above and grows the ends through
it to secure it. Gently pull and adjust
the note into position. They can up so rope
and let's do it again. Folder roping have seen from above by the end through
to pray thee not. Keep placing more Ropes around. You should feel the
entire circumference. In this case, I have used
her labor and Ropes by the total ammonia will need depend on the width of Jarvis. We will keep making head knots. Faster robe over
and tie the knot. You can adjust the
feet of rope to take if you need
to add more Ropes. Now a rain the Ropes
along the circumference. Take that all the
knots are well done. I may sure the
perimeter is fear. Nif is small space as we will attach the
hanging a strip there. He's way. It will be okay. Let's add the hanging
a strip to do these played another
par in front of do handle the North amid. I'll leave it like that. They they hanging Ropes we made. In this case, the shorter one. Place him for unbiased the
four rows behind The feedback. To connect it a star by
taking the leftmost rope. Now, we will create
a horizontal globe. Heats not on the film Decor, trade Decor down on
the field Decor. I know when it
sells to the left. Pull the working Cord tightly to the upper
left of the feet. Acre. Repeat the same process
with the same working core. Now onto the second thing, the net rope to the right, like before, go behind the
film Decor and come over. It says to the left, repeat this movement
one more time with the same row to
complete, the knots. Continue with the same
movement for all four Ropes. Ready? Now located 2nds on
the filler rope and pull. Perfect. Now, it's perfectly secure
9. Second Design - Gold Accents: It's time to add
the monitor dots. The most charming
part of the class, less incorporate a
pretty golden Athens. And we'll go for
these golden 2s. But you can also
choose other type of golden beets or
element to like. These tubes can
hold multiple core. In my gaze they fit Phi core. So I will create
groups of Phi core. It will use washi tape to make it easier to insert the core into
the pollen tube. Will grab ungroup. I said, of Phi core with a washi tape. This way, it will be much simpler to thread the
core into the tube. It's a fantastic trick. When it comes out from
the other end pool. It can be a bit tricky. Next, I will position the
golden tube where I want it. In my case, in the center. I will create a pattern of
groups of Phi core separated by two individual core all
around the base to conference. Let's move on the next one. I will take my set
of Phi core again, them with washi tape at the end and easily insert them
into the golden tooth. We have put the
tube in the center. Yes, like the first one. I will continue with my pattern. I choose group of
Phi core because that's what fits in my tooth. And I lead to cor between
each group for symmetry. Depending of the
core you have used, you can leave the
necessary number of core for the pattern to fit. Currently. You can place the car
according to your preference. I will create another
group of phi course. I will place the washi tape, insert the tube,
and position it. The desire place. Again, I will leave
to course and take my last set of five cards. Ready? Now, I will review and
a Das, everything. Soon I will show you hope
to finish these Hanger. Good, beautiful dozen
10. Second Design - Tassel: Let's Han, our creation when
the hook for this step, working in a vertical position will make everything
much easier. You will need a row
of about 100 cm. The Ropes in your hands. Depending on the
bus you are using, you can look from
above to take if it's Centre Hall, new rows firmly. With your other hands, place they work in row on top. All eat alone with the
rest of the Ropes. Now, by the working, roll over your fan and start grabbing all the
rows from the WACC. Keep wrapping tightly and tighten and as
strongly as possible. Keep wrapping
several more times. One more round. Perfect. To finish. They
diane of the work in row and pass it through
the loop that has formed. Then pull firmly from the
end that lift upward. There you go. Nice
and King graph knots, which is great now
for creating Tassel. We are only good. Isn't it? Absolutely beautiful
11. Final Thoughts: Congrats. Absolutely fantastic. You have reached this point. Let me offer you my hair
failed congratulation level. Now, not only how you master
some basic macrame knots, but you have also craft
their beautiful hanger to showcase your Flower
and liven up your home. The best part is you have made
them with your own hands, is not that simply amazing. Throughout this class,
you have discovered that we guess a couple of month
on your skin beforehand, you can create to your magic. Moreover, I hope I have
activated your creativity, leaving you're inspired to
other on your PCs with Beats, ornament and other the
correlative elements, adding that unique
personal touch. Lastly, I want to express my deepest gratitude for you one me on this
learning adventure. Like all my classes. It's a been done
with a lot of curve and your participation
here means so much to me. Remember, you can follow
me on social media. Studios, stay updated
on my projects. We do have liked to see
more classes like this. Your support will
mean the word to me. I will really
appreciate the view. Cool. Share a photo
of your project. I leave your opinion
about the course. That could be as
really fantastic. Once again, thank you so
much and sending you a big, big, big two or half. Hope to see you in
the next class.
12. Behind The Scenes: That's all I do need
for this class. And I said, Yes, I knew when we ready to get started. Okay. Isn't it? Okay. Okay.
 Ginny Núñez