Transcripts
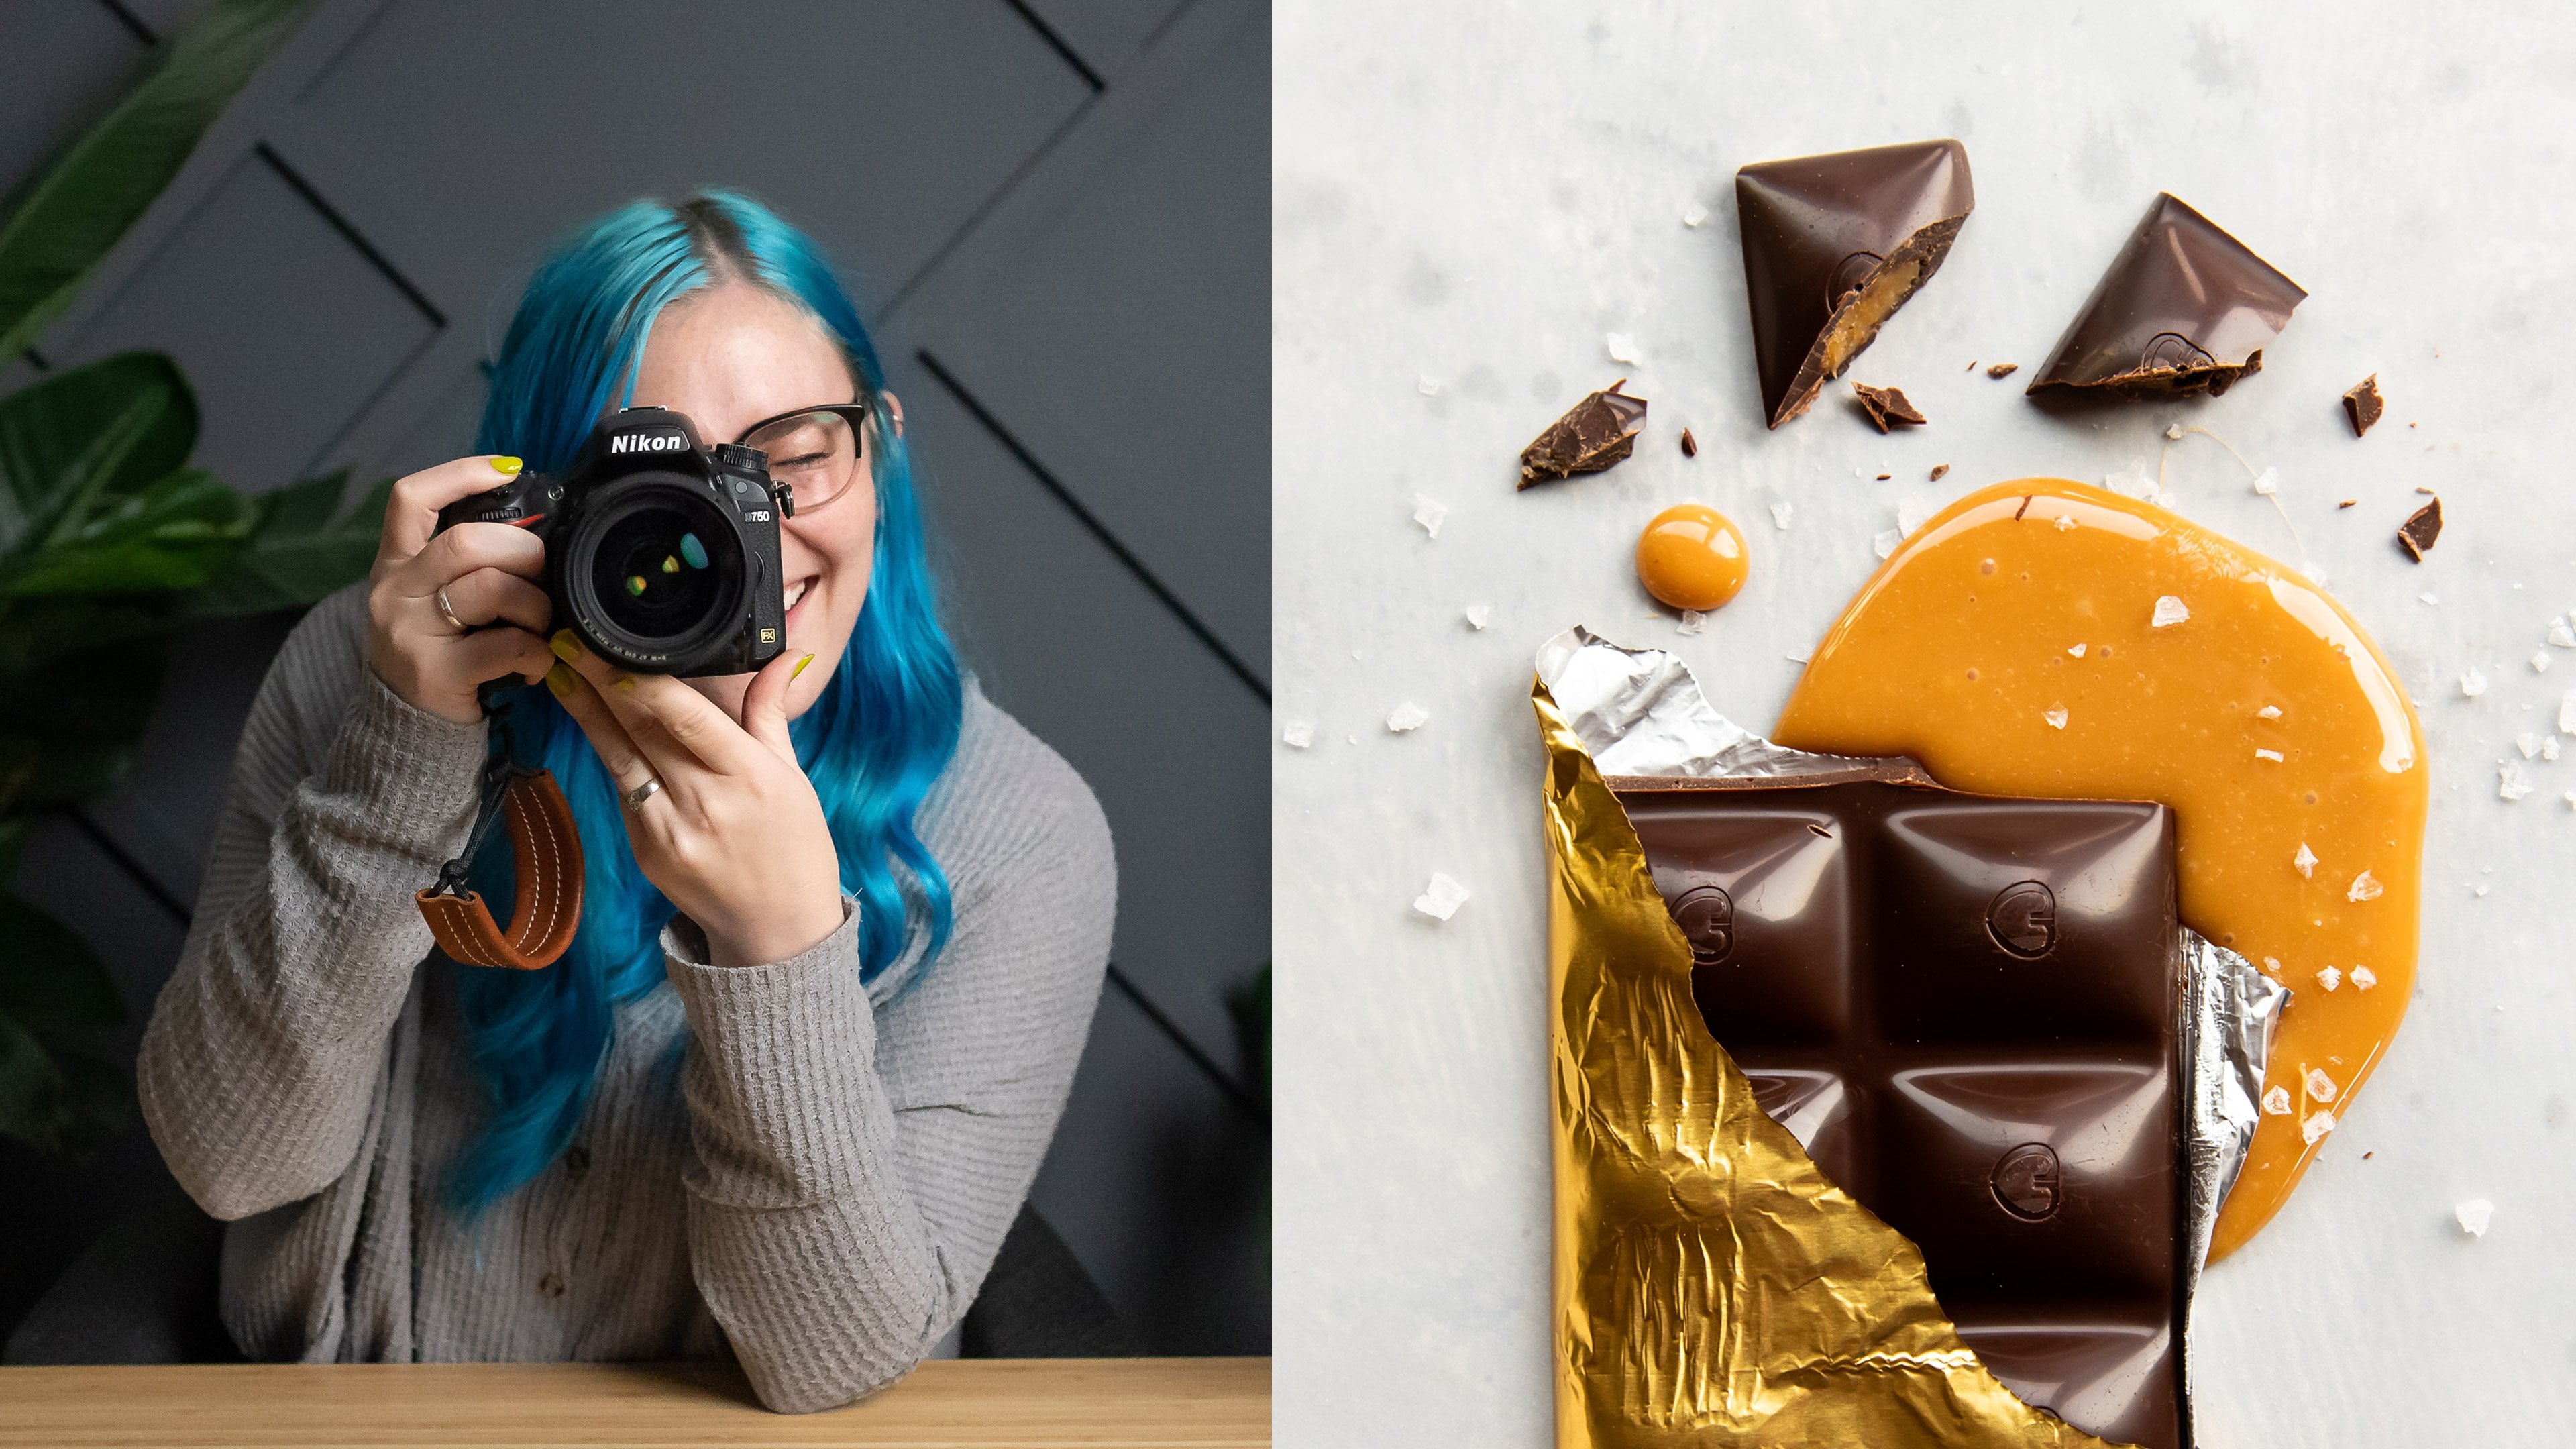
1. Introduction: Hey, in this macro photography class, I will be showing you how to set up a photo shoot in your kitchen, to take close-up, studio quality art pictures, with your DSLR and your smartphone. For your class project, you'll be styling and photographing art portraits of fruits. I'm going to show you some tips and tricks, and have a few setups for you, so you can get some inspiration for what you're going to do for your project. This class is great for photographers, Instagrammers, food bloggers, or just people like me, who happen to love taking pictures of things, with cool textures. My name is Tabitha, I do photography for a living. I have a passion for photographing people, but I didn't use to. When I was 13 and I first started getting into photography, you would find me laying in the grass in my front yard with my mom's Kodak camera, taking pictures of the little mushrooms growing in the lawn. All I wanted was to take pictures of the little tiny, cool texture things that most people overlook. That's how I first started taking pictures. This class was up into my roots, which I'm super excited about and I hope you are too. Let's make some art.
2. Macro Principles and Tools: All right, so really quickly I wanted to go over some terminology just so we're on the same page. Macro photography is essentially anytime you take a picture of something and in your picture it looks bigger than it would in real life. If you're taking a picture of a teeny little poison dart frog at the zoo, or if those live where you live, that's really cool. But in your picture, your poison dart frog looks this big. That would be a macro photo. It's typically used for things like that. Most people take macro pictures of bugs and flowers, plants, poison dart frogs, and it's typically used for stuff like that. We take macro pictures so that we can see each of the different scales on a snake or all the hairs on a bumblebee and all the pollen, and we can see all these details that we wouldn't see just on our own with our eyes. Macro photography is a great way to tell a story and a great way to make captivating images that really make people stare at them for a long time because it's not something we normally see. That's part of why I love it. You can take macro photos just with your camera, with whatever lens you have by getting as close as possible to your subject and cropping and just trying to blow up the picture as big as you can, that's a way to do it. But you'll probably notice that you can only get a certain distance away from your subject before it's too close and it gets blurry. That's the minimum focal distance that your lens has, and that changes per lens. A lot of consumer level, really affordable lenses are going to have, typically, a shorter distance or if they're a wide angle, you can usually get really close. But because it's a wide angle, it seems like it's the same distance away and so you're kind of, it's sixes at that point. But they make macro lenses just for this. A macro lens is awesome because I can get two inches away from my subject and I can still focus on it. That's why the lens is so huge, because it's a beefy lens, it's very powerful. The only problem with being able to get closer to your subject is it reduces the focal length of the picture. So let's pretend this is a poison dart frog and I'm this close to it. Instead of getting the whole frog in focus, I would only get a tiny sliver on his face or on his back. I would not be able to get the front of his face and the end of his legs all in focus because I'm so close and so a way to make sure that all of it's in focus is either by stepping back a little bit or closing down my aperture so that I am able to get more of the frame in focus. The only problem with closing down your aperture is I'm sure you know, it makes a picture darker, and so it's tricky in low-light settings. You'd have to shoot really bright or with lights or use a tripod. You have this give-and-take. A lot of macro photography pictures have really shallow depth of field, not very much in the picture is in focus and it goes with the art feel of it. I'm okay with it. You just have to decide what is most important in your picture. So yeah, this macro lens, when I first got it six years ago, retailed for about $1200. Now you can probably get it for 850. It's so awesome. This is the Nikon 105 1-2.8. I love this lens. It's only one distance, it's a prime lens and so it's always the same distance, but when I get closer I'm able to focus closer. Anyway, this lens is awesome. I absolutely love it. It got in a little bit of an accident on the golf cart. I should have had a filter on it, like a UV filter to help protect it, but I didn't and it came out of my backpack and was bouncing around in the back of the golf cart and suffered some cosmetic damage. I lucked out. The lens still works perfectly. It just has a little chunk taken out of it, which is a bummer, but still works great. Yeah. If you don't have 800 bucks lying around, same, you can get a macro filter. This is a thin piece of glass that's bevel, so it's thicker in the middle, thinner on the outside. It has threads so that you can screw it onto the front of your lens. It comes in different sizes. This one would not fit on this lens. I'd need a larger one, but this fits for my regular kit lens and that's what I first got it for. This is basically a glorified magnifying glass. You just put it up in front of your lens and it magnifies what you're seeing so you're able to get a little bit closer to your subject. If you're really careful, you can get, actually, really effective pictures with it. You just have to watch out because around the edges it's less blurry, so it has a little bit of vignetting, it can warp your photo, but ultimately, it's a great option. These things run for 10 bucks. You can get just one for 10 bucks or you can get a whole set. It comes with a neutral density filter, which is the sunglasses one that's dark, UV filters, all sorts of things. I highly recommend a filter. Make sure though when you buy it, you get the right size for the lens that you're going to use it for. Then if you're doing mobile photography, you can get those little clip on lenses. This is a lens. I don't know my clip is but it clips on to where the camera is on the back. I would have to take my case off for this, but it clips on and then I'm able to get really close to my subject and get pictures that way. I've found though, that with the macro lens, at least the one that I have, I'm able to get individual hairs of the carpet, but not really an effective photo. With what we're doing today, we're mostly going to just do tight close up shots, but not necessarily blowing out of proportion crazy textured macro pictures, if that makes sense. That's my three solutions. There's other ways you can get macro pictures too. You can get extension tubes, it's just like a tube that goes between the camera body and the lens, and it makes your lens longer so that you're able to get closer to your subject. I actually don't have any extension tubes and I've never used them before. But I know a lot of macro photographers use them with great success. Then there's also this idea that clips onto the front of your lens, but basically just does the same thing as the filter. There's a lot of different options and there's other macro lenses, not just the 105. There's other ones, so you can definitely get into it a lot more affordably. Honestly, with a lot of the plant pictures that I take, I just use my 35 millimeter lens because I'm able to get probably like a foot away from my subject and I feel like that's a good crop. Then again, you can crop if you need to, if you want it to be even closer. That's basically it. There's all sorts of numbers and calculations that we can get into, but I just really think that's too much. For this class we're just going to be scratching the surface of macro photography, if that's okay. Let's just jump right into posing our scenes, photographing our fruit and then we'll see what you come up with also.
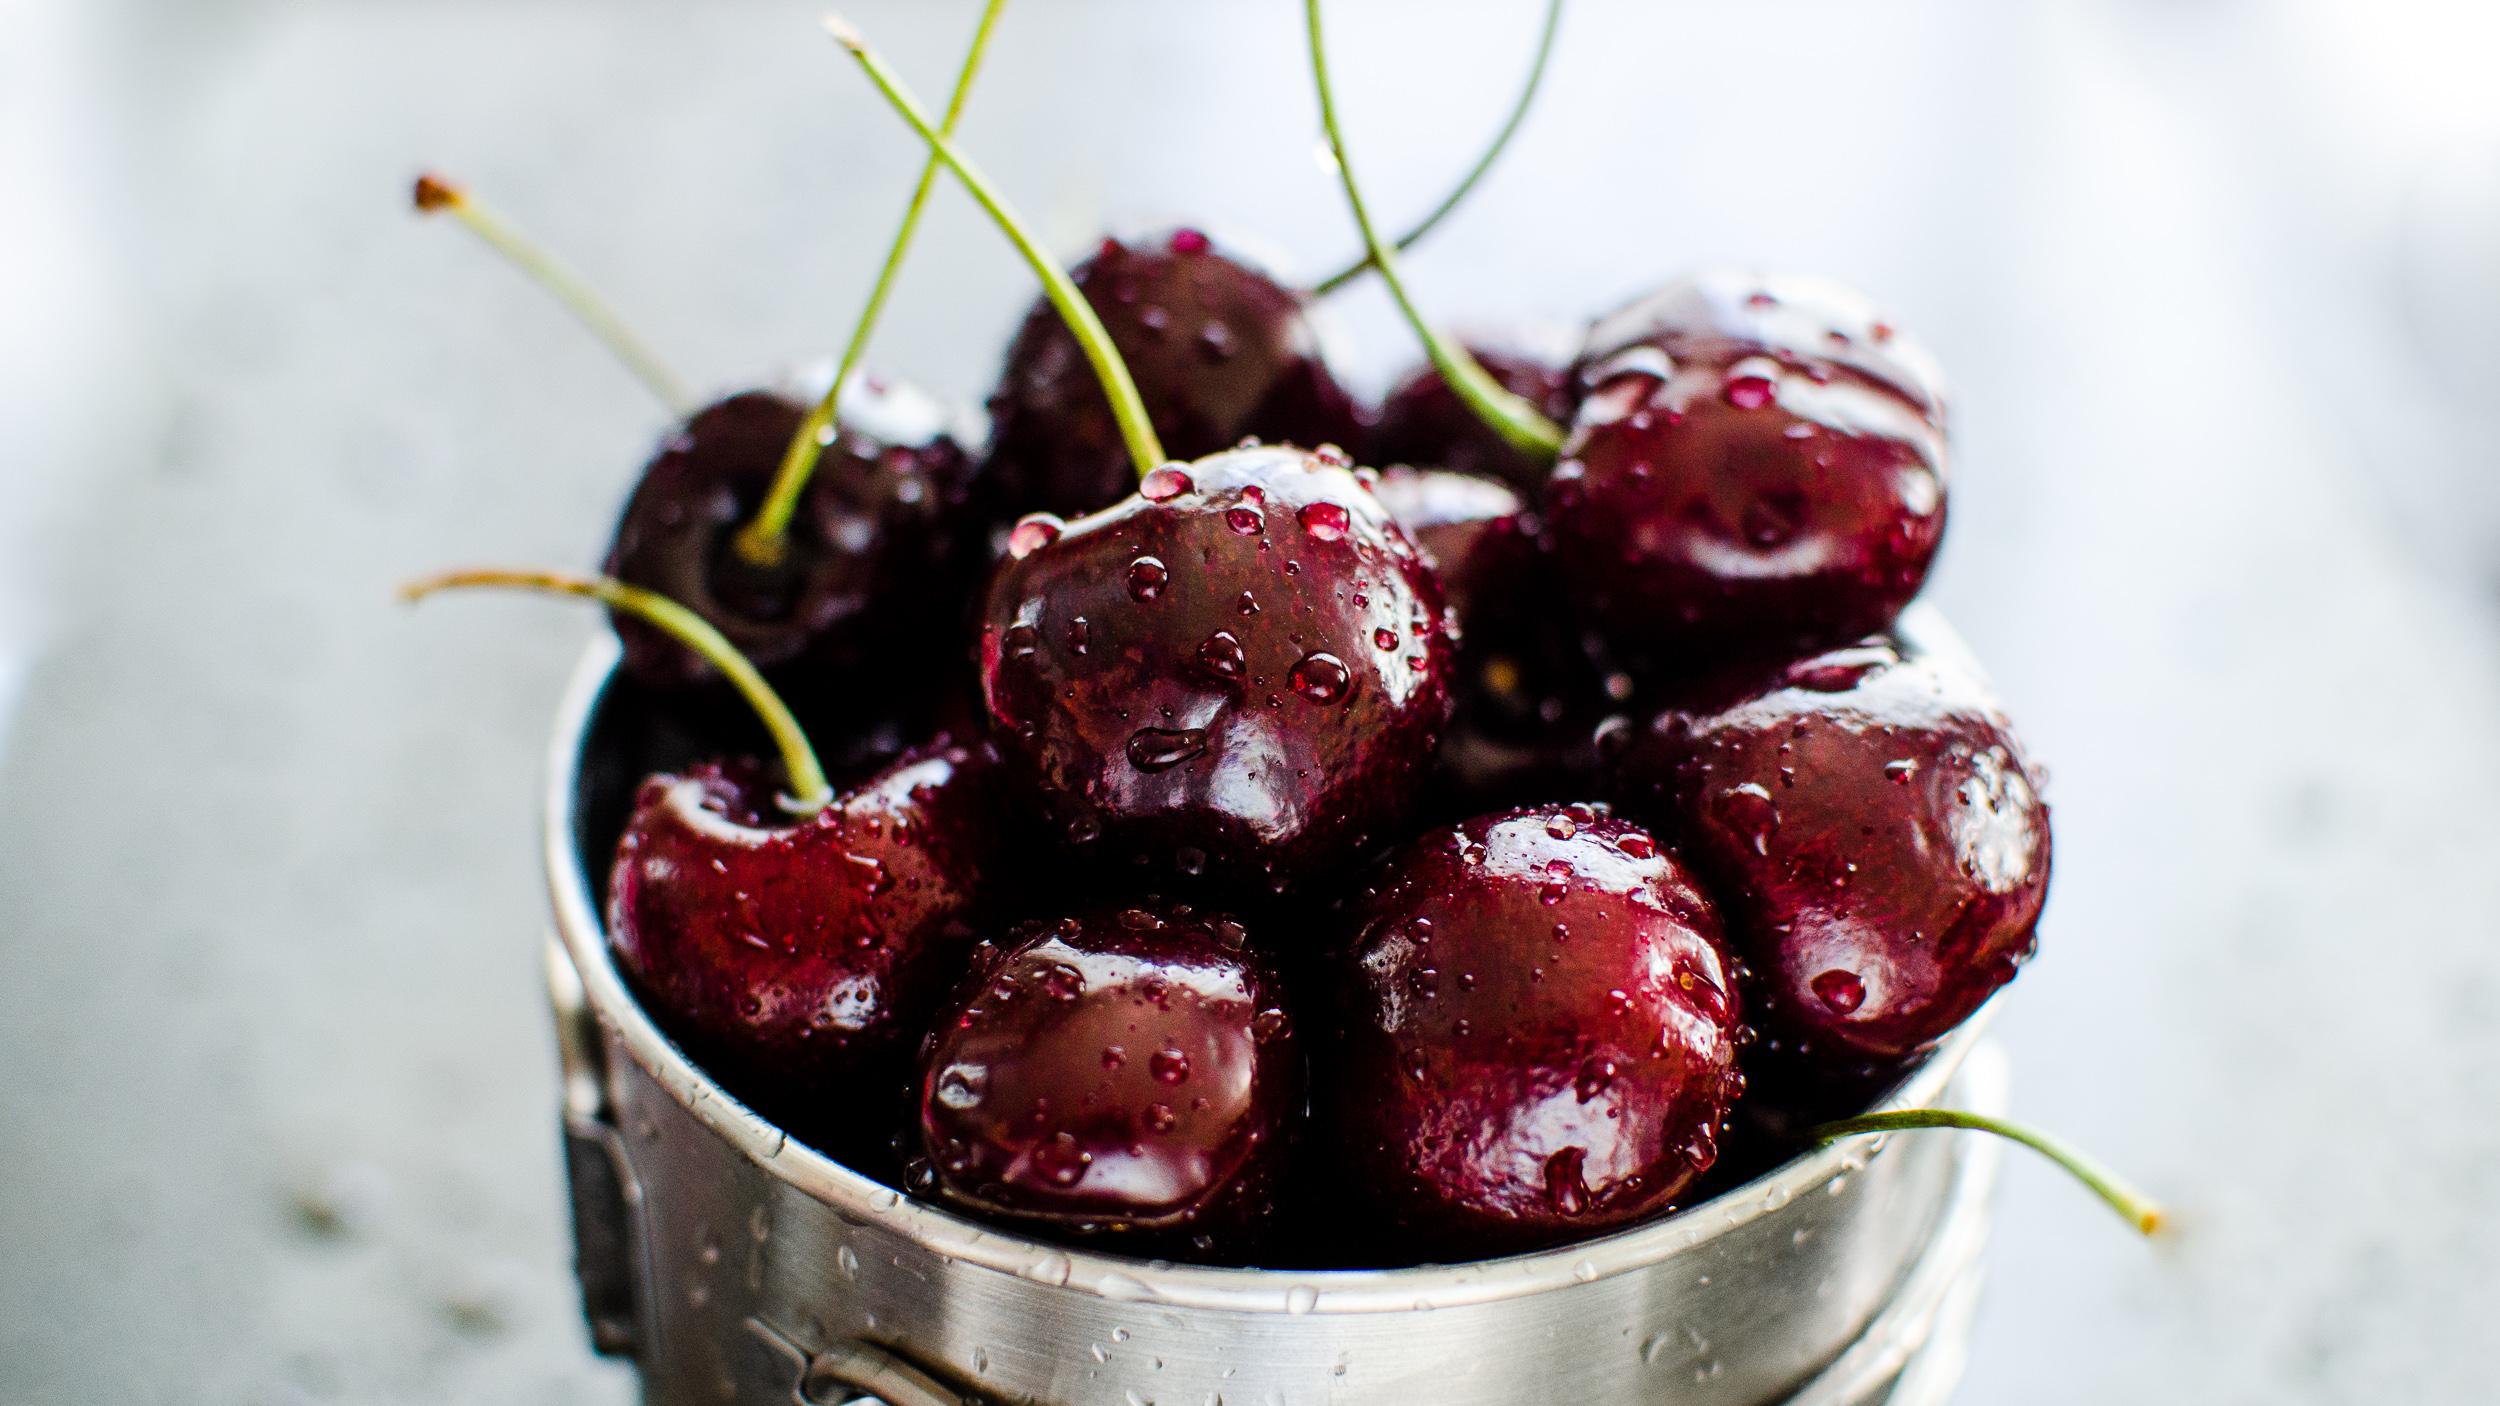
3. Selecting and Styling Backgrounds: For my kitchen set up, I have a few things going on. First of all, I have this big giant window. This is just my kitchen sliding back door. Usually it has these white curtains on them, but it was kind of weird, cloudy day today, so I had to open. We have different surfaces. These are just really big pieces of tile that actually we used when we built our house, so these can be great backdrops. Paper bags can provide a little bit of cool texture to the background of an image. This is just like the lid to a wooden box. It can be a cool surface. If you had a wooden cutting board, that would be a cool surface. I have different little jars and bowls and things that hold. We're going to be photographing berries, and so these will be great to hold her berries. Then I have two different cookie sheets. This one is well loved, it's a little bit sticky and off colored and it's dark. So if you're going for a messy look, this is a good option. Then I have a brand new bright white silver pan. That will be great for a more clean sterile looking picture. So yeah, just kind of stuff that you find around your house. I could also use the surface of my table. I could use my wood floors, I could get my wood slats out that I use as a wooden background, and so these are just some ideas that you can use for your pictures because basically you need to be mindful of. Let's just say for example, we're going to be photographing some cherries in a dish. This is not how we'll do it, but just for now. If we have a little cherries on the dish, wherever you set them, that's going to be in the background. It's going to be there even if it's out of focus. So you need to be mindful that you're not putting it in the middle of things that are messy-looking. Sticking with your clean, simple backgrounds is a great way to make your picture look better without doing a whole lot of effort. Another thing that you can do is you can buy a roll of butcher paper. It's just white paper that you use to cover tables or whatever. Banner paper I think is another name for it, and it's just nice and white. It gives you just the clean, bright space to work on. So I'm going to bring you a little closer so you can see how I would set up and how I would prepare for a shoot. So for the first image that we're doing, we're going to photograph some of these dark, sweet cherries. Just throwing things to hone, that looks pretty bad. It's really hard to tell that these are red because they're so dark compared to this light colored tile, and so I'm going to find a texture or background that's going to be a lot darker. I'd just like to try a few things. This is still pretty light, but I'm wondering if it'll add like a warmth that we might be looking for. We might even just go with this filthy pan, yeah. So that looks really dark. But if I bring up, let's see if I crank my settings, I can basically start to see a little bit of red in there. Really quick I wanted to go over lighting. Right now the light is coming from this side and you know that because this is light and this is darker, and so this is an effective way to photograph a picture, but I actually prefer to shoot with my camera facing this way. So I like to get backlit photos. Before we do backlit photos, I wanted to show you what it looks like lit from the front, so the same way that the light is coming from. So here's what our cherries look like with the light hitting them straight on the same direction that our camera is hitting them, and so this is this kind of lighting. Then let me just show you how pretty backlighting looks really quick. Right away we're getting this really pretty halo around the cherries. I'm loving how about looks, it actually makes our background a little bit lighter, but that's okay. So right now we have kind of like the direction that we want a shoot and now we need to prepare our subject. These cherries haven't been washed, they haven't been prepped. I'm going to be putting them in this little silver canister. So a trick that I like to do when I'm using something that's really deep and I don't have a whole lot of cherries to work with is you can get just another little cup and put it inside and then instead of having to fill your canister with 30 cherries now you only have to fill it with 10 or 15 before it looks bold. We just make sure that we fill it up high enough so that it looks like it's overflowing. Then will be a little more picky about which ones are on top and making the stems look good and everything, but that's probably a good amount of cherries and we might have a couple on the ground around our subject. Now that I kind of know how many cherries I'm going to use. I'm just going to put these in a bowl and get them washed and ready. So I have my cherries freshly washed. I picked out all the weird ones. I had a couple that were winners. Let me see if I can find those. That one was a winner, that one. We want save our winner cherries for the top so that we can make sure to show off the best looking ones. Those four look pretty good in there so I'm just going to dump in. Right now we have a lot of stems going on, so I'm going to try and get rid of some of them. They're a little bit distracting, you can get rid of. Now we need to place our winner cherries. Actually, I'm going to hide that one stem. This one looks really good. We'll stick that one in front just like that. Then I wanted to have a couple laying in the background because it's so overflowing and it's just a little messy, and messy is good. Let me zoom out just to see if I can get it little nicer. What I'm avoiding is the edges of the tray. Then I wanted to just have these everywhere. That should be pretty good. Right away I can tell that the picture in the foreground is really, really pretty dark, and so what I can do is I can take this little note card, bring it in here and help fill in. So yeah, you can see how those cherries look a lot rounder when I bring just that little bit of feel carbon. So I'm just holding it just like this, but out of camera's way. I would hold this up while I'm shooting. Then also you can see it's catching on the metal tool that helps define the metal can, and so you can use this to bring bounce light back into your picture. Another cool thing that I like to do is making the cherries look really, really pretty. So I have a little squirt bottle and I'm just going to squirt our cherries. I hope this isn't bleach. I think it's water. Anyway, you can spray your cherries so that they have lots of droplets. We just want to go crazy with this. Ideally, you've got a spray gun that's more like a missile that minds a jet, and then I'm even gonna spray the background to help muddy it up. So it looks dirty in the blurriness of the background, basically, awesome. Then I'm going to bring that filled card back in just so you can see more of those jobs, I love that. So I'm going to take a couple of pictures. Then in the next video, I'll lead you through how I would edit the picture in Adobe Lightroom.
4. Cherry Lightroom Edit: Let's talk editing. This is my final image and I wanted to show you how big of a difference the fill card makes. Here's what it looks like without, this is like a really muddy shadows. The can has a lot of unwanted colors so by adding that little index card, I've got definition in the shapes of the cherries and I've got this nice bright highlight in the can. My light is coming from behind me, bouncing off the field card and hitting what would be shadow areas of my picture. Phil cards are awesome. It makes a huge difference. This is not what I got straight out of camera. What I got was this, this is my basic picture everything set to zero. This is what I started with. It's very muddy, it's not very contrasty. The colors aren't saturated. This is not that pretty other picture, we're just going to kick it up to this and I will show you how I go through that. Right away I pretty much to start right at exposure. This is a dark image, I want to bring my exposure up so you can see what's going on with those cherries. I'm also going to bring up my contrast because I love a really contrasted image. Then I'm going to skip over highlights because I feel like my highlights are doing great. They're very healthy, bright highlights, my shadows. I'm going to bring those up just a little so you can see what's in the can. My whites I'm going to bring up a bit too, you can see what those are doing. They're just adding a little bit of contrast and then my blacks I'll bring down. Right away, you can see my pictures is a little bit warm, so I'm actually going to bring the temperature down just a tiny bit. Awesome. Then I'm going to add some vibrance and saturation. I usually don't bring these up past ten because if I did, that'd be really wild. We'll leave it at ten, 11 and adjust those if we need to, dropping down to the tone curve, you can click the curve and edit it that way, but I usually don't because I'm not exactly sure when I'm doing when I do that. I just break it down through this. I leave the highlights, the lights. I feel like this slider is a lot more sensitive than the whites slider from above. I usually bring it up a teeny bit because if you bring it up too much like it's blowing out your highlights like crazy, I just bring it up to like six. Then my shadows I bring down and then darks usually it kind of depends per image whether I bring it up or down, I feel like down looks really good, that looks awesome. Let's fix the crop really quick because obviously you don't want this crazy pen shadow in the pictures. We're going to open up our crop tool. I'm going to adjust the angle first. I'm going to bring my cursor outside of the image and then pull to adjust my angle. I'm also going to drag this down to get that ugly shadow out of the way. You can see my pictures is not centered. Usually I would want to put it on the rule of thirds, kind of like on one of these lines, I would put my big kind of subject but because this picture is so close up, it would be distracting if it wasn't centered. I'm just going to center it, it doesn't mean you have to like center exactly in the middle, but kind of look at your information here, we've got these big cherries are hanging off the edge of the cans so I don't want to center that can purse, but I want to center like the information and then we have these stem sticking out. I don't want those to be cut off. That's information that's kind of like jumping into that negative space and so I feel like that's a really fair crop right there. Then we'll pull out of the crop tool. I think that's effective. What we don't want in the picture is this dark gray line from the edge of the pen. I'm just going to use my clone tool right now it's set to heal. If you're familiar with this tool, you know that you can make click on something and it will make it disappear. Basically it'll take information from the selected circle and add it to the whenever you chosen and it's the shape of a circle. I'm going to delete that because I don't want to keep that. If you draw with it, you can make any shape that you want for your selection. I'm just going to take out the whole corner and let go. It's going to automatically choose a spot. I usually have to move it. I don't want to take information from the cherries. I wanted to take information from the plain white backdrop. I feel that looks really effective. It cleaned it up a bit. We've got a little bit of gray here in here, but it's not very distracting. This corner is pretty gray. I'm just going to tone that down a little bit and then sometimes I like to go in twice and just try and see if I can tweak these edges. Edges are weird. I feel like when they touched the edge of the photo, it's like something crazy happens. Sometimes with your edges you just have to like play with them a bit to get them in the way that you want. I found that if you take information from a different edge of the photo, that helps not have that crazy shadow. That is super super clean. Let me just show you what it looked like before. We totally got rid of that and made it look a lot better. If you are relying on a really small surface and you're trying to purposely clone out stuff like that, you're going to have a lot of trouble. I would just try and avoid those kind of things at all possible but if they do show up in your image, you can work with the clone tool a little bit, or in Photoshop, it's honestly a lot easier in Photoshop if you have that and if you're familiar with how to do it but the spot removal tool in Lightroom is actually pretty decent. Here's what we have so far, I'm just going to adjust my crop it teeny bit because it seemed a little bit off centered and then the can, I hate this, this is like weirdly warm. It's got like some weird green tones in here and some pink tones in here. There's a lot of weird colors showing in my can. I'm just going to take those out. One way to do that would be to bring the vibrance and saturation down but the it would change my vibrance in my cherries. I'm actually just going to use this adjustment brush, this mask tool. Right now I haven't selected for temperature and I haven't dragged down to negative 20. If it's up, it'll add warmth and if it's down it will take warmth away. I'm just going to adjust my brush size with my scroll wheel and I'm just going to color in the can, I'm just taking out all the extra warmth and this can that I feel like is distracting. Paint that a bit and adjust the size to get up in here, what you want to avoid is touching the cherries or touching any other like I'm not going to touch the stem. I feel like that took out a lot of those distracting, harshly yellow colors and then we still have a lot of weird colors in here. I'm just going to bring the saturation slighter down just a little bit. Obviously, we don't want to go all the way because then it would be weirdly like, here's black and white picture and here's a color picture that's super weird so I'm just going to bring it partially so that it still looks realistic, but it's not distracting like before. Then if you hover over this little dot, you can see exactly what is being masked. I've missed a spot right there. There we go. I don't have any cherries selected. I think that's perfect. That's where I've gotten with that. I'm going to turn off and show you my before and after. Here's what the can looked like before, crazy right? Then here's after. It is not as distracting at this point. Here we have this, the clarity slider is one slider that I usually save for the end if the picture needs it and so I used to love the clarity sliders. Very heavy handed. I would like use it all the way. Look how crunchy and amazing unlike high-contrast this isn't so cooling crazy but now I rarely use the clarity slider. I never use it when I'm photographing people but for art pictures like this, a little bit of clarity never hurt. That's where you got it and then I'm just going to add a teeny bit of a vignette. That's the shadow around the edge of the photo. Just a little bit to bring in some information from our water speckled pan. Although its going to look crazy. Just a teeny bit. I haven't just set to negative 18. I'm happy with how that looks. Let's take a look at my previous edit and see how close we got. Wow, pretty close. My previous edit has a little bit more blue in it, I'm going to bring that down, maybe bring up my saturation, and then also I'm going to make my cherries a little more saturated. I can drag up the red and orange automatically. I can select this little picker tool and I can pick a color from the image. I just click on it, hold it down, and then I can drag my mouse up to add more red or down to take it away. This tool is cool because I can add just those colors. If it's hard to tell what colors are going on. If you hover over it, you can see it's flashing over here. You can see it's choosing between red and orange depending on where exactly is being selected in the picture. If I go over here, it's selecting the yellow and the green. Anyway, you can select exactly the image in the picture and then adjust to up or down. It also works with the luminance and the hue. This would be my typical edit sequence.
5. Blackberries and Macro Filter: Okay for our next demonstration, we are going to be using blackberries. I'm going to move that tray over and then put this bright clean one on. What I'm going to be doing is I'm going to be filling this little bowl and then I'm going to be shooting from above. I only have a little container and I think there's not going to be enough room. Well, let's just see. I haven't washed these but I have washed another set of berries that are already prepared for this. Before I get those out, I want to just set up my base with these guys. I just want to make like a little bed of berries and then I'm just going to adjust my tripod so that I'm shooting above, all right. I'm actually going to open up just a little more so you can see that, that might even be too much contrast. I'm wondering if my little paper bag might be better. I just crinkled it up a little bit so there will be a little more texture in this image. The cool thing about these blackberries is they have a really pretty surface that reflects a little bit of light and dark. Actually, That was kind of cool. I'm gong to take this one's a little bit smashed, so I'm just going to like spread its juice around this. It's gong to look a little messy but it'll be cool. That's awesome. My fingers are dirty. Right here we have our Blackberries, I mean, this is a pretty decent shot but a way that we can make it better is by using frozen berries. I went ahead and froze a tree of berries that I would use for this session. I froze these this morning, they probably been frozen for I don't know a few hours. But you can see already I've just taken them out of the freezer and they're already starting to get little frost growing on them. I'm just going to set these nearby. We're going to hurry in place all these frozen blackberries on top of our not frozen ones. Then we're going to be quick because as they start to heat up, they'll just turn really white, which is what we want. Let's get our hero berries, I like that pink spot right there, that's cute. One splat on the bottom, I feel like that looks good to go. Hero berry 1,2, and then this one looks pretty cool. I'm actually going to bring him a little more prominent. I love how that looks. I'm just going to, this is going to be a little weird, I'm just going to blow on them a little bit so that they turn white faster. Before we do that, I'm just going to make sure my focus is right on, and then I'm just going to take my [inaudible] Awesome. Here is my straight out of cameras shot. It's actually pretty good for having no edits done on it. Here's what it looks like after I just push it a little bit, I added some saturation and some contrast to really help those blackberries stand out. Now let's talk a little bit about focal distances. All right, I'm hand holding my camera. I just wanted to show you with my 35 millimeter lens about how close I can get before is too blurry to get any closer. That's where my lens stops. Obviously if I get closer, It's just gong to get blurry or I can't focus. I just need to pull back just a little bit. That is as close of a crop that I can get with my 35 millimeters. You can see it's chopped the top and the bottom of the bowl off. I mean, are those really larger than my? I don't know. I'm going to use the filter and we'll see what we can do with it. Now at the same distance where the top and bottom are chopped off, it's blurry. I haven't changed my focus at all. I'm still at maximum focus. We're going to just go closer until it's in focus. Awesome. We're able to get individual berries as like the hero, subject of the shot. Awesome. That would be like a picture. Then you can turn it around and frame other shots. But as you can see, the focal length is completely different. Let's see, if I wanted to shoot up here with the same crop, my lens won't even do it. This is me focused all the way out. All the way out using the macro filter, I can get this close. You can see that you've got a range. You just have to play that you can see the focal distance is very slim. That's about what we can expect with the macro filter.
6. Grapefruit and Versatility: For the next picture, I wanted to add a little bit of visual interesting tell a story. I have this little clean empty jar. It's hexagonal, which I thought was cute, I saved it. That's what you do when you're a photographer. You just save random crap that you think might look good in a picture. Then I just cut open this grapefruit. What I'm going to do is I'm going to squeeze the grapefruit juice into the jar to create a dripping. I'm shooting right now into the back lit.The window is back there behind the jar. That will really help the light in the picture. It'll help the drips catch the light. For the picture, I would hold it so that you could see the grapefruit and then I would squeeze so that the juice drips in. I'm going to take a picture of that so you can see what that looks like. Here is my striated camera next to my edit. This is my back lit image that I got of my grapefruit. What I love about the final image is how the light reflects off of the surface of the grapefruit and how the juice in the jar is really well-lit. You can see it has a nice color to it. I don't really like how muddy like my skin tones look in this image. I had to brighten up the foreground quite a bit in light room to help make my skin tones look right. I figured while I had everything set up, I may as well try a couple of different angles. Here I have it set up on the floor actually and a little bit further away from the window so that I had a lot more light fall out of the picture so it could be more contrasted. I love this shot because it conveys a totally different mood than my bright white shot. I like that the drip is in motion and I like that the light hits the jar and it like glistens a little bit. One thing I initially didn't like was how my veins are like popping out of my hand. But for this shot actually adds to it because the blue is like a slight contrast to the pink and the grapefruit. It turned out well, one thing I would recommend for this particular setup is to find a hand model. It was so tricky for me to lay on my kitchen floor and try and squeeze a grapefruit while holding it and trying to photograph all at the same time, I should have just grabbed somebody to help me with this. I feel like I got a little bit of my thumb cropped out which bugs me a little bit, but probably if I hadn't pointed it out, you wouldn't have noticed either. But there's that it's always a learning experience when you're doing photography. As long as you're learning and growing, that's what's important. Then I figured I had my grapefruit out, I took a couple of other shots of it as well to show a different emotion and feeling. I think it's important that if you're photographing your subject to get a lot of different angles and personalities of what you're taking pictures of. For anybody who runs an Instagram account, like making sure you have enough content to pose enough engaging, beautiful imagery post. It can be kind of tricky. If you're going through the work of putting together a photo shoot like this grapefruit one, definitely take advantage of the fact that you can shoot this for multiple angles with different moods and feelings and incorporate a lot of different looks into one subject. That way you have a lot of content to choose from and you're not limited to just one or two shots. These are just the few of the shots that I was able to get with my grapefruits.
7. Tomatoes: So next we're going to be doing a moody shot of these tomatoes. These are actually kumatos, they're brown. I never really seen these before, so I thought they'd be fun to photograph. I've already set it up. Basically I just layered some tomatoes that I sliced and then I put basal around them, and then I made some on top and underneath to give a visual interests. Then I doused it in olive oil and balsamic vinegar. Right now you can see I have this really moody shot. I'm just going to pan through this, just so you can see what we're working with. I love the way it looks. I used this crappy old cookie sheet again, and I think that shot is a winner right there. But I was thinking one way to make it a little bit better would be with a little bit of rock salt. So I have this sea salt shaker. I'm just going to sprinkle it with little, well I'm going to see if you'll even be able to see that hopefully. It's probably way too much salt, but it'll add a good contrast. I may still eat it even with that much salt on it. I think you need a little bit more back here. I want a really, really strong contrast. Salt is so cheap and it's a great way to add some visual interest to your picture. Let's see, yes I love that. I think that really, really took it up a notch. I feel like that finishing off there just looks really good. I'm just going to pan out for you just so you can see exactly what this looks like. I have my window, I have a bowl with my tray on top, my tripod on the table. My table is a disaster by the way, this is normal. But anyway, so that is my tomato pile right there and I made it. Let me just show you a side angle. I'll make it a little brighter so you can see what I have. Already this is a completely different picture. Make sure that when you're shooting, you are taking advantage of all angles. This one you can see the tomatoes look a lot more red, which is weird because they're just really brown in real life. So that shot you can see more of the salt. But I don't really love the shape of the tomatoes. I really designed them so that I could photograph them long ways. When I photographed them this way, the light hits how shiny they are, and so it really adds that visual drama. Here's the picture, I would say at a more balanced exposure, and then what I had was I had my shutter speed a little faster, so it had a more moody emotion to the picture in general. I would shoot both and then depending on my end use for it, just go from there. Then let's see what kind of macro shots we can get with this. So closer up, that's about as close as we're going to get. We throw this macro filter on, so this way you can see the individual seeds. Let's get a basal leaf. Can see the salt thats turned the basal. That's a cool shot of salt. So just changing it up, the salt is boring, but it looks really neat when you photograph it in the right way.
8. Final Thoughts: That's it. Thanks so much for taking my class. I hope that you were able to learn something, and I hope that you feel inspired to post your own fruit pictures in the project section. If you have questions for me or you want to recommend future videos, feel free to leave that on the comment section and I will totally respond. If you share your pictures on social media, please tag me so that I can see and comment. My handle is just Tabitha Park. Hopefully, your kitchen there is a little better than mine. I am not excited to clean this up. Anyway, thanks again for taking my class
 Tabitha Park, Product & Food Photographer