Transcripts
1. Introduction: Hi, I'm Tabitha. In this photography class, we are going to be making a splash. I'm going to show you how to throw objects into liquid to get them to splash just the right way and how to capture it on your camera for best success. It's a mess, but it's really fun to try and create, and once you get that perfect capture, it's exhilarating. It's really fun to share this type of thing on Instagram, I feel like it really adds that in the moment feel to an otherwise stagnant feed. If you're looking for ways to improve the look of your Instagram feed or maybe your portfolio, or you're trying to find ways to stand out in the field, this is the class for you. I'm going to share with you my tips and tricks, best camera settings, great light to make things really sparkle and how to get it all done by yourself if you are working solo on this project. This class is for intermediate to advanced level photographers, you're going to need a dedicated camera like a DSLR or mirrorless, something where you have control over the shutter speed and you can take pictures very quickly. I'm going to talk about high level lighting concepts and how to get this image tuned in just right, we're going to have a little bit of a scene setup and I'm going to show you how to capture it with natural light or artificial lighting. With all that said, my name is Tabitha, I am a lifestyle product and food photographer and a teacher here on Skillshare, I'm really excited to get started shooting, so let's begin.
2. You Will Need: Thanks so much for joining me. For this class, you will need a camera. I highly recommend a DSLR or mirrorless camera for this photo. Because we need to capture a burst of images with a high shutter speed. Using a phone is not super-helpful. It's possible, and I'll talk more about how to get it to work for you in the next section. But for best success, use your DSLR or your mirrorless camera. They're built for this. You are going to need liquid for the splash. You could do water, but I'm thinking beyond that. We could do juices or wine, hot cocoa, coffee, a bowl of cereal with a splash of milk. Feel free to get creative using any liquid that will allow for a splash. Photographing clear liquid and opaque liquid is a little bit different, but we'll get to that in the lighting section. You're going to need a projectile or few projectiles, basically something that you can toss into the liquid to get it to splash. Grapes are really easy to find. You can get a whole bundle of them in your grocery store. I found clusters work better than single grapes because a single grape just hits the liquid and makes a small splash, whereas a bunch of grapes makes a bigger splash. Thinking about surface area when you're picking your objects to toss in is a factor. Ice is a really good thing to use because it tends to go in drink, so if it ends up in the shot, it makes sense because ice is normally in drinks. You can use things like marbles or dice, you could technically use coins. I like to go for objects that aren't going to ruin whatever I'm shooting. If I'm making a cup of tea, I want to put stuff in it that I'm still going to be able to drink the tea afterwards. That's just a fun challenge that I like to put on myself. Obviously, do whatever is going to work for you. You will want to use a tripod for this. I cannot imagine trying to get clear shots without a tripod. If you don't have a tripod, get creative, but most of you will probably have tripod. Then lastly, this one's optional, having a second set of hands. You've got a friend nearby, someone who can jump in and help you out with the shot. It's a little bit easier to have someone dropping the objects and someone else hitting the shutter button, especially if your lens makes it so that you have to be far away. With my shot demo I'm going to be using a 35 millimeter lens, so I'm pretty close to my scene. So I can actually hit the shutter and drop my grapes at the same time. You can definitely do this solo but having a friend around is helpful. It's also fun too, because you can use slow-mo mode on your phone and take some behind the scenes shots and really make it fun. Other than that, you'll just need your basic scenery options. If you use backdrops or incorporating items like books or plants or other things to add a little bit of a story or a mood to your shot as well. You'll see me styling through my shot demo later on. In the next section I'm going to talk to you all about camera settings.
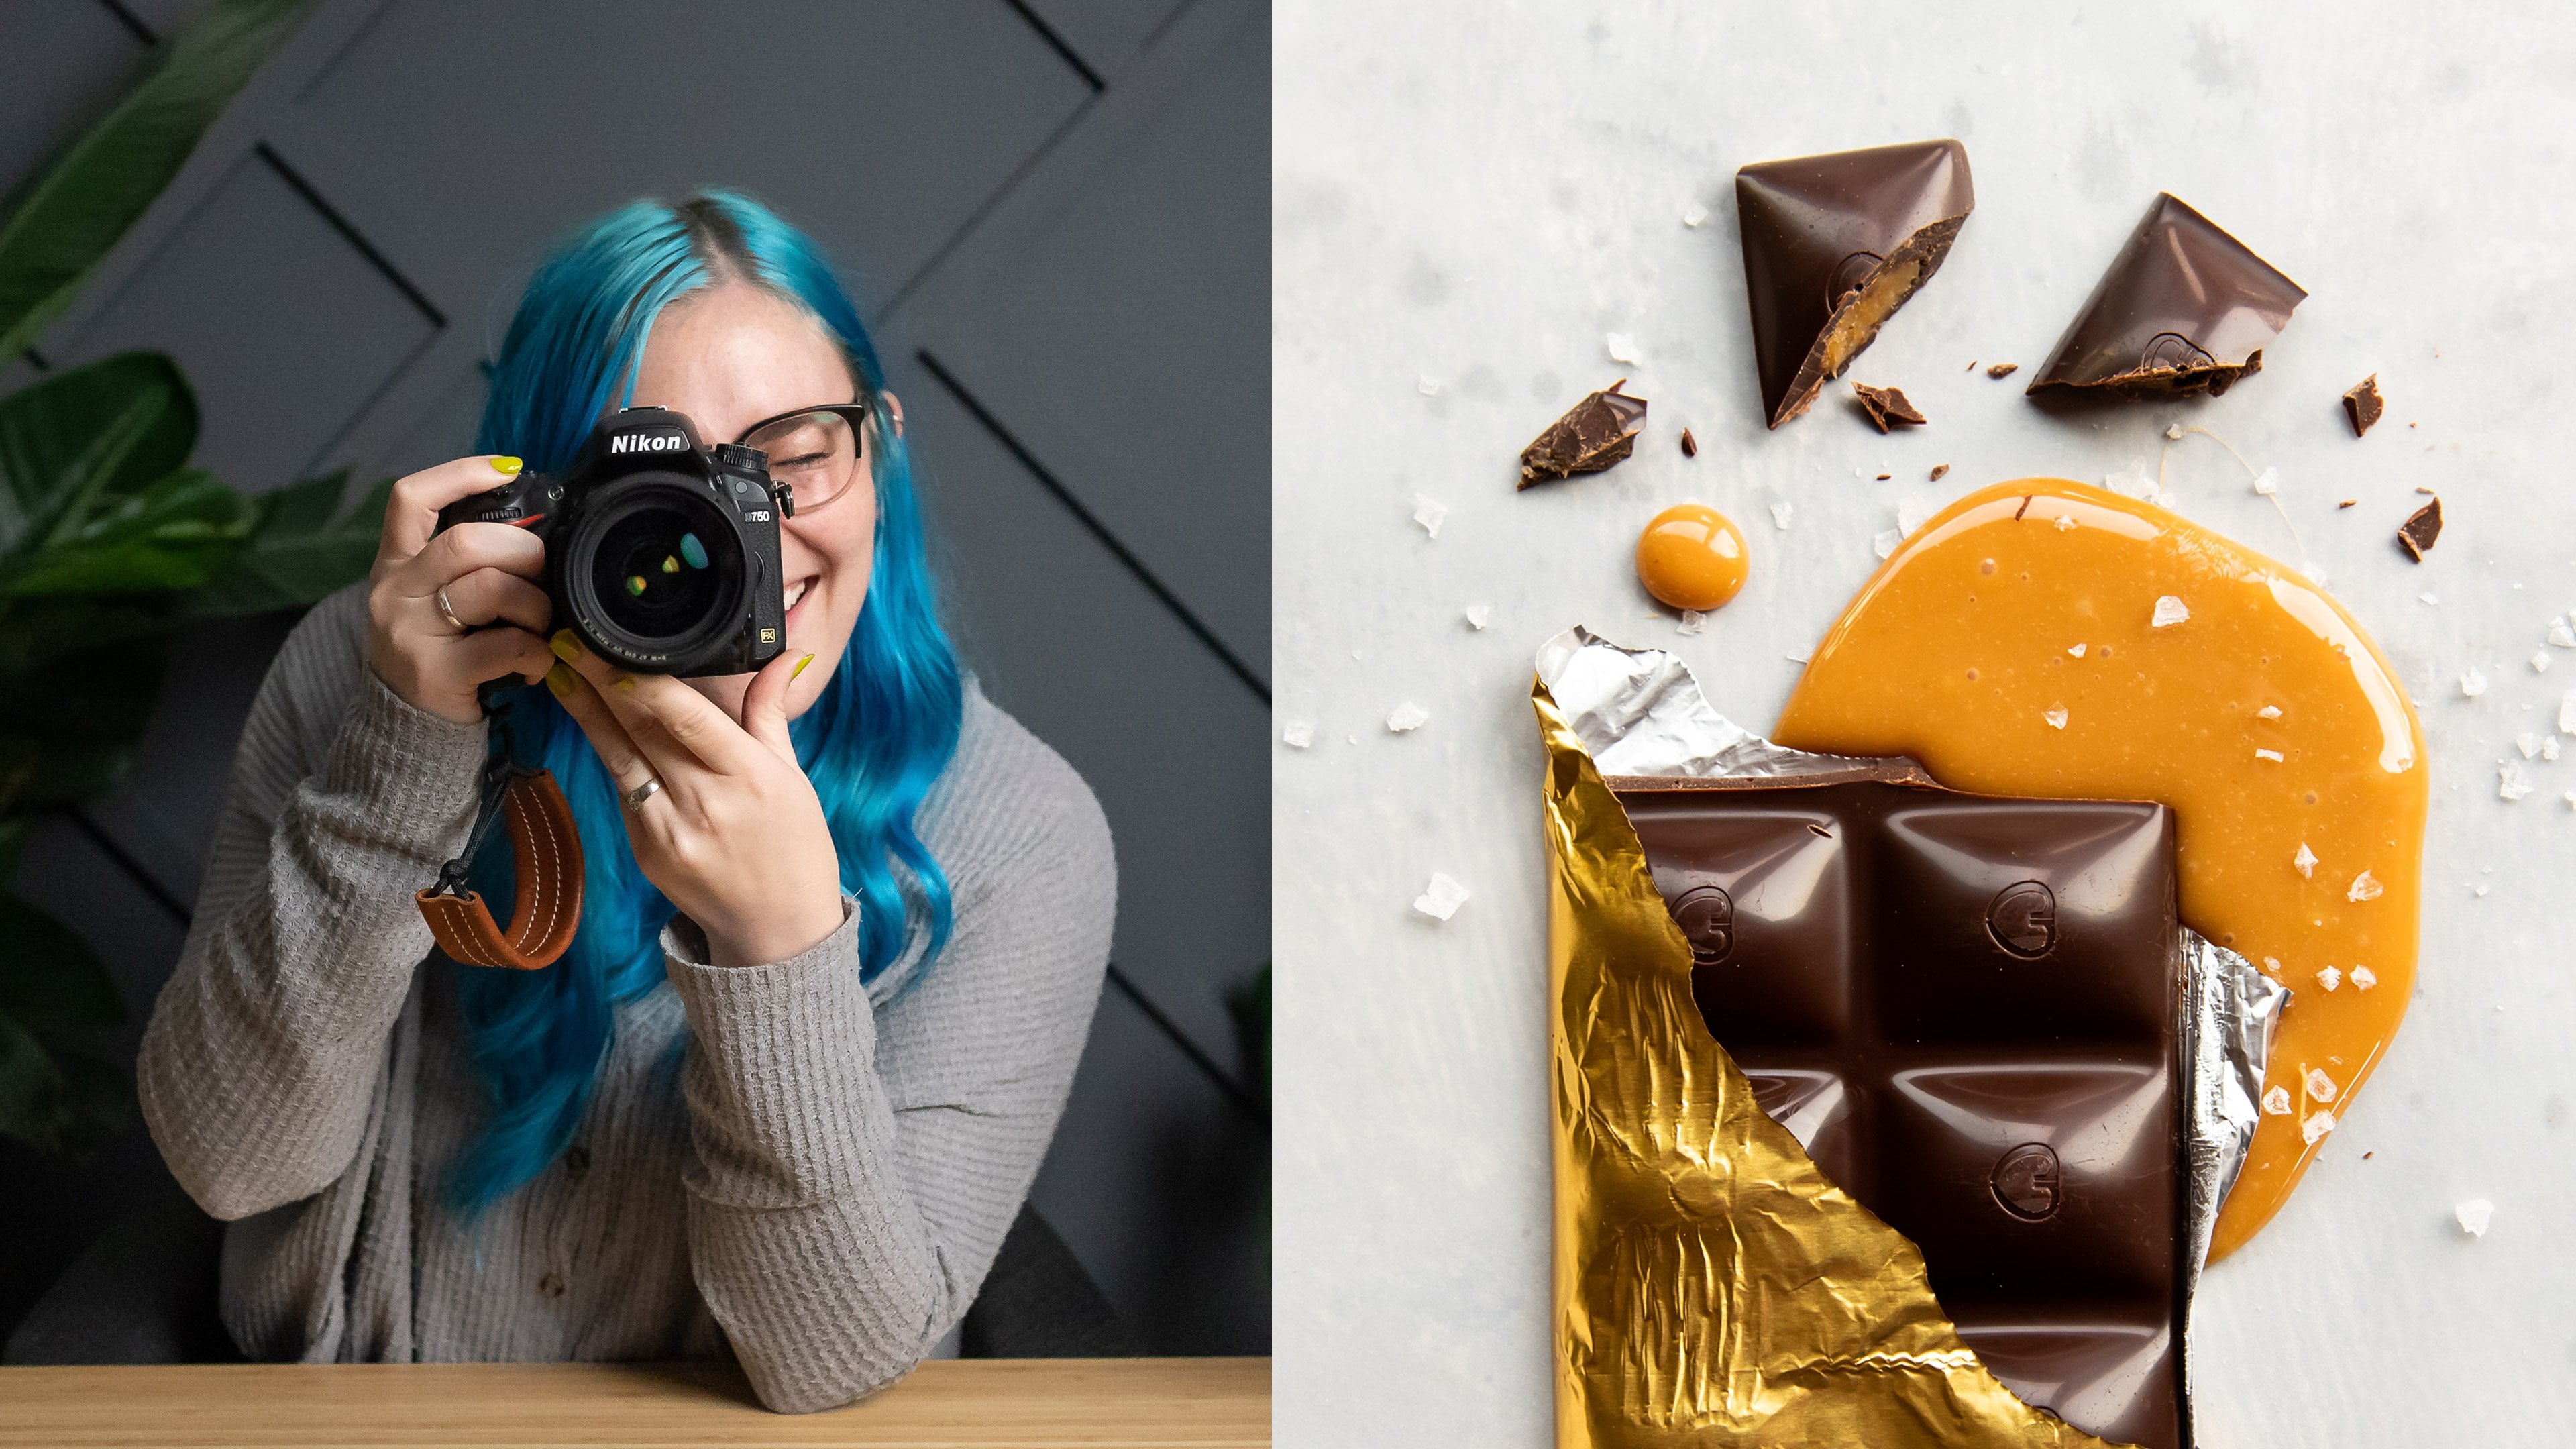
3. Camera Settings: Let's talk about camera settings. For my demo, I'm going to be using my Nikon D750. This is a DSLR. I've done the shot with a couple of different Sony mirrorless cameras as well, and it always goes very smoothly. You are going to want to make sure that your camera can do continuous shooting or finding a way, figuring out how to get your camera to do continuous shooting. On this camera, I have to turn a wheel, set it to CH, which is continuous high, which means it'll take lots of pictures, until it runs out of memory space or it tires out. If your camera does have continuous shooting mode, there's going to be a limited number of pictures that it can take in a row before it starts to slow down. Keep that in mind and I do recommend doing a test session. Throw some grapes into a glass of water until you can figure out your settings and you know confidently what your camera's going to do before you set up your whole big scene. As you can hear mine, it takes maybe 10 or 12 and then it starts to slow down. If you look into your camera's stats and it says it's going to get a lot more pictures than you're able to get, you might want to consider using a faster memory card. There's going to be a right speed that your memory card is capable of. If you're hitting that wall and you're not able to take as many pictures as you want to consider using a more expensive, higher-quality memory card that can keep up with your camera. I'm going to be shooting with a 35-millimeter lens, you can use any lens you're comfortable with. You just have to make sure that you know how far away you are going to have to be from your scene to get the shot. The angle that we're going to be shooting from is about 45 degrees. We're going to be angled down. You could do straight-on, but a lot of the splash happens in the top of the cup, so I recommend being at 45-degree angles. Flat lay doesn't make a whole lot of sense for this type of photo, but anywhere in that range is going to be perfect. For a proper exposure there is your shutter speed, your aperture, and your ISO. For this shot, I recommend setting your shutter speed first. You want to use a shutter speed 1/1,000 or faster. You can go slower, but you're going to get a little bit of blur in your splash, and it's a less effective photo. I would recommend starting at one. Experiment with faster shutter speeds if you can, but once you have the shutter speed set, next important is aperture. With my lens, it can go down to 1.4. That's super wide open, very little in the seen is in focus. You have this balancing act where you want to make it easy for your splash to be captured in focus, but also sharp enough to be frozen in time. I've found that F2 is as wide open as I feel comfortable going because I'm more worried that I'm going to miss that very thin line of focus in this shot. Doing F2 just gives me a little bit of extra breathing room. Obviously, if you can go F4, you're going to have a lot more success, more of the splashes going to be in-focus. I do like the way that an out-of-focus sharp splash looks in a shot. It looks at the real. You've got these, these tiny little dots that are more like orbs. they're [inaudible] , you've got a forward and backward, and it creates a cool mood to the shot. Using now those wide apertures is great, especially because you'll probably need it shooting at such a high shutter speed. Then the last thing that I set up, is my ISO. Basically picking an ISO that will give you a proper exposure and it is probably going to be pretty high. I usually recommend shooting it as low of an ISO as you can, but you're going to have to get up there for this shot, especially if you're shooting indoors with a window light. My ISO was around 1,600, sometimes higher, 3,200, it really depends on the camera. If you have a newer camera, a lot of times they're better in lower light and their high ISOs have a lot less noise. Don't be disheartened if your photo looks like it's going to be pretty noisy because in the editing section, I'm going to show you a few things that you can do to tone down a lot of that noise, doing some noise reduction on the shot. Use those high ISOs. That's what they're for is for these high-speed type shots where we really want that fast shutter speed and we want to make sure we have an aperture that'll capture it. What you want is to be able to capture a rapid number of shots in a short number of time because your object is falling, it's going to hit the surface and it's going to produce a splash. You can get probably two different shots from one splash, but it's tricky to catch if you're relying on your camera to do the timing. Either grab a friend or if you can hold down your own shutter button while you're dropping. That is another way to get success for this shot. The last thing that I wanted to mention is when you are positioning your camera, you're going to want to plan for that splash zone. Make sure that you've got enough space above and to the sides of your mug, that your splashing, because if you really just crop in nice and close, you're going to miss all the action in your shot. Let's talk briefly about how to get this shot with a phone. If you don't have another camera to work with and you really are set on making this happen. You are going to need continuous shooting and a high shutter speed. With continuous shooting, a lot of phones do have a burst mode. I have an iPhone 10 and that's the only phone that I've ever used, so I'm not sure how the other cameras work, but if you set it up on a self timer and hit the Go button it counts down and then it will do a burst of shots, 10 photos all in a row, which is awesome. For this type of picture, you can drop your object and it will take 10 in raw and then you can choose between your favorites. The problem here is you don't have control over your shutter speed. Often, phones are just designed to create perfectly exposed, scene as best they can. If you're working indoors, often the shutter speed is a lot lower because it's a lot dimmer of a space. You'll see that your camera probably gets only 1/250 of a second of shutter speed, so you'll get a little bit more blur. To avoid this, you can just go outside, go into a brighter scene, get closer to your window. That's going to force your camera to automatically increase the shutter speed for you and you'll be more likely to get pictures in focus. If you want to have total control over your shutter speed with your phone, I recommend using an app like the Lightroom app. It has a built-in camera. You can go use that camera, access the manual settings, change your shutter speed to that 1/1,000. The only issue with this is there's not a great burst mode. You can hold down the volume button and it will take a burst, but it seems random. It's not like [inaudible] it's like [inaudible]. It's just different. It's not what I expected. I found it really frustrating to try and get pictures with my phone. If you are determined and you're willing to do a lot of practice and figuring it out, you can definitely make it happen. But again, if you have a DSLR or mirrorless or you've got a friend, you can borrow one from, that is the route that I would go. Now that we've talked all about camera settings, let's jump into lighting in the next section and then we will shoot.
4. Lighting: All right, lighting. For this class, I am going to do my main demo with this window light. Then I'll have a follow-up demo where I show you the same thing but with artificial lighting if you're working at night. I am in a studio space here that is naturally lit except for my hair light over here. But this is a 1.5x4 foot window. It's quite small compared to the big back door window or main windows on the main floor of my space. I have a smaller window, but it's fine because I'm on the south side of my house. So I get quite a lot of light through these windows. Sometimes it's direct, but right now, it's not. That's coming in through here. I'm going to go ahead and scoot the table so it's closer to the window, so that I get as much light out of this space as possible. The nice thing about working with a slightly smaller light is that you get a little bit more contrast, I feel like. Sometimes when you have a really, really big expansive light or window, it just fills in all the shadows and you don't get as much drama in the shot as you might want. I'm excited to see how this one goes in this space. Another thing that I wanted to mention about the way this window light is, is I'm going to set up on this table. The table allows me to push my object forward so that my light is more behind my subject. Think about where the direction of your light source is when you're planning out your shot because you're going to want to incorporate side lighting or slightly back, so having it hit your subject from a little bit behind. You could go full backlighting. You'll have to get a higher angle if you do that. But what this will help you do is shine light through any of your sparkle splashes. If you're shooting with a clear liquid, you're shooting a cocktail, or wine, or tea like I'll be shooting, you're going to get light through those sparkles and it's just going to add that extra bit of drama to your images. I don't recommend putting your light source behind you when you're taking pictures. Front lighting isn't great, it tends to flatten out your shot. Keep in mind where your setup is. If you can set up on a table and turn it so that you're incorporating that side lighting and slightly backlighting a little bit too. You can totally use direct light for this if you want to go outside and you got the sun's setting or the first light in the day. I wouldn't say use the sun overhead because your shadows are going to be a little bit messier. Feel free to get creative and push the envelope a little bit, experiment with different lighting environments. But the best success that I've had is to get really close to my window, and make sure that it's slightly behind my subject, and just crank my eyes a little bit because that's more comfortable for me than going outside, and trying to set up, and worrying about the wind then if people are watching, I don't know. Just be patient with the process and don't be afraid to crank your eyes out if you need to if you're not getting enough light for the shot. That pretty much covers it for lighting. I'm really excited because next, we're going to shoot.
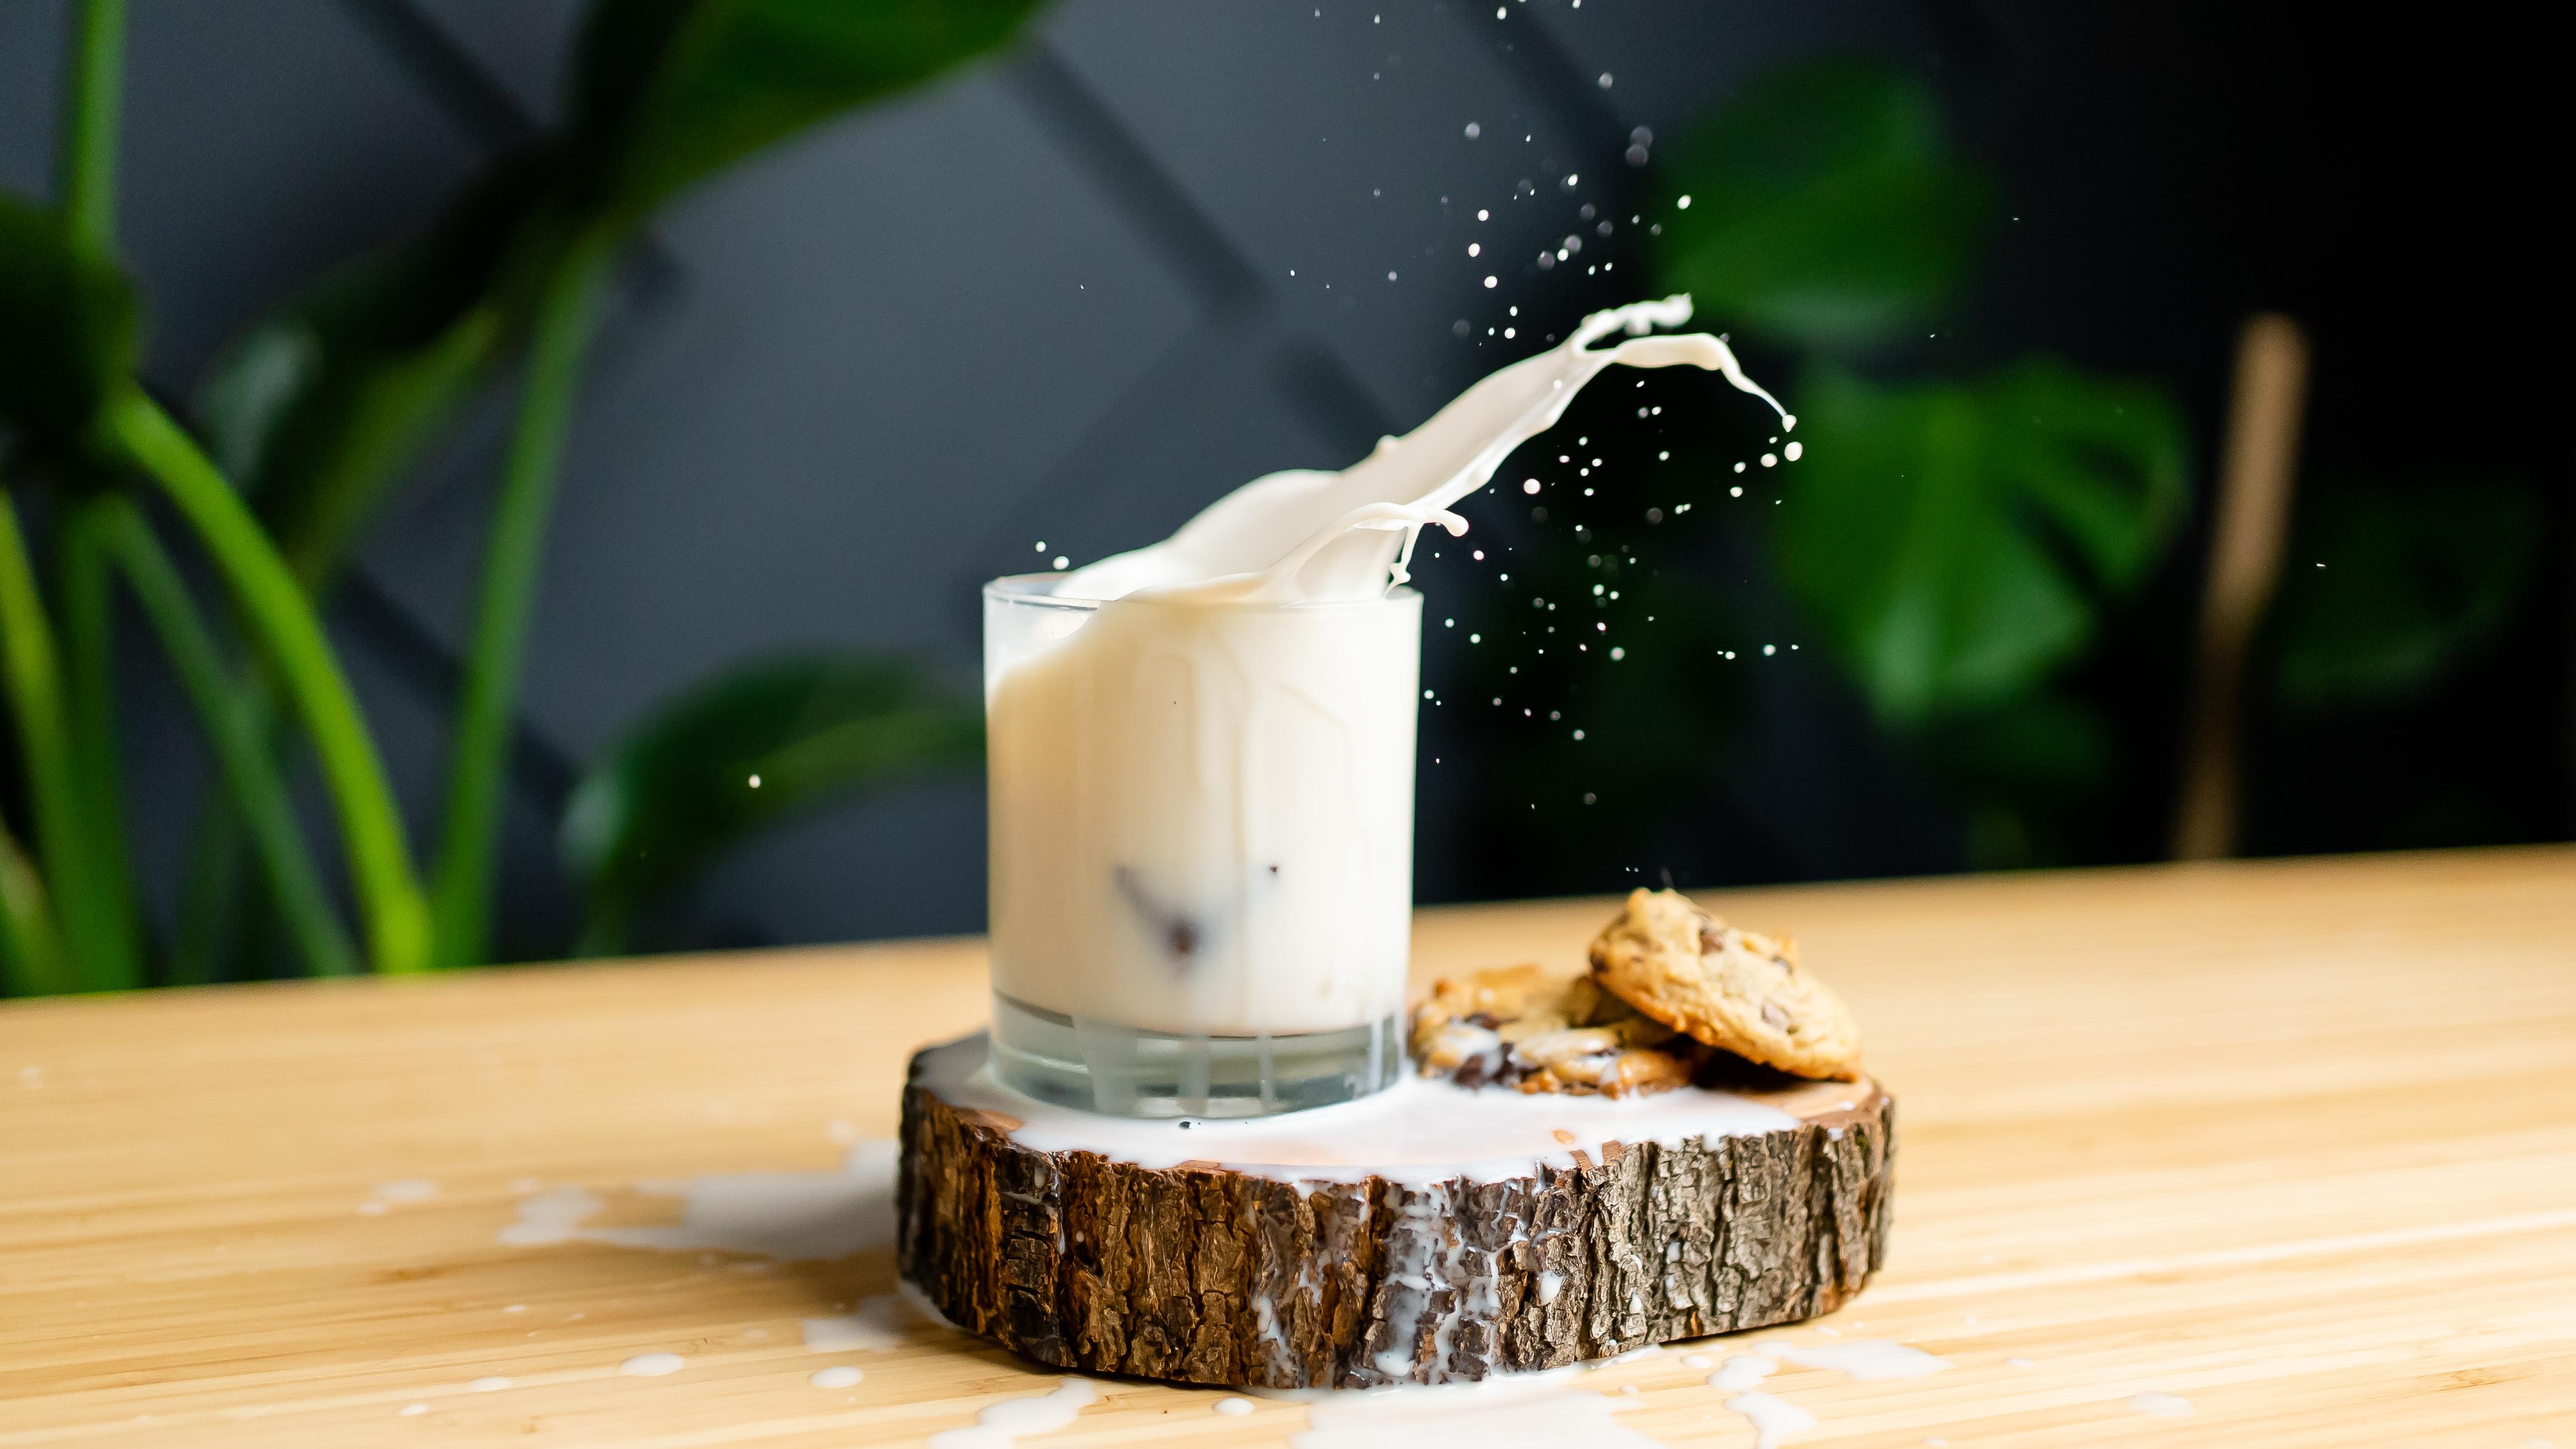
5. Natural Light Demo: Here we are in my studio. I have rearranged just a little bit so that I can utilize this as a shooting space. I have moved my table a little bit closer to my light because if you want a lot more light, more contrast, I got to get closer, so I move the table closer. This is a smaller window, but we're on the South side of this house since the light that comes in is a little bit brighter, but we do have an overcast day. I've got this little spill of light on the table. The key here, like I mentioned before, is having your light be at the side or slightly behind if you can because it's going to make the splashes really sparkle and that's what we want. Right now, I have just set up a very basic version of this set, this is just a clean bamboo table. I've got a small-ish cutting board that boosts up our subject. This is the mug, I went ahead and picked a mug that is not see-through because we're going to be dropping grapes into this and I don't want you to see the ones I've already dropped in there, so it's an opaque mug that is important. The angle that I'm at here is about 45 degrees, maybe just a tad lower 30 degrees. I can see the surface of the liquid and it's going to splash up, so my scene is really basic right now, I'm going to add a few things to make it a little bit more special. I have this little vase with flowers, it looks really cute. I'm shooting hibiscus tea, so it's going to be pinkish and I wanted to play into those pink tones that I know are going to shine through in the droplets by incorporating some pink flowers. It's going to be feminine floral looking. I have a little pile of broken flowers that have fan petals and I thought that it might be cute to do some little petals trailing up. These are not hibiscus flowers, these are just ranunculus from a recent bouquet that I shot. I'm just going to sprinkle those in there and I'm going to style through my main camera. This is my Nikon D750, and this is what I'm going to be shooting with. I have a Sigma 35 millimeter fixed lens on here. I'm watching through my screen as I style so that I'm making sure that everything looks good, cute. I'm putting the petals on the side toward the light. I practiced this scene before-hand and I had the petals on the shadow side, and I feel I didn't get to see their true colors, so keeping that in mind, which side is your light and prioritizing your prompts that way that can help make your shot looks better. Right now they're coming directly out of the corner of my scene and I don't love that, so I'm just going to make them cascade. Then I'm going to take this little bucket, I had some extra foliage that I thought I could throw in there, but I'm pretty sure if I just place it just off scene, it'll throw some springs in the scene without being too distracting. This is going to add some visual depth. We have our mid ground, which is our subject, we have our background, which is the foliage, the wall, the plants, and then we have a foreground which will be out of focus, it'll be this foliage pieces reaching in. This is a fun way to layer your scenes so that it has lots and lots of depth and drama. We're shooting at F2, which is really wide open. Hardly anything in this scene is going to be in focus, so it's going to be really important that I really nail that focus. I have a few more little pieces I want to use for styling. I'm going to incorporate some actual hibiscus leaves, this is just like a loose leaf tea and so it's going to help tell that story. I'm going to put that on the side and trail out. I want it to look intentional but not super placed, so I'm just trying to make it look effortless but purposeful. Awesome, I love that. Then I have some little sugar granules, these are little rock sugar crystals, they might be a little bit too much, so we'll just see. I'm going to put them back here where the light spills and let them cascade around the table, I think that will work, there we go. Some information but not too much. These ones are getting too close to the handle, I want to make sure the handle feels nice and separate. Cool. I actually hate the sugar, I'm just going to take that right out. I thought it was cubed for second but it's actually not good. It's a little too distracting. There we go. Sometimes simple is just better. Maybe I'll throw one of these little flowers here. Nope, it's in the shadow, I'm just going to leave the shadow alone and let the scene tell the story. Much better. I'm actually not sure about this teabag now I think I like the teabag. If you were doing a branded shot, you definitely want their little logo in there, so this will be good practice. One last thing, my vase is right on the edge of my shot and so is this little blurry thing, and I know that I'm probably going to crop this down for Instagram by four by five, so if I want that to be in the final photo, I'm going to need to scoot it back so that it drops in my frame. I'm actually going to bring this up, bring that forward, it's just a little minor tweak. I think that'll be better. I'm also getting a fun sparkle out of this glass, which is cute. I'm going to clear some space and grab my projectiles. I'm going to be throwing grapes into this tea today because then I can still drink the tea afterward. For a shot like this, a big cluster does really well. A single grape does a smaller little splash, but a cluster of grapes is just like grapes also sink, and so having them sink to the bottom is very effective. Just touched there a little bit. A few checks that I like to do before I get started is making sure that my exposure is correct. I'm currently set to 1 over 1000, and I'm shooting at f/2 and my ISO is 1600. The resulting photo is properly exposed, if anything, maybe it's just a little bit dark, but I'm okay with that. I don't want to increase my ISO anymore and I don't want to open up my aperture anymore because I really want to maintain good focus. One quick trick that I like to do to make sure that I maintain focus because the splash is going to happen in the center of the cup and it's not in the shot right now, you need to plan for it. Rather than focusing on the front of the glass or the back of the glass, I like to position the glasses handle right in the middle. This is exactly parallel to where my splash is going to happen. I'm going to focus right here on this handle. Hold down my shutter, maintaining my focus and I'm going to get ready to drop my object. What I like to do is position my hand above my cup and then raise it up so that it's directly out of the scene but in lines so that when I drop it, it's going to actually splash. Then as I soon as I let go, I'm going to hit this shutter, and then I'm going to see if I think I got it. We have our splash, but I think we can do better, so I'm going to go ahead and just keep on shooting. Sometimes your splashes make a giant mess and you'll have to stop and clean up. But I say if it's not too messy, just keep on shooting. They're turning out so pretty. Something else you can do if you're having trouble aiming, you can position it in the shot, and then as you let go, lift your hand up and out of the scene. That way it's not in the shot because you're not going to pick the one where the grapes are in mid air, you're going to pick the shot where they're splashing in the water and hopefully, you have time to get your hand out of that shot. My mug is getting full of grapes, so I have the spoon and this towel at the ready so that I can sit and fish them all out and then I will mop up my scene and keep on shooting. Sometimes it takes a few rounds of shooting before you get that perfect shot. I recommend taking a look at the back of your camera while you're shooting the scene if you feel like you're really happy with the shot yet. You don't want to feel like, "Oh, I've been at this for 20 minutes, I'm going to stop" and not know if you've got the shot. It's really important to make sure as you go, that you're in focus and that your pictures are turning out the way that you hope. I have a separate towel, it's more dry, that I'm going to dab out the extra tea splashes with. Sometimes this is really messy and a lot of the tea ends up all over the table and your liquid line drops too low and you don't get very effective splashes going forward, so sometimes it's helpful to have a second cup. I actually have a second mug ready that I can shoot with if that gets to this point. Now that I have mopped up a good portion of the splashes and gotten all the grapes out, we're going to go for round 2. Same story, we're just making sure that we absolutely got the shot. Grapes rolling on the floor. I just don't know if I have the shot. This is taking a minute, normally it doesn't take this long. I'm going to top up my tea just a little. Great. All right, we're getting somewhere. It didn't let me keep on shooting, I need to take a break. After several attempts, I think we finally got a few really good pictures to work with. I'm going to go ahead and set up another quick little demo for you using artificial light in the next section.
6. Studio Light Demo: This is my artificial light setup, you can see I have a big bright light up on my C-stand, I've got the aperture 120d mark two with a light dome attached to it. We went ahead and set it to 100 percent power, so this is as bright as it can get, and it is a continuous light, so it's not going to flash or anything. You can see that I've positioned it about three feet from my subject and I've got it giving me some angled backlighting, so not quite sidelight, not quite full back-light somewhere in between to get it to really light up that negroni, so I can really see those sparkles. I've got three cameras going on here. The first which you can't see it's the one that's filming me, that's a Sony A7R3 that's capturing this footage, and then I've got my main camera for photos which is a Nikon D750, that one's the one on the left. Then the camera on the right is a Sony A7S3, which is capturing those slow-mo footage that you see throughout glass. I'm shooting this cocktail, this new negroni with an amazingly giant clear ice cube from PDX ice, they're a local ice company here in Portland. This one happened to have a TIE fighter on it because Star Wars, he doesn't really like Star Wars. Anyway, I loved how this massive ice cube really made a huge epic splash, tons of surface area, really heavy, sunk to the bottom I feel like this was so, so, so fun to play with so if you have the opportunity to issue a big ice cube like this it is very, very fun and I highly recommend it. I'm really excited with the photos that I got, and you will see me editing them in the editing section next.
7. Editing: Time to edit. I have gone ahead and imported all of the photos from the two sessions and gone through and picked out my favorites. I over here in Adobe Photoshop Lightroom Classic 10.1, I have called all of these we're going to go through these first three, these were my three favorites, I really like this splash because it takes up a lot of lateral space than the shot, this next one is very cool, it has some fun dimension to it, and then this last one is also very cool. It makes me think of an alien or a snail head, so I'm going to go ahead and edit this first one because I think it conveys the feeling that I want to convey. To get started, I'm going to start out with a crop. I'm going to click on my Crop Tool, change Original down to 4 by 5 / 8 by 10 that's my Instagram tall crop, and I am just going to dial that in real quick. I'm keeping in mind tangents. Anything that gets too close to the edge of the frame or exits out of corner, for example, this top-right corner if I were to line up the stem of this plant, it would draw your eye right off the corner of the page. I am trying to decide if cutting these petals on the bottom is distracting, I don't think so because they're out of focus, and that puts my cup of tea right on that rule of thirds spot. I'm cool with this crop, I'm going to click the crop box to accept. Next up we are going to look at our exposure, this image over all seems very cool to me, so I'm going to bring up the temperature, just a hair. Next up, I'm going to increase the exposure just to touch, and then I'm going to bring up my shadows. This is going to bring a lot of definition in the darker areas of the photo. Bringing up the shadows often takes out the contrast and I really like a good contrastive photos, so I bring up the contrast just a little and then I kick it in a little further by bringing the black slider down and the whites slider up. Then usually that blows out the highlights a little bit in some of the spot, so I bring the highlights later down just a hair. I'm feeling really good about that general at it so far. Let me show you where we started after the crop. That's here, and then here's where we are. Just with a few quick little tweaks, I want to talk about the noise reduction. This image from a far looks like it doesn't have a whole lot of noise, but if you do zoom into these darker areas of the shot, you're going to see a lot more of the noise in the image. This was shot with 1600 ISO on my Nikon D 750, I'm pretty sure that camera is five years old now, so the way that it handles noise is less advanced than a newer camera would, so let's go ahead and treat that. I'm going to go down to the detail drawer, it has this Preview box for us, I'm going to click out of it and then click in where I know there's quite a lot of noise. Before I do a noise reduction, I'm going to sharpen the image. It's a good habit to be in to sharpening your pictures. I drag the sharpening slider up about halfway and then I drag the masking slider up while holding the Option key, and everything that is white gets sharpened, so I just make sure that I'm not sharpening that noise. You can see the noise in the background, if I were to leave the masking down, it would sharpen the noise, we don't want to sharpen those, but we do want to sharpen the edges of the object. I brought my masking up about halfway as well. It's going to be really hard to tell, but I'm going to try and show you. Here is before my sharpen and here is after. It didn't sharpen that noise and we're going to reduce it just a little bit more. I'm going down to the noise reduction slider and I'm going to bring it up until I feel like it's smooth but not fake looking. If we bring the noise reduction all the way up to 70, it looks like a digital painting, it's just a little too smooth. It doesn't feel real, so we're going to bring our noise reduction back, we want to have some noise, but not as much as we had before where it's at that level of distracting. I am happy with this level of sharpening and noise reduction, I'm going to bring it back to before the sharpening and noise reduction, and after. It is just nice, I feel like they go hand in hand, you want to reduce the noise, but you also want to maintain that sharpness it's so key. Then at this point, I mean, we could ship it the way that it is, it's awesome. I want to check a few things, I'm checking my horizon. I really am a stickler about straight horizons, I want to make sure that that line on the table that's created isn't tilted because if it's crooked, the picture's going to feel like it's falling over. Mine is pretty right on, which is great. Then I feel like the liquid in the teacup is a little bit dark still, so I'm going to see if I can bring that up. I'm going to go down to the Tone Curve menu, I like to take the Darks slider up, that brings a lot more light into those shadows again, but in a slightly different way than before. Then I like to bring that Shadow slider down, just a hair that just deepens and makes those blacks more rich. Now that I've brighten that a little bit, I'm seeing that I missed getting my backdrop fully in those background here, so there's a little bit of a line where you can see the wall behind it. I going to open up my crop box, bring that in just a little, which will arguably make the picture better because it's closer in, the detail is brought front-and-center. That's great. Perfect. Last few little clone stamping is what I like to do at this point. I zoom in and I can see little tea droplets all over my mug because as you know, I threw 30 grapes into this cup. I'm just going to clone them out just so that there's less distraction, less elements for the viewers eye to get caught up on, you could totally leave this stuff if you want to add some fun personality, but I know that there's a lot already happening on the wood cutting board that I won't really be able to easily remove, and so that's where I'm going to let that personality shine. One more quick thing I wanted to point out, I was shooting at 1/1,000, which is my recommended shutter speed, and you can still see that some of my droplets are traveling at such a fast speed that they have become a line instead of a dot. This is obviously more pronounced when you have a slower shutter speed, but the main action is what I care the most about and that is where we are sharp. You can see that because I focused in on this handle, the center of the splashes in focus, that's these elements here, and then the back of the splash is slightly soft. But it did give us that fun, ethereal, orby, splashy effect, which I think turned out great. Then at this point, I think we've got it. When I go to export a photo, I just right-click on it, go to my Export menu. I pretty much keep all my export settings the same, I put them in a sub-folder we'll call it splash and we're going to rename this, HabiscusTeaSplash. Actually, I'm putting them on my Instagram folder so that I can just drag and drop those photos into, I'll show you. I limit my file size to 1800K, color space, sRGB. I resize to fit the short edge 2160, that's the short side of a 4K video, 2160 by 3840. There's so many numbers. I just keep it at this or I do 2400 or 1800, it just depends on how I'm feeling. I sharpen for screen in the standard amount and then after the export, I have it show in Finder. So I'm going to hit "Export". I'm going to open my AirDrop and unlock my little telephone, and then I can drag and drop this to my phone. There it is. Now I can post it to Instagram super easily. Now lets edit my artificial light demo. We have three negroni photos that I love. Let's go through them. This first one has these four walls of liquid with a shh right above it. We have more of a backlight going on in this shot as you remember, and I didn't get any light on the backdrop, so it's all about that leaf. I think it gives it a fun tropical feel. I don't love the stick, but I'm going to get over it. My negroni, we've got it shooting straight up. That's our shot number one. Shot number two is a moment after this where it starts to fall on the outside of the glass, which I think is very fun. Then shot number three was from a different splash, but I loved the way that it hit the table in this like captured the moment feel with these solid droplets. Anyway, we're going to edit the first one because I feel like the first one is the strongest. We're going to start with our crop, very same as before, 4 by 5 slash 8 by 10. This time I'm going to drag it down a little bit because that table has no information down at the bottom. We really want to make sure that we're keeping our eye on that negroni. That looks awesome. I'm even going to bring it in just a little bit so that we're really like, "Hey, check this out." Happy with this crop, feeling good, let's jump in. This one I'm shooting at 2500 ISO, I'm at 1/1000 still, but let's look at the noise here. For some reason, the noise is less pronounced and I think it's because I have a lot more contrast in my lighting. There's a lot of shadow and there's a lot of highlight, and there's not a lot of that gray area that's being lit by me cranking up my ISO. The things that are bright feel bright and good and the things that are dark are dark enough but they don't show off all that noise. The noise here is less, even though the ISO was higher. You might run into that where you'll be surprised that your ISO doesn't give as much noise as you expected. Again, I've told you probably 100 times if you've seen my other classes to keep that ISO really low because you don't want noise, but you know what? We can fix the noise. We got this. Let's tackle my temperature first. I feel like this one's pretty right on, but it leans a little bit pink to me. I'm going to drag my tint slider. This one's super sensitive, so I'd like to hover over the number instead of the pin in the center. Hover over the number, click, and drag. I'm going to make it just slightly greener, very, very subtle, actually, negative 14, that was dramatic. Here's the before and after. The reason I felt that way is because the bamboo table looked peachy to me and I know that it's not actually peachy in real life. This also brings in a little bit of yellowy-green into those leaves and that is much more effective. Very subtle, but good. We're going to increase our contrast. This one doesn't need it as much as the last one because we have a lot of contrast in our lighting. Let's go ahead and pump up those shadows. That actually really makes all those little teeny tiny spray light up. I love that. We're going to increase the whites, we're going to bring the blacks down just a little bit. I'm going to see what bringing the highlights down does. It actually brings that table back a little bit. A little bit more info in the table or less reflective and more like, "Hey, this is a bamboo table," which is cool, it adds a nice mood. Let's increase the clarity on this one. Sometimes I'm half and half on clarity, but this one really feels like, let's make it punchy. We're going to increase the Vibrance just a little bit. If you like your photo to be very colorful, I recommend using the Vibrance slider instead of the Saturation slider. I feel like the way that it enhances color is a little more natural. I can bring this up to Vibrance plus 20, and we're getting to the edge where it's like that's colorful. But if I bring it up to plus 20 on Saturation, it feels intense. It's fiery, it's electric. Double-click to bring it back to zero, that's a fun trick, but yeah, I definitely just prefer the Vibrance slider. I'm going to increase the darks just a little bit, bring those shadows back down. I am loving how this picture is turning out. This is so fun. Let's go down into our detail drawer and mitigate that noise. We're going to bring the sharpening up. I like to zoom in on an actual sharp part of the photo when I'm adjusting the sharpening, bring it up, adjust our mask on that. Looking good. Now let's reduce that noise. Before, and after. It's just polishing it up a little bit, loving how this turned out, so good. I forgot to touch on lens corrections before. This one doesn't have a lot of lens distortion, but if you check this box, Enable Profile Corrections, it will remove the dark vignette around the edge if available, and it will flatten your image so that if it was distorted, like this lens gives you a lot of distortion, it's going to put things back to what feels like human normal. Enabling profile corrections. You can also do that when you import and it will automatically do it. But sometimes I feel like, I like a little bit of that natural vignette. We are going to export it the very same way, but we're going to call this negroni splash and we are going to export it. We're going to bring it over to my little phone here and get ready to air. This is my favorite part. I just love science and technology. The best. There it is, yey. Now I'm going to post it on Instagram. Anyways, so that is my Lightroom edit. Hopefully, you found something helpful here and you feel like you can confidently edit your photos and feel good about what you're doing and why and all that good stuff.
8. Final Thoughts: That's everything, thank you so much for taking my class. I hope that you enjoyed it, and I hope that you learned something new that you can take into your shooting workflow, and incorporate into future projects. I hope that you take the time to create a class project. I always love to see what you make. If you do, end up taking this picture, please share it in the project section on Skillshare. I always love to see how things turn out, and how you put your own spin on this style of shot. If you enjoyed this class, I have a bunch of other classes at my Skillshare profile. They go from how to create your own backdrops, to photographing coffee, and donuts, and chocolate, and a bunch of other fun classes as well. We talk about different lighting techniques, and editing tips, and tricks. Hopefully there's something over there that is interesting to you, and if not, I always love to hear what kind of classes that you want to see from me in the future. With all that being said, thank you so much for joining me, and I will see you in the next one. That was a record. I've never done one takeaway [inaudible].
 Tabitha Park, Product & Food Photographer