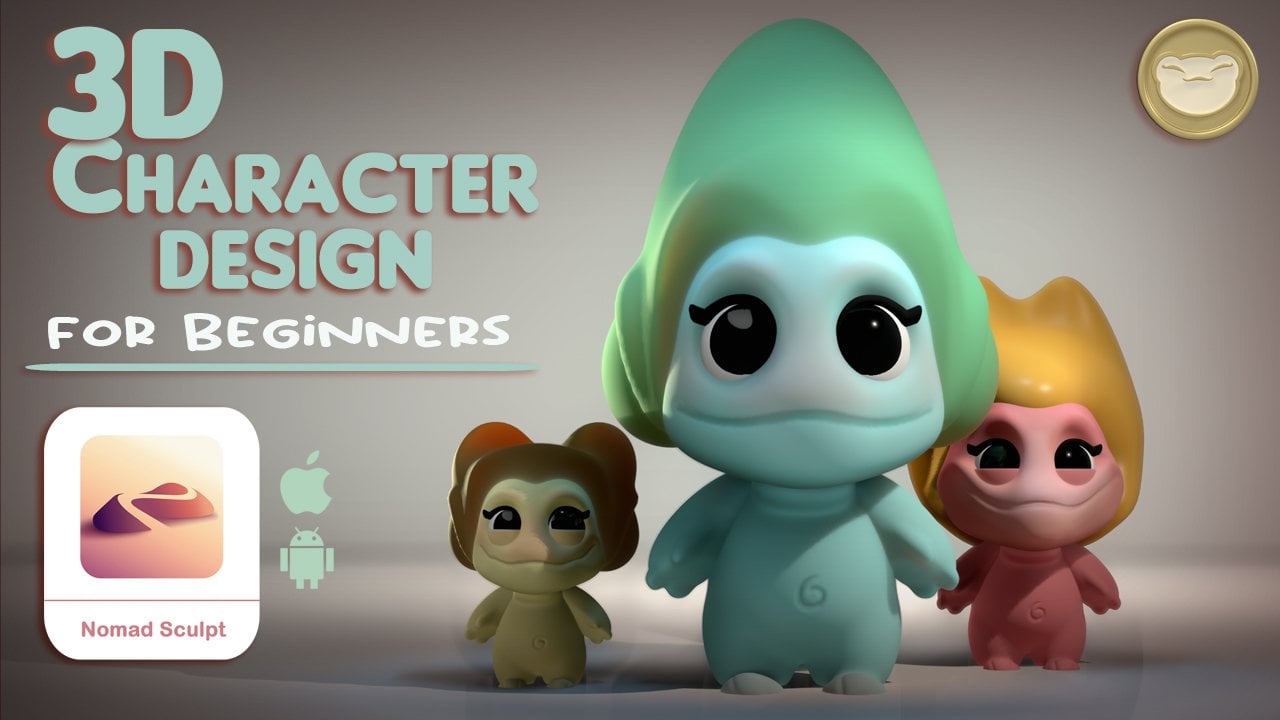
Transcripts
1. Discovering 3D: Intro: Trust me, it's not as
difficult as you think. Hold all your butt. Welcome to discovering three D my free beginners three D sculpting class here
on skill share. I'm inviting everyone
to join me and explore the more structured
approach to learning with streamlined lesson
by lesson courses. In this beginner course, you'll discover the ease of
digital sculpting as we turn a two D character sketch into a three D model
using Nomad Sculpt. Whether you're looking to create your own designs for three
D printing or you're an artist looking to refresh your designs or your
characters in a new way. This class will bridge
the gap between you, thinking three D is just
too complex to learn to you creating three D characters
and designs anywhere. Any time I'll show
you step by step, how to bring a two D
sketch to life in three D using simple shapes and straightforward
sculpting techniques, you can adapt for
your own characters. Trust me, it's not as
difficult as you think. Thanks again for joining me, and I hope you're excited to dive into this
wonderful world of three D. The only limit
is your imagination. I know it sounds cheesy, but I'm completely obsessed and I'm also pretty
cheesy here line.
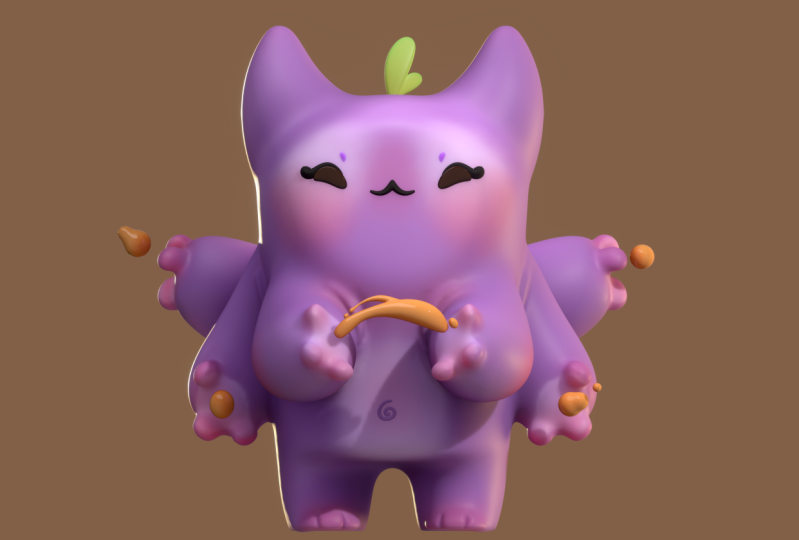
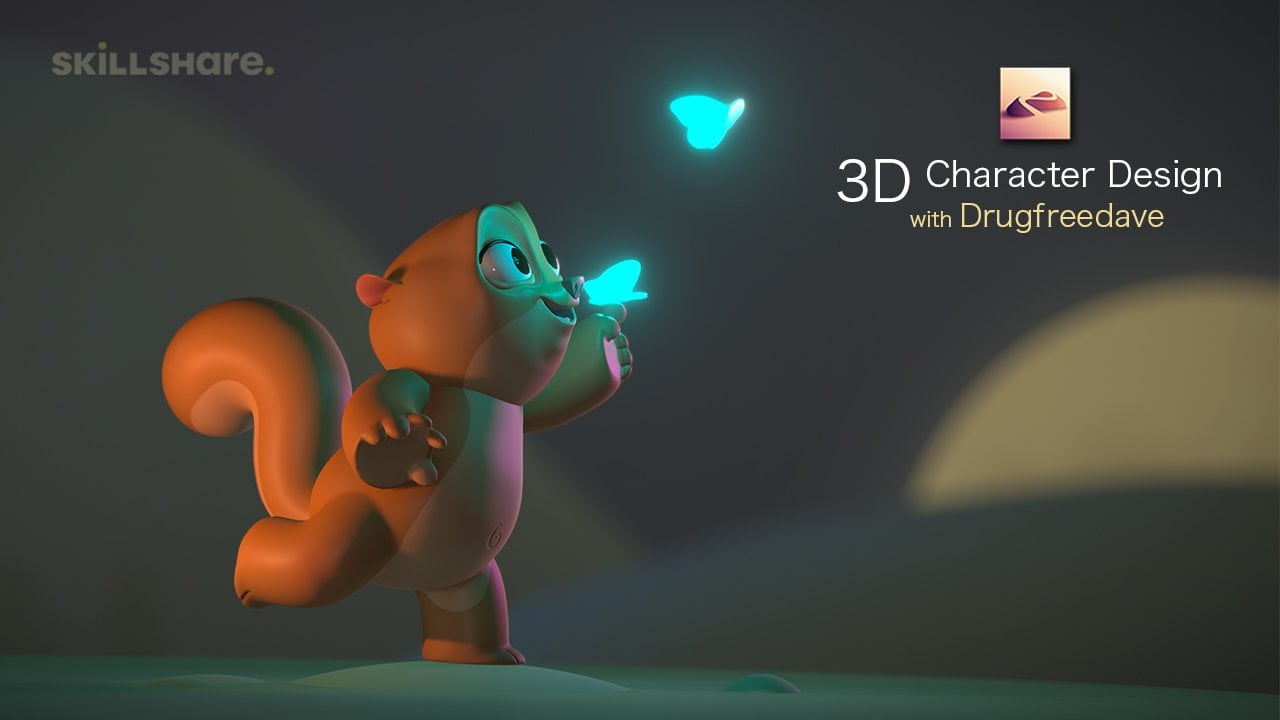
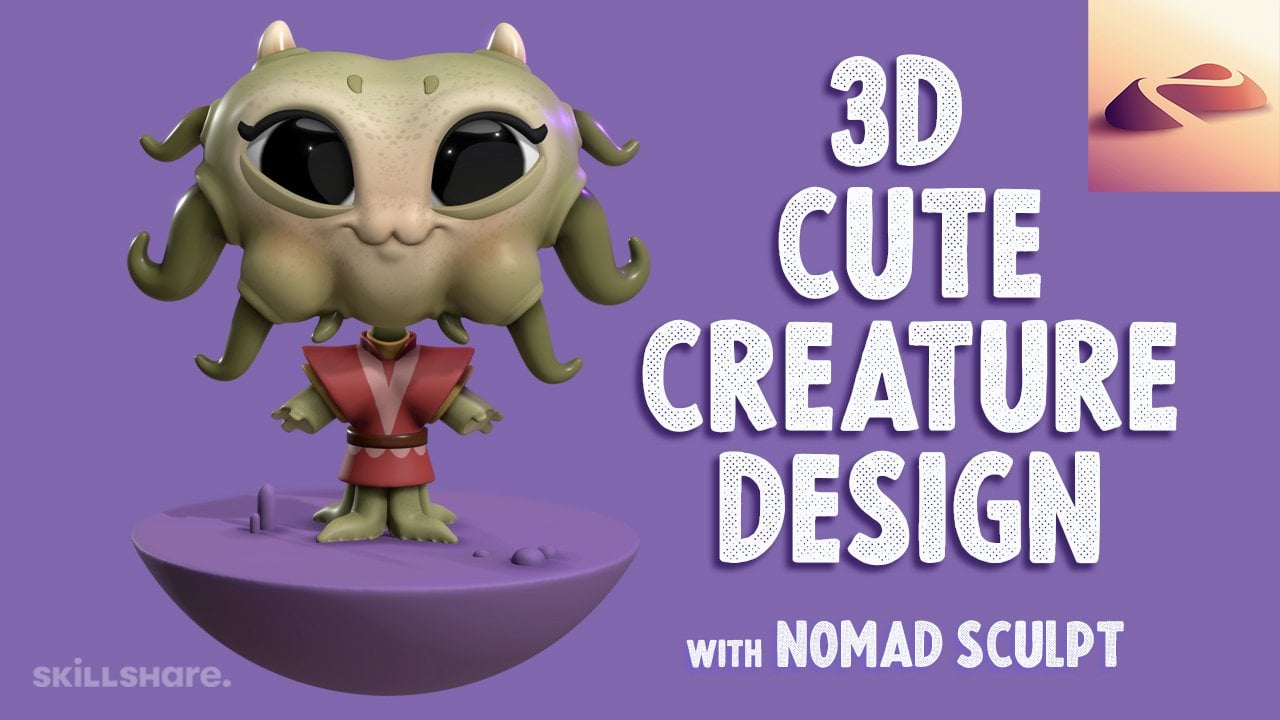
2. Class Project: So for today's class project, of course we're going to make this cute character
with multiple arms. But one thing I really want
to stress is in my class, I always want you to create
things that make you happy, that look the way you
want them to look. So if you're just getting
started, of course, follow along with the class,
create this character. You can always go back
and change things. You can do the class again, but then change it
to make it the way you want to once you're
more familiar with it. That's really how you learn. I'm happy to show you
everything that I know, but you're really
going to learn a lot. Once you start to play, I really encourage you to play. Have fun with the class. Change the colors,
change the sizes, the proportions, add
things, take things away. I want you to be as creative as you want to be in this class. There's no right or wrong. The more different
your character is, the more I'm excited to see it. So that's pretty much it
for this class project. I know you're ready
to get started, so let's jump to the next
video, Getting started.
3. Getting Started: All right, welcome.
Thank you for joining me. We're
going to get started. This is how nomad sculpted
will probably look to you. The background color might
be a little different. You can change that here
by tapping to icon. You can change it to whatever
color you might want. I'd like to keep it dark and there's going
to be a sphere. This number is going to
be a little bit high. Just take your sphere
and just delete it, and then you can
add a new sphere. Let's just hit Validate, and now we have our new sphere. The first thing I'd like to
do is make sure that I'm an orthographic and not
perspective. Let's tap here. You see perspective
and orthographic, We want to be an orthographic. I like sculpting and a map. It makes it look like
clay and it's just easier to see Tap
this little sun icon. And we're going to switch
from Lit PBR to Matcp. Before you do that, scroll
down to your environment. Tap Environment, Import. This is where you're
going to import the downloaded
environment image. Just make sure you download that from the Projects
and Resources tab. We're going to import photos. Then you find that
image and you tap it. And then you tap ad, it's going to show up down
here. You just tap it. And you'll notice the environment changes,
the colors change. Now that that's all set, we can change from Lit PBR to Macap. I use PHGclay. Obviously you have
some others here. Let's go ahead and
import our image. We'll tap here reference image, then you want to tap the image. This is also available in
projects and resources. Import photos, then
you define your image, tap it and then add. Once you go back to this menu, just tap transform and
then you can move it. I usually like to
put it right around here and then tap the screen to just go back
to regular sculpting mode. Now that we have that also, if you don't see this grid here, you can tap grid right here. Also, just note that
this is the snap cube. You're able to turn your
model in space with this. You'll see me do this
a lot. I'll tap front. That way I know I'm
looking directly at the front of the project. Let's add a floor platform. Let's tap on the sphere. I'm going to tap this
little tool icon. And we're going
to use the gizmo. Gizmo is like our controller. You can see the gizmo here. There's a lot of functions. Let's just take the
arrow and move it up. Of course, if we
want to zoom out, just like you would
on your phone, but we want to see that grid, so make sure we hit front. Let's go here to the
scene menu, Add. Let's add a cylinder. We can control the cylinder
with these little dots here. Let's tap this one, or touch this one and bring
it down to the red line. Actually, let's make it bigger. If you notice this
menu bar up here, tap gizmo again,
let's make it bigger. This orange ring, let's
just increase the size. Maybe something like that. It
doesn't have to be perfect. We can actually use the
gizmo to shrink it down. See this node? You can use that to shrink it
because we didn't validate. I don't want to
get too confusing, don't worry too much about this. But anytime we add a shape up here, there's
going to be this menu. It's going to say validate. There's some things
that you can do before you start working
with certain shapes. We're not going to do too much of it right at this moment, but just be aware
that you have to validate in order to use all of the tools since we haven't
validated this cylinder. That's why we have
these extra tools. If we want to, we can
make a hole in it. If you want to tap radius,
then we can adjust. So it's more like a cone
or something like that. There's a lot of shapes,
there's a lot of things that you can do before you make it an actual three D
mesh in your project. I just wanted to tell
you a little bit about what this is and
why this menu comes up. I'm going to do
with two fingers. I'll just go back
here. I'll hit front. Let's just use the gizmo, since we'll use that more often. Tap gizmo, we'll shrink this. Then we'll use this
green arrow to move it right underneath
that red line. Okay, now we can tilt so we
can see we have our cylinder. We have our platform.
Personally, I like my cylinder platform
to be a little rounded. This is a little extra,
but I'll show you anyway, you tap these three little dots. Post subdivision, I'll
put this up to two. You can slide this
down a little bit. It'll get a little
bit more round. Maybe I'll do
something like that. 36. Now the platform is just a little bit more
soft. I'll hit Validate. Now that we have our platform, we don't need the grid anymore. I'm going to turn the grid off. It's always a good
rule of thumb to save. Often there is auto save. I don't use it, so
I save manually. I tap on the little folder. I'm going to save
this as Y, judge. In the next video, we'll
get started with sculpting. We're going to do some blocking. We're going to use simple shapes to make the general
shape of the body, the arms, and all the
other little pieces. It'll be much easier than you expect see in the next video.
4. Blocking: Body, Arms, & Fingers: For the body. Let's
use a cylinder. And we'll use our sphere.
We'll move the sphere up. Let's add a cylinder.
We can tap gizmo. We can move the cylinder up. Now let's adjust the head so
it's even with the cylinder. We'll move it up a little bit. We'll use the orange ring to
make it a little bit bigger. Maybe something like that. Maybe a site big. We'll use this little green node above
the arrow to flatten it. That looks pretty good. We also want to taper at the bottom. We'll tap on the cylinder. We'll tap gizmo to bring
this menu back up. Then let's tap radius. Now we have two dots on radius. Then we have these two handles. We'll take the
bottom one and just make it a little bit shorter, or smaller, or more narrow, maybe it's the best
way to say that. I think that's pretty good. If you need to, you can make the top one a little bit bigger. We just want to fairly
even with the round part, I think that looks pretty good. Let's go ahead and validate it. I just realized that I didn't have the sphere that we added. I was using the original sphere, but I've replaced it
with a regular sphere. This is how yours
should look when it's pretty much lined up
with the cylinder. Now let's go ahead and add
the horns with the tube tool. We'll select the tube tool, we'll use path, we
don't need snap. We'll type on the
screen, drag, lift up. Then we'll press this
little green button and that will give us a tube. We'll drag the bottom
one like this. It's more, looks
like an Android. We want to have a
little bit of a curve. Let's just tap in the middle of the line and then move it out. Then we'll tap radius. Now we have two nodes in radius, and you can make
this side bigger. You can adjust it to make it the size and
shape that you want. I want it to be rounded, so I'm going to tap these
three dots and I'm going to put the post subdivision up to two and I'm going
to bring this down, the division X, maybe to five. We'll see if we can get
to look the way I want. Sometimes it's a little bit
difficult doing it that way, but that actually
looks all right. We'll turn this up a
little bit, put it to six, gives us a little
more flexibility then it's just a matter
of you can also use the gizmo to move the
whole thing around. And then you can tap tube to
go back to the tube options. Now we'll hit Mirror. And it's just going to mirror
it on the other side. Once you're happy
with your horns, you can just hit here
and then hit Validate, and that makes them
official shapes. All right, the first
thing we should do is go through and name
all of our meshes. Tap the scene, we
have our sphere. This is the head, three
dots. Tap the three dots. Name head the mirror. So these are the horns. We can go ahead and validate, join children and we'll
rename it Horns Cylinder. This is the body. This
cylinder is the floor. So I'll just put LR. Now for the arms,
let's use spheres. We can just place them where
they're supposed to go, and then we'll just stretch and manipulate the spheres
until they look like arms. We'll go to our
scene, add sphere. We'll use our gizmo,
and we can move it up over and let's shrink it. Maybe a little bit bigger. We'll start with this
arm that's down. I'm going to go ahead and
mirror it and then validate it. Let's use the move tool now. We're just going to stretch
the sphere by pulling on it. You just pull on it, keep
it ovular like an oval Now, because I wanted to
have a dip there. I'm just going to push
on it towards the top. Push and pull, and see how
it gets that nice curve. You can also hit solo if you just want to
see the shape that you're working with.
This looks pretty good. It needs to be a
little bit rounder, so I'm going to pull
it on this side. And then I'm also
going to turn it and just make sure that it's
nice and pudgy and round. Even in this angle, I'll hit so lo again so I can see
it and it looks pretty good. The only thing I would say is it tapers off a little bit more. If I hit Solo again and I
feel like that's not tapered, I can take smooth and I can just smooth out the areas where I want to take
away some of the mass. If I keep smoothing this out, it's going to get smaller. I can use that and I can move to just shrink,
shrink one side. It's just a matter of
adjusting it until you get to what you want
it to look like. I think that looks pretty good, but it's a little big. So I'm going to take gizmo and I'm just going to shrink
it with the orange ring. Then I'll take move and I'm going to drag it up
and I'm going to continue to manipulate it
until it's just how I want it. I think something like
that looks pretty good. You can see it gets smaller
as it goes into the body. Let's go to our scene.
We have our first, let's name this arm one. Now we can just clone this. We'll clone it. This
will be arm two. Let's add this one is
the one in the front. Arm two, we'll take our
gizmo and then we can move it up closer together. Then we can use these
rings to just adjust it. You can swivel it with the
different colored rings. We just want to swivel it up, but it looks like it's
something like this. Maybe I'll swivel it
on the blue axis, move it up a little bit,
something like that. Let's look at the front view. And I think that looks
pretty good actually, let's just adjust it
a little bit so it's more falling down a little
bit. Think I like that. I want to make it a little
bit thinner up here, so I'm just going to squeeze
this together a bit. I think that looks great. I think I also, maybe I'll use these arms for
the ones in the back. We'll take arm two and clone it. And this will be arm three. Now we'll use our gizmo. Let's, let's check a line because that'll make it easier for us to just
move it straight back. Move the blue arrow
straight back. We can actually use these rings to put exactly where we want it. It looks like the arms
are a little higher. Let's go ahead and
do something like this and just maneuver them into place
where we want them. I think that's perfect.
Okay, that's good. They are going into the body. Let's use the flattened tool. We just want to figure out
where the palms would be. There's these cute little
fingers, little knobs. We can add those on,
but I'm just going to make it flat on the front parts. Just tap on the arm.
I'm just going to use the flattened tool
and just make it a little bit more
flat on one side. And then I'll just take smooth
and just smooth it out. Now it's a little flatter there. I'll do the same thing here. I'll tap on this arm. I'll use flatten. Just make a circle where I
think the palm would be. And then just smooth, I'll
take the same back here. Tap there, flatten, and we'll
flatten this one out here. Okay? And we'll smooth
that out. Looks nice. We're going to use
the inflate tool to add a little fingers. What we want to do is we want to make the arms a little
bit more dense. That way the inflate
tool will work better and it will hold its
shape a little bit better. I'm going to tap on
these front arms and I'm going to vox will
remishI'm going to use the one down here
and I'm going to Vox remasht, right, 175 Rem. I want to do that
for all the arms, we'll do that for the
back ones too now. This will make our
numbers quite high. As you can see, it's
a little bit higher than the arms are 57.3
k, which is a lot. We'll bring it down
a little bit later. Now let's use the inflate tool. And let's go back
to the first pair of arms I'm going to zoom in. I don't really want the
inflate tool to be too big. Maybe around 50. Now, I'm
just going to add three nubs. I'm just going to go
in a circle pattern. I'm going to lift off,
and I'm going to do that twice. There's 123. I did them close together. I spaced out the
thumb a little bit, but essentially I think
that looks pretty good. Now I'll use smooth, just smooth them out just a
little bit, just a smidge. Now just do the
same thing now if you notice I'm using
the flat part. It was like the palm
for example here. I'll take inflate and I'll make the thumb
maybe around here. Okay? One. And then
we'll do one here, and then we'll do one here. Okay? I think that
looks pretty good. I'll just smooth them a
little bit for some reason. I'm not crazy about that one. Don't know why sometimes it
happens it's inflate again. I like that a bit better. Go ahead and just
smooth it a little bit. Fleet 123. Just a little faint. Smooth. I think that's great.
5. Blocking: Legs, feet, & Leafies: Okay, we have all
of our arms here. They look good.
I'm just going to leave them in this
mirror for now. But let's add some legs. Add sphere gizmo. I'm going to move the legs over a little bit and
you can tell that they're already in a mirror
and we didn't select mirrors. Let's go to the scene
and make sure that we take this out of the mirror. This is going to be legs. Move it over a little
bit. We'll shrink. It'll shrink it a
little bit more. Let's just stretch it out. We'll stretch it out some. I think that looks pretty good. I'm also going to
stretch it this way. I'll stretch it a
little bit more this way. Move it up a little bit. I'm just going to put it where I think it should go
and it looks like it's lined up with this. And it's also on a
little bit of a curve, I'm going to take this ring and just curve it a little bit. I just want to give it
that little tiny curve. I think that works. It'll look something
like this. Now, I'll go back to the gizmo, bring up our options
and mirror it, but there has to be some
space in between there. Maybe we'll just shrink
it a little bit more in, like that and then move it. I think that's a
good compromise. It's got some room in there now. I think that's
pretty good. Now, he does have some toes
in the drawing, if we want to do that
the easiest way. Okay, we have the legs and
they're in a mirror right now. We can take the whole
thing. Clone it. Let's rename this mirror to, let's rename this leggings toes. That way we don't get him
confused with the legs. And this mirror is the arms. It's always good to label
and it's also good to save. Now we can take this toes. Let's just go to
the yellow toes. We'll bring them out, and let's shrink them. Let's squash them. Let's move it down here. And then let's turn it. There's something like that.
And then we can move them back into the leg, and they look good. We shrink them a
little bit more, depending on how you
want them to look, you can make them however
you want them to look. But I like just
subtlety like that. We pretty much have
all the basic shapes. We can go ahead and vox
these shapes together. It's up to you if
you want to add, if you want to
voxmh these horns. Because Vox remshing will take all of these parts and
make them one part. Just go to your scene. We have all of these arms,
all these legs. I like to just
validate them first. I just go here, tap,
validate, Join children. That's if any of
these things are red, you can always validate them. Legs, toes, validate everything. I'm going to bring the
floor to the bottom. Then you just take everything
else except for the floor. Take all of this vox remsh. It probably around 200. Now, all of your
shapes are one shape. Then take smooth
mixture symmetries on and you can just smooth
the whole thing out. But when you're going
to smooth it out, just be careful around the arms. I'm going to mostly do
the top because I like the detail of where the, the underside of the
arms touches the body. If you smooth it too much, then it will, it'll look
a little too smooth. This, I don't mind the legs, I don't mind the front part. I don't mind making
that nice and smooth. Another thing I want to
do is trim the feet. Because if I hit
this and I hit solo, you can see that that
looks really bad. I hit Solo again. Trim, touch the body and
I'm going to use rectangle. Trim rectangle, and then
you make a white rectangle. I'm going to make it
right underneath where I actually want to trim
the slightest bit. And then just trim it,
then you can look, it's a lot more clean. If you wanted to leave the horns or have the horns be
a different color, then you would just box mesh everything except for the horns. Fingers are still
looking pretty decent. They might need a touch
up if you think they don't look as good anymore, they might need a
little bit of a touch up in which case you can use inflate
and go over them. You can make them a little
more round if you need. Also, you notice that
the toes like went away. If you did want to
add the toes again. Sometimes that happens
when you box remesh, you can always just
add another sphere. I just added a sphere. Shrunk it, move it over. Go ahead and hit
mirror up here, Gizmo. You can make the toes because they're really not
that difficult to make. Maybe do something like that. You can validate them and you can actually just trim them. Now I'll use rectangle
and I'll trim, I'll trim it then I'll
go ahead and say, okay, we have our mirror here, so I'll select mirror, validate it then the
head is now the body. Then I'll select that. You
can vox remiss them together. I'm going to do a quick save. You can vox remiss
them together at 200 and then see if
that looks better. Now it's a little more strong, the toes are a little more strong or a little more defined. I'll just smooth it a little bit so I don't lose any
of that detail. And then you go, this
is looking pretty cool. I like it a lot actually. Another little thing you
can do is you can always use drag if you want to give the fingers a little
bit more umph or if you want to flatten them out a
little bit, you can use drag. And you can give
them a nice little, give them a little
bit of personality. We lost this finger here. Let's go ahead and
inflate this again. We'll just smooth it
ever so slightly. I'll take drag and I'll flatten out the thumb a little bit. It gives it like an underside of the fingers which is cool. Now, let's make
this little leaf. We'll make the two
little leaves, and we'll use the same
shape for the eyes, and we're making good progress. We, we have the head, which I'm going to rename it main because it's the
main part of the body. I'll add a cylinder. We'll go ahead and
tap our gizmo. We'll move the cylinder up. Then I want to use snap
and I'm going to put 90 and be sure
there's two snaps. Just be sure it's the
one with this angle. Snap 90. Now it's going
to snap 90 degrees. I can shrink it or squash it so it's a
little bit more flat. Let's just tap Gizmo validate. Then we'll go to
our Symmetry tab. Scroll down and hit show line. Make sure show line is selected. We want x, I think
we want y, x, y. And local. Local just means
that instead of the project, it's going to focus
on the local object. Now you see a green line here, You see the red line here, which is exactly what we want. We use the move tool,
we have symmetry on. Anything we do on the front is going to
happen in the back. Anything we do on
the left is going to happen on the right as well. We'll make the move tool
a little bit bigger. Now we just have to make
this leaf like shape. We can just spread this out. Move it up, maybe make this a little bit
more narrow down here. I want to make it
narrow, but I'm going to make the move
too, a little bit bigger. I just wanted to try and keep it everything nice and smooth. Okay, I think something
like this is pretty good. I think that's great. This is going to be leaf,
so let's rename it leaf. Once we have the leaf in
the shape that we want, we can just use smooth
and just gently smooth it out so that it's nice and soft. Now we'll take leaf,
we'll shrink it. That's going to look pretty
good for the leaf on top. Make it a little smaller. Let's go ahead and clone it. Now let's make some
eyes with this. I'm going to rename it, let's use the gizmo to bring it up. We'll swivel it 90, then we'll move it down
and into the territory. We'll go ahead and push
it towards the body. Even though we move that
part into the body. I sometimes I like the face of my characters to
be a bit flatter. I might just take flatten
on the main part and just flatten out this area,
that will be the face. I tend to do that in a
lot of my characters. I like the way that
the facial features sit on the surface. Now, just gently smoothing. I don't want to affect
the arms too much, I just want to make
sure that the face is nice and flat, and smooth. Now we go back to our E
and we can shrink it. We can is a good tool
to use for the I. Let's go to the symmetry
and let's turn off x. We just have y and local
now we can just use drag, We can make it into
the shape of the I. It takes a little finagling, but it always does. I'll use the gizmo. Let's
hit pivot center pivot. That just moves the
pivot to the middle. Let's turn off snap. I'm just going to angle
it a little bit more. It looks like it's a little
more rounded on top. I'll just pull this
up a little bit. Okay, that looks pretty
good. It's just very big. So we'll go ahead and shrink it, I think to something like that. I want it to be a little
sharper on the back side. I'll just use drag
and just manipulated. I might even use flatten
if I can't get it. I'll use flatten and
I'll try to flatten one part out so that it's
a little bit sharper. I'll try to smooth it out. Now it's just a matter of
trying to match it up to the drawing, to the blueprint. I'm going to push it in
and then I'm going to tilt it so it's on the surface.
Something like that. Now that we have this eye here, we can add it to a mirror. Add mirror. But I made a mistake. Happens a lot. The
mistake that I made was, remember we were using
this and we put local. That doesn't work
anymore for this, let's change it to x, let's change it to world. It's no longer doing
everything by the I, now it's doing it
by the project. Now when we go back
to add mirror, it's going to it mirror
you can go back to, you can go to your gizmo
and then you can now adjust this even more.
6. Detailing: Let's take this leaf
and let's go ahead and put it where it needs to be. The leaf is validated. I think I'll use the move tool, but we don't want the
left and right symmetry. See how it's leaning
to one side? We'll leave symmetry on. We'll just turn x
of turning x off, that means the front and the
back will still be matched, which is what we want.
We'll move tool. We just want it to be
floating in one direction. I'm going to put it right in the middle and then
drag that over. Now I'll use my gizmo. Remember if I want to
bring it into the middle. Pivot. Center pivot. Now I'll move this back
over in the drawing. It's smaller than the horns. We'll make it smaller
than the horns tilted a little bit right in the middle. Maybe back a bit, maybe we'll move to put
a bit of a bend in it. We're going to have to turn
symmetry off for that, Just put a nice
little bend in it. We'll use the gizmo to move it back and then maybe tilt
it back a little bit. Okay, that looks good, so let's go ahead and clone this then We can just make another little small
one right next to it. I shrink it so I might have to adjust the width
a little bit. We'll nozzle this right
into the other one. We'll put it right
behind it. Looks great. I like it. I just want to zoom in and just show
you things close up. You can just have
a good look on how I have everything
set on the body. What is this little
guy? I love him. Now let's add the little mouth, that's what I like to call him. I'll zoom in here. And we're
going to use the tube tool. We're going to use snap, because snap is going to
snap to the surface. Let's just use curve. If we look at the drawing, it's right below
where the eyes are. We'll just start
here on one side. Just make a nice
little curve, perfect. We want to go ahead and
make this nice and round. We'll tap the three dots. We'll put this to two, then we'll bring this all
the way down to, I would like to do four, but maybe we'll do five instead. Okay. Now let's go ahead and
tap the radius twice. And we can make the
bottom a little smaller, make that a little bit bigger. And we can mirror, I'm
going to take this end node and just stretch
it out a little bit until they come together. The only thing you
need to adjust is how curve you want this. Once you're happy, go
ahead and validate. You're going to
continue to adjust. If you need to,
you can just move. You'll still be just
adjusting one tube, but since they're in a mirror,
they'll react together. I just want them
a little sharper. Once I'm happy, I
will take the mirror, validate it, and join children. That means joining these
two mirrors as one shape. Yes. I'll rename this mouth. I'll do a quick save. It's a little easier now
that it's one piece. We can use the gizmo and
we're going to have to say do pivot, center pivot. Rink it. Maybe just
up a little bit, something like that.
Looks pretty good. I'm going to box
Mish around 140. Then I'm going to take smooth the symmetry and just
smooth this a little bit. That'll make it nice and clean. You could flatten it too. Nice little flatten. Oh, I think it needs to be
a little bit smaller. Now, this little
detail I always add, it's called, I call them its. Let's go ahead and
take this mirror. I'm going to rename
this E. Okay, I'm going to add a sphere. I don't want to go in this eye, so I'm going to take it out. We use our gizmo and
I just like to put it right up really small. So something like that,
but even smaller. Okay. Maybe something like this. I'll go ahead and mirror it, validate it, and I'll take drag. And sometimes I like
to just leave them plain, sometimes I like to, I'm going to drag it down
and then give it a little, make it a tad smaller now and
just do a shape like that. It's a really simple detail, but for some reason
I really enjoy them. I love very small details. Here's another little detail that I want to add for the feet. Just make sure you
tap on the main. I just want to give him my
little toe separations. I'm just using make one here and here. Even though he has I type eyes. Let's add it and just
see how it looks. I'll use curve with path. I think I'll start right around here and I'll just make a nice curve and
then curve this up. I'll go ahead and use
radius just once. Then I'll shrink this side and I'll make this side
a little bit bigger. Maybe pull that
out a little bit. I want to make this rounded. I'm going to pull this up and add a little node
right underneath. I'll hit radius again. Now all of these I can adjust then I'll just
adjust the last one. It's a little bit easier to get that round bit at the bottom. I'll just adjust
these so that they sit nice and flat over the eye. I want to make sure
this corner goes. Let's tap snap. Because if you
don't uncheck snap, then it will never
go into the mesh. But I wanted to go
into the mesh here. I'll make it a little
smaller, even this one, maybe I want to hide this corner into the mesh
so that it's perfect. Just like that. Once you're happy with your
eye lash, you can mirror it. It should mirror
to the other side and then you can validate it. I think I like the
way mine looks. Sometimes I like to double
check before I validate. Okay. So we'll validate. Another option that
you can do is you can make it flat with profile. That's another little
option that you can sort of toy with that
looks really nice. Actually, I might just
go ahead and keep that, give it a little smooth, see how it reacts. Yeah, I think
that's really nice.
7. Light & Color: Once you're happy
with everything, if we tap this little sun, we can change from
Matt cap to lit PBR. I don't like to light it. If it's white I'm
going to go ahead and change the color
of everything. I'll tap the scene.
I'll select everything. Then I'll crossed
out color sphere. I usually make it this color. It's like a Terra. It's actually very close
to the, the mat cap. And the reason I do this
is because if it's white, sometimes when you add the
lights they can look too bright because the mesh is
just too light in color. This is more neutral. Let's
go to the same thing, this little light icon. We'll turn the environment off, then we'll add our first light. I really like the
placement of this light. This is a sun light. It doesn't matter where you move this. The only thing that matters
is using the rings and how when you use the rings, that's the only
thing that matters. But I like the default view. I move it here
because that makes sense to where the
light is coming from. I'm going to change this to two. Okay, I think that looks pretty good. Here's our first light. Let's add our second light. I'll move it over here. I'm going to put
this to 4.5 or so, but now I'm going to
use the green ring and I'm going to
swing it around. This is going to
be our rim light. It's just hitting the back. We bring it down a little bit. We have that nice bright rim
along the dark side of him. That's perfect. We can
go ahead and name these. This one is going to
be the key light. That's our main light. This one is our to
a quick save Also, I like this position. I'm just going to save this. I'll tap the camera, add view. I'll just name this one. Let's go ahead and
add another light. We can just take this
light and clone it. We'll name this 12 for two. I'd like to bring it to
this side and just flip it so that it's
hitting the side, but not quite the same way. I don't want it to be
another rim light, I just want it to be
hitting the side. And then we'll ease off
of it a little bit. We'll bring it back down to maybe like a
little bit above two. I think that looks pretty good. Then we'll add our
last last light. We'll rename it TD for top down. I like to move this light up. Maybe it will keep it as sun. I usually change it
into a spotlight, but I might just keep
it as another sunlight. I like it a spot light. I'm going to tap sun
and change it to a spot light and I'm going
to put it right on his face. I want to make it a
little bit softer. I'll tap the three
dots and softness. I want to do the same
thing with R two. I'll tap the three
dots and make it soft. It looks great. Let's
turn on post process. Tap this button here. Turn on post process, and you get a clear review of what it's really
going to look like. You don't have to
turn this up now, but I'm going to turn mine up because I want you to be able to see everything now. I have saved presets. I'll just show you mine DFD two. Then I'll just show
you my settings. These are my settings for
mine. You can pause it. So everything looks pretty good. Let's turn on the environment. So we'll go back to lights, turn on the environment,
it's very bright. I'm just going to tone
it down a little bit. Maybe right around there, I think looks pretty good. I also want to change the
material to subsurface. That'll make it look
a bit more realistic. We'll go here,
opaque subsurface. Turn this down a little bit, maybe to 0.15 These two leaves, leaf one and leaf I'm going to take those and
join them together. Then we'll do subsurface. We'll turn that down to
the same, around the same. The only other things I might
do that for is the dots. I might do that, but I think I might keep
everything else as is. I do need to label these. We'll take the lashes.
We'll validate them. And these are the
lashes in this mirror. This is the dots. So we'll validate those as well. Okay, quick. Now, it's up to you to color your character the way
that you want to color it. You can match mine. You
can have to match mine. I'm not sure what color
I want to make him. I'm feeling like some purple
I'm going to use here. I try to find the color I want. You can change the roughness
or the gloss here. Paint, all pretty simple. This. I think I want
to light green. These, I think I want maybe
a dark chocolate color. The lashes, I want to be black. Those are always black. Very rough actually. These can be black too. You can always adjust the
mouth will be black as well. We can adjust the
background color. I'll get rid of the
reference image and then change this color. Here I'm practicing trying
to do lighter colors. Put the exposure up a little bit so it makes a
little bit more sense. Since this is yellow, I'm
going to change the rim light. I'll add some warmth
to it so it'll match. Maybe even our two add
some yellow to it. With that or a really
cool way to color, you can use the paint
tool and use layer. You can add a layer and
let's say you wanted to add. I'll use a little eye
dropper to grab his color, then go back here and maybe
I want a lighter version. Now on my layer I can
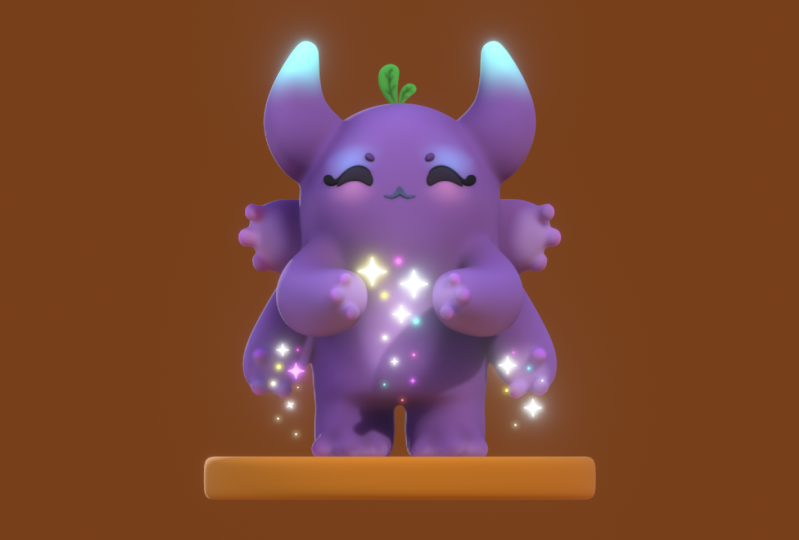
add some details. If I want something like this, then you can adjust the layer. Congratulations on creating
your little character. Feel free to color any way
that you want to color him. Add things to him, take things away,
adjust the background. You can add things that you
might have sculpted before. That's the fun part,
is just really getting a chance to experiment and
really make it your own, or you can just leave it exactly
like we've done it here. I'm going to do probably a
few different color ways. Just have some fun and maybe
I'll mix and match colors. The only other
thing that I wanted to show you really quick is if you wanted to
bring the size down. Let's say for example the body. You could just go
here miscellaneous and you can go to decimate. I'm going to decimate
once this will bring the size down to now
it's 63.5 so it's like half. There's really not that
much change in quality. If you keep decimating, then you'll see a
change in the quality. But for a lot of these details, like the leaves,
they're pretty small. The lashes are pretty small. The eyes are pretty small. The mouth is 11.5 K, That's big. So I might decimate
that. Decimate it twice. There's all these little
things that will bring the size down on your characters if you are using a device that's maybe not that powerful or
something like that. As you can see, I did make
a few changes to things. I added some spheres and
stretch them around. But once you're done, make sure you check
your post process. Just make sure this is on.
Make sure all the bells and whistles are on and everything looks the
way you wanted to look. Then you can go to the
little folder tab, make sure you give it a save, then scroll all the
way down to render. Then you have all
the options here. Screen is just like what
you're seeing here. The interface is the panels, and the tools, and everything.
That's the interface. Transparent background
means it'll just be the character, no
colored background. I'll leave it as is and
export it as screen. Once you export it, it'll ask you where you
want to save it, so you can save it to your ipad or you can export it
to something else. Usually I send these
over to my computer. This will be the final render, the final image
from Nomad scope. If you're feeling fancy, you
can also do a screen record. Here's how I do a screen record. I'm using an ipad, so it's different if you're
not using an ipad, but I have hot keys. I swipe down from here, and then there's a button here. Record. I'll record this, it counts. Then I'll go here. Turntable, position it. We have our turntable. Then to stop it, you can just tap here to stop the turntable, but you also have to stop the recording. You just go here. And then you would press
to stop the recording, which I forgot to do of course. Then once you do that, it'll
be saved in your gallery. Then you have the video here. You can edit it
here in the ipad, or you can just send
it to Final Cut Pro like I do, and you can edit it. All right, so in the next video I'll show you what
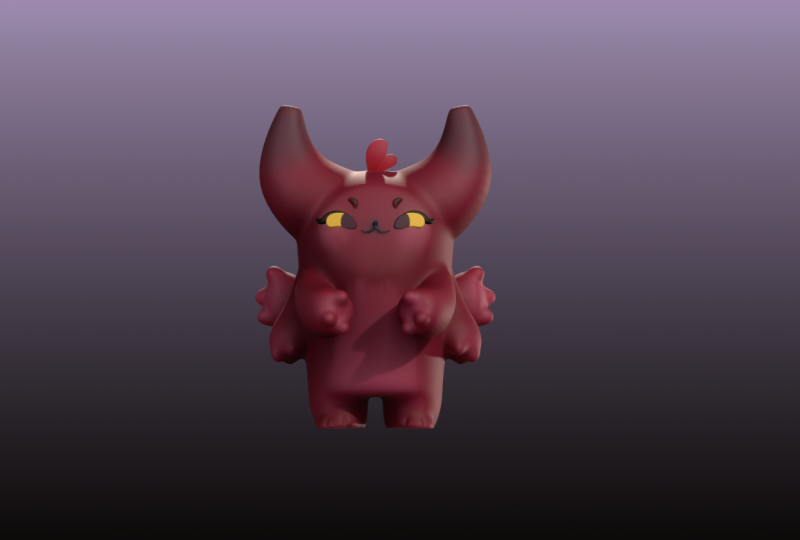
I've come up with. Maybe I'll show you a
few different styles. Maybe I'll show you a
blender version of him. And I'll give you a few words of encouragement and then
we can call it tonight.
8. Thank You!: Welcome back guys. Thank
you so much for joining me. I hope that you learned a lot. I really wanted to make a free skill share
class because I just wanted people to experience what it is I bring
to Skillshare, along with what I
bring to Youtube. I understand if
you're not going to sign up for Skillshare, but if you can and you want to, I'm really excited to have new students here
on skill share. Also make sure to
rate and review. It really helps me out. It really helps my space here on skill share and also I can't
wait to see your projects. Be sure to export your
renders and upload them to projects and resources. I love seeing what
my students make and I'm excited to see
what you guys create. Especially the things
that are going to look a lot different than what
we created in class. You can upload more than once, so feel free to upload
anything that you make. I'm excited to see, of course, I'm going to bring this
character over into blender. So if you want to
see more about, learn more about
exporting things into blender and just
more nomad content. Of course, you can
always go to Youtube. I have a lot there.
I'm very active there. Just head to Youtube.com
slash drug free. Dave? I love teaching. I love that you
guys are here and that we're kind of on this
journey to learn and grow, and get better as artists. That's what I'm really here
for. That's what I love. I'm excited about this stuff. I'm really cheesy and
really excited about it, and I hope that you are too. I hope you got a lot out of it and I hope that
you'll be back. I'm constantly on my art
journey and trying to get better and I want to bring
as many people with me. As long as you're willing to put in the time and
put in the effort, then the sky is the limit. Keep drawing, keep sculpting. I'll see you all
in the next video.
 Dave Reed, 2D & 3D Illustrator - Brooklyn, NY