Transcripts
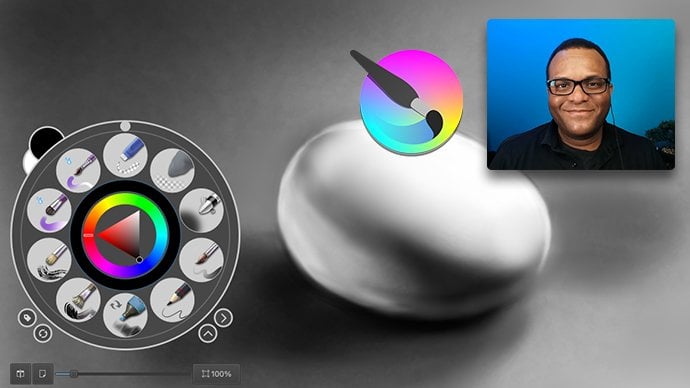
1. Digital Portraits Intro: Digital painting is a fun and
creative way to make art. In this intermediate class, I want to show you how I
paint portraits using crita, but I do it with a twist. I make portraits and
character studies from screen grabs that I take while streaming
movies and TV shows. Many of the techniques that I teach in this class
can be used with other software as well as
with natural materials. I've been painting
portraits for years, and I recently
discovered a fun way to explore painting
portraits digitally. I've often searched
stock art websites for interesting portraits
to practice my drawings and paintings
with mixed success. But one day while
watching a movie, I paused the movie
to grab a snack, and I thought, what
an interesting face. And it was at that moment
that I realized that I had an endless supply of
dynamic faces to work from. In this class, I'll show you how I combine two of my
favorite activities, watching movies and
creating digital art. I'm actually really
excited to do this class because
I can't wait to see what interesting images you all create while watching movies. When I see a face or an
expression that I like, I capture it with a screenshot. Just imagine faces with dramatic expressions
and long cast shadows. Characters that I'm
emotionally invested in. Whether I love
them or hate them, I feel an emotion which I
think influences my work. A character in pain, a character sensing something ominous
is about to happen. Happiness, sadness. These are just some
of the moments that I strive to capture
in this course. We'll start with a
screenshot to work from. I don't trace the images myself, but I'll show you how to
trace an image if you're not quite ready for the challenge of drawing from observation. But I will also show you how
to draw from observation using visual measurements and corrections to
create a portrait. This is my preferred
method because I think the imperfections that come about when drawing this
way or painting this way, give the drawings and paintings a unique hand drawn quality. I'll show you how to block in the lights and darks
to give depth. Then I'll show you how to blend those shapes to give form. I'll show you how to
create the look of traditional oil painting
or other natural media. We'll be working in black
and white in this class. In order to keep things simple. I'll save color for a future
class in graduate school. I studied painting
oils on canvas. So I'm a bit partial
to the look of traditional art and I work hard to achieve that
look in my digital work. And that ability to create
an organic look with digital tools is what I hope you will learn by
the end of this class, as well as how to create a
portrait from observation. I'll be teaching the class using the free open source
software called Rita, but these techniques
can be used with other software.
My name is Aaron. I'm a professional
graphic artist and I teach digital art in a
pair of junior colleges. I hope you will join me in my digital painting class and create unique and dramatic
portraits with me.
2. The Project: In this video, I'm going to show you how I select photographs, how I typically would watch a segment on a streaming
service like Netflix. Here you'll see how
I'm watching a drama. And then I'll pause it and
I'll take a screenshot. And that's how I
find my reference. And that is what I want
to be your project. I would like you to
use that technique by watching a streaming service because that's what
makes this fun. Everyone will have
a different image that they'll come up with. And if you're
nervous about doing a portrait take maybe
you do a profile because profiles are
significantly easier than a head on or face
forward portrait. Because, you know, you
only have one eye to draw and the profiles
just tend to be easier. But for the project
I want you to, I would like you to choose your own image and from a series or a
movie that you like, something that you're
connected with. And then I'd like you to
post that at the end. But for the rest of this video, what I'm going to do here is
show you a movie that, well, a series that I've been
watching and how I take screenshots and how I
end up using those. But after that I'm
going to change to a different photograph because of copyright, copyright laws. I'm not exactly sure
how much of this, of these images I can use. I'm just going to show you a
very short segment and then I'll show you how I select the photo that I'm going to use. But then after that,
I'm going to end up using a photograph that
I found on Pexels. Dare I say, if you want to use the same
photograph that I use, I will upload that as well. But again, for the project, I'm hoping that you
will do something different or maybe even do
both. Anyway. Here we go. Kai erosmas. Thank you.
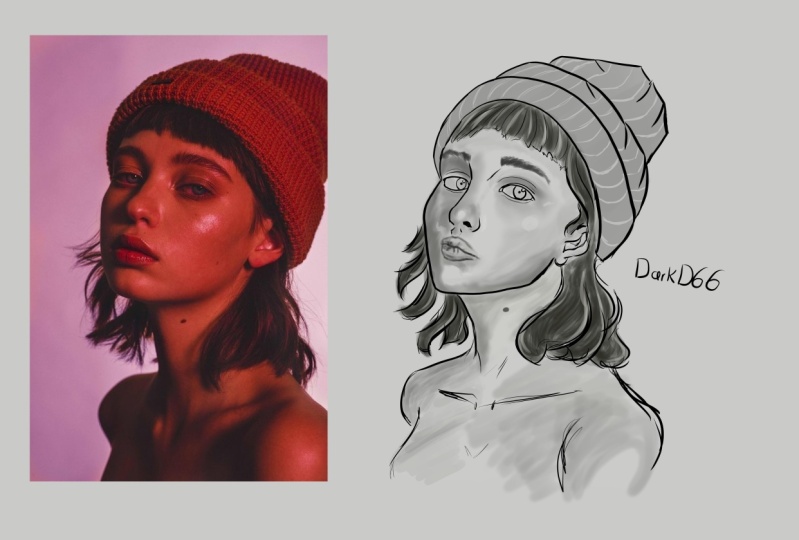
3. How I Choose A Subject While Streaming Shows: These are the images that
I've narrowed it down to. Actually, this is not
one of the pictures. I know I said this was about
portraits, but I don't know. I have this thing
for instruments and especially wood instruments with the shapes of them and hands, but these are the ones that the shots that I grabbed
that I kind of like, I really like this one. I want to say that's a
contender. That's a contender. Anyway. This is the, well, it's a TV show, a Japanese
show called Quartet. I sometimes watch
Japanese shows because I lived in Japan for a bit and I do it to try to see if I can, you know, pick up
some of the Japanese, although my second language
skills are pitiful. Anyway, I think this is sorry
for that tangent there, but I don't know I'm liking that one just
because it's unusual. But this one was going to be my pick just because I like the shape of that
instrument there. So let me see where I
can get rid of that one. Again, this one I like
mainly because of her hands, but her face is in shadow. So much shadow that I
think that might be counterproductive
for this project. We have this one actually. I'm going to eliminate this one. Why? Because teeth
are difficult. You'd be surprised at
how difficult teeth are. So I'm going to
eliminate that one, although this one's a
rather plain expression. But let me check
the other one out. I had two of them actually. The one where she
was looking down was the one that
I like the most. Let me double check those again. Yeah, I'm going to go I'm going to go with
the one where she's looking down
slightly. All right. So we have a winner and hopefully you have picked
out something found a show that you like
and that you have picked out something
that you like as well.
4. Choosing A Copyright Free Subject: So this video is going to be
a bit redundant. All right? Because I already chose
a photograph and, you know, found an image
that I wanted to work from. But because of copyright
considerations, I thought it's better
not to extend that, that time where I'm working with these images from Netflix. I've decided here to switch it out with an image that I know
is free and clear to you. Something that I
found on Pexels. These are images that I've
downloaded and I've gone, one thing that I have noticed is as I was going
through the images, I wasn't really liking
them very much. I mean, they're nice,
but they don't have that same punch as the images do when I'm taking
those screen grabs from movies and TV shows. And then I realized that
I like this image here. But then this was actually from a production, a play production. So the lighting is
a bit different. It tends to be more dramatic and the actors tend to
have more dramatic faces. Okay? So that's something
that I realized, because I think this is the
one I noticed at first. And then I started looking
through those and then I went from to orchestras
and I could find, you could get some really
nice dramatic lighting. I like this picture here, but her eyes are closed, so I didn't want to
go with that one. But typically with
a studio shot, a studio portrait, you're going to have that three
point lighting. A light here, a key light, a soft light, and hang on. Is it a key light?
A secondary light, I forget what you call them. And then a hair light. I prefer the more
dramatic images, and this is the one
that I settled on. This one right here, I was torn between this one I kind of like this because of
the way her eyes, the way she's looking
off to the side. But I didn't like that
her head was cut off. I wanted to show more. So this is the one
we're going to go with. I will make this photo
photograph available to you. I'll put it in somewhere
where you can download it, but I would like you to at least try the process
of watching a movie. And you can either take a
shot with your cell phone, but get in close and, you know, pause it and take that picture. Or you can watch a movie on a computer like I'm doing
and take a screenshot. But the advantage of that is you are emotionally invested
in these characters. And you grab the scene
that catches your eye. So give that a shot. But if you don't want to,
you can follow along, you know, directly with me
by using this photograph.
5. Where To Find The Example Photo That I Use: You can find the
reference image here on the page under the
Projects and Resources, and it's right here.
6. My Drawing Tablet: Now I'm going to use
a drawing tablet. This is called a
Wacom drawing tablet. This is sort of like the, I guess, industry standard. There are plenty of
others that you can use. This one costs, I
think this is, gosh, about $400 But you
can probably spend about $40 and get a decent drawing tablet
that will serve you well. There we go. I seem
to have misplaced my, my stylus, the pen you
just draw on this. And for some people, drawing on a tablet that is disconnected with the drawing surface
is disconcerting. You can get these tablets
where you plug it up to your computer and
you can draw on the secondary screen
using your computer. This isn't like an ipad. It's not like an ipad is
going to be different, But yeah, you'll
need to plug that in and that will
cost you a bit more. If you've never used
anything like this, I think you'll be happy with it. It should still get the job done and you can draw and it'll give you that
pressure sensitivity. The problem is like if I
draw here with this tablet. So let me make sure turn it on. All right, so here I'm
going to draw with a mouse. I'm going to right click
to get my pop up palette. I'm on the brush tool right
here, and there's a pencil. And if I draw, that's
with the brush. And then if I draw
with the stylus, it's significantly different. As you can see, it's
pressure sensitive. Okay. And I can't do
that with the mouse. Okay. So that's why
you want to draw with a stylus or pen
and a drawing tablet. All right. So I'm going to
erase that now from here. I just want to show you how I
7. Setting Up To Trace: I want to show you how I start out with the drawing and we're going to
be working in Rita. And I'm going to open it up here. I've already installed it. This is the latest version
which is 5.2 0.2 It looks a little bit different than some of these other
versions. All right. So you can see right
here it says open image. And I believe this no actually
new image is what we want. And this would be create a new document as
well. So same thing. So I'm going to click right
here and I'm going to go with either a 4300 or US
letter size document. And then we can crop
it to fit the image. But I'm just going
to go ahead and go with four right here. And again, 300, if
you choose 600, that there's nothing
wrong with that. But just be aware that it's going to draw more
on your computer. It may slow things down. If the computer is
going too slow, it's not keeping up with
your brush strokes. You might want to consider
going down to 300. And for some of you, 300
might even be too much, you might want to drop
that down to 200. I wouldn't go much below 150, but you could go lower. But just pay attention
to how it looks, but this is still considered
a high resolution image. All right, 4300. And then I'm going to hit
the button right here. All right, so we
have this here and I've moved this
over to the side, because I like to draw
from observation, and that just means the
image is off to the side. And I'm going to look
and I'm going to draw. Draw. You know,
you've seen people where you see where they'll take the pencil and they're,
you know, doing this. That's just them making
measurements to try to size up the image and make sure the
relationships are right. That's the way that
I'm going to work. That's the way I prefer to work because I think
the images have a, a bit more personality
because of those imperfections
that it introduces. It's more challenging
because if I only work this way when I sit down with a piece of
paper and a pencil, it's going to be a little
bit more difficult. Yes, I can print
something and trace it, but just sitting
down and drawing, I want to keep those
skills intact too. This is practice for me. But if you want to just jump
right in and get started, I'm going to show you how
to trace from the photo, and this is the
way I would do it. So I'm going to move this down. This is the image
that I have selected. And I'm just going
to click and drag and drop that you see here. It gives me the
option to insert as a new layer and I'm
going to click that. Okay? You see it cropped off some of the rest of the image, but that's okay. Okay, so now we have
this image here, and now what I want to do from here is since we're going
to be tracing this, I don't want it to be so
dark because my drawing, you know, the brush
strokes will get lost. So the first thing
I'm going to do, you see it's layered here. It's on the top layer. I'm just going to click right in the middle where
it says opacity. It doesn't need to be exact. And that'll get that
opacity down to around 50% I can click
and adjust it if I want, but roughly 50% is good. And you'll see this
image is on top. We'll need to move that
below our drawing layer. Okay, And this right here, well, it says paint layer. Okay, so we're going to click, hold on this and drag down. I don't know if you can
see how it's highlighting. There's like a blue line
showing me where it's going to go and then I release
and it drops into place. Now this little icon right
here, that is a lock. And I'm going to click on that
just so it locks in place, so that I won't move
it around by accident. Then I need to click on the paint layer and
I'm ready to go.
8. Tracing An Image: From here, I just want to
show you how I draw again. Make sure you're on
the paint layer. The way I typically
draw is I just sketch in the shape of the face. Okay, we just start to
bring everything in. I typically don't like to just trace one unless
you're really good at it. You're going to have these
really wobbly lines. Like you can do it and get
some speed in practice, but I find that it has a nice organic feel by
drawing these straight lines and letting them know overlap and then going back
and erasing from here. Again, we're just
knocking in the shapes. I'm not going to
keep going with this because I'm going to spend more time doing the
drawing from observation. Again, it's good practice when
you're not on a computer, it has more organic feel. Then once you get
to a certain point, you can just turn
the visibility of that layer off and
check your drawing. It's always a good
idea to turn that off anyway and
check your drawing. I'm going to end this here. The next video, I'm going
to start observation. You watch that, You can see
how, how I approach that. You'll see I
continue to build on this sketch and different
techniques that I'll do there. But again, if you
just want to get your likeness or you
don't want to spend a lot of time getting
everything just right, you can do this tracing. All right? So I will see
you in the next video.
9. Setting Up To Draw From Observation & Searching For Brushes: I tend to switch back
and forth between my mouse and the pen. It it just depends
on what I'm doing. All right. I'm going
to open up Rita, and we're going to get started and we're going to get started now is setting the document up and drawing by observation. Actually, since we're
drawing by observation, there's really no set up. We're just going
to start drawing. Okay, I'm going to
go click New Image. And I'm going to
choose here again, we're in Crit 5.2 0.2
I am going to choose predefined either four
or US legal letter. Yeah, 4300 is the
pixels per inch. You could go 600 if you want that extra super
high resolution. Maybe you want to
make it larger. But I recommend going
with the 300 just because it'll be less
taxing on your computer. And 300 pixels per inch is
considered high resolution. So the first thing
I want to do is make sure we're all
in the same spot. Okay, I'm going to
choose a workspace here. This is the default workspace. And I may change some
things up as we move along. I consider this to be
an intermediate class, so I'm not going to
go in too heavily on interface and how
to work with Rita, but I'll throw bits
in here and there that explain how
I'm doing things without spending too much
time because I'm going to assume that you already are
comfortable with Krita. All right, here we go.
So I'm going to go to window and my work space, I'm going to put
it on a big paint. Let's see what we
get here. All right. Big paint works. I'm going to move this over.
You see right here. Okay, I'm just going
to adjust a few of these things here to my liking. I like a bit more room here
where the brush presets are. I'm going to hover my
cursor right there and just slide that up here. I'm going to drag that up. Uh. Oh, I seem to be
missing my layer. There you go, the
layers. All right. They got a little loss there. Actually, I'm going to
move this up a little. I don't need that much room for the advanced color selector, and I think that's good because I'll be needing
these layers later. All right. N I'd like to have
the extra space spent here, so I can see the brushes here. Advanced color selector
doesn't look like this. If you don't have
that color wheel, I don't remember
what the default is. If you click on this
little icon right here, this will pop up and you
can just click right here. And you can choose a
different color wheel or something if you're more comfortable with
a different look. And I'm just going to
close that up right here. This is the image that
I'm going to use. This is about the area
that I'm going to use. I'm probably going to crop off some of this
bottom actually, I'll crop that later. But basically, here's
the crop tool. If you want to crop it
now, you can crop it down. But what I'm going to do is I'm going to come over here to my brush and okay, the brush is selected. And then I'm going
to right click. And when I click it, it will pop up. All right, I'm going
to choose a pencil. If I right click, you should see enough
tools in the pencil. I'm going to put a thing
down here, a little icon, and maybe I'll see if
I can find the lesson where it goes into one of the previous lessons that
I've done where I explain how you can change things, where I deal with the pop
up palette and making changes like how many
tools that I have here. Although I will say that if you go to the settings, that
would be over here. Rita preferences, open
that up right here. You'll see if I
scroll down here, pop up palette, that
number right here, say maximum number of brushes
in presets, I put 20. And again, that's
the pop up palette. All right. I think the
default is maybe ten. I just put 20. Okay. All right, so you can
leave it as is or change it. All right. So I'm just going to click on a pencil right here. But if you also, you
can come over here to your brush presets and maybe the tools options
here is selected. Just make sure that the brush presets is
open. Right here. It's this bar here is all you can change to
different brush presets. And I have different I'm
using different brushes. I've installed a lot
of different brushes. If you are interested, I talk about some of that in
the other lessons as well. I'll put that here if you want to go back
and look for that. But if you want to search for some of the
brushes in the defaults, you can find that right here. It says search. Say I want
to search for pencils. I'll just put that
there and type in pencils and see it just
eliminates everything else. There's a brush that you
begin to like do that. You can also add it to your pop up palette
and that's using tags. And that'll be in
the next lesson.
10. Organizing Brushes: Here. I just very
quickly want to show you how you can
organize your brushes. Say I like this brush
right here. This marker. I'm going to right click on
that and you can see that here's the name and it
says AP marker, dry copy. I've already copied this one. But if I want to
assign it to a tag which is a group of brushes
that I want to save, I just again, I right click. And I can choose right
here, assigned to tag. And then here I
can go through and choose any of these sets. Right here, say I want
to make a whole new set. I'm going to come here and I'm going to choose Tag right here. I'll click tag, and I'm
going to make a new tag, and I'm going to
call this practice. All right, and then
I'm going to hit the plus symbol and it's saved. Now when I come back here and say I want
to save this brush, I'll right click Assign to tag. And then I just look for
that tag that I just made. Here it is Practice. And right there that is
labeled as practice. I'm going to add an eraser. I'm going to write
click Assigned to tag Miss time is just showing
up on the other side. And I'm going to
choose practice. And maybe a brush, nice low watercolor brush
here assigned to tag. And I'm going to put
that also on practice. So now I have three
brushes, okay? So now if I just want to use that brush set, I
can come right here. You see where it says all? I'll click right here, Hold, and then I'll just choose
practice. And there it is. And there are those
three brushes that I've just put in there. Now one of the things that
I really like is you can right click out here and you see here's my pop up palette. I can come over here, you see
this thing that looks like an old fashioned tag that you'd see maybe at a garage sale. I can click on that and then click right here where you
know this old fashioned tag. And so I can just choose
my practice palette. And boom, there we go. This is the set that I made
every time I add a new set, something new to the set. Let me take this back to all. Let me right click on that
airbrush assigned to tag, and I'm going to change
that to practice. There we go. It's not here. So I'm just going to right
click and right click again. No, it didn't, Did
I do that right? Let me try that again.
I'm going to try this air brush again. Let me see. Make sure I
got it assigned to tag. I don't see the practice tag. I think that means it's
already set. I can't find it. So I'm going to right click
on this one assigned to tag. And this one I am going
to choose Practice. Okay, so now we have five items. I'm going to click and then
try right clicking again. Nothing. All right. Let
me, let me click away. Pick another tool and come back to my brush and
right click still. Nothing. All right. I'm
going to change my tags. I'm going to pick
traditional. There we go. And go right back to practice. And there are my five
brushes or five items, so that's something that
you have to be aware of. If you add something to the tag, you have to change it
and come back, I guess. All right, here we go. So that's just something to remember
if it's not showing up. Change your brush group
or tag set and reload it. That's just something
to remember. All of your tags are
not showing up in a brush set that you've created. Choose another brush set and then come back to it and
everything should show up. And let me just check to
make sure that showing up here and I will go
down to practice. There you go. Since
I don't need this, I'm going to delete this tag
and poof, it's all gone. Oh, now I'm curious what's
going to happen here. I'm going to choose
a different tag. Set Digital now, let me go back, right click, and it's not there. All right, so that's
how it works.
11. Starting With A Sketch: I'm just going to go
ahead and click on a pencil and I'm going to sketch out how I want this to
compositionally appear. I'm just sketching out this
little peak in her hair. All right, here, just to get a sense of how
I want it to go, then I'm just going to
draw her face again. I'm just eyeballing it and there'll be lots
of corrections. You at least I'll never get
this right on the first time. I mean, I've seen some
things on Youtube where these people are drawing
what they call it, the Xerox artist, not me. I got to draw, correct.
Draw, correct. Okay, so now I have
this and again, I'm just knocking
out the composition. Here's the muscle in
her neck, right here. I'm going to try to put in that violin and what
I'm doing here is I'm just trying to get in the major areas and then I'll
start to narrow it down. Okay. I'm just going to
imagine her shoulders are right here just so
that'll help me, but I don't want to go
too heavy with this. All right? So that's
mostly blocked in now. I need to go back
and start refining. That's what it's all about. And trust me, I will never
get this on the first shot. One thing you can do
is if something is off and you just
really want to check it as we did and how
I set up the tracing, you can, after you get
everything blocked in, you know, and sketched in, you can go and
copy that and drop that picture on onto
the drawing board, scale it up and position
it as best you can. And then that'll
give you an idea of where things are off, you know, so you'll get the practice
of working from observation, but then you can fix
things up after that. So here I'm going to try
to imagine the shape of her head so you can see it's
coming down right down. I'm sure you've seen that. Like it looks like
if I draw a line straight from that
peak in her hair, straight down, that's the angle. And that's one of
the things that you might want to try
is like I'll hold the pencil up or my
pen up and line it up to the tip of her hair and I'm putting my
thumb to take a measurement. Although I really don't need
a measurement right now. I'm just trying to get the angle and that's the right angle. And then I bring it
over here and I can see that my angle is just
a little bit off. Okay. And then I
will come across, I'll try to get her, her eyes are pretty
horizontal. Okay? And then I'm just going to guess where they
are going to go. I just keep going back
and forth like this. Then one thing
that's nice that you can do is you start
looking at the shapes, not just like her eyes
and things like that. Like I'll look at the
shape of her forehead. I might be tempted to
draw the eyes here. And then if I look at
the shape of a forehead, I can see that, okay, I need to alter that to
get that shape just right. And I just keep adding
bits and pieces. And I'll move down and try to guess where I think
that nose is going to go. I'll look here.
Whoops, Accidentally clicked outside the software. I'm going to zoom in
a bit. There we go. Move that up because I'm
actually not using all that. There we go. All right. So now I'm back
here over in Crita. Maybe need a little
more room. There we go. I'll just draw. I think I
may skip ahead a little bit and add some commentary later rather than try to talk about everything
that I'm doing here. I think I'm just going to
speed this up and I'm going to do commentary later.
12. Useful Tools & Techniques: In this video, I
want to show you a few specific techniques that I use when I'm digitally painting
that will come in handy. I'm jumped ahead
here because after I did some recordings
where I go through and record the
videos and I wanted to show you them at
high speed because it's going to be well over an hour that I'm
working on these. So I don't want to spend too much time having you
watch all of these videos. So I'm going to speed things up and then I'm going
to talk over them. But because everything
is so sped up, a lot of things that
I do won't be clear. So I just wanted to take
this moment, this video, to explain some of the
techniques that I'll be using in the video
to follow this one. If you've watched some
of my previous videos, my previous classes with the still lives and
things like that, I use some of these
same techniques. If you get to a technique and you already
know how to use it, just skip forward a little bit. So the first thing I want to do is I'm going to show
you my desktop because I'm using a lot of
key commands and I want you to see how
I'll be working. All right, so the first
thing I want to do here is let me
delete this layer. I'm going to open up at, I'm going to open
up a new document. So I'm going to go
file new create. Okay, now I'm going
to come over here to my paint bucket tool
and I'm just going to put a nice little background so that you can see
what's happening. Now I'm going to hit
this little plus symbol right here to add a new layer. And this is where I'm
going to be drawing. I want to show you how
I will be working. The next thing I'm going
to do is come over to my brush tool and
then I'm going to right click to bring
up the pop up palette. I've used the tags here. This particular special
group of brushes, I just created this, so I had a variety here
to make this demo. Okay, so I'm going to start off with this brush right here. Let me right click again. So you can say that
says dry marker, although I sometimes duplicate
markers and it says AP, that stands for my name. And I will duplicate
them and make changes. Like sometimes I will
save extra brushes like this one maybe has a different opacity than
another similar brush. You can see over here,
they're fairly similar. Okay, anyway, what I want to show you is say if I'm drawing, actually let me
reduce the size of my brush the way that I use
the size of my brushes. I can come up here and
change the size up here. I can right click and come into my pop up palette and
change that here. This little button right
here, that chevron. I can click on that and that
gets rid of that side menu. But I usually keep it open
so I have access to flow, size, and opacity and angle. Okay, but there are better
ways to get to that. Here's my brush. I'm going to come up
here to the top here in this tool bar and click on the default you see right there. I can click on that default, that black and white button, and I get black in
the foreground. So I can draw off black, and the background
color is white. So now I can draw, okay, now say if I'm drawing a nose, I'll just sketch that out. I'm going to reduce the
size of my brush here. And that's going to
be the nose here. Not a great nose, but not
the way I'm drawing it. Okay, I've drawn in
the basic shape of the nose and say that I
want to create a shape, there's a couple of ways
that I can do that. One way I can just draw
directly on top of this layer. Or I can make a duplicate layer so that it gives me a
little bit more freedom. What I'm going to do
here is I'm going to click here and make
a new blank layer. And now I'm back
to my brush tool. I'm still owning my brush tool. I'm going to make this larger and just to show you
how I'm working, rather than come up here and use the size or right click and come in here and change
the size here. When I change the size, I usually use my keyboard and I'll hold the shift key and I drag to the right and I
can drag to the left. Okay, drag to the right and drag to the left
most of the time. When you see me working,
you'll just see my brush get larger or smaller
and it looks like magic. It's because I'm using
this key command. All right, so back to this nose. We're going to draw this shadow. And I can come in here and
I can draw this shadow. But you can see it's
looking muddy tool. I can right click and come in
here and choose an eraser. And I erase, and you see
what that looks like. Click, I stay on the same tool, There's this little
eraser button right here. I can click on
that, or I can hit the key on my keyboard and you
see it toggles on and off. When I erase with that, you see it has that
pressure sensitivity. And I can, with the same
brush that I am creating, it has the same texture. Sometimes you want to have
that different texture of your brush and other
times you want to have the exact same texture and controls that you have on the brush
that you're using. All right, so. Okay, so here
I can hold the shift key, drag to the right
to make that large. I can click on the turn that off the eraser was on and
I just fill this in. Okay. Then I can use the eraser and I can
just come in here and trim the side of this very quickly and
knock in a shadow. It's easier for me even
to come in here with a very small brush
and trim those edges, but at the same time, it doesn't have
that scribbly look. You see it's just like it's one smooth stroke and that's
typically the way I work. But the key here is I'm
on a new blank layer. If I was working
on the same layer, this wouldn't work the same way. Okay, so once I'm
happy with this, I can select this layer. I'll right click and
merge with layer below. Okay, now they're merged
and now I can use blending or however I want
to work to push that around. But now that I'm on this, you know, it's merged
with the layer below. If I go to my eraser, you know, and I try to shape that, I start erasing my sketch. Okay. So it's just
something to be aware of. I hit undo and I unmerged that. So I'm going to erase that. Actually, slide my brush
to the right erase. Okay. And I want to show you something else that I
do say that I am okay. So I'm going to do this again. Actually, I'm going
to do this with that. You can see it's right here. These multiple pencils, just because you see this has
a nice texture to it. So then when I erase on this, it has a nice texture, even texture like a big
fat piece of charcoal, as opposed to, you know, me using a bunch of
scribbly pencils. Okay, so that's the
advantage of this. Now something I want
to show you is say, I'm working on this and I'm going to paint
with black and white, just to show you
what's happening here. So one way that I
like to paint is I have my brush and
you can see up here, the foreground color is black and the background
color is white. If I paint with black, who I'm tapping the X
key to flip them. You notice up here they're
flipping back and forth. So I'm going to
paint with black. All right? I keep doing that. All right? I'm going to paint and say I'm just
painting in here. Then I'll switch and then
I can paint with white. But you see how it's blending. Actually, I'm going to
switch over to this brush. I like this one
better. It's a bit smoother and I'll add
texture at the end. But you can see
I'm just painting, adding gray, black, white. Okay, so the point
that I'm making here is that is one way
that I can work, okay? But say if I work with
the black and white, I mean with the eraser, I'm going to hit undo. Get rid of these. Actually, let me just delete that
layer and start over, make a new blank layer. Now I'm painting with black, switch that foreground
background, if I'm painting with black. And then I want to come in here and start adding
shading and things. I'll just hit the eraser. And then I can come in here and lighten that area up
here, shape that area. Okay, so those are two different
ways that I will work. And it just depends
on what I'm after. And it also depends
if I am working on a layer that is merged or if I'm working on a
separate blank layer. Because this eraser is very useful when I'm on a
separate blank layer. And then I get to
a point where I want to merge it with
the layer below. I'll merge it right click, merge down and emerge
with layer below. And then I'll make
a new blank layer. And then I can
continue working with that brush and I can
continue using the eraser. But if I merge with
the layer below, right now I'm going to click, I'm going to merge it twice. Merge with layer below. Right click once again,
and I'm going to merge with the
colored layer below. Now if I come in here and
I start using that eraser, you see I'm erasing to the layer below which
I don't want to do. This is another way
that I will work, is I have the brush and here
I will just sample colors. I can either come over here and hit that eye dropper tool. I believe the key command is I, it's okay, the eye dropper
is to sample a color. But I usually just when
I'm on the brush tool, I'll hold the command key. I'm on a Mac and you see
I get the eye dropper, I release it, goes
back to the brush. So all I have to do
here is I'll say if I want this kind of gray
color, I can sample it. And you see how it's giving me a completely different
look and see, rather than erasing
these edges here, I can paint them out. Okay, now I'm going to sample
out here at the light blue, reduce the size of the brush. And then I can come in here
and add some highlights. Say I do want to add some white. I'll flip that. Add a
bit of white there. And now I can go back to the
command ear control on a PC and I can sample
colors that you blend. Now I'm painting
with three colors. I'll just sample the black here. I do a lot of this, make the brush larger if
it's a little too dark. And this is the way I like
to blend colors as well. Say if I paint a color here, I can take the black
and I just do it light. And then I'll sample that
color here until I get a color that I like and
then I can mix over that. But let me try this. I'm going to use some black, paint it in really heavy. Then let me try it lighter. I can just keep sampling these colors until I get
a color that I like. They blend in until I get
something that I like. For me, it just has a
bit more life to it. Whereas, if I say, come down here, let
me sample from here. Make black. And then
I will make some. A lighter color.
Lighter lighter. If I come over here, I'm
going to write Click, and you see here's this blending tool, this blending stub. I can use that and just
blend things here, but you see how mushy it gets. Sometimes that's the effect
that you want and other times you don't want that
really blended effect. I typically prefer the more rougher look that
you get from here. All right, so there's
one last thing that I want to show you. It. So it depends on the
brushes that I'm using. Like if I'm going
to write Click, I'm going to go back to
my this marker brush. And I'm using a higher end drawing tablet and
it has tilt control. And if you, that's one of the things that you
should look for tilt control. But it is not 100% necessary. Most, even the cheaper tablets will give you pressure control. But the tilt control is this
where if I take the brush, you can see I'm not actually
touching the drawing board, but I'm just rotating it above. And you can see how
tilting my brush is this, Tilting my pin is
rotating my brush. Okay? And that's
something that really makes working like
this very useful. Another tool, if you
don't have that ability, you can tilt your canvas and that will help solve
some of that problem. But let me show you. I put this brush
here because you see it doesn't tilt, okay? It doesn't have tilt control. What I can do here is
I can right click and I can choose right here,
the angle of the brush. I can click here and then
now I can change the angle. So see if I want
a thin line here, but then I right click and I can rotate it
out to the side. Come on, there we go. Now if I go up and down, I have a nice thick line. All right. There's a
couple of different ways you can do the same thing. So you can see the
brushes horizontal. I'll right click. And
as I said before, if I rotate my canvas, now if I drag in this direction, I get that nice thin line. And then I'll right click. And then I can click
right here and it resets that angle and then I
can get that thick line. Okay. My preferred way, I think this is a good way to work once you get
comfortable with it, but I think it will take some time for your mind
to wrap around it. But what I like to do
is you see up here in the tool bar is there's
these little things here. Although I sometimes call this the Options Bar in Photoshop, they call it the Options Bar
and these are the tool bars, It's a little confusing. But this bar up top right here, you see it has the size. You can control the
size of your brush. But since I can control
the size of my brush using my shift key,
I don't need this. If I click right here, this opens up and I can change the opacity,
which is here. And I can change the
flow and there's rotation in this
pattern scale thing. I'm just going to
click right here. You see where it says rotation? And click now the
rotation is up here, so I don't have to right
click to go into the pop up palette every time I need
to change the rotation. Now if I want that angle, I'll just click right here.
Drag that straight up. I can also manually type in, type that in if I'm a numbers
person or and then I can rotate and then I get
that horizontal view. Okay, and again, the combination of all
these things and the rotating the canvas I think
would be quite useful. All right, so those
are all the tips that I wanted to show you going into the demonstration of
the actual illustration. So hopefully it'll be a little clearer what I'm doing
as I'm doing it, but that's really the
meat of everything. Hopefully, this
will prove useful when you're working
on your pieces. And some of you might just find these extra little
tips useful enough. And you don't need to watch the demo of me doing
the actual painting. Me personally, I enjoy watching other people work and
see how they do things. And so it's up to you
if you want to do that or if you want to jump straight
into your project anyway. I'll see you in the
next video hopefully.
13. Ugly Painting: All right, so try to get that Once you start
getting things in, once you start blocking
in bits, the mouth, the nose, and things like that, it becomes a little easier. Because when you're
starting from nothing, there's no reference. But once you build reference, it definitely becomes easier. I can right click, bring up the pop up palette,
grab an eraser. Use the right bracket
key to make that larger, and then I can start
erasing things out. This is an area
that I always have trouble with is the area between the mouth and the nose. I always misjudge
that difference in getting where
I get the mouth. I always have the chin.
It's always too small. Let's see how it goes. I like to think in shapes, like there's the
roundness of that chin. Okay, here's the bottom
of it right there. Watch the shadows. The shadows can help too, because they help make shapes. I can see there is
this shape right here. I'm going to try to draw
that shape. All right? As I'm drawing this, I can see that the shape
of her cheek is off. I need to start
shrinking that again. The more you drawing, the more you start to see. I try to look at
the whole thing. Now here's a little
trick that you can try. I'm going to write, click here. You see that button
right there that will flip the canvas
and says mirror review. That's just so you can
see what it looks like. You can see like, maybe you could see where
things were off, but I can't see them. As the artist, your mind tends to play tricks
on you and you don't see exactly what is off.
I'm going to write click. I like to turn my body
to get the strokes, although that brings
me to another point Is another way you can do that
is if I right click here, bring up the pop up palette. That's what this
little dot is for. I can rotate my canvas so that I can get a stroke without having to contort
my body too much. Then I just click right back
there and it will go back. All right. Now it's always
a good idea to look at it. One thing I like to
do is to zoom out. That's another way to
get a good look at it. So I'm going to zoom
way out. Take a look. I think I've blocked in things like I'm seeing now that her
nose is a little too big. And I'm going to trim
that down the size. You see how I'm
drawing the shape? Sometimes I don't even draw
the bottom side of the nose. Sometimes I just like that swipe the of a brush and
that tends to work. But yeah, this is helping. Now I'm going to start trying
to block in some shapes. I'm not sure if what
I want to do with this the layers just yet. So I'm going to make a new layer and start blocking
in some areas. Because sometimes that
helps because honestly, I'm feeling a little stuck. I'm going to click on
the little plus symbol here and that'll give
me a new paint layer. Now I'm going to write Click, and I'm going to choose
a different brush, this little four
pencil thing here. I'm pretty sure
that you have that. I'm going to increase
the brush size here. That's a nice one
because you can fill in areas really quickly. See here, make sure, again, I'm on the new layer. So if I decide I don't
like what I'm doing, I can always come back. I'm going to squint right
now and see if I can see the dark areas and
I'm going to just start darkening in
these areas here. If I overdo it,
it's not a problem. The squinting to place things and I'm just
going to come across that knows right here. And I'm going to really
darken that up right there, because I'm just going
for the shape, okay? The thing is when you're
painting or drawing, there's a stage, you know, and some people call
it the ugly stage, where it just looks like
total garbage until you know, and then it starts
to come together. All right? One thing is
I tend to lose things. You know, you'll draw something and then I'll start
to lose them. Then they start to come back. You have to bring them back, you'll take them away and
then they start to come back. Reduce the brush size. I can change the brush
size right here, The opacity of it and the flow, that's the amount of
paint coming out. Or I can just change the size
right here in the opacity. It's just a lot
quicker to get to. Another thing that I
forgot to mention is right clicking and going to this brush tool to the eraser. If you are drawing, say I draw that there, I can just click on this
little eraser right here and it erases
with the same brush. Whereas, if I go
to the brush tool, I mean to the eraser tool, it's a different, you know, it gives me a different
kind of brush. So I'm going to go back to the
pencils and start erasing, and then I'm just going
to start trying to bring out this, these things. All right? A problem I'm
having right now is you see that when I erase
on top of these lines, the lines aren't going away. So I need to merge these two layers at this point.
Okay? You don't have to. It's up to you how you are
more comfortable working, because I can just
turn them off. But see then it
loses all structure. So I'm going to merge this
layer to the bottom layer. So I'm going to right
click and choose. I'm going to write,
Click on this layer and choose Merge with layer
below the sketch. And this charcoal,
it's all merged. Now I'm just, I'm
going to try to start bringing things together where I see a highlight here. Now I can just go
back and forth and try to darken this up. One thing like I
darken that too much, I find that a larger brush, I can just kind of
sweep over that, reduce that brush size, take that to an eraser, and then sculpt away.
Sculpt that away. Okay. And here. All right. I'm still an eraser. I'm just going to dig in here a little bit
to get that eye, and then I'm going to erase. Okay? So I'm going to
dig in these dark spots, hit that eraser again. I'm going to go back and forth, back and forth again. If you're tracing, you may
think, oh, I'm tracing. So this is just going to be easy and you'll lose things or you'll trace it and then you'll find it seems like
it's going to be easy. But even tracing can
be more difficult than you would think because you start to cover
over those lines. And then maybe you turn that
off and on to take a look at it or you'll drop the opacity if you have that image below it. Okay. So I'm starting to get enough built up
where I'm starting to find I'm getting to that point where I'm
starting to feel comfortable. Like if I want to drop
in the hang on the eye, I'm just doing a quick
measure of checking. Okay, Those eyes are pretty
much straight across and that's not what
I've drawn again, like you may see
that these eyes, I go to the tip of the eyebrow and it goes almost straight across and then go here and
I'm coming way over here. I'm going to have to fix that, hit that, eraser, trim down, come across so that it's not
so much of a difference. Okay, that Eso. I'll just hit the white right here For that
white of the eye. One of the things that I like
to do when I'm drawing is sometimes you see how those eyes just appear rather
than drawing in the eye. I'll often just black
in an entire area and then bring the eye out by, by doing the opposite. I'll bring in the light part
of the eye within the dark. It seems to have a
bit more life to me. Okay, now I'm just
checking the height. Still not getting that
measurements not lining up right. But let's see, I'm going
to come back to this, maybe reduce the
size of that brush. Don't be, don't be tempted to start drawing things
out line by line. Just think shapes in shapes. Okay? Think shapes and never marry anything as far
as, oh, that's perfect. Because then you end
up working around it and that'll destroy
something just as well. There's a quote by Picasso where he said something
to that effect. If you see something in
a painting, destroy it. I've tried that.
I don't like it. You know, you see something, but just don't hold it precious. If you have to destroy it, okay, you have to sacrifice the beautiful stroke for
the whole. All right? This is starting
to come together. It's just getting
through this stage of getting things right
to look like something. It's painful, all right? I think I let me flip this canvas and see
what it looks like. It still looks like a person. I can see there's an angle here. You see the curve of the eye, but the white of this eye is
just going straight down. But I need that to come
over a little bit. There we go. Now I'll come
back and paint that back over. I'm starting not to groove on this brush so much right now. I'm going to try
something different. Again, whatever
floats your boat. One brush that I really
like, this marker. Which one does it say? Hang on, let me see
which one is it? I like this one, but
you can see it's plain, but it doesn't have any texture. But it's really good for
just blocking things in. Oh, now I'm starting to see, look at that nose, The
eyeball comes down here, the wide of the eye comes here. And I got the nose all
the way over here. I don't know why switching
that brush seems to have given me a bit of a heads up
that something's off here. And I know you all have
that marker brush for sure. So here you can see I'm
just painting in the top of the lip and I'm not
worrying about the bottom. Okay. So then I can come across, I'll hit the eraser, and then I just erase and cut that away
to get the bottom. Okay? And this looks hideous. Oh, this looks hideous. Starting to look like the
joker here. All right. You know what I'm
going to do? I'm not used to talking while I draw, so I'm going to stop
talking, work on my drawing. And then I will narrate this. I'll play it back at
high speed and narrate because this is difficult. All right? I'll talk to you. We I'll be talking
to you anyway. I'm not going anywhere. We, Lisa won't seem like
I'm going anywhere for you. This is something also
I just did by instinct. You hold the shift key and
if I drag to the right, I can enlarge my brush and drag to the left and
reduce that brush. I don't have a lot
of desk space, but this is basically
what I'm doing. Hopefully this is on camera
to the drag to the left. All right, I'm going to cut
this here in the next video. It's just going to be high speed with me talking over the video. All right, see you in the next
video. Oh, one more thing. And it's a good idea
to get away from your work sometimes stepping
away, you step away from it. When you come back,
you'll see things that are right or wrong. Okay? So I'm going to step away for a little bit and I'll
be back in a second.
14. Speed Painting: In this bit here, I just want to talk about what I call the
ugly state of a painting. It doesn't always happen, but it quite often happens when you're
working with something. When you start out, it goes through a
period when it's just ugly or it's not working and you just have
to fight through it. And I'm going to go ahead
and start this video here. I paused it and I'm just
showing you the piece. And I was very unhappy
with this when I stopped, although I'm going to hit the button to start
it out. Here we go. When I was working on this, I was struggling and I was
using a different pencil. And this is the moment when
it started to come together. I switched over originally I was using it was that I forget, I'll put it, I'll post it here. What the name of this brush
was that I was using, which was that group of three pencils is
what it represents. Okay. And what I switched
to was the marker. And for some reason, the marker just works for me. Whereas the pencil, I
like the look of it. I like the texture of it, but it just wasn't working
with me working for me. I just feel like I have
a lot more control and things do what I want
with this particular brush, this marker, the thing is, I wish it had more texture, but it just works for me. So I'll work with this and then my plan is to
add texture later. So here you can just see
I'm working along again. This demo here was about 53 minutes long and I
really didn't think anyone would really want to sit here and watch me and listen to
me talk for 53 minutes. Just kind of rambling on
about whatever I was doing. So I figured I'd
speed things up to about 6 minutes
and talk over it. This is one of those things
you could even skip if you want because I'm just using
all those techniques. The same techniques
that I demonstrated in an earlier video when I did the nose on the
blue background. Here you can see I'm
just painting erasing. If you watch how
I use the layers, sometimes I'll create new layers and then I'll merge them down. Like right now, I'm, I'm selecting the shape and
I'm using the Warp tool. I'm going to
transform selection. Then I write click and I choose
transform, I choose Warp. And I can push things around. Sometimes I'll do that,
I'll go to free transform, then I'll write click
and I'll liquefy. Those are just
different ways that you can use digital painting
to your advantage. These are things
that you just cannot do in real world painting. Some of the things
that I talked about in the video is if you
watch the eraser, you'll see the erasers
going on and off. I'm adding things with eraser. I'm painting and
then I'm erasing. And painting and erasing. And sometimes I will flip from, you know, painting
from black to white. Black to white. It just
depends on what I'm after. And again, right now, I'm just seeing that eraser
flash on and off. Um, and I'm erasing the disadvantage of
erasing it as everything. Well, it's not necessarily
a disadvantage, but the difference is
it erases everything. But if I take those same
things and I duplicate it, like right now, you can say I'm working on a separate layer. I like using the eraser here because I can
make shapes and if I don't have to worry
about messing up the drawing or the painting
that I've already created, I'm sitting here adding a
little highlights in the eyes. Usually, I save those to
last, I guess you might say. I was getting a little greedy. I put the highlights in
and they just didn't work. You can see there's
no real highlights. Well, there aren't any highlights
in the original image. They really don't belong. But sometimes I do find highlights can bring
a piece to life. I don't know if
you notice how I'm flipping the canvas
from time to time. Again, this is very high speed, but I'll flip that canvas
by flipping the canvas. Then I think I
talk about this in the other video and
show you how I do that. You can find that flip tool
in the pop up palette, but it gives you a
way of seeing because your brain makes adjustments to things and you think you're seeing what you're
not actually seeing. You think the proportions are right and they're actually off. I think Davinci, it was a book. I read a Vinci's Notes to artist I believe was
the name of the book. And he said that something
similar to this and he used a mirror to look at
his work when I'm painting, it's been a while
since I've actually painted in the real world, but I would always keep
a mirror on my canvas. So I would step away from the canvas and hold it
back and, you know, look through that mirror to get that reverse image which sort of separates the changes that
your mind has made from, you know, what
you're looking at. You can also do this by by distancing yourself
from a piece, like in a digital painting.
I will shrink it. In real world, if it's
a smaller painting, I might prop it up in a room, on one side of the room and
then walk away from it. I remember when I worked
in the newspaper business, there was an illustrator. His name was Earl. He used to, you'd all constantly hear
his drawing hit the floor. Bam, bam, bam. He, he'd work on it and then you'd just
throw it on the floor. And that was his way of getting some distance to see his work, to get a fresh look at it. You know, sometimes you
go away and you look at, you take a and you
watch something. Sometimes when you, when you just spend some
time away from a piece, it changes the way it looks. You come back the
next day and you see all those mistakes that
you didn't see before. Here, you can see started adding a little texture once I got the image the way
I really liked it. I added texture, to be honest, I think I liked it a
little better when it was when I stopped
using that marker tool. But it does have a
certain look to it, so I added the texture to
make it look more natural. And in the next video, what I'm going to do is I'm going to show you
how to add texture. I've done this in
another class here, but I'm going to
do it again here. I'm just going to very quickly show you how to drop
that in and add a lot of texture and really
make that piece come alive.
15. Adding Texture: Here I'm going to show you how to very quickly
add some texture. Again, I talk more about
this in a previous lesson. I'll, I'll post which course I go into texture
more about down here. What I'm going to do is I'll
make this available to you. This image right
here, it's image, whoops, that I found on Pexels. It's an image that
I found on Pexels. I'm just going to grab
this and drag and drop, and drop it onto the image, and I'm going to insert
it as a new layer. All right, so that's the image. Now what I'm going to do from here is change the
blending mode. Right here you can see where in the layers panel
where it says normal. I'm going to click on that and hold and I am going
to change this. I think overlay might work. I'm going to try soft light and overlay and see what we get. Actually, I think
I like overlay, but let's see what soft
light does for us. I like overlay better. All right. Just so you can
see what's happening here. I'm going to turn the visibility off on this layer, off and on. That's it off and
that's what it on, so you can see off and on. It really adds a nice
bit of texture to your image with very
little almost any work, and this digital
painting is done.
16. Thanks For Taking The Class: Hi. Thank you for
taking the class. I hope you enjoyed yourself. And please if there
are any comments or suggestions that you might
have, please let me know. Also, I hope that you uploaded your project
to the project area. I can't wait to see it anyway. Once again, thank you and I'll
see you in the next class.
 Aaron Porter, Illustrator