Transcripts
1. Welcome to Class: Hello, skill share. Let's
illustrate traditionally, digitally together. As we're moving into a more and more digital world full of AI generated artwork, I think many are craving that tactile
traditional art look. Even though working
with paints, pencils, pastels, and all the other amazing art materials
is great fun. There's a huge convenience
of working digitally. With incredible digital brushes mimicking flowy
watercolor washes, the powderiness of a pastel, or the scratchy texture
of a colored pencil, we can now achieve
similar results and procreate pretty Nato. In this class, I will
be taking you through my process of picking
digital brushes that have amazing traditional art
textures and all of my tips and tricks for making
digital artwork feel a little bit
more hand drawn. Will also be drawing a few
digital traditional mushrooms together to put together everything that we've
learned in the class. Hello, everyone. I'm
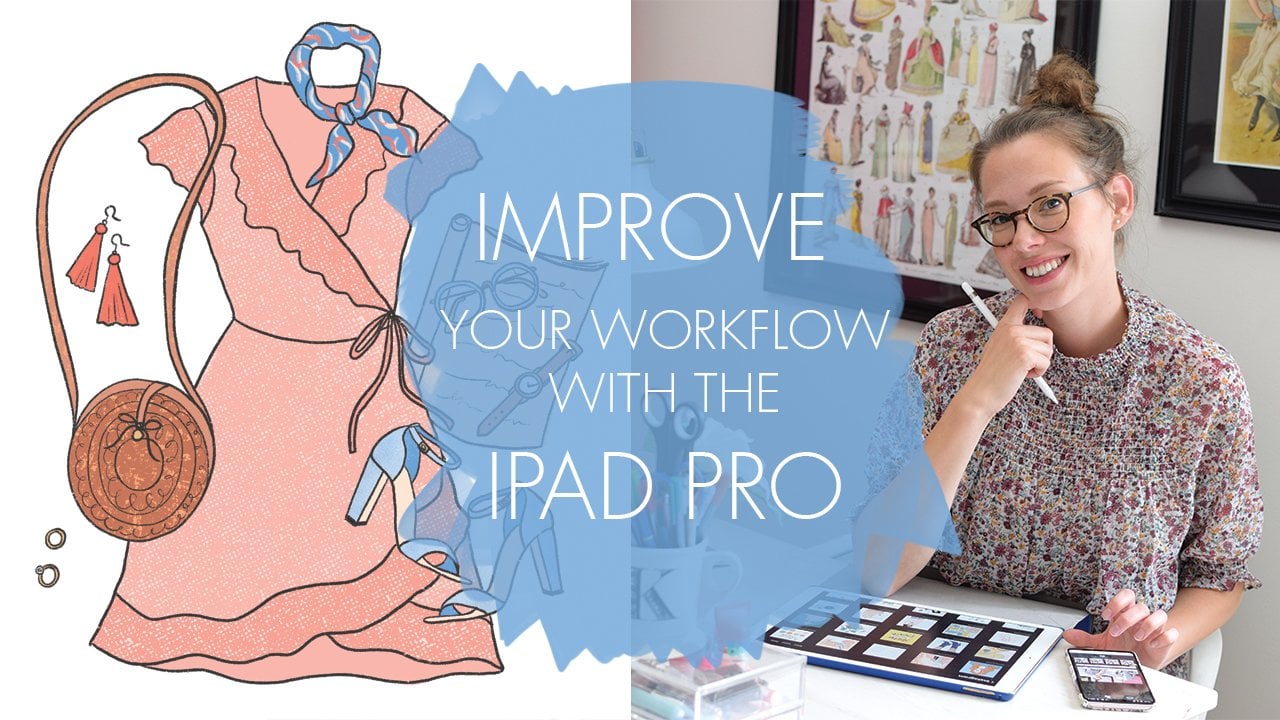
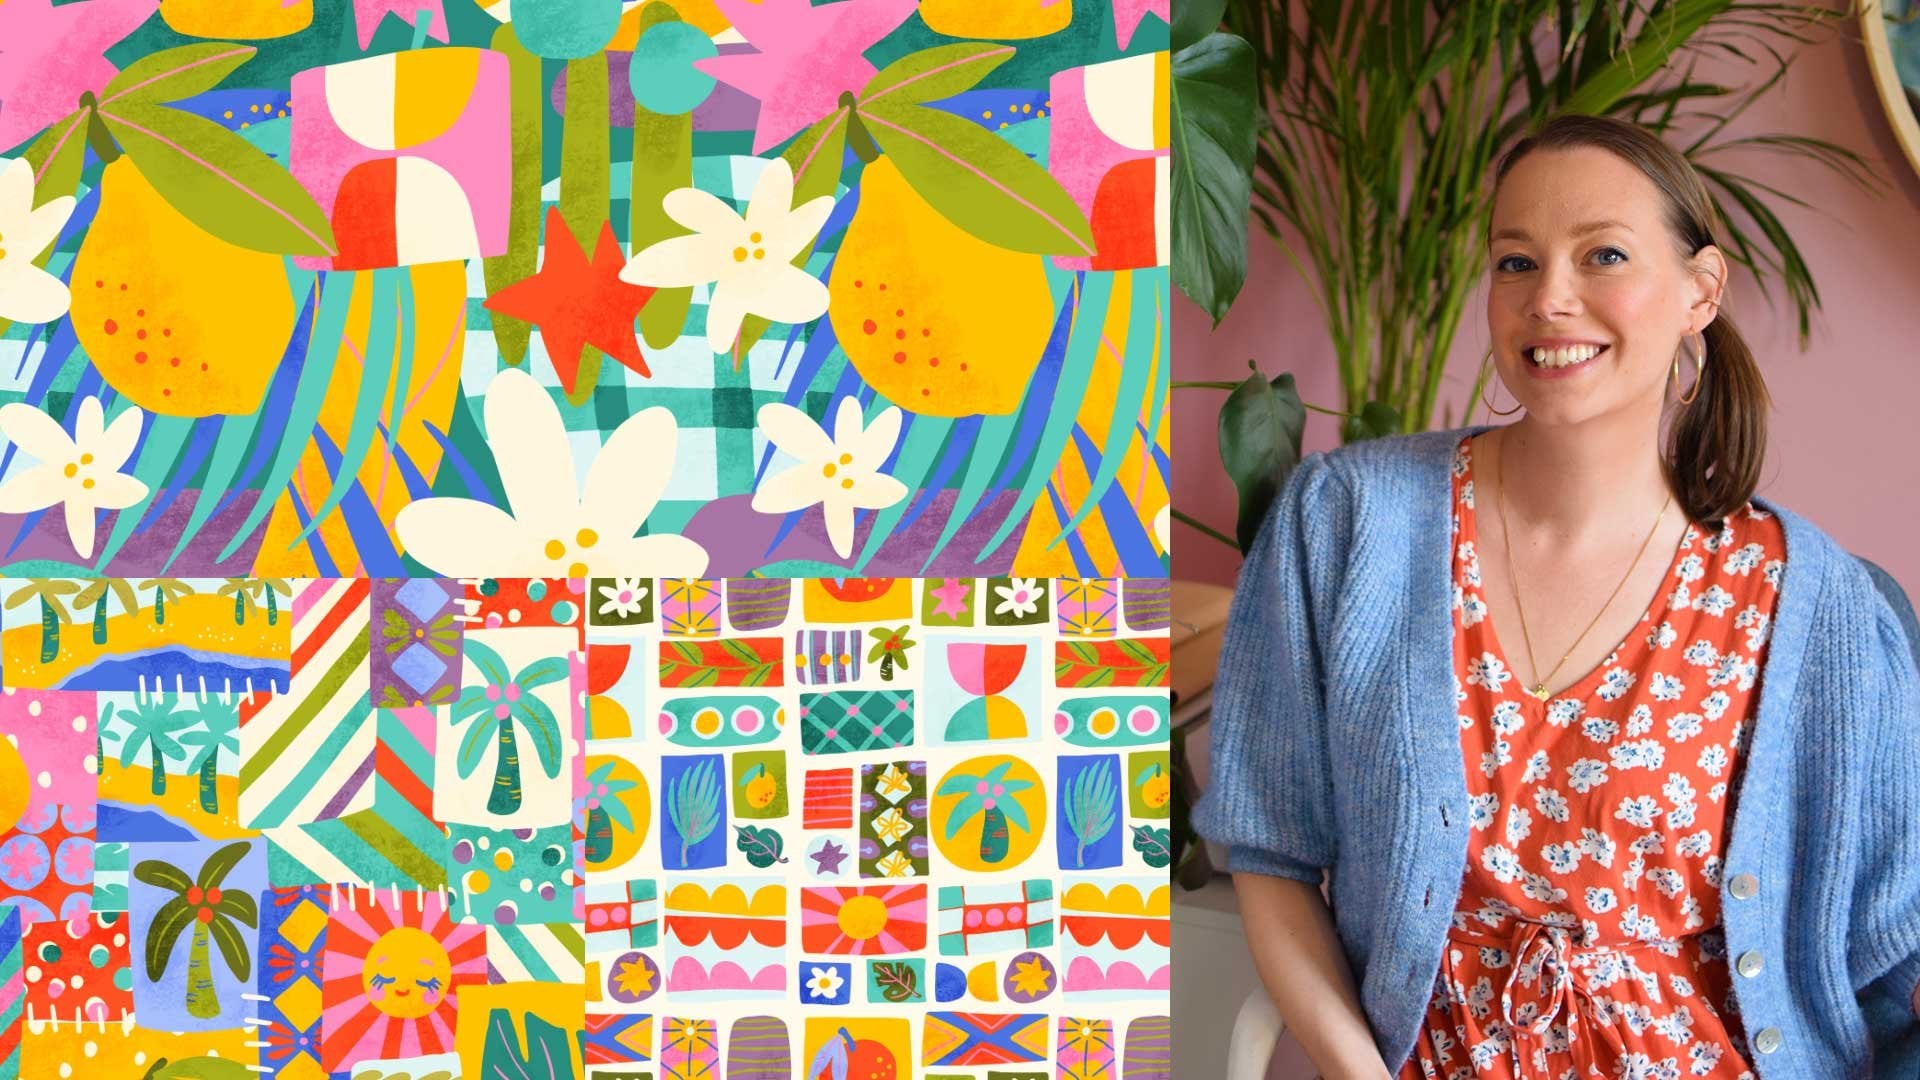
Kristina Hultkrantz, an illustrator and
surface designer from Maria Fred Sweden. I work mainly as a
surface designer, and I've had the pleasure of working with companies
like Hobby Lobby, American Greetings, paintbrush studio
fabrics to name a few. Welcome to my CheeryPink Studio. As much as I love working in my sketchbook and getting messy with paints and pastels
and all of that, I still do very much
like creating digitally. It's just so nice to
not have the mess, and I'm also very keen on that undo button and layers and getting to recolor
things in, like, 5 seconds. I adore Procreate, and I love discovering new
brushes that can give me the same kind of feel
that I am getting in my sketchbook when I have
my fun Friday play days. This class is great for anyone who loves working digitally and would like to give their art a more traditional art
feel. So let's get started.
2. Supplies and Class Project: If you'd like to follow along exactly as I am in this class, I will be using the iPad Pro with Apple Pencil and
the program Procreate, but feel free to use a similar tablet and program
if that's what you have. I'm sure that you can
follow along. Quite well. In the class, I will be sharing my favorite procreate brushes, as well as sharing paid
brushes that you can purchase on your own
if you would like. If you're tempted, I am
certainly tempted all the time. I even have a whole class called Get to know your
Procreate brushes that I'd love for
you to check out. It's really comprehensive,
and I think it's my best class here on Skill
Share. So check that out.
3. Why Work Traditionally Digitally: I just want to talk about
a few reasons why working digitally rather than traditionally, could
be right for you. The first one is to
speed up your process. If you are usually working on paper and you
find the process that's slowing you down
and maybe you have a tighter deadline for
a certain project, jumping in and working
digitally could really speed up your process because I personally find working
digitally faster. You also have all the
tools an advantage of digital by being able to have different layers that
you can test out colors. This is my second
tip that you can test out different things
rather than on paper, wasting paper or
materials before you get started on a traditional
project, possibly. You can jump in digitally, test out different colors, different looks, and
then work traditionally. You have maybe a sketch
finished and you can ability to move
things around, have different things
on different layers. You can test out
compositions without having to redraw and
redraw and redraw. That is one thing that makes working digitally really great. Also, if you are working with a client and they come
back with changes, it's much easier to
change a digital sketch and recolor something than having to start
over from scratch. My third reason why
working digitally, traditionally might be great
for you is if you maybe work traditionally and then you want to do some
adjustments digitally, and you're going to want
to have brushes and things that mimic the same
look that you have on paper. It's good to explore
these brushes. So when you do want to retouch your traditional artwork that you have something similar
and it really matches well. You don't see digital you don't see that
discrepancy between your traditional mark making and your digital mark making. So that's it. So I hope that you are inspired to start
working digitally, traditionally,
depending on, yeah, if you want to speed
up the process, if you just want to
test, something out, or if you just like
the convenience of having an undo or layers
and stuff like that.
4. A Look at Other Artists: All right. In this section, before we jump into Procreate, I just want to show you a few other artists that I
admire and their digital work. That has a very
traditional feel. So let's jump into my computer, and I will show you
some of my favorites. Alright, so this is going to be fun to look at
other artists work. I want to start off
with Rebecca Green because she's one of my
favorite illustrators. And yes, she is known for her
more traditional artwork. I would say she like,
95% of the time works traditional with gouache and colored pencils and neo
colors and things like that. But like in this post, which is really detailed. She mentions that, she does preliminary sketches
and I want to mention, like, Rebecca Green's
blog is amazing. She shares so much
of her process. I've learned so
much from her and her other outlets of
sharing her work. It's really amazing to get such a close look
into her process. I find her really
inspiring. Alright. So I will link this blog post
so you can go check it out. This book Kafka and the Doll that Rebecca
Green Illustrated is a great example of how you can use digital
and traditional together. She shares her process extensively here with her
inspiration and style testing. And you can tell that some are drawn on scraps a
piece of paper, and then she jumps in
digitally to really, like, flesh out the characters and, like, really design
those quickly. And then she goes back
to paper and, like, flips back and
forth so that yeah, she gets that
quickness of, like, probably being able to design characters and change head
sizes and move legs and things like that without
having to redraw that 100 times and
then jumps to paper again to test out the
style and the textures and then jumps back and forth until she found
what she was doing. In this project, if you read it, she took so long
figuring out the style that her deadline
was approaching. So she decided to do all of
the finals in Procreate. So here she did painting. Studies, and I think
these are beautiful. But I really like how
the finals did turn out. And yeah, here is the traditional work
that she was creating, I assume on her paper, and this is what
happened when it looks how it looks in
the final version, which is just so interesting
to see the difference, but also like, the sameness. It's just a little bit crisper, but it still has all those
elements of the scratchy, hand drawn colored pencil lines and that textured feel of drawing with a really
thick colored pencil. So yeah, let me just show a little bit more of the finals. Yeah, these are all done
digitally in Procreate. I'm pretty sure she's mentioned somewhere that she
uses vivi brushes. I've never used
those but before, but I'm sure they're great. I will link those
as well somewhere. About this class section. Yeah, I just love
the texture of this. I love that she uses a cream
as if she's working on ivory paper or, like,
off white paper, and just using all of the textures that she had in her original artwork,
just cleaning it up, keeping some of the texture, and I'm sure that she was able to work much
quicker because, yeah, you can you don't
have to redraw stuff, you just move stuff around
until it looks good. Digital is amazing. So yeah, that's the first artist
that I wanted to showcase. Then we have an
artist called Jarvis. He's from England. And I have heard in interviews
that he from this book, the boy with the flowers in his hair, he worked digitally, which is amazing
because this looks like and this looks
hand painted. But supposedly, it's not. So he found some really
excellent brushes to work with. I have no idea what
digital brushes he uses. But you can tell that
he has previously worked a lot with
traditional Media, so then he could mimic what he was creating on paper digitally. And I think maybe that's key in this class is
that you should have had some experience working with traditional media so that you can mimic what you like on paper in your digital
procreate files. Like these ones,
his previous books, I assume they were done with traditional media,
but I'm not sure. He also has a book,
his newest books, the Bear and bird series that
are also digitally created. And again, he has, like, Rebecca did with
that cream paper that almost is like a
first step to get it, like, not so white, digitally crisp, gives
that, like, paper look. And then his digital
brushes that he uses look like they look like
a dry ink brush, and I don't even know what. They just look like
gorgeous ink smudges. I love this brush. I'll just show you a couple
more examples of his work. It's just really darling, and sweet in the textures. Like all this in the background. It looks like some kind of watercolor and inks
and things like that. It's just amazing. Here again. So cute. Alright. Next up, I want to show Julia
Sada a Sada work. And I know from also reading
lots of interviews with her that she has previously worked
with ink and watercolor, and, like, her style is,
like, painstakingly detailed. So I know that her
book, where is it? The one that she did about
Frankenstein and Mary Shelley. That one was done with
traditional media. But then she's moved
on to Photoshop. So she took her
style that was like a painstakingly detailed
ink outline drawings and filling with
watercolor washes, and she moved that
into Photoshop. Again, I assume for convenience
and to make it quicker. So this is her newest book, right? The Queen in the Cave. And she's mimicked that digital or that traditional
watercolor feel or her works that
she created before. And again, like I can only imagine how much time she saves. It's just so amazing to
be able to move things around and test compositions and not have to
redraw everything. Her work is amazing. It has this tactile feel. It feels really lush.
It doesn't feel so flat because there's that
variation in the color. These watercolor digital
brushes are amazing. It'd be funny, too. Whoops. I I I hope that I'm correct. Um, but that's I've been doing a lot of
reading interviews, and there's also images of
her drawing in Photoshop. So I feel safe, saying hanging bats, like, yeah, girl, the
queen in the cave. I know that you know this
one was done digitally. Yeah, so that's
pretty interesting. And the last up I just wanted
to mention Alex T Smith, who is a really
huge illustrator. And I know that he works. He likes working on paper first. Let's bring up an
example of his work, like doing all the
lines in pencil or ink, and then he will
It's not loading. Why is it so pixelated?
There we go. And then he'll do
the color digitally. So that's something you
can think about, too. Like if you feel
more comfortable doing your sketches on paper, if that just feels better
to you and then doing all the coloring in Procreate or Photoshop,
something you can do. So that's all the artists that I wanted to showcase
in this class. I hope that you're
inspired by some of their work, like I am. Okay, let's move on
to the next section.
5. My Favorite Traditional Looking Brushes: We're finally jumping into
Procreate, and this time, we're going to be looking at my favorite Procreate
traditional digital brushes. I'm going to be sharing
with you the ones from within Procreate
that I really like, as well as my
favorite paid brushes from amazing brush makers. Alright, at my desk now. I just want to quickly show
you that I like working on a table. What
are these called? I like working on a table easel while I'm working on my iPad, so I'm gonna cause this
it's difficult to show. So that I'm not
working like ruining my neck looking down
all the time all day. So that's just like an extra quick tip before we jump into this
actual section. Okay. It also makes me feel like a real artist like I'm working
on a canvas rather than, you know, like, drawing over. It's like, a little bit more it was a little bit
nicer for my back and neck. Now, we're in Procreate, and we're going to
talk about brushes. I want to, of course, show you my favorite procreate
brushes first because you do not need to
buy tons of brush packs, even though it's really fun. And I also really
like that I can support other digital artists
by buying their brushes, and some of them are
really, really good, too. But anyways, we're
going to start with what Procrea has to offer, and they have great
brushes to start with. So I want to show you like, I have to go I've bought
too many brush packs, but once you get
started, you can't stop. So, I want to mention
I really love the H. Let's pick a good color. This nice greeny blue. The HB pencil is a classic. Like if you just
want pencil lines, like, to do a
sketch, pretty good. Also, if you want to get, like, that colored pencil look, we also have the 66b pencil, which also is a
little bit thicker. Like if we were looking at
Rebecca Green's artwork, like, creating those really sick lines of her characters and stuff, you know, or Jarvis, his work was more like
some kind of inky pen. So, yeah. I also
remember that you can up the size and decrease
the size depending on, like, the quality of line. So I didn't have this
one in my duplicate. The Banobo chalk is
pretty good, too, if you want, like, a
classic pastel look to do, like, the shape of items. So that one's pretty
good. Let's see what we have in my little favorites. Do I have the chalk? No, so I'll move those
over too. Sketching. So I swipe to the left and
then I'm going to duplicate. And these two that I've
duplicated the whoops, swipe to the right
to highlight them, and then just pull them. God. And then we pull them, and we go up to my
little group here, fabes I've called them, and we drop those in. So I have my two
pencils, the HB pencil, and the six B pencil, and we have a chalk.
Now we move over. We have inking brushes, and pretty much the
only one that I really like in here is the dry ink, that one I use all the time. That's become like my
classic brush because I really like when you fill
stuff in, there's, like, little it's not
perfectly filled. There's little speckles in it, and that can also be reduced
and be a nice outliner. So I really like that one.
And then in this one, as well, we have this thylacine. I think that's also
really neat to get some paint brushy strokes. I have that one. But I mean, you just go through all of these and pick out the ones that
are interesting to you. Like, this one might be good. Like, this kind of
gives that feel of what Jarvis' work was maybe. But I think I already
have those in my. Let's see, drawing, were
there any of these? Like, I know I like
evolve, I think. That's also like to get a really scratchy outlines kind of like working with oil
pastel, eagle hawk. Yeah, again, it's like, yeah, maybe something like that for the Jarvis lines if that was
something that you liked. But there's so many.
So you just kind of have to figure
out what you like or what kind of look you're
going for and then pick the brushes from there. Just go through every single
brush that they have. Again, I would love to
showcase my other class, get to know your digital brushes because that one I
really go through extensively brushes
and how I choose them rather than doing
that in this class again. Okay, so what else do we have? And then we have charcoals.
So these are really great. Let's remove all
that. So let's see. What do we like in here?
That's pretty good. Four B compressed. What's a little darker,
six B compressed. That's pretty good,
too. Vine charcoal. Oh, that's nice and smudgy.
I like all of these. That one's a little
bit more I don't know. Carb and stick. No,
I don't like that. I love all those other
ones. Charcoal roll. Uh, is that okay? Block. I don't think
I'm gonna like that. But all of those
pastel ones I love, but I feel like we don't need all of them. I
really like this one. Maybe. I can't decide. What was that? 02,
three, one, two, three? What was that one? That
one felt pretty good. Then the vine charcoal. Yeah. Maybe take those
for now. What was it? This one's really good?
No, I prefer this one. Okay, so it was these two, the vine and the 60
that I preferred. And I'm just doing this
quickly. Duplicate. Okay, so we'll have
something to work with. So I'll bring those over
to my favorites folder. So we have those. So now we have like
sketching brush. We have some pastels to do some nice shapes
and backgrounds. We have dry ink brushes, and we have some
fun here's an ink out I don't even know where
that one's It's more, like, painterly.
That's interesting. Is that down here in the paints, painting? Yeah, we
haven't gotten there. So yeah, there's all these
to go through with paints, but I almost I almost
don't want to. Yeah, like, a painting brush. Not really into that. They're
a little bit too smudgy. Can't get around that. Maybe here's guash. That does not look
like quash. All right. So those are my favorite brushes in the Procreate set.
Let's go back to them. I love HB pencil, six B pencil, the six B compressed charcoal, the vine charcoal,
the Bobo chalk, dry ink, Ica evolve,
artist crayon. Looks like this also has
that, like, pastel color. No texture, I mean, Eagle hawk to give, like a little bit of
painty texture, sticks. Again, like, paint texture and thylacine to get
some stripy action. So again, just go through
and see what appeals to you. And yeah, we got
to move on because we have so many brushes to show. The next person that I want
to showcase is Shelley Laslo. She has amazing brushes. I have I think I've purchased every single one of her packs, and I think they most mimic the textures
that I like the most. Out of all of her packs,
I have several of them. These are the ones that I like. So these aren't from one pack. They are, unfortunately, from, like, all of her different ones. And here, I've given my
paper an ivory tone. And we can go and look at
some of her packs, let's see. The Inspiration
studio beautiful. Messy brush. Right, eight. I just I love them the
most. They are my favorite. Switch softest water.
This one's beautiful. It's just, like, so subtle. And different brushes
work in different ways. They layer up differently. So fun too. Um, check out. Alright. After okay, let's, That. I want to showcase one of our artists here
from Skillshare. We have Esther Nariyoshi
who does brushes, and her brushback I have
her sketchbook Essentials, I think it was called, yeah. And this one's great
because you get, like, a whole pack to be able to create a
traditional digital work. So here's a nice textured pencil and a liner that has, like, some textures so
you could do, like, line work of your figures. Let's do, like, a
really nice person. Wow. Some quash. Wait. Some gouache to do some shapes or,
like, a background. Then we have pastels
to layer on top of that or just crayon again, like, more textures
that you can test out. Melted butter. That is, like, a really nice name. Marker juicy and scratchy. Yeah, like really starting
to dry out kind of thing. You go figure out, like, how you would use that. A tree maybe would be awesome. And then a juicy marker. Yeah, so you can get those
outlining shapes of items. And they layer like
a marker does when, you know, when it gets more and more opaque as
you draw on top. And then remembering,
yeah, you can go back in with a different and to, like, get the shape. So this is what we're
going to be doing in the next section is
figuring out how to use them. So I just want to showcase some brush packs
that I really like. So that's Estonario's brushes. I will link them in
about section somewhere. We'll find it. I want
to also Lisa Glance, who's also a skill
share teacher here. Is an amazing brush maker. She has ones that are, like, for watercolor,
called aqua real. Um, they are very realistic. Like this bloom accent one. Like what? So pretty. Or there's even stamps
to use, like, a Neat. I feel like drawing
digitally watercolor, it's like a skill on its own. You kind of have to figure
out how to do that. But, look at this
with the edges look exactly how watercolor dries. I don't know how
they do this when they create watercolor brushes
or any brushes, actually. Here that makes the texture
of cold pressed paper insane. So she has amazing
brushes as well. This is her watercolor pack, but she has a quash pack. She has other traditional
more digital ones, so definitely check
hers out as well. I mentioned with Rebecca
Green, the Vivi brushes. I don't have her packs, but check those out as well. Next step, we have Bardo Bush. She's also a skill share teacher
and amazing brush maker. I think I have one of her sets, the pencil box one, because I really like pencil textures. So again, let's create
a new look here. And these are really fun,
like extra toothy pencil. And these ones are
really fun to, like, no. If you want to get a
background that has that like, hand drawn scribbled
in background. Like, this makes it
so much quicker. Look at that. Like, it's already done. Imagine doing that on paper. That would have taken
1 million years. There's even a bigger one. Like, if you really want.
Look, how cool is this? Blows my mind. There's even now, why won't it I need to,
like, press harder. Like a curly one. I love this. Like, imagine for a character with curly hair, how cute that would be. Yeah, so amazing
brushes as well. And then last but not least, I would like to showcase
Max Max Packs brushes. I also purchased his
watercolor brushes, and they're also really
beautiful and realistic. And the pack that
I bought is huge. It's like, I don't know.
There's so many to choose from. And they have a
watercolor look that I really like. Look at this. Like, it changes
color as well as if, you know, like when
you pick up color, traditionally, maybe the palette
has another color in it. It's just incredible. So I really just so fun to highlight all of
these amazing brushmrs. But it takes a lot of
work to go through all of these packs and pick out
the ones that you like. I have so many different
brush libraries here, like favorites from Procreate. I have my favorites from Shelly Lazlo
that I put together. It's just easier than going
through all the packs. Now, here, I have, I don't know, 25 or something of her brushes in one place that are my favorite
that I've gone through. Or I have, like I
didn't mention her, but Asia Orlando also
has amazing brushes, and I purchased, like,
all of her packs as well. But then go through and pick out just the
ones that I really, really like it's overwhelming
to have, first off, like 50 different brush packs to go through every
time you need a brush. So I highly suggest creating a library of favorites. Yeah. And then I have a favorite here. I don't even know
where those are from. Now, this seems to
be from Procreate, so I've already done that. So that's my other
collections for Dundan. Alright. Digital brushes
are the best. We know this. I hope that I have inspired you both to check out Procreate's
brushes. They are amazing. And maybe you want
to check out a few of the brushes
from other artists. I will make sure to
link everything. Some of the links
might be affiliates, but most of them are not. Okay. Enjoy checking
out digital brushes.
6. Tips and Tricks: Oh. Alright. Now that we have a collection of our favorite brushes
and we're ready to go, I just want to share with you
my best tips and tricks for making your digital artwork look a little bit
more traditional. So let's jump into that. Alright, my friends,
now I'm going to share with you all of my secrets. So these are gonna
be little tips for how to make your
digital artwork a little bit more traditional. And the first thing
that I want to share is digital papers. And these are magic. I do not know again, like I didn't how artists create digital
brushes that are so amazing. But I certainly do not know how they do this
witchcraft to make a digital paper that
makes your work look like it's drawn on paper
for real. It's insane. So I would like to
showcase first, Lisa Glance has digital papers. So this is one of them. They come also in a pack, something that you can purchase. There's different kinds. So maybe a texture and look appeals to you that doesn't
appeal to me, vice versa. So I have put I'm showcasing Shelly's
favorite brushes that I have picked out. These are the textures that
I really like at the moment. And this is This was
Lisa's OG magic paper. And I'm just going to
turn off the paper. When you get one of these, it has lots of different
layers that have different um adjustment layer
I don't have words anymore. They have different
adjustments on them and different opacities and somehow it gives them textures. But
let me just turn it off. You can see how the
brushes feel more flat. They don't have as much texture, but then when I turn them on, all the texture of the paper
brings the brushes to life, which is really interesting. Another tip that I
mentioned previously is to tone your paper a little
bit so it's not white. So here you can see the
paper is slightly off white. Like cream paper, which I find really nice
to work on top of. Let me showcase some other
papers and textures. This is Lisa Glans'Guah
smooth paper, and then you can see that it has that traditional
watercolor look. Again, I have it in a toned
light ivory, off white color. If I turn off the paper, you can see again the
brushes still have amazing texture
and gorgeous look. But when you turn it back on, they just give that extra
oomph. So stunning. One thing to know
if you are sharing your work just online
like Instagram, these kinds of background
textures are really nice, but maybe you would have
to test print to see how that paper texture
looks when printed, like, for a book or
something because it might look dirty. But those are
effects that you can adjust within the papers. To adjust that so that you
can make it your own as well. Also, I also have papers. If you purchase brushes
from Shelley Laslo, then those packs come with a
magic canvas or magic paper. So the sh brush, Brush pack comes with
this lush brush paper, and it's really beautiful. Again, I really like
it has kind of, like, speckles and natural look to the paper, which
is really nice. I can turn off the
paper again so you can see what it looks
like with and without. And, again, like I told you, it looks really beautiful
without and then with it. And again, you can open
it up and remove things. Like if you don't
like all those tiny specks that's in the paper, we can remove those. The paper texture,
if that's too much, you can kind of remove that, but that really did
a huge soft grit. Like, so there's things
that you can go in and adjust to make it look exactly
like how you would like. So I really like that one. But I think my favorite from her from her inspiration
studio brush pack. And this paper, I
think it has again, it's very similar
to the other one. I almost don't see
the difference, but maybe it has a little
bit different texture. I really like all those textures
and fibers in the paper. I think it's really beautiful, and I think that having the the speckles and things
really feel special, and I really like it, again, working on a tone color. So those are my first
steps for making your digital work look really traditional is
using magic papers. But moving past that, if we work on this one, we can use our procreate
brushes so that it's fer. We can if we're a few other tips are
like work how you do, usually work on paper. So if you're creating
a digital sketch of something, what
should we sketch? Like an apple? I keep it simple. So just do sketch
like you normally would and kind of forget about that you're
working digitally. So maybe you created your sketch and you want
to go in and paint it, so maybe you would
erase a little bit. So using maybe a chalky brush. So kind of like eras, but not erase very much, so you still can
see your sketch. Like and leaving your
sketch is a way of making it look like it's
real. So that's one tip. And then I highly suggest
working in layers. You can remove stuff. But otherwise, you could just work on one layer, but
that's kind of insane. Defeats the point of
working digitally is having lots of
layers so that you can adjust things really easily. So working on a different layer. We still have that sketch as
if it is stuck to the paper. Then we can move in
and give some color to this apple and make it I
don't know, really yellow. Like, seeing that sketch
there is really nice. I really like that look. Then this other one, we need some other chalky bits. Do you give that apple
some more color? We need a little bit
highlight, I guess, over here. And then we can move back into when we have another layer and have the maybe the
pencil as a stem. We need some kind
of brown in here. Yeah. And then maybe, I don't
know if you're like, an outliny person, but adding
some outlines to things. Yeah. Thinking about how you
work traditionally and just doing it
digitally and in layers. Those are my biggest tips. I know that it's not
revolutionary, but it's all right. To recap, I highly suggest
checking out magic papers. I highly suggest trying to mimic your artwork like you do on paper in your digital
artwork, the same process, having a sketch, trying
to erase it a little bit, but keeping it so that you see
the sketch in some places, especially if you use a
color that mimics graphite, a really nice grayish color, this looks just like pencil. Depends on what kind of
dark pencil you're using. Let's see. Yeah, maybe
more gray like that. Also, thinking about using your eraser in a way that feels mimics how it's
used in real life. So not erasing perfectly. Like, maybe you can't quite
get rid of your sketch, or if you're erasing parts
of your other sketch, like, it's waits It's not perfect. Those are ways of making
your digital artwork look a little bit more
traditional. And, yeah, that's it. So those are my very
simple but effective tips for making your artwork look a little bit
more traditional.
7. Traditional Artwork Studies: I know that you want to get
started on the class project, but I just have one more
section where I want to talk about doing
master studies that we can really study
other artists work or your own work from your
sketchbook and try to mimic that digitally so that
we're really building up our digital traditional
digital drawing skills. So let's do some quick studies. I will show you what
I have gotten up to. Now I want to share some of
the studies that I've done. I've done studies
of my own work. This is an example of that. I took a photo of my
sketchbook of a sketch that I really liked that I had done in pan pastel and colored pencil, and I tried to mimic
that in digital. Now, I mean, here I'm using the Shelley Lazo studio
inspiration studio Canvas, and I am using her
brushes as well. I do, yes, think that it's mimicking the traditional
look really nicely, but it is a lot cleaner
because I have the ability to work clean in
the digital space, so then it becomes cleaner. But I mean, it's something
you just need to practice on. I'm not sure which one I
like or prefer better. I think I like the one in
my sketchbook a lot better, but the one here in
Procre is really nice. I can try to showcase
what I did here, which will be difficult. But as you can see here,
I have different layers. I have the shadow underneath
the figures one layer. I have all the spots of her
body in digital pastel. And then I have linework for
the background and her eyes, and then I have her hair and the details of her
dress on another layer. So I don't have
everything on layers. But yeah, it's fun to see
how something comes to life. The Let's see, what kind of brushes did I use for that if I go into my Is it this one? At the silky pastel. I assume it's this silky
pastel that I used as the background to
mimic pan pastel and then her great eight B
as the colored pencil. Again, I showed you that
Procreate has really good ones. So that's an example of how I have taken a photo
of my sketchbook. You can have it just to the
side or you can bring it in to Procreate like this. So if it makes it easier
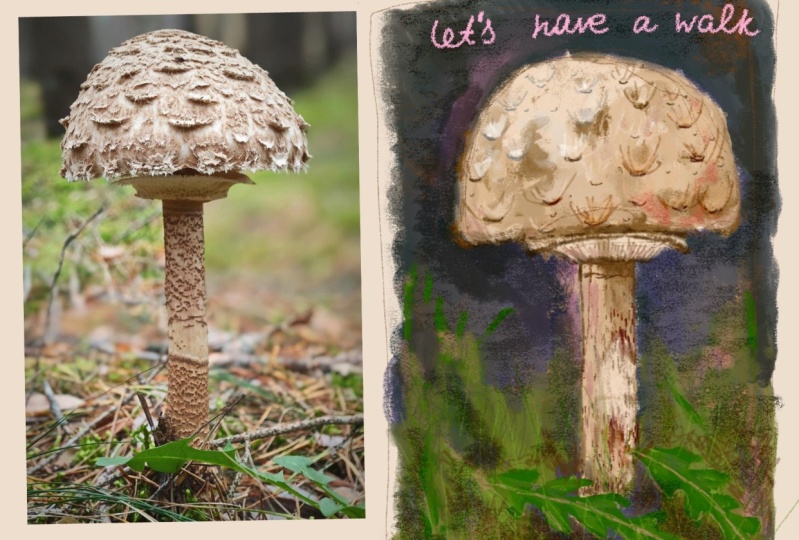
for you to really see I did another example. He did a master study of
Rebecca Green's work, because, again, I just
think her work is so textures and beautiful. And I follow her work online. So I've seen her process many
times and how she paints, but it's still really difficult
to try and mimic that. So, again, I have a
photo from her blog with a picture of her artwork. And I tried to
mimic it over here, and I think I did
pretty amazingly, trying to figure out
different brushes and techniques of layering
and trying to mimic her work so that I could get more comfortable with creating these
kinds of textures. That's what I'm
mainly interested in. I don't want to copy her style of drawing these beautiful
little creatures, but it's something about
the layering of the colors. Like, I really like what's
going on in this corner with the bluish gray on top of the like mauve pinks and
the paint and things like that on top of each
other and trying to get something that looks
really juicy and luscious. Same thing I did over here, pretty bad study of this beautiful artwork
that you created. There's just so much lovely
texture in there and trying to figure out how to
get those kinds of again, what kind of brushes? What kind of layering can I do and then also think about what I like about that,
what I'm learning. Like, I don't want to be if I could wake up
and be Rebecca Green, have her talent, that
would be fine by me. But I'm me and I need to
focus on what I like, obviously, and I like
what I create as well. But thinking about that
while you're copying another master of illustration or painting or whatever
is drawing to you, thinking about what is it that I'm trying to take from
our artwork and maybe it's not always about boon
copying every single stroke, it's finding the
look that I like. I feel like I found that. The only problem when
you're doing this and you're working quickly, I have no idea what
brushes I use. So I highly recommend
maybe doing some notes on the side, like, have swatches of your
brushes that you use for that piece and write which ones they are because going back, I really not sure
which brushes I used. Again, I'm pretty sure
I used the shelly one, so I could go in and be like, now, which one was it? Which one was I using
for the painting? No, that's maybe some
textures were using that. Wet colored pencil? Maybe a little bit of that. Mm. Anyways, see? So
that's a problem. So I highly suggest
taking notes so that you can come back to what you're doing and
remember what you did. Alright, so then moving on. Choose an artist or two that you really
admire and pick out an artwork or two and try to mimic some of the textures with your digital brushes
that you're using. And try to mimic those looks
with the brushes that you have and see if you can create some of those
looks that you like. And you'll probably learn
something along the way. That's what I usually learn. See here, I've done
the Let me I just saw I have turn this way, I have swatches of the paints. So it must have been was
I using the lush one? No. Quash. These ones. I was using these. No. There
we go. I'm finding them. I was using her gouache
set, Layer Love. That's this one. That one? Oh my God. Chubby? Is this one. Mm hm. Yeah, Watery Guash. It must be this one,
right? Watery quash. I think that's what I
was using to create all these things
in the background. It's good to know.
Okay, let's move on. And this is another example of work on the right
is something from my sketchbook that I created with traditional media such as paint and pastels and colored
pencils and oil pastels. And then I've started to mimic those kind of
textures in digitally. But that's what
we're going to be doing for the class project. So let's just jump into that. But here's a little preview
of me testing out some stuff. In the next section, we're
going to be starting on the class project finally.
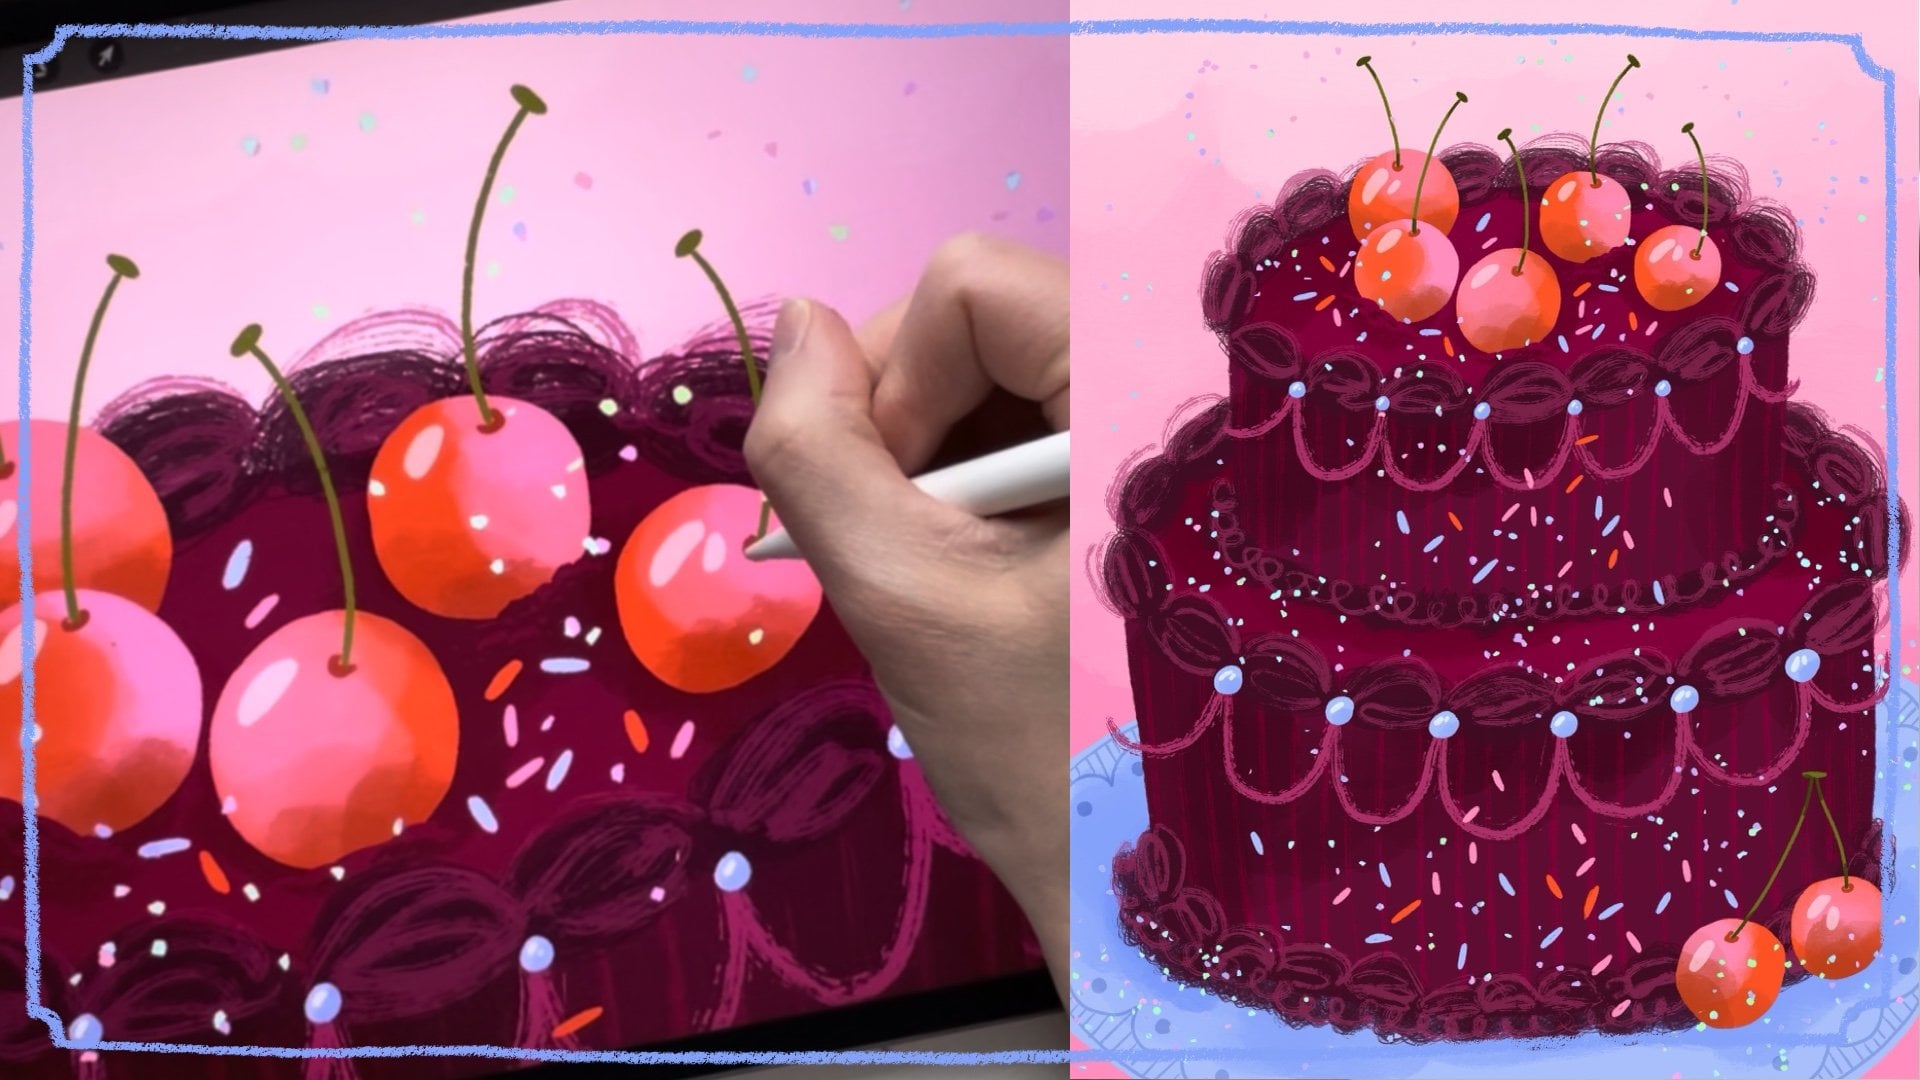
8. Project: Sketch: Alright, finally, we're gonna jump into the class project. I'm going to share
with you some photos of mushrooms that
I took this fall, and we're going to
be illustrating them together with our
favorite brushes and our digital traditional
techniques and to make a traditional digital
final artwork. Good grief. That is
difficult to say. So in the following sections, you will follow
along my process of bringing a illustration
to life in Procreate. Alright, yeah, we're studying
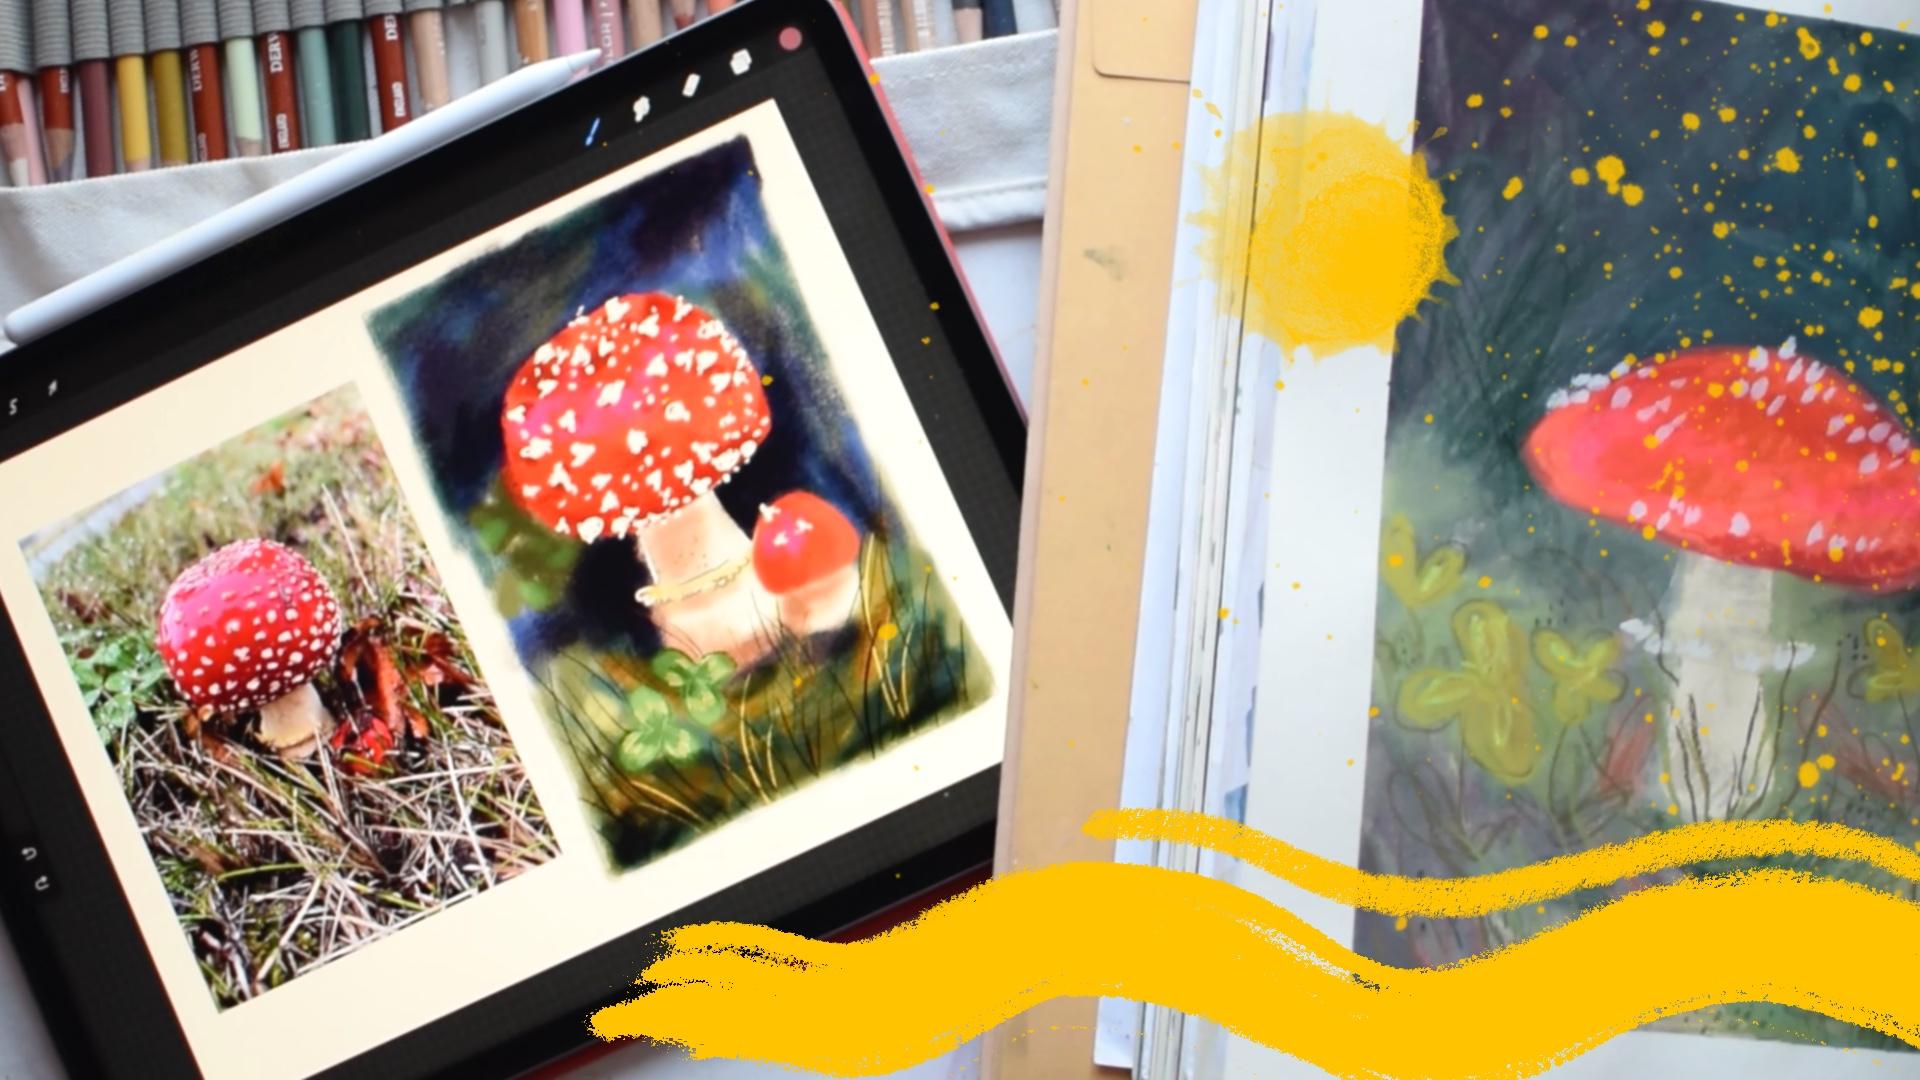
on the class project. I have made available
three photos that I took of some In Swedish,
they're called Flugswamp. In English, they're
called toadstools, right? They're very quite
poisonous mushroom, but they're very pretty. And so I have this
one to choose from. I have this one, as well. And this one. I think I'm going to choose the first one has the most
focus on the mushroom. Feel free to do as much of the image as you'd
like with texture, but I mean, like, this
is just a reference. That's a whole class on its own. So yeah, let's jump
back into Procreate and we will create a final
artwork in here. Let's jump into this. I'm going to use my Shelley Las studios
Inspiration Studio Canvas with specs it's called.
That's the full name. And I'm going to take away all these amazing artworks that we created because we
don't need those anymore. Let eat. I have the brushes here. We don't need those either. And again, you have
to make sure to draw underneath the paper textures, and it's a good idea to lock, like I have here to make
sure that that's locked so you don't manipulate
the textures in any way. Just leave them and just
draw underneath it. If you draw on top of it, then it won't have the effect. That's just how that works. So we need to bring in the photo because I'm going
to make that easier by having the photo
here to reference in the canvas and we'll
make a little artwork. So I'm going to start off by
creating a pencil sketch. So I have my graphite color, and I'm going to we'll use
the procreate brushes, so I will take the HB pencil, and I'm going to map out like a little panel here.
For us to work. As if I'm working kind of like in a page in my sketchbook. And then I'm going to draw
my mushroom as if again, like, I'm just how I would draw on paper just
to map something out. There's a little baby mushroom here that you can hardly see, and maybe we should bring that
out because that is cute. I took these photos on a morning walk home from
dropping off my kids at school. There we go. And then we have all
these grasses that we can remember to include a little bit of that just to
mimic a little bit. There's some cute clovers. They're in the background
here, which we can keep. Some texture, but we could bring a couple clovers
into the foreground just because why not? So that I feel like
has a nice look, and then I want to just
blur out the background. And now when I'm
seeing this, like, it looks kind of kind
of too far down, so we're going to
use the magic of procreate and move
it up a little bit. So yeah, that would
be annoying on paper. You just have to yeah, deal with it or erase everything and move on. There's our sketch. And then, again, if
we like the idea of keeping the sketch
as a part of our image, so it feels kind of like
it was drawn on paper. Then let's do my
erasing technique that I'm just going to erase
some of this rather than, you know, you could use
the magic of Procreate and reduce the opacity
of your sketch. This kind of feels like
cheating. I don't want to cheat. I want to give you
these tips for how to make it look kind of so just give it a
nice, like, erase. So some of the bits, like if you really tried really hard to get those away and
leaving some of it, and then we can leave this. That looks amazing. It's a great sketch and all
we need to get started, we could add in, like, no, I'm not gonna add in
leaves and stuff. I just wanted to focus
on the mushrooms. I think that would
be great. Alright. Wow, that's it. We got started.
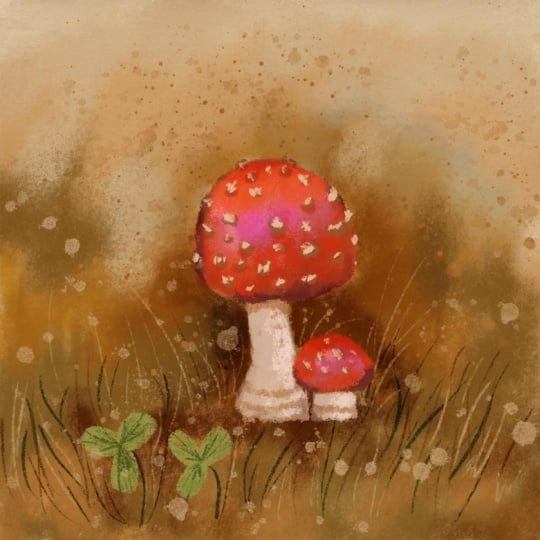
9. Project: Color: Right. Now that we've
gotten our sketch finished, it's ready to put on color. And because we are
working digitally, we want to make our
life better and easier. So we're going to add
a new layer so that we can adjust things
if we wanted to. Let's see what should we go for for I'm really into the
pastel look right now, so I'm going to go with
either the vine charcoal and the compressed whoops compressed six B charcoal,
something or other. So we'll start with
the vine charcoal. And in this image,
it's very green. Obviously, it's in the grass. I really liked with
my other image that I showed you
from my sketchbook, I had decided to make the
background much darker, and I think that will really showcase the mushroom make it pop more, so I'm
going to do that. I have this color
palette that I've named Adelina, and we
can start with that. So I'm just going to start
putting in and trying to think about how I would
work with other materials. Like, I would put in some of
this color and try not to get it on the mushroom area and then switch
colors to kind of, like, blend together
different looks. With the Apple pencil, you can rest harder and
lighter so that you get different opacities
of the brush, so you can make it really light or you can make it really dark. So remember that. Yes. I'm just trying to get some
variation here. I different greens
and blues to mimic a background that's kind of It's okay to go over
certain things again. Can do a lot of this green. Okay, now that we have that, I'm going to go back and choose some other colors to
kind of blend that in. There's some bluenss over there in the corner that's from, like, the sidewalk, I believe. We're just mimicking that. It's nice having
different variations of color so it doesn't
become so flat. That's one thing that
maybe is easier with traditional work because you have different colors, paints. You just have your whole
palette that's wet and you accidentally kind of
press pick up colors. With digital work, you have to be you have to
think about that. So if you're going to
take different colors, you have to think
about doing that. Let's see what's this
weird green I have. Yeah. So like a warmer
green could be nice. I can even start to
place in these clovers. Just kind of I'm doing
this kind of randomly. Kind of looking at my reference, which areas are kind of darker, but it's kind of all the same
in the background there. I would like more
of this light color in the front or this
warmer color in the front. So there's a difference between the background and
the foreground. So the foreground, I'm thinking should be brighter and lighter and warmer and the background
can be cool and darker. I'm just going to
bring in this chalk. O Okay. And then we need some
variation of the colors there. So yeah, even warmer. My make some of that, like, dead grass that's going
on in the front. Let's see. That was that one? Maybe. Is this too light? Maybe. Maybe just some sections
of a little bit lighter. Going back maybe a little
bit of the cool down here, just to bring it all together. Again, just kind of random, kind of thinking
about those brush not those brush strokes. The brush strokes mimicking
kind of the grass. And this is just
the underpainting. So then when we go in
and put in more details, it will make sense later. I also want to bring more of that dark blue because
I really like that. Let's see if we
test another brush. Let's try the six B compressed and see,
Oh, that was more. That was too intense.
Let's make it bigger. Yeah. Just give, like, even another texture. Ooh. So I like that, and giving, there's a lot of darkness here, but behind the mushrooms. And that was going to make
those pop really well. And then maybe even, like, down here by the foot
of the mushrooms. Okay. Something look good. Alright. On a different
layer on top of that, I'm going to start
working on the mushroom. So we have the what's it called
the foot of the mushroom? M just trying to get different colors there. It's kind of warm. There
needs to be some darkness. We go back to the other
one, the vine charcoal. It was kind of more
precise, I guess. Okay. And then we had that
the it's like a skirt on the foot of the ug
swamp toadstool. Go getting some shadow in there. Again, this is my underpainting, and it's kind of messy, but we will bring in the
details later in the final. Okay, so then we need
the red of the tops. And this I'm going to do quite
a little bit more full on. Still gonna use that pastel. We can test out another.
Like, do we have another one that we
like? That Eagle hop? What does that look
like? That match? I don't know, does
it feel too pinkily? I kind of like, Oh, I like
that brushroke there. I get that. Okay. That's interesting.
I'll go back to my charcoal and it's
almost pink at the top, so I'm going to
bring in some pink. The shine spot is quite pinky. So I'm going to
bring that in. Oops. See. So nice with the double fingertp to get
rid of that undo button. And then we need some
shadow of the red too to bring that make it
look more three D. A lot of shadow down here. I really like curves in. Shadows up here. Mm, do this other brush again. Pick another red, maybe
a little bit brighter, kind of mesh these together. Give some highlights
to that one. Okay. What else? I feel like those
clover, yeah, clovers. I kind of lost them. So I want to go back
and this one, maybe? No, the other one.
I like that one and bring those back
a little bit more. Can't see my sketch anymore, but I'll just make it up. Oh, yeah, and then
it's underneath that. So I want it to go over. So I will bring the
clovers over so I can overlap the foot of
the mushrooms there. So like that. Maybe just a little bit of just like a highlight
of green to give those some life there.
Does this look nice? Like, it's getting there, has a lot of texture.
Which I like. And it does have that
traditional feel because of all these
juicy pastel looks. But, I mean, there's
so many different styles that we could have done. This is very pastel. I'm gonna pretend
like I'm drawing in pastels with colored
pencils on top, but you could choose to make it look like you drew
with watercolor, only or watercolor with oil
pastel on top, or I mean, there's so many different
ways of creating art, it's completely up
to you, obviously. So that is my underpainting
finished. I think so. We could you could
always do more. I mean, there's
lots of browns in the image that you could bring
in to bring some warmth, but I feel pretty
good about this. In the next section,
we will finish it all up with all
those juicy details.
10. Project: Details: All right. Now it's time to add all the details so we can bring this illustration to life. So again, we want a new layer, and I'm going to use
this six B pencil, and let's check the thickness. It's too thin, I feel. Something like that? Does
that feel good to me? A little bit more. There,
I feel like that's good. Okay, so I want
to define some of the grasses down
here in the bottom, and I want to bring the
clovers out a little bit more. Let's see. What kind of green? That green, I want a
little darker version of that green so we can go into the clovers and really almost
I don't want to completely. Like I am kind of completely
giving them an outline, but give them texture there. Mimics. It What clovers look like? They have a lighter
section somewhere. Do that. So like that. Then darker or the little
there little stems, and then yeah, we
need to bring in some We had to bring in some linework for those grasses in
different whoops. Try some of this er color. Need something
maybe even lighter. What does that look like? Let's give some
highlights to those. Some of those grasses
are really light. Does that look good?
It's quite intense. And then even darker
green that's even darker, almost black could bring in. Very black. And again, there's so many
ways of creating artwork. If you want more shadows, you can go in and, like, make sketchy shadows of different areas to bring things out or
highlight something. I don't really like that, but I just wanted
to show you that. Again, we have different
brushes that we can use to try and more shadowing if we didn't feel like we didn't
get enough contrast in here if we just need some
more of that, keep going. Um let's see. I'm gonna continue with a
60 pencil and see what I can get with that I can test out different
sections. Like this. Just wanted to look
a little bit more like bit more realistic and textured and something's
going on here in the foreground rather than
just all melting together. And then I can do another layer and we can start to give the
mushroom some definition. So I want to give it Let's see a little definition here on
the side with the skirt. I kind of like how the
little mushroom is a lot less softer and kind of
melts into the scene. It's it's not as
important as the big one. Those lines were quite light, so I definitely need some
darkness in here, too. Um, there's some, like, texture on the the
mushroom, work on that. Mm. I like that. Don't It's right. Defining definition there. Um, yeah, you could work on
that navy blue, like if you wanted
to make the side of this a little
bit more defined. So everything isn't so
squishy and So that is, like, has a nice edge there. That's kind of nice.
I'm going to put the white speckles
on its own layer. Let's see what we can
we use to make those? We have the dry ink. That feels like it would be
good if we had something that looked more like oil pastel, something that's
really, like, chunky. We could quickly see if we have something that looked like
that. What would that be? Trying? Painting?
Those are too painty. Inking? No. Sketching Oo pastel. No, that looks like dry pastel. Oh, well, Babes, let's see what does
this look like? Kind of kind of gives the I just want spots
that are really, like I want spots that are
not so perfectly defined. So let's see what this Ica
brush does. Yeah, Inca. Okay, so we're our new layer. And yeah, see. That looks neat. Then there's smaller ones, and they go all the way
down here to the edge. A little one has just a few and then we can go back in
with a pencil and maybe make some of them
because some of them became quite like
the same shape, and I don't want them
to look like they were made with the same,
like, shape brush. So we go in with
that. And then you can also make those really small little speckles that
are in there as well. There's lots of
speckles on the top. What fun is this? I think
this is really fun. Okay, so now we've
given our mushroom, some spots, and it's quite nice. It feels like a
hand drawn sketch. Those we could give a little bit of shadow to those
underneath the spots. No, that doesn't look good. It would have to
be, like, on that. So let's see if we
take the charcoal and we take that red, but we do a little bit darker. Like, it's too big. Like, slight shadow
underneath some of them, just to make those kind of
feel like they are sitting on top of the rest of the
mushroom. That looks nice. And that would have been kind of impossible to do afterwards, after creating in a
traditional artwork. So that's another
thing just like, Oh, we lucked out by using digital
instead for this piece. And I want to go a little bit more of
that pink in there, too, give some more of
that highlight, 'cause I like that some
pink on here, too. Button. That's pretty good. And yeah, shall we call it? It feels like a nice it feels like a nice digital
traditional sketch that mimics the look of pastels and
colored pencils that I would do similar in my sketchbook. We got one more section, and then we're done with
their class project.
11. Project: Adjustments: Alright, we're finished
actually with the artwork, but since we are
working digitally, I just want to give you
a few tips for how to use this digital tool to
make some adjustments, possibly, if you
needed to do that. So one of my favorite things with Procreate and
working digitally, I love using the soft
light adjustment layer to give some extra shadows
and depth to my artwork. So to do that, I would choose a I don't like to go completely black,
but I will go, like, charcoal black, choose a pencil that
has nice soft texture, such as this six
B compressed one. I'm going to make
sure here we press N and go to soft Light. Again, I have another
whole class about this. It's called It is called shadow and Light in Procreate,
so you can check that out. But I just want to show
this my favorite way of just quickly you can
add shadows to things. As you can see, it just darkens that color without
it's not black. So if you just want
to darken some areas without having to switch
your brush color, see, so I can just, like, go in and give some definition to some
areas or a lot of areas. I can make my brush bigger. Like this whole foreground, I wanted it a little
bit darker or the dark around the mushrooms
a little bit more. It's just a really
incredible quick way. It's my favorite thing ever. I can just turn that off quickly just to show you how much of an impact that
easy thing does, see? Just I instantly gave it a lot more contrast and depth.
And I really like that. If you want to adjust colors, we did put a lot of things
on different layers, but I didn't put every
single color on a layer. But here, for example,
you can choose the mushroom layer and you
can go to hue saturation, and we can adjust it like that to make it
slightly different. But that changes the
entire mushroom, so it usually doesn't
work very well. But if the red color was just slightly off
and you wanted it more pink or a little
bit more orange, that is a quick
way of doing that. You can otherwise also you
can make this alpha lock, that section and you
can paint over it. Here we can choose a
pink brush again with your similar kind of and you can just paint
over that section. And change the colors
like that more manually. And again, would you took away your highlights and things, so you would have
to go back and do the highlights again
in that new color. But it's way faster than
starting all completely over. That is another tip
of how to do that. If you again, so I can show you that in
the background as well. So you have this background, you press Alpha lock, and then you choose new colors
that you want. Like, if the background
was a little bit too blue, maybe, we could go in with,
let's try this color. What would happen
there. So make it a little bit more turquoise. Because it's alpha lock, like, you can go off the screen,
you know, like that. Just go back I liked
how it was before. And the same thing with these
brush strokes in the front, you can alpha lock those. And again, if you thought
that maybe they were too dark or light or different
wrong color here, I can make them purple
to give them like a purple edge to all
of those it's neat. I just wanted to share
those quick tips of how you can adjust. Make some adjustments to your digital
traditional artwork, if you want to recolor, if you want to add
some simple depth and extra contrast and
shadow to your artwork. I hope that you found
those tips helpful. Let me just get rid
of those because I don't like that. Is that good? Is it back to
normal? I think so. Alright, so that's it. That is the project finished. I really hope that you have learned a few things
in this class. Lots of tips and tricks that you've been
inspired to create, more traditional looking digital artwork. It's really fun. Either this is just for you, maybe it's just to make some sketches that you'll
send to clients or what? See what you decide
to create with it. Or you just want to get more and more comfortable with Procreate. It has been a pleasure
having you in class. Wow.
12. Next Steps: All right. That's it. We are done with our projects. I really hope that you have
had fun in this class. I just want to mention
a few next steps so that you can keep this digital traditional
procreate thing going. The first thing
is to keep going. Obviously, if you
discover new brushes, test them out, see
how they layer. See how you can mimic some of your traditional artwork if
you work in a sketchbook. It's really fun to try and get as close as possible.
At least I think so. And then just try
out different looks. You can do more master studies. Remember, it's totally okay
to copy other artists. As long as you're doing it
for educational purposes, you're not claiming
it as your own work, and you're not
selling that artwork. You're also not trying to
steal someone's style. You're just trying to learn a few of their techniques
and maybe bring one or two things to your own artwork and
continuing to learn. You don't want to become
somebody's copycat. Really important
for me to say that. But the same time, I learn so much from other artists and
looking at other artists works and how they layer and how they use different
textures and their colors. So it's really important and I think it's so fun to
do little studies. I always learn, I always learn something new to bring
to my own art practice, I usually also always learn something that
I don't like about that artist's work that also is good to know that I don't want to bring to
my art practice, which is really interesting
and really helps you to grow your art and your
skills faster, I swear. Maybe you could set up some
goals to once a month to create a new digital
traditional artwork to share in your
portfolio or online, such as on Instagram,
maybe once a week, if you feel like once a month is too little, it's
totally up to you. It's really fun and
important to have personal projects that you're working on. I really like that.
13. Follow Me on Skillshare and Beyond: Alright, that's it. Finally,
we're in the last section. I want to thank you so much for taking this class with me and learning all about digital traditional techniques
in Procreate. I can't wait to see all of your mushroom illustrations
in the project gallery. So please be brave and share those with us so we
can give you a like, so we can give you a comment. If you have any questions
at all and would like some Nice feedback, please let me know and I will be happy to
help you with that. If you'd like to hang out with
me outside of Skill Show, you can find me on Instagram at Kristina Hotkms or my website,
Kristina hotcuns.com. I also have a really
beautiful patron group. If you'd like to work with me monthly and get
monthly inspiration. I have two groups
collection club where we do surface
design collections. Around a theme
every single month. And I also have fun Friday, which is my sketchbook
play group, where we also work
on different themes every month to develop
our art skills. So I hope to see
you there as well. Otherwise, just
follow me here on skill share so you'll be
notified of my next class. And I also, if I'm
talking about it, I have 30 plus other classes here on Skill Share for
you to check out, as well. Make sure to go look at my
profile to see all those. Oh, and leave a review. Bye.
 Kristina Hultkrantz, Illustrator & Surface Pattern Designer