Transcripts
1. Welcome!: Hey, everyone. My name is Maggie Stara, and I am a digital marketing strategist and a serious sales funnel enthusiasts. Sales funnel seem to have this aura of complexity around them for some reason. Like you have to be this crazy marketing octopus and have eight arms, and unlimited budget, and at least 40 hours in your day just to pull off a successful and profitable sales funnel for your business. What makes this class so special is that I will be taking away that complexity and overwhelm, and you will learn the exact steps you need to take in order to create a fully functioning and profitable sales funnel from beginning to end in just a few hours. Within this class then, you will be creating this gorgeous sales funnel that will have a landing page for people to sign up to your free offer. An email sequence to deliver their free offer. Sales pages, order pages, and even more complex email automations that will allow you to not just get customers, but make sure that they receive the love and care that they need from you after they purchase, making it much more likely that they'll want to buy from you again and again. But the important thing is that you're not here to learn a few fancy online tools. You're here to learn how people think and how they feel throughout the sales process, and why they actually think and feel that way, and how we can leverage the knowledge of this to increase your sales in your own sales funnel. You will have direct access to the templates we're going to be using throughout the class that will help you to write like a professional copywriter and create pages and emails within your funnel that your audience will look at and think, wow, it's like they're talking directly to me. You will also be taking a look at how to promote your funnel once it's live, and how to measure the success of your efforts. Then finally, we'll also be going through some more advanced techniques where you will learn how to increase your sales by adding in additional paid offers to your funnel, and using additional free tools to see how your audience is using your pages, and adding some social proof and a live chat tool to your pages so that you can increase the success of your funnel. Throughout the entire class, you're going to be learning some really important principles in the world of user experience and human behavior. The role that emotion and other psychological principles will play on the creation of your marketing materials, and really, overall, just how to create an awesome and authentic and human experience for your audience throughout your entire sales funnel. This class is perfect for any existing or aspiring freelancers who want to learn how to build awesome, profitable sales funnels for their clients, or anyone who wants to learn how to do this for their own business. Even if you don't yet have a paid offer that's live or an audience to sell to, I'm going to be showing you how you can get around both of these challenges with just a few cool little tricks. Now if you're brand new to the world of sales and marketing funnels, and it's all a little bit intimidating still, I would really recommend that you check out my digital marketing strategy sales funnel fundamentals class because that's going to give you a really good foundation for the theory and the principles behind what we're going to be creating here. But for those of you who are just keen to execute, the next lesson is going to be a summary of my fundamentals class. That's going to give you a really great foundation for what we're going to be creating here today. Now, I'm going to be super transparent with you about sharing my own experiences as well as some client experiences with you. About things that have gone well and not gone well, just so that you can really learn from my mistakes. But also so that you know that it's okay that things don't go right the first time or even the tenth or hundredth time. Because great marketing is not about perfection, it's about adaptability, and that is what's going to become your superpower. Please start by going ahead and downloading the class guide in the Projects and Resources section. That's getting give you access to all the templates we're going to be using throughout the class, and additional resources like your free 30-day trial, forget response, and other tools that we're going to be using throughout these lessons. Thanks so much for being here today, guys. I'm really excited to get going. Now if you're ready, let's dive straight in.
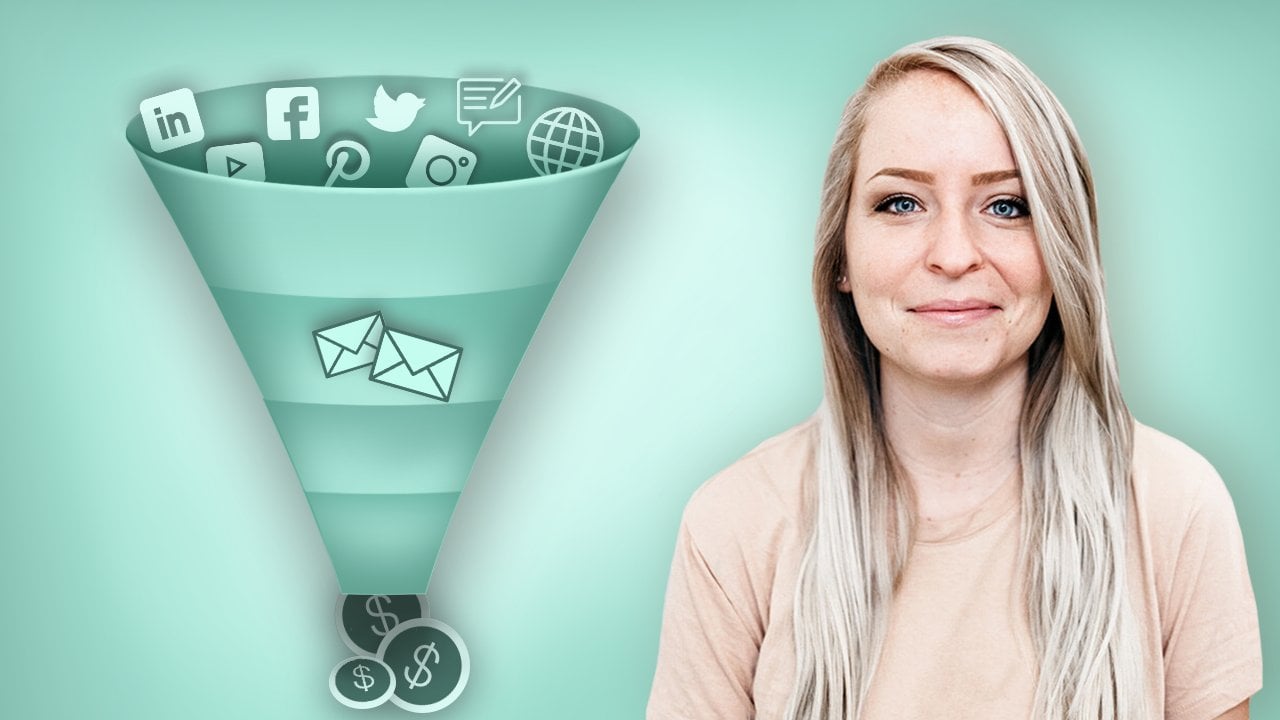
2. Sales Funnel Fundamentals Overview: In this lesson, we're just going to go over a few basic elements of what it takes to actually build a profitable sales funnel. That I would like you to be familiar with so that you don't feel like I'm speaking marketing as a foreign language as you're going through the lessons within this class. I've also included some key terms and some definitions inside of your class guide, so if you're ever listening to me and you're kind of thinking, I've no idea what she just said and what is this thing? Then hopefully, you'll find a definition and also some really helpful resources within your class guide that can help you out, okay. So make sure if you haven't already, to go to the Projects and resources tab on your desktop, and make sure to download your class guide and store it somewhere where it's really accessible for you because we are going to be using it quite a lot throughout these lessons. Now if you're ready, let's get going and figure out what sales funnels actually are, why your business needs one, and how they're structured to make sure they're really profitable. Let's first talk about why your business actually need sales funnels. Well, legendary business executive and marketer, Jay Abraham teaches us that there are really only three ways to grow a business; you can either increase the number of customers, the average transaction value per customer, or the number of transactions per customer. So effectively, you need to find a way to get more people to buy your stuff, get each person to pay you more for that stuff or get each person to buy more of your stuff. So ideally you want to achieve all three of these things with one system which is exactly where a really effective sales funnel can come into play. So when we talk about a sales or marketing funnel, all it really is, is a framework that businesses use to turn strangers into customers. The reason they're called funnels is because the funnel is wide at the top and small at the bottom, which is exactly how a sales funnel works. Where at the top of the funnel you'll have hundreds or maybe thousands of people checking out your website, and social media, and watching your videos, then in the middle of the funnel is where a percentage of these people will actually give you their email address and become a bit more interested in what you have to offer. Then by the time you get to the bottom of the funnel, you are then left with a lot less people than you had at the top, but these people are super targeted. They've not only read your blog content and maybe seen some your social media stuff, but they've given you their email address, and they watched your free training, or downloaded your e-book or guide or checklists and they really feel like they're getting to know, like, and trust you enough, to open up their wallet and actually buy whatever you're selling by the time they get to the bottom of this funnel. So all you're doing with these various stages of the funnel is you're moving your audience slowly through the customer journey of awareness, consideration, and finally through to their decision to purchase from you. Though, let's break this down. At the very top or the beginning of your funnel, your job is just to attract people to your stuff, and make them aware that you even exist. Now you can do this through writing blog posts, posting on social media, creating videos or things like appearing on podcasts, or really whatever else you can think of just to get yourself and your brand out there. The key point here is that you're not really asking for anything in return yet at this point. You don't want anything from your audience other than their attention. Only after they've actually engaged with this valuable free content, do you want to move them to the next stage which is the middle of the funnel stage where your audience goes from just pure awareness, to actually considering whether or not your business is a good fit for what they're looking for. At this point, your goal is to get them to commit to receiving more of your awesome valuable content via their email. It's still free content, but they have to trust you enough to exchange their personal email address for that free content. So you kind of wooing them, you're dating, you're flirting, you're putting in the hard work, and you're convincing them that you're the best before actually asking them to buy anything from you. Now at the bottom of the funnel is where you actually ask them to buy for me. If you've done a good job of building your relationship up until this point, they're likely to not just buy one thing from you, but to buy from you again and again and become advocates for your business, telling other people to also buy your stuff through testimonials and social proof which will really help to increase future sales as well. I think everyone knows at least one person who's that crazy brand advocate for some brand out there. The people who are going to camp out the night before a new iPhone drops just so that they can be the very first person to spend $1800 on a new phone, or the people who are dressed head to toe in Nike clothing. No matter if they're going to the gym or a funeral. That's the dream for any brand, is to have people who are so ridiculously passionate about what you're selling, that they're ready to tell the world about it, and more importantly, they're ready to buy anything and everything that you sell now or for the next 10 years. Now coming back to the three ways to actually grow your business here. In order to get more customers into our business, we need to create lots of amazing, valuable content for our audience so we can attract as many people into the business. Then we need to make sure we're nurturing this relationship with more, both paid and free quality content in order to get people to buy from us again and again like that super iPhone fan who without fail will purchase a new iPhone the second a new model comes out so that we can increase the number of transactions per customer. Then our final step is step 2 here which is to increase the average value per transaction, per customer. The best way to guide your customers through the purchasing process is by providing them offers at different price points. Now everything within the sales process is a bit of a psychological mind game which is why in order to succeed with creating the most profitable marketing plan for your business, you really just need to understand how people think and feel when they're buying your stuff. So one thing and think of it as a real life purchasing scenario here. Imagine you walk into an Apple store and the first thing they offer you is their $400 Apple care plan. Which if you're not familiar with it, it's that service that they offer on all Apple products, which gives you free repairs and assistance for your Apple products. So $400 is an enormous amount of money to think about before you've even committed to purchasing the product itself, and this is why it's not actually advertised anywhere in the store, and they don't even mention it to you until you're already handing them your credit card and paying for your brand new iPhone or MacBook, and the way they mention it is also really important. It's super casual, almost as if you're grabbing a pack of gum at the grocery store checkout. Their tone suggests that it's a no brainer, and everyone gets it, but it's no biggie if you don't want it. It's not a hard sell by any means. And at that point when you're already agreeing to pay three, four or five grand for a new computer, and they say, " Hey, do you want to protect this beautiful thing that you've worked so hard to buy for just a couple 100 bucks?" You're so much more likely to say, heck yes, I do, because your mind is already in a purchasing mode, and you're excited, and your adrenaline is circulating, and you feel like you're on top of the world, and what's another 400 bucks anyway, right? This is exactly why, whether it's in a physical store front like this, or in an online store, it's really important not just to have a bunch of products and services at different price points, but to present these to your customers in a logical order of events as they would actually happen in the customers minds. And the best marketers cracked into the system, and leveraged it to sell almost anything online, on autopilot, with this general customer value optimization framework. So the general structure of this process goes like this: first, you determine a product market fit. So this step essentially will just help to guide the decisions for the rest of your funnel because it'll help you to get to the bottom of what problems you're solving, for which audience, and how you should incorporate this language into your sales materials. Because people aren't buying your product, they're buying the transformation that it's going to bring to their life if they buy it. They're not really buying that gym membership, they're buying a better healthier body and it's really important for you to remember that. Then once you have this narrowed down, you will then choose how you're actually going to attract those customers to your offer through a traffic source. So will you be posting on social media? Will you write really awesome blog posts or create videos or maybe start a podcast? The answer to this actually lies a little bit in step 1 because you will likely choose your traffic source based on how your particular audience likes to consume content, to find solutions to their problems. Then in step 3 you're going to drive your audience to a free offer otherwise known as a lead magnet, and this free piece of content is something you will give away to your audience in exchange for their e-mail address. That can be a free guide or free training or checklist, honestly, the sky's the limit. The only stipulation is that it has to provide a crap load of value to your audience so that they want to keep going through these steps and become a customer later on. Step 4 is to offer a tripwire, which is a low cost and highly discounted offer whose entire aim is to really just turn someone from a lead into a customer. Now your aim at this stage is not actually to make money, I know that sounds really counter-intuitive. But the aim here is just to get someone to purchase something from you, anything at all, so that it makes it easier for them to purchase something of greater value from you later on. So the entire Fiverr model was built on offering a very basic service for five bucks, that would just turn someone into a customer with no real risk involved to see if they enjoyed the service, and then presumably, if they did, then they would want to come back and pay higher prices for more and more services with this freelancer. Then we get into steps five and six which is where your sales funnel really starts to actually make some money, but hopefully you're starting to see why these steps come so late in the process. Because everything up until now has been about building your audience's trust in you and your business so that when you present them with your core offer, which is the main product or service that you actually want them to purchase, they say, heck yes, it's a no brainer because you've done such a good job of developing that trust factor. So let's say that core offer is a $3,000 MacBook, and then you casually mention that you can also add a $400 Apple care package to that $3,000 MacBook, which is your profit maximizer and they say, yeah, okay, why not? So this is the whole system in its entirety, including the final step which is step 7, which is then to create a return path so that you can insure your customers keep buying from you again and again for years to come. Not all sales funnels will leverage all of these elements, but this is the framework for reducing friction within the purchasing process, and then getting the most value per customer. The key is for everything within your funnel to seamlessly and effortlessly move someone to the next step. It should be a no brainer for someone to say yes to each offer that's presented to them along this journey. For example, a brand like Apple has the reputation and the trust that they know that people coming into their store or buying stuff online are mainly just deciding on which model to buy, not whether or not they should buy. So they can jump straight into the core offer, and then use their Apple care at a profit maximizer to make a little bit more money from each customer. But if your business is brand new, you do need to develop a lot more of that trust. Or what if your business is an ongoing fee and people want to be able to actually try out your service before committing or getting locked into an ongoing service. So just to give you an example, gym might offer a tripwire, which is a discounted introductory offer for new members where someone can try at the gym for $19 for their first month instead of the usual 67 bucks. Now at the end of that month, they'll then be offered the core offer which is the $67 a month for a minimum of a six month contract. Now, when they agree to this and they're already in the process of purchasing it, they have agreed, then they ask them if they also want a discounted gold pass. That's going to give them access to relaxation facilities like the sauna, and the Jacuzzi in the gym for only an extra 14 bucks a month, right. So that's less than 50 cents a day for all of this amazing extra good stuff, and that makes it a no-brainer especially when someone is already in that purchasing mindset. Now, isn't that so much better than if that gym just said straight up, look, pay us $81 a month for all of these stuff. No discounted trial, no actual extra packs even though they're in there, but it's all packaged together so people can't differentiate that as getting a good deal because they don't see it as that. Again, it's all about just reducing that friction throughout the buying process and getting people to just commit to that extra level of payment one step at a time instead of all at once, right? So this is the kind of marketing magic we are going to be looking to create throughout this class by showing you how to actually set up the individual elements of a successful funnel like this for your own business. Hopefully, that's given you some context for just how powerful sales funnels can be, and you're pumped, and excited to learn how to leverage more marketing psychology tricks to get more people to buy more from you, and buy stuff more often. All right, and now if you're ready, let's get into it all with the next lesson, and I'll see you there.
3. Set Up and Build Overview: Over the following few lessons you're going to learn exactly what tools and offers you need to have in place in order to launch what I'm going to be calling your minimum viable funnel. Which basically means what is the bare minimum number of elements you need to have in place in order to actually launch a live funnel that's going to start making you money. And the reason for this is because I don't want you guys to waste months, and months, and months on creating something that is perfect. You'll have the perfect e-mail marketing sequence and you'll have the perfect landing pages and the perfect sales pages, but then you launch it and you realize it's just not working, because it doesn't work for your audience or whatever the case may be. Or you'll realize that it's working really, really well and those months and months that you spent building in, is time that you could've spent actually selling your offer and making money from your funnel. So I want to get you guys up and running as soon as possible with the strategy. I'm also going to be showing you how you can actually sell stuff to an audience before you even have a live offer to sell, and before you can really have an audience to sell to. Then I'm also going to be showing you how you can stalk your competitors online in an awesome and authentic and normal way that you can then leverage the strategies that they're implementing for their business, and use it to grow your own business and grow your own funnel. Now if you're ready and you're excited, let's get going into the next lesson.
4. Tools to Have in Place Before You Begin: For those of you who have learned from me before, you will know that I am not about making things more complicated than they need to be especially if you're brand new to something. Because I would argue that stress and overwhelm might just be the two biggest reasons that people fail in the marketing world. It's not often due to a lack of resources, or a lack of talent, or creativity, it's often because beginners will look at these big guys like Russell Brunson and GaryVee over here, and see some of the stuff that they're doing, and think, "Oh, my gosh, there's absolutely no way I can execute on this." Well, of course, there isn't because these guys have decades of experience, and 100 plus people working for them behind the scenes. But they make it seem like it's really achievable for anyone to do, even if they're a one man band on their own, doing their business. This is a great thing because you can aspire to be like these guys, but it's a bit of a problem for beginners because it can create that overwhelm. This was a big problem for me when I started as well. I remember tuning into the marketing school podcast that's hosted by Neil Patel and Eric Siu, which is targeted at seasoned marketers dealing with hundreds of thousands of dollars of marketing budgets a month, which I didn't know at the time. But I just remember listening to these guys and thinking, "Wow, they have so much knowledge, and this is amazing, and they've all these results." But it also reminded me of when I was 13 years old and I had just moved to Canada with my family, and I was trying to learn English for the very first time. It was basically marketing as a foreign language. I just felt so incredibly overwhelmed, and just didn't know where to start with all of these recommendations and things coming at me. When in doubt, I really want you to keep this acronym in mind, K-I-S-S. I think it stands for keep it short and simple in the marketing world, and that's how most people will break it down for you. I like remembering it as keep it simple stupid, because it just clings to my memory as a way that every single time I'm trying to over-complicate a process, I just need to keep the simple, because the elegant solution is often the simplest one. You can always build on something once it's successful, and as you learn more skills, and you learn about new tools. But, again, I'm all about trying to prevent that overwhelm because it is such a hindrance to a lot of success for a lot of people. This does go for everything inside of your funnel, but particularly when we talk about the tools that you need in order to succeed. Because I can honestly promise you that as you do more research, and you talk to more people, you will get 100, 200 different opinions from people about what email marketing tool is the best, and which landing page builder you should be using. Then suddenly, you find that one day you're paying more money on unnecessary software than you do for rent. Seriously, that sounds extreme, but my old digital marketing agency quite literally paid more for their various bits of software that they acquired over the years than they did for rent. Some of those tools actually did the exact same thing as another tool that we were paying for. It was just the case of someone at some point recommended it, so we bought it, and we kept paying for it, and completely forgot what the purpose for it actually was. Lets keep it really, really simple here and talk about the absolute basics of what you need in order to execute a simple but profitable funnel. Then I will also be walking you through what you can add, in a little bit later, to add that bit of complexity to your funnel once you're ready and comfortable in doing so. I promise you that this is the thinking that's going to prevent you from spending way too much time and money on tools, and software, or the advice of experts before you even have a business model or a sales model that works for you, and is generating that consistent stream of revenue. Now, if you already have a website and email marking platform that you're really happy with, please don't go in and scrap everything and start from scratch unless you feel a need to. But for those of you who will either be learning this skill to execute this for your clients, and they might actually be looking for recommendations of what tools to use or you, for yourself and your own business, don't have anything in place yet, or you're willing to change, then I'm going to be walking you through how you can execute a fully functioning sales funnel with just one tool, which is amazing. I'm so glad that I've come across this. But I will be taking you through a few different options out there, and I'll be linking you to these resources because I'm very aware of the fact that some of you guys will want to do your own research to decide what's right for you and your business. You absolutely should do that. You should never trust the opinion of one person. But if I went into every single possible option out there in the universe, we'd be here forever. I'm just going to go over a few, and then talk about some pros and cons, and what these tools are for. Then I'm going to talk to you about the one tool that I found that can do it all for an affordable price, which is going to save you time and money in the process, which is a huge, huge bonus, especially when you're time and money poor at the beginning of growing your business. In order to collect email addresses and sell your audience on your offers, you need somewhere first to build these landing pages that are going to help to get people through your sales funnel. Basically, these would just exist as single pages on the web that will allow someone to put in their email or make a purchase, and then you can send them your free offer or paid offer straight to their email. There are plenty of options out there for this, to build these designated landing pages. These are just two of them. This is Leadpages and Unbounce. These guys have really, really great features. But in order to get to a subscription level with these tools that allows you to integrate payments on your order pages, so you're not just collecting email addresses, you are actually taking payments, you have to pay a little bit more than what I think most people would be comfortable with at the beginning. At the time of recording, Leadpages here is sitting at $79 a month if you want to include the option to take payment, not just collect email addresses. Likewise, Unbounce at the time of recording is $80 a month for the cheapest plan, which actually only includes 500 conversions a month. Which might sound like a lot here at the beginning, but then if you're successful, and you want to keep making money from it, and you want to scale that success, you might find that that's just not enough. But the benefit of these kind of builders is that unlike a WordPress website, they're really quick to setup. So they have these a drag-and-drop builders, you can test stuff out, see what works, see how people are interacting with them. They even have pre-created beautiful templates right there and ready for you to customize to your own offer. The main problem for me is the price. Especially because this price actually only allows you to collect these e-mails or sell your products, it doesn't actually allow any email marketing tool yet at this price. You don't have a way to send the email out yet unless you then connect a tool like this to another tool. Then in addition to these landing pages, you will also need somewhere to actually send your subscribers once they opt-in to receive your content. Lots and lots of people will start with MailChimp for their very first email marketing platform, mainly because it's completely free up until 2,000 subscribers. Now, I don't want to hate on MailChimp here because there are still circumstances where I recommend it to clients, especially if they're only planning on using it for a very, very simple tasks, like somebody put in their email to receive a free e-book and all you're doing is sending them that free e-book. Now, as soon as you want to get into something a little bit more complex than this, MailChimp gets very difficult to use, and you might actually end up hiring experts that can customize it for you, and you then end up paying more as a result of this. Now, ConvertKit is also great because unlike MailChimp, it actually does offer advanced landing page builders. It also offers a free email marketing plan up until a 1,000 subscribers. It's not quite 2,000 there, but it is combining the ability to collect emails and store them, and use them for email marketing. I do think that this might change in the future because the tool is getting quite popular. It also does start to get a bit expensive after that 1,000 subscriber mark. I think the big downside for me at this stage is that there's no way to sell anything directly from within ConvertKit yet. This is currently being tested and it might launch soon. But at this stage, you can create a landing page, you can send emails, but you can't sell anything through it; so it's not a true sales funnel that you can build through something like ConvertKit. There are a lot of other options out there on the market, not just the ones I have mentioned, but I do believe that when you're just starting out, GetResponse is awesome for being inexpensive, but also really smart and flexible in terms of email marketing. Yes, it doesn't actually have a free plan like MailChimp and ConvertKit, but you guys, do you have a free trial link inside of your guide. You've got it free for a month to play around with it. After that, their basic plan is only $15 a month if you have less than 1,000 subscribers, which is awesome. Now, you'll find that a lot of other tools out there will limit what you can do with their cheapest plans. But with these guys, $15 a month, you will get email marketing, automations, unlimited landing pages, one whole sales funnel, unlimited lead funnels, the ability to sell digital paid products directly through the platform. There's just so much you can do with it, which is so wild. Because if you had to piece together other tools to help you do all of this, you would be looking at paying well over $100, $150 a month for this. Now, I'm not going to lie, of course there are downsides and shortcomings with every software, and GetResponse is not an exception to this. There are some things that it doesn't yet offer that the other guys do really well. I will be mentioning these throughout our lessons because I have actually found some workarounds these. But the only thing that I do want to mention for now is that at this stage, these guys don't offer refunds for their annual plans if you cancel halfway through the year or at any point during the year. After your free trial, if you do choose to sign up with them, I would actually recommend going on the monthly plan until you're sure that you are happy with them or you can stay on the monthly plan forever. It's more of a risk to pay for a whole 12 months upfront if you know you're not able to get a refund, if you, for whatever reason, need to leave them halfway through that year. But these guys also have 24/7 chat support. I've never had to wait more than a couple of minutes for an answer. That's a really big bonus for me in terms of recommending them because I know a lot of my students do end up having a lot of software questions when they're using a new software. These guys make it really, really easy to ask questions in real time and get real answers very, very quickly, which is awesome. I know a lot of you guys are visual like me. Here's a visual of the sales funnel that we're going to be creating throughout these lessons that you can create in GetResponse with literally just a few clicks. It will automatically create emails and landing pages for you that you can just go in and customize to your offer and your brand. But it effectively builds an entire sales funnel for you, which is why I absolutely love it for this purpose. To summarize now, in order for you to get started on executing everything from a setup point of view, all you really need is to have either a separate landing page builder or your website with an ability to somehow create landing pages in a way that's still quite user-friendly and easy for you to do. You need an email marketing platform of some sort to collect emails, or have a tool like GetResponse that's able to be a substitute for both of these areas, which is exactly why I'll be using it throughout these lessons. Now, at this point, you may also want to go ahead and get set up with a Stripe, or PayPal account, or both so you can collect payments, because this is what we're going to be using to take payments from our audience through GetResponse. Now I am going to walk you through how to actually make this happen inside a GetResponse and how to integrate your payment processor. But just keep in mind for now that both of these tools are completely free for you to set up, this Stripe and PayPal. I've included some handy links inside of your card in case you're not sure how to set these up for your business, so make sure to check that out there, and I'll see you inside the next lesson.
5. Offer to Have in Place Before You Begin: We'll be talking more about how to leverage a kickstarter style launch in a later lesson which is going to allow you to essentially start earning money from paying customers before your product or service even exists and whereas ready. But for now, let's just talk about the different elements of your ideal funnel structure and what you need to have in place in order to really be able to execute on these in later lessons. These are the four main elements of your sales funnel. While the free offer or free lead magnet is unnecessary to have as is your core offer or your main product or service that you're selling, your tripwire and profit maximizer are both nice to have options. They will help you because a tripwire or that low cost offer will reduce the friction for someone to actually become a customer, and your profit maximizer will allow you to get more value per customer. Especially when people are starting this process, they might not actually have anything to offer at either of these two stages yet, which is completely fine. But it can be a good idea to just start thinking about what you might offer to your customers in the future to make sure that everything is aligned, and it will be really easy to add these steps into your sales funnel in the future. Maybe just start thinking about how you would want your sales funnel to be structured in its entirety in the future, even if you're not necessarily executing on every single stage of it at this point. For anyone with a service-based business, you all got instinct, might be just to advertise your services straight away, especially for local businesses. But this can be a mistake, especially if you don't really have a large engaged audience yet, because maybe you're missing out on the opportunity to show off your expertise or the value that you can provide on your audience because you are not leveraging that free offer. As a brand new restaurant, for example, you don't really have the reviews of the user-generated photos that people look for on Google or on Instagram to decide whether or not they should eat at your restaurant. Instead of just advertising your menu, what you could do is you could offer two for one special or maybe a free coffee with your brunch and that might be a way for you to build up your reputation for future customers and really draw them in. Now as a digital marketing agency or any agency, you could just run a campaign asking if anyone needs help with their marketing, basically just advertising your services. Do you need help? We can help. Which is a trap a lot of people fall into, or you could switch this and flip it on its head and offer a free guide on the 10 things that you must ask an agency before partnering with them. Now that you know anyone who downloads a guide like this, is likely looking for an agency to partner with. You can then retarget them later, and you've got their e-mail address already so you can maybe e-mail than later saying, ''Cool, you downloaded this guide, can we help?" But this gives you an opportunity to really show off your knowledge and gain their trust and really make this about them before you ask for anything in return. Now there are exceptions to every rule, as they say. For this, the exception is service-based businesses that provide an immediate service for an immediate need. For example, there's really not much of a point in a restaurant advertising for a free eBook on the top 10 best brunch meals on Google, when someone is searching for something like restaurants near me, or a pest control service with a free training on how to effectively get rid of ants in your kitchen. Because chances are the most effective return on your investment in this case would be just to get your stuff in front of the people who are looking for a pest control service because they have an ant infestation. You could just pay Google to say, "Look, show my website whenever somebody searches for there're ants in my kitchen, please help." Because of this, our focus here is on the majority of businesses that are offering something of great value that solves a more in depth problem. Like, "I'm super shy at parties or in social situations, how do I overcome my social anxiety?" Not my arm or my head is bleeding, where's the nearest emergency room? The main thing to keep in mind is that there is a lot of value in free offers for almost any business, but it has to align with your overall message. Because of this, it can actually be easier to think of your core offer and work backwards. What is the core offer you want to actually put out there, and what is the ideal customer of that offer? What problem does that person have and how do you solve it for them with that core offer? How can you take just a small percentage of that problem and solve it for them for free with your initial free offer? As an example let's say your core offer is a package to design and build a full service website for small business owners who are not super tech savvy. This solves the problem of not having an online presence or having a bad customer experience with someone's crappy website that they have currently. To then solve this problem in a smaller way with the free offer, you could offer them free audit of their current site where you could suggest improvements so they can make or maybe give them a free eBook on the 10 easy website changes that will get you more leads as an example. Both of these give them a small win and a feel for your expertise to then decide if they want to actually proceed with your core offer. Ideally, you would also want to have a low ticket offer that sits in between these two stages, and maybe up sell or profit maximizer. That's going to allow you to get the most value out of that core offer. An example of how this might work in this case would be to offer a discounted package of 20 landing page designs that can convert visitors into leads, the regular price for that would be $99 and today they get it for nine bucks. So something really discounted that's a lot of value and still solves that problem in a greater way than the free offer, but not as in-depth as your core offer. This is just two things. It still focuses on their pin point of not getting enough leads through their current website, and it shows off your design skills, which will then ultimately drive them to seek out your services to help them implement these landing pages on their website and do a complete overhaul because we know these people are not super tech savvy. That's our core audience is small business owners who are not tech savvy, so we know that just giving them this $9 offer is not going to be enough for them. Then they would ultimately want to sign up for the core offer and also we would then present them with a profit maximizer, which will then come into play once they've agreed to the core offer. It has to be very closely aligned with the web design and development package. A perfect profit maximizer is something that just adds value to the customer, but it doesn't necessarily take up a lot of your time as the provider of that service. An example might be a 12 month website maintenance package that you provide them with at a reduced cost of 100 bucks a month for 12 months. That could entail things like updating plug-ins, making sure everything is running smoothly, making sure the site is secure, all that regular maintenance stuff. But it's not a whole lot of work on your end, but the customer especially one that is not super tech savvy, will feel like they'll have that support system there if they need it for a whole year after you launch their site. This is just an example of the kinds of offers that you could create before you proceed to building out your sales funnel. But again, just remember that the minimum is just to have one free offer and a paid offer in place and the rest can happen in the future. I'll be showing you exactly how to set up your landing pages and e-mails to deliver your offers. But the actual offer setup is entirely up to you when it comes to both the free and the paid offers. But I do find that a lot of people do get stuck in how to present a free offer because it's the first introduction somebody has to your business. You want to make sure that it looks good especially if it's a PDF or some sort because a lot of people are not super comfortable jumping on video for free training or something like that. Canva can be a really great resource, easy-to-use and free for creating an eBook or a template or guide to give away as you're free offer. We're going to have a look at how to create something like this in the next lesson, and I will see you then.
6. Create Your Free Offer in Canva: It's free for you to sign up with Canva, and when you log in, you'll see something similar to this. Now, they are constantly changing things around so if it doesn't look exactly like this, just bear in mind that you will still be able to find all the functions that we're going to be talking about here. Unfortunately, they don't actually have ebook templates, they have Ebook Covers. You can search for Ebook Cover and it'll give you all these amazing covers for your ebook, but it's not going to give you the insides of the ebook which is I guess the part that people struggle with the most sometimes. So you might be able to just combine these different templates together. The A4 document is the one that I like to start with for my ebooks because essentially that's what they are. They're mini guides and mini ebooks, and most of them will have multiple pages within them. You can either search for it here or when you're actually in the editor so I'm just going to choose one over here so I can show you. This one has two pages that you can then customize to your brand, and then once you're actually in the template it'll also give you some other ones that you can go in and customize. You could then go in and add a new page depending on how many pages that you actually want in here. I would suggest that if you're writing an ebook or a guide that you have it written out somewhere in a Google Doc and doing all of your grammar checks and all that before putting it into Canva because this is not a perfect tool when it comes to grammar checks and all those things. But you could just go in and have a look at other designs and maybe just either use them as inspiration or actually use them as pages of your book. Now obviously, these two designs are quite different, so what I would want to do is make sure the colors are the same, and the font size are the same as well, and any images, I'm swapping out for my own images. But really you can keep going through this way. It's cheap, it's free, really. It's probably the easiest way to do this where you can take inspiration from different templates and just making sure you're going in and clicking on the different elements. I would go in and make sure that all of these are my brand colors. An easy way to do that is you can just go to Change all and it'll change all of this particular color that was on this one template to my branded color, and then I would go through all the rest of the templates and make sure that all of them are the color that I want. Once again, I would say Change all, and it's already starting to look like one cohesive ebook there. Obviously, there's still a lot of work to do there and if you're not super familiar with Canva, it's really intuitive and there's lots of resources for using this tool. But if you're not confident in design, what you might want to do is just go to something like Creative Market, and you can search for Canva ebook template, and yes, you will pay 20, 30 bucks for it, but these ebooks are pretty much done for you and all you have to do is swap out the images, and they're already ready to go in Canva. So once you purchase it, it'll give you a Canva template to add into your own Canva account, and you can start going in and customizing it and you have 40 pages of this beautiful ebook already done for you and ready to go, and it's a lot easier than piecing it together for yourself. So you just have to decide whether you want to spend the time or the money, that's the decision there. But then either way, whether you're using a purchase template or one that's free here, all you really have to do is just go to Download, and I would download this for PDF Standard instead of Print because print sizes will be too big. But then you can essentially just go in, download this and upload that into your GetResponse account or whatever else you might be using to deliver this to your subscribers. But it's as easy as that. Then they'll be able to open this up and read their guide or ebook there. One other thing I should mention is that technically, your ebook doesn't have to be an A4. It can be landscape, in which case you might want to browse through presentations in here because they do actually have really good presentation slide decks, and you can utilize these for your guide. Especially if maybe your guide is a type of presentation because these will have 40, 50 pages that you can use and customize to your liking. These are beautiful customized, they have all the text and the images, and it's a lot easier than piecing together those one or two pages off of those A4 templates. If you're happy to experiment and have your ebook set horizontally instead of vertically, you can do the same thing. You just download it, it's still going to be presented to them as a PDF, it's just a less conventional format. But then you might want to try the slide formats in Canva, and that might work for you as well. Hopefully, that helps guys, and I'll see you in the next lesson.
7. Sell Before You're Ready - Kickstarter Marketing: I'll often find that people have a pretty clear idea of what they want to sell, but they want to start selling it now and they just don't have anything ready for it yet. If that's you, then this lesson is just for you. Or maybe you have existing products in an existing business and it's thriving and everything is great, but what you want to do is you want to promote a future product or service that's not quite ready yet. This will be incredibly useful for you as well in this case. The entire Kickstarter model is based on putting yourself out there before you are actually ready. So that you can gauge interest and have a bit of a the proof of concept and ultimately really get money in the bank through crowdfunding before you actually have a live product or service to sell. There's nothing worse than spending months and months or even years building something to perfection, only to launch it to crickets and realize there's actually no demand for your amazing product or service. If you don't think that people will buy whatever you're selling before it's live, this stat from Kickstarter should be enough to persuade you. Since their launch in 2009, 18 million people have pledged $5.2 billion to 187,317 projects. So if 18 million people can back stuff that doesn't actually exist yet, you can bet that your audience will back you too. So one of my biggest pieces of advice, is whenever possible, embrace the Kickstarter model and start before you're ready. Start selling before there's anything really to sell yet. Because the worst thing that could happen is that no one buys from you. In which case, there's either a problem with your sales funnel or your offer. But imagine how much worse that would be if that happened once you spend all of your hopes, dreams, and resources on building your product or service, instead of going through that emotional roller coaster when it's still just in the concept phase. So here's the traditional way of doing things. You would get an idea from problems you've experienced. You would build that idea with the skills and the tools that you have available. You would then test the product or service with your beta users. You would launch it to your beta users who are people just like you and monetize your product by asking people for money. Simple, right? But now imagine if you could flip this on its head. By doing this, you would get an idea from potential customers. You would then monetize your product by asking potential customers for money. You would build your idea with the skills and tools you have available. You would then launch your product to the people who are similar to your existing customers. Then you would test the product with your customers. Doesn't that seem so much better? There are so many ways that you can do this, but the key is to just make it seem as exclusive as possible. People love feeling special and like they're a part of something that only a select few people know about. I don't know if you have watched this on Netflix yet, the documentary about Fyre Festival, but if you haven't, you should watch it. I'm going to link you to it because it's one of the best examples of what happens when incredible marketers partner with a very disorganized execution team. These guys raised $26 million with a super clever marketing campaign that tapped into people's desire for exclusivity, for a festival that didn't even exist yet. They had no plan on actually how to execute this. They made it seem like it was the place to be and that you would feel horrible if you didn't pay them thousands of dollars to attend this festival. Which really at the time of marketing was still just an idea of a festival. So leverage is type of marketing model, but make sure you actually deliver on what you promise. Whether you actually take the money from people with the promise of delivering their product or service as soon as it's live. Or you're simply allowing people to register an expression of interest by filling out a form, either way, you'd need to make it seem like it is the coolest, most exclusive thing in the world and they'd be silly not to jump in on it. So hopefully that gives you a bit of confidence in knowing that whether you already have a live product or service, or you're still in the process of launching it, you can follow along with the steps in the following few lessons and even actually collect payment from interested buyers with the intention of delivering them their product once it's live, you can very easily just tell people something is just not going to be delivered to them for another month or two and they can expect it by November 2nd, but as a result of purchasing it before it's ready, they get a $200 discount. Honestly, people would jump on stuff like that, because if it's something they want and you've made it seem like it is the coolest thing in the world, they're happy to pay for something that doesn't really exist yet because they believe in you, they trust you, they know you, they like you, and they want to be a part of this thing that you're creating. But before we get to the point of execution, l also want to talk about one more cool little hack that can help you make money from a sales funnel even if you don't have anything to sell yet. So more on that in the next lesson and I'll see you there.
8. Earn While You Learn with Affiliate Marketing: I don't want to spend too much time here on affiliate marketing because this could be a topic all on its own and I could do six hours just on affiliate marketing. There are lots of awesome resources out there that I can include [inaudible] so you can do your own research on the topic, but I did briefly want to touch on the fact that if you don't have anything to sell yet and you're not confident in pre-selling things and collecting money for it yet but you do want to begin building your email list so that once you have something to sell you have a warm audience to sell to, then affiliate marketing can be a really great way to, at the very least, offset the cost of your marketing spend and your time, but in the best-case scenario, it can actually be a really great way to increase your revenue stream for your business. We're going to talk about how you can become an affiliate for other creators so you can sell products and services for other people and make money this way. Then we'll also talk about how you can leverage other people to become affiliates for you and help you sell your offer once it's live and ready to go. We're going to talk more about that when we talk about ways to promote your sales funnel once it's live in a later lesson. But for now, let's talk about what successful affiliate marketing is and what it isn't. Essentially, all affiliate marketing is when somebody will pay you a percentage of a purchase or a flat fee for a single or recurring sale for referring a customer to their business. There are lots of different ways to do this and often you'll see a lot of YouTubers, including myself, do this by including affiliate links of discounted products or free trials, or even just linking people to full price products that people can purchase through their specific affiliate link where they will get a percentage of a commission if you end up buying a product through their link. For example, my Adobe Spark YouTube video here has a link to a free trial that people can use. This will allow them to basically use this paid tool that I feature in my tutorial, but they can use it for free. Then if they decide to pay for the tool later on, I still get a commission for it because they used my free trial link. I also definitely disclosed this within my video descriptions, so you'll see that second arrow is pointing to a disclaimer telling people that I do get a commission if they purchase something, but it also means that they don't actually pay any extra for purchasing it through my link, it just means I get a percentage of the sale and Adobe gets a percentage of the sale. This is great for me because while my primary purpose of this video is to provide education for my followers and get them introduced to my brand, I also get paid just by being an affiliate. I will always going to include a link to Adobe Spark because that's the tool that I'm using in this video, but I might as well include an affiliate link to it so if they do buy something, I get a percentage of that. It's great for Adobe because think about how much work it takes for them to get a new customer. They have to advertise on Facebook and through email and on Google and Instagram and TV and buses and bench ads and back of toilet stalls. Just about everywhere that they can advertise, they will, and it gets really expensive. Now imagine that instead, all they had to do was give me 30 percent of a sale once it's complete and the person hasn't refunded it. There's absolutely no marketing required on their specific end because me as an affiliate, I do all of that work for them, and everybody wins in that scenario. Unfortunately, there's still a lot of misinformation about affiliate marketing out there. I can't say that every single affiliate program is legitimate, but what I can say is that there are some people like Pat Flynn from Smart Passive Income, who have confidently shared their income statements with their audience and have built multimillion-dollar empires largely through affiliate sales. This is a screenshot that Pat shared on his blog of one income from December 2017 where he made over $100,000 just from affiliate sales, and he breaks down exactly how much he made from each and every single affiliate partnership that he has with different software tools. I can't say this enough, but affiliate marketing is not multi-level marketing or network marketing or a pyramid scheme and it's not a myth. I will definitely link you guys to Pat Flynn staff if you're interested in learning more about how this stuff works. But for now, I'm going to share with you some best practices with affiliate marketing that I largely learned from the master of affiliate marketing himself, Pat Flynn. Some best practices here for you is to do demos, not reviews. You will see some people doing those unboxing videos on YouTube, for example, and then just giving people an affiliate link to buy the product that they've just reacted to in their video, but a very small percentage of affiliate sales will come through just because you told your followers to buy something. The majority of successful affiliates will essentially be showing their audience how to use a tool and how they use it, what they like, or just demonstrating how it fits into their creative process or into their day-to-day life. The reason is because people need to be able to imagine themselves using it before they'll decide whether or not to buy it. It's also a lot less pushy because you're essentially just demonstrating that this tool is cool and this is a feature that you like, and whether or not somebody buys that tool is almost a secondary thing; the primary purpose there is just educating your audience. If you do a good job of that education component, of course, they're going to buy it. The second thing you want to do is be very transparent about getting a commission for the sale. Your audience isn't paying anything extra for buying the product through you versus buying it directly through the brand, so they're usually quite happy to go through your link and support you instead of going directly to this big brand, as long as you're honest and transparent about it. You also want to make sure you're only promoting products that you are using and loving. There's absolutely nothing wrong with you looking at which companies give out the best commissions and maybe ones that even give you recurring commissions if it's a purchase for an ongoing payment type of tool, but just make sure that whatever you're promoting, you're already using it, or make sure that you are using it before promoting it to your audience. Imagine there's an influencer on Instagram that recommends an awesome face cream and it makes everybody have a horrible skin condition. They would lose their credibility pretty freaking quickly, wouldn't they? It's the same thing if you're recommending crappy software that breaks or isn't trustworthy and you're recommending it to your audience, and they'll know that you're probably not actually using this thing that you've recommended because it's pretty terrible and has a bad customer service or bad user experience. So you want to make sure that you're only promoting stuff that you really use and you love. Finally, you also only ever want to promote things that are actually aligned with your business goals. Imagine you're a beauty blogger but what you're promoting is a pet grooming service. Makes no sense to your followers. They're probably going to switch off and they're going to see straight through the fact that the only reason you're promoting this thing is to get money, not because you have their best interests at heart, and it's going to potentially also fill your email list and your audience with the wrong kind of people if you do get a few sales because it means that you might have people in your audience that are interested in pet grooming and not your beauty content, which is why you should only ever align yourself with affiliate programs that are very targeted to your particular business and your audience as well. To give you an idea of what this looks like in real-time, here are two actual examples of two affiliate offers I've received recently from people that I follow on social media. On the left is Rick Mulready, who is a Facebook ads expert. This ad is promoting a completely free offer from his friend Colin Boyd through an affiliate link. By downloading this offer, I would then be upsold to Colin's paid program, and Rick would then receive a percentage of that sale because he sent me. On the right is Bucketlist Bombshells, and they're directly advertising a paid program for Melyssa Griffin with an affiliate link. Their particular audience is marketing female girl boss, and so is Melyssa's, so they're very closely tied and they would probably assume that someone from their audience might just go ahead and buy a $1,000 program without knowing much about it because their audience is very familiar with Melyssa's content. Now, this is very risky, so my preference would be for the very first one, where Rick is just promoting a free offer that's aligned with something that his audience would want to learn about. But both approaches are essentially leveraging this power of affiliate marketing where the person who's advertising the offer is not the creator of the offer, but they know that their particular audience would get a lot of value out of it and is very aligned with it, so they might purchase it and then they would get a percentage of that sale. Hopefully, that gives you a bit of an idea of how you might set something like this up. If you would like to leverage affiliate products within your funnel, basically you can just promote someone else's content or products to your audience and make money while you're working on setting up your own offer and definitely afterwards as well. I'm still a part of a lot of different affiliate programs that I use to supplement my revenue from my main business model. We will talk a little bit more about this as we go through the actual implementation side of things. But now in order for you to just find affiliate offers within your industry, you can just Google the tool or the product you would like to promote to your audience because again, like we talked about, it's likely going to be tools that you're already using and loving and you just want to share with your audience anyway but you would like to potentially make money from sharing it with your audience. Then you would just use keywords like affiliate or partner program, or a brand ambassador for any physical products. These are just a few examples here for ConvertKit and Pepsi. Then also for people, you make lists of affiliate programs, like this one for baby clothing affiliate programs, which would just be a list of different baby clothing brands that offer affiliate commissions. My recommendation is always just to look at the tools and the programs that you're already using and loving and just seeing if they have an affiliate program, rather than just typing in affiliate program into Google and trying to pick one from the thousands and thousands and millions of lists that are going to be there. For me, for example, I was already using Adobe products for about 10 years. I already wanted to make tutorials and courses on them for my audience, so I just wanted to see if maybe they had an affiliate program so that instead of just linking my students to the Adobe website, I could use my own fancy affiliate link to the same Adobe website so that it would allow Adobe to track if somebody came from my particular link and purchase their stuff and then they would pay me a monthly fee. I will talk a little bit more about how to set everything up in terms of learning page design and overall sales funnel setup for this kind of structure if you are planning on leveraging other people's content in your sales funnel. But for now, the main takeaway within this lesson is just for you to know that it is entirely possible to create and launch a sales funnel and start making money from it straight away, even if you're paid offer is not yet live because you can leverage other people's paid offers like this.
9. Learn From Your Competitors: While I can give you guys the tools and the skills to build your funnel, the tips within these lessons have to be as applicable as possible to as many business models as possible. Because I don't know every single person's unique situation and unique business model as well. While you're going through these lessons, I also encourage you to not just learn from me, but also go and learn from your direct competitors to see how they're doing things. Check out what they're doing really well and what they're not doing so well. Go and actually sign up for their free offer, go through their funnel and check out their learning pages and see what you're up against. Because at the end of the day, you need to not only be able to attract your ideal customers to your offer, but you also need to be able to communicate your point of difference. As in, why should they choose you over a competitor? The only way you're really going to be able to define this is by knowing exactly what your competitors are actually offering to those potential customers already. Let's go ahead and just take a look at a few websites where you can go and find information about your competitors. Again, I'm going to link you to these inside of your cards, so make sure to check all the links there. But do bear in mind that when I say competition or competitors, it doesn't necessarily mean what it used to mean. Twenty years ago, this would have meant that if you were a local butcher, your competitor is a butcher in the next town over, or a big grocery store with a deli section at competitive pricing. Now, in the 21st century, your competitor could be someone in the same industry that's on the other side of the world. So you're not necessarily competing for the same audience, but you might have a similar offer. You might have a lot to learn from each other. Keep that in mind when you're searching for other businesses. Get your head outside of that box and really just explore businesses that are similar to yours, even if you're not directly competing for the same user base or the same audience, but you still probably have a lot to learn from those people. I'm going to show you an example of how this is done. Your best friend for direct access to people's sales funnels is going to be the Facebook Ad Library, if your competitors are running Facebook ads. If they're not, then unfortunately you're not going to be able to see them here. But a lot of the time you will find at least one competitor who is running Facebook ads. This will allow you to directly see how they're advertising their sales funnel or their learning page looks like, you can then go in and sign up for their free offer so that you get their e-mail to see what their follow-up email sequence looks like, how they're presenting their paid offers, etc. There's a lot for you to learn from here. Again, like I said, you can go from a global perspective. It doesn't have to be a local competitor. For example, let's say I'm a health supply store in Canada. I could search for how health supply stores within all of North America are doing their marketing, or because I know of a particular brand that does their advertising really well here in Australia, I'm going to use an example of an Australian health store that is on Facebook ads library. I can just go in and type in Flora and Fauna. This is their Facebook page here and as soon as I click into it, I'll be able to see all the ads that they're running. I can see that they are running 310 ads, which is a little bit insane but that's perfect because it gives me a lot of data about what they're doing and how I might be able to replicate this. These guys do a lot of educational content, but they also advertise a lot of their products. Here's where I can go in and check out exactly how they're doing stuff and how they are promoting their brand to potential new customers and existing customers as well. What I could do is just click into these face masks or basically any of these ads, I can go into see add details. Then I can see that this is the text of the ad and that's the ad itself. I could click to play and see this video. Beautiful, cute, and this is the link that I want to see. I can see exactly where they're advertising to. Obviously these guys are product-based. Most of their ads are running directly to product pages because their aim is e-commerce, so its quite different in terms of a sales funnel perspective. They're probably just testing out which offers work best for which audiences. But it's just to give you an idea of the fact that you absolutely do not have to be looking for local competitors. You can just go and search for just about anything. I think I put in dental, this is Aspen Dental. If you are looking for different people advertising, usually if they have more of an audience on Facebook, they're more likely to advertise. It's not always the case. But obviously if they're not advertising, you're not going to see any ads. You want to make sure that you are selecting people with slightly larger audiences because they're more likely to be running ads. These guys are running 1,600 ads, which is a little bit insane. They've obviously got a few different locations and they're just advertising the fact that they are about to be opening up with these ads over here. You can see which free offers they've got. New patients get a free examine X-rays if they have no insurance, you can see what they're charging for dentures and all this good stuff. Even if you're not a dentist in their local area, you are not even a dentist in America, that's perfectly fine. You can still use a lot of inspiration from this. I'm going to use myself as an example. One of my competitors would be Amy Porterfield, because she does a lot of digital marketing and teaching people how to create online courses, all that good stuff. You can see she's running 160 ads. I would then go through, she would be advertising her podcast quite a bit. She's advertising a lot of her organic content. But she is also advertising things like her free offer, which is a live masterclass that's free. We then go through and have a look at this learning page. She's advertising a free live master class. She has probably some testimonial somewhere, a little bit of an idea of what I can expect from the class. At every point it'll just ask me to put it in my e-mail address to sign up for it. What I would do in this case is I would sign up for this particular masterclass. So that I can see how she's dealing with delivering her free offer and not just delivering it, but then how is she selling me on her paid offer because nobody's really sending you a free offer with just the principle of here I have some free stuff. If they're getting your e-mail address, it's probably because they're going to try and sell you onto something. People will expect this now, so it's not a huge thing. If you are sending somebody some free content and then you sell them onto a paid offer, people are not going to get mad at you, you might get the one person ever wants and well, who feels betrayed but that's perfectly fine. It does happen. I would sign up for this, I would then receive access to the live masterclass. I would then attend that live master class and then get pitched onto her sales offer, her paid offer, then I would want to see what her sales page looks like. What's her order perform process? What's her price point? All of that good stuff. Then I would take lots and lots of notes so that I can try and implement some of that for my own sales funnel. Facebook ads library is brilliant for this because it gives you direct access to people's offers and sales funnels. Obviously within the marketing spaces, this is a little bit easier because a lot of people are doing this stuff really well. Whereas for physical products or for local service-based businesses, not that many people are running ads for free offers. They might just be running them straight to paid offers, but still you can get a really good impression of what your competitors are doing from here if they're advertising on Facebook and not everybody's going to advertise on Facebook, but you still want to check out what your competitors are doing. You can go directly to their website and see what they're promoting there, if they've got any free trainings or free e-books or anything like that or you can go to a page like similar web. Now this is a free tool. There are some paid tools that do this a lot better. Free tools will have their limitations, but with a tool like this, you can still search for some bigger competition research on here. You can search for some bigger websites on here, pick up any local, small service-based businesses, but if there are any big names in your industry, this is where you could go to to see what they're doing with their website particularly. This is more focused around things like how their ranking in Google search results and are they running any paid ads on Google and which social media platforms are they using to send people to their website? This gives you more of an idea of their strategy, but the other thing that it's great for is it taps into their audience interests. We're going to look at that in just a little bit, but I'm just going to take you through this. It'll tell you how often or how much traffic she gets through a website? How long do people spend on her website? Where are her visitors coming from in terms of countries? What are the traffic sources? You can see how much of a percentage of her traffic comes from social media, from search results, referrals mail or just direct, and then you can see if she is advertising, this is her organic traffic is mostly organic. Then she's also advertising for pretty much just her own name, which fair enough. She has two paid keywords on Google, you guys probably not going to be leveraging Google ads as much in terms of getting people to a free offer, but obviously Amy Porterfield is doing that for her own brands, so people who are looking for Amy Porterfield will get an ad to say, this is in Porterfield. This is where you can see where she's focusing her energy on. Obviously, most of her traffic from social media to her website is coming from Facebook, a little bit from YouTube, and then a lot less from the other platforms. This can be really good if you're at the beginning of building your business on social media and through organic methods, you can come in here, look at your competitors and see where they're actually focusing their efforts. If I was deciding on which platforms to actually set my business upon, I would look at this and go, or I know I need to be on Facebook. I might need to really consider YouTube because Amy Porterfield is really doing that, then maybe I don't need to focus so much on Pinterest and LinkedIn, because she's not, and there's probably a reason for that, but of course, I wouldn't make my mind up just based on one business. I would want to check out other businesses to really get a good sense of truth if other competitors within my space are following the same pattern, but then really the part of similar web that I want you to look at is the audience section. This gives me an idea of what interests people have, who are within Amy Porterfield's audience, what are they interested in? Primarily online marketing business, a lot of tech, a lot of web design and graphic design, and then finance because she does teach people how to build online business. These will give me an idea of my own audience and how I can talk to them about these things that they're probably interested in, if I share an audience with Amy Porterfield. It's just gathering data about what my competitors are doing and what I can learn about their business that might give me some ideas about what to do with my own business. This will also give you an idea of the topics that people are searching for, who are also searching for Amy Porterfield. There is a section for competitors and similar sites to Amy Porterfield in case you're thinking on each other competitors that are within my space and I don't really know who they are. This is where you can come down to and take a look at who is a competitor of Amy Porterfield that you can also check out to get some more data and some more information about what they're doing with their website. Hopefully that's helpful in terms of allowing you to take out your competition and seeing what they're doing, with their website and with their social advertising. I much prefer using Facebook ads because you can actually go in and sign up for people's free offers and almost become a potential customer of theirs to see how they're wooing their customers and how you should be wooing your potential customers, but there are lots of really good tools like similar web that also allow you to stalk their website a little bit, especially in case you are looking at focusing a lot more on building up your organic content, writing blog posts and posting on social media, this can give you a good idea of the direction you should be taking and the kind of topics that you might want to be writing about. It's more just about helping you to understand the direction that you should be taking if you are a complete blank Canvas and your business is brand new and you're really not sure where to take it and what your audience wants from you. It's the best idea in the world to just look at what your competitors are doing and go from there.
10. Build Your Funnel - Overview: Over the next few lessons, we're going to go over the processes that I have set for myself to structure my own workflow and the workflow of my client as well. Now it's a bit of a crash course of everything, including, how to write effective landing page copy, and emails and sales pages and order pages. Everything you really need to know and do in order to launch an effective sales funnel for your business. But please keep in mind that my goal here is not just to teach you how to make a pretty landing page with a particular landing page builder. My goal is to actually teach you the strategies and tools and tactics that it takes for really, really successful businesses out there to create amazing landing pages and really high converting sales pages. Those are the skills that are going to put you over the top in ensuring that your sales funnel is really, really profitable. The more that you can actually follow along with these lessons and use the templates that I'm showing you and that I'm providing you with, the more you'll be able to actually set yourself up for success and get the most out of these lessons. Hopefully you're excited and you're ready and I will see you in the next lesson.
11. Set Up Your Account: If you do already have an e-mail marketing platform and a way for you to build with landing pages, sales pages, order pages and all that good stuff, and you're not going to be using GetResponse, then please feel free to move on to the next lesson. However, if you are either starting from scratch with this stuff or you're maybe not super happy with the current tools that you're using, and you just want to see how GetResponse works to see if maybe it's the right thing for you, then let's get straight into how their conversion funnels work and how you can use them to grow your business. When you actually start your 30-day free trial, you'll be able to access everything straight away, with the one exception that you will have this GetResponse badge at the bottom of your e-mails when you're sending them out, unless you are then on the paid account, and that's not super dramatic for people. Hopefully it's not too much of an issue. I'm going to show you exactly what that looks like inside of you're GetResponse account. Let's go ahead and actually sign up for a free trial with me using this dummy e-mail address over here that I use to test some stuff out. I'm going to go ahead and just create my account and start my free trial. There's no need to put in any credit card details or anything like that in order to start your free trial. This is exactly what you're going to be starting with as well. You're going to have a completely blank account like this one's going to be over here. Just go ahead and see if these guys have sent me an e-mail. Again, this is not an active e-mail account by any means. I'm just using it for testing purposes. This should work and everything should be blank. So I should have absolutely no details. I should one e-mail subscriber, that's really just me. It's going to prompt you to put in an address. This is a legal requirement. You need to have a business address listed at the bottom of your e-mails. It can be a P.O Box, it doesn't have to be a physical address, or it can be your home address or anything like that, but it does need to have a physical address listed to it. So you need to make sure that you are filling this stuff out. Again, I am going to be using a dummy address here. I'm just going to write in our street address. This doesn't really matter. Richmond. It might require a phone number. I'm just going to put in a dummy phone number for now. Take me to my account. Perfect. Keeping in mind, it is going to continue to try and get you to upgrade throughout your free trial, don't feel like you need to cave into this. There's really no benefit to upgrading earlier. It's their job to get you to get there paid stuff. Just keep that in mind for now. I'm happy to just have my dashboard. They will eventually or occasionally have some sort of pop-ups to remind you of some free trainings and things that they've got going on. You can always exit out of that. You have some kind of demos here for a few things that might assist you with just how to navigate around the platform and all that sort of stuff. You can also sign up for their affiliate program. This is especially great if you're doing this for clients and you're going to be setting clients up for this platform. So that every single time one of your clients signs up with your own affiliate link for GetResponse, you will get an ongoing income from that, for as long as they use GetResponse. It's quite good. I think it's about 30 percent. So it's about $30 US a month on even just their cheapest plans, as long as they have enough subscribers, that kind of value can add up. I do recommend that if you're doing this for clients as a freelancer, it's always a cool thing to get a bit of extra affiliate income from recommending cool tools for your clients. This is the chat system here. I mentioned this before, these guys have 24-7 chat. Even on the free plan, if you just click "Start the Chat", it will pretty much connect you with somebody within kind of five minutes. I think that's the max I've ever had to wait. So keep that in mind. You can always use that there. If it's a more complicated issue, they'll escalate it to their development team or any other kind of team. But if it's something they can answer for you pretty quickly, they'll offer you really good support, pretty much right on the spot there. We're going to go over all of these different actions that you can do inside of GetResponse. But just a few things that I want to mention with your actual accounts set up. So this is my account and if I go into Manage my Account, this is where you want to go in and actually tweak a few different things. You've got your address and the time zone. Based on the address you've put in, it selected a time zone, you want to make sure this is correct in the time zone that this account needs to send its e-mails in. What I mean by this is making sure that if this is your client's account and you're setting it up for them, that this time zone reflects the time zone they need in order for them to be able to send out their e-mails correctly. So if they want to send out their e-mails at 09:00 AM in their time zone, but you have put in a different e-mail address, and it's on the other side of the world and 16 hours behind, and their e-mails are going to get sent out at weird times, then this is problematic. So you need to make sure that this time zone is correct with the time zone that it should be in for this account. In terms of e-mail addresses, so it will have your e-mail address that you set up the account with. But if you want to also be sending out some test e-mails, for example, if you're going to be sending out a monthly newsletter and you are writing it and you need to send it to a client as a test e-mail so that they can read it, and check your links, and make sure everything looks good, and they approve, then you need to add their e-mail address in here so that you can select it for sending your test e-mails. Otherwise, you're not going to be able to send them the tests e-mails. So if you do need to have several people managing this account and being able to send them those tests e-mails, then this is where you can add their e-mail addresses in. Now landing page domains, this can get a little bit tricky just because it is specific to whoever you have your domain and your hosting through. There are so many different ways and different companies for setting up your domain and your hosting. It can give you specific advice on how to do it within your particular tool and your particular brand that you're using. So make sure to consult either the 24-7 chat with GetResponse or these helpful articles that will teach you how to set up a sub-domain, most likely. For example, my domain is livingtoroam.com and to create my landing pages, I used a sub-domain that is signup.livingtoroam.com, so that it's separate from my website but it's still branded. The benefit of this is that if I use it for my Instagram bio link, for example, it still looks nice and branded. You can 100 percent still create landing pages within GetResponse even if you don't have a branded landing page domain. So don't worry about it too much. It's not a critical element of your funnel. If you are a little bit scared by this or you're just not sure how to set something like this up, don't let it stop you from actually going in and practicing and setting up everything within your funnel. It just means that you will get an auto-generated, sort of GetResponse.com/1745freee-book or something really random as your URL for your landing page. If that's not ideal for you, then this is where you can go in and connect your domain to make sure that your landing pages are nice and branded and that they look really consistent with the rest of your brand and your online presence. Now in terms of the GetResponse badge, this is what I was talking about with your free trial. This is the one thing you cannot disable on the free trial. Once you are on a paid account or if you move to a paid account, this is where you can come in and disable this so that you don't have that kind of badge at the bottom of your e-mails. But really, it's not that big a deal, but just know that this is where it is. The rest of these, I wouldn't worry about for now. Now, moving onto lists, the one great thing that GetResponse does right off the bat is it creates one list with your own e-mail address inside it that you can use for testing purposes. So this is awesome if you're creating a newsletter and you have to say who you're sending your newsletter to, you can say I want to send it to this list, and it only creates an e-mail for one e-mail address which is yours. So that's perfect because it means you don't have to panic about sending the wrong e-mail to the wrong people. I can speak from personal experiences, this can be really scary. I sent the wrong e-mail to 60,000 people once when I was first working for clients within e-mail marketing. It was fine, it wasn't that big a deal. Everyone's human, we all screw up, but it's good to be able to test this stuff because everything is scary when you do it for the first time. So just know that as soon as you sign up for a GetResponse account, there will be a list in there and the only e-mail address inside of that list is going to be yours. It's got my first name there and it's got my e-mail address there. So if I choose to send an e-mail to this list, it's just going to send it to me. That's great. The other thing we want to do is we want to create a list to add our paying customers to. Then I'm going to go through how to set up a store within GetResponse so that we can create our funnel. We're going to go ahead and just click on "Create a list". You want to make sure everything is in lowercase and using underscores only. I'm going to be selling an online course, so mine's going to be students social media. I don't have any other list really in terms of settings yet, so I can't copy existing list settings. But this is a really good hack for shortening your list creation process. Now what you want to do is you want to go in and edit those settings. I'm going to go ahead and just go to Settings. Now I'm going to put in the list title, so it's going to be students of successful social media management. Here's where I would put in why people have ended up on the list. Because this is what they're going to see when they are managing their subscription preferences. So you know when you get newsletters and at the bottom it'll say unsubscribe or manage your preferences. So if you click on manage your preferences people can stay on some lists and unsubscribe from others. They will see all of these list titles here and then they'll see a description of what this list is for, because sometimes you're on newsletters for like three years and you don't remember how you got there or what is it that you actually downloaded in order to be on that list. So this is where you can get a bit of a refresher. So you might say this list is for everyone who purchased XYZ. So it would be whatever the course is, but you would want to make sure you're filling that out. This is more for their own purposes. You want to make sure you are showing the postal address in the message footer. I would leave the rest of this. Most importantly, you want to go over to subscription and turn this off because you don't want to be getting an e-mail every single time somebody signs up to one of your e-mail list, otherwise it's just going to get painful. That's primarily what we want to include for those, and now every time you're creating a new list, let's say you were going to create another list for a new opt-in freebie, you could copy your existing list settings. But you would have to make sure you going in and customizing everything every time. So that is looking good. Now what we want to do is we want to go in here and actually create our store and our products. There are a lot of other tools here and we will be going through most of these ads, we're actually constructing everything. I don't want to overwhelm you at this stage by showing you everything that GetResponse has to offer, because I think it'll make a lot more sense if we go through the different functions as we're building our sales funnel. But the first thing we really need to do in order to go in here and actually create our funnel is to have something to sell. We are going go into stores and we will create a store. So you could connect your existing store here, but I'm going to be obviously creating a blank store with some new offers and products. You want to make sure that whatever currency you're using, you're taking note of what that currency is. Hopefully it's the exact same currency you are using for, let's say, advertising methods. So if you are going to be running any Facebook ads or Google ads or anything like that, and you're paying for those ads in a particular currency, ideally you want to be also selling your stuff in that same currency. As a general rule of thumb, it's generally going to be US dollars because it's easier to have everything in one currency across. But if you're a local business operating in a local currency that's not US dollars, here's where you can come in and change that. I'm going to go ahead and create and I want to start by adding a product. These are my four categories. I'm going to be using the online course function here. This is my test product or offer. If whatever you're selling does not fit into these four categories, it's all right. Just select one, it not that big a deal. It doesn't really affect things too much from what I can tell. Just select whatever is the closest service, is probably the closest to you [inaudible] most things that fit outside of these categories and you can customize things as you go along. This is just a brief description that somebody will see as they're purchasing this. Let's say something like, management or marketing. In terms of price, I'm going to set this at the price that I want to sell it at eventually, $37. I would then go in and find a file. Now you can use some custom or rather stock images. So if you go and click Browse files in images, you can use some of these stock images that they have here and you can search for some additional ones here. Shutter stock as well. Giphy, so they do have gifs as well. These are quite fun and there are definitely used cases for these, maybe not these ones exactly. But we will be using some of these in our landing page building exercises. I do encourage you that especially for your own products and services, you want to be using your own custom image of that product or service because obviously you want to make it look exclusive and worth buying. So try and make it as customed possible. This is exactly why we created that list, so that I can say I'm going to deliver this product by copying them to a list that has my offer. So I'm going to be copying them to my students or social media list, and that's going to then trigger an e-mail that's going deliver them the offer they've just paid for. We'll go more into that later on but for now just know that this is where we're going to be copying them to and I would hit save. Now it's important to note that you can add more products to this store. So it doesn't mean that you just to have the one product. This one store that's going to function as a shell for our funnel can have multiple products in it that you can then offer through your funnel. Make sure that you're adding these in depending on the different price tiers. This is where you could add in your up-sell offer, that's another $200 offer. Make sure to add all of your different offers in here before going through and customizing these inside of your sales funnel. Then we would go into conversion funnel. This is exactly what we're going to be creating here. I'm going to go on and create funnel. In this case, I'm doing two things. I am actually delivering a lead magnet, but I'm also selling a product. I'm going to go over to sell a product. If I was going to select the quick sales funnel, this wouldn't include the lead magnet section, it would only include the sales stuff. It would only include paid offers, not free offers, but if you select full sales funnel, it's actually going to create everything including your free offer lead magnet page. I'm going to have the social media management sales funnel and create. This is the store that I want to be selling from and I only want to be selling this product for the time being. This is exactly why we want to be using either PayPal or Stripe for our sales funnel because it will allow us to do one click up-sell pages. So as soon as somebody buys this one thing, the next page can then upsell them onto another product that they can purchase straight away without putting in their payment details again, whereas with other payment processors you can't do that. We want to make sure we're using either PayPal or Stripe in order to be able to actually create those kind of up-sell offers later on. I am going to go through all of that, so if that is not making too much sense at this stage, all you need to do is just pick either PayPal or Stripe. As a reminder, PayPal will allow you to use PayPal and credit cards as checking out, Stripe is credit card only. For now, I'm going to use PayPal, but I will actually show you a clever hack that I found for getting around the fact that at this stage, GetResponse only allows you to connect one payment method, which is a flaw I found with these guys, because generally you want to give people the option to have at least two payment methods. So you want people to have the option of checking out with different payment processors, and I have found a way around it and we'll go into it a little bit later on. But for now, we just want to be selecting PayPal. Then you want to make sure you are connecting your PayPal account. Awesome. That is connected, and that is all good and that's it. It has pretty much created this big, beautiful shell that I can go in and pop my information into for all of my sign-up pages, my sales pages, up-sell pages if I want them, confirmation pages, and everything that I need in order to actually execute this big, beautiful sales funnel. In the next lesson, we are just going to briefly take a look at how to set up some basic tracking for your funnel as well. So I will see you in the next lesson.
12. Set Up Your Tracking: Their response makes it really easy for you to track your user behavior, and that is just with the integration of Facebook Pixel and Google Analytics. For the time being, they don't have further integrations at the time of recording. Hopefully that'll change. I am going to go into some more advanced integrations later on that will allow you to track your users through things like the LinkedIn insight tag, and your Pinterest tag, and other platforms. But for now, just focusing on Facebook and Google Analytics. So going into integrations in API from your drop-down here, you can go through and head on over to Facebook Pixel, and when you click into this, it's going to prompt you to actually connect your Facebook Pixel on your Facebook business page, and it's going to talk you through how to do that. Then it'll place the Pixel on every single GetResponse landing page. So even if at this stage you're not comfortable advertising on Facebook or Instagram, and you have no desire to do that, it's still a really good idea for you to start tracking your visitors, so that if in three months or six months you decide that you want to advertise to everyone who visited these pages but didn't actually purchase, and you want to advertise to them about your new paid offer that they might want to check out, then you can do that, because you will have collected all of their data and you will be able to actually see who saw all your pages and who didn't purchase because of this integration. So I do recommend that you go in and connect it. In order to really check that it's working, I recommend the Facebook Pixel helper. It's a little Google Chrome extension and it'll talk you through how to check that somebody has an active Facebook Pixel on their website. So if I go to livingtoroam.com for example, and I've got my Facebook Pixel helper there, so I can see I've got my pixel active and these are the things that I'm tracking on this website. So that's my first recommendation. Secondly, I would recommend that you go in and you start tracking things through your Google Analytics account as well. It's just best practice so that you can start seeing your user behavior inside of your Analytics account. Again, if you're not familiar with Google Analytics, that's fine, but it's just a good idea to have these things in place so that by the time you decide that this is a world that you want to delve into and you really want to get super nerdy on analyzing your data and you are ready to get going with all that, then you will have that data there to analyze. It doesn't mean that you have to live and breathe Google Analytics or even Facebook advertising at this stage, all you're doing is collecting that data so that in the future, if you do want to do something with it, it's there for you to use.
13. How I've Structured My Offer: Before jumping into the next lesson, I did just want to really quickly take you through my own offers in my funnel so that you have some context as to what it is that I'm creating throughout these lessons and why I'm creating it this way. So my core offer that I'm going to be looking to sell in this particular funnel is going to be a course bundle focused on teaching people how to become social media managers. That's worth $249 that I'll be offering to my audience for $37. Now ideally, a core offer would be at least a couple of $100 if not more, but for the time being, my focus here is just to get the foundations correct and also to make it seem really achievable for you guys because I don't actually find it all that helpful when someone is teaching me how to make a multi-million dollar funnel, because it makes it seem really overwhelming for me and really unachievable. So I wanted to create a reasonably priced funnel just to show you guys how to measure its success and how to troubleshoot the areas that aren't working because that's what's going to allow you to be successful with your own funnel. I've listed my core offer for $37 here. There's no tripwire for this particular offer, and there's no profit maximizer yet at this stage. I'm going to be showing you exactly how I would go about adding these in later lessons. So don't worry about that. But for now, our focus is just on getting the main elements right. This is my core offer and the step before my core offer would be my free lead magnet, which in this case will be a free 30 minute training on how people can actually become social media managers and what it entails and what they should know about it before deciding whether it's right for them. That's going to then seamlessly lead people into purchasing my paid offer. That'll be the basic structure of what I'm offering within my funnel. Promote the free training to my audience, get them to sign up, and then send them a couple of emails to make sure they purchase my paid offer. Sounds pretty simple, right? It is in theory, but hopefully in the next few lessons you will actually start to see how everything can come together for your own funnel in a relatively seamless way as long as the offers are right and they're closely tied to one another and they're really closely related so that it's a no brainer for your audience to move from one stage to the next. That's my overview of my own funnel and now let's get into it with the next lesson. I'll see you there.
14. Organise Your Assets: All assets that you create within your funnel should be quite consistent across in terms of design elements, your tone of voice, the copy you're using, the phrasing you're using, images you're using. Basically, everything should feel like it's a really clear and logical experience for your customers. From the very first organic posts they see on social media or if it's a paid ad through to the landing page, through to the e-mails they receive, the free offer they receive, and then the paid offer, and all of that stuff in-between should all feel like it's one big, wonderful experience that's completely consistent across. This is exactly why I try and put a lot of effort into the planning and preparation of all assets before, actually, going in and creating anything inside of my software, my tools, so that I can make sure everything aligns and looks consistent across. The other reasons for doing this is especially if you're working for clients and you need approval of your work before actually going in and creating your pages or your e-mails. This can really save you time because you're not creating something that the client doesn't want you to create. It's a lot easier to edit when you're still in a Google Doc than when you are actually in a live page design. Also, this is great for you to have a copy of what you've actually created, stored in your own Google Drive because you might not be with the same client or even the same e-mail marketing provider. For example, if you're doing this for your own business, you're not going to be with them forever. You want to make sure that you have a backup copy of all of you work whenever possible so that you can use it in the future if you need to. It's the same thing as you don't want to write a blog post directly inside of your website. Because what happens if one day all of that data is gone and you lose 10 years worth of blog posts? You want to make sure you have a backup of everything that you're creating. By doing it the way that I'm going to be teaching you means that if in 10 years from now or even six months from now, you want to look at something for reference, but maybe you're using a different tool, or you just don't have access to the thing that you created back in the day, then you will have this in your Google Drive so you can go in and take out exactly what you did and how he did it. Now I can honestly say, and I'll say this over and over again, it goes completely against my nature as a creative to plan and prep. Some creatives are really good at this. I'm just not one of them. I want to go in and straight, and start creating straight away. But I've actually taught myself to appreciate this process, and hopefully, I can pass some of that appreciation onto you and teach you how I've been able to do it as someone who's not super enthusiastic about planning and preparation. Especially, because honestly, the more time that you can invest into the preparing and planning phase, the less time you'll actually spend on troubleshooting once everything is live later on. Now I don't want to over-complicate things as I try not to do here. So I will just be creating what I'm going to call a minimum viable funnel. As in what is the bare minimum number of components for me to include in my funnel in a way that I can still be profitable, and allow me to test a few things out and expand on that later on by adding additional elements. Especially, if I'm running a brand new business, I don't really know my audience yet. I don't know if my offer works. I don't want to create this big, beautiful monster. I just want to have a smaller number of steps in this funnel to begin with. That means there's less chance for error and less things to measure to see if they're successful. Then that way I can also prevent myself from getting overwhelmed when I'm creating my very first funnel for myself or for my clients. To be honest, even my second, or third, or fourth funnel. Some people just appreciate taking this in steps. It can be a good idea to just start with the bare minimum that you need in order to be successful and profitable, and nail those components, and nail them really well, and then move on to some additional elements later on. I'm not going to be actually creating a tripwire or profit maximizer at this stage, because I really want you guys to get the basics right first. But I will be showing you how I would actually go about adding these into my funnel once it's live and I felt confident and comfortable in doing this. We'll go into that in a more advanced lesson later on.once you guys are a little bit more familiar with the tools we're using, and why we're using them the way that we're using them. Because as you guys know, having the ability to leverage various price points throughout your funnel can be a really powerful way of increasing your value per customer. So I don't want you missing out on that knowledge of how to set something like this up. But I don't want to go into it at this stage because we just want to get the basics of how to set up a landing page, how to write a sales page, how to structure all of this stuff. Then we'll go in and use the knowledge that you already have of the basic elements, and then expand on that with the profit maximizer and the tripwire stuff. The basic main elements that we'll be looking to create for our minimum viable funnel would be landing pages for your lead magnet or free offer delivery, or sign up, and then the thank you page. So once somebody signs up, you need to have another page to direct them to you to say, "Thank you for signing up," and give them some next steps. Then you need a sales page, for your paid offer and an order form for them to actually check out and purchase your offer. Then there needs to be another page on the other side of that. So once somebody signs up, they go to the Thank You page, once somebody purchases from the sales page, they need a confirmation or a purchase order confirmation page. Those are the four main pages that will be creating. Then the main e-mails you need to have as a bare minimum, is you need to have an e-mail to actually deliver somebody the free offer that they sign up for because if they've given you their e-mail address, so you need to actually send them something. That's the very first e-mail. Then the second email is the actual paid offers. They need to be able to access it and they need to receive that via e-mail. Those are the bare minimum e-mails that you need to create for your sales funnel. We will be going through this step-by-step. I am also going to then show you a really easy way to add some additional e-mails to your sales funnel, that are really going to assist you, not just with the delivery of your free offer and the paid offer, but we've actually converting prospective buyers before they become buyers. These are the e-mails that will sit somewhere between that free offer delivery e-mail and the paid offer e-mail to get them to actually go in and purchase. But this is the general bare minimum number of components that you need to have in place in order to create a functioning sales funnel. I am going to be sharing with you my process and my templates for creating all of these assets, and how you can do the same with some documents that I have included for you inside of your guide. We will be going through each and every element of your sales funnel together. How to prepare each one, how to structure each one in order for it to be successful. But ultimately, at the end of the day, you want to end up with a Google Drive folder that has all of your assets within it that are specific to you and your business and your funnel. They need to be ready, they're prepared, and prepared for you to actually go in and take those assets from Google Drive and create and launch your funnel. This is why I wanted to go over just briefly how I structure mine, and then give you some options for ways that you could change it, for it to be entirely yours. But of course, the start of this is you need to have a Gmail account so that you can access your free Google Drive so that you can store all these documents in the Cloud so they don't exist on your computer. That is really important because computers crash, and you can lose all your stuff really quickly. You also need to be able to access your stuff on various devices. Storing them inside of a Google Drive is a really good idea because everything is online, it's in the Cloud, you know it's safe, and you can also really quickly share these documents between you and your clients if you are working with clients. Jumping into my Google Drive over here, here's how I would structure it. I would have a folder entitled my Google drive, and it would have my free offer assets, my core offer assets, and then also if I had a profit maximizer or a tripwire, I would then create separate folders for those as well. Obviously, I would replace this with the actual name of my free offer, it wouldn't say free offer. In this case, I can go in and rename this. This is the acronym that I'm going to be using, which is social media free training. It's my social media free training assets. I know that is the name of this general funnel because I'll have a free training for people to discover what social media is all about, and then all my paid offers will align with that free training. That means that my core offer here would then be renamed, and it would be SM. It's still a part of the same funnel, so I like keeping a part of the acronym consistent across, but then the paid offer in this case is the social media management training. That is the actual paid offer, but this bit is just letting me know that this is a part of this funnel. If I'm searching for it in my Google Drive and I have several funnels that are being stored in that drive at the same time, then I know these ones are particularly for this funnel because that's how I've decided to identify. Again, in terms of naming conventions, whatever works for you, you can use full words. You do not need to use acronyms if it's a bit too confusing. But either way inside of your actual folder structure, here is how I like to structure things. I would have one folder that would be all the stuff that I'm actually going to deliver to people. Whether it's a PDF or a video or the kind of a guide, whatever it is that I'm actually giving to people in exchange for their e-mail address, all of those assets would go in here. That could mean the actual final finished assets. It could be the final e-book on the final video or any elements that I need in order to actually create that. If I'm creating a free training like I am in this case, this is where I would drop in all my video files, maybe my audio files, any slides I need in order to create the training, any images that I need, all of that would go in here. Then I would organize it according to whatever made sense for that particular thing. But I just always have one folder for the thing that I'm actually going to deliver to people, then I would have another folder which would exist just for the e-mail marketing side of things. That would be the e-mails that I need to send to people that are going to deliver them this thing, and then I would have the landing page assets. We are going to go through your landing page template, but this is where I would then put that template. I would have my written landing page inside of this folder ready to go when I actually need to go into get response and build it. But this is where the text for that landing page and maybe any images or anything else that I need in order to actually go in and create that landing page. All of that stuff would go in here. Again, this is the bare minimum structure and it really does depend on if there are any extra elements to your free offer that you feel like you need to organize. But the bare minimum is to just organize the thing that you're delivering. The e-mails that you need to send to people in order to deliver the free offer, and then the landing page or sales page that you would need to create in order to actually get people to sign up for the free thing so that you can send them the e-mail. That's my strategy for this. You can absolutely feel free to just dump everything all into one folder. Especially, for now while we're just going through everything, if you just want to have it all in one folder and that works for you and you're not confused by that, perfectly fine. I have gotten into the habit of organizing my stuff mainly because of working with clients. I have found that it's a lot easier for them if things are as hyper organized as possible. It makes it easier for me to explain where things are as well, because you can obviously then just right-click and you can share any particular folder with your clients so you don't just have to link them to one folder that has text, and images, videos, and PDFs, and everything, all in one place. It can be really overwhelming. So treat yourself as a client if you're doing this for your own business. I do this for my business now. I almost treat myself as if I was a client and how I would like things organized if I was doing this for a client. But for now, just have somewhere on your Google Drive, ideally where you can store the templates that I'm going to be giving you throughout the following few lessons, so that you can really easily access these in the future when you're going to be writing more and more landing pages and sales pages for your business. Now if you're ready, let's get started with learning all about what it actually takes to make a really great landing page for your free offer in the next lesson. I'll see you there.
15. What Makes a Killer Landing Page: Now you have a shell of where your assets are going to go inside of Google Drive and you have your GetResponse account all prepped and ready to go or maybe you're using a completely different tool. Either way, this is the time to actually go in and create all of the elements of your funnel. We'll start by talking about the landing page you need to create in order to get people to actually sign up for receiving your free offer because these will be incredibly key components of your sales funnel success as this is the entry point to your funnel. So it's really important to get this part right. But I know that copywriting is really not everyone's cup of tea and it can be a quite a scary thing for a lot of people. So this lesson is aimed at really helping you to get over your writing blocks and make it easier for you to create all of the rest of your assets as well. But the important thing for you to remember with everything you write online, not just your landing page, is this quote here, "People don't buy drills; they buy homes". In other words, people aren't really interested in buying the tools, what they're buying is the results. So focus a lot less on what you can provide people and more on what they actually will gain from the offer that you are going to be providing them with and you'll absolutely nail it with that mindset. Now, before we go into what to actually include and what to avoid in creating your landing page, is quite important for you to first think about, how did somebody actually get to this point? How do they get to the landing page? That all depends on your traffic source. So think about where you're going to be promoting your offer? Will you'd be putting up inorganic post on Facebook for your audience or are you going to be running ads? Or are you going to maybe partner with people who can advertise your offer for you, like when we talked about affiliate marketing? How you get people to your landing page will have a pretty severe impact on what needs to actually be on that page. This is an example of a landing page for an upcoming workshop that I got invited to by Gillian Perkins and then on the right there is the email that promoted this particular workshop. I know Gillian because I've been on her email list for a while and I've been watching her YouTube videos for a few months now and I trust her. But I don't know Chandler. I had no idea who he was and ultimately, he is the book writing expert who is hosting the workshop. So I need a bit more information about who he is and why I should trust his service, which is why the email is so elaborate, even though the landing page really isn't. Whereas if Gillian just said, hey, check out this guy's upcoming workshop and so probably click on that email link because I trust her and I trust her expertise. I'm curious about this, but I'd really need Chandler's entire backstory to be on the landing page because the email would have been so short. But because she explained everything so well in the email and the promotion of his landing page, it meant that the landing page could be quiet short and succinct. Just to be clear there is no right or wrong way to advertise or promote your landing page and there's no one answer. Some people have few thousand people on their email list and that's how they want to promote their free offer, so that's a great strategy for them, whereas some people have a really great Instagram audience and they know that it's going to go through an organic Instagram post and that's how they're going to get people there. In which case, they're probably not going to be able to explain a whole lot in Instagram posts because people on Instagram don't read that much. So they will need to create a really elaborate landing page as a result of that. So whatever the right traffic sources for you and your business, that's completely up to you. But just know that it does affect what needs to be on that landing page based on what happens beforehand and how much contexts people have before either getting to that page. Now once you have an idea of how you're going to be inviting people to the page and let's now talk about what actually makes it really great once they get there. First of all, you want to make it short and sweet. It's definitely always better to be clear rather than clever. A customer will never say no to your offer because you explain something too simply, but they will say no to you if you confuse the crap out of them with way too much information. So once again, simple is usually better. Then you also want to make sure that things are clutter-free. So there are no distractions, no unnecessary images or text on the page, or overlapping images or texts that can really, really skew the customer experience as well. You want to make sure that you have one clear and singular call to action. As an example here for you is a course platform called Kajabi, who tested out different calls to action. All they did was change their button texts on their landing page from see plans and pricing to get started today on their page and it increased conversions by 252 percent. Now, the reason this works so well is because get started today is actually a cause action. It inspires you to do something which is to get started. So we're going to be talking a lot more about how to leverage this powerful word choice on your landing page as well. But for now, again, clear is always better. Then moving on to powerful headlines. We will be going a lot into how to write headlines over the following few lessons because they are so powerful and inside of your guide you will also find a link to OptinMonsters, 700 plus power words and I want you to go in and bookmark this and save this link somewhere. Because I can honestly say that I use this for every landing page, every email, every sales page, every blog post, anything that I write on the Internet, I reference this page, because these words will help to increase your conversion rates like nothing else. Because what they do is they tap into people's emotions so well, and that is what they're designed to do. This is the list of 700 plus power words to boost conversions and they are continuously updating this. So this was originally written couple of years ago, but they've obviously just updated it in 2020. So this is absolutely amazing because they are actually divided into the seven deadly sins, because I guess that's how people think. You will find greed words and then examples of how to use these. So it's going to actually be showing you before you leave, don't miss our free website conversion inbox and it's giving you a highlight of all the greed words that they're using there and also how much it's actually increased the person's sign up rate from what they initially had. Then you have curiosity words and lazy words and some sloths words or other. It's actually better. Lust and vanity and all of these ones. So each and every section has a different twist and it's tapping into different emotion for your readers and then it'll also have examples of how to actually use these words and how it can help you improve your conversion rates. So this is amazing for writing headlines and again, I have included this inside of your guide and you will also have this inside of your actual landing page creation templates. So we'll be going over that in just a little bit. But for now, just know that this is an amazing resource and I really highly suggest that you bookmark this somewhere on your computer, because hopefully you'll end up using it just as much as I do. As an example, let's say I was a confidence coach and my main landing page headline here would be used to confirm what the free offer actually is in just a couple of words, which is free confidence-building course. Then the sub-headline would then be used to communicate a bit of a longer explanation of what people will actually gain by signing up for this free offer, which is how to become the life of the party and gain more friends. So this is the powerful headline and sub-headline relationship that we're going to be learning how to create. Then you want to go ahead and really focus on the copy. For example, what you might say is by the time you finish this free course, you will gain X, Y, Z. Instead of saying people who have taken this course have gained X, Y, Z. It's a subtle difference, but using words like you and we that make people think like it's for them and we being a part of a community. So again, it's for them becoming a part of our community. People are quite selfish with things like this. So they always want to feel like whatever you're writing is specifically for them. So you as the writer and the creator of these words, need to always be thinking about how you can make your copy really engaging for the reader and making each person feel like you're talking directly to them. You also want to make sure you're selecting captivating images and you're only creating or including necessary information. So don't ask people for their zip code and their phone number and their dietary restrictions if you don't need it. The more information you're asking them for, the more people have to fill out and this means that some people won't actually opt in, even though this might be a perfect offer for them, but they just don't have the time to fill out all these fields or they don't see a reason why you would need to know their phone number or their dietary restriction. So then they become suspicious and they don't opt in because of that friction in their mind. So whenever possible, just ask for their first name, email address, and nothing else. Now making sure that it's mobile friendly and using simple fonts. About 85 percent, if not more of your visitors will be looking at your page on mobile devices. So although you are going to be creating things on a computer screen, most of the people looking at it will be seeing the mobile version. So many, many people, including myself, will put a large amount of effort into their desktop view and then the mobile view is an afterthought and I just really want you to start even just mentally at this stage to get into the habit of focusing on the mobile view first and making sure you're giving it the love and attention that it needs. Because this is where most of people are actually going to be seeing your stuff these days. Don't worry about it too much because I'm going to teach you exactly how to design for all devices, but always be thinking of in that mobile friendly and mobile first mindset. Now when it comes to fancy fonts, again, this is just one of those things that naturally happens and I'm going to be showing you guys an example of a landing page I first designed. It's horrible. Wait for it, is just, yeah, special. But I think a lot of people get into the trap of these tools like GetResponse, giving you all of these options for all these amazing fonts and colors and images and you feel really tempted to use all of them all at the same time and this can be a problem because your users will much prefer a cleaner page with less stuff on it. That has very few simple fonts that are just easy to read, so they're not too small, not too big, they're just right there. The kind of Goldilocks of fonts that you want to be aiming for. So just don't over-complicate things and try and restrain yourself, even when it can be really easy to get over excited in trying to do too much. I'm very aware that this is a lot of information for you to keep in mind, which is why I'm going to be providing you guys with templates to follow. So do not worry, you do not have to memorize everything I'm teaching you. I still have a checklist of things to include every single time I create a new landing page and I've been doing this for years. So we will be getting into our template soon enough. But for now, I just wanted to show you guys a few examples of landing pages so you can see what all of these different steps look like in action. So let's take a look at that in the next lesson.
16. Landing Page Examples: Okay. So now let's get into some real life examples of landing pages that are taking all of these steps that we've already discussed as to what makes an awesome landing page and they're doing these elements really, really well. So we can see how brands are actually putting these into action. So Invision's homepage here uses a landing page on its own. It has a killer headline that grabs the visitor's attention. Then the sub-headline tells the visitor what the product or service is all about in less than 20 words. Then the call to action is to get started with using the app, watch a video, or request a demo. Now, this is, for me, a few too many calls to action. But again, it's because we are looking at their homepage here, not a designated landing page. So that makes sense as to why there are multiple calls to action. But the headline is my specific focus here. Extra points for including some brand logos of big brands using Invision at the bottom to really enhance the trust that I would have in their brand straight off the bat just by seeing these in association with their brand. Slack is another great example of this, where the headline is, Slack is where work happens. Then the sub-headline then says, with channels in Slack, you and your team know where to go to ask questions, share updates, and stay in the loop. This is super clear and the additional images of people actually using the tool on the right make me really want to know more, which then brings me to my next point, which is to use captivating images. Now, our brains process images 60,000 times faster than text, meaning that images are really critical to the success of your landing page. The pictures should be high-quality, prominent, and relevant. So if you're selling a product, you need to include photos of that product. But if you're selling a service, just find a way to demonstrate someone using your service in an image. Airbnb is a really good example of this here because they could have easily just listed their properties on their landing pages. But instead, you'll actually see them showing images of people using those properties and enjoying those properties that tap into people's emotions by showing them what it could be like for them if they were to book that property so people can really start imagining themselves actually booking these properties or experiences. Now let's talk about engaging copy because this is where things get tricky for a lot of people who are not used to writing or maybe don't even enjoy writing. There are a few angles that I want you to consider potentially leveraging in your own landing page copy. This is the curiosity angle. So this is Jenna Kutcher's landing page for a free guide on how to negotiate like a pro and other life changing secrets from her $100,000 a day business coach. Now, this page has benefits written all over. Even though it's not a 100 percent clear what the secrets are. But I'm already hooked because I know I would personally never spent $100,000 on one day with anyone. So I would never learn these things firsthand. I want to know what this person has to share with me on negotiation and running a successful business. Now, another angle is a loss aversion angle, which is a powerful psychological marketing tactic, because our brains are wired to avoid pain. Basically the gist of this is that we hate feeling the pain of losing something more than we enjoy the pleasure of gaining something of equal value. So for example, the pain of losing $100 in a poker game is a lot greater and lasts a lot longer than the joy of finding 100 bucks on the sidewalk. So if you can find a way to bring up your audience's pain points and then show them how your product or service relieves this pain, this can be a really great way to boost your conversion rates. This is a really great one from Neil Patel that taps into my need to get more traffic or for me to want to avoid losing precious traffic, and he's going to show me how in just three minutes, which is awesome. Then there's the pleasure enhancing angle. Yes, we're absolutely pain avoiding machines, but we're also pleasure seeking machines, and on your landing page, you can show your audience the pleasure they could experience through your offer. This is your chance to tap more into their emotional side, not just the functional logical side. Just imagine that let's say you are a pharmaceutical rep for an antidepressant. You're not really selling the pill itself. What you are selling is a better, happier, brighter future that person will have when they take anti-depressant. So this example here is really great because it's saying that people can reclaim their reputation, which sparks interests straight away because it is enhancing that pleasure factor in their brains. Now, alongside your engaging copy, also want to make sure that the call to action is really powerful as well. So you can make it big, bright, and colorful. Ideally, you want to do both of those things, but just make it really actionable. Don't use words like submit. Make it really specific as to what people are actually opting in for. You can even use images like this one around your call to action button to actually point the reader's attention directly to that button. This is from Crazy Egg here, and it's also super actionable. The button itself is super actionable by saying, show me my heatmap, instead of submit or something that's quite passive. This is a very actionable call to action, because it tells them exactly what they're going to get when they actually fill out their answer. So this guy is physically pointing at the button. But you can even do this by just showing images of people looking left and right based on where the call to action is, people have found really, really great success with is using images of people whose eyes are directed at the button, and that's a really great way to direct the reader's attention to that place on your page as well. So there is a lot different elements for you to keep in mind. But hopefully, what these examples have shown you is that every single landing pages totally different and unique to each business. I'm going to be making this much easier for you in the next lesson, where we're going to go through step-by-step and answer some questions together that will help you really construct your landing page content in a way that is unique to you and your business, while still leveraging a lot of these powerful techniques that we've discussed throughout. But before we get there, I did promise you that I will show you an example of my very first landing page that I ever created. Oh my lord, it's painful to look at. It's creative and the bright blue background with the orange blocks, and the white text, and the weird fonts, and weird image editing, and your eyes just have no idea where to look. But I wanted to show it to you because people still signed up to this. I don't know how, but they did. So just know that mistakes will be made and nothing is ever perfect the first time you do it. So some of you guys will be creating your tenth landing page, your hundredth. But some of you will be starting with your very first page. I will, of course, be teaching you how to create beautiful landing pages, not ones like this. So you can feel confident in knowing that with the tips that I'm going to be talking you through, you can avoid having eye sores like this one as a part of your sales funnel. But use it as inspiration to know that even terrible landing pages like this one can still lead to people signing up for your free offer, if the offer is good enough. I do promise that with each and every new landing page and new email that you write, it will get better and better and better. One day, you will look at the very first thing you created, like I do for these things, and just think, wow, how far I've come, seriously. So it's really great. Again, this is why I really like saving my assets and actually keeping track of what I'm doing as I'm going along. So that one day, when you've done this 100 times over, you can look back on the very first pancake and just go, wow, yeah, I've definitely learned a lot more than I give myself credit for. All right, guys. So hopefully that gives you a little bit of inspiration and confidence to know that you're probably already 10 steps ahead of where I was when I first started creating landing pages. I'll see you in the next lesson where we're actually going to go ahead and write our amazing landing page. So I'll see you there.
17. Write Your Killer Landing Page: Now we know what makes a good landing page and we've seen some examples. But before we can go in and actually start creating it and designing it, it's quite important for you to write the copy in a blank Google Doc, so that you don't get distracted by images and layout, and colors, and all of the things that are very easy to get distracted about. You need to make sure that the words are right before you can start to think about design and the actual general flow of information. In the first part of actually writing our landing page, we're just going to be brainstorming and putting some ideas together by answering some questions, and then we will go through and actually write out our copy, and collect any assets that we need in order to create our landing page. I want you to go and actually click on the link inside of your class guide that's going to give you access to the landing page, brainstorm, and plan template. You guys are not going to see any of this. It's going to have a button there that says request access. Don't request access because I'm not going to be able to allow you to actually edit this because it needs to remain a blank and text free template, so everyone can use it. What you want to do with all the templates I'm giving you is head over to file and make a copy. Then you can put it in whatever folder makes sense for you, and name it something that makes sense to you. In this case, I would put in my social media free training, and it's no longer going to be a template, it's just going to be a landing page, brainstorm, and plan. Now that's going to create a page for you that has all of the same content in there for you, but it's just going to allow you to actually edit it. Again, at this stage we're just brainstorming. What is my one singular goal that I'm trying to achieve with this landing page. Am I looking for people to download an e-book, fill out a survey, book a consultation? What do I actually want people to do? What's the one action I want them to take? For me, I would say that I want them to sign up for a free training. Again, it doesn't really matter if it's bold or what size it is. This is just a brainstorm document for me, and this is where I would fill out as much information about my audience as possible. Hopefully, you guys have thought a little bit about who your buyer personas are, who your customers are that are most likely to actually sign up for your free offer and ultimately purchase your prayed products. If you haven't thought about it, this is your chance to really think about it. Who are they? Where do they live? How old are they? Are they parents? Are they not parents? Who do they follow online? What books do they read? What are their dietary restrictions? As much as you can write about them here. This is going to help you frame your copy around their pain problems, their pleasure points. What are the solutions that you can provide to the problems they're experiencing in their lives? Even just a tone of your actual copy. Are they quite funny? Are they quite youthful? Is your audience between 20 and 25, in which case you're going to be writing very differently than if your audience is in their 50s. This is why you want to include as much detail about who your audience is, that's going to be reading the stuff on your landing page here as possible. For me, I would maybe just pick one of my customer personas here, and I would just say, target market would be age 20-35, female, English-speaking countries, most likely. Doesn't mean I wouldn't advertise to countries that are not primarily English-speaking, but again, I'm just trying to be as specific with this as possible. I would then obviously give them a name, but I'll just say; single, no kids, interested in travel, and working for themselves, independent. Then I'd say; fans of Seth Godin, Amy Porterfield. The reason that this is important is because I would be targeting people who already have some knowledge of the social media marketing world. They're not a complete blank canvas, so then I know that on my landing page I don't need to explain what social media management is. I just need to explain to them that it's an option for them, career-wise. Pain points for these guys would be; stuck in a nine to five career, sick of office politics, filling unfulfilled. I would keep going with that, and I would also put in their hobbies and their interests, but you get the point. As much as I can put in here that might allow me to cater my copy on my landing page to this. In terms of competition, we'd again go to Facebook ads library, maybe do some research on my competitors websites, and I could actually put in URLs here. Do keep in mind that people's URLs change, and just because you put in a URL doesn't mean that someone's not going to take that landing page down. Which is why I like to take screenshots of people's landing pages, not just putting in the URL because they do get taken down, especially if it's a timed offer. If they got a webinar that they're presenting this next month, then chances are that URL is not going to exist for much longer. But the main thing you want to do here is actually write down some points of what they're doing really well with their offer, how they're presenting it. Anything that you really enjoyed about their landing page in terms of the texts they're using. It's important for you to make this your own and not just completely copy your competitors, but this is where you could go in and write some key points. I know, for example, for Amy Porterfield's landing pages, I would write down; using lots of images of herself, bright colors, playful. These would be things that I like. Then I would say, I actually quite dislike the fact that her page is too long, too much text, not visual enough. Quite bright and colorful, but it's really not got that many images on it, so I would actually change that about my own page. I would write in, competitor: Amy Porterfield. URL or screenshot. If I take a screenshot of her landing page, I can tuck that into my Google Drive and I can link that particular image here so I can keep it forever instead of just whenever her page is live. That's my preference, and I will link you guys to a resource for creating an actual screenshot of an entire landing page. Let's just go ahead and do that now. This is a slightly different version of what I've seen before. It's a lot more visual, it's a lot more broken down. I actually prefer this version of her landing page, and it's got a countdown which is awesome. Then I would use my Chrome extension, which is full-page screen capture. Again, I will link you guys to this, but essentially all it does is it'll take a screenshot of the whole page for me, and then I'm able to download this as either a PDF or just an image. Then what I can do is I could come in here, this is my free offer, and I could just put it in here. Doesn't really exist within any of these folders, this is just competitor research. So I could upload my screenshot. I would rename this so that in the future I'll know what I'm looking at. Amy Porterfield landing page screen grab. Then what I can do is I can get a shareable link, so it's just me, I've already got access to everything and doesn't well, that's fun. Copy this link, and then I can jump straight in here and type a link this. For that in the future, if I want to look at this landing page for competitor research purposes, I know it's going to be there. I'm not just guessing it's going to be there, because if I do link to a live page, they control that page so I'm not sure if it's entirely going to be there. This is where I would come in and talk about my competitors, what I liked, what I didn't like, and all that good stuff that I can maybe use for my own research. How do they get to this page? For me, I would emailed subscribers, posted on social media organically, and ran paid ads on Facebook and Instagram. This is important because if I'm going to be running ads to this page, I need to know that it's not just going to be people who already know me, like my subscribers and people on social media. It's going to be maybe people who have never heard of me. That means that there needs to be a little blurb about who I am on the page maybe if I'm going to be running it to people who don't know anything about me. I either need to put something about me in the ad itself or on the landing page to say, ''hey, this is me and this is what you need to know about me, not just my offer''. This is again just brainstorming and then here's what I've written here. You guys may or may not use all of these. You honestly may not end up using every single one of these points. Use them in a way that makes sense to you. I would actually recommend against using all of them because it means that your copy is going to be way too long for what it needs to be for a free offer. But I wanted to include all of them just so you've got them for your own reference, and I've got little explanations beneath them as well. The first thing we're going to start with is a killer headline. Again, this is something that people take years to practice, which is why I love the headline analyzer because it gives you an actual score of how good your headline is. Sometime it will ask me to sign up. Sometimes it will actually ask you to sign up for the mailing list. It's still a free tool, but you can put in fake information so that you can access this. Just know that if it pops up with the thing that says sign up, you can actually just put in fake information. That's fine. This is the actual headline that I started with, which is working online 101, how to start your career as a social media manager. That's a 61, that's not great. We want to have this in the 70s for our headline. When you scroll down, it'll actually tell you how you've done and why it's giving you that score. It'll say most of your words are too common. You've got a few uncommon and some emotional words, you have no power words. The opt-in monster power words that we were talking about, like secret and forbidden and that whole guide can be really useful in increasing power words, and then it'll also tell you if it's too long in terms of characters and word length as well. It will tell you why it's giving you that score and how to fix it. Every time you change it, it will give you a headline history. If you find one that you like, and it was three headlines ago, you can always come back to it because it'll keep a record of all the headlines that you are creating. I did actually already do this because I don't want to take you guys through the whole lengthy process of changing things because honestly, it can take like 20 minutes at least to get to a headline that you actually like. But just know that this is sort I started out. I think I did about eight or nine variations before I got to one that was a good enough score that I actually liked. This is how that ended up. It was how to become social media manager in 2020, perhaps without the 2020. See what the score is. It's 70, that's pretty good. I think if I remove the 2020 bit, it'll be short enough for it to like it a little bit more. Yeah. Perfect. Then if I take this out, let's just see what it thinks of that. Yeah. That's pretty good. That's where I would go with my actual headline. Then we would have a sub headline that will actually explain a little bit more about what this is. But you can see that it's obviously keeping track of everything that I'm doing. It'll tell me that I still don't have power words. The word actual combination of common, uncommon, and emotional is quite similar, but it's quite short and punchy. It does like exactly what I'm doing. It'll also tell me that people will remember the first and last three words of your headline, so you want to make sure these are quite powerful. It will give you some examples of how to make things better. Again, if you can go over to the power words, got from opt-in monster and add in a few of those emotional trigger power words, it will be much, much better. It does take a while to get to the right headline and sub-headline. But I'm happy with this one 75 a is really, really good score. Anything in the green, which is anything above 70 is awesome. I will keep that and you guys will always have that as a link there if you are looking for a bit of a reference. I've also included some examples here of the headlines you could do. This is a how to use formula, so it's how to achieve something. But then you could also have a list formula so it could be 10 ways or 10 lazy ways to achieve something. They are definitely formulas for how to create awesome headlines, but the headline analyzer will really, really help when you're still in the brainstorming phase. This is where I want to actually put in a more in-depth explanation of what people will get. I might say something like earning more while working less has never been easier. Learn how you can. Online and become your own boss in this free training. That's technically two headlines or two sub-headlines that you maybe want to include just this second bit, not necessarily that. But again, I'm just brainstorming for the time being so I'm happy to keep that there as a powerful and more in-depth explanation of my headline. The powerful explanation is essentially just a more elaborate version of the sub headline if you find that this isn't descriptive enough and maybe your offer is quite complex so you think it needs further explanation that's maybe a more in-depth paragraph as well. Then, again, this is just talking about how you can alleviate your audience's pain points and how you might be able to enhance their pleasure and what are the problems that they're trying to solve and how are you solving these for them. I'm quite happy with what I've written up here for reference for an actual base for what I'm going to write for my copy so I'm not going to fill these out for the time being for a level of trust and authority. Again, for free offers, this is not as critical as it is for sales pages, so when we were talking about including logos of big brands that have featured your brand that's really great for sales pages, but for completely free offers it's not quite as necessary to say, I've been featured in Forbes magazine, or testimonials, for example. It really only needs to be there to see if people actually required to pay for something, so you don't necessarily need to include that on your landing page, but if your free offer is really, really closely tied with your paid offer, so if, for example, your consultancy and your free offer is to book a free call with them, then yes, you would want to include some authority building element on your landing page because people are very close to actually working with you in that case, so you want to have testimonials of past clients you've worked with on your landing page already in that case. These are more just guides to go over all of the different elements that we talked about so don't use words like submit, use words like, make me famous, I need help, yes, I want the checklist. These are all action items that you can use for your calls to action. Here's where you could also link to any images that you want to include on your landing page. Again, this is more for you guys who are doing this for clients and the clients need to sign off on the images that you're using on the landing page because copying and pasting them in here maybe a little bit too small, so maybe if you want to just link them to another part of your Google Drive that has the actual images then this is where you could put that in. Otherwise, you can easily just describe the images as well. I could just say, Maggie on laptop. If I know that that's a particular image that I want to include, I can just write that in here as well. This is more just some extra guidance and the link to your power words here as well. Then this is more about next steps. Once you're done with this, you want to actually go into a blank Google Doc and write out your landing page copy based on the stuff that you've brainstormed up here. I'm going to go over that in just a second and I'm just going over to step 4 here. Any other assets that you need for your landing page like videos and images and all of that stuff there's just some guidance for you here of how you can do that. My preference for any video content is to go through Wistia. With Wistia, what you can do is you can have up to three videos for free on an account and they're just a lot more customizable than what I find with YouTube or Vimeo. You can definitely do those guys as well. Let me just zoom out here so you can see this a little bit better. But this obviously is basically a looping GIF, it allows you to put a text overlay, allows you to use your own branded colors, so that's all under the Customize tab within Wistia. It's really easy for you to get set up with these guys, they've got lots of helpful articles. But this is where you can go into, let's say, appearance, and I put in my hex code there but I can change this to any color that I want. I can just discard that. Same with the text. If I was going to customize that, go into the thumbnail, you can say, do you want it to be an image or do you want it to be a video which is a preview of what they're going to get if they click on that. This is the text overlay here. It just looks a lot more professional in my opinion than if you just embed a YouTube video. This is particularly for those of you guys who are going to be doing trainings, so you don't have a PDF download. You're going to be offering people free training as your free offer, Wistia as my preference. It's really easy for you to add in captions and basically anything that you need to do, you can do within Wistia and you can do it for free within their free account as long as you have less than three videos. Only really downside is that it still has their branding on it which is not a huge thing really. As a part of that also, you have some powerful statistics that you can analyze to see what your engagements like where people drop off especially if you're delivering a free training that has an upsell to a paid offer then you can see if as soon as you are mentioning the paid offer are people dropping off or are they staying tuned? You can also see where people are tuning in from globally, geographically, and such. That's really, really awesome. I've linked you guys to Wistia, Vimeo, and YouTube. You can use any of them for your video content. Then in terms of images, so if you don't have your own images to use for your landing pages you can always use a resource like Unsplash. These guys have completely free to use images, so they are licensing free, you don't have to credit people that provided these images for you. As soon as you click into any image on here and you go into download, just make sure you're downloading this as a smaller image because their original size images are gigantic. You want to make sure that you are only downloading them in the size that you need them. I'm also linking you to a resource called TinyPNG where you can drop any image in here and it's going to make it smaller for you, which means that your landing page is going to load a lot faster, which is going to be much better for your users especially people who have a crappy Internet connection. If you have a really, really big image, not just big in size, but big in actual file size, then it might take a long time for that page to load because your software is trying to load that image so it might mean that some people actually just exit that page because it's just taking way too long to load, so you do want to be using small images whenever possible. Again, all of that is explained in here. If it's a little bit too confusing for now, all you need to do is make sure that any images that you are downloading, if you want to reduce the file size, you can drop them into TinyPNG and it will do that automatically for you. The final step is to actually try and simplify the copy that you've written. For me, I have written my copy here. I'm just going to exit out of this. This is how I've structured it based on the brainstorm that we did inside of here. I have taken some of these points and things that I like about competitors and things that I think my audience would resonate with and I have gone in and created a general structure what my landing page will look like. I'm going to have a headline, I'm going to have a sub-headline, this is going to be my call to action to get people to sign up for my free training, and then this is going to be the four points that are included inside of the free training, and then some more details about how to tap into their pain points and another call to action. The final step that I like to take once this is all written out in a Google Doc like this, is copy this and drop it into the Hemingway editor. Let me just zoom out here. What the Hemingway editor does, if I just delete what they have there and I paste in my own content, is it will actually highlight things that I can simplify or that are a little bit too confusing. You want this to be ideally a grade 6 level, not so much above grade 5 is maybe a little bit too simple, grade 6 is the ideal grade reading level because, again, we want to try and be as simple with this as possible, so some of these things are not going to be visible on the landing page, so it's not going to say headline or sub-headline or call to action. Those are just for my own reference, but any actual texts that I'm using, it's going to tell me, this is hard to read, this has a simpler alternative. Let's go ahead and take a look at what that alternative is so I can maybe change this, so I can change that to their alternative. This is awkward to read in their opinion. What if you could work with businesses all over the world and give yourself a promotion every time you learn a new marketing skill. Yeah. That is awkward to read so I'm going to go ahead and change that. Let's just change that. Cut it down like that. That looks good. Give yourself a promotion every time you learn a new skill. How would it feel to start working towards building your own dream instead of spending your days building someone else's? Absolutely, I agree with them, that is awkward phrasing, so let's just say, it's time to start building. Now we're at a grade 4 level. The sweet spot again is grade 6 level, but anything below that I see it as a good thing because, like I said, no one's going to say no to you because something's too simple, they will say no if it's too complicated. I like the Hemingway editor because it keeps me in check because sometimes I read stuff and I think, oh this makes perfect sense, but then this editor will remind me that things that make sense to me don't necessarily make sense to everyone else. Then I could just go and copy this over and then edit my original documents so that it's a little bit more user-friendly and then build that in my actual get response tools. We'll go ahead and do that in the next lesson and I'll see you there.
18. Create Your Killer Landing Page: So now we're going to get into the fun stuff, which is the awesome creating of your actual landing page. You'll see just how easy this is inside of GetResponse. So the first thing you might want to do is go over to Files and images, so you can upload any media assets you want to use for your page. If you're not quite sure what you need because you're not sure what the layout is going to look like, then you can always do this once you're actually inside of the page editor. But if let's say you have pre-approval from your client or from your own business, so you know there are specific images you definitely want to use in your landing page because you're using product photos, for example, then this is where you could go and maybe create a specific folder like I did just here. All I've done for the time being, is I have just dropped these two images in here that I know I'm going to be using for my landing page. Again, making sure that these are quite small in size and file size, so you can see that these are just over that 100 kilobyte mark, which is still good. Same with this guy, it's not too big and also they're actually quite good in their overall size of the image as well. So once again, making sure that if you are using any images, but especially ones from free websites like Unsplash over here, if you're using any of these to use for your landing pages, which I actually quite recommend. I often use these for my own landing pages as well. So making sure that you head on over to Download and try and download one that's quite small unless you're using it as a background image for your landing page. In which case you might want to download the larger, not the original size large one, because these are meant for print mostly because these guys have to be uploading them in file that's as big as possible in case people do want to make prints of them. But you don't want to go too large. I would actually say probably the medium one is fine and it's going to make it quite big. So we want to head over to TinyPNG and I'll just grab that image. I can say it's 370 kilobytes. That's actually not too bad for an image or that size. But then all I've done is I've just put it in here, resized it, and it's resized by 56 percent. But it's still going to be a really high-quality image. I could then add that image stray into GetResponse here. I could say I want to add files to my file library and I would probably rename this ones. So I do try and rename my images. Not necessarily because of search engine stuff like you would for a website where you want to make sure that if someone is searching for laptop on table, that your image pops up because of SEO. You mainly want this so that when you have an image library of 1,000 images a year from now or six months from now that you're able to find the image you're looking for because I wouldn't know to search for this in my own image library. So I would want to name it with something that is specific to that image in case I was looking for it later on and I would just go ahead and add that for now. Again, we're testing things here, so it's not super critical. But that's just how you can add some images there so they're all ready for you once you then go and move into the conversion funnel section of GetResponse. But at this stage we are disabled, nothing is happening, it's because it's just a shell at this stage. It's actually going to have a little moving element here based on what GetResponse wants you to do next. So this is the very first thing that we want to be doing, which is to create our free offer landing page or a sign-up page. So it really actually say put a sign-up page with a form and maybe even an exit pop-up where people can subscribe and offer a freebie to get more signups. So we're going to go ahead and go through the different templates that GetResponse actually offer for these sign up pages. So there's lots and lots to choose from, which is why I recommend starting with this over here, where it's narrowed down by different categories. It can help just because of the actual way that it's laid out and the complexity that they're using as well will be specific to the actual offer. So if you are going to be selling physical products, the structure is going to be quite different to somebody trying to get sign-ups for a webinar, for example. Online courses are my preference because that's what I'm going to be using for this demo and I already know I'm going to be selecting this template over here because it's quite simple. It doesn't have too many elements and I like that because I have tested this a lot with my own offers and the best-performing landing page I've ever done have been the simplest ones. So I can see the preview here, what this looks like. Then it's also going to create a thank you page for when somebody subscribe to your free offer, it will pop them onto this thank-you page that looks very similar to the initial landing page. So the actual style is quite similar and it's got that consistency across. So I'm happy with that. I'm going to call this the Signup Page. So all of your elements are already pre-set here. Obviously, you want to make sure that you're following these prompts. It actually gives you prompts for how to write headlines, how to write sub-headlines, how to put in these elements to include in your free training. But hopefully if you're following the steps along with these lessons, you will have done this already. So you have this prepped in a Google doc of your own, that's going to have the outcomes of your free offer and the different things that you want to be prompting people with on your landing page. We are going to be creating two different variations of this page. So this is variant A, and then what we're going to do is we're going to duplicate it and make slight changes so that we can test out which of our variants is performing the best and then turn off the one that isn't. Now you can create multiple variants. So you can go as far as making three or four different variants, but two is usually enough unless you have enough traffic to these pages to really justify having more versions because it's going to split your traffic evenly. So if you're going to have a100 people visiting this webpage, and it's going to put 50 people to variant A and 50 people to variant B. So it starts to break down and create quite small traffic numbers if you have too many variants, but you don't have the traffic numbers to back that up. So more on that in a little bit. But what we want to do now is make this branded to what makes sense to me and my brand. So I would remove this logo because obviously that is not my logo in terms of the pop-up form. So if I double-click on this, it's going to show me what this looks like. So it's very branded to this particular page, and you can then go in here and edit this as well so you can edit your buttons and your actual form. Obviously, this is a crazy color in terms of the button and the hover color. So this is where you can come in here and edit it using your own branded Hex codes. Yes, I'm I a freak, I remember all my company Hex code. I think you just naturally do after a while. But obviously that doesn't quite work with the background color and unfortunately, this is not a color, it's not a solid color, it's an image that they've used. So in order for me to change this color, I would probably have to just remove the image and then choose a solid color that is more compatible with my brand. So let's say I would start with my actual branded color there and then make that slightly different so it's not that clashed like it is with the orange. Now the reason I'm not actually going to go too much into customizing this at this stage is because I'm not going to use an exit pop-up. The reason for that is because I want to make sure that I'm able to run Facebook ads to this page and Facebook doesn't generally like exit pop-ups unless they're the kind of pop-ups that appear when somebody clicks on a button on this page. So if somebody clicks on a button, let's say there was a button here and I click that and something pops-up, Facebook seems to be okay with that. But when it's an exit intent pop-up, which means somebody's trying to exit the page and as soon as the page tracks, so they're heading towards that exit little cross on their browser tab or they're trying to exit the page in any way, this is going to pop up. So it's happening automatically based on their behavior, but not based on them actually clicking and taking an action on the page. Facebook guys don't particularly like that, so for that reason, I wouldn't necessarily use this if I wanted to make sure that I can run page traffic to it in the future. So I'm going to remove that for now. But if you are going to be only promoting these with organic traffic, definitely use an exit intent pop-up because it can rescue a lot of your subscribers, and you always remove that or have a separate funnel for your paid traffic and then have a separate one for your organic traffic. It's just something that I've gotten into the habit of removing if I know I'm going to be running advertising to it. So then I would just go through, I will delete this because I'm not going to be using their e-book obviously. I can keep that background for now. I really hate this. I don't know. It's one of those design elements that I'm sure is quite creative, but I really don't want that combo but it's fine for now. What I want to start doing is actually filling out this page with the text that I have chosen for my landing page. So I'm going to head on over to my actual Google doc here. So I know this is my headline and my sub-headline, so I'm just going to copy both at the same time for now. Let me just chuck them in here. I'm going to copy my headline and put that in here. I want that to be centered. GetResponse doesn't unfortunately allow you to auto align stuff. So there's nothing at this stage anyway to click to say, can you center to this but it will give you these guidelines for how to center a few things. Now you notice that there's a box, it's almost like an invisible box that's attached to the sub-headline, which allows me to move the box together. So if I was going to put both of these texts into this box, it means that if I can grab this invisible box, I can move these two elements at the same time. That's a big benefit when we get into designing stuff for mobile. But for now, I'm actually probably going to move these things outside of this box because I don't really need it. I'm going to go and erase that. If I was starting from scratch, I can always just start with text here. So any of these elements here on the right-hand side, you can just drag on over and start with your texts from scratch. But in this case, because I'm using a pre-made template, all I'm really doing is just customizing the stuff that they've already given me. I can just stretch stuff out. It's quite intuitive, it's a drag and drop builder. If you've ever used a similar one in the past, you will be quite familiar with how this works. So it's not too complicated to use, which is awesome. Now, obviously I'm not going to be using an orange, but I might try and use a slightly different color. Okay, cool, happier with that. Now this is obviously then going to be way, way too large. So anytime you are clicking on any of these sections, you will notice that you will have these corner bits where you can expand a section or expand a box, same as you would with any drag and drop editor. So I can move this up. So it's not as big because I don't really need to take up as much space. The reason they probably had it that big is because they had that e-book embed in there. Because I've now shrunken this it also means that it gets rid of this beautiful turquoise green thing, which I don't want on my page, which is awesome. Now obviously I would want to move this down without damaging the overall layout of this bottom section. So sometimes it is a little bit fiddly. I need these little squares to be there in order for me to be able to expand on these sections. Sometimes when you're working within the section themselves and then you click on the section itself, this doesn't appear. I don't know why that is. I think I've experienced that in various builders at this stage, unfortunately. But it's fine. So just make sure that if you are having trouble getting these little squares to appear so that you can adjust the width and the height of something, just click away, click into a different element and then click back into it and it'll appear. I would want to make sure I'm moving this stuff down so that it's not super, super close to this. But also what I want to do is I actually want to move my subscription box up a little bit farther up on the page. So it should be one of the first things that somebody sees. Because if I've done a good job of actually promoting this page through social media or through a blog post, or maybe I'm promoting it on someone's podcast, or I'm promoting it through paid ads, then somebody who lands on this page probably already knows that they want to opt in. So I want to give them the opportunity to do that as soon as possible and make sure that they're seeing the actual box where they can opt in. So when you click on the actual sections themselves, so these are these big blocks, the building blocks of the page as opposed to the elements inside the page. So this would be a text element, this is a button element. But when I click over here, you can see that it's highlighting this entire section, and that's when these arrows will appear up here. So this allows me to rearrange the actual sections on the page as a whole. I can click the arrow above, and now it's moved this way farther up on the page, is pretty much one of the first things that somebody will see now. That's a really great thing because it means that somebody basically goes "Okay cool, I'm going to learn how to become a social media manager in 2020. I just want to go ahead and opt straight in." If they're not sure they can keep scrolling down the page and find out what it is that they're actually going to learn inside of the training. That's going to help anyone who's a little bit unsure about what they're going to learn. But I want to make sure that anyone who's ready to opt in has the opportunity to opt in straight away. All right, so these guys are in an invisible box. That's why it wasn't letting me do it. After I've positioned this where I want it. Maybe a little bit farther up. Okay. So if you're not sure how to create these invisible boxes, all you're really doing is grabbing a shape, so I would grab this square shape. When you click away from it, you'll see that it has a frame. So we don't want it to necessarily have a frame. If you double-click on it, you'll be able to adjust any coloring or anything like that the moment it's got a solid border style. So I want to go over there and click on "None", so it has no border. So it's just a completely blank square. But it means that any element that I drop inside the square, like text and, making sure it's in there. I could also drop in a button let's say, I could drop an images. Then now these guys can move together. So they're able to really easily move them around the page. All right, so that's exactly what these guys are clearly situated in because they're in an invisible box you can't always see them. But obviously when I hover over it, it'll highlight the box as a whole. When I hover over, this is going to highlight the individual elements inside of it. Okay, so that's looking good. I want to make sure I'm going to move this down. I'm going to be adjusting this text because it's not an e-book. So I do want to delete this or replace it rather with my own image. So I'm going to go ahead and click on "Replace." My files are in here. We're going to be using this image in here. Now because I'm just conducting a training, I'm not actually delivering any e-book or product. I'm not able to use an image of a products, but I do want to use an image of myself because I'm the person who's going to be conducting their training. So that's a no-brainer. Then you can use any of these elements around here to make it smaller or larger or you can use this crop tool if you maybe think this is a little bit too much of the background, I just want it to be primarily me. So then I would just crop that and hit "Enter" or click "Away" and that's going to be nicely cropped. I want to actually go in and not have it cropped so that looks good. Okay, so now I'm going to go and continue to grab a few more things in terms of my text. So I enter your name and email. I don't necessarily need that to be capitalized. I don't necessarily need that to be bold. Maybe that's a bit too big, 24 is just a little bit too big. So this is where I could adjust my fonts, my font sizes, the line height, the font color. You want to make sure you're highlighting things if you're changing the font color. Any text stylings can happen here. My button is definitely going to be a different color so I want to double-click that. I'm just going to make it a solid color. Now I need to change the text on it because it is. If I click on this, should allow me to change anything in terms of my border radius. So if I want a square button instead of a rounded corner one, I would just make sure to get this to zero. That looks good. All right, so that's a little bit more on brand. I would maybe play around with this a little bit more to make it look a little bit more mine in terms of my own branding. One of the main things that I wanted to do is make sure I'm changing these over to make sense with what I actually want people to put in there. So I want people to just put it in their first name. I want to put a little asterisk because it is required in order for them to fill this out. This is going to say email address or just email, email is fine. It can't say address because people will think, I want their home address for whatever reason. That is not what we want. All right, perfect. Let's see what else we need to put in here. I'm going to change the button to show me how it's done. These are the four things that I want to put in as my four action items. [MUSIC] Okay, that's looking good. I want to actually add in one more section here. So this is a new section and then drag that in here and make that slightly bigger. I'm going to use an image. So I'm going to drag in an image here and replace that. Again, remember when we're talking about how to increase your conversion rates for things, you can do that by using images of people looking towards certain things. So this is going to be me looking at the texts that I'm going to put over here, which is going to also drive the eye of my audience to that section. So hopefully that's going to increase my conversion rates. This is why I really like using images of people looking at the actions I want people to take on the page. [MUSIC] I want to include a button and this button, all it would do is it would go up to the top here and guide them to this section over here. In terms of the actual link, I'm going to go in here and you could type in a web address. This is just a floating button. So it's quite different from the actual form because this form already knows that this button is going to have somebody submit this particular form. But this button doesn't technically have a purpose yet. So I want to make sure that we're giving it a purpose and it's going to go to a section on the page. Then it's going to ask which section I want to go to, I believe it's Section 3. Let me just check that. So this is the first section, 2, 3. So I want somebody to end up over here and I'll show you what that looks like once we arrive. But for now, I'm really happy with how that's all looking and in the next lesson, we're just going to take a look at how to make all of this mobile optimized. So I will see you in the next lesson.
19. Optimise for Mobile View: Let's take a look at a few final tweaks that we can do before making sure our learning page is optimized for mobile devices. I'll just start by making sure that I'm linking a privacy policy page to the footer. At the bottom over here, its got copyrights, all rights reserved. That's all well and good. So you could change that to 2020 and putting your company name. But for now, what I want to do is, I want to link to a privacy policy. I'm going to grab my privacy policy URL from my website and I'm just going to put that in here. So I would say privacy policy and this hyperlink there and set it to open in a new window. Chances are, no one's going to go to this privacy policy. I can't imagine that they would or have a reason to, and that's fine. That's not really the purpose. The purpose is, if you're ever advertising through paid ads to your landing pages, you need to make sure you have a privacy policy attached because bots crawling that page are going to look for that. Because it's basically you being transparent with your audience about the fact that you are advertising to them and how you're collecting their information. So that does need to be there, and I like to have this prepped for my sales funnel, even if I'm not necessarily advertising to it yet, because it can be really easy to forget this when you do start advertising. It's the same reason for this where it says, enter your name and email below to sign up to the Living to Roam newsletter and get instant access to the free training that could change your life. Maybe that's not the best way to phrase this. Ideally, you would say, "Hey, just sign up for your freebie below." But again, this is just for me to be compliant with regulations requiring people to actually give consent to signing up to a newsletter, as well as signing up to a free offer at the same time. I can almost guarantee that most people I've seen don't actually do this. They will just say, "Sign up for your freebie below," and then they'll send people newsletters anyway, but I have actually found that Facebook really likes this wording because it is compliant with pretty much global privacy laws, because it's basically saying to somebody, "If you sign up for this free training, you will get additional things from me, not just this free training." Now speaking of that same thing with your data protection in terms of collecting user data and using it for advertising on Facebook, on LinkedIn, on Twitter, on Google, just about everywhere else, if you go into settings, you can make sure you're switching on your cookies notification. So it's going to allow you to customize a banner that somebody's going to see when they first land on it, that's going to be telling them that you are collecting their data, whether or not you use this is totally up to you, especially if you're advertising in the United States and within the European Union, you might want to be using something similar to that just because it is a requirement, especially for people advertising. You can definitely learn more about it here. The other things that you might want to go through, and I will show you what this looks like on a live page, is putting in an image, putting in a great title, putting in a favicon, which is the little element that shows up in the browser tabs and putting in a description. What this means is that if somebody is going to share this page on Facebook, it's going to look nice and beautiful. It's not just going to look like a blank page with no image, no texts, or anything like that. So now what I want to do is I want to go ahead and create a mobile view of this page and then we're going to create our second variant. So I'm going to go over to mobile and just remember that most of your traffic is going to be coming through from mobile. So you want to make sure you are putting in the effort here and you're making it nice and beautiful, you're resizing things in a way that makes sense and also keep in mind that this view is not a 100 percent accurate. It's not by any means. It tries really hard and is pretty good, but it's not a 100 percent. So you want to make sure when you're done resizing things that you actually go through once your page's live on your mobile, put in your URL and check that everything looks good. So this looks all right. Now obviously, this has a bit of a white background. So this disappears a little bit. So what I would have maybe do is, try and either stretch this out or I would maybe choose a slightly different image to make sure that this second email field doesn't completely disappear on me. But that looks a lot like that and it does go over to the next section a little bit, but that's fine. I could make this text slightly smaller as well. Doesn't need to be gigantic like this on mobile, and also keep in mind that you cannot completely hide elements from mobile at any point. So if you use this little icon over here, it means that this is going to be visible on desktop, but not on mobile. That looks all right. I would maybe just check and obviously this element in particular is built particularly for desktop, not for mobile. Maybe double-click on this. It's using an image in the background over this grid that you can see there, and I would actually maybe just delete that. We don't really need it. So it's a little bit cleaner. This doesn't look quite right when it's center aligned. That looks good. My privacy policy, all of this stuff is where it needs to be. So I'm happy with how that's looking, and now what I could do is just click on the plus sign. It's going to create an exact copy of what I've done, so that I can create a slight variation of this. So what I could do is, I could change my headline and I could change color. But again, you want to try and change one thing at a time. So that's where you could create variant C, variant D and each of them only has one small tweak, so that you really can know exactly what it is that's probably causing the success. That's how I found out that this form being really, really high up on the page does really well because previously I've had them at the bottom of the page and then I had a variant where it was high up on the page and it converted sometimes even 15, 20 percent better because people saw it earlier. So this is how you want to test things out. The one thing I do want to test here is a video, just because I do like the idea of using video whenever possible. So I want to go ahead and just put in a section here and I'm just going to move this down. I'm just going to embed a video. This video is going to explain what the training is all about. So you can see that here it says, this has affected my mobile view. So I'm going to fix that eventually, but not for the time being. For the time being, I just want to go in and pop my URL here. So it's not going to be this video for get response landing pages, but it's going to be the video I want there. So when you hover over, it already said to me that I can embed a video from YouTube, from Vimeo, from Wistia. So I'm going to be embedding my video from Wistia, and I'm going to go over to Wistia here and I know this is my free training lining page video. So I'm going to pop into that. Now it's not actually asking for an embed. So here it says embed and share, and I could grab a code to actually embed my video somewhere on a website, but what it's asking for is a link. So all I want to do is copy this link and pop that in here. Cool. So that's got my video there now. It's moving. It's prompting people to play it. It's maybe not as big as I would want it to be. So I would want to make sure that as long as it's the right dimensions, it's as big as it can be. Because, again, I'm going to be testing this out with a landing page that doesn't have the video on it. So I want to see which one works better. So I'm happy with how that's looking, but I want to make sure it looks good on mobile, which it obviously doesn't because it needs to be resized. So I'm going to go ahead and just make sure that this is mobile friendly. Cool. That's looking good. Really that's the main difference between these two, is just the video. So I've just changed the one element. So if one of these pages converts a lot better than the other, then I know it's really just because of the video. Then we want to go ahead and customize our thank you page. Once again, I would delete logo because it's not my logo and my thank you page, again, will have a video on it. So I'm going to go in and drag a video because I'm actually going to be using my thank you page to deliver my training. So as soon as somebody signs up for the free training, they are going to have the opportunity to watch it straight away. So I'm going to go in here and copy this link instead now. Let me just manually copy it and make sure it's working, and then double-click on this and embed that. Now what I've actually found with these videos when I launched this particular sequence is that they're a little bit too similar. So what I would do in retrospect is make them look quite different. I would have a different outfit on or I would be in a different background. People did get a little bit confused as to whether or not this was an actual free training, if they saw this variation of the first page. So you want to make sure that you can learn from my mistakes even on that front, and making sure that if you are delivering videos consistently throughout your sales funnel, that you're making them look a little bit unique, so that people know it's a different video than the one that they just watched. So this looks a little bit off in terms of the dimensions, but that's probably just because the builders maybe a bit overwhelmed with how much work I'm putting into it. So it does normalize a little bit the more you play with it. I've found that these black corners do happen sometimes. It doesn't necessarily mean the video's not going to be the right dimensions. So I'm just going to leave that for now and I've got a bit more work to do on this page anyways. So it's more just, so that I have it and it's ready to go. I know that I'm also going to be guiding people through to my sales page after they're finished watching this particular video. I want to make sure that this is far enough down the page, so that they can't really see it while they're still watching this video here. I also want to make sure that this is far enough down once again, so that they don't see it unless they've gone through the actual training. Inside of the training, I'll basically tell them that they can click below the video to find out more about my paid offer. So I don't necessarily want them to actually see this unless they watched enough of the video to know what it is that they're going to be clicking on, but this is where there's going to be a button to a sales page that doesn't actually exist at this stage. So I'm just going to put in a bit of a dummy button, but this is where they're going to be then taken to a sales page and be able to check out my paid offer. I'm just going to prep this, but obviously we don't have a URL yet to direct it to. I'll make sure that no matter what color I'm choosing for my buttons, they're consistent throughout and that they are the right border-radius as well. So I'm using square buttons. So I want to make sure I'm continuing to use square buttons. I'm not using this weird golden color here. Cool. So something like that. Again, I would try and cover this guy up or change the background a little bit because you don't love that. I really don't love that, but it's all right for now. I'm just going to make sure that the button looks all right where it is, because sometimes it does get just attached to the section itself. It doesn't really know where it's supposed to be. It doesn't go anywhere yet. So we need to make sure we are coming back once we have a live sales page and linking those two things together. So I'm going to save this and I'm going to save and exit. I don't want to publish it yet because I'm going to be doing that in bulk at the very end, where we can also set up any tracking or custom URLs or any of that sort of stuff. For now, I just want to prep everything and make sure it all looks good. Then at the end, I'll be doing final checks and then also linking things like our buttons altogether once I'm going through with the final stages of launching the funnel. But for now, I just want to go ahead and save and exit.
20. Create a Privacy Policy: I also just wanted to mention that if you ever feel like you need to link to a Privacy Policy or an About Us or our Contact Us page, which normally would go to somebody's website. If you don't have a website where you can have a privacy policy like this one on livingtoroam.com where I talk about how I'm collecting your data, how I'm abiding by the rules of the GDPR and all the different laws and regulations around privacy policy and obtaining data from my visitors and my users, all that stuff that you would put in a privacy policy on a website but you don't have a website to link to, you can actually just leverage a separate landing page inside of GetResponse for this. Just go the over to landing pages, create a landing page and set up a landing page that is going to have absolutely no purpose other than to host your privacy policy. This is a bit of a sneaky work around to make sure that you can get started as quickly as possible and still make sure that you are disclosing everything that you need to disclose to the people who are subscribing to your stuff. Then you would just get the actual URL from that landing page and you would jump into your free offer page like this one over here. Instead of linking to a privacy policy on a website, you would just link to this landing page that would have nothing on it except a bunch of legal jargon about how you're collecting people's data. The same goes for when you're actually in the builder for your landing page, you'll remember in the settings up top, you can enable a cookies notification. This does a very similar thing where it's just telling people that you are grabbing their data, you're tracking their behavior, you're collecting their information, and then it'll say more info. But this link doesn't actually go anywhere. It doesn't have a GetResponse link there. You need to be able to link this to something to give people a bit more information about how you're using their data. Even for this kind of cookies notification, you still need to make sure that you have somewhere to link them to. Whether you're linking it in the footer here or you're linking it up top, you still need to make sure that you have a page to actually tell people a little bit more about how you're using their data, and a separate landing page is a perfect way to do that.
21. Autofunnels Explained: Once you save and exit out of your initial learning page and you've customized everything and you have exited out of that, it's going to prompt you to autogenerate the rest of your funnel based on the template that you created in that initial step. We are going do this because it is the easiest way to get everything up and running. You don't have to think about which email do I send and which learning page do I need and all that stuff. I'm going to go ahead and just create yes, autogenerate my funnel. It's going to pop in kind of place holders for my sales pages, my order pages, confirmation pages all of that stuff based on the template I selected at the very start of the funnel. It can take a little while to populate all these things, give it a little bit of time. But once it's all done, this is exactly how it will look like. We'll have our initial signup page here, we have the one inline form, which is just that form that we had on the page itself don't have any exit intent pop ups, but those are all ready to go. Now the things that it has also created for us is the very first auto responder. That is the automated email that's going to get sent out to somebody as soon as they fill out their name and email here, this is the thing they're going to receive straightaway. At this stage, this is going to have, obviously there e-book that they had as a part of the templates. We need to go in and customize this and make sure that it actually delivers them, whatever it is that we want to deliver them. But just know that that is the email that it does for you automatically, any future emails that we will be creating together, you have to actually manually go in and create. It only does the very first email. It's a case of here's your free thing and it stops there and then they just sort of hope that you will get people on to the sales pages in other ways, or you'll create your own email. The only one that's prepopulated for you is the very first free offer delivery email. It has also created our sales page, or at least the shell and the template of the initial sales page you'll notice that the URLs at this stage are a little bit messy because we haven't put in a custom domain. I'm going to be showing you how to change this a little bit later on. It can be something that you change at the very end so there's no dramas in doing it a little bit later on, but just know that we have our sales page prepopulated as well, It has created an order form for us, it has also created an abandoned order form email rather for us. If somebody goes to the order form, they put in their details there, but they don't actually purchase. It's going to send them this email to say, hey did you mean to forget this or do you want to still check out? This can be really great and that's where you have a percentage of recovery for people who maybe really wanted to order the thing that they started to order and then something happened, life happen, and they just didn't check out, so sending them this email to say, hey go and get that thing that you wanted to get. It can be a really great thing and that's already done for us as well. We also have our confirmation page so once somebody actually purchases, this is the page they're going to go to and they also going to get an email telling them that they have purchased and it's going to have a confirmation in there for them as well. In the future, if they want to have some sort of a proof of this being a purchase that they've made or the forgotten what they bought from you or how much it cost than they will always have that email with them that tells them exactly what they bought. This is where we'll also going through and potentially create some upsell pages. What's on this confirmation page and what's going to be in this email will be dependent on what they buy. If they just buy these cool offer, then that's all that's going to be on these pages. If they then buy any additional offers from us, it's going to automatically prepopulate that own these pages. It's going to say, you bought this, and this, and this depending on what they've actually purchased. Let me zoom out just so you can see this big beautiful beast as a whole here. You'll see exactly all of the amazing steps that are there. This stage we're not going to be creating an upsell page I'm just going to minimize that, but I can always just go in and create it again here and there's also an additional step here which is about creating ads. I don't really recommend creating your ads inside of get response just because it is a little bit limited but if you are just wanting to put 10, 20 bucks into it to try and get a few extra people into your sales funnel and get some cold traffic coming through the sales funnel, you can test it out. It's not something that I have done for my business just because I prefer to work inside of the Facebook ads manager, but just know that that is an option there you can always click on this and it's also going to prompt you to be able to create your Facebook and Instagram ads. That's going to direct people straight through to your funnel. Zooming back in just so we can see things correctly here. At any stage, if you want to see what something looks like, use this little box with the arrow to pop this out and it's going to show you exactly what this is because you have a tiny screenshot of this page here, but it's not really super clear. You can always click on it there and it's going to show you this is what the email is that people are going to get delivered. Anytime anything says hello friend, this is where their first name is going to be. This is just a default. If somebody's first name is not in there, it's going to say hello friend. But this for me, if it got delivered to me it would say hello Maggie. Obviously it doesn't have a title e-book here, this doesn't go anywhere yet because this is just a template for you to fill out. We are going to be customizing this together. I just want to show you how these things look. Same with the sales page. If we pop that out, we can see what it looks like here and this is just a template so we are going to be customizing it, but it's already caught my product in there. I could technically go in and purchase this because everything is already set up. I've got my order form here. Obviously none of the features and benefits are there yet. We're going to be customizing that together a little bit later on, and if I purchase then it would pop me over to a confirmation page which we can't preview because the actual page itself depends on what they've purchased, but we can edit it. At any point you can either click straight into the pages in the emails themselves or you can go over here and go edit page, edit email or delete the pages or emails there That's just the overview of the autogenerated funnel there for you, which is awesome, love this function because it takes a lot of the legwork out for you. I will see you in the next lesson when we start to talk about how to create beautiful and converting sales pages.
22. How to Make a Sales Page That Converts: Now we've come to the important step of your funnel when we will actually turn your subscribers into customers. Everything up until this point where you introduce your sales page is still incredibly important, but this is the point where people can start to really go wrong because getting leads is actually not that hard getting the right leads and then converting these right leads into customers is the tricky bit for a lot of businesses. You'll now be taking everything you've learned about creating an effective landing page and then amplifying it to create a level of trust that will make someone not just want to give you their email address, but also to give you their payment information. If you're going to be utilizing the power of a tripwire or our low ticket offer it can be really easy to just focus on your core offer sales page because it's worth a lot more money, and then treating that lower ticket offer as an afterthought. People in this setup will often do a really great job with their free offer landing page and then they will focus on that $200, $500, even $1,000 core offer page, and then the low ticket offer sales page that might come in between these two is treated as well yeah of course someone's going to buy my $10 thing it's a no brainer and look how much value it is, but you need to stop thinking about your offers in terms Of the dollar amount and more in terms of what they represent to your audience. Whether the first things anyone buys from you is $10 or $10,000 it's still a huge leap of trust for them to become your customer. This is the first time they're purchasing something from you so they need to feel like you recognize what a big deal that is. As an example Russell Brunson's free book tripwire where you just cover the cost of shipping has a landing page if you have a look that is longer than most sales pages for $10,000 offers. There's technically nothing really in this for him because he's actually giving it away for free it's just saying you pay 10 bucks for shipping and handling in the US or 19.95 internationally. Why would he try so hard for something that's essentially a free offer that's not going to make him any money? Well this is the very first time that someone is giving him payment details and their address and effectively turning into a customer of his business. This experience can really make or break their future decisions to buy from him again. It's really important that you're giving your customers these consistent level of dedication throughout their experience within your funnel no matter what the price point is of your offer. This is something to really keep in mind because it's a mistake that I often see people making. Now this is a little bit over the top if I'm honest he's showing some 10-15 testimonials of people rating the book and it's a free book which is extreme and not many people will put in this level of dedication for a free offer, but it's not entirely free so keep that in mind. He is giving it to people for free, but they are still required to put in their payment information so it acts as a tripwire by reducing the friction for his future customers to give him their payment information. It is essentially a tripwire so he is putting in that level of detail and putting in these bonuses that are valued at couple of 100 bucks within this sales funnel. He does need to build up that trust so that somebody who purchases the shipping on this free book is much more likely to trust him to pay for his $100 or even $10,000, $20,000 programs that he offers. Let's now talk about the actual elements that you need to consider in your high converting sales pages at all levels of different price points. Some are similar to your landing page, but we are going to be using them in a slightly different way here because ultimately a landing page is not necessarily aimed at getting someone to buy. So the intent is quite key here. Also keeping in mind that generally anytime there's an exchange of money you will have to put in a bit more information on the page because people will need a little bit more help in deciding whether or not it's the right decision for them as opposed to just putting in their email address for a free offer. First you need to understand who you're selling to. Who's the audience? Who is the buyer persona? Much likely the landing page you need to know who you're talking to with the copy you're putting on this page. What are their pain points? What are their problems, and how are you solving these for them? Then you need to communicate your value proposition. This is one of those fancy marketing speak terms that I hate because it's very traditional marketing, but it can be really helpful for you to understand. I'm going to try and make it as easy and as modern digital marketing gig as I can. Basically all a value proposition is a way for you to tell potential customers who you help and how you help them. It boils down to just why does your business exist? Some examples of big brand value propositions are these ones from Airbnb and Slack. You'll remember from an earlier lesson they're basically a tool for teams to communicate with each other, and share details about project updates and those sorts of things as people are managing campaigns and launches et cetera. The longer one for Airbnb in terms of their value proposition is Airbnb exists to create a world where anyone can belong anywhere providing healthy travel that is local, authentic, diverse, inclusive, and sustainable. Then their shorter version is travelers benefit from a truly local experience and hosts benefit from extra income. Then Slack's longer one is Slack saves time by tearing down communication and system silos. Shorter all your tools in one place. Very straight and to the point. It doesn't necessarily follow the traditional value proposition style that I'm going to be teaching you how to create, but that's also because these guys would have probably started with a very basic value proposition and over the years really developed and made it their own. But in order for you to start and just put something on the page that tells your customers who you are and why you do what you do I want you to really think about who you help by doing what, and how, and then try to incorporate this into your sales page for people who may not know anything about your company yet. This is your opportunity to really connect with your audience on an emotional level and make you stand out from the competition It's worthwhile for you to really think about why you're selling whatever you're selling, and who you're helping there. Then you also want to make sure that price is right. Your sales page can present your offer either at a discounted price or an inflated price than what people can find elsewhere. Which is why often you'll Google something, and you will find different price points. It doesn't necessarily have to be super consistent with where people can find your offer elsewhere on other websites, if you're offering them on separate sides. But the key point here is to try and really pay attention to how people are reacting to your pricing structure. Smart psychological trick for you here is to avoid using whole figures. For whatever reason $97 sounds like a lot less than $100, even though it's only a $3 difference. Try and use numbers ending in seven or nine, not using whole numbers like 60, instead you would use 57 or 59 because it does sound like a lot less. But because you control everything on your sales page, you can also control these figures. If you find that not enough of your visitors are actually converting, you can play around with a lot of different elements on your sales page. But one of those things is your actual price point. We'll talk a lot more about that when we actually get into how to build our sales page. But just know that because you are listing your product or your offer for a certain price somewhere else, doesn't necessarily mean that inside of your sales finally you have to use that exact same figure. Same with Russell Brunson, he's offering his e-book for free on the expert secrets page. Here it's completely free, but then he also says, "You can buy it on other platforms like Amazon and Barnes & Noble, where it's not free." Amazon selling it for I think 15, $16. He's kind of using that to say, "Hey, I'm selling it for a lot less than these other guys." But the opposite is also true, where maybe it's 16 bucks on Amazon, and you want to sell it for 30 bucks on your own side. There's nothing wrong with you doing that. Just keep in mind that people can still do their own research. They might still go and see if it's at a cheaper price somewhere else and buy it somewhere else. That is just the nature of things, some people will shop around. Keep that in mind, but there's absolutely nothing wrong with you playing with these numbers on your sales page. Then you want to make an impactful headline and sub-headline. That's the same as in our learning page examples. Then you want to describe your product or service. You can list features. But if you are doing this, then focus more on the benefits to the customer, rather than the actual features themselves. Let's say the feature of your service is that you offer 24-7 support. That's awesome, that's a cool feature. But how does that actually benefit the customer? Does it save them time? Does it save them money or effort? In these case what you could say is, We offer 24-7 support, so that you can feel confident that we'll be here whenever you get stuck." So you're kind of positioning your feature as a benefit automatically. Then you want to make sure you're making things conversational. So same as your learning page. You need to make sure that you're talking to humans, and you're making it about them and not about yourself, and you services. Now, unlike realigning page for free offer, it's quite critical for yourselves page to have some proof that you know what you're doing. If you don't have an existing client base for your case studies for this particular offer, what you can do is you can use testimonials from other areas of your business, or you can maybe offer to give your stuff away for free, for an exchange for testimonials for the first 10 or 20 people, so that you can include those testimonials for your sales page for your future paying customers. Either way, people need to trust you. It's quite crucial for them to really feel like someone else has trusted you in the past. Now of course, we want to make sure we're using visuals and not just big blocks of text. Then this is going to be quite different from your learning page, but on a sales page you actually want to have multiple calls to action to purchase. I would say, a minimum of three calls to action. They'll all say the same thing and go to the actual same place for people to check out. But if you have a really long sales page you want to make sure that every couple of paragraphs you're including a button that's directing people to purchase. We will go over examples, but just using this one here just because I've got it open, you will see that as you're going through it, every couple of paragraphs there's going to be a button that Russell Brunson has included, that basically goes through the exact same place where someone can buy his book, or at least pay for the shipping. It's all going into the same place, but he's including it every couple of paragraphs giving people multiple chances to check out. Then you want to add an FAQ section. Your goal is to handle customer objections before they actually arise. If you can include some frequently asked questions and the answers to these on your sales page, it means that people don't have to reach out to you to ask the stuff that they're wondering about. It makes your salespersons a lot smoother. Then you also want to include a guarantee. Now, this is not a requirement but you should think about including a money-back guarantee or a 30-day refund period, as well as a security and privacy guarantee for your visitors. You don't need to go into an enormous amount of detail. You can definitely link to external pages that cover the details of exactly what you're guaranteeing. But you should let your audience know that you've got their back. I am going to show you how to set this up in just a couple of lessons there. Don't worry about that for now. At this point, we're just getting familiar with how sales pages are different from free offer learning pages. As is the case with our learning pages, you want to make sure you don't have any distractions. So there's no headers, no footers. You will have a mobile-friendly design, not making it super long just for the sake of being long, and all that good stuff. We're taking the exact elements of the learning page and really just expanding on that and amplifying it because a sales page really has to convey that kind of trust factor. It has to have a lot more of that critical information that really develops your audience's trust in you. Again, once we actually go in and create a sales page together, all of these tips are going to become a lot easier for you to visualize because I will be providing you with a template, where you can actually brainstorm all of these. But for now, let's go through some more sales page examples together in the next lesson, and talk about some pros and cons of these.
23. Sales Page Examples: Just like we did for our free lead magnet learning pages, let's go through some examples together of sales pages. Because well, landing pages are relatively easy to find examples for because you'll usually see people offering free things even organically on their Facebook page. Or you can find them through Facebook ads and those kind of things. Sales pages can be quite difficult to track down, especially if they're for high ticket offer type things. There's a good reason for that because people usually want to nurture you before you get to a paid offer. So they will often hide these from search engines and they're really only accessible to people who have received that free offer and they've been nurtured through e-mails and other free content before they actually got to a page where someone's trying to sell them on a four or $500 offer. But we are going to be looking at one of these kinds of pages, specifically from digital marketer. Let's go ahead and check it out now. This is their customer value optimization specialist certification. Gosh, that's a mouthful. But you get the point. It's basically for people to actually get certified as funnel experts, which is similar to what you guys are doing right now in these lessons but obviously in a much more elevated way. Also digital marketer does provide actual certifications in these types of areas. But it is essentially people who are going to be learning how to create a tripwire, how to create a free offer and a core offer and how to piece it all together. Very similar to what we're doing in these lessons as well. If we were to go ahead and just click on Enroll Now, it's going to take us all the way down to the bottom where it's going to say it's $495 for all of these different things. If I click on that, it's going to take me to an order page where I can then check out. Let's just take a look at the actual sales page and things that are good about it. You can obviously tell it's quite long, but things that are really great is that the headline and the sub-headline really convey value. The buyer will learn how to become a funnel optimization specialist and they're going to learn how to develop meaningful relationships with customers and automate their customer acquisition process. This is a sub-headline all on its own. This is the most profitable customer getting campaign they've ever created and they're going to show you how to create that for your own business. That's great. That's already captivating. It's really up front and center, which is awesome. There is no navigation up top as well, you'll notice. Which means there's no way to escape for potential customers. While their logo here in the top left-hand corner is clickable or it seems clickable, it doesn't navigate away from this page. It doesn't go back to digital marketer. It just stays on this page because the URL for it is just this page. The only thing you actually can do is give them a call. But there's no menu items to check at a blog and contact them and about them, whatever those general navigation elements would be on a website, for example. This sales page is specifically for the one purpose of getting somebody to sign up for the certification. So there's no way to get out unless you actually exit the page. A few other things that they have that are good is that, they will use headlines and breaks in their text to give you a bit of a break from all the texts because they do use quite a lot of texts. They use bulleted copy, which is really a great thing to do. Instead of just using big chunky paragraphs, they're using short sentences, bullets, then also bolding some of their text and then using headlines around their different categorizations of the copy to give you a bit of a break. When you get through about halfway through the sales page, you'll start to notice that they start using some different colors and different images as well. They also have awesome visual cues, like the arrows that will point to things to drive your attention and your sight to that particular area that they want you to focus on. They have multiple calls to action throughout. If you click on any of these buttons or hyperlink text, it will go to the bottom of the page where you can then go to the checkout. Then they also have a list of exactly what's involved on the inside. You know exactly how many modules they are, what are the lessons within these modules and what you're getting. Even the module listings are broken up with an enroll now button. That's a really powerful thing. These buttons are also slightly different color to the rest of the element on the page which I like. At the very bottom, it also talk about who should get certified and why they should get certified. It's very clear who it's for. If you're one of these people, you're either a marketing professional or an agency owner or a CEO, you would look at this and go, awesome. I know this is for me. Why is it for me? Maybe I go to this section to figure that out. It also talks little bit about the instructor with his image and it's got the frequently asked questions which is really powerful because it's a pretty chunky offer. It's US $500. It's not super affordable for a lot of people. Obviously, if you're a CEO or a marketing professional, you probably have that kind of money to spare, but still, it's an investment. People might have some questions about, how is this going to help me? How long will it take for me to finish the course? Am I guaranteed to get certified if I take the class? All of these questions that they've probably gathered from past students and then they've just answered them on this page so that future students can have these questions answered before they purchase. Things that could be improved on this page is that it is incredibly text heavy. I don't particularly like the fact that I have to go to almost half the page to actually get my first image. Everything before that, these paragraphs are all text. That's a little bit unfortunate. I would break that up and I would use a lot more images and a lot more visual cues throughout because I know that especially on mobile, this would take a long time for somebody to read. The buttons are a slightly different color than everything else. This one particularly is quite similar to this color and then same with these ones. They're still green, they're not a crazy blue, so they don't stand out as much as they could if they made them a completely different color than everything else on the page. But they're obviously trying to be consistent with their branding so that's fine. But Enroll Now is not as much of an action item as I would like it to be. My recommendation would be for a sales page like this to change their button text to something like, make me a specialist or something like that that's much more action taking. I would also include some images of people and past students, some testimonials, those things. I mean, digital marketer do have quite a big reputation in the marketing industry. They can probably get away with just using icons here. But these icons specifically are not particularly diverse in terms of age or ethnicity or anything like that. They're all white, very neutral icons. They're not necessarily representative of the people who are probably taking this course. I would like to see a lot more images and visual representations of the people that are in this course and also what results people can expect to get. So including a section for people to say these are the results that they've achieved with their business, it's entirely possible that that came before somebody got to this page. They might have sent them some testimonials and some social proof through e-mails before somebody gets to this page, which is why it's not necessarily on this page. But that's where I would say, I would like to see some more human side of the sales page with those images and with those testimonials as well. Now, we're going to take a look at almost the exact opposite type of sales page in terms of design and actually what's being sold. This is the Learn Dothraki classes by the Living Language School. In case you're not a fan of Game of Thrones, Dothraki is a fictional language from the books and TV series Game of Thrones, similar to Star Trek's Klingon that people have been obsessing over for years, where people are quite keen to maybe get fluent in it just because it's quite a cool nerdy party trick. The reason that I like this sales page is because it caters to its audience really, really well. They know someone who would come to a page like this is likely a really big fan of Game of Thrones. They don't actually need to spend a whole lot of time trying to convince them why this is the perfect course or book to invest into. They just provide a bit of trust and authority in the brand, and the author as well, as well as the product by providing a free chapter from the book for people to download. This is a very different thing because we're talking about very low price offers and a free offer all on the same page. This is a unique sale situation, but we can still use it to have a look at some things that they've done really well and then some things that could be really improved on. The call-to-action buttons on this page are great because their color is not actually used anywhere else other than in these buttons over here; you could argue that yes, it's also on the inside of the learning platform in this image, but it's not actually used anywhere else on the page itself except for the buttons. That's a really big win in my books. The headline is also very, very clever because it demonstrates exactly what people are going to learn through the products, which is to learn Dothraki. Then they've also got authority badges at the bottom over here, from HBO and the critically acclaimed Game of Thrones, along with some features on big websites that they've been featured on from really well-known brands. The use of the video to show behind the scenes of the course is just an extra bit of trust-building factor to make someone decide whether or not they like the sound of this guy's voice, if he's teaching them through a course, if they like his teaching style, that sort of thing, so any kind of questions that they might want answered are pretty clear from that video. Now, just a few things that I think could have been improved; there are way too many calls-to-action on this page, several products you can buy, several in the news features down here, and then also people can download free content and the upsells and everything is all together. I would recommend that they pick one action for people to take and then maybe have multiple calls to action to drive to one page where they can check out. Then you can use the other offers as upsells to that initial thing. Let's say this was just one page for people to download a free offer and then the next page would then upsell them onto a, almost like a trip wire which would be the book and the CD package. Then as soon as somebody bought that, they would upsell them on to the online course and maybe throw in the companion app as a freebie with the online course. It's almost just staggering these offers in different segments of the sales cycle, rather than putting them all on one page. There is no FAQs either, so it's not entirely clear on how long it'll take someone to actually go through everything. You can click on "More Info" and it does have a little bit more information on each of these products, but it's not entirely clear exactly how long it would take me to actually master Dothraki. There are just a few too many ways to get out of this web-page as well. Their logo is clickable to get them to the homepage, then they're also asking people to follow them on Twitter and on Facebook, and obviously these are all clickable as well, and additional ones down here so you can learn more about Living Language. There's just way too many ways for people to get out of this sales page, which is why it's not a particularly good example of a sales page, but also because these guys are really, really unique and they're probably the only ones who are offering this service, they don't have to be all that nit-picky about how they design their sales page because they're probably not competing against anyone else. Whereas with DigitalMarketer, there are plenty of people who are offering digital marketing courses and services out there, so they need to make sure that they are nailing each and every aspect of that sales page in order to make sure that they are doing a really good job of convincing their audience they should buy with them and not their competitors. Again, those are just some examples, and we will go over how to actually create your own sales page, how to write it, how to make it really captivating, and then also how to design and actually create all the elements inside of Get Response. But before we do that, let me just, once again, share my very first and truly wonderful or awful, depending on how you look at it, sales page here. The top half is on the left screenshot here, and the bottom half of the pages on the right. Yeah, with the colors and the fonts and the overall design, it basically makes my brain hurt a little bit, but there's actually a lot of good stuff on this page in terms of me including Frequently Asked Questions and several benefits and features that I communicate to the customer and telling them what they can expect to learn and who it's for and who's not for. The overall structure of this page is actually pretty good, for the fact that it was my very first one, and these babies do landed me a couple of thousands of dollars worth of sales, even with all the crazy colors and the design elements which are definitely not ideal and not how I would structure things now, but just, kind of, again, reiterating the fact that it's the information you're presenting that's a lot more critical to your success than the actual design. Because I find that design is actually where a lot of people struggle because it's just not everyone's cup of tea, which is why I like using pre-designed templates, and that's what I'm going to be doing with you guys, but I think that's the part that people get scared about is, "Should I just pay someone to actually design this thing for me?" I just want you to be very clear on the fact that if the information is there and you have found a way to really communicate to your audience how awesome your product is and how much it's going to help them solve their problems, the design is almost a nice to have. Unless it's really painful, it's lime green with turquoise on top of that lime green, and there's moving elements and things are overlapping, people will forgive a lot of the design elements as long as the content is there. Just remember that no sales page is perfect. You saw the one from DigitalMarketer and that's a billion dollar company and they are still testing things out to this day, so don't ever feel like you have to nail every single element of your sales page. But hopefully, now that you've created your learning page hopefully, and you have a good basis for how to actually take that one step further and use the words and images on your page to really turn your leads into customers. Now, it's time for you to actually plan it all out in the next lesson, and create and write your amazing sales page. I can't wait to see you there.
24. Write Your Sales Page: It's time for us to go in and actually write our conversion-optimized sales page copy. This is going to be slightly different from your learning page copies, so we're not going to double up on information you already know. But we will go over just a few elements that will be different for writing the page for a paid product than it would be for a free opt-in. Let's go ahead and jump straight into our template. Once again, you guys will have to copy this. So you're going to have to go to file, make a copy, and you want to make sure you're naming this something that makes sense for your sales funnel, or you might want to just make copies of all the templates and then make copies of those for each individual sales funnel, whatever works for you, but you will always have access to these original templates, just so you know that that's always going to be available for you there. In this case, this is going to be my sales page brainstorm and plan. This stands for a successful social media management, which is a bit of a mouthful, but that's essentially the name I've given to the product that I would be selling in this funnel. So it's a logical next step for people who have taken a training all about how to become a social media manager, and now I'm going to be presenting them with an offer that is going to actually allow them to get the training and access the information that they need in order to actually become a social media manager. Presumably, people who'd be interested in a free training on it, they would also be interested in a paid offer that would actually allow them to achieve the things that they learn in the free training. You might think that a lot of the answers on this page are going to be quite similar or will overlap with your initial answers to your free offer learning page, and that's absolutely correct because your audience is going to be the same throughout. It's just going to be more and more targeted as you move a little bit further down to the bottom of the funnel, where people are going to be interested in your paid offers. The people that will sign up for your free offer may never get to this point. Ideally, most of them will because you want as many people who signed up for your free offer to be interested in your paid offer, but this will be a much more targeted audience, but the actual audience themselves will still have the same pain points, will still have the same demographics. So you are still targeting the same people at this point as you were at the top of the funnel where you were just advertising your free offer to them. You can go ahead and just copy your audience details over from the initial brainstorm page, but your goal here is very different. In this case, we have a goal of people actually going in and purchasing my successful social media management course bundle. I want people to actually go in and purchase it. So that is the goal that I want to achieve with the sales page. In terms of competing against, I don't actually have specific competitors at this stage. I definitely have people that I was competing with for my free offer. I was competing with people in the digital marketing and social media marketing space at that level. But at this stage, I'm really just sort with myself because there is no direct comparison of my offer to somebody else's offer that I want to be emulating in my process. Now, that doesn't mean that I can't draw inspiration from what other creators have done, even if their offers are a completely different, but this can be really handy if your offer is quite similar to somebody else's. If you are a service-based business where you maybe have a local competitor, let's say you're a dentist and there's another local dentist, in which case you are going to be looking at exactly what their paid offers are like, how they're structured, what their price points are, and you would then be taking note of that here. Same with agencies. They're always competing against each other in that sense. This is where you could go in and just add in an extra few points for their particular sales pages. Then in terms of how they got to the sales page, this again could be quite critical, especially for those of you who might eventually run sales funnels straight to paid offers. This is the case with, let's say, e-commerce brand will very rarely actually run any free offer promotions, they will run their audience straight to a paid offer. Which means that their audience has absolutely no context for who the brand is, why they should trust them, but because it's just their product, it's likely that they already know a bit about what the product is and they just need a little bit more detail on the sales page about whether or not this is the right product for them. But if you are doing this in a similar way to what I've been teaching you throughout this lesson, which is the fact that you actually had a free offer and delivered an e-book or delivered a training or something like that, that tells your audience a little bit more about who you are, what you do, and why they should trust you, that means that you don't have to explain a whole lot on the sales page, or at least you have to explain a little less than if you just promoted this to a completely cold audience who have never heard of you, they don't know who you are, and you need to really write your backstory on this whole sales page. For me, I know that these people definitely came straight from my social media free training, plus they received some emails as well. I could maybe then go into more details about what those emails actually entailed. Did they receive an email that promoted this paid offer, and already had some social proof in it, or people using my product or service, in which case then I don't have to do as much work on that and on my sales page as well, but for now, this is just basic context. The person who's viewing the sales page has definitely received my free training offer, and they've maybe received an e-mail or two about this paid offer as well. We'll get more into emails in the next few lessons, so don't worry about that. You haven't missed a lesson or anything like that. I just want to make sure we're doing the pages before we get to the emails. Once again, with headlines and subheadlines, this is quite similar to what you would have had for your actual learning page, but you don't necessarily need to be pitching quite as strongly as you would for a learning page, because your sales page is going to be much lengthier than a free offer page. That's why a headline is quite critical when you're getting somebody to sign up for an email list, because they need to know exactly what you're talking about straightaway. What are they signing up for? They need to do that within the first line or two. Whereas by the time they've gotten to your sales page, they've probably had a bit more context before it. So they've watched your free training, they've received those emails, they already know what's going to be on the sales page. You can actually use the headline to build up suspense and tell a story. You don't necessarily need to have it as a how to formula, although you actually can, but you could also have it almost like a what if or an imagined formula. That's how I like to structure my sales pages, where I tell a story from the top of the sales page to the bottom. I start with something like, imagine never having to work for a job you hate ever again, or what would it feel like to be able to travel full-time? All those kind of things are just curiosity, peaking that curiosity as they're going through that sales page. It's not necessarily telling them exactly what the offer is straight away, but completely up to you how you structure this based on your offer. Make sure you have some headline that's quite punchy, and you might want to have a subheadline, but it's not always appropriate, or at least it might not actually look like the subheadline for your learning page. Instead, it might look like a hook. This is an additional element that we didn't have with our learning page because it is quite specific to sales pages. I've actually written in here, this can be your headline, your call to action or a separate element altogether. Your hook can come in wherever, and you might not end up using one. But hooks can be really powerful because they're essentially conversation starters that get people to want to know more and read a little bit more. Here's some examples of what a hook might be. If your offer is something that saves people money or saves them time, then your hook would be phrasing that in a way that actually gets that emotional trigger out of them. It'd be something like, stop wasting money on this thing, buy this instead, it's going to save you this much money on average per year. If it's for a parental product, then you could say, are you ready to become the mom who's always buying her kids organic lunches, or are you ready to become the mom who has the coolest lunches, or you could change your life today for only $50, or are you ready to get paid to travel? These are all different emotional triggers. These are all about loss aversion or pain aversion or pleasure, but also some of them are quite heavily integrated with our desire to be socially accepted and liked in social situations. So saying something like, are you ready to become the mom who has the coolest lunches, or get showered in compliments from your husband or wife after you use our product, those are all social validation triggers. All of these hooks have some emotional connection that you can use to present your offer in a way that is a little bit more intriguing to your audience and just saying, you can save 50 bucks by downloading our app or something like that. That's where you could put in your hook. Your value proposition. We already talked a little bit about this. This is more just talking about why your business exists on your sales page. Once again, this is a lot more critical for people who have competitors within their space and direct competitors, because this could be the reason that somebody chooses you over a competitor, because you might have the same services, you might have the same price points, but maybe your value proposition is more strongly aligned with your customer than your competitor's value proposition. They might buy into why you do what you do a lot more than you're doing to your competitor, and this could be the difference over them choosing you over your competitor. Then we get into the price point. I've written a few prior notes in here for you based on what we've already discussed. Avoiding using whole figures and discounting. This is a really big one. This is one that I'm definitely going to do for my own sales page. I would find a way to bundle a few things together, that would make it seem like it's a lot more than what it is. So I'm going to be selling my offer for $37, but I'm going to be essentially telling my audience that I might strike through. I'm going to be telling the audience that it's an original cost of $249 if they wanted to buy all of the things that I'm including in my offer separately. That's what it would cost them. But just for being there today, they get it for 37 bucks. This is psychological, its price anchoring. People are much more likely to buy something when they feel like they're getting a lot more value than what they're paying for. In terms of what you're actually selling it is important on your sales page to actually include what your offer has inside it. Because a lot of you will be building these sales pages for things that are not as straightforward as buy this pair of shoes, they're brown and leather. You are going to have much more complicated offers, just like I do with my own sales offer. You do want to include some features of what it is that you're actually providing to your audience, but you want to frame it in terms of benefits. For example, I have a 101 lessons and I think it's about 14 plus hours of content that they're going to be getting for that $37. That's a feature. I mean, that doesn't really mean much to people. That could be a 101 really crappy lessons and 14 hours of really crappy content, they don't know. Then I need to frame it in a way that is talking about the benefit to them if they take those 101 lessons. I could say something like, by the end you will be equipped with all the tools you need to succeed and land your first client as a social media manager. Something like that. It's very similar to, we offer 24/7 customer support, you're not in this alone. Get all your questions answered right when they pop in your head. You want to go based on feature. Then what's the benefit to your audience and list them in that way. Then once again, you want to be looking at what are their pain points, what are the things that they're seeking to gain from your offer and how are you delivering these things to them through your offer. Those were quite similar to your landing page. But obviously you're going to be going into more detail because you're giving me money. This is the critical bit, which is all about building trust and authority. It sounds quite extreme in my explanation here, but people want to know you're not going to rob them of their money if they give you their credit card details. All it takes is a few testimonials, a few case studies of past projects or talking to a real human through a chat system. We'll talk more about that in later lessons. But for now it's more about how to actually build that trust by showing that somebody else in the past has bought this thing and it has had an impact on their life. So this can be difficult if you're launching a brand new product or service, but you can just give your paid product or offer to test audience, whether it's friends or family, or just go to Facebook groups and ask people and say, look, I'm launching a new system. I want to test it out on ten really lucky beta users and you will get the whole thing for free in exchange for a testimonial. People are honestly going to jump on that. You're going to get more requests than you think. You just have to find the right places is to ask people for this. I'll just give you some prompts for actually asking for testimonials because this is one thing that I think people do a little bit poorly when they're first starting out. Because it, again, it just comes with the experience of knowing how to ask certain questions. When you do just say, look, give me a testimonial at the end, people will write it as if it's a sales testimonial. It's not going to sound genuine. It's not going to be in the format that you really wanted to be. You will probably feel like you can't ask them to rewrite it because they're doing you a favor by giving you a testimonial and then you're stuck with a testimonial that's not quite right. In order to make sure you get it right the first time, instead of just asking them, hey, can you review this thing? Ask them to actually paint a picture and tell you a story and say, what was your life like before using this product or service? What was it like after? Or if you are recommending this to a friend, what would you say exactly? Because people will go into a sales mode, Amazon review mode. They'll just say this course was awesome. It was worth all the money. Maggie's awesome, and I love those testimonials. I do. But the thing is, that's not the thing that's going to convince new people to buy it because it sounds like you prompted them to write it even when you maybe didn't. You want to make sure that whenever possible, when you actually have the control over your testimonials, that you prompt people to write it as a real life story. It's the difference between somebody saying, "Look, this was worth the $37 I paid for it. I had a great time. I learned a lot" and saying something like, "Before I was a stay at home mom of two kids and I was struggling to make ends meet because I couldn't find a career that suited my schedule. With the help of this course, I was able to land my first two online freelance clients that I can work for around the schedule of my little ones. So I can still make really good money from my laptop while I spend time with my family." It sounds totally different. It's actually probably the same thing you might get. Its the same thing for them, but for you and for your future customers. That paints a much more emotional picture of somebody actually using your product or service to gain something from it. It makes them much more likely to also want to get the same experience. That's a little bit of a prompt there for you. Calls to action. We just want to make sure they're as actionable as possible. We want to answer any frequently asked questions. You might not have frequently asked questions if you're launching a brand new product or service, and that's totally fine. You will get questions as you go along and as you start selling stuff. Feel free to add these in once you have them. But you can also preemptively think of some places that people might get stuck. You can use your test bunnies. You can use your beta testers and ask them where are you getting stuck? Or can you take notes of where you're getting stuck through this offer? Let me know how I might be able to overcome this or how I could have explained this better to you before starting. Finally, you want to make sure that you have a guarantee. So this is either a 30-day refund guarantee or two-week refund guarantee. Just making sure that people feel like if they give you all their money, there is a way back from it. If you can offer that, not everyone can offer that depending on what you're selling. I'm going to use the agency example. You cannot refund an agency package because, if somebody spend $2,000 on Facebook ads, that's money that's going to Facebook, you can't refund that. You might be able to refund your services section of that payment. But there are certain things that just cannot be refunded. But whenever possible, you want to make sure you're offering a satisfaction guarantee so people feel like they're being taken care of and that you care about their satisfaction of your product, not just their money. The rest of this is quite similar in terms of images. The other steps that I've put in here is, you want to go into a blank Google Doc. You might want to use the Hemingway Editor again, like we did for our landing pages to make sure everything is as simple as possible. But then finally, you also want to do an objective edit of your sales page copy by thinking these different questions. You want to be thinking, is it believable? Then read your entire sales page copy and think, is it will believable in terms of what I'm saying that I am offering to them more than I'm guaranteeing and then make adjustments, then go is a bit too salecy or pushy and read the whole sales page again. If there's any bits where you're like, okay, that's a bit of a hard pitch. I'm not asking them to give me their money and then it feels like they're being held up at gunpoint, then you may need to go in and adjust that and keep going through these questions. That will help you to adjust your sales page copy to make sure that it's still aligned with how people think and feel and making sure they have a good user experience on that sales page. Once again, we would just go to a blank Google Doc and put in my headline, my calls to action, my testimonials, everything in here ready to be put into my GetResponse Editor. Even if maybe at this stage you don't know what order you want to have all of these different elements in. For example, I'm still continuously experimenting with where to put my testimonials. I have some pages that have my testimonial really high up on the page. They're almost like the third or fourth thing that somebody sees before they even see what's in the program. Some sales pages, I have put them at the very bottom. Almost everybody that's on that page knows exactly what's included in my offer. They know what they're going to get, they know who it's for, they know who it's not for. The last thing they see is my social proof or my testimonials. You just need to test this out to see what works best for you. But at this stage you just want to collect all of the different elements that you definitely want to include on your page and then make sure to also collect any visual assets. If you're creating any videos for your sales page or any images, drop those in a Google Drive folder somewhere so they're all ready to go for when you go in and actually build your sales page. All right, so let's do that now and I'll see you in the next lesson.
25. Build Your Sales Page: Okay. So we are now going to get into actually building our sales page inside of all of the sales funnel depending on the template that you choose for your funnel, and of course, whether or not you're building this in order to get a response, you might be taking slightly different steps. But in terms of the planning and preparation, this is how I would start which is to have a really good outline of my sales page. I've gone through, and actually added some additional content, and made sure that everything is planned out and ready to go. I have also sourced my images that I want to use for the sales page and popped those inside of my image library and get response so it's all ready to go. All my assets are prepped, and now I just have to go in and build it. The process for doing this is I locked it as write out all of my text, and then almost organize it with these red text headlines in a way that I can see my menu in the left-hand side bar so that I can make sure that I am hitting all those key points that I want to hit within my sales page. The key is to not force it, so if you're not hitting every single one of those key points that we discussed about what makes a good sales page, that's fine. You don't have to check every single one of those boxes. You just want to make sure you're leveraging as many of them as possible. So that's why I like to write first and then organize once everything is written to make sure that actually I've probably already hit a lot of those points, and then maybe take a look and if there's a few things that I'm maybe missing, then I would go in and maybe add a testimonial section if I've forgotten to put one in or a trust factor building section, or an introduction to me. I always include a section that introduces myself, has an image of me, has a bit of a backstory of why I do what I do and who I am. Those are the kind of things that are a little bit easy to miss when you're just writing stuff down. You want to make sure that at the end, you're actually going through and organizing things a little bit for yourself so it's a little bit easier to really have an overview of; have you included enough calls to action. I can see that I've included at least four so far. I might include more depending on how long the actual page ends up being. I also like to include things in red that I'm not actually going to be putting on the page. These are more guides for me to know that this is my headline, and here's where call to action is going to go. Here's where my testimonials are going to go. Then here's where I'm introducing my offers. It also makes it easy to navigate so I can just click on something and jump down straight away. This is me telling a story. Here's me getting a little bit emotional with them. Then here's me introducing myself. Then down here is where I would show them what's on the inside with a video. This is where I would include a video of the actual offer that I'm presenting for those people who are maybe not as convinced as to whether or not this is the right thing for them, and they might just need to actually see what's on the inside before they decide. Finally, I also want to maybe prepare few assets from my order form. Your order form is going to be very basic. It's basically just where people go in and put in their name, e-mail, and payment information. It's also your opportunity to handle any last minute objections that people might have. It's a good place to put it in a few extra testimonials or proof points and remind people as to what it is that they're actually ordering on that page. That's also where I like to include my money-back guarantee and anything to do with secure processing. So anyone who gets a little bit funny about putting in their payment details at the very end, that's where I can overcome that objection. Jumping in to GetResponse, our auto funnel has been generated. I have had two page views, which is basically just me. I want to go in here and jump straight in. These sections are still red, so that hasn't been published, which is fine. Again, we are not actually launching this yet. We just want to make sure everything is prepared. We're not going to be focusing on the e-mails at this stage. We just want to go in and customize our sales page and order form. At the moment, it's got a hideous name. We want to make sure we're changing that. I can go in here and edit the page or I can jump straight in here to do the same sort so that the editor pops up for me. With this sales page, what I'm going to do, just because it's going to be a much longer process than it was with my learning page, I'm going to go in and start quickly putting stuff in. I'm going to speed this up for you guys so you don't have to sit here for 40 minutes watching me just drop elements into my page. Like I said, all of my design elements have been put into my image library inside of GetResponse. But if they hadn't been yet and I just wanted to add any images last minute, I can always jump in here which is going to be the Files and Images tab or if you don't have an image on the page, you can always use the image drag and drop and then replace. You can always add files in here. If you haven't added them in before, this is where you can come in and add them in here. I'm going to go ahead and get designing and I will see you when we hit a point that you are not familiar with yet. Let's now just quickly talk about a few things that I've done here. Obviously at the end, I would want to make sure that I'm going over everything, and that I'm happy with it. I would probably go and cut down on some of these text, because now that I see it in the landing page, it's maybe a little bit too text-heavy. But there are a few elements that I want to just point you to in terms of things that I've done that I think could work really well for your own landing page. You would have noticed that some of the sections that are done, have been in different colors, or have slightly different styling elements. This is all done with the purpose of breaking up the text, so it's not one big long heavy landing page that's fully text-heavy. You want to make sure you're including images whenever possible, and colors whenever possible as well. The other thing that we discussed is to have call-to-action buttons that are totally different from the other colors that you are using on the page, because it makes them stand out. Even though it's not super correct in terms of graphic design, it doesn't really go with the colors on the page, that's the point. You want to make sure that anything that you want to draw the attention of your viewers to is big, bright, bold, and colorful. Now when you're customizing these buttons, one mistake that I often make, and you really only find this out when you're testing, you want to double-click on the button, and head over here, and you will find a "Hover" section. This is just a normal button here, but especially on desktop, when somebody hovers over your button, you can create animations. These are based on what the button looked like when you first placed it, so it may or may not be right for how you actually want it to look. In this case, I don't mind it. I would maybe bold it just because my normal button is bolded. I want to make sure that the "Hover" button is also bolded, but sometimes the actual color of the button will be all lost, so you want to make sure that you're checking the "Hover" button design, as well as the actual normal design of it as well. Now, I want to actually go in and add a few GIFs, because this is something we haven't really done before. You just want to put in a regular image, and hit "Replace" and then go to Giphy, which is their GIF provider, and I would put in, sticker. The word sticker can be used before anything else to give you these GIFs that are transparent. They're a little bit easier for design elements, rather than having those ones that are either clips from movies or TV shows. I would maybe use this one, because it's quite similar to my color scheme. That one's good. I want to put another GIF up here. Oh, yes. Oh, my gosh. This is awesome. If you don't watch Queer Eye for the Straight Guy, you might not be as excited by this as I am. I would maybe try and align it so that it doesn't look super like it's floating in space. That looks good. I would maybe add in another GIF just here, with the bonus content. This obviously has an arrow in it, but it's a wide arrow, so it's not going to pop up there. That's fine. I just like having some moving elements on the page that are not too distracting for people when they're actually trying to read the content. The last thing that I do like to do, is to actually make this stand out a little bit more by adding that colored background, and by making this a little bit more vivid. That's probably how I would do it at the very end, but maybe use a slightly different background color than the one that I've been using throughout, so that it makes it stand out a little bit more. Something like that and that's what I could use for all of my sections just to make it seem a little bit more dynamic. Now it is important that you are aligning things. You would've seen me throughout if you watched the demo, just holding down my command-key and then clicking on various elements. Like this. It allows me to drag and drop few elements all at the same time, and this allows me to really neatly align a few different elements on the page. This is quite important because you want things to look neat and clean and GetResponse is quite clever, because it actually tells you that you're only really designing within this area. This area will still be visible on desktop, but you should be designing within this area to make sure that everything is visible on all different screens, on desktop and tablets, before you move on to designing things for the mobile view. You also want to make sure that you are allowing some empty space around your text. As somebody is hovering over a particular section on your page, that is the only text that they should be able to read. That's why I've included a lot of white-space around my different text-blocks so that they're only focusing on one section at a time. The last thing I would say is with your buttons, always make sure that they are pointing to the right place. Double-clicking on this, if you go over to the hyperlink, naturally won't have anything in there when you're just placing these buttons on your page, and you want to make sure you're saying that you want it to go to an order form in the funnel, and it will naturally go to the very first order form that you will be designing within this funnel. The last thing that you could potentially do is add a countdown timer, so you can put this anywhere on the page. If you want to have that sense of urgency, you could be counting down to a specific date if you are designing this for a particular launch. If you know that you are going to be driving traffic to people to sign up for a webinar that's going to be on a particular date, you could actually have a live countdown. Otherwise, you can have an evergreen timer. All that means is you just say countdown from one hour, as soon as somebody lands on it, so then you could make it seem like people only have an hour to purchase, even though it's still going to allow them to purchase past that one hour, but it creates a false sense of urgency. People would be, "Okay cool, I only have 59 minutes, and 59 seconds to get this thing. I want it, and I want it now." That's something to definitely test out. Then you can say, okay, once that hour is up, do you want people to still be able to stay on this page, and check out if they need to, or do you want to actually redirect them to another page, making it seem like this offer actually has expired. You can always customize this as well. You just double-click on any element at any point in your sales page, and it will allow you to customize the fonts and the actual color of your countdown timer. Right now it's not obviously moving, because we are just in the builder, but if I was to preview this, then it would start the countdown for me. At this time, I don't want to be including a countdown timer. I'm happy with how this is set up. Again, I did this very, very quickly. I would probably go through it and make sure that everything is on brand, and looks how I want it to look. I would probably take a little bit more love and care with this, but for now, all we want to do is have a bit of a demonstration of what a sales page would look like. What are the different elements that we want to involve, and how we want to proceed. In the next lesson, we're just going to go through and customize our mobile view, our different variations of our sales page, and our order form. I'll see you there.
26. Create Your Order Form: When it comes to creating split tests of your sales pages, it's not as straightforward as it is with your free offer landing pages, because it's really easy for GetResponse to determine, "All right, half of your people went to this landing page, half went to the other one, and 40 percent of these guys signed up, and 60 percent of these guys signed up. So this page is obviously better." With sales pages it's not as straightforward, because it's not easy. At this stage [inaudible] to get a response to tell which sales page performs better, because this is not technically where people are checking out. They're checking out on the order form, and no matter how many variations of your sales page you have, they're all going to be going to the same order form. That doesn't mean that you shouldn't do some split tests of your own. It just means that it's a little bit more manual in terms of determining the success of a particular sales page over another. So I am going to get into that specifically in the advanced lessons a little bit later on. So if you do want to play around with a few different things, because maybe you're not quite sure as to what's going to work on your audience. I'm still not sure to this day. Every single time I launched a new product or offer, I do a different landing page and a different sales page, and sometimes things work totally differently than they did the time before. So it's always good to test stuff out. But just know that at this stage it's not an automatic process inside of GetResponse, mainly because you can't tell which sales page variation somebody came from when they purchase at this stage. But again, I am going to show you a hack around this. It is quite easy to set up, once you know how to do it, it just is a little bit more manual. So more on that later, just so you know, and we will create some variations. But first, the first thing you want to do is create your mobile view, so that you can make sure everything looks good before you go in and create your variations. Because it means that you don't have to go in and make those changes on every single variation. Okay, so let's head on over to our mobile view here, and I think most of this is going to look good. Mainly the problems that you'll encounter is the fact that things will be a little bit too squished, but as long as all of your buttons are in the right place, and also keeping in mind that real estate on mobile is very different than it is on desktop. So you might actually want to cut down on some sections on mobile, and keep them on desktop. For example, this is a really cool little trust-building exercise, but is it really necessary for me to have this on mobile? I would argue that maybe it isn't, or a can come a little bit later on in the page, because on desktop this doesn't take up much room. But on mobile, this is almost a full screen of texts or of images here. So what I would do is probably hide this from mobile, which means that if I switch over to desktop, it's still there, but on mobile, it's not there unless I click on "Show Hidden". So then it'll tell me which elements I've hidden, and I can go back and change this, and make that available for mobile users again. Just so you know, so I've hidden that and as soon as you hide an element, it will give you the option to show hidden elements, or hide them again. So that's all good. These testimonials have stacked up nicely. This is also why I went through the pain of actually putting these in as individual testimonials, rather than including this as one big image. Because on mobile that would have been so small, no one would be able to read it. But again, this is a good amount of testimonials for desktop. For mobile, it's way too much. So I don't need 12 people telling me how great I am. I would probably pick four or five, because by the time somebody scrolls through all of these testimonials, they're probably tired, and they don't really even care about what they're going to get on the inside. So I would go through and just hide a few, and try and just resize this element so that it's not quite as big. Obviously, I would want to go through and pick the best ones. But for now, I'm going to leave that. Just letting you know that in a real life scenario, I would go in and hide a few of those. Now the problem with this is that this is going to end up being way too cluttered, and this is way too small. But it makes it really difficult because you can't actually resize sections from the top. You have to resize them from the bottom. This is also why it can be a good idea to separate out your elements into different sections as often as possible. So if you ever need to resize stuff, you don't have to go through what I'm going through now here. I'm just selecting. I can select this as a box as a whole. So again, this has the benefit of grouping some elements together, and now I can just drag this down, and it's going to drag down all the different elements that I've selected. I want to make sure I'm not going too far below where I've stretched my section out to. Looks all right. Now I can go in and make this bigger, and move that down a little bit, and then I'm going to create a more white space around these, so that it's not quite as text heavy. I can actually rearrange these. So lot of the time people think you can't rearrange the elements inside of your box, because it'll mess with your desktop view. I could actually put this up on top and the text on the bottom. It doesn't affect my desktop view. So if you think, "Okay, this is text, and this is text, and that's a bit too much. I want to use this image up top to break it up." You can absolutely change that over. But I'm happy to just keep things as they are, and I would probably stretch this out a little bit and give it a little bit more room to breathe. Move ten down a little bit. Now, some things will just end up being center aligned, that were actually left aligned on your desktop view. I'm really not sure why that happens, but it's a good idea to go through and actually left align things, if you don't want them to be center aligned. I think it just assumes that on mobile, it's a better user experience if its center aligned. I don't necessarily agree with that. So again, test things out. Don't trust me, trust your users, and their behaviors. So if they agree with GetResponse and say that center alignment is better, then definitely keep it like that. I would actually maybe remove this arrow, because there's not much room for it here and I would want to make sure that I'm resizing this for the correct dimensions. If it's going to let me. Cool. That's all good. Again, I would maybe go through and pay a little bit more attention, and try and give everything a little bit more room, so that it's a little bit easier to read. But overall that's pretty good. Nothing's overlapping. There's no really dramatic things that would be a big no-no on the mobile device. But you do want to make sure that you are going through and making sure that it's a good mobile experience for your users. Okay, so then I would go to desktop, and then I can click the plus sign, and it's going to create an exact copy of my variant a to a separate landing page. At the moment they're the same, until I make some changes. So the easiest changes for you to make, if you're a bit scared to split test, and you're not really sure what you should be testing for, is moving some sections around. So you might remember that I talked about my testimonials. Initially, I had them at the very bottom of my sales page, and then I moved them farther up because I found that that gave me a better conversion rate with my visitors, but you could test this out. So I would maybe move these sections down a few rows. So at the moment there in two separate sections, so I would have to probably move them separately, which is a bit of a pain. I didn't think that through. But I could just grab him and move him down. Let's say past my offers, so I would present my offers first, and then present my testimonials afterwards. So my first variant has my testimonials first, my variant b will have my testimonials just after the presentation of the offer. So that's the only change I would make, and then test that out, and see how that works for me. Chances are the actual mobile view should look fine, because you haven't necessarily changed anything. You just moved stuff. But it will still give you a bit of an alert to say, "Hey, not sure if this is going to look good on mobile now that you've made these changes. So you might want to check it out." At any stage, you can also hit preview to see what the live page will look like, and also you want to make sure that you are saving along. It does do it automatically for you, but just in case your computer runs out of power, whatever, just make sure you are actually saving, and you can always "Save" and "Exit" at any point as well. Okay, so let's go on over to our order form, which is looking a bit messy at this stage, and I'm just going to go through and customize a few things here. Then we'll chat about what's on this page in a little bit. So, I'm Nitpicky, welcome to Design. I promise you that people are probably going to care a lot less about the design elements of it on the order form as they will anywhere else, so don't worry about it too much if things aren't perfect, and done is always better than perfect, so keep that in mind. But a few critical things is if you try and put any element onto the actual web form, it won't allow you to do that, because that's where people are putting in their billing details. There are a few things that you actually cannot do and one of them is to put anything inside of this section, because it can mess with the data, and the other thing that you might want to do is remove any unnecessary parts of the web form. You can customize this, so you can customize what it says here. For example, if you don't want somebody's full name, you could put in their first name, but because they're putting in their billing details in here, it might just be a good idea to leave it, even though with PayPal, they actually check out on a separate page. This is a one size fits all order form where they put in their billing details, even if they're not necessarily putting in their credit card details on this page, like they would with Stripe, for example. This is just going to take them straight to a PayPal order form if they click on the "Order Now" button, but they have to fill everything out anyways. I would just leave it at full name and email address, and I would actually maybe put an asterisk there, so they know they have to fill out both, and then just moving things up a little bit, so there isn't that awkward gap that I've left there from the phone number, and same with the product box, so you can move stuff around as long as it still exists within this box. Now it is quite important that if you are moving stuff around, that you put it back into this box, because I actually did that accidentally once where I put this button slightly outside of the box somehow I think it was just on the edge, and it basically stopped taking payments for me. You want to make sure that you are putting things back in if you're moving them around, that they're still within this box, otherwise the payment's not going to get processed correctly. Like I said, eventually in the advanced lessons, I'm going to talk to you about how to integrate this form in a PayPal and Stripe capacity, allowing people to check out with credit card, or with PayPal. At this stage, it's only allowing for one or the other, but I will be showing you a hack around this. You just need to make sure that everything is set up like this, so it at least can take one payment method. This is the bare minimum, and this will allow people to go on and actually purchase your offer. The only other thing that you might want to include on this page is that the prices are listed in US dollars, because it doesn't actually say that, it just says $37. Doesn't mention the currency. If you do want to be quite transparent with your customers and making sure that they know it's within US dollars, then this would be your chance to do that. Now, if they are going to be checking out with PayPal, PayPal will actually tell them this on the next page, it will say, "This is your exchange rate into your local currency." But if they're going to be checking out with a credit card on this page, it's not actually going to warn them about this, especially with countries that use dollars but different kind of dollars like Australia, they might think, "Oh, 37 bucks. That's awesome," and then they see a statement on their bank account that says $59, because the US to Australian dollar exchange rate is quite intense. That might be a thing just to put in a little note saying all prices are in US dollars. That's up to you whether you decide to do that, but that's just something that I've gotten into the habit of adding in for my customers, especially because I have had a few people ask me about it. Then we want to make sure we are customizing the mobile view, especially because obviously things seem to be a little bit messy in the mobile view here. Obviously things got a little bit thrown out of whack as I was designing my own content within their template, but that's fine. Then it's telling me that it's affected my desktop view. I want to make sure that I head on over to the desktop view, and check that everything is still okay. It does sometimes just mean that maybe there's a larger gap down here than there was before. It might be a really small change, but sometimes it does affect the desktop view. You want to make sure that you are checking things as you go along, and just like with our landing page, you can go over to settings, and put in your title, and have a cookies notification, put in your Facebook image description, all of that stuff. For now all I really want to do is give this a title, so this is going to be my Successful Social Media Management landing page. This is just so I can identify it within my sales funnel. Again, at the very end I would go and tidy everything up. It depends on how you want to do it. If you want to do it as you go along, or at the very end, it's totally up to you, but for now I'm just happy with everything being as it is, and I would just save and exit. In the next lesson we're going to start to get into the emails that we're going to be delivering throughout our sales funnel. As I mentioned, it gives you a few emails as a given, which is your lead magnet delivery email, your abandoned order email, and your confirmation email, those are all ready to go. Then there will be a few emails that we will add to this that are going to help to get people from your free offer download to actually purchasing your paid offer as well. I'll see you inside the next lesson.
27. What Makes a Perfect Email Marketing Sequence: Now we're getting to the real intimate stuff, which is talking to somebody over e-mail. I know you might be thinking people get so many e-mails these days or you get so many e-mails and they're so annoying. Why would I even bother? That is a huge mistake. I can't tell you how many times I've signed up for a free offer or a free training, and then they maybe delivered me that free thing but then I just never heard from that brand again. I'm talking complete inbox crickets. What's even worse is when you actually go in and purchase something from somebody, and they send you an e-mail saying, "Yeah, your order is confirmed, here's the thing you bought," and then you never ever hear from that brand ever again. People have come to expect e-mail communication. There's a reason why your inbox is full. So give the people what they want. E-mails do have the best conversion rates of any method of marketing. Which is crazy if you think about the fact that these things are free for you to send. Let's talk about how you can actually write magical e-mails for your subscribers. This is not going to be as straight forward as creating one landing page or one sales page. Because how many e-mails you actually choose to send and what they will look like, will be entirely dependent on the anatomy of your sales funnel. The more steps that you have within your funnel, the more e-mails you need to prepare to send. Again, for the time being, we're going to be creating the minimum that we need in order to launch the funnel so we can test some things out. But also so that we can still be profitable and try and re-engage our subscribers and get them to actually buy from us. First let's go ahead and talk about just the different kinds of e-mails you could send within your sequence. The welcome e-mail is a no-brainer. The purpose of this in your sales sequence is to build a relationship with your audience. You can't just jump straight into a sales e-mail. You need to deliver the free offer, the free lead magnet, maybe thank them for being on your e-mail list. Maybe use this to build a little bit of trust with them and maybe set some expectations for what they can expect and how often they can expect to hear from you. The added bonus with a welcome e-mail is that on average these things have an open rate of sometimes 50-60 percent. Whereas your other e-mail well be sitting at around at 20 percent mark. So it's really important not to waste the precious space within this first e-mail just by saying, "Hey. Here's your free thing." and leaving it at that. You want to make sure you are starting to build a relationship with your audience in this very first e-mail. Now if you want to be an absolute legend and take this one step further, you can actually take this opportunity to learn about your subscribers, especially if you're a brand new business and you don't really know much about your audience yet. Instead of just relying on data to see that your audience is located in this area geographically, or they're interested in these things online, you could actually spark a conversation and just say, "Hit "Reply" and answer the following question." What is the one problem that you are looking to solve within your business in the next six months?" You'd be surprised how often people actually do reply to the questions that you post them in your welcome e-mails. It's not a huge number of people, but the people who are the ones who will be replying are the ones that are going to be your die-hard fans in the long run, so it's worth getting to know them. Here's a screenshot of my own inbox of people replying to an e-mail that's not my very first e-mail that I send, but it's one of the e-mails in my welcome sequence, which has a bit of a quirky headline that says, "Are you ready for our matching tattoos?" Inside this e-mail, I ask people to tell me a little bit about themselves and what they want to achieve. Now, over the years, I've not only become virtual friends with some of these people, but I've actually met up for coffees while traveling around the world to meet some of them in real life. Don't be afraid to experiment with this very first introduction that somebody has to you and your business, and you can use it to form a connection or get to know your subscribers a little bit better. Then there's the social proof e-mail. Now on average, about 70 percent of people are willing to trust a testimonial from someone they've never even met. That's not even coming from a friend or family member, it's a complete stranger and we still trust them. Because testimonials are just another form of social proof, which is that psychological tendency to just do what we see other people doing. Because if they're doing it and they're liking it, that must mean that it's worthwhile. Just think about it in a real life situation, would you walk into a restaurant that's completely empty during rush hour? I mean, you might, if you're completely desperate, but you'd probably be a little bit skeptical about the quality of their food. Because you'd be like, if the food is so great, why is no one in here? On the other hand, if you see a restaurant that's jam-packed, it might be hard to get a seat, but you're like, okay, this must be good if it has these many people inside this restaurant." It's the same thing online. It's quite critical, especially in a sales sequence, you want to be able to show that you know your stuff. Much like you would for a sales page, I know it can be overwhelming. You definitely can still ask your friends or family members for testimonials as long as it's authentic and they've actually tried your offer or service, and they're happy to refer that to other people. Or just as we did talk about with the sales pages as well, you can use testimonials from other parts of your business to promote your new product and offer that doesn't really have that social proof yet. Hopefully if you were able to send out a sort proof e-mail, the next logical step is to actually show them what they're getting and what it looks like on the inside so that they can make an informed decision about whether or not it's the right thing for them. This is where this e-mail comes in. Let's say you're an agency, for example, you could show them a video of how the process works when a new client signs up and what they can expect. Or if you're a clinic offering a surgical procedure, you could show a video of a before and after shot talking about what people can expect from the process. It's applicable to nearly any industry because people don't like not knowing what they're getting. So this is your chance to really show them, especially if your product or service is something that's a little bit of an unknown. This is a screenshot of Russell Brunson, who's the CEO of ClickFunnels, walking somebody through how his software works. This is quite critical because ClickFunnels was one of the very first funnel building software in the market, and people didn't really know what to expect. They didn't know what they were getting for their 100 bucks a month that they're paying for the software. So it was very important for him to actually walk them through it so that they know what to expect if they sign up. Finally, we've got the don't miss out e-mail. You do want to end with an e-mail giving people one last chance to buy your offer. It can include a last minute discount or an urgency prompt to say, "Hey, you only have 12 hours left to buy," or something like that. There are lots of other types of e-mails you could include in your sequence, but these few are a really great place to start. In the next lesson, we're going to talk about the actual anatomy of the e-mail and what makes a great subject line, what makes a great body of your e-mail. Then we're going to go into our template where I'm going to share with you a few more tips of how to create an impactful e-mail sequence. Then we'll actually go in and write and create ours. I can't wait to see you inside the next lesson.
28. What Makes an Irresistible Email: Let's talk about it. What actually makes an irresistible e-mail? Now, of course automated e-mails are never going to be as personalized as the e-mails you write just in your Gmail account to your friends, or coworkers, or your mom, but there's a lot to learn from these types of direct e-mails that can be applied to your automated sales funnel e-mails as well. Here's an example of the best cold pitch e-mail I've ever received that actually ended in a collaboration as well. I just couldn't say no to this offer because of how awesome, and personalized, and dynamic it was. The subject line is, ''We want to pay you, Maggie, or should I say Mags?'' Which by itself is almost enough to get me to book a call with them, but the e-mail itself was also really brilliant. Plus, it includes a quote from me where that arrow is pointing to, meaning that this person really did their research on me before approaching me for a collaboration. Now, these are the kinds of things that you cannot automate because you can really only do this if you're writing a custom e-mail to each and every person. But there's a lot about this e-mail that can be used for an automated e-mail like the fact that they use social proof from other people and the fact that it's super funny and personal, and most of all, it's so human. The reason that I'm showing you a direct e-mail that I've received rather than an example of an automated one is because I think the mistake that people often make with their e-mail marketing is that they think their e-mails have to be super generic and free of any personality in order to appeal to everyone on their e-mail list, which is the opposite of what's going to help you succeed. You are not going to be for everyone. There will be people who will unsubscribe. There will be people who won't like your e-mails and that's fine because the people who will stay are the ones that you want to keep on your e-mail list because they're the ones that are going to keep opening all your e-mails, keep buying your stuff, and they're going to be your loyal subscribers and followers. Let's break down this exact e-mail to see what we can actually learn from these kinds of direct e-mails to use in an automated e-mail sequence. Subject lines should be simple and to the point, but human and personalized whenever possible. Then, the from field should include an actual name, which is yours or your brand's, not that dreaded no reply@ whatever, whatever or info@ whatever, whatever. For example, my automated e-mails get sent from maggie@livingtoroam.com, which has drastically increased the number of replies I actually get compared to when we were using hello@livingtoroam.com because people know exactly who they're going to be talking to. When they were reply to that e-mail, they know they're going to be talking to me, Maggie, not someone on my team who might reply, and because of this, the interaction rates that I've received since I've switched this really, really simple thing in my e-mail marketing has been really, really dramatic for me. You also want to make sure you're being very clear and visual in the actual layout. In the example that we were talking about in the slide before, this was done through bolding some text using hyperlinks, using bullet points, using emojis, but you can do a lot more within your actual e-mail marketing software with images. We're going to get into that. But it is quite key to try and make things be broken up with some visual components whenever possible so that people aren't just reading these big block paragraphs that have absolutely no stylization throughout. You also want to make sure that throughout the e-mail from the subject line all the way through the body and on your sign-off, just everywhere you can, be warm, friendly, and human because even if you are a business, you're still a human communicating with humans. You also want to personalize with information and details from the sign-up or subscription forms because I promise that your open rates for personalized e-mails will be drastically higher than those without personalization. For example, you can use the person's first name throughout your e-mail, and I'm going to show you how to do that. But the difference between saying, ''Here's your free thing'' and ''Here's your free thing, Maggie'' is a really, really big difference because people feel like you're actually talking to them and not just sending this generic e-mail out to everyone out there. You can set this up really, really easily. We're going go over that in just a little bit. Your e-mail marketing software, no matter what you're using, if you're not using get response doesn't quite matter. Every e-mail marketing software will have some system for detecting trigger words for spam like free cash, cheat, those words that would be used in promotional e-mails. You want to make sure that your e-mails are getting delivered and aren't ending up in spam or in the promotions folder of people who have a Gmail account. Try and avoid using words that a promotional e-mail would use. But, again, your marketing tool will pick this up, and it'll tell you you've used these words that might trigger a spam filter and it might not get delivered to your audience's inbox, so try and remove these. Starting sentences with conjunctions will go against everything you were probably taught in school, but it can help to create a story throughout your e-mail and connect your paragraphs to ensure that your readers are staying engaged until the end of the e-mail. This is a practice that I have gotten into the habit of with sales pages, with e-mails, with e-books, with anything that I do, just making sure that all of my paragraphs are connected and tell a story. I can start a paragraph with before, after, because, but, all of those things that will connect my paragraphs. Even if it doesn't feel like it's grammatically correct with what you've been taught, it can really, really help because it means that somebody has to continue reading in order to get the full picture of what you're trying to say. Finally, you want to give people a call to action. Don't send e-mails for the sake of sending e-mails. You can do this with your maybe regular newsletter from time to time, but each e-mail within your actual sales funnel needs to have a purpose. If it's not giving somebody a call to action to do something, then don't send it. Now we have hopefully a bit of a better idea of what kind of e-mails we could create for our sales funnel. Now in the next lesson, let's go in and actually create these. I'll see you there.
29. Write Your Email Sequence: It's important for me to note at this point that this is not a perfect science. There's no way for anyone out there to tell you that you should write exactly four emails or exactly seven emails, and this is exactly what they should look like. Because everything is so, so specific to you and your business. A perfect example of this is that there's an ongoing battle that marketers have been having for years about whether or not images actually belong in automated emails. You'll see a lot of marketing purists, so I would say, like Pat Flynn and Neil Patel, who will send out emails with no images at all. Because technically speaking, the closer your automated email looks like an email that would actually be send by a real human, the better your deliverability will be. Honestly, marketers are constantly finding new and different ways to do some things. So I can provide you with some guidance, but you need to make sure you're customizing this to your own business and your own unique style as well. I'm someone who has always been very pro images and gifts and videos because, yes, while they might actually make my emails a little bit less deliverable, and it does mean that sometimes they'll probably end up in spam or in promotions tabs of my audience. It means that the people that are actually reading them get a really good user experience, and that has been really great for me and reflects my brand really well as well. So it's important to see what works for you and test this out for yourself, and practice definitely makes perfect as it does with everything. As you can tell, these are some of the very first emails that I ever sent down to my subscribers back in 2017, and it's a color and font overload. When you compare that to the emails that I send now, it's literally not in day. But I really had to teach myself the dos and don'ts, and had to practice a lot and test a lot to figure out what works for me and my audience. Hopefully with my help, you can learn from my mistakes, and it's not going to take you three years to nail your strategy and make emails that are perfect for your audience. So let's go into our Google Doc template now so we can try and write out our perfect email sequence. I'm not going to be going along with you and actually writing out my different emails inside of this template for this particular exercise. Just because I think it would take too long because I'm going to be creating quite a few emails. But also because I want you to use this template as more of a guide for your emails if you need to think back on, okay, what was that thing that Maggie said about subject lines? Or what did she say about this? This is more of a guide or a checklists for you to check out when you are actually writing out your emails. We can feel free to just write out your emails in a blank Google Doc straight away, you don't necessarily need to do a brainstorm for every single email that you do. But I know that some people are really particular with their structure and their workflow, and they will want to start with a bit of a brainstorm before actually going in and writing stuff flat out. So I did want to include a template for your emails for that purpose. Once again, the emails that you choose to include in your sequence will really depend on the offers that you are presenting within your sequence. You will always have a welcome email, but whether or not you choose to give people a little bit more free content before then introducing your paid offer, might depend on what's the price of your paid offer. If it's $1,000, then yeah, you're probably not going to go straight away from a welcome email to give them a free lead magnet straight to pitching your paid offer. You're probably going to have some additional emails in-between these where you're going to introduce maybe a free training or a free webinar, maybe some additional videos or blog posts to really get them familiar with you before then pitching them your paid offer. Whereas if your paid offer is 20, 30 bucks, then you can pretty much go straight into it because it's not a huge jump from a monetary perspective. But I do want to include the different options for you here, and there's probably more that we could include. So definitely feel free to add in any additional ones into your template as you're brainstorming. But these are the basic ones that you want to look at when you're creating your sales sequence. Now in step 2, this is a guide for you to follow as you're creating your emails, and also you've got some prompts in there in terms of what kind of email is it? What's the number in the sequence? What is the subject line? I'm including my best converting subject lines in there for you. So you'll notice that a lot of these were curiosity prompting because that would maybe even confuse people, which is why they want to open the email, which is what we want. But I have really, really high open rates compared to the actual averages. So I'm really happy with my open rates based on these subject lines, so that's why I want to include those in there for you. Because your subject line is really important because that's going to determine whether or not the person actually opens your email, and reads it, and clicks on it, and buys from you, or they just think, that sounds boring and I'm just going to go ahead and put that into my junk or just delete it straight away. I've also linked you to some more examples as well. If you are struggling to get inspiration for what to write. In terms of preview text, this is something I've written a little bit of a note about here in GetResponse in your autoresponders, which is what we're going to be creating in your sales sequence. You actually cannot determine a preview text, I think this is a bit of a flaw in the software. But your preview text is essentially just the first couple of lines that somebody sees in their inbox before they open it. So they'll see the subject line and they'll see some of that preview text, whether that comes so is a mobile notification or on their desktop. They will be able to see this and inside of GetResponse with any other email workflow that you do, outside of your sales funnel, you will be able to actually put this in there. So it's something to keep in mind because it's one of the first things that somebody sees. Just like your subject line, it can determine whether or not somebody opens your email. Again, this will make more sense once we're putting it inside of our software. But just keep in mind that it may or may not be available for you to put in a custom preview text. If it's not available, all that means is that the very first few lines of your email is what's going to display as your preview text. Then you want to make sure you have one goal. This is super, super important. You want to make sure you're not linking to seven different articles in your email, you have one goal, one purpose, one call to action. That goal may or may not be attached to some links that you need to include in your emails. Again, if you are a big fan of brainstorming and you want to include your links in here, and especially if you're doing this for clients, this can be helpful for clients to get their head around what you're doing, in which case you might want to include your links in here. Otherwise, your goal could be to get people to reply to you, in which case no links are necessary. But if you do have some URLs that you want to include in your email, this is where those would go. Once again, for your body, you want to make sure that you're telling a story as much as possible. So you're not starting each line as a separate paragraph, but you're continuing on from the previous paragraph. Then I've just got a few prompts in here for you for social proof and for visual content. If you do want to include any images or anything like that, this is where you could kind of map that out for yourself as well. Now some extra elements for you to consider here is using simple language, avoiding spam words, making sure things are mobile-friendly, and all of that sort stuff. But especially pay attention to this one, which is the fact that your email should really reflect the brand and the design elements of your landing pages and your sales pages within your funnel. Remember that we talked about it from the outset and threw the fact that all of your language, all of your images, all of your even just font choices, and the graphics that you are using should be the same throughout your sales funnel. They don't necessarily have to be identical to your brand, but as people are moving to your sales funnel, they should feel like it's part of one big experience. You're not using different terminology to refer to things. So if you're running a webinar but you're referring to it as a free training, continue to refer to it as a free training. Don't go saying, okay, this free training, a video series, a webinar series, and you're continuously changing terminology throughout your sales funnel, little things like that can make the difference between somebody buying your stuff and not buying your stuff. So you want to make sure that, once again, with this template, you are going to file and make a copy and saving this your own Google Drive so that you can use it again and again. Eventually, you want to end up with a Google Doc that looks like this one over here that I've created with my own e-mail sequence. I have my welcome or my free offer delivery e-mail, then I'll have a second e-mail and a third e-mail that are going to be part of trying to get people to actually purchase my paid offer if they haven't already. Then the abandoned order email and the purchase confirmation email are ones that GetResponse sets up for you automatically. So it's already in there, you just need to go in and customize it and make sure the branding is on point, but it's already set up for you. So these three emails are the ones that are already set up, and you just need to go in and customize them. These are two that I'm going to be adding in order to make sure that somebody who has watched my free training, or if they haven't watched it yet, then they'll get an email saying, hey, have you had a chance to watch the free training? Go in and watch it, and PS, buy this thing. These are going to be really crucial to getting people to actually purchase your paid offer, and getting them to prompt them to watch that free training because, once again, people sign up for so much free stuff. They get so many emails, sometimes they just need a reminder to say, hey, you signed up for this thing a week ago, do you still want to watch it? There's every chance that they might go back and watch that thing. They might just need that extra little reminder. Similar to the way that I've done it with my sales pages, with my emails, I want to make sure that anything that's not actually a part of the email is in red. So that's just prompting me to say, okay, I need a call to action button. I don't need this text there, but this is where a button is going to go. This is where my email signature is going to go, so I'm not going to just say, Maggie, that's just where I'm going to put in my email signature. This is where the title of the free training is going to be. In terms of personalizations, these will be called different things in different email softwares. I'm going to refer to them as merge tags. Basically, all they are is it's going to pre-populate data from your actual email database. So every single platform will have a different text that it's going to require in order to actually pre-populate this correctly. So GetResponse is this particular format, but Mailchimp is totally different, ActiveCampaign is totally different. Every single email provider will have their own version of this kind of shortening that's going to essentially just allow that software to pick up that person's first name, last name, their phone number, their state, or whatever data you've collected from that person in the past, you can use to personalize your emails. Again, that's going to make more sense once we're in the software and building it, but because I know that inside of GetResponse that is the sure code that are needed there, I've already put that in there for myself. But if you didn't know, what you could do is just put in something like this and make that red so you know that you need to replace that with your particular personalization. So you might need to make sure that anything that you need to replace is red, and you want to just start gathering some images that you want to use inside of your emails as well. Now we're going to jump into GetResponse in the next lesson and actually start creating our emails. So I will see you there.
30. Publish Your Pages: Before jumping in and actually putting everything into our emails inside of our funnel, the one thing that we want to do, is make sure we actually have the correct URLs to be able to put into our emails. Do you remember that in the very first email, in our email sequence, I have a call-to-action button saying, "Hey, take me to the training," and the reason this is important, even though we have automatically set it up so that as soon as somebody hops into my free training, the next page is a page with the training on it. I still want to be sending people an email saying, "Hey, here's the training," in case they need to pause it, or maybe they signed up, and they're on their way to work, and they don't have the time to watch it. They need to be able to access that training later on. This email is quite important, and it's important that this URL is in there straight away, because it can be easy to forget that you haven't put in your correct URLs into your emails and your launcher funnel, and there's all these buttons, and they don't go anywhere. For that reason, we want to make sure we're jumping into our funnel, and we're going to go in and actually publish some of these pages, so that we can make sure that they're live, and we can actually direct traffic to them, and we can use these URLs and make them a little bit prettier as well. I'm going to go ahead and jump into my very first landing page here. It's red inside my funnel, so I can see that it's not published yet. I have my first variant, my second variant, and this is the default "Thank You" page that I want to make sure people are going to. Don't worry about the preview here, the videos sometimes just play a bit funny. We're going to go in and make sure that they look good. If at any stage you want to double-check that you can always hit the Preview button. It'll show you what it actually will look like once it's published, so you'll be able to see that it looks good. It looks fine on both mobile and desktop devices. Now, what I would want to do is actually go in and publish it. There is also a button on this page down here that I need to go to a sales form, but I don't have that URL quite yet. That's just something that I would want to note down to make sure that later on I'm coming back to this, and making sure that URL is actually there for people to go to that sales page. But at this time I just want to go to "Next step", and fill out some of these last-minute details. I'm not going to go through and actually put in my title and my description here. I would do that as a very final step. It is a part of my checklist to make sure I'm doing it for all of my pages in one go. Everything looks good, and I'm just checking those last-minute details to make sure everything's going to work. But this is where I would put in my title or my description. I can also do it in the settings in the previous page. But this is also where you can choose whether or not to index something in search engines. For example, if I want this funnel to only go to my subscribers, and I want to maintain that control over who sees the funnel, then I would say, "Hey, don't index this in search engines," so that no one can just randomly come upon it by googling me, or googling my brand, or just googling the topic of this page. If this is going to be a social media management free training, and somebody looks for that on Google, if I don't have this ticked, they might be able to actually find this page. In this case, I don't really want to be indexing it, because it's more of a test demo funnel. This is where you can go in and customize a few things. We did talk about, you can put in your own custom domain, or your custom sub-domain, and it's going to give you the instructions on how to do that one last time here as well. But in this case, I maybe don't have one, or I don't really want to be using it at this stage. I can just customize a few things over here by putting in social media training, and then using this last part of the URL to customize this as well. The last bit of it can say gr8.com, subscribemenow.com, or getresponsepages.com. Subscribemenow is pretty good in terms of signing up for trainings. But I think gr8.com is awesome because it's short. It's not really super branded in terms of GetResponse branding. I'm happy to just keep it at that. Then this will also affect the rest of the URLs in my sales funnel. I'll show you what that looks like. But this is something to pay attention to. Where do you want that “Thank You” page to go to? Even though we did create a “Thank You” page already, it's not necessarily listed here as the place that people are going to be sent to. The default might be the sales page. Which means that as soon as somebody signs up for the free training, they'll be directed straight to the sales page. Which is awesome if you are offering a trick bar, for example, and you want to be able to sell them something straight away. But if you're not doing that, which I'm not doing in this case, you want to make sure you're changing this to the default "Thank you" page, which is the one that we just customized. Because that's where my free training is, and I want to make sure people are seeing that before they then go to the sales page. You want to make sure you're changing this. Again, if you didn't necessarily link your Facebook pixel or your Google Analytics to your account as a whole, here's where you can do that by just customizing your tracking for each and every page. Not something for you to worry about right now. We will talk more about that in the advanced lessons as well. But just so you know that you can do individual landing page tracking, and if you click down, it'll say, "You can put in your Google Tag Manager, or your Facebook pixel tracking code here," and you can do that page by page or do it for GetResponse as a whole, in which case it's going to track all of your landing pages, and you won't have to worry about this so much. The last step is to go in and publish this so that that URL we've just selected is live. I'm going to be able to actually send people straight to this page here. Now what you'll notice, because I've changed this, it's also changed it in my sales page. This now says social-media-training.gr8.com/offer_page. Then my order form is going to be the same thing, where it's going to be the same URL/order_page. If I was going to click this out, actually it's not published yet. It's going to say it doesn't exist. I want to make sure I'm publishing it. I'm going to make sure all of this is enabled. Sometimes it does get a little bit funny with things like this. I want to make sure it knows it needs to be live. Cool. Now it's live. You don't necessarily need to go in and publish in each individual page if you've already done it, you can also just disable or enable your entire funnel here as well, which is handy if you're done with the funnel and you don't want people going through it anymore. Then if somebody comes to this URL and this is disabled, they're just going to find one of those error pages, saying that the page that you're looking for doesn't exist anymore. What I now want for my first email is the actual "Thank you" page where my training is. I want to make sure I'm going to this page, and then I'm putting in, /thank_you.html. That's going to give me my "Thank you" page. I could also just actually sign up to it to get the same page, but no matter what your URL is, your actual "Thank you" page is always going to be, /thank_you.html. Within GetResponse, if you're using the default "Thank you" page, so this is the URL that I need in order to actually build my email. I'm going to keep that open. I want to go in and customize my very first email. You'll remember that GetResponse has actually created this for us. I can just go ahead and jump straight into it and start customizing.
31. Build Your Email Sequence: This is not your subject line yet, this is just to help you determine what it is that you are actually including in this e-mail, so I'm going to say free training delivery so that I know that this is that particular e-mail. I want to make sure people are being sent this immediately as soon as they sign up on any day of the week, and I want to go in here and you can choose another message if you've got other templates or other designs inside of GetResponse but in this case, we just have a brand new account. I'm just going to go ahead and click on "Edit message", because I might keep some of the elements that they have put in there for me, but I might also remove some of them. Once again this is a message that's going to appear in my list of messages and not going to be seen by my subscribers, so I'm going to make this free training delivered again and this is the bit that is actually going to be seen by my subscribers. I'm going to jump into my template here and this is my subject line. I'm going to go ahead and copy this in. If I didn't know what this code was, what I would say is your training is here and then click over to "Personalize" and pick the actual code that I need. So I want it to display the person's first name and exclamation point so then you know that that's what's going to display there. It would just say, "Hey, your training is here Jackie, your training is here Maggie." It's just going to pre-populate based on the information that that person has provided you. Now this is where those e-mail addresses come in handy, not just for test e-mails but it also allows you to put different people into your From section of your e-mail. If I had different team members and these e-mails are coming from different team members, this is where I could go in and add a new from e-mail address so that I could put them in here. For me, I'm happy to keep it as just Maggie<living.to.roam@gmail.com>, and you can also change the actual reply to. So you can have this as the same e-mail address but if you want it coming from a person, but the reply will go to hello@yourbrand.com, you can change that over here, but it's still coming from a person with a personalized e-mail address, but then if they hit "Reply" on that e-mail, it's going to go to a generic e-mail address and that's fine if you want to change those two things. We're going to go ahead and click on "Next step". Okay. Now I have some basic building blocks over here that I can use in terms of image and text. These look really basic and these are only for their auto responders which is what we're in here right now. When you're actually creating big beautiful newsletters or additional e-mails in side of GetResponse, this is a much more versatile platform and set up, it's just because it knows that for your actual fun and you only really need basic things, so it's only presenting you with really basic elements that you can include in your e-mails. So for now, that's all we really need and I'm quite happy to just keep it quite simple. Now I'm going to go ahead and just delete some things. I don't mean this logo here, I'm not going to be showing a preview of my free training for my e-mail. The background itself has a color here, I don't really need it to have a color so I'm going to go ahead and just make sure it's not a color, so I can make that white or I can make that just transparent either way, and this is the actual size of my text or my e-mail. Generally speaking, it's a good idea to keep it to 600 pixels. Why? Because that is the width of most e-mails that will come across your desktop. That's what they determined is the right ideal width for your e-mails, but of course you can get a little bit creative with other elements inside here. So I'm going to just go ahead and erase these. There will be a footer present there that'll say your business address and also that it's been sent from GetResponse, if you're on the free trials still so keep that in mind, there will be something at the bottom still, but for now, I'm happy to just keep deleting a few things because I don't really need these, and I'm just going to keep the bare minimum. I'm going to drag a few things. So yeah, you can just grab things and drag them straight into your actual e-mail here. Now I want to grab my actual e-mail copy, and then we're going to jump into our app here and highlight this and just paste it in. So that doesn't mean that you might have to format this text once it's pasted in. Depending on what text font you actually want to be using, I would recommend that you stick with something really basic like Arial and make sure you're going within the recommended 12 point to 15 point font so it's big enough for people to read and [inaudible] but yeah, [inaudible]. So you want to make sure you are customizing things as you go along. This is now blue, so that is the color that we're using on our landing pages and our sales pages, but is it something that you want to be using inside of your e-mails? Probably not. I would stick with a blank color across and you can make it slightly larger than your actual body text, but you absolutely don't have to, and they don't in fact have to be separate blocks either. You could make it into one block. Now I've already stylized this for myself, so what I can do is I can just save this into my snippets so I can click this over here and it's going to save it for me here, so then I can always drag and drop this anywhere in my e-mail, and it's going to allow me to have the same styling for that new block and I would just customize the actual texts there. Now this is a little bit wide for my liking because the actual e-mail is 600 pixels across, but then it's got this huge amount of padding, so play around with that a little bit with these functions over here. This is the actual spacing top and bottom, and then left and right. If I go to the right, it's got 63 pixels on the left and the right, so that's a little bit enormous. I would change that to 20 on the left and maybe 20 on the right, and let's have a look at what it is on the bottom. Again I would not go over the top, they're trying to make it look a little bit more like a promotional e-mail, I would actually argue, so you don't want it to look too much like it is a promotional e-mail. You want it to look as much as a regular e-mail as possible. I'm just going to go ahead and delete this section, and I will also delete this section because now the font is not quite right for what we're looking for. I'll also check the spacing of this because it looks a little bit too chunky on the bottom here, so it's 16 on the top and 58 on the bottom. Why? I have no idea. Probably because it had the e-book above it, so it didn't look super awkward before but it does now. I'm going to keep that and I will just go and add in the rest of my text here. I can go in and duplicate this or I could save it to my snippet and drag it across. Any of these buttons will allow you to duplicate the same block, either to the right, or the left, or the bottom as well. I can go in and delete this because I don't need those two columns, but I want to drag this below my button here, and double-click, and paste in my new text. Again, it's going to paste it in Times New Roman for whatever reason, which is a little bit too much for me. But I'm happy for it to be Arial 14 pixels rather, making sure that this personalization is correct. Again, if you're not sure what the personalization code is, you you always go over here, there's a little person icon, and you can choose from different contact data fields there. The one thing is that it will put it in there in a different font sometimes if you're not using the font that it wants. You'll see that that's a slightly different font, so I want to make sure I'm highlighting that and changing that to the actual font I want and the sizing as well. Because what it'll do is it'll put their name in there, but it'll look a little bit awkward because it's a different font to the rest of your texts there. This is a question I'm asking them so I would maybe want to bold that. Obviously, this looks a little bit awkward now on its own, so I would actually probably go to space this down and say, "Hey," and put in their first name there. That's already copied it over in Arial which is good, so I don't have to change the font on that too much. That's looking good. I want to make sure that I am using my CTA correctly. Take me to the training is what I want to be saying here. Obviously, I want to be making sure I'm changing over the stylization. This is the roundness of the buttons. I'm going to make sure that that is square. This is going to go in here, take me to training. My URL is going to be over here. I'm just going to copy and paste this. My social media training forward slash. Thank you. Html. The actual background or this doesn't need to be a color at all. Perfect. I would say that this can be black text and not necessarily bolded. The one last customization I want to be doing is putting in my signature at the bottom. I've gotten into the habit of using an image for this. Again, I would erase this snippet because I don't need it to be there. You can also go into mobile preview at the same time so you can see what it would look like in an e-mail. Obviously, this -mail signature is a little bit too small in the preview, I wouldn't necessarily trust this. It usually looks pretty good on mobile. Again, you want to make sure you're sending it to yourself and you're checking it on all your devices before making a call on that because if it is that small, then, of course you want to change it, but if it looks good, then that's fine. This is what it will look like if somebody is reading it on a mobile, but horizontally. This is where we can go and send a test message. I'm going to go ahead and share. I'll send myself a test message because that's the only e-mail address I have in there at the moment. Going over to my inbox, it's there. obviously, this is not what it's going to say. It's just because I am sending myself an e-mail. That's also why it's going to report it as spam because it's going to say you're sending yourself and e-mail and it's automated. Do you really want to be doing that? But the benefit of sending yourself a test e-mail is that you can check that your personalization has worked. It says your training is here, Maggie. Cool. Hey Maggie. This is also where I said Maggie. Then you can click on the "Take me to the Training", so I can make sure it goes to the right page. That looks good. This looks a little bit fuzzy. I would make sure that I'm going in and checking them, maybe replacing it with a bit of a clear image so that it doesn't look pixelated. It should look like a nice e-mail signature. If it doesn't quite work as an image, I will just add in my name in text instead of in an image. This is what I was talking about, that it's added in my business address, unsubscribe section, and also the get response badge. But other than that, this looks pretty good. I want to make sure that I'm going in and confirming this so I would go to the next step. I like keeping this open while I send myself the test messaging in case there needs to be a change. That's it. I would say Save and Publish. The rest of this is relatively easy if you go in and add any e-mails to your sequence. This image here is not quite updated with our customized e-mail, but I can just say add another email, and let's just say free training. I want to make sure this goes out on Day 2. W2hen they sign up, they get that first e-mail immediately. They get that on Day 0.. Two days later, exactly at the same time that they sign up, they get the second e-mail. If they sign up at 11 o'clock, then 11 o'clock on Day 2, they will get the second e-mail. Now, when it comes to choosing a new message, I can go over to choose message and use the same format that I did for my free training. I can say, hey, select this as a message and then edit this message. Then I would just go through and customize this to my second e-mail. It's going to be in the offer page URL there. That was good. I would just want to make sure that I am sending a test message. Next step, Save and Publish. Now I have two of these e-mails in there. If I want to check what they look like, I can just pop them out here. This is the very first one and this is the second one. These are the previous. Remember, I said that anytime it doesn't have someone's first name in there, it will just say friend. Your subscriber is going to see their name wherever it says friend, but it'll just give you an idea of where that is. Then you'd want to make sure you're checking that it's going to the right page. Yeah, that's going to the sales page. Then I would also check my e-mail to make sure it got delivered, and it all looks good. Yeah, that looks good. That's pretty much how you would go through and you would make sure that you're doing that for your third e-mail and then also going through and changing your abandoned order e-mail and your confirmation e-mail as well, because these are just very generic and you want to make sure that they look relatively similar to your branding from the rest of the funnel. You would go in here and you would say, hey, let's go and edit that e-mail. Thank you for your order, that's fine. It doesn't have to be really fancy, but you want to make sure you're actually just changing the actual colors. Obviously, it has rounded corners. There are just a few things that I would go in and change. You don't want to be changing any URL because that needs to be an automated link. I would go in here and make that my branded colors and drop as a line. That's not how I talk, that's why I like customizing my confirmation e-mails. If you go in here, this is a "Hey, congratulations, your payment has gone through. Please allow up to 15 minutes for it to come through before reaching out, if you haven't received your login details. Thanks so much." I will just go in and customize that. Again, send myself a test message. This isn't going to have a proper link in your test message because I haven't ordered anything yet. But you want to make sure everything looks good. Then I would just go to next step and make sure I'm saving everything as I go along. It's easy as that.
32. Attach a PDF to Your Emails: Throughout these lessons, I'm showing you guys how I am delivering a free training to my subscribers. Because it's a video training, I have it embedded on my thank-you page that somebody sees once they subscribe. But you don't necessarily have to do this and many of you won't do this. Many of you won't have video content to deliver to you your subscribers, at least not straight away because it's took me a long time. I would say years to get comfortable on video enough to deliver my free stuff in the form of video content. I started with delivering a lot of e-books, a lot of guides, a lot of written content, checklist, those sorts of things, and I still do that to this day. So it's really useful for you to know where you can put this inside of your GetResponse account so that you can get a link to that download, because sometimes this can be confusing part of the process. How do you actually deliver a PDF to your subscribers? Sometimes people get stuck on this, but GetResponse makes this really easy. Inside of your conversion funnel section, you'll notice there's a tab that says lead magnets. So all you have to do is you go in here, you have some test ones that they already have in there for you. This is exactly how you're going to be setting it up. I'm just going to open and you're going to have it. There is a beautiful guy. You're going to copy this URL, and that's what you're going to put inside of the email to deliver to your subscribers. So you're just going to go into Add Lead Magnet and you would put in the name, the description, and image of your file, then you would upload your actual PDF here up to 50 megabytes. Obviously, your e-book is not going to be quite that large, but this is where you could also deliver videos or podcast episodes or really anything that you want to put in here you can. If you have multiple files that people are going to be able to download, you can use a zip file to add them in here, but mainly you're going to be using this for PDFs. Then you would just add it in and it would just appear in here, like the rest of these, which would allow you to attach it to your funnel sequence. So once it's in here, you would just go to Preview to grab that URL. Then inside of your sales funnel, remember, this is where it's going to be attached to this particular email. So where it says Take Me to the Training, if this was an e-book, this is where you would put the URL and people would be able to essentially open it up, and it would open up this beautiful PDF for them, and then they could click here to download it.
33. Set Up Your Automations: The final step before you can launch your funnel is to ensure that any of the final touches required to make this a really great experience for your users and for your audience are in place and ready to go. What I mean by this is that any tags or actions that need to actually happen in order to make sure your subscribers aren't receiving e-mails prompting them to purchase after they've already purchased, for example. In this example here, the person on the left has purchased, so they shouldn't be receiving another promotional e-mail. The two people on the right have not yet purchase, so they should be receiving another promotional e-mail. Luckily Get Response only does a lot of the heavy lifting for you with their autofunnel function, which is why I love this tool, but there are a few additional steps that you might want to take because, for example, if funnel emails are only active until somebody purchases. There is no follow-up built into the auto funnel sequence. You may want to add in some additional steps after a purchase happens that will send your customers their paid offer and then maybe a follow-up email to check-in how they're liking you're paid offer, and then asking for a review or a testimonial. Automations can seem quite complicated if you've never worked in an email marketing platform before. These guys have a lot of really helpful resources on how to set up different automations and what they would mean. If you ever get stuck, feel free to reach out to them or if you're using a different e-mail marketing tool as well. They'll always have really helpful support for you there. For the time being, I just wanted to briefly cover the difference between automations and autoresponders. You remember that you have autoresponders that we use within our funnel and then automation is a separate tab. Sometimes it can really seem counterintuitive because you're thinking, what do I need both. I will link you guys to this really hopeful article on what is the actual difference between these two. Effectively, autoresponders are the messages that will go out automatically in a sequence, one after the other at regular intervals. You'll remember that we had the [inaudible] funnel, as send one autoresponder straightaway when somebody signs up for my free training, send one, two days later and four days later. It's reacting to it's contact subscribing. That's all it's seeing is that somebody subscribed right away, send them an e-mail and then two days later send an e-mail and four days later send them an e-mail. There's really no difference in how that happens to different contacts moving through those autoresponders. Whereas with marketing automations, it's a lot more complex with what you can do with it. You can still send out regular messages and you can still say, wait two days sending this message wait three days sending this message, but you can do so much more by tracking the actual user behaviors. You can see if somebody, if a particular customer or a particular potential customer opened a particular e-mail, then you can say, if they've opened it, send them this email. If they haven't opened it, send them this e-mail, or if they clicked on a particular link or if they have a special occasion, like a birthday, if you have those details on their contact forms or if you have tags or scores, you can see if they visited any particular landing pages or if they've abandoned your cart or purchased something. There's so much more that you can do with automations, which is why they can be so powerful and why we're going to go into it today. With your funnel two automations will happen automatically. One will be of abandoned order and one will be your order completed automations or workflows. Those will be happening automatically because they're triggered by somebody either purchasing or attempting to purchase something, but not actually quite checking out, and it needs to send them an e-mail to say, "Hey, you've wanted to take this out, but you didn't." Then we need to go a bit further with this because if you remember within our actual store, we didn't get a response. At the very end, I also said, how are you going to deliver this product to your customer? I said, I'm going to copy them to a list that has my course. Because just sending them an email saying, "Hey, your order's been completed," is not enough. You need to actually send them the thing that they've purchased for, and the best way to do that is through an automation. You do have different options here. You can copy them to a list, you can move them to a list or you can redirect them to a site that has your course. This is specific to this particular products. If I had selected a different product or service to sell to my customers, if it was a downloadable e-book, or something like that, it's a really simple process where I send them an e-mail and say, "Hey, here's the thing that you purchased." For me, I need to actually set up some additional workflows outside of Get Response in order to make sure people are getting enrolled in my course. In order for that to happen, I need to be actually copying them to a list and then doing something with that list in order to deliver on my offer. Before we go and do that, let's just get to know some workflows. Automations will have a series of workflows within them. You can use these for so much. You have all these amazing templates, so it's not like you're starting from scratch every time and having to figure this out on your own. They have templates for welcome messages, abandoned carts, webinars, even affiliate marketing and sales promotions. You can jump into these and let's do a simple one, like welcome here. We want to be welcoming new contacts. If I click on "Preview" I can see what this looks like. Basically it triggers when somebody subscribes to any of my lists by any method, it then has a placeholder for a message to send. You would have to actually go and create a message to send to your contacts and would wait for two days and send another message. This is similar to autoresponders up until this point because you could do the same thing with autoresponders, but then it's also assigning a tag, which is something you can't do with autoresponders and you need an automation for, which is why they put it in here. For example, you could send them a message to getting to know your business and another message to further introduce them to your blog posts or get them to follow you on social media or another video or something like that. Then we could assign a tag to that contact to say, this person has received a welcome series, so don't send it to them again in the future. If they subscribe to another list, if they have this tag, don't send to them again. Once again, make sure you're checking out their resources for how to customize these workflows if you ever get stuck. I'm going to jump into the two that we will have within our account as soon as we create a funnel. One will be the abandoned order sequence. I'm just going to open that in a new tab so we can see what that looks like. It's pretty straightforward. There's really not much we need to customize here. All it's saying is, as soon as somebody abandons this cart with this particular store, it will filter by the context from this particular funnel. Every single funnel and every single list that's attached to that funnel will have its own workflow. It'll filter by those particular people here. Then it'll send them a message that's going to be prepopulated based on the actual order they left behind here. Then it's going to assign them a tag to say they've abandoned cart. When you actually look at that contact within your get response account, you'll be able to see that they've received this message and that they also have this tag. You can check out in here if you've thousands and thousands of people on your e-mail list, you can filter them via this tag to see how many of them have abandoned cart. That's a really simple one. The one that we're really interested in here is our order completed workflow. Before we get into the actual workflow here, let's just have a look at what's available to you when you're building your workflows in your automations here. You'll have three kind of major categories. You will have conditions, actions, and filters. Filters are a little bit more complicated. We're not going to get into those too much right now, but I will go into them a little bit more later when we talk into more depth about split testing. But for now we're going to be dealing with conditions and actions. Conditions are based on the actions of your users or your customers that they're taking, and these will act as almost triggers for what's going to happen next, which will be the actions. If somebody visits a particular landing page, send them this message, or if they've subscribed to something or clicks on a particular link, move them to this workflow or remove a contact or wait. This becomes really handy when you're doing things like cleaning up your e-mail list because maybe you have thousands of people on your email list and you're paying for those people every month, but there might be a couple 100 if not a couple 1,000 people who have never opened a message from you ever. Then you could say, have they opened any newsletter from me ever? Then and if the answer is no, then you could say, "All right, well, then just remove the contact." You can say, "No, they haven't opened anything, ever." Remove them from the list and you could just say, "Older lists." That's where it becomes really handy to have these kind of automatic workflows where it's not just helping you to nurture your relationship with your customers and perform certain actions within get response, but also to keep your list really clean so that you can have those really high open rates and click rates because you're maintaining that list that's really active. You don't have these people on that list that have never interacted with your business. They might have opted into download something three years ago and they're still there, and they're not opening any of your newsletters but you still paying for them to be on that list. That's where workflows can come into really handy. How I should also say that there are about 17 different ways that you can perform anyone action within almost any e-mail marketing tool. There's no one right or wrong way to do something. Same with what I'm going to be teaching you guys here, you can separate into two different workflows or you can have completely different lists. You can move people to a different list, you can copy them to a list. There's no one right or wrong answer. It's just a different preference for doing things differently. My goal is just to teach you different ways and just to think about it more critically when you're creating these kind of workflows, and really to test what's working. If it's working, then great, if it's not working, then you would hopefully know how to fix it. Also what works for me may not necessarily be what works for you and your business, so think critically about the stuff that I'm teaching you here and think about whether it makes sense for you to set it up the same way for your particular funnel. For me, I know that at this stage, I've just sent somebody a confirmation of their order e-mail, but I haven't actually sent them anything in terms of their paid offer. The first thing I need to do is copy them to the students lists so that I can use that as a trigger to actually deliver my paid offer. They've been sent this message, I would then go over here and copy them to a list. I would need to make sure I'm connecting these as I go along. The list is going to be students of social media. I could then add them to an autoresponder cycle. I could attach an autoresponder e-mail to this list to say, as soon as somebody is added to this list, send them this e-mail, and if that had been there, then I would add them to a cycle on day 0. But in this case, I don't actually have an autoresponder cycle there, so I would just say, "Don't add to cycle because there's nothing to add them to," but you notice that this was queried out. So when I said select the day, there's nothing to select, but it's still gray. It needs something from me. Anytime this isn't a color, it means that you've not done something that it needs you to do. Then I go, Don't add to cycle and now it's turned navy, meaning that it's ready to go and it's going to do what I want it to do. Then I'll just zoom out because I'm going to keep creating here. I could add a wait time. I could say, wait a little while to see if it's going to copy them across correctly because things don't always happen instantaneously. But in this case, I'm happy to add in my next action which is going to be to remove contact, not from list. I'm happy for them to stay on this list. But I do need to be removing them from the actual autoresponder cycle. If you'll remember, within our actual sales funnel, there's still going to be getting all these emails because I'm copying them to a list. I'm not moving them across, I'm just copying them. So that means there's still going to exist in this list and they're going to continue to get these emails promoting my paid offer to them, but they have already purchased it, so I don't want them getting these emails. I want to make sure that I am going in and removing them from this autoresponder cycle of this social media management list. Then I would just connect these. Then I need to do something with the people that I've just copied over. I would go in here and I'm going to include this in the same workflow. You could separate this out so these could exist in a separate workflow altogether for my students. But just so you guys can see it is a hole, I'm just going to include it in here. I would just say, when they subscribe to a specific list, which is going to be my students or social media and any method on that, send them a message that's actually going to deliver them the paid offer. I could go in and create the new message, or in this case, I have already created it. So I'm just going to say add in this particular message, which is going to be my paid offer delivery. I need to make sure I'm connecting these and now they're beautiful and colored, which means that they are now active because I'm creating this inside of one workspace here. I do need to make sure that these are connected at the end, in which case what I might do is add a tag. I would go in and tag these cards on both ends, which means that this copy of the contact that's going to be on this list and then these copy of the contact that's going to be my students list, they're both going to have the tag that says duplicate. The reason I like this is because again, it allows me to maybe in the future have a workflow that is designed to remove some duplicates. Because like I said, with get response, you do pay for each version of your contacts. If your contact is on this list and this list, get responsible, count that as two contacts, not one, even though it is the same person. Sometimes if it starts getting a little bit too expensive for you to keep all of your duplicates. It's a good idea to keep an eye on how many you have and then maybe put together a workflow where you're just combining them all into one. This tag is not actually going to do anything. It just means that if you're jumping into your contact list and you're looking at your contacts there you can go and see how many duplicates you have because you've tagged them accordingly, but that is the gist of it. What I might do in this case if this was in a separate workflows, especially what I would do is that I would put in a wait time. Let me just remove this for now and I would put in a wait time after this of 14 days. I would then send another message to say, hey, it's been two weeks since you signed up to my course. How's it all going? Do you have any questions? Is there anything that I can help you with. Hit ''Reply'' to this email and let me know how it's all going. Two weeks is not in my experience long enough for people to have actually implemented anything even if it's a pretty short paid offer. But it's just for you to check in and then I would put it in another wait time for another month, let's say and say, how is everything been going? Do you have some wins to share with me that I can share with my own audience. That's basically your way of asking for a testimonial. That's where you would add in another email a month later to say, hey, can I promote your story to my audience? Basically, not in those words, but that's how you can automate this whole process so you can make sure that you are not forgetting to get testimonials from your audience. Then I would essentially add the tag at the bottom of all of that instead of up here. But for this time I don't actually have that message. I'm happy with it just being quite simple. For the time being, I'm going to connect all of that and I'm just going to assign that tag. Then you need to make sure you're saving and publishing before you exit out. Really the last thing I wanted to show you is just the fact that the automation message builder is different from what you're used to seeing within the actual autoresponders inside of the funnel. If you go up here and you're creating autoresponders over here, this builder's going to be the same as the automation builder, which I'm about to show you. These are both exactly the same. There are a lot more clean and funky looking rather than the autoresponders that are attached to the funnel. You'll remember that this is quite clunky and old-school looking. I'm really not sure why they have two different editors for the final messages that are attached to the funnel and then the actual autoresponders and the automations within get response itself. But this is a little bit more restrictive. You can still do a lot with it, but it's just a little bit different from what you can expect inside of the actual autoresponders within this section here, and then within the automations themselves. All you're doing here is just putting in a title so you know what it is, especially if you're selecting it for your actual workflow. You need to give it a title that'll actually tell you what this is so that you remember which message to select. The linked list is mainly just for some settings for the footer. But in this case, this is the list that's going to be receiving it. So I've linked that they're, my from and reply to email addresses are there, subject line is exactly as what you guys are used to. But the difference is that you also have a preview text. If you want to include a preview texts, you can do that here, whereas we couldn't do that inside of the autoresponders within our actual sales funnel. This is where you can add in a bit of extra attention to make sure that your subscribers are opening your messages. Then the actual design and content is quite different in terms of the layout of the messages. In this case, I just picked a random design and I just plopped in all of my details. But in terms of where things are located, this is a lot more clean and a lot more sort for you to understand if you're ever looking to personalize anything or adding an emojis hyperlink that's all there. Then if you're used to email marketing platforms like Mailchimp for example, then this might look quite familiar where you can drop in different sections and different elements. Then it'll prompt you to say, hey, drop in a video or a drop in an image and you can put in particular URLs and it'll give you a preview there. With your images, you can just drop them straight in from your library. You can play around with this stuff, so, so much more. There's a lot more that you can do with it in terms of layout. You can add things like social icons at the bottom. So you can then go in and make sure the URLs are correct. I've just done that with Facebook here. But then this is great because it means that all you really have to do is do this once and then you have this message there, and every time you create a new message, you can copy across this beautiful layout and you can use it for all of your future messages. The only thing that you need to be across with this stuff is if you're sending yourself a test message, it's not going to come across with any personalizations because it doesn't have my name there, it only has my email address, so it doesn't know what to personalize. Whereas with our autoresponders within our funnel, it had that personalization within the test message. That's the one main difference and that's also why you want to make sure you're putting yourself through the funnel as a test subject so you can make sure everything is working correctly because you may not necessarily have that here's an option. But in this case, I'm happy with how that's looking and that's pretty much it. Everything else you're pretty familiar with already. It's just a slightly different layout from what you're used to. But then once that's there, you will have the ability to select it when you're creating your automations. If you want to select any messages to include in your workflows, make sure you jump into automation messages and create it here before creating your workflow so that it's there for you to select. Or alternatively, if you're ever in the actual builder, you can jump in here and it'll allow you to go in and create a new message here as well.
34. Launch and Test Overview: Okay, guys, now we're getting into the big leagues. We are going to be actually launching and testing everything we've created up until this point. So this is really exciting and I am also going to be taking you through my own live funnel which I had already created based on everything we've just created and have put an audience through that funnel so that we can take a look at what a funnel actually looks like once it's live and people are going through it and they're purchasing or not purchasing, and how to analyze all that data and measure your success. Then we're going to go through how to promote your funnel once it is live, and you want to actually let people know that it's out there. You can also learn how to promote it, not just to your own audience but to also an audience of other creators if you choose to go down that path. Finally, for those of you who are really keen to just get into paid advertising and start promoting your funnel through Facebook ads, and Instagram ads, and every other kind of ads, I am also going to take you through why it's so important to focus on an organic first approach in promoting and testing your funnel. So now if you're ready and excited, let's get going into it with the next lesson and launch everything.
35. Complete Your Launch Checklist: Up until this point, we've been going through our funnel relatively casually by putting in all of our different elements but not focusing on the little details, and the real reason for that is because I don't want you to get hung up in making everything really perfect as you go along because that's a really easy way for you to get stuck and get overwhelmed with how long everything is taking. Because if your goal is perfection, you're never going to get there. Then you might get stuck in just trying to tweak and touch up your sales pages and emails and making everything so, so perfect and you get really stuck and overwhelmed. I find it easier to just go in and create everything, make your funnel, make all the basics of everything, and then do all of your touch ups at the end before you're going to launch and test everything. Because it also gives you one last opportunity to go through all of the assets you've created and double check that everything is working correctly. Because as we were creating things, let's say in our thank you page for our free offer, we needed to link to our sales page. We have a button linking to our sales page, but that sales page wasn't created yet. We couldn't really link to it yet at that stage, and that's why this final phase is so important and why I've created this checklist for you so that you can make sure you're going through everything and taking things off as you go along to make sure everything is looking good, and then we're also going to test this with fake email addresses so that you can make sure that everything looks good on the customer side and you're actually going to put yourself through as a paying customer so that you can really rest easy as you're launching this to real life people out there so you know that everything definitely works. Keeping in mind that a lot of the checklist is quite specific to get response, if you are creating your funnels inside of other tools, you will still be able to use a lot of these checklist points. But you might just have to customize them based on where they appear inside of your different software tools. But the steps will be quite similar in terms of what you want to make sure you have in place before you launch your funnel. Starting with our store setup. Let's jump into get response and we want to go to our store. Again, I really casual put this in there at the beginning. I didn't really go through and make a full description of my offer. I would want to make sure that before I actually launch these to people, that everything in here is exactly as I wanted to appear, because as you might remember, this will appear on your sales page, it'll appear on the confirmation page, it'll appear in their emails if they receive an abandoned order email. It's going to appear in a lot of different places. So you want to make sure the title is exactly as you want it, the description is exactly as you want it, the image, if you had a placeholder image in here, that you are making sure that it's exactly as you want it. For example, this is quite colorful, I would maybe just use a bit of a different image here. I might use my actual course bundle mockup here, so that it'll be less colorful and might be a little bit more versatile in how I can use it. This is my chance to do these last-minute touch ups. I'm happy with copying them to a list and I would say that making sure that it's exactly how I want it, it is going to change on the sales pages where I've used that image, or if I update my course title or the description, it's automatically going to change wherever I've used that. So that's fine, and that's all good in terms of the source setup, in terms of the page setup. This is my last option to go in and change the URL structure of my pages, if I want to use a custom domain, because then I can make sure everything is interconnected correctly. But in this case, I'm happy to just keep my current URL structure, and if you double-click on these as you're going along, and then right-click, and you can sort these off as you go. If you're like, yeah, that's done and I'm happy to take that off, then double-click and then right-click to bring up that check mark so that you can take things off as you go. But obviously my URL structure is all good, I'm going to go head onto my conversion funnel, making sure that my URL structure is as I want it, which it is there. Awesome. Next step is all my pages have a title, description, and image. This is something we haven't done up until this point, but it's something that I do want to make sure that it's set up. I'm going to jump into my landing page here. Especially with your very first free offer landing page, you want to make sure that it has the ability to be shared across Facebook. This is also quite important if you are going to be advertising to your pages, because Facebook needs that to be able to be shared on Facebook in an organic fashion, even if you are just advertising to it. Might seem quite counterintuitive, but you want to make sure that you are doing right right Facebook and making sure that if somebody were to just copy your URL and then put that into Facebook, that it's going to look good. You can use elements of your landing page inside of your settings here. I might use that, and I can use this as my title. I don't need a Cookies notification at this stage, this is where I can upload my favicon. I have put that into your launch checklist as an optional step, because otherwise it's just going to have the get response favicon. Probably, majority of your traffic is going to be coming through from mobile, in which case they're not ever going to see this. It's not a crucial step if you don't have one customized, but basically all it is is that little icon in a browser tab when you're on a desktop that is usually a company logo or something that's a little bit more branded. But this is the bit that I want to focus on, which is an image to use on Facebook. This image here, so you would want to use a horizontal image, not a vertical one, because as you know on Facebook, when somebody shares it, it's going to be a horizontal image, so this image is going to get clipped, and it's going to use the center of this image, so it's probably not going to look amazing. For that reason, you want to make sure you are using a horizontal image. But in this case, I'm just trying to go through the checklist and make sure that I'm following all the steps, so I'm happy to have a place holder image here. I'm going to click on "Okay", and let's have a look at our next step. That's done. We have a title, description, and image. We don't have a favicon, but again, optional. All pages are hidden from search engines if they need to be. If we go to next step, our title and our description have carried over to this page, and I've ticked over saying, I don't want to index this inside of Google. This is where my URL is, and I want to make sure that that is all good. All videos work as they should, all links and buttons work as they should, and I have checked how all of my pages appear on mobile devices. Now we would want to go to the previous step, and come over here because I know that this is where my video is and this is also where I've got this button that needs to be customized and needs to go over to my sales page. Here is where I would put in learn more. The link that I need to go to is not actually going to be an order form in the funnel. It's going to be a sales page. So I need to actually put in an address. So I jump into my funnel and I know I need to go to this particular sales page. I'm going to copy this URL and put that in here. I don't need it to open in a new window. I'm going to open it in the same window, and then save that. So now I could preview this to test it out, but I actually prefer to take myself through the funnel at the very end. But you can preview to make sure you videos are playing. Playing at double speed. So if I sound like a gerbil, that's why. I watch my videos on double speed. Sorry, guys. Then I would go through to this button, make sure it goes through to my sales page, and then I can continue to go through and test out stuff on my sales page as well. So I would make sure that this go to my order forms, but I would like to test everything out separately. So at this stage, we're just concerned with our free offer landing pages and making sure everything looks good on these pages particularly. That's all looking good in terms of my lunch steps, and I would just publish or save. It's already been published. So if you just hit Save, it's pretty much the same thing at this point. Now this has updated as well. So my title there is different. I want to make sure I'm doing the same thing for my sales page. I'm going to save that. I don't need a favicon at this stage, all pages are hidden from search engines. We'll check that in a second. All links and buttons work, all videos work. I'll check how all of my pages appear on mobile devices and privacy policy is linked. I will then just go through and make sure I'm not indexing in search engines unless I want to. My sales page URL is there, my order form URL is there, and I will just publish. The last page you want to go through is your confirmation page. Again, it's going to be really simple. It's really just going to be a page where you're going to display what the person has purchased. So it doesn't need to be super complicated, but it obviously should have some branding on it so that it looks like it's a part of one funnel and it makes sense with your overall brand. The next section we want to get into is our emails. My from email address is correct and it's customized as I wanted. So when I was testing my emails and I was sending it to myself, it just says me because I am sending these emails from the same email address that I'm actually using to set up the account. So this is the benefit of having multiple email addresses and customizing the actual from section. Then all email lists have an appropriate title and description in place. Again, we did this quite quickly at the beginning because I don't want you getting hung up on little things like this, but it's a good idea for you to have this setup appropriately because when people actually click on the unsubscribe link in their footer here, what's going to appear is something similar to this, where if I'm on multiple lists, so this is a different GetResponse account that I have, which is a live account. This is all set up, so I'm just showing you what it'll look like. But when I would hit that unsubscribe link, it'll tell me I'm on this list and this list, and this is why I'm on the list. So this is important because otherwise, people are not going to know how they ended up on your email list because they might've subscribe a year ago, and you need to tell them why they're on that list, when they subscribed, and give them a chance to stay on some lists and unsubscribe from others. So specifically, for this, people might say "Okay, I'm actually a student of this course, so I want to stay on this list, but I maybe don't need to stay on this one." So give them a chance to unsubscribe from some lists or unsubscribe from all lists. So we're going to go into lists here and I want to just go into settings. This is where I can customize my list title. So this is going to be students of successful social media management. I'm actually going to copy and paste my list description here. I could actually choose a category, let's say. That's my postal address that I've got there, and that's pretty much it. But you want to make sure that that is there, for all the lists that people are going to be subscribed to so that if they hit Unsubscribe, that they're seeing something that's nice and clean like this and not gibberish. Then you want to make sure you've sent a test email of every single email, you've checked it on desktop, you checked it on mobile, everything works. Your abandon order email has been customized. Your confirmation of purchase email has been customized. You've created a workflow sequence for customers to engage with them once they've purchased and you've customized you order confirmed workflow to actually deliver your paid offer to your customers. So remember when we were talking about our actual automations here, that the order completed workflow just really, all it does is it delivers an email saying, "Hey, you've purchased this thing." But it doesn't actually deliver them the thing they've purchased. So you need to go in and customize that, to whatever suits your business model and however you're delivering your paid offer to your customers. But you need to actually go in and make sure people are going to get the thing that they've signed up for. In terms of your abandon order email, keep in mind that this email is only triggered after somebody doesn't take an action within 30 minutes of being on the page. So if you click into this, it'll say, when should you assume that the cart is abandoned? Within 30 minutes. So when you're testing this out for yourself, make sure that you give it at least 30 minutes to check that the email is being triggered and that it's being sent to you correctly. So that's pretty much all the stuff that you want to make sure you're checking and you're going through all the buttons, everything is looking good. All your videos are playing. There's no issues and you are sending all of those URLs to your phone so that you can check how everything looks on a mobile device. As a bonus section here, of putting that you are tracking everything and everything is set up correctly. That's all about launching. In the next lesson, we're going to get into actually testing your funnel and putting yourself through the funnel as a fake customer to make sure everything works. So I'll see you inside the next lesson.
36. Test Your Funnel: Now we're ready to actually test our funnel and put a few different e-mail addresses through it to make sure it's all working, and to also get a bit familiar with how contacts move through, get response, and what you need to know about how they appear and how their information and behavior appears as well. Really the only thing I want you to pay attention to is this section over here, which is that we're going to be decreasing the cost of our offer. So obviously at this stage I only have the one paid offer, which is fine. If you had multiples, which we're going to be talking about in a little bit, then you would want to make sure you're decreasing the cost of all of them, so you can still create up-sells down-cells, and you can put yourself through all the different steps and make sure that everything is getting sent out as it needs to be. But for now we just want to make sure we are testing ourselves out as a customer, so I'm going to go through and head on over to Storage and Products. I might open this in a new tab and I'm going to get on over to the one offer that are half here and click on Edit. Now you can make it whatever price you want, you can make it $1. I like to make it $0.50 or $0.20 or something. So I'm not actually paying too much for testing everything out for myself, and you can always change that back once your funnel is live, so not to worry about that. Now, if I head on over to my funnel and I check out my order form, that should now say that my offer is down to being $0.50. I'm going to do two things. I'm going to put myself through as just a lead that is going to be a bit indecisive so that I can test out my abandoned order e-mail. I'm not actually going to check out with that e-mail address, and then I'm also going to test out a different e-mail address through which I'm actually going to purchase my offer, so I can see on both ends whether everything is working. At the end of the day, the lead that doesn't purchase should actually receive the rest of these auto responders, and then the other lead that does purchase shouldn't hear from me again on the actual sales front but I should receive a nurture sequence for people who have purchased. Those should be the two things that you're testing out. I'm going to go ahead and just jump into my learning page here. Remember that we have two variants of a learning page here, so you might receive one or the other. I would make sure that everything is good. I'm just going to go ahead and sign up with my first e-mail address here. I just need to put in my first name and I can use the same e-mail address that I used to set up the account, that's fine. Cool. That comes straight to my thank you page, that's awesome. Let's say I have watched the training. I want to see what the sales page is all about. I'm going to head straight to it. To test out that my abandon order e-mail sequence works, I would just put in some details here with my Paste e-mail address. I can skip this because it's going through PayPal, but essentially what I want to do is I want to start the checkout process button, not actually go through and pay for anything, so that I can test that if somebody was going through and really abandoning the actual confirmation of payment process, that my e-mail is working, and one of the biggest reasons that people actually do abandoned checkout is the fact that on this particular page, they'll see that it is being paid in US dollars, which was not necessarily clear on the previous page. So over here it's just got the dollar amount, but it doesn't actually at this point say anything about it being in US dollars, which is why I like to usually include a little blurb up here somewhere to say, hey, all of this stuff listed on this page is in US dollars. Because then, people know that as they're going through and checking everything out, it'll give them the conversion to their local currency, but it's not a surprise. That's the first test. It's going to take a little while for that order e-mail to come through. So I just want to exit out of that, and I want to do the same thing again and sign up and actually complete a purchase with a different e-mail here. Again, I'm just going to go right here. Show Me How It's Done. Awesome. Yes, Let's Do It. I want to buy things. I can put in my billing address, but you unnecessarily probably need to because I'm going to be checking out through PayPal. So it might actually let me go to the next page if I don't fill out all of these details here. If I was going to be putting him my credit card details on this page, then yes, I would have to fill this out. So let's see if it lets me go to the next page because I'm going to be going through PayPal. Cool. So this is what your customers are going to say. They're going to be able to check out through PayPal. Obviously that's a bit of an awkward customization. I'm not even sure how that happens there. That's fun. Not a huge problem. It'll say, I'm paying in US dollars. This is what I'm paying for. This is who I'm paying to, because that is our business details there. How am I going to pay it? Am I going to pay it through a card or am I going to pay it with PayPal? Then I can cancel and return to the side if I wanted to. But in this case I want to actually go through and check out. I was going to tell you what my rate is, so I'm going to be paying 72 Australian dollar for 50 US cents. Cool. I've paid this to our business details. Here's what I've purchased and then I can return to the seller's website, and it's going to link me to the confirmation page, which is going to say, "Hey, here's the thing that you purchased," and this is also why on this page you might want to include next step. This is why I usually include on this page, "Hey, you're going to receive an e-mail from me on how to login within the next 10-15 minutes. You're going to give yourself a bit of breathing room with that because sometimes things do take a little while, especially if you're going through external services and external automation tools, which we haven't discussed at this stage yet. But you want to make sure you're giving yourself a bit of room for error. So I usually say, "Hey, within the next 10-15 minutes, you're going to receive an e-mail from me telling you how to login to your course or how to download your offer or whatever." However you're delivering your paid offer, you want to give them some instructions here. Then this is also where you might want to maybe include your social links and say, "Hey, follow me on social media," or "Read this blog posts," or give them something else so they're not just exiting this page. This is just an opportunity for you to guide them to a different section of your business or a different website. So I would just go in and exit that. Now if I refresh my funnel, I should receive or I should be able to actually see that I had two people who viewed this forum and two of them actually signed up. So I have a 100 percent sign-up rank. Great for me. At this stage, this is only measuring clicks, so because I haven't opened or clicked on anything yet, it's not actually seeing that yet. I've had, well, presumably it's saying six unique visitors. Really, it's just been me. But at this stage, I've just had one order. This abandoned order e-mail has not been send yet because it hasn't been 30 minutes yet. So we'll check back in a little bit later on. But I've had one confirmation e-mail saying one person go into the confirmation page and I've earned $1 because it rounds off. So if it's anything under a dollar, it'll just round up to $1. This is why the testing process is so crucial, because sometimes things that you don't even think about and sometimes they just forget about will come out in the testing process. This is also why I love to put through one e-mail address as just to lead and test my abandoned checkout process and then one e-mail as an actual customer, so I can test both ends of the spectrum, and also because this particular inbox here, which is just my living.to.rome@gmail.com, which is just a testing address. That is one that is never going to purchase. That means that I should receive the rest of that e-mail sequence. So two days from when I don't purchase, but from when I actually sign up for the training, in two days I should receive that second e-mail and then in another two days after that I should receive my 30 mailing sequence prompting me to purchase. This is why it's really good to actually test things out with a few different e-mail addresses before setting anything live. I can already see that if a few things went wrong in terms of how I've personalized some of the e-mails, this one is great. It comes from maggie@livingtorome, it comes from this particular e-mail address that came across really nicely. The link works, everything looks good. My e-mail signature fixed the fuzziness as well, which is really good. So that's fine. What happened here is that I'm still getting notifications from people signing up to my e-mail list which is getting really annoying guys. I know you might think, that's really great. When somebody buys something, I want to know but it's honestly, it'll just drive you a little bit insane if you're tracking every single person that's signing up to your stuff. You can do it through your dashboard in your marketing tool. You should never be getting e-mails every single time somebody signs up to something. I want to be fixing that. Also my abandoned order e-mail, if I click into that, this is perfect. It's still got the bundle checkout there. Unfortunately, I don't think you can change the color of this button. At least I haven't found a way to do that, but it doesn't bother me too much if I want to actually integrate it as this abandoned order checkout, which will basically pre-populate whatever it is that they didn't end up checking out with. In this case, I only have the one offer. Maybe I don't necessarily need this whole setup. But in the future, if you have four or five different offers across different funnels, you might want to use this because it will then be specific to whatever it is that they didn't check out with. If it was one particular offer, then whatever page it was that they abandoned the checkout on that's what would appear here. That looks good but what's happened there is I didn't actually customize the from address there, so it's still the old address. I want to make sure that I'm customizing the from address on my abandoned order e-mail and then I'm going through and disabling these notifications. Those are the two things that I want to do first. I'm going to go ahead and go to Lists and I'm going to go into the Settings of this particular list and remove this notification setting. Once again, you might remember when you are actually creating new lists, you can import settings from a previous list. It's not going to be super dramatic for you have to do that every single time. The next time you're creating a list, just say Copy existing list settings and then use whichever list that you've used before. Then you can just create your new list according to the settings that are already there and just go in and customize a few little things. The major settings that are there will be already pre-loaded for you. That's the first thing. The second thing is that I could either go through my conversion funnel or through my actual automation messages because my abandoned order and my confirmation e-mail are both attached to automations. I can go through here to customize these to make sure that I'm changing over my e-mail address here. I want to make sure that this is from this. That looks good. I will just save that. This is why it's important to test these things out. In terms of someone who has no purchase, those are the only things and they're not major, really. It will still come from Maggie, it just wouldn't come from Maggie@livingtoroam. I know it'll come from a bit of weird e-mail address. You want to make sure that everything's coming from the same e-mail address but presumably, you would have set that up at the beginning, anyways. That should be fun. But yeah, that all looks good. Now switching gears here a little bit to this other e-mail, which is my maggie@livingtoroam.com, which was my test user who actually did purchase and seeing if there's anything there that's not quite right. Same thing. I got the training, that all looks good. Then my thank you for your order e-mail didn't come from the right e-mail address there, which is fine. I've gone and corrected that already. The actual e-mail itself looks good. Obviously, the name field here has the full name because that's what they put into the form. If I wanted to just include the first name, I could go in and change that. But I mean, really all and all that looks pretty good. If I click on the order summary, it should take me to the right page where it'll tell me what I've purchased. All looks good. It's exactly what I bought. Awesome. I also got a receipt from a high payment. So you want to make sure that everything looks good in this general section. Everything in the description of the item that I've purchased and then the payments been sent to hello@livingtoroam.com. Now for my actual GetResponse, which is in another GetResponse account, this will say maggie@livingtoroam.com. It's a little bit more personalized again. But you want to just make sure that if somebody was looking at this in their inbox six months from now and that they know who they actually purchased this thing from and what it is that they actually purchased. That's really all you're looking for there. Now finally, here's the last though hiccup that I noticed. It's the from e-mail address again, so we will go in and change this. But the other thing that's screwed up a little bit here is this hasn't been pre-populated. I actually know why that happened. It's a really easy fix, but it's something to keep in mind. This is why it's best not to get too comfortable with using these merge tags or these little pieces of code that will pre-populate your customers names. You want to make sure you're checking these once you to actually put them into your e-mail software. The reason for that is because GetResponse actually has a slightly different integration for this within their automation messages as they do within that autoresponder setup that we were doing before. You will have noticed if we go into these messages, actual layout looks quite rigid. It looks quite 1990's. It's very different. If you go into personalize, it still got these contact data fields. But if we go into the new automation setup, which is slightly more modern, I'm not sure why they've separated out the builders into two different builders, but they have. So if you are in this second builder, the personalization within the e-mail itself actually needs to look a little bit different. It's best to check that you are following that check process at the end and also why we test. Instead of this code here, what I would do is go up here and put in the first name. It needs to be this bubble contact data field, which is obviously a little bit inconvenient that you're not able to use the same short code across the whole platform. It got it there but for whatever reason, it needed to be in this format. That should work now. That's the only two places we actually use their first name. That's all good. I would just go and Save and exit or I could save it as a template as well. But in this case, I want to just save and exit or click on Next. I want to make sure I'm changing my from e-mail address to make sure it's coming from the correct person. Awesome. I would go in and update that. I think that is the only other thing that I felt like needed changing. I would check that the Facebook links goes to the right place. Yeah, that looks good. But the main thing there is that my actual automation worked. My workflow in the order completed section once somebody has actually purchased from this funnel, the person obviously then ended up being copied to my students on social media list and then they got this message. I can see that number 1 there. Remember I was telling you about the fact that you will start to see some numbers. Somebody said the billing status changed to failed instead of succeeded, they would end up being a number 1 over here. But obviously, my payment went through and they were from this particular contact list and everything went smoothly really well. Now I should technically have two contacts and both of them should have this tag that says duplicate. Let's go in and actually check whether all of that happened. I will jump on over to my lists. It technically says I have four contacts, but technically it's really just two contacts on different lists. This also means that they might be on different days of their autoresponder sequence as well. That means that this particular person has just signed up to my social media management funnel and they're on day zero of this particular funnel, but that same person is also in this initial list and they're on day six of that list because they signed up six days ago. That is where things get a little bit more complicated and that's why I like assigning duplicates in my workflow. Now if I click into this, there will be a tag that says duplicate. I can see that obviously this list that I'm looking at here is my students of social media. If I go into my contact activity, it should tell me that I have received this e-mail, I opened it at this time, then I opened it again 15 minutes later and then I clicked on a link another few minutes later. But it's not showing any of the contact activity from before I purchased because technically that was a different version of this contact. It was this contact pre-purchase. This will still have that duplicate tag but now this is going to have my training activity and then also my thank you for your order activity because I received this before that contact was copied. If it says your training is here first name, don't freak out, that it hasn't pre-populated. Again, this is just one of those GetResponse things. For whatever reason, it doesn't actually show you what the person was seeing. But as you would've seen within my actual inbox it said, Your training is here, Maggie. Everything pre-populated as it should have, but it doesn't actually say it here. Those are just a few of the things that I want you to really look out for before you actually go in and promote your funnel externally to other people because you obviously want to make sure that everything is working correctly. You're happy with how your workflow and your automations working. In this case, I would actually go into my automation and I would put in the e-mail that would be sent out to somebody a couple of weeks after they have actually purchased. You can also separate these out. Obviously, I have included everything in one workflow canvas here, but absolutely you can just leave this to what it is. Then anything with your actual subscribers you can deal with in another workflow and create a separate workflow for that. But I would actually go in and include messages to check in with people two weeks later to make sure they're liking the program. All of that I would put in here before actually launching my funnel. Of course, the last thing you want to do once you're happy with everything is go in and change the actual price of your product. Because I don't want anybody to end up getting caught that lucky with my offer. I want to make sure they're paying full price for that. I will just go ahead and save that.
37. A Look Into a Live Funnel: Now, you might notice there is a bit more activity in this particular account here and the reason is because I am now switching over to my actual existing live account. This is where I've basically implemented all of the same tips that I've just taught you, but also some additional ones, and I've tweaked and I've tested things, and I had a look at how everything's working, and I'm going to be able to actually show you how this works in practice when you have thousands and thousands of people going through your sales funnel. So not just teaching you how to set stuff up and then going, yeah, okay, go test it out on your own. But I'm actually going to be able to take you inside of my funnel, and go, all right here is where mistakes were made. Here's some things that I tried that worked really well, and here are I few things that you might want to tweak, and that's also why we are going to be getting into some more advanced tactics later on for those of you who want to really scale your success. But first, I think it's quite important for you to nail the basics of just how to set up a funnel with one payment method, have it couple of people going through it, test a few things out, also just measuring a few things. So we're going to talk about how to measure the success of your efforts in just a few lessons. But for now, let's just go ahead, and take a look at a live funnel that I have that's very close to what we just created, with a slight few variations in colors and those sorts of things. But everything we've created up until this point is pretty much entirely based on everything I've done here. So this had 7,521 unique visitors going to my free training. You will also notice it has a little beaker here, meaning that I'm split testing a few different variations. So it's got 40 percent sign-up rate, but I actually sent a couple of thousand people to one option on my landing page, a couple of thousand people to another, and tested which one worked well. For me, ironically, it was one without the video that converted a lot better for me. So that's the one that I have running now and I actually turned the other one off completely. So at this stage, you can go to manage your pages here and you can see that over here for my sign-up page, if you click down to AB test, one of my pages, which was the variant B, obviously did a lot better than my initial variant A. So I had a couple of thousand people go into each. Then you can always turn off variance. So you can publish as winner. You can turn them on, turn them off. You can go in and publish as winners. So this little trophy here means that I basically went and said, this is the winner. Now, drive all of my traffic just to this one because it's performing a lot better for me than the initial page. Let's go back to funnel for now. So like the one we created that didn't have exit intent pop-ups here, I had very similar emails across this particular funnel. I had a seven percent click rate, which I'm really happy with, and we'll get more into stats in just a little bit in a further lesson, because I want you to know what actually you should be measuring, and what's a good click rate, what's a good open rate. All of those sorts of things. So we're gonna get into that in just a little bit. But yeah, then I had about 1,200 people going to the sales page. Keep in mind there is room for error as we saw with our funnel, our visiting the sales page, and it said five unique visitors had been there. It was just me. All right. So there is always a bit of room for error, but it does mean that roughly 1,200 people did visit this sales page, and again, I am split testing a few things there and we'll talk about that later on and how to measure split tests over your sales pages. But that's a pretty good ratio if I had almost 3,000 people sign up and 1,200 of them visited my sales page. So not everyone who's going to sign up for your free thing is ever going to take an interest in a paid thing. But this is a pretty good ratio of people who are interested. It's almost half of the people who actually signed up for my free offer, who expressed an interest in my paid offer. Then I had a few orders. Now, keeping in mind that this particular sales funnel is being managed through Stripe. But I also have a version where they can check out through PayPal, and I had an additional couple of orders through there as well. So let's take a look at this particular order form. You'll notice that the order form is very similar to what we had, just slightly different colors, and the difference is that I have got a little disclaimer there saying, hey, all the prices are listed in US dollars, and if you would like to check out with a credit or a debit card, use this form. So it's got credit or debit card details. It's called the product there. It's got the Order button there, exactly as we set it up in our own funnel. But then it's also giving people the option to checkout with PayPal if they want to. So if we were to click on this, it's going to give us an identical option of an order form. The only exception is that there is no credit card or debit card details, and these would just take them to a PayPal checkout. So it is identical, but it's obviously clear that this is how you took out through PayPal. This is not ideal. I'm not going to lie. It's best for everything to be on one page, and a lot of other payment processors will have the option for you to check out either with card or with PayPal, all on one page, and that is ideal, 100 percent. It is much better for that to be the case. However, again, get response is so much cheaper than anything I've found and it is a really good way to just test out your skills in building funnels, and get a few sales through, test your business model, test your product, test your offer. Then in the future, if you do want to invest time, energy, and resources into building out sales funnels, through more complex tools that are a little bit more flexible in terms of payment processors, currencies, all of that good stuff. So a lot of the time, you will find it will allow you to check out in your own currency. All of that would be really useful to have inside a get response. But it is limited because you're not paying the high ticket price that you would if you are selling hundreds of thousands of dollars for orders every single month. So this is just for you to really get the hang of how to build this stuff out without the complexity of dealing with currencies, and sales taxes, and different payment processors, and 17 different tools, and how they all work together. So it is easier to just do it this way and still give people the option to checkout through PayPal if they wish to do so. So I'm going to be showing you how to implement this inside of your own sales funnel, where you'll have a funnel like this that has one payment predecessor, but then you still give people the option to check out with a different payment processor if they want. This is what your sales photo could look like. This was just running for a couple of weeks for me really to just test out the stuff that I was teaching you guys and see how it might work in practice, and making sure it all works. So if you were to set everything up yourself within this funnel structure, that it was going to be profitable for you. This is what we're going to be going off of in terms of measuring numbers as well. Then I'm going to be going through with you of how I would maybe changed things and get the best results for my efforts within my funnel. I hope that you enjoyed having a live look into my own funnel here, and we'll get into the next lesson where we'll talk about how to drive traffic to your funnel, and then how to measure your success, before moving on to the advanced lessons, where we talk about different, more advanced tactics for scaling the profitability of your funnel. So I'll see you in the next lesson.
38. Promote Your Funnel: There is a heck of a lot of noise out there in the online world about paid ads. Don't get me wrong, I love ads, but I also appreciate that not everyone actually wants to get involved in paid advertising because it's complex, it costs time, it might require you to outsource. There's a lot that goes into it. I also believe that there is an enormous amount of value to be gained from testing everything out organically before pursuing paid ads, if at all, pursuing paid ads in the future. Mainly because paid ads won't fix your funnel. They're going to amplify any problems that are within it and likewise, they'll amplify your success if everything is working correctly because you'll be able to have a larger volume of people going through your funnel. But you will need to leverage your existing audience who are already familiar with you and who trust you to test out your funnel on an audience who might actually be honest. They're going to be much more willing to provide you with feedback and telling you what's working and maybe what isn't working. I did this recently with my own audience for the funnel that you saw and discovered that there was a video that was incorrectly embedded. There was a broken link on a landing page. Thanks to my awesome audience who actually reached out and e-mailed me to tell me about it, I was able to then fix that for any future traffic that I might promote through paid ads. Like I said, and I'll say this again and again, nothing is ever perfect the first time around. So having your loyal followers provide feedback can be so valuable before you actually launch out to a cold audience. I see a lot, a lot of businesses who just think, hey, okay, well, for every dollar I put into my funnel through paid ads, I get $1.20 back. That's awesome, let's just pump tens of thousands of dollars into it and hope that that $0.20 margin just escalates. That's not how it works. If it doesn't really work for you on an organic basis when you only have a couple of people going through your funnel, it's not actually going to work for you any better if you have tens of thousands of people going through your funnel, because they might be things that are wrong with the wording or just with the general user experience. So make sure you're testing this out with people who can actually provide that feedback to you because you're not that objective about your own work either. This lesson is all about the different ways you can drive traffic to your funnel through organic measures and how to actually go and get that feedback for what's working and what could be improved. First, let's talk about all the different ways that you can push your existing audience through your funnel, if you already have a bit of an audience online. Then we'll get into what to do if you don't have an existing audience online yet. The first thing would be to set stuff up on your website, if you have one. If you don't have one, that's fine. But for those of you who do have a website, it can be a really good idea to write some organic blog content for your site, if you have one, of course. That almost acts as a preview of what the free offer's going to be. So that at the end you can say, hey, do you want to learn more about this topic? I'm currently running a free training or an offer or have a free e-book that's going to help you to dive in deeper into this topic by discovering 10 more ways to achieve this thing that we talked about in this blog post, and then sign up for it here. So that can be a really good way to promote your offer. This is almost an example of it here on Melyssa Griffin's websites, so she's got a case study of someone who grew their email list to over 5,000 subscribers and had a $20,000 course launch. Then it's all about how she did it, what she did, how you can do it too. Then throughout, it's got these icons in the middle. Then at the very bottom is well, encouraging you to sign up for a free masterclass, which is five ways to grow your e-mail list and which one you should be using based on your personality type, which really, really closely aligns with this type of blog posts. That's a really good way to do that on your site if you have one as well. The next one's going to be a link in bio on your Instagram. If you have an Instagram account for your brand, you can convert it to a business account for free. That's what I would suggest that you do so that you can actually include a link to your profile and you can access all the analytics you need in order to actually run a business on Instagram. Even if you're not selling anything through Instagram specifically, it's still a good idea to have a business accounts set up. Then you can just include a link to your freebie here or if you don't have a pretty enough link and maybe you have multiple links that you want to actually draw your attention to, then you can use something like link in bio, which is free, free to set up as long as you have the brand and one like I have here. Now obviously this is on a desktop view and on mobile this would just be stacked. But essentially it allows you to link to various offers in one go and allow people to explore all the different things that you have to offer. It's a really good way to drive attention to your offer there. You could create some stories and create some organic content and say, hey, check out the link in my bio to find out more about this amazing offer. Anytime that you feel like you would feel inspired to do video and you're comfortable in doing this, absolutely do it. Don't feel like you can't promote business stuff on TikTok or on Instagram Reels or IGTV just because maybe yours might be photos, skateboarding dogs or people dancing. It's still a really great way to advertise your business. So example of TikTok here, this is Elise Darma and she teaches people how to grow on Instagram. She's got this video that is teaching people how to look for hashtags on a particular tool that she uses and how she uses it to grow her Instagram profile. A hundred and sixty one thousand people saw that. Then presumably they might come to her TikTok profile and in her actual link on her TikTok profile. She then has her sales page. This is a $27 offer that she might get sales from. So it's not necessarily top of funnel, it's not a free offer, it is a paid offer. But if somebody is interested in growing their Instagram account, which presumably the people who would've watched something like that might be. Then her offer is something that also helps people to grow on Instagram. It's really closely aligned. So that's a really good way to promote your offers as well, if you're comfortable with using video. Now I know these kind of short, fun, but it's kind of catered to really short attention span kind of videos are not everyone's cup of tea, but if you still want to leverage video and maybe in a bit of a different way, YouTube can be really, really great way to do that. Sunny Lenarduzzi is an expert in teaching people how to grow on YouTube particularly. But I picked this video because it's from 2015. It's quite old. It's from when she first started growing her YouTube channel, and it's a video that's still getting thousands of views every single week because it's teaching people how to get more views on YouTube. Then if you were to look into the description of the video, she is allowing people to download her YouTube SEO checklist. If you were to click on that, you would get to a page like this where you can download the guide. So this is the top of her funnel where she's promoting this little checklist, and then the people who would then download this checklist might get additional emails, additional trainings, promoting additional offer, and eventually those people would end up in her paid offer, which is about US$400, and then be upsold into her premium paid offer which is a couple thousand dollars from just one little checklist from a video that was at the start of her career, which was just a webcam near a window. Nothing spectacular about it, but it was good content. It did get the views and it allowed her to promote her offer completely free. Now, it is best for that YouTube video to be really closely related to the free offer at the start of your funnel, so that people who would be interested in learning how to get more views on YouTube would also be interested in downloading the YouTube SEO checklist, and would also then eventually be interested in the paid offer, which is teaching people how to grow on YouTube through an online course. You might also have a big presence on a platform like LinkedIn. So use whatever is comfortable for you and whatever you already have and established presence on or where your audience is hanging out. Digital Picnic is an example of this. These guys have a really good presence, and not just in terms of followers, but in terms of engagement on LinkedIn, which is rare, but they do and that is also why they advertise their corporate training on this platform because it suited to that. So people who are going to see stuff on LinkedIn, people who are active on LinkedIn are going to be interested in corporate training and that is why they promote their paid offer on this platform because it's going to get in front of the people who are most likely to take action on that, and obviously they have got quite a good bit of engagement on that post as well. Whereas if they're promoting this on something like Instagram or TikTok, they might just not go anywhere. These are just some of the examples of how you can leverage organic social media and your website in order to promote your top-of-funnel content. If you do not already have a strong existing online presence that you can leverage, it might be a good idea to focus a bit on organic growth before actually launching your funnel. After all, that sort factor is super key even if you pump money into paid ads where you have four followers on Instagram or Facebook, people can get quite suspicious about your credibility. That's why it's important to focus on that growth before even considering advertising. But you can get around this a little bit, so I do still think you should grow your own brand and your own social profiles. But you can also leverage the authority and the trust factor of other people and their audience. For example, you can apply to be on podcasts and leverage their particular audience to promote your content to their podcast audience. They might not let you promote your free offer directly, but they will allow you to give out your website and your social media details so that their audience can go and check out what you have to offer. Then if you've done your job correctly in promoting your free top-of-funnel offer on your website and all on socials, it'll naturally grab people into this stage of your funnel when they go and visit you there. But a lot of podcast hosts these days are actually allowing people to also say, "Hey, I've got this free training that I'm currently doing," or, "I've got a webinar coming up if you do want to go check it out." So it does depend on the podcast host and their set up, but this can be a really great way to go if you're not super shy and you're happy to be on podcasts. If you are super shy and you want to do something similar, you can often write guest posts for people or brands within your industry and area of expertise, and then point people back to your website to drive them to that top-of-funnel. Now the next method is a little bit more advanced because it does require you to create a customized learning page for each person who's going to be promoting your offer, but I'm going to show you how to do that if you are interested in leveraging this technique. It's just basically a joint ventures or an affiliate route. You might remember from an earlier lesson where I was talking about a webinar that I signed up for to learn how to write my own novel, and this was presented primarily by Chandler Bolt, but it was promoted to me by Gillian Perkins. If you don't remember, it's fine. Essentially all it was was Gillian Perkins, someone I know whose email I'm subscribed to and who I follow on social media, promoting someone else's offer, which was Chandler Bolt. Gillian teaches people mostly about YouTube, but she also knows that her audience is small business owners and entrepreneurs who might also benefit from learning how to write a book. So then she promotes Chandler's free webinar. If anyone from her list signs up to his free webinar who then also signs up to his paid program, which is about $3,000, she'll get a percentage of that profit. Now, the difference here is that both Gillian and Chandler have established audiences, so they don't necessarily need to be doing this because of a lack of audience on their own. But they are doing this because this is still a really great way to increase your profits regardless of your audience size. So keep in mind that this is a strategy you can use even if you already have an audience, where you find someone who maybe has a slightly different audience to you and wants to promote your offer, and all you really have to do is give them a percentage of the sale. Now, this is obviously a screenshot of the learning page. But if you were to then look at the URL, you would see that this is really specific to Gillian's audience. So anyone who signs up using this particular form with this link will be tagged with Gillian's name on the back end of that software. So if they eventually purchase, then Chandler will be able to actually give Gillian and affiliate commission because he'll know that this particular person came from this particular URL that is linked to Gillian's audience. All this essentially means is that the entry point of your funnel will be slightly different because you want to make sure that they're entering through a custom URL, and the rest of the funnel will be exactly the same. The thank you page or the emails, everything will be exactly the same as you have it, but you just need to create almost a copy of that first learning page that is customized in some way so that on the back end you can say, "Hey, anyone that has come from this particular URL with this person's name on it, tag them with something so that on the back end, I know that this is where they came from." So first we're going to go in and create our learning page, and then we're going to link it to the funnel so that we can make sure that the rest of the events will happen exactly as we want them to happen. I'm going to jump into get response and we'll start creating.
39. Create a Custom Funnel Entry Point for Affiliates: I wish I could say that you can save your existing landing page as a template. You can, in a sense. If you go into your landing page or any of your sales pages and you head up here, it'll say that you can save it as a template. You can, but what this means is that you will find it in your landing pages as a template only for a sales funnel. If it came from a sales funnel, you can use it for another sales funnel, but you can't use it for a stand-alone landing page, which is what we want to be creating here. So if I go to my templates, I now have this here, but it'll say you can create a funnel with this as your starting point, but you can't create it as a one-off page. All that means is that you will have to create a separate landing page for your affiliates, but let's say you have four or five affiliates, then these landing pages will be able to be duplicated really quickly. You just have to create it once, and again, this is quite a simple page, so it shouldn't take you too long to build it from scratch. You can also just use any of the templates that they already have in there. I just want to show you how I would go about this, so let's go ahead and sign up and registration. That's the template that we want to be using. It doesn't massively matter which one it is as long as it has a sign-up form. I'm going to use this one because it's a weight loss course and it looks funky enough. This is the landing page and this is the thank you page they've created. This doesn't really matter because what we're going to do is this is going to be our sign-up page and it's going to redirect to the thank you page that's within our funnel. This is not going to be relevant, it can stay looking exactly as it is. This is going to be my, let's say, affiliate and landing page for a free offer. You can change this later, it's just so I know what it is. Then you would go in and you would customize this as we did with our other landing page in terms of the colors and the fonts and everything else. That's why it might be easier to actually start with a blank page. The reason I picked this one is because it has images of people, so I could say that this is one of my affiliates. If I was going to erase this, I would maybe want to use an image of my affiliate on this page because it's going to be for his audience. This is Jack C. Lets say Jack C. is going to help me promote my free offer and I know that he's going to be sending this particular page to his audience. Then I could use a quote from Jack about how awesome this free offer is, so when his audience gets to this page, they don't really know who I am or why they should trust me, but they know Jack. Jack says, this is good stuff and they should sign up, then they're much more likely to trust me. The other reason that you want to be using a customized landing page for this kind of process is also because you might have to put a little bit more effort into it than you would if you were driving traffic to it yourself with your own audience. These are people who have no idea who I am. You don't really know how Jack went about promoting this page, so you don't know what context somebody has before they got to this page, and you want to include as much information as the person needs in order to actually sign up for my free offer. The main thing that I want to make sure I have is a sign-up box. This probably has a popup form, I would think. It's got it here. This is just email, that's not really enough for what I need. I need their first name and their email, so I'll go in and probably delete these and add in my own static form somewhere over here. Let's put it in its own section. This is where I want it to be. I would go and remove all the stuff that I don't necessarily need, but really all I need is their first name and their email and then sign them up. The key component of this, after you've done the mobile customization and everything else, you don't necessarily need to create variations of these because you're just using it for this affiliate purpose. Again, the thank you page doesn't really matter because we're not actually going to be directing people to this. What I really want to be focusing on is the actual settings part and what you need to do there in order to make sure that it's going to the right place. Once again, I don't want to be indexing this in search engines. This is not the name that I would want to put in here, so I would want to customize this based on my affiliate. I would want to say something like Jack's, I don't know what his business is, but let's say it's Living Life. Maybe I wouldn't even include his name, I'll just include the brand name, and I'll put in a divider and say social media management printing. Because that is what they're signing up for, I would put in a description, and I would go through all the steps that we went through in our actual launch checklist, make sure everything looks good, but this is where I would need to include a slight variation to what my original landing page actually is. Social media training is the actual one that I have, and I would maybe put in Jack. Then I know that that is his audience that's going to be going in there, and the list that these people are going to sign up to is the social media management, so the list is exactly the same. I don't want a confirmed opt-in. This is when somebody gets an email saying, "Hey, did you mean to subscribe to this thing?" They need to actually make sure they are opting twice almost. I find it a little bit tedious, so I usually switch that off, but you can always click on here to learn more about the confirmed opt-in, and I want to make sure I am adding them to a cycle on day one. These are the three messages that I have attached to this particular list based on my original funnel. This first message is on day zero, so it gets sent to them immediately as soon as they sign up for my free offer, and I want to make sure they're not going to the default thank you page. I want to make sure they're going to a custom thank you page and it's going to be the actual thank you page of my funnel. Let me jump into the actual thank you page, which is also where my training is hosted. I'm just going to grab that URL, and this is where I want them to go, and I would publish that. The next thing that you want to do is you want to go over to automations and create workflow. I'm just going to be starting from scratch, and I'm going to make this my affiliate tagging sequence. I want this to start when somebody is subscribing to my list. It's going to be the specific list, and it's going to be my social media management list, and the subscription method is through a landing page. It's going to be through specific landing page, and this is going to be the Living Life-Social Media Management Training. When somebody subscribes to this particular list through this particular landing page, what I want to be doing is I want to be tagging these people. I tag them, and I would create a tag, and it would be something like Jack's list, and I would add another tag which would be affiliate. That way I know if somebody with this tag signs up to my paid offer, I am required to pay someone a commission. The reason that I'm separating these out is because you might have various affiliates within this workflow. What I could do, let's say I had another landing page, and that landing page is going to be Rosie's rocky road friend, I would create a landing page for that, and I would select that over here and then I would assign the tag that would say Rosie's list, and all of them would eventually end up being linked to this bit that would say affiliate. So if you had multiple affiliates in this one sequence, you can just create them all in here and you could keep copying and pasting this over and making sure that you're just customizing it through the particular landing page where they signed up. So when somebody actually signs up here, they should be tagged with this and then also tagged with that. At this stage we only have the one landing page and the one person, so I'm just going to save and publish this and then we're going to test it so that I can show you what this will look like on the backend. We're going to just export. Now I want go to my landing pages and I'm going to go over and sign up. I know this landing page looks like crap. I know it doesn't look great, but it doesn't really matter at this stage. I'm just going to put in a test email because it doesn't actually matter. Now it has linked me to the actual exact thank you page that I want to be linked to you, and now let's go and have a look at what's happened on the backend of this. I just put in Nick, and now if I go into it, he is tagged as being on Jack's list and an affiliate and he will have been sent your training is here. Now he's going to be going through my actual funnel and he's going to be receiving all of those auto responders. Currently, he's on day zero, but on day two, he's going to receive my next email and he's going to keep getting promoted into buying my paid offer. But then at the end, me as the person who has to pay out my affiliates, at the end of the campaign or within 30 days of somebody not refunding their paid offer, I could then go in and check, are they an affiliate, and if they are, who's list did they come from? The easiest way to do that is if we go just into where all of your lists are, you can either go by tags, so there is an option just for tags and you could just go into affiliate and show contacts, or what you can do is you can just search for people and then go to advanced search. I would only really be interested in people who are on this list and have also been copied to this particular list and have purchased my offer. You might have noticed about when somebody does purchase something, they're also going to be tagged with the tag to say that I have ordered something through a funnel. This particular list and also this particular list will both have that tag. Even though I'm copying that contact over, both of them will have that tag. What I could do is, show me anyone who's on these two particular lists, add a condition and I could say tag exists and the tag is affiliate, and add another condition saying tag is assigned, funnel ordered. Then I could see anyone who has come through an affiliate who has also purchased my offer, and then I could go through them and figure out how much I need to be paying my affiliates. Is it a little bit time-consuming? Absolutely, it is. If you are going through specific tools, for example, Teachable have their own affiliate program, I know a lot of other sites do as well, it's a little bit easier. But if you are going to be checking out through GetResponse in order to utilize their funnel function, then unfortunately, this is the way to do it. But you can also export contacts so it can make it a little bit easier where at the end of the month, you can just go in and create a contact export and have a big Excel spreadsheet that will basically tell you exactly how much profit came from each of your affiliates. If you're not making a huge amount of sales, this really isn't as time consuming as it seems, and this is also a really good way to just make sure that you can create a customized landing page for each of your affiliates.
40. Measure Your Success: Once your funnel is up and running, and you've ironed out the kinks and you have a few people going through it, it'll be a really good time for you to check and see how things are going and what could be improved. I should also mention that it's important to let things run a little bit, depending on the length of your funnel. For example, if someone a signing up to a free offer and then they're set to receive three emails over the next five days, prompting them to purchase your offer, then you need to actually make sure you're waiting until a solid number of people have gone through this whole email sequence before going through and measuring everything. Of course, the more people you can have going through this sequence, the better. So ideally, you would have a couple of hundred people going through it. But I would say a minimum of 25 people should go through your entire funnel before you make any changes to it. Only really make changes if something is really wrong at this point, because with such a small sample size, it won't be statistically significant get with 25 people. But for example, if 25 people were sent your welcome email and then no one opened it, then that's a problem. Or this scenario 2 here where you had 50 people go to one version of a landing page and then 50 people go to the other, and 24 people from version 1 signed up and only one out of 50 signed up to your version 2, then you know something with that second version really needs to be changed. If the differences are quite dramatic, then it's easier to pick up. But if the differences are really slight, then you might just want to wait to have a few more people go through your funnel before jumping to conclusions about something really working or not working for you. Let's take a look at the numbers that you should be measuring at each stage of your funnel and what numbers you're really aiming to achieve at each stage or what percentages you're aiming to achieve at each stage as well. I'm going to be using this made up example here from get response, and then we're going to compare this to my own funnel stats to give you an idea of how to diagnose where things are going wrong because that is your superpower as a marketer. It's not to launch the perfect funnel straightaway, but it's to be resilient and be able to diagnose what's happening and what's not quite right and how to change it. A great converting landing page will convert 50 percent of its visitors into leads. Anything between 40 and 50 percent is still awesome. If it's significantly below that 40 percent mark, then maybe the page is too slow, or I'm promoting my offer to the wrong audience who's not really interested in it, or they were interested, but then something on my page really turned them off and they just left. This is exactly why split testing your landing page can be really beneficial, because it'll give you a really great chance of seeing what works best before choosing a winner, and then driving all of your traffic to that page that converts the best for you. Because you might actually find that one of your versions of your landing page is converting at 50 percent and the other one is converting at 30 percent. So then you know which one to turn off. Generally, it's not quite that significant. Usually, it's a difference of a couple of percent, but even a couple of percent can make a really big difference to your bottom line. Now, we can see from this made-up example here, Get Response is getting a 25 percent conversion rate, which is too low for my liking. But they've also supplemented that with a pop-up exit form, which got them another 25 percent for a total of 1,068 contacts, which is an overall 50 percent success. They're on the right track there, but if they really need an exit intent pop-up to give them half of their subscribers, then there's something wrong on that landing page itself. Then you also want to be checking your open and click rates for your follow-up emails. As I mentioned already, your welcome emails will have open rates of more than 50 percent sometimes because you're just delivering the thing that the person has signed up for. But any additional emails are more likely to sit within the 15 to 25 percent open rate category. Now, again, in this particular example, these guys only have a 10 percent open rate and only sent one email in their sequence. So that's very low in my books because it is their welcome email, because it's the first email they're getting from their funnel. The 10 percent is too low and we would want to go in and focus on this area, and try and improve it if this was our percentage at this stage. Now, according to HubSpot, the average email open rate is currently seen at 20.94 percent, but it really depends on the industry. You'll see from this chart that they've provided us, the average email open rates really vary by industry. So it's important for you to check out what the average acceptable email open rate is within your industry before you start to panic about adjusting your numbers, and of course, your business model can play a part on this as well. It's not just industry, but whether you're e-commerce or you're a more service-based business, that will really play a part as well. Now let's talk about click-through rates, which is basically the percentage of people who clicked on any link within your email. The average across industries is 7.8, which means that out of the 20 percent of people who opened the email, only about eight percent of them will ever click on the links within that email. But again, let's check out the chart here from HubSpot about different industry click-through rates. An industry like real estate, for example, had one of the highest average open rates, but one of the lowest click-through rates. Now, keep in mind, this is just a guide for you to use. If you have 10 people on your email list and five of them opened your emails, and your open rate therefore, is 50 percent, that's amazing. But then eventually, you'll have 100, or 1,000, or 10,000 people on your list, and it's going to be so much harder for you to get to a 50 percent open rate. Don't get too hung up on the numbers, just use them as a guide for your decisions on what you should be improving and what you should be comfortable with. Now, if you do find that your open rates are far too low, then you might decide to maybe change your email headline, for example, because that is the single biggest deciding factor for people either opening your emails are not opening them. Now, maybe your emails are ending up in people's spam folders because you've included too many images. So you could try and make them a little bit cleaner and a little bit more minimalistic. The same goes for clicks. If your click-through rate is a little bit too low, maybe it's because your email text is too long and your call to action is at the very end. Then you might try placing that call to action at the beginning, so people are going to be more likely to see it and click-through. You can also use color to make it stand out a bit more. Now, after your email stats, you also want to be looking at your sales and your order page stats as well. Get Response will give you a percentage success based on the number of page views for all of your pages versus the number of overall orders, and this makes sense if you're doing the quick funnel option, which only includes paid offers. But for the full sales funnel option, which is what we're doing, it's a bit crap, to be honest, because really what you need to be measuring is the number of people who actually made it to your sales page and how many of those people actually purchased your stuff. Now, there are many industry averages for email open rates and click rates, but when it comes to actually turning your prospects into customers, the averages get a little bit blurry. Now, the general rule of thumb is that anywhere between one and 2.5 percent is a pretty good conversion rate for your paid offer. Anything below one percent is not great, anything above 2.5 percent is fantastic. In order to calculate this, you would look at the number of purchases divided by the number of unique page views times 100 to get your conversion rate percentage. Hilariously, for this particular example here, they had 534 people check out the sales page, and 148 of them completed their orders, which is a conversion rate of 27 percent. That's a little bit insane. I don't think of anyone to achieve this in the industry, they would be over the moon. But again, this is a fake scenario with completely made up numbers and I'm not convinced that they knew really what they were doing when they were doing this. So I am going to be walking you through my own example for that reason. We'll also take a look at one more from a different brand whose funnel also includes a trip wire so that we can take a look at some more stats to keep an eye on in terms of additional paid offers within your funnel. Here is a screenshot from my own funnel and how my stats sort of stack up with what we were just talking about. My landing page is converting it 40 percent. I'm pretty happy with that, but I would maybe try out a few more things to try and bring that a little bit closer to that 50 percent mark, but overall is still within the right bounds. I'm happy with it and as I've mentioned, I don't have an exit intent pop up because I was running paid ads to this page. That's a bit of a no-no from Facebook and it can affect how Facebook actually promotes your ads. But if I was driving only organic traffic to this page, I would absolutely setup an exit intent pop-up, which would then help me get that number a little bit closer to that 50 percent mark. As for my e-mail open rates, you can't see them within him funnel because I have several e-mails there. So I had to actually pull the screenshot from my dashboard instead but my open rates are really great. I have a 45 percent open rate for my welcome e-mail, and then nearly 34 percent on the e-mail my subscribers receive on day two, and then 29 percent on the email they receive on day four of my funnel. Open rates-wise, I'm really, really happy with where this is at and I wouldn't really change anything there. As for my click through rates, I have a 7 percent click rate which is just below the average, but still well within what's acceptable. But considering my open rates are quite a bit higher than the average, it does mean that I might need to do a little bit of work here on getting people to actually click on the links within the e-mails. So I would maybe go in and try to make my e-mails a bit shorter and make my call to action a little bit more obvious, and maybe try out a few different ways of phrasing my call to action to see what might work better for my audience. Taking a look at my actual purchase conversion rate, I had 34 orders from 1,259 unique page views, which gives me a conversion rate of 2.7. That's already awesome but then I actually went one step further and I added a second payment option to my checkout by creating a duplicate funnel with a PayPal button, which then resulted in 19 more orders, which gives me a total of 53 orders and a conversion rate of 4.2 percent. Now I'm going to be honest, a couple of these would have been me testing stuff out, making sure everything works through Stripe and PayPal, and making sure my checkout process is working but I'm still really, really happy with this conversion right here. Overall, my funnel is pretty healthy and what I would do next is to try and actually increase the initial landing page conversion as 40 percent is kind of on the edge of where I would want to be. So I would try and get this number up. I would also then play around with a few things inside of my e-mails to try and increase the click rates. But more than anything, what I would want to do next is create an upsell page so that I can increase my value per customer. Because my conversion rates are pretty good but in order for this to be really profitable, I would need to increase the amount that I'm actually making per order. Let's take a look at one more example of a brand who did this really well by including several paid offers within their funnel and kind of stacking them up. This is a case study from Authority Hacker, you get to whopping 10 percent or nearly 10 percent conversion rate on their Tripwire, which was priced at $9.95. They had 301 people sign up to their free offer lead magnet, 30 of those people bought their $9.95 Tripwire, and eight of those people then bought their $297 core offer, which gave them a total revenue of $2,594.68 from one funnel and just a couple of weeks. That sounds really, really awesome, right? Their numbers do look amazing at pretty much every stage of their funnel, but there's always a bit of a catch. The important thing to note here is that this was them promoting to their solid fanbase. These were their existing subscribers who had been consuming all their free content for months before they were offered this free lead magnet, which then upsold them onto these paid offers. Then these guys try to do the same thing by promoting this funnel to people who have never heard of them before through Facebook ads. They were barely, just barely breaking even because they found that these people converted about three times less than their existing fanbase. So while it's definitely important for you to test stuff out on a warm audience and keep building up your warm audience, it's also important to not expect the same results when you actually begin promoting your offer to audiences who have never heard of you or your business. So hopefully that's starting to make a bit more sense in terms of what you can look for within your funnel to make sure everything is working correctly, and what you should be measuring. But more often than not, there will be things that need to be fixed inside of your funnel. When you're making changes, it can be a good idea for you to keep track of the changes that you're making along the way in a spreadsheet or in a physical notebook because it can be so easy to forget when you've made the change and what change you made. So what I like to write down is the date, my stats on the date that are making the change, what is the change that I made, and then also set a reminder for myself somewhere in my calendar to go back in a couple of days or one week to see if there are any improvements or any changes to my stats over that week, to determine whether or not the change I've made is making a difference, whether it's a positive or a negative difference. It's also really important for you to focus on making one change at a time otherwise, you're not really going to know what's making the difference. Because let's say you made two changes and one made a really positive change on your audience, and the next one made a really negative change, so they've kind of evened each other out and you really have no idea what's working and what isn't. So make one change at a time and keep track of the changes you're making. That is a lot of stuff, especially if numbers and analysis are not your thing. I know this stuff can feel really, really overwhelming, but it's honestly so satisfying when you make one small change to something as so simple as changing an e-mail headline and you can increase your profits by a couple 100 bucks sometimes. It's super powerful stuff and if you can learn to love it, you'll absolutely nail this process. Now over the next few lessons, I'm going to be going over some more advanced tactics for improving your conversion rates. So you want to start with a really solid foundation and not over-complicate your life with too many bells and whistles, but once you're ready and you're comfortable to add those bells and whistles in, that's where you can really try to skyrocket your profitability with just a few simple tweaks in additions to your process. I hope you're at least as excited as this bouncing Gingerbread man and this awesome grandma in a party hat, and I will see you inside in the next lesson.
41. Advanced Lessons Overview: What an amazing achievement that you've made it up until this point and have made it through all of those lessons. I know it's so much information, I'm incredibly proud of you, even if you don't feel that yourself at this point. But hopefully you feel a real sense of accomplishment having gone through all of that and gained all that knowledge. Because it really is really complex stuff, so really, really well done. Over the next few lessons we're going to get into some more advanced techniques that you can use to further boost the profitability of your funnel. But I just want you to know that these are not a requirement for you to implement straight away, by any means, you can feel free to go play around with what you have created up until this point, promote it, measure the success, tweak a few things, and then come back to these lessons once you're ready. But then when you are ready, we will go into a few additional things like how to add some awesome products to your funnel with trip wires and up-sells like we already discussed in previous lessons. Then we're going to look at how to actually further measure the human behavior of people going through your sales pages and how to use that to really implement some changes to your sales funnel based on the behavior of your audience. How to add some further social proof and live chat. How to handle objections and all that amazing stuff that's going to be found within these advanced lessons. But once again, make sure that you're only going through these if you're ready because it can be a little bit more overwhelming and complex stuff. I am also going to be teaching you how to send regular newsletters from get response because I want t make sure that your audience is feeling that love and nurture, not just because you want them to buy stuff from you, but because you genuinely care about them being on your email list and you want to send them regular updates about your business and provide more value so that in the future they might be ready to purchase from you, even if they weren't quite ready yet throughout this initial funnel, they might be ready in a month or two. By sending them regular communication through your emails, you're going to make sure that you're nurturing that relationship. So we're going get into that and so much more within the next few lessons. I'm really excited and I hope to see you in the next one.
42. Integrate Multiple Payment Processors: In this lesson, we're going to take a look at how to add an additional payment processor to your system. But once again, I just want to encourage you to testing that with just one payment processor and really see if you're actually seeing that friction. The reason I started experimenting with how to add a second payment processor, within GetResponse is because I had customers who really wanted that extra payment method. I had people who e-mailed me and were asking whether I could offer PayPal in addition to offering them to check out with credit and debit card details. Unless you actually have that friction, you may not necessarily need a second payment processor because it is a more complex process. I did want to give you guys the option to learn how to implement this within your funnel, but just know that it's perfectly fine if you just choose to have one payment processor and your audience particularly might not have resistance to that, and they might be perfectly fine with just having one option to check out. Just know it's not a requirement, but I'm going to be showing you how to do it in case you find that that is something that your funnel needs in order to make sure you're converting more people into customers. The first thing you want to do is you want to make sure that your primary funnel that people are going to be going through is switched over to going through Stripe. I know we set everything up through PayPal, and if you are only going to have one funnel that people are going to go through, then I recommend PayPal as the option for people to use just because they can still own the actual PayPal checkout page. They can choose to check out with PayPal or they can put in their credit card details and check out as a guest. It's a little bit more tedious and people don't always know they can do this through PayPal, which is why it's a good idea for you to give them the option of credit card on the actual page itself. If they want to use PayPal is a backup option, then you give them that option as a backup. But the primary option should be credit card if you're going to be using to funnels like I'm going to be teaching you in this lesson and multiple payment processors. If you only have one funnel, one payment processor, then I recommend PayPal. But in this case, what we're going to do is we're going to switch this funnel over to a Stripe payment processor and then link it to an identical copy of the order process, that's going to give people the ability to check out with PayPal. I've already done this in my settings. All I really did was I just switched his over from PayPal to Stripe. If this doesn't work for you for whatever reason, if you're trying to do this and you hit Save and then you go back to your funnel and refresh it and it's still got the original payment processor, this has happened to me before, and I have queried this with GetResponse as to why this is happening. All it comes down to the fact that once it's published in live funnel it's a lot more difficult for them to change over the payment processor. But the way around this that I've found is just to go into your integrations and API and just delete the original or disconnect the original payment processor. If you're doing PayPal and nothing's live yet, there's no money being taken yet, you can actually disconnect this processor, and then essentially what it does is it completely removes any processor from your funnel, and it'll allow you to connect a new one. That's only if you're ever having trouble, try it this way first you should just be able to go into Stripe and then it's going to prompt you to set up your Stripe account, if you haven't already or connected here, and if you hit save, it should actually just put your funnel into a Stripe processor there. But if for whatever reason you hit Save and it still says PayPal then try disconnecting your PayPal and that way it'll just have a little red question mark there because it says you haven't actually connected anything yet and there's no way for people to check out. Then you go into settings and it'll allow you to choose a new payment processor there. We're going to start with creating a copy of our sales page first so that we can use it for our new funnel. We're not actually going to be using the sales page itself, just the order form, but we need to actually create a template of this to use in our PayPal funnel. Let's go ahead and do that. We're going to go over here and save as template. Cool. We can exit out of that. Now if I head over to, either I can go to funnels and create a quick sales funnel here, or I can head over to landing pages and create Landing page, My Templates. This is going to be there and I can create a funnel from this so I can create a funnel. I want to just be creating a quick sales funnel here. This is going to be my Social Media Management PayPal funnel. Each sales funnel does have a list attached to it so every time you create a brand new sales funnel, it'll also create a brand new list. You need to make sure that you are checking that everything is correctly set up within that list. I'll go through that with you in just a second, and that's it. Save. I'm going to go ahead and create a sales page. I need to select it here. This is going to be my Successful Social Media Management bundle. It's only copied the one variance. I don't have both of them there, but I really don't actually need this page at all. I just need the order form and I need this to be configured via PayPal because my other order form is going to be configured via Stripe. I would just leave this you don't necessarily need all of the billing details on this page because this page is going to be particular to PayPal. You could technically remove this and really just have this section down here, but for now, I'm just going to keep this. What I really want to be doing at this stage is just adding in my PayPal logo so people know that this is going to be checked out with PayPal. I'm going to go in and add a logo. It's just so that people know that when they actually order through this site, that it's going to take them through to PayPal. You could add a blurb in here saying "Hey, when you click on Order Now above, you're going to be redirected to PayPal." I want to make sure that it doesn't look like this on mobile. It looks all right there, and this needs to just sit outside of that section so we can attach it to a different section or just move this guy down to check the desktop view. To have a look. There we go. That's good. It doesn't have a shoes over here either. Perfect. Now what I need to do is just grab a URL from this. I would make sure I'm filling all of this out as well. I want this to be something similar, so it would be social-media-training. But it can't be quite exactly the same, so I'll just put in 2, making it slightly different, and Publish. Again, this is just going to be for your order form, so you're not going to be doing any of this. In terms of your confirmation page, you could copy over, but it's easiest to just go in and select the template. This is going to be our confirmation page, and just delete that. Really that's all we customized on our confirmation page anyways. I want to make sure the mobile view looks good. Out again, just to make sure I'm filling all this out. For now, I don't need to. That's my funnel. I'm not ever going to link this actual sales page; what I'm going to be linking to is this order form. I need that URL. I need to be jumping into my original sales funnel and head on over to this particular order form here so that I can actually link to my PayPal integration. I wouldn't worry about it too much with the actual sales pages, it's more just on your order form, somewhere on the order form, you want to be giving people the option to checkout with PayPal. I'd like to change these things around a bit because people are used to filling out their billing details and their card information at the same time. We didn't have this here before because we initially were checking out through PayPal but now we are checking out through Stripe. So I'm going to make sure I'm grabbing all of these different elements. It's going to overlap for a little bit, but I'm going to move this up. Now it does say credit card information but it will actually accept debit cards as well. Sometimes people get confused by that and that's why I like to change it to just either just card information or I would say credit and debit card information. People are a bit confused, and that's there. In this case, you do need their billing details, and product, order now. That all looks good. Now we want to add in our PayPal icon. I can't put anything on this actual order form, but I can shorten this and I can say or click here to check out with, and then I can say, PayPal. If I space this over, I'll be able to put in the PayPal logo next to it and get message. This is just me being maybe overly creative. You can absolutely have the logo outside of the button. You'd want to make sure that obviously you're checking how everything appears on hover, and that this actual button makes sense with a design over your paid overall, but you can put the image on top of your button. You just need to make sure that you are putting this behind the image so that the image of PayPal or the logo sits on top of that button so people know they can check out with credit card or they can go here to check out with PayPal, and then these will direct them to the other order form. I need to go in and grab this URL. I can double-click on this, and I'll just say open in the same window. Then I would maybe add a little blurb up here telling them that they can either use this form to check out with credit card, or they can go over to the PayPal form. This is how that looks on my live sales funnel. It says use the form on this page to check out with credit or debit card or use the following button to be redirected to a PayPal check out instead. This is exactly what we've just created. They can use this to check out with PayPal or they can use the previous page to check out with their credit or debit card. Now, once again, you just want to make sure that when you are creating something like this, you're checking how it looks on mobile and that all of the buttons are exactly where they should be. I'm not going to go too much into that, but just make sure that everything looks good and it works. Then you would want to go through and actually publish it and then double-check that everything works. Then your last step is going to be to jump into your automations and make sure that everything that needs to be here is here. Because it has now created a second abandoned order sequence and a second order completed sequence for your new funnel because essentially, it's brand new. These emails now need to be customized according to how you had it the first time around, and you need to be going in and making sure that everything looks how it should as well. It's easy because you've done it once before in terms of your order completed. If I opened this in a new tab, you already have that workflow completed, you just need to make sure that here it says only contacts from this particular list, whereas in the second sequence, it is now a different list. It's your PayPal list. You can go in and rename this. It doesn't have to say PayPal, but you just need to make sure that you're going through and essentially replicating the sequence. You might have gone about it in a very different way than to what I've done here, but all you're doing is effectively just replicating what you've already done in your first workflow, but only on the left-hand side because the right-hand side is actually going to pick up both funnels. What I mean by that is you're going to essentially thank them for the order. You're going to copy them to the list. All of that is going to be exactly the same, so I'm copying them to the students or social media list, or whatever list you will have to deliver your paid offer. Then I'll have a wait timer, and then I'm going to remove them from the original autoresponder cycle of that original list because this second PayPal list doesn't have any automated messages attached to it, You you don't need to remove them from anything there, but those people will still exist on the original list if they sign up for your free offer through the original funnel. I know that's a little bit confusing, but all you need to know is that if somebody checks out with PayPal, then they'll effectively exist on three separate lists. They're going to be on the original list of the original funnel. They're going to be on this PayPal list because they actually checked out with PayPal, which would have copied them over to that list, and they're also going to be on your paid subscriber list. In this case, that's my students or social media list because that's where I'm copying them over to. You do need to make sure you're conscious of where your contacts are ending up when you're actually doing these workflows so that you can make sure they're not receiving any further promotional emails once they've already checked out with your payment method. The reason you don't need to copy over the right side of this workflow is because as soon as you copy your new PayPal purchasers over to the students or social media list, this automation will trigger, even though it's technically listed in a separate workflow because you've just copy them to that list and the trigger for that workflow is they've subscribed to that list with any method. Then it's going to trigger that send the message paid offer and assign the duplicate tag. Then just like we did for our initial funnel, I would make sure to go and discount everything to $0.50. Make sure I'm putting a test email address through both of the funnels, through my Stripe funnel and my PayPal funnel, and making sure everyone's getting the emails they're supposed to get and they're not getting emails they're not supposed to be getting. That's your little workaround in case you do want to add another payment method. This will usually just come about if you do get a lot of people requesting an alternative payment method. A lot of emails I got when I first launched my get response funnel was for people who wanted an alternative way to check out. It was creating a little bit of friction for me, which is why I found this workaround. But you might not find that to be the case with your own funnel. This is all about testing. I just wanted to give you the option in case you find that you're getting stuck and you're maybe losing people in the checkout process because they don't have the payment method that they're looking for.
43. Optimise for Your Best Performers: I'm going to be using my live funnel for this part just so I can show you how to test things when you actually have traffic going through your funnel and people visiting self and what it actually looks like in a live funnel not in a demo one. But again, the structure is very similar to what we set up. My key here really with this lesson is just to introduce you to how you can go through and split test some of your assets to make sure you're getting the most profitable results from your funnel. Some things can be done automatically and then some things are a little bit more manual. Do keep in mind that there are some limitations to what get response can do, because it is an e-mail marketing platform first and a funnel builder second. If you're going to be using a different tool, something like click funnels that is specifically designed for funnel building, it's going to give you a lot more options and a lot more automation capabilities. But again, I'm not focusing on that here because most of you guys will likely be doing this for smaller clients or for your own business and you're not going to be doing it at the scale that people who do funnels reclines full time would be doing it. This is going to be more than enough for what you need with a little bit of manual labor involved of course. In terms of playtesting your landing pages and your sales pages to make sure you're getting the most out of these. Just heading to our funnel and going over to manage our pages and these are any of the landing pages that are attached to this particular list. I do have an extra one here that's just attached to something I'm testing at the moment, so this is not a live page, but the rest of these are live in my funnel and you can see that I've got this little beaker here saying am I A/B testing or split testing. These have already been determined in terms of which one of these is a winner, so I basically just run these as a split test and get response will automatically run 50 percent of your traffic to one variant and 50 percent to the other. At this stage unfortunately, you can't set up a rule to say once one of these is four percent or higher, more successful than the other, then turn the other one off and run most of my traffic or all of my traffic to that winning variant. Ideally, that's what you would be able to do and you can do this in more sophisticated tools. With get response, you have to manually come in here and monitor things. It will be telling you this pages converting it this percentage, but it will continue to run your traffic evenly to both of these pages until you manually come in here and publish a winner which will then switch the other variant off. It would be the same if you had a variant C, variant D. You can have more variants than just the two. But just know that you do manually have to come in here and switch the one off that's not performing very well for you. Like I said, with these two variants it's not a massive difference for me, but four percent can make a big difference when you're talking about thousands and thousands of subscribers. It was worth it for me to be able to test that and make sure that I'm switching over to the landing pages performing better for me. I obviously didn't switch this off fast enough, I really could have made a call on how it was performing within the first 100, maybe 200 subscribers. I really didn't have to wait quite this long, but that's fine. I mean, it's not a huge difference to me and this was all for the purposes of testing. It's fine, but yes, definitely feel free to put a reminder somewhere in your calendar to go in and check on these numbers so that you can make sure you're getting the most out of your funnel because your funnel will just give you an average of these two. It might tell you you're converting at 50 percent and you say, "Yeah, that's awesome. Keep going." But then you jump in here and you realize one of your pages is actually performing at 60 percent and the other one's performing at 40, so it's giving you an average of 5. But really what you could be doing there is turning off the one that's not performing very well for you and just keeping the one that's performing really well. That is on the actual entry point of your funnel there. In terms of sales pages, I had actually started to get response about these for you guys to make sure I'm giving you the best advice on this because it's a little bit more tricky inside of their software, like I said, because it doesn't actually track how people are performing from the sales pages into purchasing customers. This is a lot more straightforward. You have this many visits, this many contacts, this is your subscription. But with this, it's not really that straightforward because they're not necessarily new contacts. It does say that this particular variant gave me eight new contacts but really, they're not new contacts. They were on my e-mail list already somewhere and they converted into this funnel. But not every new customer is going to appear here, so you can't really determine the success of these from these numbers over here. Unfortunately at the moment, get response doesn't have a way of tracking which customers or which version of your sales page before they purchased your offer. That is a little bit unfortunate. Now, their recommendation is that you can duplicate your funnel and you can test it that way. You could send half your traffic to one funnel with one version of your sales page, and then the other half of your traffic to another funnel with a different version of your sales page. That's not split testing because there would be two completely different URLs. It's not ideal because if you're promoting the top of your funnel or you're promoting this amazing lead magnet on your socials and in your newsletters and you have affiliates and you have all these things going on and then you have to send them somehow to two different versions of this or you might have to promote two different URLs at the top of the funnel here, it gets a lot messier and then it's not a true split test because you're split testing completely different audiences, completely different things. That doesn't work for me. I have found a workaround to this by, again, a little bit of manual labor so that I can keep track of what's happening in terms of my numbers. The best way I've found of doing this is literally coming in here and switching off different variants on different weeks. Literally, see how many visitors came to this sales page during one particular time period. Then I would obviously then go into my actual reporting to see how many sales I made during that week. From these 200 visitors, I think I've made, I don't know, one sale or something like that. Maybe no sales at all. I knew that this wasn't a good sales page for me whereas this sales page after 200 visits had already made a couple of sales. Then I said, "Okay, this is obviously a winner for me and that's the one that I want to keep turned on." You're manually driving traffic to each variant by switching them off. I will jump in here and you can go in here and either publish this winner or turn different variants on and off. If I had variant A, B, C, D, I could turn some off and make sure I only have one running at a time. I'm driving traffic only to that one seeing how that's impacting my sales, and then the next week I will turn it off and turn on variant B and then see how that's impacting my sales. It is a little bit more manual in this sense and unfortunately that is the case of you want to pay less for your tools. That means, they're going to do less for you and there's going to be a little bit more manual work involved. But the reason I really like this is because it forces you to check in on your stats which is something that a lot of people forget about when they're first running funnels. They don't go in and check on what's working, what isn't, they think, "Oh, I'm going to keep it running for a couple of weeks and spent a couple thousand bucks for testing," which is all well and good. But if you're not really tracking your stats, then you don't know how things are working. I really like the manual method anyways because it forces me to literally come in here, write down the numbers, write down my number of sales in a spreadsheet somewhere, write down the dates where I'm switching things on and off. It does also mean that everything is still running to one URL. If you have any ads running or it's an e-mail somewhere, that link is going to stay the same no matter what landing page actually appears there, so is a true split test in that sense. But, of course, you don't have to be split testing if you're not comfortable. Split testing your sales pages, that's fine. You should split test your landing pages because this is how people are going to get into your funnel. You want to make sure that you get the most people into your funnel that you can and then the rest you can tweak as you go along. That worked really well for me in terms of testing what works well for my sales pages, what works well for my customers and that stuff. Now, the last thing that you might want to split test is your e-mails. The way that this is set up inside of GetResponse, it's not super straightforward because these auto-responder emails can't be split tested in this particular way because it's attached to people signing up here. But if you are really keen and you want to split test every single section of what you're creating, and you're a very marketer, and you want to learn more. There is a way to do it where you can just go through the automations. I'm going to take you through to automations. Let's just create a quick workflow because this is a live account. I don't want to mess up what I have. The way you could do it is put in subscribes, and then the list is going to be my left. Too many lists. Sorry, guys. Social media management list. The method is going to be via my landing page. Sorry, specific. It's going to be this particular landing page. This is just a different way of setting up your funnel automation. You could then send them a message. Let's just use one anyways. This is for my students, but it doesn't matter, just to show you what I mean. You would create the actual message inside of automation messages, you would create it here. You would then go into your workflow. Instead of just connecting these, which would essentially do the exact same thing that your funnel does. So what it does is somebody signs up here and then they get this email straightaway. If I connected these, that's exactly what happens. Someone signed up there and they would get the message right away. But what I can do is I can actually split test this. So there's a splitter, and let me just move these around. Everyone who signs up from that particular landing page then would get half this email, and then I would have another email that would be, let's say identical, but have a different subject line. Then what I could do is I could just always say, at this stage, it's just the same email, but I would go in and create two different versions. I would create version A and version B. Then I would send half the people to this version, half the people to this other version. Then I could continue split testing every single email that I have in that automation by coming down here. All the people that got version A and all the people that got version B would be split tested again. They would basically be put into a pool of people that would then be evenly split. It doesn't necessarily mean that the same people who got this half will get this half of this email. It's, again, just going to be a completely random half-half split. Then I would just send the next email in my automation and just zoom out, so you can see this a bit better. But yes. If we jump back into our funnel, I will then go in and recreate this second email, and then I would recreate the last email as well inside of my automation messages. So then it would appear here when I try and select it. Obviously right now, it's not in here. But then I would then go ahead and split these guys once again, and again, it would be the same message, just maybe two headlines, or I could do two different body contents and I could keep going like that up until the very last message. If I did that, it wouldn't necessarily appear straight within my funnel, but it would appear inside of my automation messages. I could jump in here and the messages would be there, and I could basically take a look at the variant A and variant B message and see how many people opened each one, how many people clicked on each one, and then determine a winner, and then pick that winner to send all of my traffic to. Again, that's a little bit more complicated, not something you need to do unless you're really unhappy with your results, which is why I'm teaching it to you in an easier, automatic way. GetResponse already sets this up for you exactly as it is. Unless you're really unhappy with the results that you're getting in here and you're not really sure what's going on, and you want to make sure you're testing things out, or you want to get the best results, then just know that you can go into the workflow function and use the splitter to really split test your messages out. But I will confidently say that for 98 percent of you guys, all you really need to worry about is split testing at this stage. Really just creating a first and second variant of your landing page, testing out something really simple like I did with just having a video on one page and not having a video in another. That will be enough to get you better results, and also impress your clients if you're doing this for clients. Then later on, once you're really confident, and you're running these things full time, and you are ready for something a little bit more complex, you can get into things like split testing your sales pages and then going through to emails. But I just wanted you to know that that is an option inside of GetResponse for those of you who really want to experiment and you want to tap into this funnel hacking system. In the next lesson, we're going to talk more about how to actually get more revenue out of your funnel by adding different products within it. I'll see you there.
44. Increase Your Revenue Per Customer: It's really important for me to acknowledge at this point that it takes companies years and years and lots of money and lots of trial and error to get to a point where they actually have multiple offers and multiple price points to offer their audience. Because it requires a lot of testing, so if you don't have multiple offers to include in your sales funnel, don't feel like you still can't have an awesome profitable funnel with just one core offer. Some people actually go their entire business existence with just one core offer and it works really well for them. They have no friction for people to buy, so they don't need a low-ticket offer to offer as a tripwire because people are more than happy to become their customers and they're making enough money that they don't feel like they need to have an upsell or profit maximizer to add in afterwards. So that's perfectly fine. These lessons are more just to familiarize you with tips and techniques and tools that you need to be aware of in case, you do want to add additional offers to your sales funnel. But make sure that you are going along at a steady pace and testing everything as you go along before adding additional complex parts to your funnel, because things can spiral pretty quickly if it's not a really stable system to begin with. So make sure that whatever you have up until this point, you are driving a little bit of traffic to it. You're testing it with your audience, you see how they're responding to it, and then adding in those offers only once you're really ready to do so and you're ready to maximize the profit of your funnel. So if you know that eventually you want to have a tripwire and in profit maximizer or other offers within your funnel, you need to plan for that with your initial setup so that you can seamlessly add your extra elements into your sales funnel later on. Here's how we'd go about doing this for my own example. So I know that my free offer is a training all about what it takes to become a social media manager. My core offer is a course bundle teaching people exactly how to actually become a social media manager and set up their freelance business. Now, I want to add to that to make sure that I'm increasing the average order value for my customers. A quite like my current conversion rates on this so I probably wouldn't add a tripwire to this particular sales funnel, especially because my core offer is less than 50 bucks. So the friction for someone to purchase isn't super high. If the core offer was $200 or more, then I would definitely want to consider including a low ticket offer to the sales funnel just to make sure that I'm reducing the friction for someone to become a customer. But even then you might actually find that your conversion rates are really good, in which case you don't want to be adding in an extra step before people purchasing your core offer. So this is why testing things out like this is really beneficial because you might have actually set it up with a tripwire and a core offer and a profit maximizer right from the very beginning, and you might find a lot of people are buying your tripwire, but then not enough people are actually going through and buying the thing you really want them to buy, which is your core offer. Whereas in this case, I found that enough people were purchasing my $37 core offer, so I don't really want to be bothering with adding an extra step before that. That would maybe reduce the number of people who would buy the more expensive thing I want them to buy. So in this case, all I would do to increase my revenue per customer would be to add to that core offer for people who purchase that. So I would want to add my profit maximizer, which would be a one hour live coaching session where I would take each of my students who has completed the program and evaluate their existing skills and passions and interests, I'd also provide an audit of their one-page portfolio website, and their social media accounts, their e-mail signature, and any other assets that they have in place to represent their brand, which is all the stuff that I actually teach them inside of the course. Then I would give them advice on how to tweak it and how to make some improvements to it before going live with everything. I would handhold them through getting their first client online as a social media manager and I would price this at $250 because I know that something like this is a lot more valuable than any pre-recorded content that's general to everyone who's taking it, because it's targeted, it's tailored to them specifically. It's customized advice to their business model and not to mention that, at the end of it, hopefully they'll actually have their first paying clients, so the session pays for itself. While I might not have everything in place to offer this to my audience yet, I want to make sure that everything in my funnel aligns with this, so that I can easily add an upsell page once I'm ready to deliver this to my audience. I'm going to show you exactly how we'd go about adding this into my funnel, but first, here's a live example of how this looks inside of a funnel for smart marketer. Smart marketer here on the left-hand side is just a screenshot of the actual checkout box from their sales page for smart e-mail marketing 2.0. It's a program they're offering normally for just shy of 1,500 bucks, but then they're giving people a 10 percent discount already. Then as soon as somebody checks out, actually puts in their payment details, they purchase this thing, it then gives them a timed offer that's only got 10 minutes on the countdown timer and then the page actually disappears. So it's got a countdown timer and then it's basically offering for them to also be able to get a huge amount, which is $500 off of the smart social course in addition to their smart e-mail marketing course. This upsell is huge because it means that it has taken their average order value from potentially being only 1,300 bucks to adding an extra $1,000 on top of that. This is the power of being able to do something like this really well. The way I'm showing it to you guys is on a much smaller scale of this, where we're dealing with couple of 100 bucks instead of a couple of $1,000. But this is just to show you that upsell pages can be social powerful because if even, one in 20, one in 30 people who buy this mark e-mail marketing 2.0 course then goes on to upgrade to that $1,000 offer, it means that is massively going to impact their average order value and how much they're able to put into their marketing, and how much they're able to put back into their business to grow and offer further products as well. So let's go in to get response now and take a look at how we can add a really powerful page like this into our existing funnel. The first thing I would want to make sure I have in place is an additional offer because obviously, we only have one offer setup at this stage. So I want to make sure that I am able to add in a second offer. Now, you can have multiple offers as well, but you don't want to confuse people on your upsell page if you offer them too many things on that page, unless you're an e-commerce brand where you go, "Oh, okay. You bought shoes. Do you also want socks or whatever." If you ordered Uber aids you know this when you're checking out from the restaurant, they'll say, "Hey, do you also want fries with that?" You want a ginger beer and you want all these things. That's fine, if it's a really low-cost offer or a physical products, but for any big ticket items or digital products, you really only want to be getting people one option one thing to purchase, one decision to make. In this case, it basically sits between somewhere between an online course and a service, but I would just say it's a service live coaching session. I'd want to put a little bit more effort into this, but for now that's fine. The price is going to be, well, 250 bucks, but we don't want to use whole numbers like $249. Not sure if it's going to allow me to go through without putting in an image, so I'm just going to pick an image of me because I'm the person who's going to be delivering this, and that's awesome. It's going to need to be a square. Now this is where I would basically tell them that it's best for them to save this coaching session until they finish the course, because that's how they're going to get the most out of it. I'm going to provide them with details via email on how to book in a time with me once they're ready. I'm just going to put in a description of how to book session will go here, and I'm happy for them to stay in the list that's going to be linked to my funnel. I'm going to add in a tagging sequence that's going to allow me to know who's actually purchased this. I'm happy with that and I will save this. Now we can jump into our conversion funnel. The reason that we want to be selecting Stripe or PayPal or both in this case, when we have created both of those types of funnels. The reason we're using them as our payment processors is because they both allow for one-click upsells, which means that as soon as somebody purchases your core offer, the next page will then say, hey, do you want to add this thing to your basket or to your purchase, and they can just say yes, and it doesn't require them to put in their payment details again, it will just add it to their bill. So you can do this with both PayPal and Stripe. If you are going to be adding in an upsell page and you're creating the same sort that I taught you guys in a previous lesson when we talked about how to do two different payment processors, then make sure that you're adding your upsell page to both of these funnels. But really, it's not super crucial if you just want to go through one funnel, one payment processor, in which case, adding your upsell page is going to be much easier. All you need to do is come in here and click on 'Add an upsell page. Now, you can actually add multiple upsell pages, which means that somebody bought this particular offer, they would then be led to one upsell page for a particular product and then people could say yes or no. If they say no, they can be presented with a different kind of offer. That's maybe a slightly cheaper version of the thing that they just said no to. You can keep doing that and you can keep going through upsells, down-sells, cross-sells, whatever you want. But the bare minimum there would be to create just one upsell page, which is what we want to be doing for now. Now, I would ideally want this to look similar to the rest of my funnel, which none of these templates do, so I would maybe have to do a little bit more work in making sure the colors are right and the fonts are right. But for now, it's mainly just about getting the overall layout right? This is going to be our coaching. You want to make sure you're selecting your offer or you could add your product in here as well, so you don't necessarily have to go through your actual GetResponse store. In this case, this is the offer that I want to be adding to this page. For whatever reason, my actual font was not existing on this page. I'm not sure why that happened, but if for whatever reason the font you've been using throughout your funnel is not there, you can just click on your texts and obviously in this case, it's there but if it wasn't, you can go to add new font and it'll allow you to select from other fonts. But again, we want to make sure everything on this page makes sense with what they've just seen. That comes down to fonts and colors and everything else as well, so I would go in and delete elements like this. This is also an image. I quite like this because it gives them a bit of an idea of where they're going through, so they're just ordered something. This is a one time offer and then the next thing is an order confirmation, but it's an image and it doesn't work with my color scheme. I would maybe go in and just delete that, and you can replace this with something a little bit different that you can actually create inside of GetResponse. I would just go in and make that. It's just the less sexy version of what they have. Just so you know, that you can create these kind of elements inside of GetResponse and making sure that they are still branded. This is huge, this is probably too big for what I would want it to be, because again, you want to be sticking with the font sizes that people had previously seen on the pages that they just came from, and same with these colors schemes. But for now, I don't want to tweak with it too much. Really, the thing that I'm interested in is this, which is the live coaching session. This will take them through to their confirmation page. These are some things that you don't necessarily want to be messing with too much, because they're usually coded in, in terms of what needs to happen in a logical sequence of events. But you can still customize this page to make it look really nice and branded and of course, you're going to make sure everything looks good on mobile. That looks pretty good. Obviously that's a little bit messed up now, but I'm not going to worry about that too much for now. I would go over to the next step, and I might actually make this onetime offer. This is super, not as critical as it has been up until this point because again, people can't really share this page because it's super customized to an upsell. They're only going to see if they've just purchased something, so this is more just doing your due diligence and making sure you're taking all the right boxes, but it's not as critical. On the previous page where you saw the countdown timer as well, make sure that that is the countdown you want. If you're only giving people an hour to make their decision or 10 minutes, ideally you want it to be really quick because it's an upsell. They've just purchased something, that payment is still pending in their account within Stripe or within PayPal. You really want that to be very quick, so you only want that to be a couple minutes, five minutes, 10 minutes to decide and you want to give them all the information they need on that page to decide. I would have made that page a little bit longer, but again, its quick decision time, so you needs to make it short, sharp, shiny. People have already purchased, they're already a customer, they're already much more likely to give you their money again, especially if you're presenting them with an offer that as a no brainer. In this case, these guys have watched my free training, decided they want to be a social media manager, they've just purchased a course on how to be social media manager and now I'm offering them a handheld session to basically allow them to get their first client and give them my feedback on everything they create as their presence as a social media manager. It is a no brainer and that should have a really high conversion rate so you don't want to be giving them too much information on that page. It should just be enough to basically allow someone to go, yeah, this makes perfect sense with what I've just bought. The other thing that you want to do, you want to make sure everything looks good. You can add up to two more upsell pages. Again, it'll just keep getting stacked onto their account as they purchase and then their confirmation page will have all the details of all the things they've purchased and same with the confirmation email that they get. It will be specific to what they bought. If they bought this and this and another offer that you might present them with, then all of that will be within their confirmation email there. But it'll essentially be one completed order just with a different value amount based on what they've purchased. But then, once again you need to actually deliver the thing that you have just made them purchase. You would go over to Automations and you could add this to your order completed automation as well as your PayPal one, so you would go in and create the upsell page in PayPal as well, and you would then add that to your respective automations or you could just create a new workflow but the actual steps will be pretty much the same. It's just if you're adding it to an existing automation, you want to make sure that you putting it in a logical place. But in this case, this would just be upsell tagging so it will happen when somebody makes a purchase. I would make this API my store and when they purchased my upsell, any amount, because it'll pretty much pay the same and I would then, obviously, this is not doesn't look configured, it'll just say whenever a purchase is made from Living to Roam, so you have to click into it to make sure that this is all correct and you would want to add a tag. Obviously, you would make this customized, so you'd say upsell purchased or coaching purchased. I've now tagged them and I would want to then email them to say, ''Hey, thanks for purchasing your coaching session. Once you're finished with the course and you're ready for our session, I want you to fill out this form,'' and I would send them a Google Form and then I would get them to book in for our session. But that's very coaching specific, so it really depends on what your upsell is. Your upsell might be another digital product, it might be physical product, it might be a service that you're providing as an agency, it could be so many different things, but you just need to make sure you're actually sending them the details of how they can access the thing they've just purchased.
45. Set Up Your Tripwire: Really there are actually only a couple of steps you need to take in order to create an additional tripwire offer before presenting your core offer to your audience. Remember that a tripwire needs to come right after somebody has just sign up for your free offer. Because it is that tripwire, think about it in a visual sense, it's just that extra step that somebody needs to take from just being a subscriber and just being a lead to becoming a customer really quickly. It's a no brainer, very quick, low ticket offer that you need somebody to take action straightaway and hopefully reduce the friction to them becoming a customer. Like I've been saying, I wouldn't actually add this into my own funnel just because my core offer in this scenario was only $37, which is too low to really present an additional low ticket offer just before it. But I do want to give you guys the skills and the knowledge of how to add this in for your own offers because eventually you'll be building funnels where your core offer is a couple of 100, maybe a couple of $1,000, in which case having the ability to feed in a low ticket offer before presenting that high-end offer is going to become really valuable for you. It just needs to sit somewhere between this and this. But effectively, everything here is going to stay the same. We're just going to make some changes because at this time, your sign-up page redirects to that default thank-you page. That is really the only thing that we need to change. We need to change that to redirecting to your tripwire page, so we need to create that and then also might need to change something in the very first email because the URL to direct them to my free training, there is no longer going to exist, but that's just for me. I'm going to talk you through the steps of how I have done this. I have done this separately myself just because I don't want to be taking you guys through the same stuff over and over again. You already have the skills to create this, you just need to know the actual steps. All I did is I created a quick sales funnel, so if you'll remember, you just go to Create funnel and you want to be selling a product, and you're going to be doing a quick sales funnel. That's all I did there, and I've just called it my Tripwire Funnel, and I created a product. Remember that you can add your products just up here within your stores and products, so make sure that you add in a tripwire product, so mine is just $9. It would be a social media managers guide, so something that's really, really aligned with my free training and also my ultimate paid products. I have connected my payment method and I created a demo sales page and order form because I just need this URL to be able to link to my original funnel. You also want to make sure that you are creating a confirmation page and you're customizing these confirmation and abandoned order emails just like you would with your other funnel. You probably already have this steps down by this point, but you just want to make sure that you're taking all those boxes and you're going in and customizing everything. This is also why you want to make sure you're testing every single funnel you create, you're testing it from a customer perspective. When you receive these emails, you would know that something's not right and you might have missed a step. Make sure that once you do create all this stuff that you are testing it. But really all we need is this sales page here. All I did is it's going to say thanks for signing up, check your inbox for access to your free training because this is now going to be the page they're going to see as soon as they've signed up. This is basically where I would introduce my low ticket offer and I would give them just a 10-minute countdown probably to say, "You know, you've only got 10 minutes to take advantage of this also $9 offer." Or alternatively you can make it one day, so you can make it a 24-hour countdown, which would then allow you to also send them some emails, and give them 12 hours to go until this offer is not going to be available anymore. To be honest, I don't really want to be doing that for $9 offer, but I have seen some people stretch that out. I think the urgency on this works a lot better. Somebody has just sign up for your free training, you're saying, "Hey, go watch the free training in your email inbox, that's where you're going to have access to it, and in the meantime, here's this awesome thing you can buy, you've only got 10 minutes to decide." Keep in mind that, yes, you're not going to get everybody to buy this because probably there's going to be a lot of people who are going to be just interested in the free training, but the people who do buy this are probably going to be the ones that actually end up buying all your other stuff as well. Because they're quite keen, they're really interested, and it's just an extra bit of money in your pocket as well. If I was going to click on "Get yours now" it's going to take me to the order form. Again, I haven't really customized this too much. It's mainly just so I know that this is there and people can check out. But the main thing that I need here is just this URL, which is going to be my dummy URL, which is just social-ebook.gr8.com/offer_page, so that I can use that to redirect my actual primary sales funnel here and redirect the people who sign up for this free offer to that page. I'm going to go and jump in here, and I'm going to go to the next step. On this page, you'll remember if you scroll down, it'll say, what is this subscription setting? What is somebody going to see when they sign up through this page? We've always had it as default thank-you page. But in this case, what I want to do is I want to say go to a custom thank-you page, and then I'm going to put in my URL here. I'm going to publish that. Now when somebody signs up for my free training, they're going to get an email, they're still going to get this email saying here's your free training, but they're going to end up on that tripwire page. That's going to give them an option to check out with that paid offer there. Really that's the main part of what you want to be doing. But now the problem becomes the fact that I personally had my free training on that thank-you page, which doesn't actually exist anymore. Because it's attached to this landing page, so it doesn't actually have a URL of its own outside of this funnel. I need to go in and actually recreate that page so that I can link to it in this email. Because at this point, if I was going to open this up and try and go to this training, it's going to take me just to a sales page because it doesn't know which page I'm talking about, and this doesn't actually exist anymore. I need to make sure that this email is going to redirect them to a landing page that has my free training on it, and this is very particular to the way I have set this app. If you guys have an e-book download or something like that, then you won't need to be doing this because really all you'll need is just a URL for that e-book, so that's just going to be delivered to them through email and that's not going to change. But for me that thank-you page actually had my free training delivered on it, so I need to make sure I'm going in and recreating that. That's exactly what I did, all I did was go to landing pages and I just created a new landing page that all it is is basically a neater copy of my original thank-you page. It just doesn't have any of that, thank you for signing up stuff at the top because they would have received that on the tripwire page. It just has my video there, and then at the bottom it says, Hey, once you finish watching your training, click here to "Learn More", and that's going to take them to the sales page of my original funnel where my core offer is going to be presented. In this builder, just ignore this thank-you page because obviously they're never going to get to that. It's just because technically within GetResponse, you never are going to be able to just build one landing page, just one solo page, it always has a thank-you page attached to it for some reason. Just make sure that you're using this primary page because then you can link to this URL. In my next step, that's where I actually decided on what my URL is going to be, and that's what I need to grab in order to customize that email. I just made it social-training instead of social media training, and here's what it looks like live. I'm just going to grab my URL for this, and in this case, I will just go back into the original email and then add that link to my new free training delivery page inside of this email. That's really all it takes to put together a tripwire. It's really not all that complicated, the only other thing is that you need to make sure that you have a way to actually deliver the tripwire. I will just change this over from this thank-you page, which doesn't exist anymore, to just that one of landing page, and that's it. The only thing that you also want to keep an eye on is your automation. Because this is a separate funnel for your tripwire, it has automatically created some automations for me for my abandoned order and my order completed. Abandoned order all you need to worry about there is your actual abandoned order email, and then with your order completed you just want to make sure that you are adding something to you that that's going to actually deliver your tripwire. You can either change this message or add an additional message, add any tags that you want to add in order to actually customize your contacts and know what's happening with your contacts. But the important thing to note here is that I changed stores, so I created a separate store for my tripwire funnel. The reason for this is because if you remember from our original order completed sequence, which was the primary funnel workflow, it has a billing status for this particular store, changes to succeeded, and then contacts from this funnel get all of these things and it also removes them from this sequence. That's a little bit problematic if you are not changing stores because that would mean that this would actually be the same function. It would just be whenever the billing for that store changes to succeeded, it would filter it out by this particular funnel, so it would actually stop. But on this end of it, technically the tripwire contacts are still present in this list because that's where they came from, that's where they sign up. Technically this is where they received their freebie and they're still going to be in this list, and then they're also going to be in the tripwire because they've just purchased from there. That means that if you have the same store for both funnels, and technically it can mess with your automation. It might be best to just separate these out into different stores and put your tripwire product in a separate store inside of GetResponse. That's just something to make your life a little bit easier there. I know it can sound a little bit complicated, but really all you've done is you have directed this thank-you page to go to your new tripwire, and then people from this funnel are going to continue going through the funnel as they were previously. They're still going to get this free training delivered, they're still going to get all of these emails, they're going to still be redirected to this core offer page, they're still going to get the upsell of your profit maximizer if you want to. Everything else stays the same, it just means that it gives you one last opportunity to try and convert your visitors into customers, especially if you're not getting the conversion rate you want from your core offer. If you're sensing that there's a little bit of friction there, then you might want to try and add a low ticket offer to this funnel. But I know that sometimes people just don't want to mess with the URLs, mess with their automations, mess with all their emails. You can get really complicated if you try and go in and recreate everything from scratch so that you can add your tripwire into your original core offer page or something like that. It can get really messy if you mess with the structure of your funnel. This is the easiest way that I've found where you can seamlessly add in a tripwire and it only takes a couple of minutes to set everything up using the skills that you already have from previous lessons.
46. Live Chat and Social Proof Overview: In these next few lessons, I'm going to introduce you to live chat systems like the one on the bottom right-hand corner of my screen here. Then also this proof pop up that's coming up on the bottom left-hand side of my screen here on my sales page because this will really elevate your customers experience by allowing them to get that social proof in real time to see that people are purchasing your stuff and somebody just purchased something seven hours ago or six hours ago or yesterday. That's such an awesome and powerful thing. Likewise, with the chat system, people can just jump in and ask you questions right as they have them on your sales page which can really, really help you to overcome customer objections as they're happening, as they're reading your stuff on your sales pages. Hopefully, you'll find this helpful. What I've gone and done is completely uninstalled all of my tracking codes and integrations with these two tools on the sales page so that we can learn how to do it from scratch. But just know that this is what it's going to look like as a final result once it's live on your sales pages and things are actually happening and it's tracking things for you. I will see you in the next lesson.
47. Get Personal With a Live Chat: I found that especially with my older clients, they just want people to send them e-mails or even more crazy sometimes is the fact that people think that people are actually going to physically pick up the phone and ask them questions. Yes, some people definitely will, especially older generations will physically pick up that phone and call them. But you need to be able to cater to the needs of your audience with this stuff. Sadly, anyone under the age of 40 is a little bit of a lazy anti-social bugger like me. Picking up a phone and talking to a real human is sometimes a really big no no. Now although we're not willing to pick up the phone, we do want an answer straight away to all of our questions. We're quite demanding like that. Often, the best way to do this is through a chat system because it allows people to ask really quick questions, get quick answers, and get them straight through to their Facebook Messenger. Remember that a confused mind will almost always say no. Some people just need to feel supported through their purchasing decision. Something as simple as adding a really quick chat to your page can really help to increase your conversion rates because people who would otherwise just get really confused about what's on your sales page and maybe just exit and never come back again, will jump on the chat and ask you to reassure them that this is the right decision for them to make. Now I know systems can seem quite scary if you're not tech savvy and it's absolutely not a requirement for you to have this setup on your pages, but it can be really helpful not just for you to answer questions for potential customers, but also to get some ideas of where people are getting stuck. Let's jump into ManyChat and create a free account so we can implement this within our funnel. Head on over to manychat.com or use the link inside of your guide and just sign up for a free account and make sure you're linking your ManyChat to your Facebook business page, so you do need to have a Facebook business page in order for this to work. Make sure to set that up if you haven't already and then you just need to make sure you're authorizing ManyChat to communicate on behalf of your page. But essentially it's going to be you communicating through ManyChat, but it just needs to have that authorized and also so you can actually communicate with your customers inside of Facebook, or you can jump on over to a LiveChat in this dashboard and it's going to have all your conversations there as well. But really what we're interested in at this stage is growth tools and we want to set up a LiveChat like this. If you were going to go over to new growth tool, you have so many other amazing features inside of ManyChat that you can leverage both on the free and paid tools. Go ahead and check it out. They have amazing resources for how to use their tools and how to get the most out of this amazing software. But really all we want to do at this stage is just set up a LiveChat, which is going to be down here, the customer chat, and I'm just going to leave it at growth tool number 9 and you can edit this message at this stage it says, thank you for subscribing. The reason for that is because ManyChat is primarily used for people to use it as a way to communicate with their chat subscribers. Just like you have e-mail marketing subscribers where people get an e-mail saying you have a new blog post or a new video or a new free offer, you can use the same thing on Facebook Messenger with a tool like ManyChat where you can send out regular updates to people who have subscribed to receive your updates through messenger. These have really, really good open rates, which is why a lot of marketers have really explored this option of sending business advertise people through Facebook Messenger because they're much more likely to read it than they are e-mails. But for now we just want to have the LiveChat option, in which case I would go in and replace this message and then go through to set up. But I'm actually going to be doing this with my existing LiveChat. I just wanted to show you what it looks like when you first create it. But really all you want to be going through is to some customization to make sure that people have a good user experience. This is my existing LiveChat. If I'm going to edit it, this message here is something that can be totally customized. Now you can use personalization here just like you would in e-mails, and it will basically take the person's first name from their Facebook connection. Mine would say, "Hey there Maggie" which is amazing, but if they choose to chat with you as a guest, this can get a bit awkward because it'll say, "Hey, there guest 745" and that's not a good user experience, which is why I choose to leave the personalization out for the LiveChat function. You can go in and if you have the paid account, so you can do more extensive things like get people to send you an e-mail or send an SMS and do all these amazing things. But on the free version, none of that is available yet. It's perfectly fine to just have a message saying, "Hey, happy you're interested. Is there something I can help you with?" Now for me, I also have an additional step that is just a time zone reminder for my customers because most, if not all of the people who are going to be visiting this page for me are on the other side of the world, so I'm not usually live to actually chat with them. Again, that's perfectly fine if they have linked their Facebook account so I can message them tomorrow and they'll still receive that message. But if they're chatting with me as a guest and I'm not there live to chat with them, then it's going to close off that chat. I want to make sure they have the ability to send me an e-mail. If they have questions outside of the time where I'm available. All I would do is I would just publish that. It's already been published, and we want to make sure we're actually going through to setup. This is where you can customize things like how does it look? I've got my branded color there and the initial message that people see, so you can go up here to preview and this is what people are going to see when they first get the popup. You can change the greeting that they see and this is where you want to determine where it's going to appear on your side. If I was going to put this on my website, but maybe I don't want it to be on my privacy page or my disclosures page or whatever page that I don't want to show this on and then I would just put the code on my entire website and I would say "Showed on every page except for these pages." Now in this case, I want to make sure that this particular chart is only going to go on my sales page that's the only place I want to show it, also because the message of setup is very specific to that sales page, so that's the only page actually I want to be showing it on. Then I would go into install JavaScript snippet. Make sure that you're authorizing whatever sign you are using to actually set up your landing pages and then you would just go to "Install ManyChat snippet." This is a little bit of a problem with get response because it doesn't actually allow you to put in code into the head of your source code. If that's gibberish, if you've never really dealt with installing code on your site, I'm going to show you what I mean by that. But basically it's telling you where to place this bit of code and it's actually impossible to do this inside or get response at the time of recording. Again, they might change this, but for the time being, we can only install codes, new bits inside of the body of the page. All that means is that, if this code was in the head of the page code. It would be the first thing to load when somebody gets onto that page so that chat would pop up straightaway. But because get responses now allow that, it means that this code is not going to fire and that chat is not going to appear until everything on that sales page has loaded, which is not usually too much of an issue. But if somebody has a really slow internet connection, it does mean that that chart is just going to take a little while to appear. But all we wanted to do is we're going to copy this code and then I'm going to jump into my get response funnel and I want to be putting this on my sales page here, and then I want to make sure that I'm grabbing my HTML block here. Now it will tell you this is just a custom code placeholder, so it doesn't actually appear on the page itself. It just means that this code is going to be loaded when the page loads. This is JavaScript, it's in script tags already. I'm happy with that. I want to save that and you can make it as small as you want. It just needs to sit somewhere on the page. Again, it doesn't appear, no one is going to see this. It's just code that's going to be floating around and we want to make sure we're doing this for both of our variant because we don't know which one's going to appear and we want both of them to have the chatbot in place and with our mobile view, it doesn't really matter again because it's not going to be actually visible and now it will save or publish that. Now if I load the page and then my chatbot should appear. It's there, if I was going to click on this, it's going to say, "Hey, can I help you with anything?" Then I can continue as myself because my computer knows that this is my Facebook account or I can continue as guest. If I just continue as guest for now, and that message is going to come up and it's going to remind me of the time zone, and then I can start chatting and then Living to Roam in this case is going to see it in their account, and going to be able to reply to me in live time in this case. If I minimize that and refresh this page, that conversation's still going to be there for me. If I continue chatting, it's still going to be there for me for the next 24 hours and after that, it's going to disappear because I've checked out as guest. If I had made the decision to check out as me, so If I was going to end this chat and I said "Continue as Maggie," then I can continue chatting, so you can see that I've texted some stuff out with myself in the past. I've sent myself gifts and I can continue to chat with myself as long as I want because I'm actually logged in and I'm going to be able to see that inside of my own personal Facebook Messenger account. Inside of ManyChat, you can configure a few additional things. In terms of visibility, you can decide to show this chat only on mobile, only in desktop and then you can also decide whether you actually want the chat window to open straight away, or you just want that bubble there in case somebody wants to chat or you can say, hey, after ten seconds, have this bubble there always, but after 10 seconds, open up this chat window and then hide it. But just opening this up automatically for the person on the page makes them aware there I'm there to answer questions in case they have any. You can also decide to have this chat on your order page if you want to as well. You don't just have to have it under sales page. You can have it all in that order page as well. If anyone has any questions while they're checking out, you can still be there to help answer these questions for them. Please bear in mind that you do not have to be there 24/7 to answer questions or hire someone to be there 24/7 to answer questions, you're probably not going to get many questions. You might get one every once and a while. This is more just for people to have a peace of mind that if they do you have any queries they can ask you, but whether you answer them in real time or in a day, it doesn't really matter. It's just an extra bit of that professionalism that makes them feel supported and allows them to put their trust in you. At the very bottom here, you've also got a check button, so I can put in my URL and it's going to start a widget check chances are, this is going to glitch because we haven't actually put it in the head code. Keep that in mind, if this says it's not working, it's because the JavaScript is not actually installed where it wants it to be installed, which we can't do inside a get response. Everything is still working. It just means that technically that code is not firing as quickly as many chat wants it to fire, but that's it. That's how simple it is to set up a chat system on your sales page.
48. Leverage Social Proof in Real Time: Social proof can do wonders for your conversion rates, and showing these in real time is even better. Now there are lots of different tools and types of software that can do this for you. But the cheapest ones that I found are the following two: ProveSource has a pricing plan that's free if you have less than 1,000 visitors per month. So that's what I'm going to be using here to show you guys how these work. But then if you plan on using this type of feature for your sales funnel permanently and having more than 1,000 visitors go to your pages every month, then I would actually recommend TrustPulse because on the paid plans, it is a lot cheaper and it has an annual subscription plan that's much cheaper than ProveSource or anything else. There are other tools that do this, but once again, if you're going to have less traffic going to your pages, you can do ProveSource for free. If you have more than 1,000 people going to your pages every month and you would need to then upgrade ProveSource, TrustPulse is going to end up being cheaper for you. But the functionality is pretty much the same with any of these proof pop-ups. As you can see from these two screenshot, they look more or less the same, they're quite similar. But essentially all they do is they track customer activity, and when someone signs up for your free offer or purchases a product, it will then display this notification on the landing page or the sales page to let people know that other people are also taking action on these pages, which makes them more likely to take that action. As we talked about before, people don't actually care if it's a friend or a complete stranger using or recommending something to them. They just care that there are other humans out there in the world who are using the thing that they're considering. Let's now go ahead and see how we can set something like this up for our own sales funnel. With ProveSource on the free plan, you have 1,000 visits per month and you can only have one active notification at a time. Now, I actually suggest that you make two notifications anyway, because it will actually start tracking both as soon as you make them, but just make one live at a time. The way that I did this is I created my free training notification first and I put that on my free training page. Then I had a pop-up saying, this person signed up for the free training. That's not the best use of these pop-ups for your free offer. The best use of them is for your paid offer, because you want to be showing people that somebody's just purchased the thing that you're getting them to purchase. It's not that much of a stretch to get people to sign up for a free training. But this makes it a really handy thing for you to just be able to test out your skills, especially when you don't have that many people going through your funnel yet. It means that you can install this, make sure that everything is working and you can test out these skills. You can help improve your conversion rates, even though it's just for the free training, people still like seeing that other people are signing up for a free training. It did actually really wildly increase my conversion rates the couple of days that I ran this. You can still do it for the free offer, and then once you have enough conversions on your paid offers, you can then switch this on and switch this one off. Because it is best if there's at least a couple of people who have paid for your paid offer before you switch this on. Otherwise, it's just going to be a one pop-up notification and then nothing else, and that defeats the whole purpose of social proof. So you want to make sure that you have maybe at least three or four conversions and purchases before switching on this second notification, in which case you can then switch this one off. But just by creating them both and setting up your tracking, it means that when you do have those purchases coming through and once you're ready to switch this one on, it'll be ready because it will have gathered all that data. Whereas if you don't have this ready and you don't have this tracking, that means that you're missing out on actually tracking your customers. So in the future, you're not going to be able to switch anything on because it's going to be blank, it's going to have no data. You want to make sure you're setting up both right at the very beginning for that reason. We're just going to go through and take a look at how that's done. You're just going to set up a new notification. You have a lot of different ways that you can do this here. You can do reviews, you can do social share counters, you can just do, how many people are on your website currently. But the one we're interested in is the actions taken by the people on our website. You don't actually have any of these other product purchases, what you can do is you can make it a form submission. Anytime somebody submits your payment order form, that's going to trigger that. Then we want to make sure that we are capturing both of our order form pages, so how we'd go in and track anything that contains order_form.html on my website, and that will actually track anyone who has purchased this core offer from my Stripe and my PayPal order form. Because if I was going to put in the whole URL, then they're slightly different at the beginning because my Stripe and my PayPal order forms, if I was going to use both funnels and both payment processors, they're slightly different. So this will capture both of them. I'm going to go and click "Next", and then I want to be displaying this on my signup.livingtoroam.com offer page. Then you can add additional URLs. But really that's the only one that I want in there, just that one, where not to display. Once again, this is just a case of if you wanted to say, hey, display it on all pages, and then you can just say, but don't display it on this particular page. But in this case I don't have to worry about that. I want to make sure mine says purchase, so you can see, it's got the preview there. So purchased, successful. I can't type today. Then you obviously at this point, it's just got their initials. You can go over to this icon website and get a free icon there and pop it in here. So it'll have a nice little icon. I'm not going to do that for now, but if you want to change the image there, you can do that. I don't particularly want to be messing with these also because I believe they're upgraded features. I'm happy with just having a really simple pop up there. This is where you can make an alternative if it doesn't pick up the person's name for whatever reason. In this case, it would because it's for a purchase. But if you're doing this for a free opt-in, sometimes people put in funny names or they put in a blank name or an underscore and it'll pick it up saying, we don't have a name to show there. So you could put in alternative so you could say someone awesome. It would then say someone awesome purchased this whatever or signed up for this free offer. But otherwise, if you leave that blank, it'll just say someone did this thing that you want to be showing that they didn't. It's best to just keep it in the bottom left. That's the standard, and you can make that nice and branded. Now that's probably too light for people to actually be able to see. So I would go slightly darker than my actual branded color. You can then decide if you want people to be able to actually exit out of the notifications so they can either have the ability to turn them off or not. Then do you want it to be clickable? In this case, I don't because I just want it to be a bit of a proof point. I don't actually want it to go to the order form, and this is where after 24 hours in this case, it'll just say recently. At this point, it's tracking the exact time, but a day from now, it'll just say, Mike from London, UK recently purchased the successful social media management bundle, because you don't want it to say four days or six days, it takes away from that proof point if the timing is a little bit too long. But even if you have six or seven of these and they all just say recently, even if it happened months ago, that's still plays on people's minds. I would keep that at 24 hours or 48 hours maybe even, up to 48 hours, I would say show the time after that, it starts to lose its power and then it'll just say recently. None of these are available to me on the free plan and that's fine. This is what I would call my purchase conversion. I'll call it test. Then we just want to go over to "Install" and grab the HTML code, copy this code and do pretty much exactly what we did with our ManyChat code. So I would just go into my actual sales page because that's where we want to display the code, and I will just place this right after my ManyChat code. Again, we want to make sure we're putting it on both variants. In this case, we also want it to be on the order form because that's where it's going to be actually tracking that people are purchasing. Any page where this is going to need to actually be tracking the data and the events that are happening, you need to put it on that page as well. I will just save this and I would also want to make sure I'm going over to my PayPal order form so that I'm tracking it on both. But then now I should be able to refresh this page. I have my pop-up there because I still have my previous pop-up activated that's actually tracked previous events for me. So these obviously happened more than 24 hours ago, but it's already tracking that code and it's displaying it because I've just integrated it onto the page. That's all it takes and I would just go in and replicate those steps for the free training. Then making sure that I'm putting that same code on the free training page. This is what it looks like with the little icons in place. Once you have your little customer icon, you've uploaded that there, I've just added those in. But otherwise, everything we just did is exactly what I've done for my own sales funnel. Then yeah, you can easily switch between these two. If you have enough events to show the people opting in for your free training, then once these will gather some additional events for you, you'll be able to turn it on and it'll automatically start displaying the past purchases for you.
49. Get to Know Google Tag Manager: You remember in an earlier lesson we talked about some basic tracking that you can do inside of GetResponse by connecting your Facebook Pixel and your Google Analytics account. But that's pretty much all you can do at this stage. Again, this will likely change. These guys are still continuously innovating in terms of what integrations and API connections they allow. But for the time being, the best way to do any advanced integrations is through the Google Tag Manager. So I'm going to be showing you how to set that up. But then when you actually go inside of each individual landing page, the way that you actually use the Google Tag Manager within your landing pages is inside of the settings of a particular landing page. You go down to analytics and re-marketing. Then in where it says, select a platform, you have Facebook Pixel, you have Google Analytics, you have all of these other integrations, but you also have the Google Tag Manager. All you have to do is put in the Google Tag Manager ID. You could click on this page and it'll actually tell you exactly how to go about setting up a Google Tag Manager account and how to actually put things in there, so that you can start tracking some more advanced things, rather than just tagging Facebook and Google Analytics, you'll be able to track basically anything that requires a tracking pixel. I'm going to link you guys through this page as well. But for now heading on over to Google Tag Manager. All you want to do is you want to link your Google Tag Manager with your Gmail account and then click on create a new account. I will just click and create a test account. I'd put in Australia. Not Austria. That's important. Yeah, why not? I want to share my data, help them out. I would just say, I don't have a URL at this stage because you might not have a website and that's fine. I will just name it something. Then I would say this is going to be for use on web. Yes, I agree to everything. This is going to pop up with a code to install your Google Tag Manager. You don't actually need any of this. All you need is this little number over here. All I'm going to do is I'm going to copy this over, but this is where I would place that code. This means that any landing page inside of GetResponse that has this Google Tag Manager ID inside of my analytics and re-marketing is going to allow me to track anything that I put inside of my Tag Manager account. So if I go over to tags, I can set up just about anything in here, Pinterest tags, LinkedIn tags, Twitter. I can go into New and I would make this, let's say my Pinterest tag. Then I would go into Tag Configuration. I can scroll through these to find the right one, or I can search here. I'll say Pinterest tag. Now I would want to make sure I'm going into my Pinterest and going into the business section to find my Tag ID. But for the time being, let's just make one up. That's fine. It's just the base code. I don't really want to be attaching it to any events. It's going to allow me to put in enhance matching. I want to do that. If I go into the advanced settings, I only really want it to fire once per event. The reason that this is quite critical is if you are putting in any tags that need to fire in a particular sequence, then this is where you can configure that. For example, if I had this tag, but then there was a particular Pinterest tag that would only need to fire when somebody makes a purchase, that needs to come after this base tag, then I would say fire a particular tag right after this one fires, and make sure that that is the sequence of how things are loading because this is the one that needs to fire before this next one. But I would need to make sure that that one is created first before messing with this. But 99 percent of the time, you're not going to have to worry about any of the advanced settings. You just want to make sure you're putting in your Tag ID for the platform that you are using here. Then in terms of the triggers, you would probably just say, "Hey, trigger this to fire on all pages." Then I would save that. So in this case, it's actually not letting me save it because it recognizes that that is not a real Pinterest tag. But you get the point. That's how you would go in and add in all of your tags. Then you would want to make sure that every time you make a change to your Google Tag Manager, you're hitting submit. Because until you hit submit, it's not actually going to make the changes. It's going to say you've had 1, or 2, or 10 workspace changes, but you haven't actually submitted them. So you need to make sure that every time you're making changes to a live Google Tag Manager account, you're hitting submit. Then it will actually allow you to track everything correctly through GetResponse. Let's just jump into my live Tag Manager here, so I can show you what that looks like. I head on over to tags. You'll see that inside of my Google Tag Manager is where I have all of these tracking tags. So that's where I'm tracking my Hotjar, which we'll talk about in a little bit. I'm actually tracking my Facebook Pixel through here and my Google Analytics because I'm not just using it for get response. I'm also using it on my own website. I'm also using this for LinkedIn and Pinterest. So I've got everything in here. Most of these are firing on all pages. But then this one, for example, my Facebook Event, is only firing when somebody actually purchases. So this is why Google Tag Manager is really great because it allows you to get really nerdy and specific with when you actually want things to fire. If tagging and tracking your user behaviors is a little bit out of your depth at this stage, don't worry about it too much if you just want to go with the real basic setup within GetResponse. You just have your Facebook Pixel and your Google Analytics linked automatically through the platform, that's perfectly fine. This is much more advanced stuff that you don't have to worry about at this stage while you're still testing stuff out. But just know that that's an option for you if you decide that you want to track some more things and GetResponse doesn't seem to have that integration inside of their native platform,and you want to be utilizing this within the actual landing page settings, then just know that you can do that through the Google Tag Manager.
50. Heatmaps - Track User Behaviour : Hotjar will allow you to go an extra nerdy step beyond what is really expected of you at this stage but I do want to make you aware of it because it can be so powerful for analyzing user data and behaviors and how people move through your landing pages because otherwise you'll sometimes feel like you're just guessing as to what's working and what isn't, and how people are experiencing this stuff you're putting out there, and there are a lot of other tools in the market. Crazy Egg also has a heat mapping system, but Hotjar has a really good free function that you guys can set up and it's also very easy for you to set up your tracking. That is the reason that I recommend it, and we're going to jump in just to see exactly how it works but I'm going to link you to the page in your cards so you can check it out, and then once you actually log in and set up your tracking through your Google Tag Manager, it's going to prompt you to setup your tracking, so it's going to link everything for you automatically and all you have to do is make sure that your Google Tag Manager code is actually on your landing pages in order to be able to track it in here, and then you can go into your new heatmap and go through the steps to set up a tracking for that particular URL, but as long as the actual Google Tag Manager code is on that URL you're going to be able to create a heatmap. I've done that for my free training landing page here. I didn't do it from the very beginning, I literally just did it a couple of days ago because I just thought of how awesome this would be for you guys to learn if you want to get extra nerdy, so it has only had 41 people look at it. It's not a huge amount, but it's still great to be able to see how powerful these things are. We're going to go into view heatmap, and you can see there I've had 32 people on desktop, none on tablet, and nine on phones. I can see where people have clicked, which is more relevant for desktop and I can see where people are actually moving through the page and how many clicks people have made in that section on the page. Bear in mind anything with numbers on it is going to always have asterisks because it assumes it's credit card information for some reason. Any time there's numbers on your page, it's just going to be blurred out. But otherwise, here you can see that people are clicking on this, which is what I want. Some people are also clicking over here. People were clicking on this button down here, so I'm happy with how people are progressing through the page, and then you can see how people are moving around. That's a little bit more hectic. This would be where the cursor was actually located, so not necessarily clicks, but where they were moving around the page and then how they were scrolling. This is really powerful because you will be able to see how many percent or what percent of your visitors actually reached the bottom of your sales page or your landing page. I can see that 100 percent of my visitors made it here, but then only 96 percent actually made it here by the time they got to the button and the sign up, it's only down to 90 percent. That's still all right, and this is exactly why I put my sign up form really high up on the page, is because if it was down here, I'd be looking at maybe 40 percent, less than 50 percent of people who would ever make it down here, which is why you want to make sure your most important information is up top. But having a tool like this and being able to actually analyze this based on real life visitors and real life behaviors from your users is a lot more logical and a lot more powerful than me just telling you that this is how it is, and you can do the same thing for your phone visitors. It's quite similar in terms of where people are coming to you, but only 66 percent of people on mobile reach this point. In that case, what I might want to do is just to remove this image and move this up a little bit higher and I can put that image just below it to make sure that more people are actually seeing the sign up form because obviously 66 percent is not that great. Then by the time they get to the bottom, again, we're looking at 55 percent, so it's actually better on mobile than on desktop, which is quite surprising. But that tells me that this image should actually probably be below the sign up form on mobile. Then if you want to go a step further and get super nerdy, you can actually see the recordings of how individual people were moving through your pages. You can see your landing pages and exit pages. This is also tracking my website at this stage because I set it up on my actual website as well, which is why it's cap 432 recordings in a couple of days instead of just the 40 that were on my free offer landing page. But I can then go in and actually play this and see how somebody was interacting with that page. You can see that they got on the page and they exited within 25 seconds as well. I'm going to assume they didn't actually fill out this form, but they pretty much went straight to the bottom. They didn't really read any of the stuff that's there, they just moved through and they probably exited. Yep. That's exactly what they did. That's how you know, "Okay, maybe I need to put a little bit more information at the bottom there because that's where they got too and then they maybe wanted more information from me and I just didn't give it to them at the bottom of that page." It is a little bit too, I would say, almost too nerdy to go through individual behavior flows, but just know that you have the recordings there and you don't have an unlimited number of recordings, especially in the free plan, it will tap out after you've reached your maximum, but it's still really good to see, especially people who took their time with it. This guy was only there for 25 seconds, this person was there for 12 seconds, and this person spent almost six minutes on this landing page. That's so much longer than I would ever expect anybody to spend on this page. What I would probably do in that case is I would organize these people by time or by duration and see the amount of people that actually spend the most on my landing pages, and these are my blog posts, so obviously those are going to have much longer durations. That person had it open for an hour, but these are now my landing pages, and then this person had it open for an hour and went to two pages so that I know that they actually signed up for my free offer and then they went to my thank you page and they went to my offer page as well. That's where I can really determine who's really engaging with my stuff and how are they moving through it and where are they pausing, because maybe I need to add some more information to the areas where they're actually dragging their attention to. Like I said, super nerdy. I do not I expect you guys to go to this level of detail unless you want to, but just know that it's possible for you to do this so that if you are getting stuck and you want some advice, don't just try and Google and try and find answers from people who have never engaged with your product, you can use tools like this to actually get the answers you're looking for from your users and from your audience and make adjustments accordingly.
51. Nail Your Negotiation Skills: Inevitably, at least a part of your sales process will happen through email or talk with people actually voicing their questions or concerns. This can be quite scary for people who aren't completely secure in their offer yet. When I was first selling my high ticket courses, I was asking for about 700 bucks from people for an offer that didn't actually exist yet at that stage. I was still creating it while I was pre-selling it. Of course, I wasn't super confident in it yet because it didn't actually exist and I didn't have anyone using it yet. I wanted to add in this lesson for those of you who might be facing a similar obstacle with your own sales and let you know the different ways that you can handle customer objections. One of the best books that you'll read on the topic of negotiation is Never Split The Difference, which is written by an ex-FBI negotiator, Chris Voss, who handled hostage situations. Basically, he's had to become a master of getting everything that he wants because as a hostage negotiator, he has to win. He can't exactly go up to a bank robber and say, "You've taken four people, let's just split the difference. You give me two, you keep two, and we'll call it a day." I mean, that would make him a pretty bad negotiator. He has since then taught this approach to negotiation to people from all over the world to teach them how to get exactly what they want out of any situation. Whether it's a job promotion, and dispute with your kid, over what restaurant to go to for dinner, or any other type of sales or negotiation situation. Just a few big takeaways for you from this book on negotiation. It's really important for you in any sales scenario, for you to understand what people actually really mean when they give you a certain objection as to why they can't purchase your offer. Because no is not the end of a negotiation, it's the beginning. Now, of course, there will always be people who just don't fit with your offer or your offer is not a good fit for them. It's important for you to know the difference. But in my experience, the people who actually take the time to reply to your automated emails to explain to you why they're not buying your offer are the ones who are ready to negotiate. Instead of listening to what they're actually saying or asking for, really try to understand why they're asking for it and take yourself completely out of it. The worst thing you can do as a marketer is to assume that it's them not you. Your stuff is perfect and the customers obviously nuts if they don't want to buy it. Don't do that. Just go and listen to them and put your own needs and opinions aside. For example, they might say, "It's just too expensive," which is just never legitimate excuse to be honest. All it means is that they don't really see the value in it. You need to improve the way that you're communicating just how much value they're going to receive from this offer if they buy it. Or they might say, "It's just not a good time right now." Maybe what they really mean when they say that is, this is not on the list of my 500 top priorities in my life right now. Maybe what that really means is that there's no urgency in your offer and you need to find a way to communicate the importance of them jumping on this deal and jumping on it right now, not in four months time. No matter what the objection is, it's just really important for them to feel hard by mirroring their language in your reply. For example, if somebody wrote to me to say my offer is too expensive, here's how I would reply. "I completely understand what you mean when you talk about this being too expensive for you right now. I was right where you are right now just a few years ago. My first course cost me $1,000 and that was all the money I had at the time. But I knew that if I didn't take that leap, I would always wonder what if. So I decided to make an investment in myself. The bottom line is that as an instructor, I know that the more people invest into something, the more dedication they put into completing the material and taking action at the end. In order for my students to be as successful as possible in building their careers, this is the price point I know is still affordable for people, but will make them value the material and see it as an investment in their future. Seeing as you've chosen to reach out today, I know there's a part of you that has that same 'what if' feeling that I once had. Can I just ask, what would I have to do to make this more accessible for you?" This is just an example. I have now positioned this offer as an absolute steal compared to the $1,000 that I paid for pretty much the same thing, actually a lesser course a few years ago and it reframed the conversation for them. They might then say that all they really need is a payment plan or a slight discount, both of which I'm really happy to offer them. But now, it seems like it's their idea instead of me just providing it for them or giving it to them straight away, which also makes them feel like they've won in that negotiation, even though it's something I was willing to give them anyway. It's like when you get locked into a gym membership for 12 months and you're going on a holiday for three weeks but then they tell you that normally, it's going to be $5 a week to suspend your membership. But today because you've been so awesome and such a valued member, they're going to waive that $5 fee. You walk out of there feeling like an absolute legend, even though it's something that they probably offer to everyone who goes there and tries to negotiate with them. It's because people love feeling like they're getting a good deal and they love feeling like their concerns are being heard. It's important for you to listen to your audience and use their objections as feedback for how to improve because for every one person who actually voices their objection via email or chat, there are 10, 20, maybe 50 others out there who have that same objection, but won't tell you about it. Listen to them and take these conversations and you can use them to make a list of frequently asked questions on your sales page that will then help convert more people without having to negotiate quite as much in the future. Either way, do not be scared of these types of conversations with potential customers, and remember to back yourself and your offer as well.
52. Zapier - Deliver Your Paid Offer: I'm going to introduce you to a more advanced way of connecting your different applications or software tools together, which is going to be through the likes of Zapier. Zapier, what it's entire function is, is to basically automate processes that don't normally talk to each other. So GetResponse is quite limited with the integrations that it has within its software. But that's where tool like Zapier can come in and it can say, "All right. When this happens inside of GetResponse, do this with my other tool." So its entire function is just to connect things and it has thousands and thousands and thousands of Zaps that you can create. You can see that these are just the ones that are recommended for me. It has 392 different Zaps that are recommended for me based on the tools that it knows that I use. They are almost unlimited. So you can search for any app. In this case, let's search for GetResponse, and then, it'll say, "These are the most popular GetResponse Zaps. " Again, we have a 149 of them. That's a 149 things that you can do with GetResponse and different apps on the Internet. So this is literally just as soon as there is a Google sheet row from something, create a new GetResponse contact, connect it with Facebook, connect it with PayPal, connect it with Calendly. You can do so much. But this is where it can come in really handy when you're delivering your paid offers through another tool. Hopefully, some of you guys will have really simple ways to deliver your paid offers that won't require this third party integration. But generally speaking, you will need a little bit of assistance in order to make sure that when somebody purchases something from GetResponse, you are actually able to automatically trigger another tool out there to deliver your paid offer or to your subscribers. So you don't have to manually go in and send someone something, because they might be on the other side of the world. So it might be, 2:00 AM your time when somebody purchases something. So you need everything to be nice and automated, and Zapier is going to help you do that. So for me, for example, my paid offer for my funnel is connected through Teachable and I have a three-step Zap that allows me to essentially say, when somebody buys this course through GetResponse, enroll them in a course in Teachable, and then tell GetResponse that that person has been enrolled in Teachable so that I know how to send them further instructions on how to login. This is just the most popular one here, but you can go through and find the right triggers, and then when this happens, then go in and do this. So when there is a new contact, because I have copied people from my original list to my student lists. So it's a new contact in that particular list. Then enroll them in a course, and I will then go in and create that ZAP. Now you do need to make sure you're connecting your accounts. In this case, I've already got my account connected there. But, if you didn't, it would prompt me to add a new account or create a new account, and it would walk me through the steps of making sure that I'm connecting GetResponse to Zapier, Teachable to Zapier and any other tools that you're using within Zapier to connect those to this account so that it knows that you have the right accounts connected. In this case, it would be this account, and then it would say, "which list do I actually want to be triggering this from?" Because it's not going to be every list that I want to trigger. I want it to be my Students Social Media Management. So when somebody is added to this particular list, then I want to trigger an enrollment in one of my courses. Then it'll ask you to test your trigger along the way every single time you're making a step so that it can actually check that you have some data in there. It's a good idea to actually have at least one contact in the list that you are using to trigger the sequence. Once again, you guys may not actually require this elaborate integration. But just know that it's entirely possible for you to create something like this. I'm going to show you what my actual live integration of this looks like. It's just this one down here where it says when somebody purchases, enroll them in a Teachable course and then update that contact in GetResponse. So this is my entire sequence. When somebody enrolls in the students of social media management list, because I've copied them into that list, enroll them in a course inside of this account. Then once they've been enrolled, then I want you to go in and actually update that contact within this account with this particular tag, which then triggers a separate sequence inside of GetResponse where I say, "Once this tag is applied to a contact, send them this email." This makes it really easy for me to jump into GetResponse and look at my contacts and make sure that this is all working. So just jumping into my live account here, I've put one of my own email addresses through as a student, and I've obviously put it through a lot of my other lists here just because it's a testing address. But what I really want to be looking for is the fact that it has this tag. The only way that it could have gotten this tag is through my Zapier integration and as soon as that tag would have been applied to this email address, I then have a GetResponse workflow that says, "Once there's a tag applied to this contact that says SS MM, enrolled, send them this email." So they're not going to receive this email until that tag has been applied so that I know that Zapier has done its job and it has sent them the thing that they've paid for. If that tag is not there, that means that something has gone wrong and they haven't received their paid offer. If that ever happens and you have any issues, you can contact Zapier customer support and see if there's something that has gone wrong. But usually if you just set everything up the way you need to set it up inside of GetResponse, and then if you do need a third party tool, like Zapier to make sure that it's all working, then I would just suggest that you go in and you put yourself through that automation, you test it out, you make sure that your paid offer is being delivered, that this tool is firing correctly and you're getting the emails you're supposed to get automatically and there's no manual labor required on your end. If you ever have any questions about how Zapier works, because really there are thousands and thousands and thousands of different integrations and things that you can do with it and filters that you can apply, there's so much that you can do with it. So I would recommend that you check them out on YouTube. They've got lots of really handy resources on how to use their tools, and they've also got a really great blog that allows you to get to know the tool a little bit more. But hopefully it saves your life in terms of delivering your paid offers, especially for those of you who are looking to deliver digital products. Because this can be a bit of a time-consuming process if you don't have a tool like Zapier to help you out. Also if you head on over to integrations and API within GetResponse, and you scroll down, these are my actives Zaps but it's got the Zap templates here. So you can see which ones they recommend for GetResponse specifically. You can just go in and configure this once your Zapier account is connected. So it's got everything that you need about Zapier here as well, right within your dashboard and GetResponse themselves have really good resources on this as well.
53. Send Newsletters and Test Subject Lines: Let's talk about what you're actually going to do with your subscribers once you have them. Presumably, people have gone through all of your automations. They have received their sales e-mails. Some of them will have purchasing from you, some of them haven't. Then what happens next? Something needs to happen in order for you to keep engaging with your subscribers. There are many reasons for this, but one of those is so that you can keep a really good reputation for your brand with e-mail providers because what can happen is if you get 2,000 people on your e-mail list and then you don't e-mail them again for another year and then you suddenly e-mail all of them at the same time. Maybe more than half won't remember who you are and they will not only unsubscribe all at the same time, but they will likely also mark you as spam because they don't know how you got there e-mail address because they haven't heard from you in a year. You want to make sure that you are regularly keeping in touch with your subscribers through regular newsletters. I would say at least once a month. Ideally, once a quarter is still acceptable, but anything longer than that is just a little bit too long for people to not hear from you because then when they do you get your amazing e-mails, they're just not going to know who you are. But you don't want to be e-mailing people for the sake of e-mailing, as in you have nothing valuable to say, but you're just e-mailing them once a week, twice a week just because you feel like you need to keep up that frequency. Absolutely, only e-mail people when there's a reason to because if your e-mails are not valuable, then your open rates are going to go down, your click rates are going to go down. Your unsubscribes are going to go up, and once again, that's going to damage your reputation. Make sure your e-mails are really good. You're providing lots of valuable content within your newsletters, but you are keeping in regular contact with your subscribers so that they know who you are and they know what value you have to provide. Also, so that the next time you pitch them, a new paid offer, that nurturing has been done. They feel like they know you a little bit more. You've provided them all this amazing value through your newsletters and your blog post, new videos that they're ready to buy from you the next time you have something to offer them. Within your get response account, you can just go up to "Create" and "Create Newsletter" and the actual setup of this builder is going to be exactly like it was within your automation messages. So it's going to be very familiar to you. You just need to make sure you're customizing the actual title of the message. Your subscribers won't see this. It's just so that you can keep on top of what is inside of your past newsletters in case you maybe want to use them as an example for a future one as well. In terms of your link to list, again, this is just going to affect some settings of the actual delivery message. It doesn't massively matter which list is linked to this, and you want to make sure you're from and reply to e-mail addresses are exactly how you want them. Then you want to make sure you are customizing your subject line. You can personalize it or add some emojis. Same with your preview text, you want to make sure you are adding that in, and it's punchy. Then in terms of your recipients, I do generally just recommend that you add in all of your lists. But you may want to segment this down to only sending these to people who are not currently receiving your auto responders. The reason for that is because if you have them in a sale sequence that's attached to a sales funnel and you want to make sure that their attention is on purchasing your pay to offer. You don't want to distract them away from that paid stuff into offering them your free organic content through your newsletter. I like to select all of my recipients, but make sure I'm segmenting them down to people who are not in automation. I'm going to show you how to create a segment like this in just a little bit. But just so you know that this is where you find it once you actually create this kind of segment. Right now we have the segments and all the lists combined that you want to make sure your deselecting all lists because you just want to be selecting the segment. It hasn't made a huge difference. I currently only have about 30 people in my automations, but that's still 30 people that I want to make sure are focused on myself sequence and are not going to be focusing on this particular newsletter. Then I would add them to receiving my newsletter. I don't want to exclude anymore contacts from receiving my message, but if I wanted to, this is where I could do that, and here's where I will go and design my message. Now, I already have templates because I have previous messages in this account because it's my live account. But if you didn't, you could start with any of their awesome pre-designed templates here. But because I have existing messages, I can just go in and select any of these ones. I will just select a previous newsletter, and you can preview it here or you can copy the content, and all you're really looking for there is just the actual overall layout to be the same as your previous newsletter. That means that you don't have to go in and customize the styling and the font sizes and all that stuff. All you have to do is actually just customize the actual body of the content. You already know all of this stuff from previous lessons, so you would know how to design a message of this type. Then you would go in and send yourself a test message in preview and maybe do a spam check as well. Then you would just click on next. Spam check is good and then the brilliant thing, and we had good response which I love, which has massively improved my open rates, is there perfect timing feature. If you hover over the information icon, it says, "We'll look at when each recipient open your message in the past and deliver your e-mail when they're most likely to open this message." What that means is that they might send this message out over a day or even two days, maybe 48 hours, until all of your newsletters are sent out because they will want to make sure they're sending it out at a time when people are actually looking at their phone or looking at their inbox on a computer when they're most likely to actually engage with my message rather than sending it out to everyone at the exact same time. This is brilliant, especially for those of you who are going to have a global audience like I do. Were sending my newsletters at 08:00 AM in Australia, actually makes no sense for my US audience because they're 16 hours behind, and they're not going to be likely to actually see that message. I really, really recommend that you select the perfect timing, and then you can decide whether you want to send it immediately or you schedule it for later and then you would just hit "Send message". In this case, obviously, I'm not going to be sending this to my subscribers because it's an identical copy of my previous newsletter, but I just wanted to show you that that's there. Then if you go into e-mail marketing under communication tools, you can do one additional cool thing here by going into AB tests and you can actually create this newsletter as an AB test or a split test. This is where you could split test a couple of different subject lines. So your body of your e-mail would be the same, but you can test up to five different subject lines to see which one gets you the most opens. I could do one that says. "Hey there." One would say, "Hey there", and then have their first name there. Then my third one would say, "Hey there", first name, and have an emoji. Then I can see which one does best for me. I would want to make sure I'm putting in my preview texts. But everything else is pretty much the same. Plus thing you want to do here is actually configure your split tests settings by deciding on how this should be distributed. At the moment I have three different variations of my subject line. And then I could say, if I have 5,000 subscribers, then 48 percent of those subscribers will receive evenly in thirds these three variants, and then it'll determine which one did the best. It'll send that winning variant to the latter half of my subscribers. Now, it needs to know the time that you want to spend actually testing this. Just because I spend a newsletter today, it doesn't mean someone's going to open it today. They might open it in a couple of days. This is where the settings can come into play and you can say, look, "Give it two days. This is not a time-urgent or time-sensitive message." "Give it two days to see how people are engaging with these newsletters and then after two days, let me know which one is the winning variant and then automatically send that particular subject line to the rest of my subscribers." That is a brilliant thing about testing subject lines, and this is a really great way to do that. But the one thing you can't do is you can't do anything with perfect timing in this section, which is why I wanted to show you guys how to do that through the actual newsletter section without split testing. So you can either do perfect timing or you can split tests, but you can't do both at this stage. The last thing we want to do is actually go and have a look at how to create a segment. You want to go over to lists and show all contacts. Then you want to go over to advanced search and say all selected lists, not receiving auto responders, and it'll show me all of my contacts that match that setting, and I will just say save a segment. You would enter your segment name there and you'd be able to actually select it when you're creating a newsletter, and it would pull up everyone who's on your e-mail list who's currently not receiving any auto responder messages from me. Now, you can get real fancy with this. You can do so much more with creating particular segments, and I really encourage you to play around with this. But the key here is just to not distract people away from your main goal, which at this stage would be for them to complete their sale sequence and purchase for my final before receiving any further communication for me, which is why I would divide up my contacts by people who are not receiving my auto responders and then people who are making sure that I'm treating them accordingly.
54. How to Use the Project Section: I want you guys to be able to use the project section of the class for whatever you want. I know that's quite different from what you might be used to here on Skillshare but there are so many different moving parts and elements to funnels. It would be quite difficult for me to say, "Take a screenshot of this or do this," so I just want you to use that section to get feedback on absolutely anything that you want feedback on. Whether it's a headline or a screenshot of your sales page or an email, I really don't mind as long as you will get some value out of getting feedback from myself and other students. I want you to use that section to get that feedback or show off awesome results. If you're finding that you're really succeeding and your sales are skyrocketing and you've done something really awesome, even maybe some tips that you've implemented outside of what I've taught you guys, please share that within the project section, I would love to hear. I'm constantly learning new and awesome things from you guys, and also just every time I try something different within my own funnels, so definitely feel free to share that there as well. But I just want you to keep in mind, as we're heading towards the end here, that you don't sort up on making pancakes altogether because your very first pancake burned. You just adjust the heat of the stove and you try again, and you start making more and more pancakes. Your funnels are kind of the same thing. If it doesn't work the first time you launch it, you can tweak it, and you don't just throw everything out and decide that it was all a big mistake. You just need to be a little bit patient and adjust as you go along. Remember that that is your superpower as a marketer. It's not perfection in the first thing that you do and the first thing you put out there for your audience to see. Your superpower is the ability to look at something and go, "I know exactly where things are going wrong and I know how to fix it." So remember to use the actual behaviors and the statistics of your existing audience that's going through your funnel and tweak and adjust and make it more and more profitable as you go along. All right. Hopefully, I'll get to see some of your amazing wins inside of the project section of the class.
55. Thank You So Much: That's it. You guys have made it to the end of the class. I am so, so incredibly grateful that I was able to have you in this class as a student. I literally could not do what I do every single day without you guys being here, so thank you for choosing this class, and I would love to hear your thoughts. So if you would be so kind as to leave me a review and let me know what you liked, and any improvements that you think could be made, I would love to hear it. I'm always trying to be a better marketer, but a better instructor for you guys as well. I know everyone has their own learning style, so I think I learned at least as much for my students as they learned from me, so I would love to hear your feedback. Thank you again so much for being here. If you would like to know about future classes that I have here on Skillshare, make sure to follow my instructor profile so you get an alert every time I create a new class, and I hope to see you in the next one.
 Maggie Stara, Creative Marketer & Top Teacher