Design Principles for a Simple and Organised Room: Guided Worksheet 2.0 | Ana Marcu | Skillshare

Playback Speed


1.0x


  • 0.5x
  • 0.75x
  • 1x (Normal)
  • 1.25x
  • 1.5x
  • 1.75x
  • 2x

Design Principles for a Simple and Organised Room: Guided Worksheet 2.0

teacher avatar 
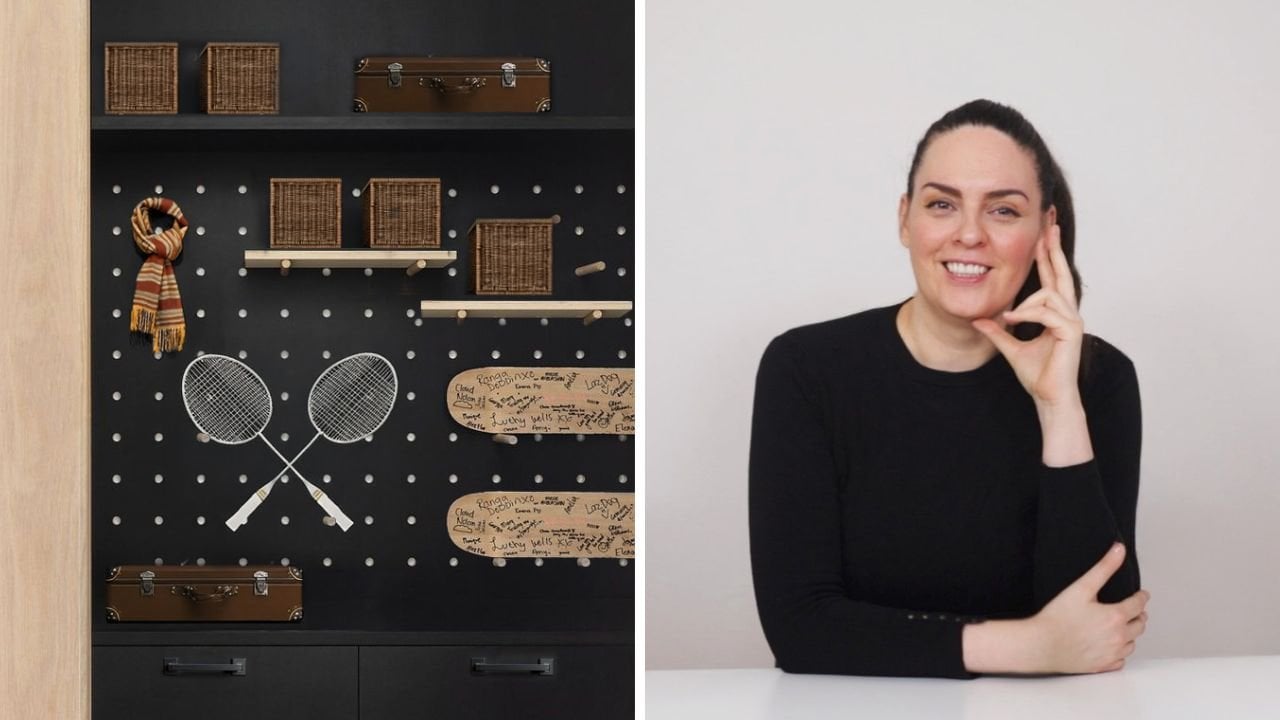
Ana Marcu, Home Wellbeing, Licensed architect

Watch this class and thousands more

Get unlimited access to every class
Taught by industry leaders & working professionals
Topics include illustration, design, photography, and more

Watch this class and thousands more

Get unlimited access to every class
Taught by industry leaders & working professionals
Topics include illustration, design, photography, and more

Lessons in This Class

    • 1.

      Intro

      2:17

    • 2.

      Step 1

      6:54

    • 3.

      Step 2

      5:19

    • 4.

      Step 3

      2:40

    • 5.

      Step 4

      15:38

    • 6.

      Step 5

      2:38

  • --
  • Beginner level
  • Intermediate level
  • Advanced level
  • All levels

Community Generated

The level is determined by a majority opinion of students who have reviewed this class. The teacher's recommendation is shown until at least 5 student responses are collected.

50

Students

--

Projects

About This Class

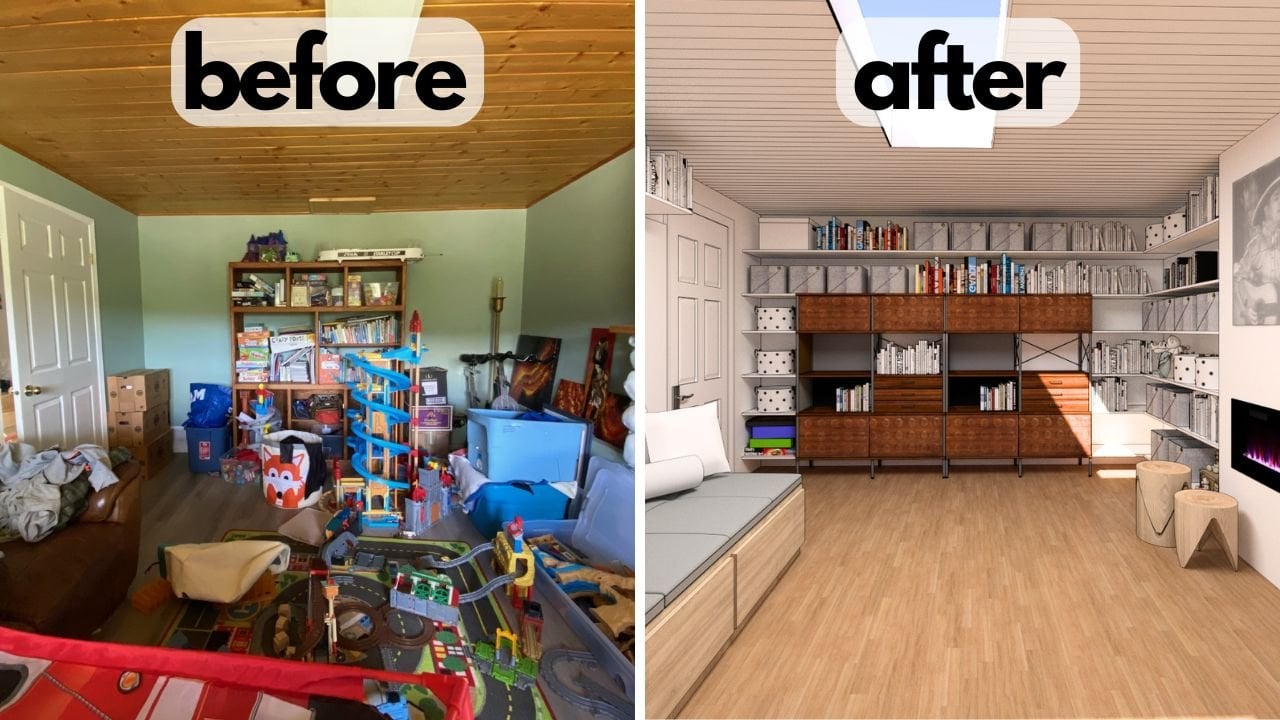
This class is the action-oriented companion to the original "Design Principles for a Simple and Organized Room." Instead of more ideas, systems, or theories, you’ll work through a structured, 12-exercise worksheet to evaluate one real room in your home—and come out the other side with clarity and concrete decisions.
It’s a powerful reflection tool that shifts the focus from perfection to intentional design, helping you understand why your room doesn’t work and what to do about it.

What will you learn?
You’ll learn how to assess the invisible obstacles in your space, define your values, and make meaningful design choices—step by step. This class will guide you to think like a designer without needing any professional experience. Each step will bring you closer to a calm, purposeful, and functional space.

Who is this class for?
This class is for anyone stuck in a space that constantly feels messy, chaotic, or frustrating—even after decluttering. Whether you're a design novice or have already taken Ana’s previous class, this worksheet-based course offers a grounded, practical way forward.

Why should you take this class?
Because lasting change in your space doesn’t come from more organizing hacks—it comes from clarity. This class gives you a structured way to reflect on your space, define what truly matters to you, and make focused, effective changes. You’ll leave with a clear action plan and a deeper understanding of how design supports daily life.

You’ll learn how to...

  • How to evaluate the root causes of disorder in a room
  • How to map daily routines and align them with room layout
  • How to increase storage without buying more stuff
  • How to create alignment and harmony through subtle changes
  • How to make small, impactful design moves
  • How to connect your values to your space’s function
  • How to plan changes you can act on immediately
  • How to use design to improve not just how your home looks—but how it feels

Relevant Links:

Related Classes You’ll Love:

Let’s Connect:

InstagramYouTube | My Website

Meet Your Teacher

Teacher Profile Image

Ana Marcu

Home Wellbeing, Licensed architect

Teacher

About me:

I'm a licensed architect and have over a decade of experience in the design and architecture industry. I have worked as an in-house architect on various projects with a strong focus on furniture, interior design and experience design. I have a double degree in Architecture and "Building Science and Technology", and I am deeply passionate about design that generates great emotional experiences for people. I've recently started my little design studio, and I'm excited to teach you everything I've learned to help you create a great home for yourself.

Transform your surroundings, transform your life!

Your home environment profoundly impacts your mood, thoughts, behaviour, performance, and overall well-being.

Learn how to design a livi... See full profile

Level: Beginner

Class Ratings

Expectations Met?
    Exceeded!
  • 0%
  • Yes
  • 0%
  • Somewhat
  • 0%
  • Not really
  • 0%

Why Join Skillshare?

Take award-winning Skillshare Original Classes

Each class has short lessons, hands-on projects

Your membership supports Skillshare teachers

Learn From Anywhere

Take classes on the go with the Skillshare app. Stream or download to watch on the plane, the subway, or wherever you learn best.

Transcripts

1. Intro: Guys really love my class design principles for a simple and organized boom. I hear that you also really love worksheets. Today I'm bringing you worksheet 2.0 for my class design principles for a simple and organized boom. Instead of overwhelming you with more information, I'll guide you through a more advanced worksheet than the one you received in the class, designed to help you implement the knowledge in your specific home rather than giving you more rules, more systems, more information. This class is about pausing, reflecting and implementing. By the end of this class, you will have a clear action plan on what to do next to make your room look simpler and more organized. Hey, I'm Anna, I'm a licensed architect based in Europe and in these classes, I distill decades of architectural education and experience into small bite size lessons to help you design your home. Your project is to complete the worksheet using one real room in your home. Your goal is not to make this room look perfect, but to read it honestly and identify a few meaningful and realistic design moves that could make it look and feel more organized. As part of the class project, I invite you to share one small decision you plan to make to begin changing your space and the difference you believe it will make. This class is for anyone who feels stuck in a room that doesn't quite work. Even after declattering, you don't need any design experience. You just need a willingness to pause, look at your space with fresh eyes, and reflect on possibilities. I believe you will get the most out of this class by watching design principles for a simple and organized room, as many of the exercises are based on its lessons. However, you can also complete the worksheet without it. If you're looking for additional support, you might also want to check out two of my YouTube videos, Room Organization without Declattering, and color room simplification without Declattering, which will significantly expand your understanding of space organization. If you're ready, go ahead and download the class worksheet from the project and resources section and let's get started. 2. Step 1: All right. To start, I would like you to download the worksheet from the class project and resources section. The first page should look like this. The worksheet is a PDF. You can print it, but if you have an iPad, you can also write on it with a PDF Editor app. I have an app called GoodNotes. You can just import the worksheet there and write on it directly in the app. Or if you can't either print or write on the iPad, you can just write the answers in a notebook. Just write the exercise number you are at and the answers you want to give. The worksheet comprises 12 exercises organized into five steps. In step one, you try to understand the organizational state of the room. Where are you currently at? Where are you starting from? What is that point? In step two, we try to pinpoint the problem. In step three, we try to identify what we ideally want. Step four is about defining the changes that are required and the ones we are actually able to make. Step five is really about narrowing down to a few actions that we can actually take right away to make changes in our space. As we move through the worksheet, I will do my best to explain the purpose of each exercise and what I hope you can achieve by it. However, I will not read the exercises aloud. I do think you can do that yourself. I will give you ten to 20 seconds to go through each exercise. Should you need longer, just play pause on the video and resume when you are ready. All right. Let's get into it. Step one, within your home as it is. Exercise one, the reality check. An exercise bond, I'm asking you to rate your room on multiple factors. How physically comfortable or easy to keep it is. Answer quickly and intuitively. The number itself doesn't matter. What matters is if one of the answers makes you pause and think, that's lower than I expected. If something scores low, that's a piece of information that needs to be explored further. Go ahead and write your answers and I will start the timer now. Exercise two, the three hidden barriers. In exercise two, we examine the three hidden barriers and the underlying reasons the room might be in this array. Is the room cold, dark, or generally uncomfortable to be in? It will never be organized. Alternatively, there may be so little storage furniture available that items are just laying around on open surfaces. Or maybe it is that one room that nobody knows what to do with, and it has turned into a dumping ground of sorts. Try to identify the underlying cause of your room's disarray so you can determine where to begin the redesign. All right, timer starts now. Two. 3. Step 2: Step two, exercise tree where effort is being wasted. All right in step two, we're trying to zero into the problem and figure out the moment the room makes us sigh the most. The moment where you'll say, I'll deal with this later. If you find yourself constantly picking things up, moving things out of the way, we're doing the same task. That's not a discipline issue, that's a design issue. What I'm asking in this exercise is to look at what seems the hardest thing to do in this room is putting things away, finding things, getting started, cleaning up or perhaps just relaxing. Give this exercise a try. The timeer starts now. Exercise for, what the room is really used for. Now, another big reason why a room starts to look messy is when there's a mismatch between how the room is furnished and how it is currently used. Maybe in the beginning your room was a living room of sorts, but now it's a playroom for your kids and their toys are everywhere. These toys need storage, but it is lacking in the current design setup. For this exercise, I want you to reflect on whether the room is used for its intended purposes. If there's a mismatch, you need to take note of that because that may be one of the big reasons why your room is a mess. O 4. Step 3: Step three, defining your version of harmony and beauty. Exercise five, finishing the sentence. Right in step three, we are defining our version of harmony and beauty. Exercise five is about resurfacing what beauty means to you with a series of incomplete sentences. Don't try to be clever or poetic here. The first thing that comes to mind is probably the right answer. These sentences help you say things you already know, but maybe you haven't articulated yet. Once you name these things, design decisions get much easier because you're no longer guessing what matters to you and what makes you feel good. Timer starts now. 5. Step 4: Step four, meaningful changes. Exercise six, function and future proofing. The next step is really about defining exactly what we want to do, and the exercises are matched to the lessons of the class design principles for a simple and organized room. I encourage you to watch them to get the most out of the exercises. Let's start with the function and map out exactly the priorities we want to have in this room. Here I give you some examples you could pick out of quick cleanup, creative making, but feel free to add anything that resonates with you. The time starts now. Exercise seven, simplify the shell. This exercise is about looking at the surface of the room, the walls, the ceiling, the floor, and try to make them look as smooth and neutral as possible. If the background is already noisy, then everything else that is added in front of it will make the space look even louder. So it's best we start with a clean neutral space to tone down any organization challenges that might come afterwards. All right, the timer starts now. Exercise eight, zoning. Zoning is the process of dedicating distinct areas within a room to specific activities and designing them to support these activities. In this exercise, we need to decide where each activity will go and understand where they might overlap. We also need to reflect on the storage dedicated to each zone and figure out if that's enough or more is required. Give it a try Tier starts now. Exercise nine. Storage. Our storage exercise is among the most effective because one of the simplest ways to make a room look more organized is to increase the storage area. If items are never put away, it usually indicates that storage is insufficient or unsuitable for the items you want to store. Look for where the mess is created and look for opportunities to expand the storage of the room. This exercise is divided into three parts and it helps you first audit your space, identify the room's hidden potential, and list the steps you will take to increase its storage capacity. Right, give it a try. Timer starts now. Exercise ten, color simplification plan. Color is one of the design elements that can make a massive difference in how organized or messy a room feels. The fewer the number of colors, the simpler and more organized the room feels. In this exercise, we aim to identify the colors already present in the room and to determine various ways to minimize their number. Right, give it a try. Timer starts now. Exercise 11, alignment finder. Alignment is the last trick that makes the room feel more organized. When things line up, even loosely, your brain reads the room as intentional and structured and organized. I think specifically this exercise will be best understood if it is watched together with the lesson alignment from my class design principles for a simple and organized room. The idea is to align the edges of furniture pieces with those of other elements in the room, whether architectural or furniture elements. So in this exercise, we match the edges with pieces of furniture. This works well with shops or other custom made furniture or furniture you intend to do yourself if you are a great DI wire. Right, timer set, go. 6. Step 5: Step five, first steps, turn insight into action. Exercise 12. All right, we are at the final step. At the end of each exercise, we took a final small decision about what needed to be done. Here I encourage you to list together your conclusions at the end of each exercise. Here, I want you to make a decision about what you should do next. Which decision do you think would take the least amount of effort and create the biggest impact? I want you to implement that decision in your space and share your results in the class project. I hope you enjoy this wadsheet. I'll see you in the next class. Hh