Transcripts
1. Introduction: Hello. My name is Rebecca. I am a graphic designer
and an EC seller. And in this mini course, we are going to look
at how to start designing listing images
for digital products on Es. If you're selling
a digital product, it can be a little
bit confusing as to how to design a
listing image for this because you're
basically creating a photo for an object
that is digital. We are going to look
at some strategies today on how you
can design this. That's pretty straightforward. Just a couple of design tips to help you get started
and create a couple of variations of a
listing image to help fill out your EC listing. You're watching
this, you probably already have a digital
product in mind, but we're just going
to be working with a rectangular PDF
style graphic element as our placeholder. So if you're ready
to learn a couple of tips and get started on
your listing images, then let's head into
the lesson together.
2. Designing Your Listing Images: To get started designing a listing image for a
digital product for EtS, I've created a blank
Canvas on Canvas. The size of this Canvas
is 2,700 by 2025 pixels. I'll put that text
on the screen. EtS doesn't have a
specific size requirement, but they have a ratio
requirement. So this fits it. However, you may see that
there are some lines here, and that's because EtS is now prioritizing
square graphics on certain platforms
and will crop or full sized image for
those platforms. So I've included these grid
lines here in order to make sure that we are designing the main elements
within the square, and a little bit of runoff can be in the extra rectangle space. In order to make
this shape the right size to add this grid
line here and here, a little trick that I
like to use is just to tap R on the keyboard
for a rectangle. Get yourself a square. Drag it to the top, and
we're going to adjust it. Now, hold down shift
on your keyboard as you do that,
get a full square. Line it up in the center, and then you can drag
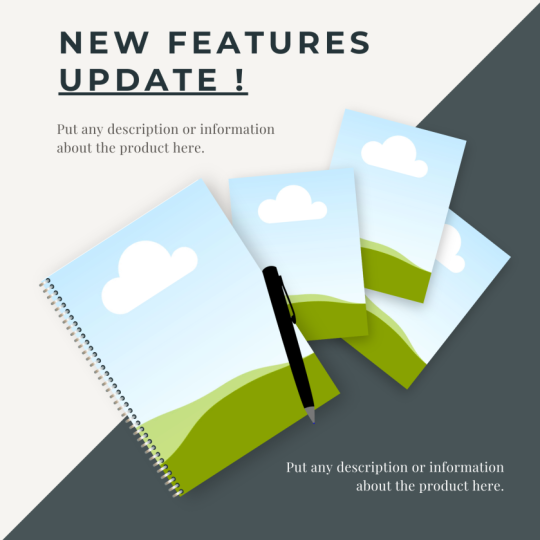
your grid lines. Now, we're going to use this as our mock up digital product. This is just a little
note pad template. The first thing I will
do is pick a background, and I'm going to use
the same background for all of my pages. I would recommend that you pick a background that is
light and neutral, so you may pick just a color, so just go in here and pick a light neutral color that you may want to use,
something really soft. This could depend on
your store branding, of course, so you may want to go with
something like that. However, I do like to use
a marble or wood element, and I like to use these
because I find them very popular and very
aesthetically pleasing. I'm going to pick I think this one right here
looks pretty good. So I'm going to
just make this the size of the whole design. I'll just remove this
pink background. And then I'm going to change the transparency a little bit, just to make it a
little bit softer. Maybe I'll put it about 70. And we will hit position and put it in the back and lock it. So now we have this very gentle marble background
that looks good. In order to make our
digital product, whatever it is,
pop off the page, we are going to
use a drop shadow. Going to go once
I've clicked on it, I will go to edit image, and then into
effects is shadows. I generally prefer glow just because it shows
all four sides of the item and just
makes it clear that it is not part of the design, but an item that is
sort of placed upon it. And you can experiment with
the intensity of that glow, but the default settings
are good for my purposes. So now we have our
digital product. It looks like it is sticking off the page, and we're
going to center it. So the image I'm designing right now is sort of what I would use as my first image because I'm just going to put
some text around it, but the item itself
is highlighted. Hit T for text box on my
keyboard and get this text box. So let's pretend
that is the product. And then we're going
to stylize this. So the font that
you choose, again, should conform to the norms of your branding for your
store and also the niche. As it is, this is kind
of a cute design, so I could pick a cute font. I'm going to use Garrett
because I tend to like it, and I'm just going to adjust
some of these settings. Now, I like to
stick with one font through the entire process. I don't use multiple
fonts in these designs, but I like to use the
different text effects. So I will do bold and sometimes uppercase for the
title of the product. We can also add a
subtitle below it. So let's turn off the
bold, and there we go. So print and use at home is
a fairly generic statement, but this is just an example. I'm going to increase
the letter spacing here. That's another feature
you can play with, and I think it works
great for things like subtitles or little
instructions. On the front cover, I would also add in any other
pertinent details. So I'll give you two examples. One could be if this is a Canva template
that I'm selling, I would probably
add the Canva logo. This one right here will do. And I would just put it
in the corner there. Another thing you could add, I will do a circle
and try and make it the same size as this canvas
circle that I just added, and I'll add it right above. And this is where
I'm going to put some detailed information. I would change the color of this to a color that
matches the design. So I'll add new color and
use the color dropper tool, and I'll just pick this
pink off the design. And then I would add some
texts on that bubble. So let's borrow this text box. Let's say 20 pages. This is just to highlight
a feature and make it a little bit more
appealing. This information. If someone thought this was
a single page template, but then realized it
said 20 right there, front and obvious, it
becomes a higher value item. And I would change
that font to white. So this is just a very basic
mock up of a front page. You can add other
text if you want, but I do think a little bit of breathing room is a good thing. So that's our first page, and I'll show you
another variation. We'll duplicate this. I'm going to delete these boxes. And I'll put this one to the
side and also center it. We can add a list of features, and then I would put some
bullet points along here that includes the different
features of this product. Again, I'm just sticking
with the same font, and I'm just changing up
some of the design aspects. So there are some examples. I would change the alignment. You can play around
with this, obviously, add more details if you like. Another variation is to do
a similar kind of concept, but we would keep
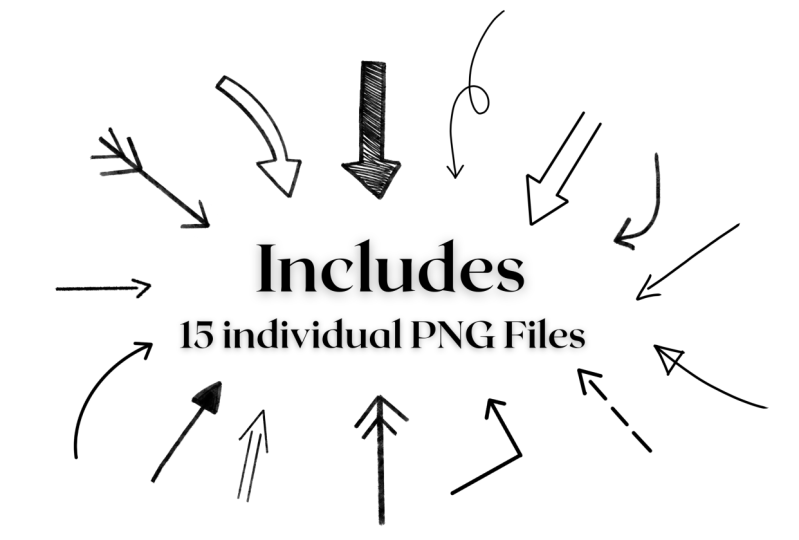
this in the middle. And I would start
adding in these things, but using arrows
to point to them, so we can make this small. And then we would add an arrow. I'm just going to search
for an ero graphic. Canva does have arrows, but they are a little
bit fussy to use, and it's often a lot easier
to just use a graphic. We'll use this one here, which I will change to be pink. And you can adjust it as needed. I'm going to use the flip
option to make it point the other way. There we go. Cute Bunny theme, I'll duplicate this and add one down here, and we'll flip this
again. There we go. And now we can add a couple
other details just by duplicating this box like that. There's another
example where you can highlight the features
of the digital product, just using some arrows. You could do
different features on each of these pages or
whatever suits you. Now, if you have multiple
pages you want to demonstrate, You can do so just by adding all the individual pages and
adding the same glow effect. But I'm just going
to use the same page a couple times just to show you. I would stagger them and
stack them sort of like this, just to give people an idea
that there's multiple pages. This is also a good
way to hide content. So if you have a workbook, you want to show the
cover of the workbook here and then subsequent
pages in behind it, just to indicate that
there are other things being shown or there's
lots more to this product, but you're not giving it all the way in the listing images. If you want to show
a little bit more, you can also scatter
them a little bit, and that can be a way to reveal
some more of the content. You can also add other pages that don't have any
graphics at all. You can just do
text based images. And these maybe
are at the back of your stack of images
for the listing photo. But you can include
policies here. So one example of what
you might want to include is licensing and usage. So this may be the kind of statement you want to put there, which basically just says this product is licensed
for personal use only. You may use and alter the
design whoever you like, but you may not
sell the template, digital file, or
finished product. This completely depends
on what the product is, what you're selling,
maybe you do have it for commercial licensing. But this is another type of photo image slide that you
can use on your product. So I hope these couple examples gave you some inspiration. I would suggest that
always consider what your niche is and what your
competitors are doing. That's another great place
to get some inspiration for what content to
include on each page. But if you just did
these and featured some different items
in the features pages, and then you showed off
a couple designs here, then that would get
you a handful of photo slides that will
help your product. Get eyes on it. I hope
you found this helpful. If you have any
questions, please let me know in the
class discussion. I'd be happy to answer them. If you enjoy learning with me, I have lots of other classes on digital products and Canva
for you to check out. If you'd like to share
your work with the class, you can upload any
one of the slides that you create to our project, and then we can
take a look at it. If you want any feedback
on it, just let me know. But I'd love to see your work
and what you're selling. And finally, if you
would like to leave a review for this class, I
would really appreciate it. I hope you found it useful
and direct to the point. And your reviews help other
students to know that this is the kind of class they
might like taking as well. Good luck with your
digital product store. I hope it all goes well. And thanks for being
here. I'll see you later.
 Rebecca Wilson, Artist