Transcripts
1. Intro - Design and Sew A Keepsake Apron: Sewing is PFK-1. It's practical and it gives you a platform to get creative. In this class, we're
gonna be sewing an apron, which in itself is a
Simple Sewing Project. But we're gonna be learning
several techniques that will allow you to
expand on that project. Use up notions that you have
scrolled away and really make a Keepsake Apron which is beautiful and
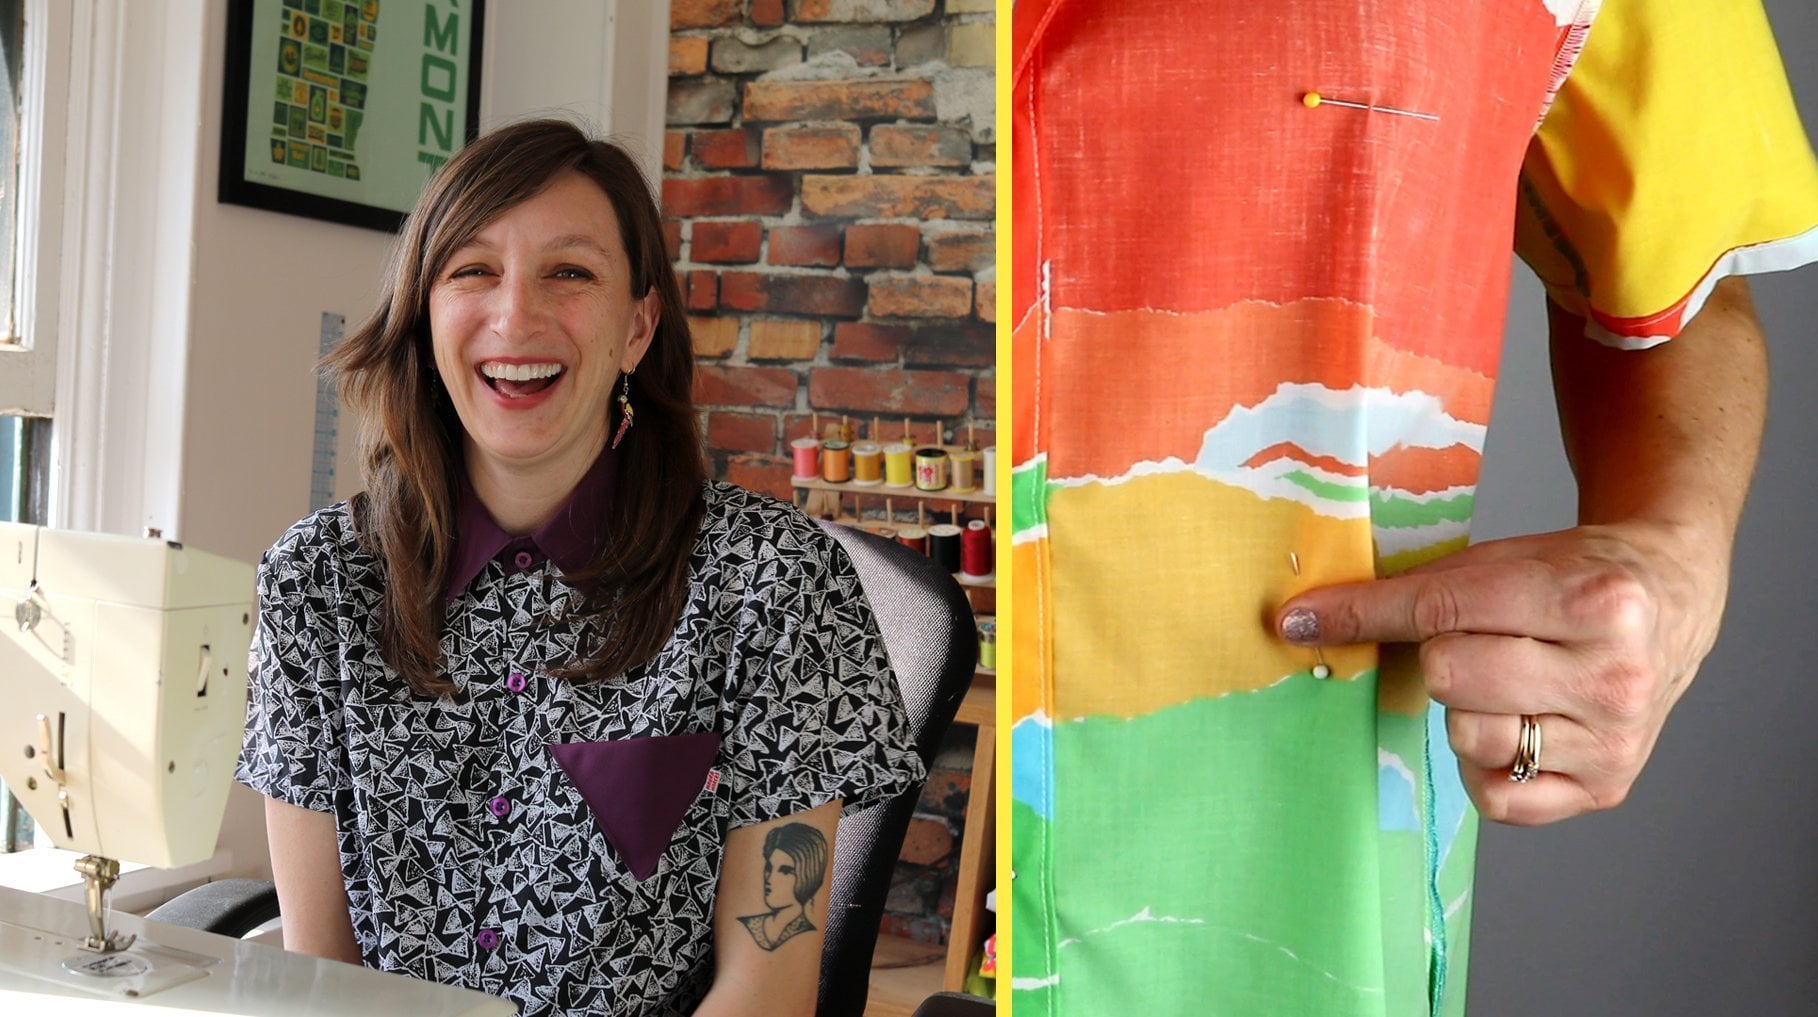
worthy of gift-giving. I'm Maura Marcks. I Design and Sew
vacation style shirts at a second hand materials. For the class project, you're going to be
following along with me step-by-step on how
to sew an apron. And there'll be
ample opportunity for you to expand
on that and get creative depending
on what kind of notions and design
you'd like to do. Okay, let's begin
2. Mini Lesson: Buttons by Machine: Here is a little known secret. You can use your sewing machine
to sew on a flat button. It's helpful to
have a presser foot with a wide opening that is big enough to see at least
two holes of the button. Feeder dogs or the sharp
metal zigzags that are underneath your presser foot that move the fabric
back-and-forth. You'll want to set this
to the off position. You'll have to adjust
your stitch to be a zigzag and choose a wide one. Carefully set down the
presser foot and arrange it so to button holes
are side-to-side. It takes a little
trial and error here. But using your hand we'll slowly lower your needle to
match up with one hole, lift and then adjust again as necessary with
your zigzag width. So each time the needle lowers, it goes into one hole
and then the other. Once you're sure the
needle will be hitting the holes with each stitch, you can use your foot
pedal to give it a few stitches a little faster. If the button has four holes, lift up the presser foot to line up with the second set of holes. Change your zigzag width to be zero and align your
needle position to be over the left whole. Give it a few
stitches to secure. And since you did that, you won't have to
tie off anything. You can just trim
the extra thread. Now that the button is secured, you can get creative and do all sorts of things
like adding a tassel. I'm going to loop it around
and give it a little stitch right under the button
as close as I can get
3. Mini Lesson: Buttons by Hand: If you have a thicker thread, you can use this to
Hand sew buttons on. I have a lot of standard thread, so I like to use that
and folded in half. I make a knot in one end and put the doubled up other
end through the needle. I'm using a smallish
needle, a short needle. So I can maneuver it through the little holes of this button. Start from the back and work it through
the button holes. And back through. Go back and forth a couple of times it needs to feel secure. The heavier the button, the more times you'll want
to go back-and-forth. You can tie off the
ends by making a naught and use your needle to guide
the not close to the fabric. I'm not graded this method. So I like to tie it off like a shoe lace making
a double knot. Sometimes a triple naught
4. Mini Lesson: Bias tape/Seam Binding: You've probably
seen bias tape or seam binding in its
various packaging, either in a tin of sewing notions or in
a box at a yard sale. I buy it by the role. So what the heck is this stuff? Well, it's a great way to add
contrast to your projects. You'll see them used a lot
with vintage apron or dresses. They are called bias tape
because they are actually strips of fabric
cut on the bias, which means the diagonal. So it's very stretchy
and flexible and it's good for going
around corners and curves. You'll see that the binding is folded over a couple of times. We're going to unfold it. And when we sew it onto
our sample pocket, you'll note that one half of the tape is wider
than the other. You're going to set
that wider fold onto the edge of
the fabric first. Line up the edges with
the fabric wrong side up and the binding
opening facing up. Using a medium stitch length sew-along the first fold line, back stitching at
the edges to secure, trim the excess tape and fabric within the
seam allowance. You can iron it at this point, but I'm just going to fold
over the edge and Sew a top stitch really close
to the edge of the tape
5. Mini Lesson - Ric Rack!: Ric Rack is a ribbon
that zigs and zags and is really FUN to sew
it onto something. There is enough of
a center that you can actually stitch it
with a straight line. It works grays and accent
underneath a pocket. To get started just align the Ric Rack to be half
under and half poking out. Pin it in place. You can fold it at an angle to get around the pocket corner. So with a straight top stitch close to the
edge of the pocket, start with a backstitch
at the top to secure the pocket
edge and sew down. Catching the Ric Rack. When you get to the corner, put your needle down, lift up the presser foot and
turn the fabric 90 degrees. If you have thread that matches your fabric, you should use it. I'm just using white so you
can see what I'm doing. I'm going to sew all the way around and when I
get to the top, I'm going to clip
the access Ric Rack and tuck in the raw edge. You can also use Ric Rack to be a decoration just right
on top of fabric. I'd suggest matching the
thread if you have it. I do have a brown, so I'm going to
swap that out now. Sewing it on as easy
once you get it started, There's a straight line
that goes all the way down. So you just need to keep your
stitches within that line. You can so just like this, but you can fold over
the access to make another FUN layer to add to an apron or another color fabric
6. Mini Lesson - Ruffles: Ruffles are easy
to make and can be used as trim for all
sorts of projects. What I've done here
to show the process is cut a strip of
cotton from a bedsheet. What you'll be doing is sewing two parallel basting
stitches down the long edge. Basting is a straight
stitch that's very loose. You can adjust
your stitch length to the longest possible. Make the first
stitch about a half an inch or so away
from the edge. Use your foot or your
machine markings to note the seam allowance and
stay nice and straight. Make this second stitch right
next to the original one. Make sure to stay
close but never touch or overlap your first stitch. Now separate the
bottom two threads from the top so you can
get a good hold of them. And you're going to
pull a bit to start the ruffles and work it
from one end to the other, adjusting to be as
roughly as you want. Next, we're going to
pin it to our piece of fabric as if this was a pocket. I've ironed down about
a half-inch fold as if this was a
prepared pockets. So we have a nice
edge to attach. The ruffle. Pinning is important because
the Ruffles will be difficult to keep in place. What you'll be doing
here is a top stitch, which will be visible. So you can choose thread
that will look nice. I'm using white here just so you can see what
I'm doing better. Set your presser foot down
close to the folded edge of your pocket and adjust your stitch length to
something in the middle. I'm removing pins as I go, which isn't always necessary
if they're perpendicular, but the Ruffles is
already pretty bulky, so I don't want to get
anything caught as I sew. I've wrapped my sample
ruffles around the corner. If I was making this for
a pocket on an apron, I'd use a much longer piece of Ruffles enough to go
all the way around
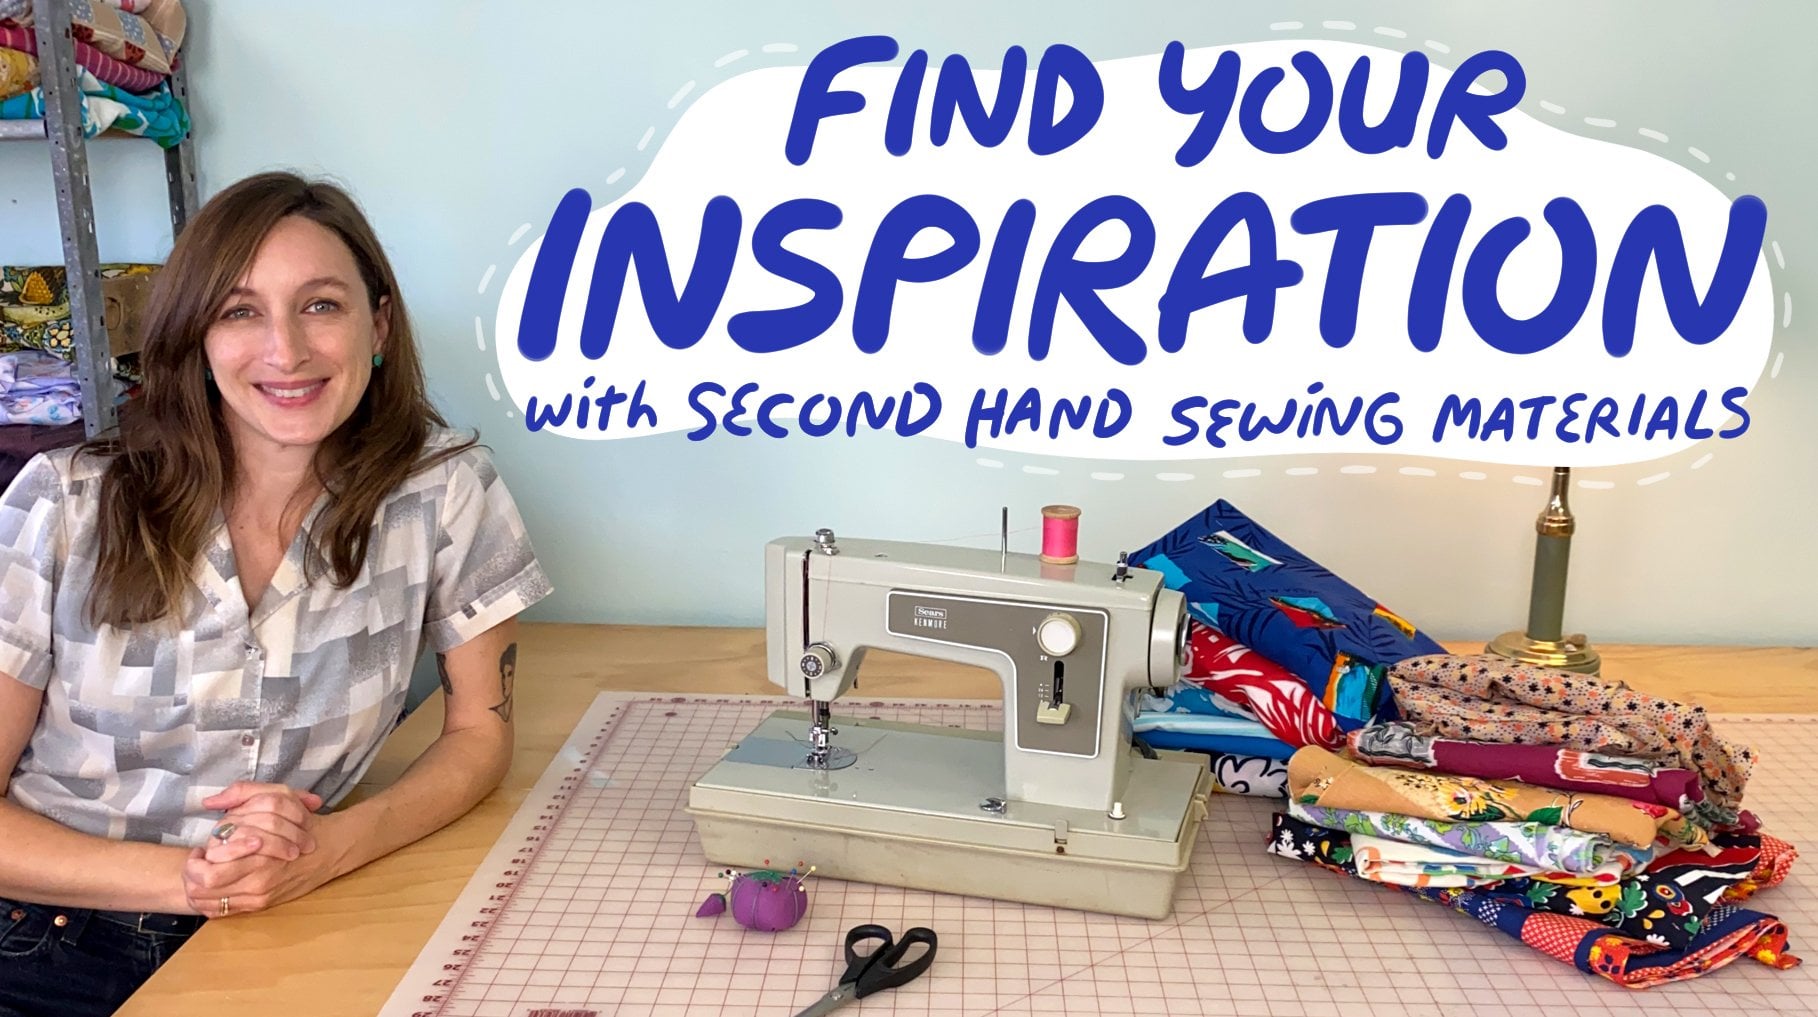
7. Mini Lesson: Fabric Care: When you're creating with
Repurposed Materials, It's more than likely
you're going to need to clean them before
you get started. Whether there's a stain to work out or maybe a funky smell. I've got some tips on fabric care that I'd
like to share with you. For really tough smells. My go-to method is to
first errored out, let it hang outside for
as long as you can. Maybe that's overnight. Even if it's raining, I like to just leave it outside. If I think the material
can handle it. Sunshine and fresh
air is a great way to get started with
funky smell removal. The next thing I like to do, I like to use a vinegar
and water solution in a spray bottle and douse the whole fabric with
it and let it sit. If you can throw it in the
washing machine at this point, then that's a great next step. If you can't let it soak with
a mixture of warm water, vinegar, and laundry detergent. Another trick to get
rid of funky smells is to actually use vodka. View. Could get your hands
on something a little cheaper than the good
stuff and put that in a spray bottle covering your fabric with that
will remove smells and bacteria and will actually air out and not have a smell
of the vodka afterwards, and you don't need to
throw it in the wash. This is great for pillows
or something with a lot of embroidery or tassels that can't really
go in the washing machine. This is my go-to recipe for
lighter fabrics and denim. Always do a color test on the underside him or
somewhere else discrete. When treating vintage fabric
because it can be delicate, the treatment might
actually damage it. I use equal parts and I usually start
with one tablespoon, equal parts, baking soda, hydrogen peroxide, castile
soap or dish soap, and a pinch of
super washing soda. Use your finger or
toothbrush to rub it in. Let it sit until it dries, and then throw it in the wash or wash at the sink by Hand. For a color safe stain removal. I use one tablespoon
of distilled water, a tablespoon of
vegetable glycerin, a tablespoon of castile
soap or dish soap, and a half, a teaspoon
of hydrogen peroxide. You can put this
into a spray bottle and shake and spray on to stains and work into fabric with a finger
or a software
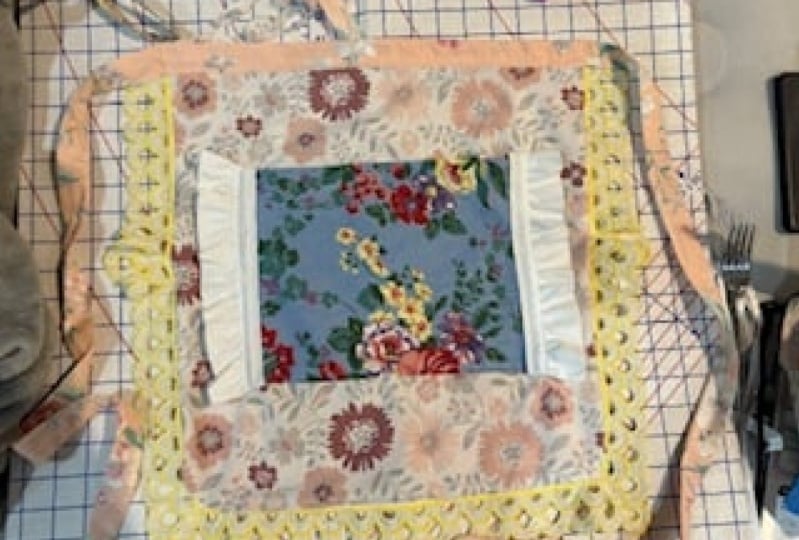
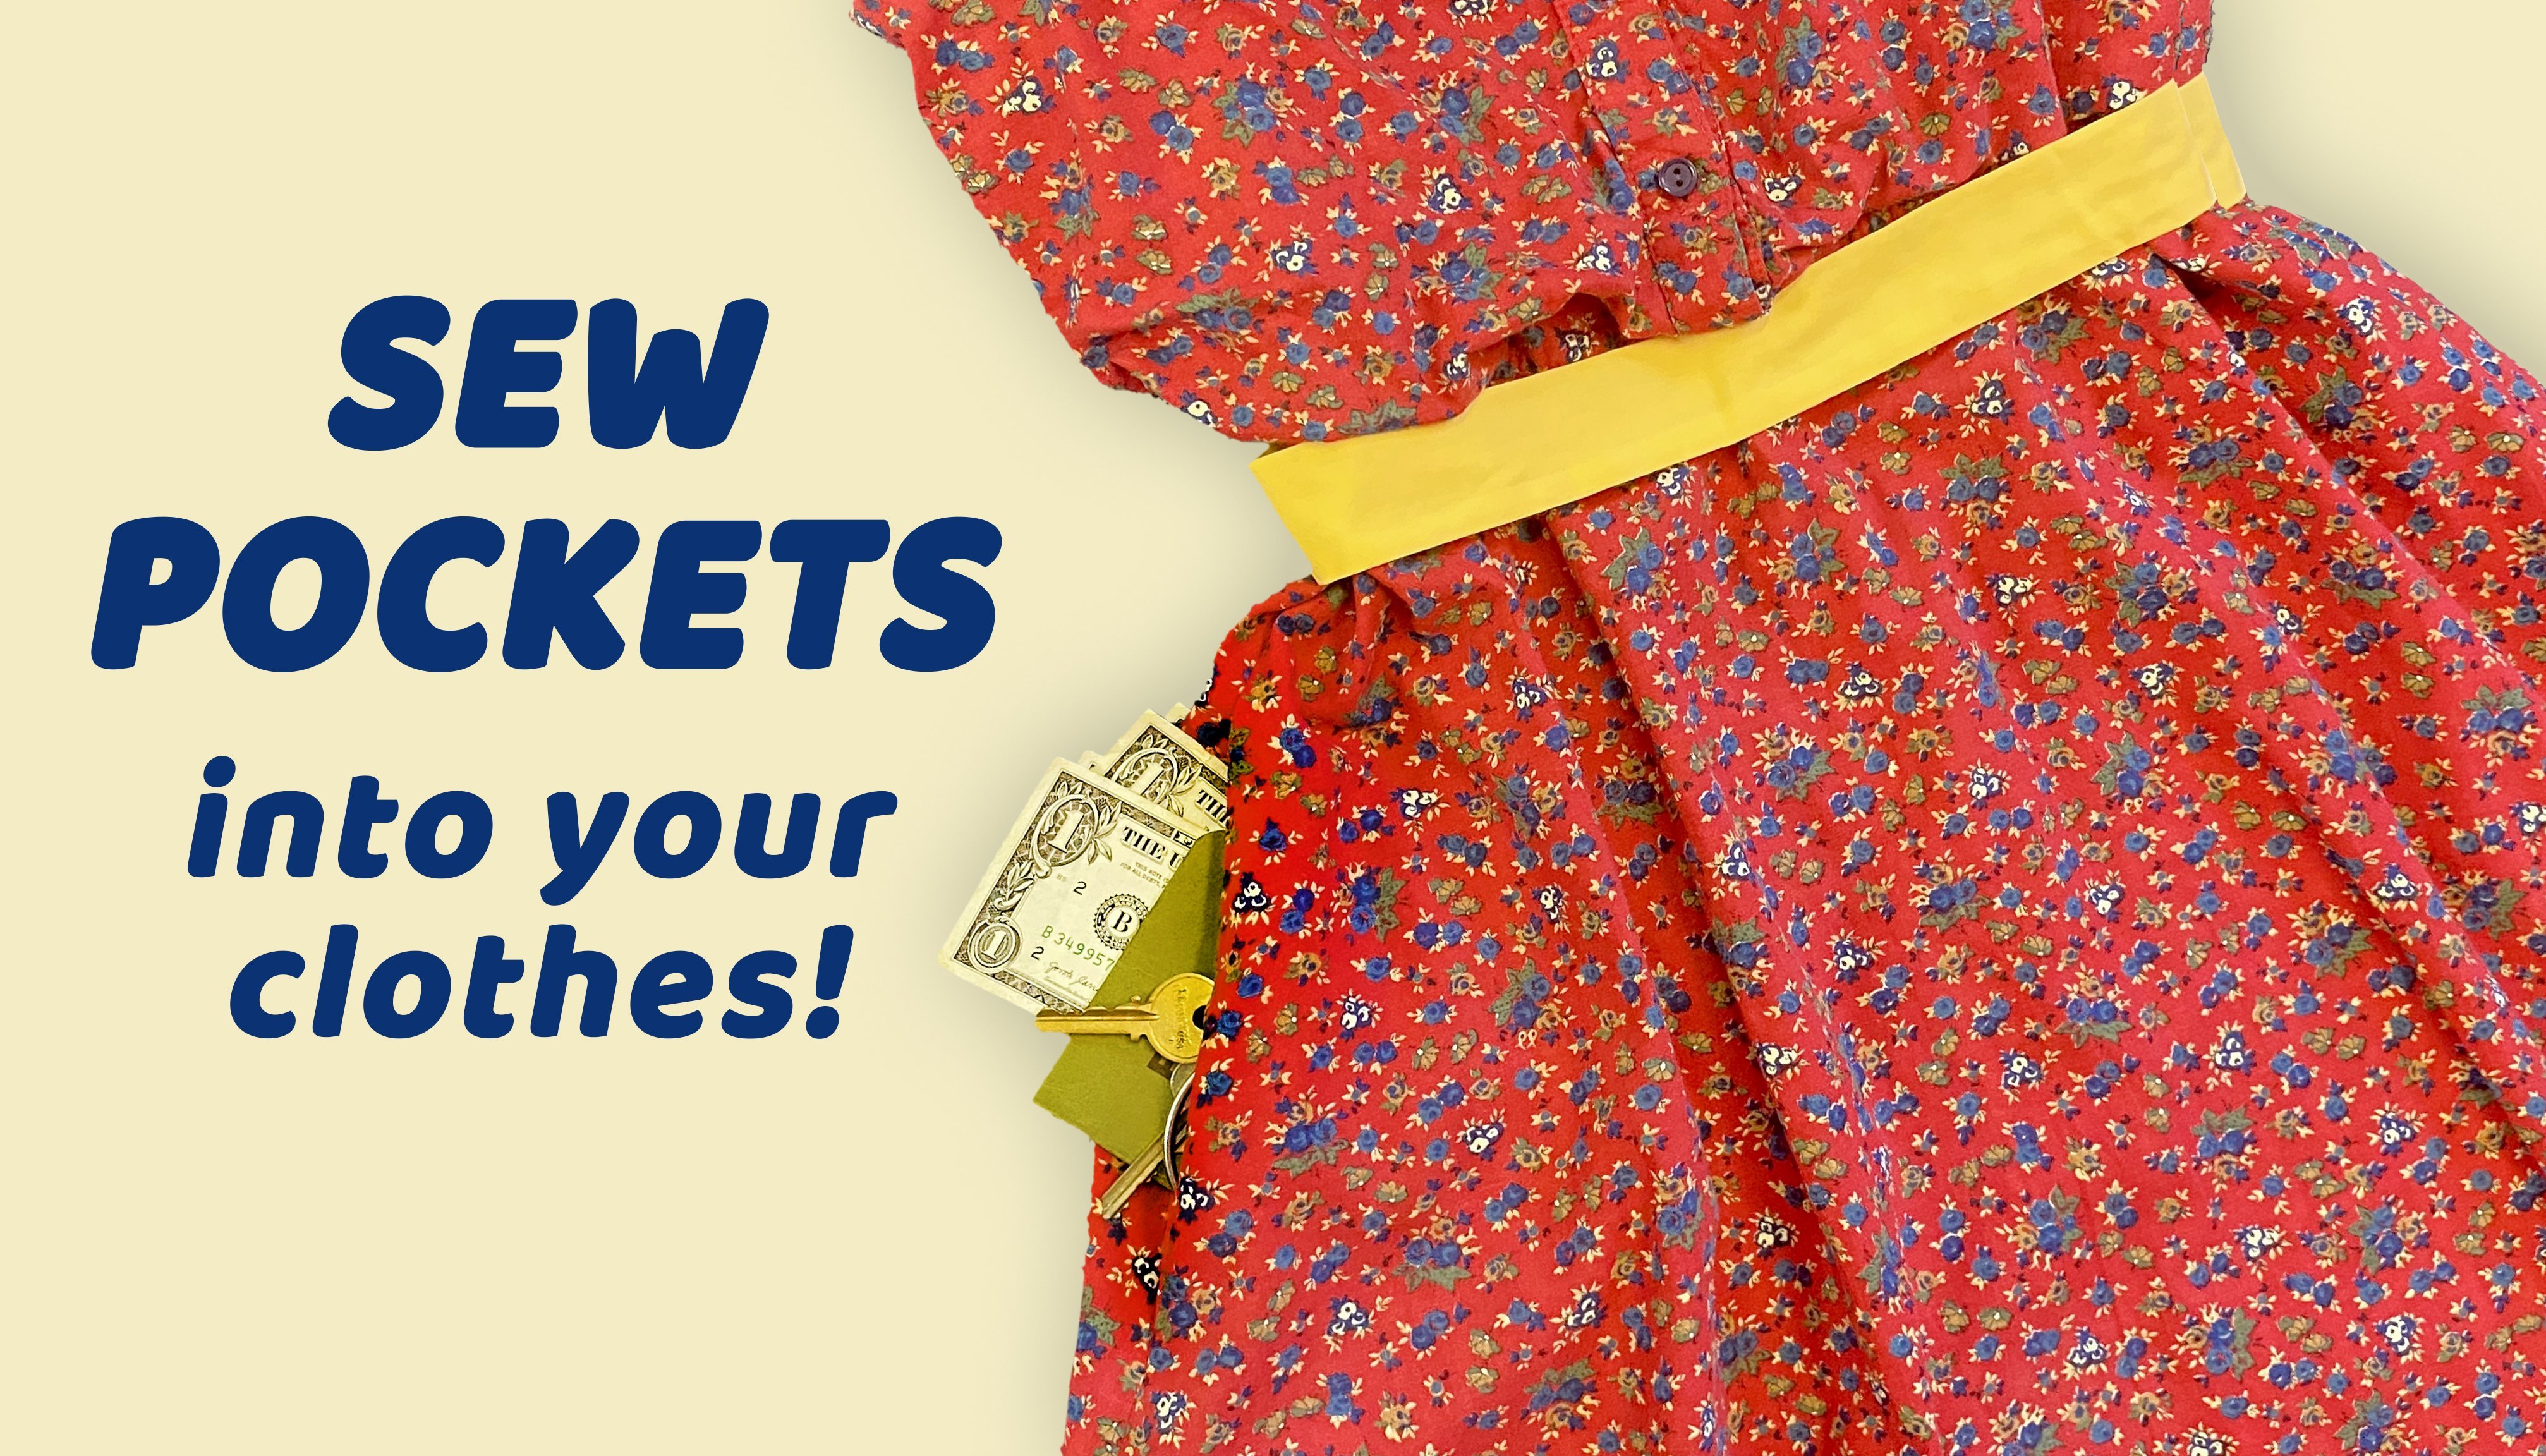
8. Project: Apron 1: In this project, we're
going to be making an apron step-by-step
using Repurposed fabrics. I'm using a pillow case
for my apron front. And I'm going to use scrap fabric that I have
around for the back. I need to make it a flat piece. So I'm using my
nice sharp scissors to cut along the son edges. I've included a printable
pattern for you to use. I'm using my first draft of that here to cut out my fabric, transfer the markings. I've included pleats which
I am actually not going to end up including for this Apron, I'm going to do a
ruffle front instead. And we'll get to that later. Now is when you can play
with your apron design, get out all your bits and pieces that you
might want to use. As a bonus, we're
going to try to use up all the second hand notions that you may have around in
your house already, like buttons and
Ric, Rack and lace. And draw inspiration
from maybe apron. You already have around. Like I have this beautiful
embroidered Portuguese apron. I've got this is my tried
and true Thanksgiving Apron, which just has some
printed design on it, but I love the
chicken than rooster. It's just fine to use these materials that
otherwise have no purpose. I think I might be
using this Ric Rack, pillow cases, fabric,
old clothing. There's endless opportunities to create with what you have round. I've had this fluffy
night gown forever, and I love these silky
embroidered flowers. So I'm going to cut them
out as best I can from the fluffy tool and see where I'd like them
to go on the apron. I like to play with the design, rearranging to see
what might look good. I think I'm going
to use these at the edges of the
big front pocket. Now I'm going to
cut out my pocket. This is also included
in your PDF pattern, but it's basically
a big rectangle, folded fabric in half and
align the pattern with the folded edge cutout and transfer your markings. The markings on
this pocket will be for where you fold
over the top edge. Using my iron, I'm going to fold over that top edge a half-inch, add any extra
markings if needed. To make a nice even
fold and iron it. Fold the fabric down
the one-inch that is in your markings,
right sides together. The next fold is actually backwards from what
you might imagine. This is going to make a
really nice corner edge. Now taking your pocket over
to your sewing machine, you're going to be Sewing a half-inch stitch
to catch that fold. And also create a base
deadline to make folding the outer edges of the pocket
really easy and straight. Once you get past
the folded parts, you can change your
stitch to a looser based. You can see I'm not
sewing anything together after I moved
past the folded part. But this straight based
in stitch will make the finished pocket so
much tidyr because it's basically giving you a
template to fold an iron. The edges, put the needle down and turn it the corner and stitch all the way
to the next corner. Turn again. As you work your
way up to the folded edge, use your fingers to smooth it and make sure the
fold is nice and straight and tighten
your stitch length back to what it was at
the other folded corner. Somewhat of a medium stitch. Go back and forth
to lock the stitch. Now fold the corners
right-side out. You can use a turning
tool or anything with a point to smooth
out the corners. Use your iron to press the corners and fold
in the base did edges. You can make nice
lower pocket corners by folding in a 45-degree angle. Then folding those corners
together into a point. Be careful not to burn
yourself here again, it can get very hot. Keep ironing as needed to get your pocket nice and flattened. Now will need to sew
down that top flap. So I like to get my ruler out
and measure how far down to sew and make a line to follow
with my sewing machine. So it'll catch the folded part and also be nice and straight. You're going to
sew a top stitch. So the mark helps you know where the lower layers of
the fabric will be. To finish the edge. I like to pull the top
string to the back using a tool like a seam
Ripper and tie them off. This not will be hidden away when we sew the
pocket onto the apron
9. Project: Apron 2: Now we can play some
more with the design. I'm thinking differently now and don't really want to
use the purple flowers, or maybe I do, but I'm going to put them aside. Maybe a green ruffle
out of this ribbon. Maybe rick rack. This off white ruffle. This part, it's totally up to you and you can really
have fun with it. I'm gonna go with a
dark green ribbon and I'm going to make
it into a ruffle. We went over ruffle making in the beginning of this course. So if you miss that, go back and check it out. I'm going to make my
ribbon really long to make sure I have enough to go all the way around the pocket. I'm sewing a straight line all the way through the
length of the ribbon. And now I'm sewing
a parallel line, grabbing the bobbin thread, which is the lower threads, and pulling and working to get all the ruffles that I want. It's a little tricky doing
this with ribbon because it can start to fall
apart if you overwork it. Now I'm going to
attach the ribbon and pocket to the main
piece of the apron. You can fold under
the raw edge to make sure nothing unravels
or it looks messy. I'm going to work this
under and pin it in place. It's pretty fluffy, so
pinning will make it easier to sell once I get
it over to my machine. Taking your time
here is important to get a good looking
roughly pocket Now I'm going to, so
this fluffy pocket on, set your presser
foot to the edge. I like to get pretty close. Backstitch and back
and forth a few times to secure the top
edge of the pocket. And work your way down, watching out for pins and making sure the priest's own threads
are tucked out of sight. When you get to the corner, put the needle down, lift up the presser
foot and rotate. Keep sewing along
the bottom edge, readjusting as you go if needed. Once you get to the top corner, backstitch a few
times to secure. Now we're going to make
a straight stitch to separate the pocket
into two sections. You can make a mark
where the center is by folding in half
10. Project: Apron 3: Make a few back-and-forth
stitches at the top and go all the way
down to the bottom edge. Make a few back-and-forth stitches to secure
and you're done. Trim any excess thread. Okay. We still need some extra
decoration on this apron. So I'm going to
play a little bit more, maybe some buttons. I have these beautiful
shiny blue ones. But I also have pink
and yellow buttons. I think I'm going to go with the blue and make them look
like a little tuxedo shirt. Okay, we don't have to do
that now because adding the back panel will be easier without the bulk of
decorative buttons. I've cut out the exact
apron shape onto some white fabric and we'll pin it together,
right sides together. We're going to sew all around the sides and the bottom edges, leaving the top open. I'm going to use a generous three-quarters inch
seam allowance. This is a little bulky with
my ribbon Ruffles underneath, so I just need to
make sure I'm not catching the Ruffles as I sew Make sure all the pins
are out and flip it right-side out just to make
sure everything looks right. Flip it back inside-out because now we're going to clip
the rounded edges. Clipping makes the
fabric stretched out to allow for a
nice rounded edge. You can iron here to
make the edges flat. I'm going to give the top
edge a bit of a ruffle. So like we did with
the ribbon ruffle, I'm going to based two
parallel stitches. Pulling the base did lines. I'm going to work the
Ruffles throughout the width of the apron until it looks the
way that I like. Now I'm going to make the
apron straps and top panel. I'm going to measure
out three pieces that are three-and-a-half
inches wide. The two straps that tie around
the back are going to be about 30 " each and you can adjust to be longer
if necessary, or I wouldn't go any
shorter than that though. I'm going to use the apron itself to measure how wide
the top panel strap will be. To measure the width of
the top panel strap. Just sit down your ruffled
apron as it is and mark the width and then add 2 " so you'll have an inch
overlap on each side. So on the top panel, right-sized together
and raw edges together, leaving a one-inch
overlap at the edge, folded back towards you. So the fold is aligned with
the edge of the apron. It makes sure you use enough
seam allowance to cover up the base did threads
from the ruffling process. I did not do that, so I'm gonna go back and
Sew a little farther in. Okay, that looks like it'll
cover up the base sting. So to the edge and fold back the remaining overlap so it
aligns with the apron edge. So back-and-forth to
lock it in and trim. Now press and continue that folded panel
edge and press flat. Fold-over about a quarter-inch. Press and fold that panel in half to cover up the ruffling and raw
edge of the apron. Will sew that down later.
11. Project: Apron 4: Take the two strap pieces
fold in half and press flat. I'm going to use
what I've already prepared to mark
where I'll need to sew the straps so they can tuck just inside this folded panel. Turning the strap inside-out, sew-along your mark until you get about 2 " from the edge. You can make a nice point
by putting your needle down in angling to
almost the edge. Trim the excess. Now we have to turn
the strap inside-out. This is actually called turning. You can use a safety
pin or there's a tool called a Botkin that is
made for doing just this. It pinches the fabric and
you push the ring down to tighten it and then you
can wiggle it through. The same goes for using
a safety pin to turn. You just have to fix
it to the point. Get it inside out and work it through the
length of the strap. Depending on the fabric, this can be very fumbling, but just stay patient
and work it through iron to flatten your strap out. I like to first iron along the seam to get it open and then iron again to have the son part B actually on
the outer edge. Now to attach the straps
to the top panel, folding over the top
impending in place in the top panel down
so you can sew it down. So along the folded edge
to attach the straps And so along the top edge, you're basically sewing
a big long rectangle. For the last stitch along the
bottom edge of the panel, flip the apron so the
right side is facing up. This way. You can make
that top stitching along the bottom edge nice and even having the pins situated so you can sew right over them helps a lot
in this situation. Go ahead and reinforce where the straps are sown in making about a quarter inch of space between this stitch
and the previous one. Now I'm going to add
my final touches of the blue buttons. Here is also another
chance to work out your design if you
aren't set on it yet. I'm going to make where
the Buttons we'll go to look like a
little tuxedo shirt. I'm going to hand
so the buttons on like I did in the Lesson
portion of this course, these are just decorative, but I'm gonna give them an
extra few stitches anyway, so they stay on for
a good long while. This Apron can be given as
a gift or enjoyed by you. Whatever your intentions are, know that you've given a
beautiful new purpose to these unused materials that
have been sitting in storage. Or maybe means something to you. And you've just been wanting
to put them on display. To submit your project. Go ahead and upload a photo
of your finished apron. Or if you're going
to finish it later, maybe just upload a
photo of the notions and second hand materials you plan on using and make
your apron out of
12. Outro: Thank you so much for
taking this class. We learned several techniques on Simple Sewing ideas to get creative with a
Simple Sewing Project, which is the Keepsake Apron. I hope you enjoy. Please don't forget to review. And if you like this class, go ahead and check out my
other classes on Skillshare. Thank you so much. And keep Sewing
 Maura Marcks, Clothing Designer