Transcripts
1. Introduction: If you are somebody who likes writing and mailing letters or just really like cute
custom stationery, and I have a project
for you today. This is what we're going to
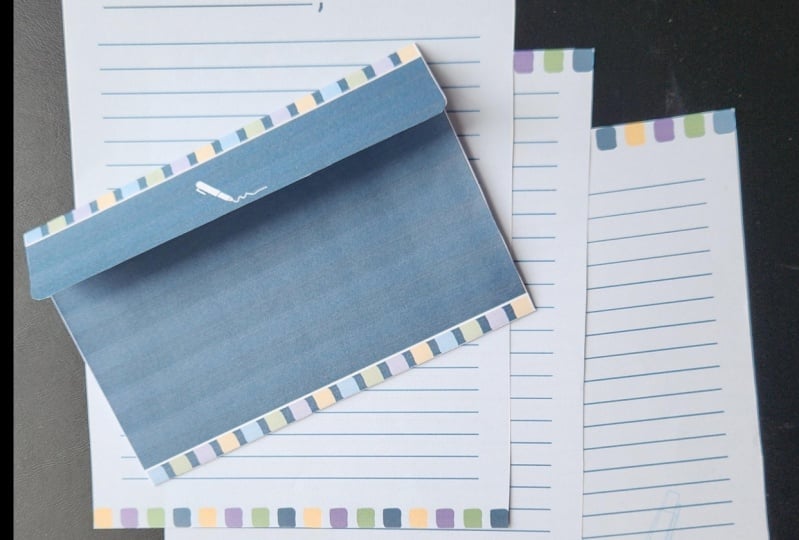
be making in this class. This is a custom
designed envelope that I have designed in Canva, and it also has a sheet of paper inside that was
custom designed to match. In this class, we are going
to be making this project, which is fully customizable
and you can use Canvas elements library or your own designs to make it
really cute and customer. This is a fun project to do, whether you're familiar
with Canva or not. It's very beginner friendly, and I'm going to give you the templates for
it so that you can just start designing and doing the creative stuff right away. I'll also talk about some
ways that you can make your own custom
envelope templates if you are interested
in going a step beyond. My name is Rebecca, and I will be your instructor
for this class. I'm an artist and a
graphic designer, and I also teach
lots of classes on the subjects of art
and entrepreneurship. But in this case, we are just making something really
cute and fun today. You don't need a lot
in terms of materials. We're just going to be using
a free Canva account and a home printer and a pair
of scissors and a gluetick. That's really it. So if you
have those things ready, let's get started and start designing some very
cute custom stationery.
2. Getting Started: Custom stationary is really fun. If you're someone who
likes to send letters, then this is a great
project for you. But also, if you are like me and maybe run
an art business, you can use your art to design these kind of products as well. And these could even
make a digital products. People could print
these off and cut them at home if you were
inclined that way. Now, the design of all of
this is pretty simple. The note paper is obviously
just a rectangle of paper that has been cut to
size to fit the envelope. So we're going to be designing that in Canva, first of all. And the envelope is
just slightly more complicated in that it's
a very custom shape. This one is already
glued finished, but I will show
you the template, and you can see
that you just got to put some designs on it, printed out and fold
and cut it yourself. And I could just put a
stamp on this and mail it. It's perfectly
able to be mailed. In order to get started, I have put a link to
the Canva template for this project in a PDF that
is attached to this class. I'm just going to show you
how to open that up and then we'll get started looking
at the Canva design. When you've located the
class resource document, then this is what it's going
to open up and look like. It's just a PDF with a very simple explanation
of what you're doing here, and we are going to click
this button right here. This is Canva template link. You do have to have a free
Canva account to do this, and you should be logged
in, but like I said, none of this is going to cost anything to use these tools. If you do have any issues, also make sure you're not
on a private browser. Sometimes the template links don't work on private browsers. And also, it may be a little obvious from the
way I'm doing this, but it's much easier
to do this project on a computer rather than
on your phone or iPad. It certainly can be done, but I'm just going
to be doing it on my computer because it is a
little bit more optimized. So when you do click on
Canva template link, it's going to take you over to a page that looks just like this. A template created by
Rebecca was shared with you, start designing now,
and you're just going to click on the
button down below. It may look a little
different from you because I actually
designed this, so it's not giving
me the same options. But this should open
up. This page for you. There are two different pages in the template that
we're going to be working on that you can use. The first page is the
envelope template, which you can see right here, and the second page is
our paper template. And I only made a paper
template, even though obviously, it's just a rectangle
just to ensure that it's the right size paper to fit inside the envelope
that we designed. Now, in the subsequent lessons, we're going to decorate these, and I'll talk that through more. But I will say that you
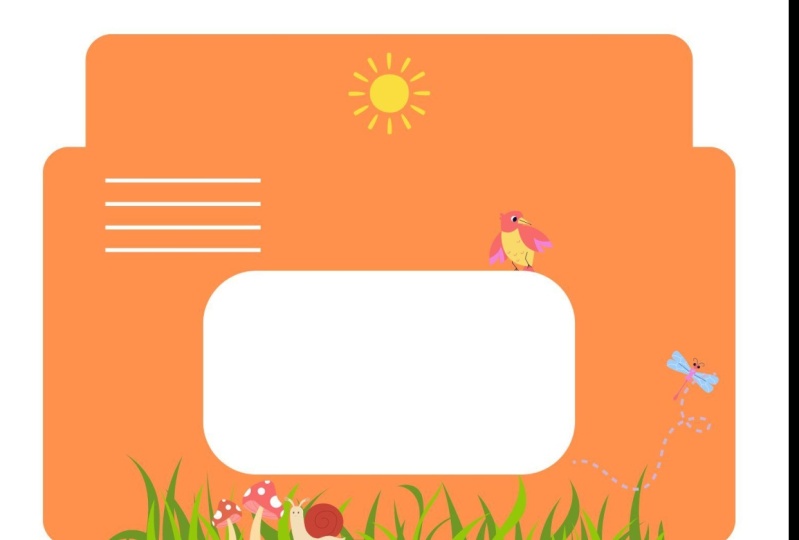
can certainly customize this envelope if you wanted to look a little bit differently. So as you saw in the
preview, when I made this, it basically has this is the front area
here in the middle. There is the back flap that
gets folded up right here. So this is going to be
designed upside down. Then this is the flap
that folds down and gets glued when you
seal the envelope. I've done this in a
rectangular design. The reason I did that was to
make the biggest envelope possible but fit
within a printer page. However, if you wanted
to try different shapes, maybe you wanted to do a
pointed triangular fold for the back. You can
certainly do that. You may just want to select
all of these things, drag them down a little bit, and then try a different shape. I actually made
this template just using shapes from the
Canvas shapes library, so you can see that they're all basically rounded rectangles that I've just layered
on top of each other. Feel free to play around
with the design of the template if you're
feeling extremely creative. Just keep in mind that
you want the back flap and the back cover
to meet up and fully cover each other
so that your envelope doesn't open up or your note
inside doesn't get out. So with all that being said, let's go into the next lesson. We're going to
start by designing our page first because
that's sort of, I think, a little bit of an
easier starting point, and we'll see what cool
ideas can come up with.
3. Designing Your Paper: We are going to start
the design process for our little stationary project by working on the
note paper itself. The very first thing that I'm going to do once I
have this template open is I'm going to
lock this guideline. Basically, I'm going to
click on this box here and I'm going to just click
on lock position only. That's going to make
sure that we aren't dragging the guide
around while we work. I just wanted to show you that step just in case it gets a little frustrating when you are moving a lot of elements around. So in almost all cases, you are going to want to
have lines on your paper. You could of course do no lines. That's totally up to you. But I'm going to just show you a quick way to add lines to your project so that you can basically make it
creative from there. We're going to use
the line tool, so that means that we are going
to tap L on the keyboard, and this line is going
to appear right here. You can also find all the
shapes that I'm referencing in the elements tab right over
here, if you go to shapes. You'll see that there's
all these lines and then all these different
shapes you can play with too. We
have this line. The first thing I'm going to do is make it a little bit thinner. So up in the top left corner, where it says line style, we can drag this down to one. Now, in terms of line weight, I change this based on
what color I'm using. So if I'm doing a
solid black line or something in the gray family to make it a little more subtle, then I'll definitely do
line weight one because it just is very thin and
isn't too obtrusive. But if I was doing a
light colored line, like let's say I
was going to change the color of it to yellow, for example, it's
quite difficult to see here at this
one line weight. So I maybe would move
that up to four, three or four, maybe against the white paper to make it
a little bit more visible. So I'm going to work with
just line way one for now, and I'm going to change
the color of this to this sort of
salon pink color. I'm designing this with
a cute style in mind. That's just my personal taste, but of course, you do
whatever style suits you. For this first line,
I'm going to drag it up to about where I think
it would want to start. I usually leave a
bit of a gap at the top because it's just a bit more convention
for note paper, but it also leaves some
room to decorate up here. I'm going to grab these two ends and make them the
length that I want. I'm going to hold
down the shift key on my keyboard while I do
that because if I don't, it can go all over the place. If I hold down shift, it
goes in a straight line. I'm just going to make this
about the length I want. Not going to go all the way
to the edge of the paper. But you could if you wanted to. I'll use the little tool
here to drag this around and make sure that pink line is showing up showing
it is in the center. Now that we've done
the first line, we're going to press
duplicate right here and drag this to line it below it and figure out how much how big you want your spaces to
be between the lines. If you wanted really narrow, you could do that, if you
wanted them bigger, you could. I'm just going to try and go
for a medium spacing here. Now that I've done that, don't click out of the element yet. We're just going to click on
duplicate again and again because it's going to mimic that same spacing that we did. I'm going to do this all
the way down the page. And there we go. We have
a full page of lines. The next thing I'm going
to do is group these. So I'm just going
to click and drag to select all of these lines. And because we locked
that outside box, it didn't pick up
on that as well. I'll hit group, and now we can easily move this around
as a unit or change the color or anything
like that very easily just by changing the group rather than having to do
each individual line. A is very core, this
is totally enough. You could just print
off at this point. You don't have to
add more decoration, but odds are pretty good
you're going to want to. And before we move
away from the lines, if you do have an issue where they are not perfectly lined up, you don't have to
do it all manually. You can click on the
group of lines and go to position in the toolbar
and then go to arrange. Now, this doesn't show
up all other groups, so let's just spend
group that very quickly. Space evenly appears. And you can use these.
If they are lit up, then there is an option to sort your items so that they're in the same line together or
to make them evenly spaced. Mine already are, so they
aren't options here, but just so you know that's
where you can find that tool. You don't have to do
everything manually. I'm going to regroup the lines. And then think about
decorating the page. So if you have your own
illustrations or artwork, you may want to do that,
which is totally cool. You could also export these templates and
take them over into procreate if you
are an illustrator and wanted to do
something hand drawn. You can totally do that.
But a really easy way to make these cute
is just to use elements from the Canva library. I'm going to do a
really simple design and just put a little
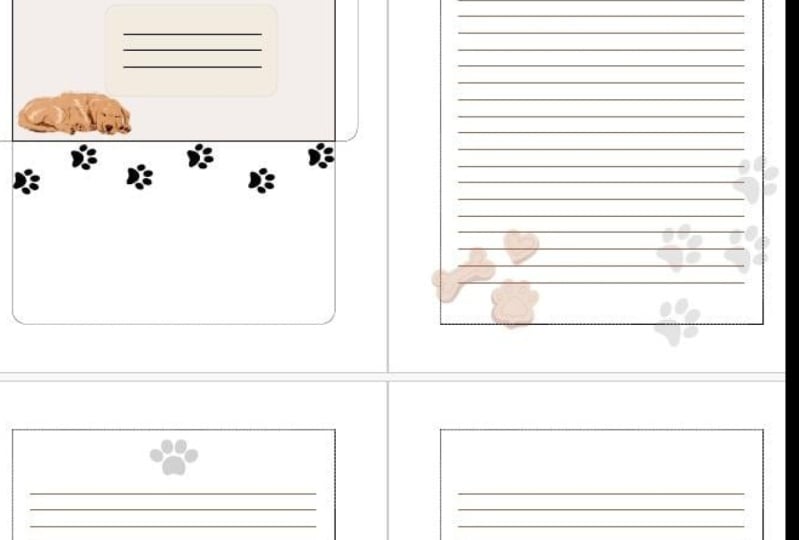
illustration here at the top. But I'll show you
a couple examples of some other pages I designed, and you can go wild with
what you want to include. Some different ideas
I've had would be to to a big image
in the background, but make it faded. You can do that using
the opacity tool to make it look sort of
subtle in the background. You could do an illustration in the corner and cut out
some of these lines. There's lots of
ways that you can decorate a note paper sheet. I'm going to go into elements. We'll go out of the shapes tab, and I searched for bunnies
before just through elements, but you can see that
I've recently used them. So I'll search for
them again. And we're going to go into graphics. You'll notice here that if you
haven't used Canva before, there are a lot of pro elements here with the little
crown on them. That just means that
you can only use them if you have a paid account, which is not necessary. But if you do, of course,
you can use them. I'm going to go into
the filter tool right here at the end
of the search bar. Click on that and
then click on free, and that'll only show you
items that are free to use. I found this little
bunny right here, which I think is very cute. I'm just going to make
it the same color as the lines using
this PC color. Make it a little smaller and just put it right at
the top of the page. And I think in this
case, actually, I would like to
have one less line so it had more room at the top. I'm going to group,
delete the top line. Regroup. I just give it a
little bit of breathing room. There. Get a little bigger. Perfect. So this is just a really simple kind of note paper that can go
with your envelope design. I like going a little
simpler on the paper just because I end up writing a
lot when I am writing things. So it ends up looking
quite busy with my text, but of course, have as
much fun as you want. A simple design
like this is also a little bit more ink
friendly for your printer. But depends on the
printer you have, I have an ps and co tank, which has a lot of ink in it, and I find the ink
very affordable, so I don't mind printing
full color pages. So this is your starting point
for designing a note page. But I'll show you a couple of other designs that I've made. I made this page, which is very similar but kind of
inverted colors. So in order to make this one, I just added a rectangle
over the whole design over the template and filled it in with a lighter
version of the pink. I didn't want to do super dark because I thought it might
be harder to write on. And then I just inverted the picture here to be
white rather than the pink. And I made the lines white and then increased
the thickness a little bit. These are actually three
point line weight. Just to make them a little
bit more visible on top of the colored background.
That's one option. I also did this variation, which is just a cute header, so you could definitely make a header or a
footer on the page. It takes up a bit more space, but I think it is
a very cute style. Here, I just used another
bunny graphic and added six of them just for
sort of a border effect. This is just a rectangle, and then this is
a scallop effect. I just search for
the word scallop in the elements library. And then I made the lines
a little bit darker, and I believe yeah, they're
line weight two as well. So they're just a little bolder. It's just a bit of
a boulder design. But I think all three, no matter which one
you do is very cute, and it's also kind fun to have variations within a collection, so you could use all of
them with your envelopes. Now that we've designed
some stationary paper, we can move on to decorating
our envelope to match it.
4. Designing Your Envelope: It's time to decorate our
envelope, so let's get started. There's a lot of ways that you can approach decorating this, and I'm going to start by just doing the same
thing I did before, which is locking all
of these items down. That's just going
to prevent them from sliding around too much. As I mentioned before, we have
the back flap at the top. We have the large rectangle in the middle,
that is the front, and we have the back cover back side of the envelope that
is upside down here. I'm not going to bother
decorating these two flaps on the side because this
is what basically gets glued down in the end. They're not super important unless you were
trying to do maybe a dark colored envelope and you didn't want a little
bit of it showing, in which case you could
fill this in as well. You can certainly start putting items on here and decorating
it however you like. Now, I did lock
it, but one option is to actually unlock it first. And to just use
some of these boxes to add the background color. By just reusing the boxes that are already
in the template, we're going to preserve
those rounded corners and not print any excess ink. So I'm just going
to click on this top one and duplicate it. I'm going to move
it to the front. So hit on position. Oh, it's already in the front,
so we're good. I'm going to line it up with the whole envelope actually and just drag it down there
so it covers all of it. And now I'm going to go to fill color up here in the top left. And I'm going to pick this
lighter pink color right here just because I
think it's a little bit easier to write and read on. And I'm also just
going to change the border color to the dark pink just so
I can still see it, but it blends a
little bit easier. So when I'm cutting, it's not necessarily going to
leave a black line. Now I will go in and
lock those elements. So that they don't slide around. But we can still see the line where the folds are going to be just by hovering over
the tabs on the side. I'll just give you
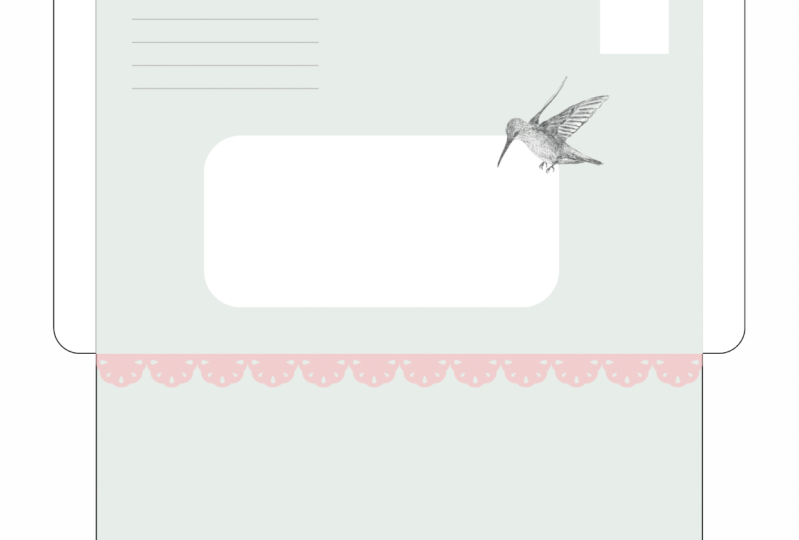
an idea of that. So now that we have
our pink envelope, let's first add
in a rectangle in the middle for where
we're going to write our two address. So I'm going to hit
R on the keyboard. We're going to make this box
white just for contrast. Of course, you're designing
this however you like, but I would suggest maybe leaving a white area for writing the address just so it's super legible for
the postal workers. And I'm going to go
into border style and round the
corners of this box. Now, I'm just going to
position it sort of in the middle and we'll make it a little bit more rectangular. And see it's locking onto the middle of the tabs
and the page as well. So I know that's a good
location for this. The stamp is going to
go in this top corner. Over here, I'm just
going to do a couple of lines for the from address. Same way we did
the lines before, I will tap L on the keyboard. I'm going to make
these lines white. And maybe we'll
change just to border with two just so they're
a little bit more bold. And then I'm going to relocate
it up in the top corner. So that's the line where
the fold is going to be. I'm going to bring it
down a little bit. Hold shift to make
it a bit shorter, and I will duplicate
that twice. There we go. Now we have three lines in the top left corner of
our front envelope. For writing our return address. That's basically it for the
necessities of an envelope. It is nice to decorate
a little bit. So I'm just going to use
some of the elements from the other pages that I showed you to make it a
little bit cuter. So I'm going to go
into elements and just find the ones
I used recently, so they're right
here at the top. I'm going to put one
of our little bunnies in the bottom corner
of the front. And I think I'll
make that a darker pink just for a bit of contrast. And on one of the example
interior pages I showed you, I used a scallop border,
and that's right here. So I'm just going
to put this right on the edge here where
the fold is going to be. This is actually going
to be the bottom of the back of the envelope, and I'm going to duplicate it, rotate it 180 degrees and
put it up here as well. So now it's going to
be on the top and bottom of the back of the
envelope when it's all sealed. Which I think will be very cute. Finally, I want to use this other bunny graphic that I had on one of the
other note pages. So I'm going to
add that here and I'm going to put it
along the back flap, so I'll rotate it 180 degrees because we are designing
these two parts upside down. I'll put it up here
in the middle, change it to white, and I'll duplicate it a couple of times to give it some friends. I'm just going to
hold down shift to grab all of them and
put them in the center. So that's my really simple
design for the envelope. When it's all folded, I think it's going
to look very cute. Even though this
section is quite empty, it's going to have this
tab over top of it, so I think it will
actually look a lot more cohesive when
it's all put together. If you are trying to save
on ink, then, of course, maybe just use a
white background and some colored elements. You can turn this box
into a line shape, give it a border
rather than making it white on a color if you wanted to make it stand
out a little bit. In order to print these
pages off of Canva, you just need to download
it to your computer or whatever device you're using. So we just go to share. Download, and then I'm going to download as a PDF where you
can do a PNG if you prefer. And just keep in mind
that when you are printing on your
computer, often, your printer will
scale the image down to maybe 97% of the page, but I like to make sure
that it's scaled at 100%, just to get the
stationary items to be the size that you actually
intended them to be. So I'm going to print off these, and then I'm going to
go over to my desk and show you how I cut them
out and assemble them, which is very straightforward, and then we're done our project.
5. Cutting and Glueing: I printed out two of the
sheets that I designed. This is the envelope
and here is the paper. I already trimmed the paper
down to size just using a paper cutter and I follow the dotted
lines around the edge. You can also use
scissors if you want. This is pretty straightforward, so I'm not going to go
over how to cut the paper. But we are going to go over just assembling the
envelope very quickly. Now, I did print these on a
little bit heavier paper. This is on 28 pound
printer paper. It's just a little bit more substantial than
regular printer paper, which is usually 20 pounds. Of course, you can
use regular paper, especially for the
writing paper. But for the envelope, you may want to use something
a little bit heavier, but you don't have
to use a card stock or anything if you
don't want to. I think a heavier printer paper is a nice touch
if you wanted to. The tools I'm going
to use for this are just a little pair of scissors.
This is a bone folder. It's used for bookmaking
and it's just for making creases really and
also a little glue stick. Okay. The first step, I'm just going to cut out along the edges of our envelope. Now that the envelope
is all cut out, we just have to start folding
along these four creases. Then we just glue
down the two tabs and ready to put
our paper inside. I'm just going to fold it over. I'm just doing my best to
fold right along that line. And same with the top flap. Okay. If you are going to design your own
template for the envelope. You just want to make
sure at this point that the top flap covers the inner flap so that the
envelope will actually seal. Then we'll just fold in the two tabs that we're
going to glue. And this is where I like to use the bone folder just to
really crease down this edge. You could also use just your
fingernail or you could use a old gift card or some sort of plastic card can be helpful. Okay. Okay. I haven't glued it
yet, but that's what our envelope
is looking like, which looks really cute in my opinion. There's
our little flap. All that's left to do is
just put some glue down. You'll see that these two little top pieces do come
up a little bit, so I'm not going to put
glue on the entire strip, just the part that
covers the back tab. I'll just put on some
glue stick here. You're welcome to use tape or you could even
staple it or use a liquid glue if that
feels a little bit more secure to you.
It's whatever you like. Okay. I'm just going to let that dry a little bit
before really testing it, but that's basically it. And when you are
done and have put your envelope or your
letter inside the envelope, you can again use the glue stick to seal it or you can use tape or stickers or whatever
else works for you. Now just to show you I will put the piece
of paper inside. So you just want to
always make sure that it's going to fit. So I'm going to have to
fold it more than twice. There's my little letter,
pop it inside the envelope. And we're done. I think that
turned out pretty cute. And I from folding, you see, I have a little bit of extra
paper just on this edge. I'm just going to grab my
scissors and clean that up. There we go. Looks perfect. So you can write
your return address, your sending address and put your stamp on and
you're good to go. You could actually
just mail this.
6. Class Project: Now that we're all finished, I hope that you are happy with your final project and you
created something really cute. I think there's a ton of versatility to this
little project, so you can create a
ton of stationary, whether it's all color
coordinated like this or mix and match set.
It's totally up to you. As a class project, obviously, I would love you
to make this, and I would love to see the result, especially if you did something
a little bit different or maybe did something
I haven't thought of in terms of the
design and technique. So if you don't mind
taking a picture of your finished project and
showing it to the class, you can upload the picture
to the project area, then I would be
thrilled to see it, and I'm sure your
classmates would, too. Now, just before we wrap up, if you did enjoy
learning with me, I do have lots of other classes that you
can take a look at. Some are graphic design, some are more business oriented, but there's probably
something for just about everybody in there. And if you did enjoy this
class or have any feedback, I would love it if
you left me review. I read them all and
really appreciate it, and they're also
really helpful for other students if they want
to decide to take my classes. Finally, you can also
find me on YouTube. If you want to see
more content from me, that's maybe a little
less class oriented, but hanging out, working
on my art business. I will put the
link on the screen for that if you are interested. Finally, if you
have any questions about this project or
anything related to it, just leave it in the
discussion for the class, and I'll be happy
to chime in there. So that's everything. Hope you
had fun with this project. Looking forward to seeing
what you did with it, and good luck with your
creative pursuits.
 Rebecca Wilson, Artist