Transcripts
1. Introduction: If you're interested in getting into book
binding and want to try a pretty fun graphic design project at the same time, then this is the
project for you. In this class, we
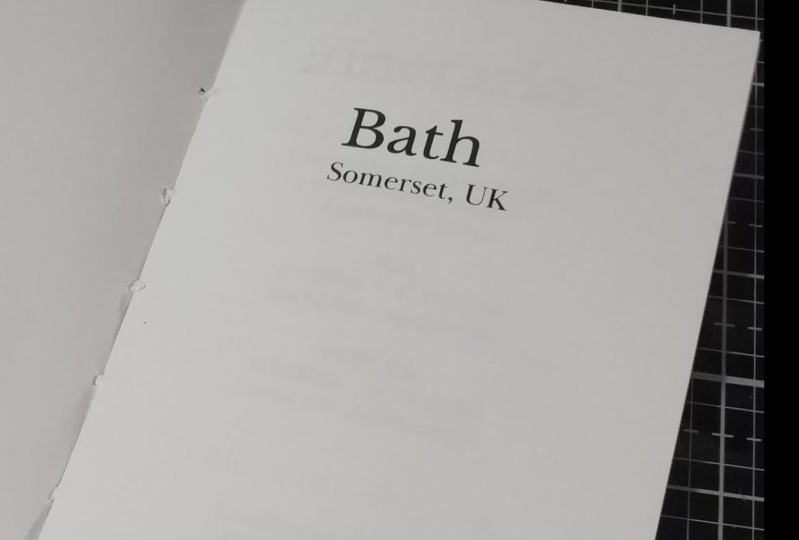
are going to be making a travel journal. This is basically a
small booklet that is custom designed with all sorts of pages just for your trip. That is easy to
slide into a bag, not heavy or bulky at all, and also extremely adorable. We're going to be
covering a lot of really basic book binding
techniques today, including how to
organize your pages, how to design them in Canva, how to print them, and
also how to do a couple of very simple book binding
techniques to secure the spine. We're not using a lot of
fancy materials today. We're using a free
Canva account, a printer, some different
printer papers, mainly just interior pages and then a piece of card
stock for the cover, a needle and thread, and just some other
household supplies. I'm starting this project as a travel journal because I
think it's a very cute idea, but you can follow
along and make this into whatever kind of
little booklet you like. It's a fun project. It won't take you very long
to complete it, and there is a huge amount
of room for creativity here. My name is Rebecca. I'll be your instructor
for this project. I am an artist, a
graphic designer and also a travel enthusiast. So this is why I
came with this idea. But I've been working
with Canada for years and teaching classes on
how to make cool projects. So I hope this one
catches your eye. If you're ready to get started, then let's head into the first
lesson together and start making our very cute
personalized travel journal.
2. Conceptualizing Your Design: Creating a travel journal using these methods is a lot like any other small book
binding project. We're going to be creating
the interior pages in Canva, as well as the cover, but the interior
pages are a little bit more technical
because we need to make sure that they appear
in the right order once we print and fold
them into our booklet. In order to do this, the
best way, in my opinion, is to make a small
mock up of the book, which is what we're
going to do next. That way we can take apart
the mock up and make sure that every page in
our canva file lines up with the way that they
need to print in order to make the booklet with the
pages in the right order. So to start our project, all you're going to need is
a scrap piece of paper. I'm just going to
take one out of my recycling bin
and cut it up and use a pencil and a stapler and some scissors and just
make a little mock up book. So let's do that first. In
terms of how we're going to be organizing this book or
conceptualizing this project. I'm dividing it into
groups of four. We're doing it on a
sheet of printer paper. When you fold it
in half, you get four little booklet pages, basically, two on each side
of the sheet of paper. So we're going to be
using four sheets of paper total in the inside, AKA, 16 pages of content
for our booklet. I'm dividing these up
into groups of four. The first four pages are going
to be front matter pages. That's going to be a
page with our itinerary, one with accommodation info, one with daily itinerary, more just like what we're doing
each day attraction wise, and then another page with important information
or resources. The next four and the
next four after that, so eight pages are going to
be our daily journal pages. And that's because the trip that I'm planning is eight days long. Finally, I'm including
four pages at the back, which are going to be blank
for gluing in souvenirs, like train tickets, receipts,
anything like that. So I want to leave
a little bit of extra space for that at
the back of the booklet. We're going to be designing
all of these pages together, but you'll see once I do
the small mock up booklet, how this is going to
work when we start to deconstruct the booklet into individual pages and sections. For your project, you can do
whatever kind of pages you want inside by no means you have to be constrained
by what I'm doing, but this is just the example that I'm going to
do for the class. With that being said,
let's take a look. I'm going to switch into
an overhead filming view, and we'll take a look at the small mock up and
how that works.
3. Making a Mockup Book: So this is how we're going to make our little mockup book. I have taken some
scrap paper and just cut it down into these
rectangles which are roughly landscape size so that when I
fold them in half, that's a realistic portrayal of a piece of printer
paper folded in half. Now each one of
these pages is going to be four pages in our booklet. We have one two, three, four. That's why it's
good to be able to divide all of the pages
in your booklet by four. It's easy to make it on
these printer sheets. I am picking up the right
number of sheets to go with the amount of content I want to put in
my little booklet. If I'm doing overall 16 pages, that means that divided by four, I need four little
sheets of paper. You can take these and
fold them up and that basically makes your
little mock up. It doesn't have to be pretty. It's just for getting
the page order right. You can either just
keep this folded and work it with it like this
or you can staple it, which is what I
did for my little demo booklet right here. This is the demo. I just stapled it and I will take
it apart after. Now note this doesn't include
the cover of the book. This is just the interior. We can worry about
the cover later. I've gone through and
labeled the pages in order, so we see one, two, three, four, five, et. Then I've written on
them what information or what content I want
to be on each page. We start off with our trip info and itinerary, then
accommodations, daily itinerary, important info, and then we get into the
daily journal pages, and I've numbered
them one through eight DJ for daily journal. And then we get to
souvenir pages. We have one, two,
three, and four. Again, it's okay to use the back in the front
because this is all going to be inside the
cover, which is separate. Now that this is done, if
you didn't use staples, you can just pull it
apart, but if you have, then you just want to
pull the staples apart. Now we can take these apart and understand what we
need to design in Canva. So now that they're numbered,
I'm just going to find them one with number one on
it and go in this order. My very first page of my Canva
document is going to have this is going to have page
16 and page one on it. Then I will show you I use a guide to
indicate the middle. Then the second page will
be the back half of this, which is page two and page 15. And so on and so forth, we will set this up in Canva
together, so you'll see, but doing this little
mock up helps you get a lot of clarity as to
what goes on each page, and also what should
be on the front and back of each page. When you're printing,
this is also helpful, just to make sure
that you are getting the right content
on the right side of each piece of paper. Are pieces of software out
there that can do this for you like professional
book design software. But we're just using Canva, which doesn't have that feature. That's why we have to do
it manually like this. But it's fun to do it when
it's just a small project with four pages or I guess eight pages if you
count the double sides. But it can be a little bit more complex if you do
a larger booklet. With our little mock ups made, I'm going to hop into Canva and start setting
up our document.
4. Setting Up in Canva: I've opened up Canva here, and as I've mentioned,
you only need a free Canva account
to do this project. We're just going to go to create a design up here
in the top corner. It look for the purple button. Sometimes I find
they move it around this home page, used to
be in the other corner. Now you can go to custom size, and we're going to do this
in inches just to make sure that we're working on a standard
piece of printer paper. The standard size printer
paper in the US and North America in
general is 8.5 by 11 ". That may be slightly different if you're in a different
part of the world, but whatever works for your
printer is perfect here. So I'm going to do it, so we're working on a landscape
orientation. So we're going to do 11
" wide by 8.5 " high. I'll click on Create New Design. And here's our
document. So we're basically going to be working on this as if we've got the
booklet open in front of us. So the first thing I'm going
to do is add a guideline, so I know where the
middle of the booklet is. As you can see here, I have the rulers on on the top side. You can turn this feature
on if you don't see it just by going to file settings, show rulers and guides. And so I have it checked
off here, so we see it. And when you have
this ruler turned on, you can go to I'm hovering
over the ruler on the left hand side right now and click and drag this purple line, which you can leave
on your design. The auto snapped when
it's pink to the center. And it's just going
to stay there, but it's not going to show up in your final project when
you export it or print it. It's just there for
design purposes. That's really helpful
in my opinion, to make sure that we know where the middle of the page is. Now, in this lesson, we're just going to be
setting up this page with some page numbers to
understand what's going where, and then in the
subsequent lessons, we will actually
design the content. I'm going to go into Grid view, which is down here in
the bottom right corner. I'm just going to
make the number of pages equal to the booklet. We're going to have eight
pages total for this project. Now we have eight, and I'm just going to go through
each one of them and put on the page numbers in the bottom corner or
the bottom middle just so that I know
which goes where. You can certainly print
it with page numbers or you can remove them when
you're done designing. So I will tap t for a text box, and I'm going to put just one. It's kind of hard to see, but
it's just the number one. And I'm just going
to put it in the bottom corner right there. I'm going to
duplicate it and put it in the other corner as well. And we know from looking
at our little mock up, which I have here.
Oh, I got it wrong. One goes in this
corner right here, so we have that, and
then this corner is 16. So we're actually looking
at this page right here is the first one in our booklet, and this
is the last one. Then we're going to scroll
down to the next page, you're going to copy
this little number here, I'll duplicate it
and take us with us. And this page, which is the
backside of that same one, should be 15 in this corner
and two in this corner. So that's it for the
first two pages. So this is why it's a little bit of a spatial
relations project, if that's something
that you struggle with, because I certainly do,
then it's really helpful to have the mock up in your hand where you
can look and go, This is the back of this one. It should be page two
and then page 15. So I'm going to go through
and add the numbers to all the other pages
in the correct order. Okay. Okay. So now we have all of our pages numbered
in the right order. So we know what to design in which quadrant or which
half of each page. And I've also reassembled my little MCA book in the
right order so that I can reference what content goes on each page based on my
little notes on each one. So in the next lesson,
we'll get started with just putting some information
on these front four pages, and then we'll go
through the different sections and design
them together.
5. Designing Your Front Matter: We're going to get
started by designing the first four
pages of our book. Now, these can have
whatever information you prefer for your project. I feel free to do whatever
you like in here. I'm just going to put
in some information that is relevant to my trip. Again, to kind of make it a reference document
when I'm traveling, but also to make it kind of
a souvenir after the fact. Page one right here is what
we're going to start with, and this is going to have
trip info and itinerary. Now, I'm just going to put
in some placeholder stuff. I am actually going on this
trip, so I have some ideas, but I'm just going to put in some text just for
our project purposes. And I'm going to start off with just the name of the trip. Let's just say London 2024
is the name of our trip. And we can choose a nice
font that we like here. I like this Baskerville font.
It's one of my favorites. I'm just going to
use that. It's also a free canva font to
use if you like it too. So we're just going
to do this sort of like the first
page of a book, and I'm going to just experiment with
different font sizes. Size 12, if you need to
know for reference is sort of typical
written on paper size. You can go down to ten if
you want a little smaller, more like a book size. So that's just a good point of reference for your
body text in here. So I'm just going to put in some information about
this theoretical trip. Okay, so this is what I have
done with my front page. I didn't make it
really fancy and by all means, you
completely can. You can add in pictures, you can add in little elements from the Cava Elements library, clip art, graphics, color,
whatever you feel like. But I'm just doing bare bones just to get through the project. This is what I've
put. I put itinerary and then wrote down the
details of departing, arriving, staying,
returning home. Then I put travel companions and I just made up two friends. I'm going with my family, but this could be with two friends. Then I put the
occasion and said, my annual birthday holiday, which is indeed what
I'm traveling for soon. Now, when it comes to
fonts and decorating, if you've taken any
of my other classes, you may have heard
me say this before, but I really like to
keep it very simple by sticking with one single
font for a project. Maybe two at most, but I find font pairings
can be a little bit tricky. I usually recommend
that you stick with one font but experiment with the different features
the font can do. As you can see here, I have done italics for the
headings for these, but it's still just
using the same font. Another feature I like to use is the uppercase
to make things in all caps and also
the spacing tool to change the letter spacing. It just adds a
different dimension. It can make things look
more like a heading without actually using a
different font or even changing the
size necessarily. So I think we will leave
this just like that, and that will be our first
page in our booklet. Now we'll move down to page two, which is right over here. And page two, according to our little mockup is our
accommodations information. So you're welcome to just
start from wherever, but I usually like to
just take the text from the first page copy and paste
it as a starting point, so I'm not making
everything from scratch. So put it about there. And then we'll say
accommodations. And here you can write down, I think I spelled that wrong. I did. And here you can put down information
of where you're staying, check in and checkout times, anything that's going
to be really relevant. You can pull this off of
your AirBNB information or your booking or
wherever else you might have relevant
travel information. So the stuff that
I've put in here, I have the name of
our fake hotel, an address and phone number, which is very useful to have. Check in and checkout times, the name of the room
that I've booked, a booking reference number, and then directions how to
get there from the airport. Very easy, very classical
so I feel like this design is looking like a
little pamphlet that you would receive
at a fancy hotel. So that's going to be page two. Again, make it way prettier
or fancier if you prefer. Page three is going to
be daily itinerary. So again, I'm going to copy this and find page three right here. And daily itinerary in my mind, is just a list of things that I think I'm going to
do on each day. So this can be very detailed, if you like, or it
can be very simple. I know that I like to plan roughly what I'm doing each
day when I'm traveling, but I don't get very specific. So I think I'm just
going to do maybe a sight seeing or an attraction
I want to hit each day, and we'll go from there. So I just made up a bunch
of things that I could do. Luckily, I've been to
London a bunch so I can reference what are some
nice things to do. And I'm just going to go
in and italicize the days just to give it a little bit of a distinction from
the rest of the text. And there's our daily
itinerary page. Now, the last page ends our sort of front
matter of the book, according to my little sample,
is important information. So again, I will just scroll
down and find page four, paste in our placeholder. Let's call it reference. So I'm thinking that this is
going to be information like a contact that you
know if you have any friends or people
you know in the area. It could be the phone
number for the embassy for your country if you are
traveling somewhere that you might want to know
that case of an emergency. Because this
reference information will be really
specific to you and also maybe it would include directions to things or
stops you want to make. I'm just going to make a list
of things that could be, and you can fill in
the blanks with that. So I will say phone numbers
and emergency contacts. Embassy information. Credit card and
banking phone numbers. This is in case
you happen to lose your card or have an issue
with your card overseas. It's really good to have
that number written down. International phone plan info. So if you have gotten a plan or a SIM card and you
want to remember, like, what's your
international phone number, or who's your provider for that, you can put that
information there. And you can also put any little country
specific reminders for things like the visa process or customs when you're
at the airport, how to use the public
transit system, anything specific to your trip. If you're a big planner like me, which if you're making a project like this, I imagine
you might be. There's lots of little things
you might want to remember. So I'll just leave this page
as a bit of a placeholder, but you can put
anything you like here that is relevant
for your trip. So that is basically it for the front matter of
our little journal. So we have four pages designed. And in the next lesson, we are going to make a template
for our daily journaling that we can just copy and paste into all eight of the days.
6. Designing Your Journaling Pages: We have sorted out
the front matter, and now it's time to start creating our little
journal templates. So that's going to
start on page five, which I'm going to scroll
to, which is right here. Now, in terms of how you like to do your
daily journaling, this is a very personal
thing, I think. So some people will
prefer just to have lined pages with no
prompts or no structure, which is completely fine. In which case, I would recommend just using the line tool, tapping L on the keyboard
to make your line. I would change it to
a line weight one, so it's very nice and thin. Extend it to the
size of the page. Write about there, and then
just start duplicating it down the page to
create your line text. And you can do this and
just copy and paste it to the different pages
and just have a little lined
journal for yourself. This is also just another kind
of page you could add too, if you do prefer to do the more template style journaling, which is what I'm going
to be designing next. So lines are very simple, so you could certainly
do that for your option. Okay. But I'm going to be using boxes to fill in because I know that
when I'm traveling, even though I love
journaling and love writing, I'm very tired at the
end of every day. So the idea of just filling in almost like a form to report how my travel day was is actually more appealing for travel
journaling for me. So that is what we're
going to be doing. I'm going to create
a couple of boxes, and we're going to use the
rectangle tool for this. I'm going to tap R on my
keyboard to give us a rectangle. I'm going to make
it transparent. I'm going to go to color here
and then click on no color. We're going to go
to border style, right beside that, and change
it to border weight one. Border weight one. And you can do corner
rounding if you prefer, but I'm just going
to leave it as is. So that gives us just
a rectangle here, and we're going to
make this a couple of different sizes and shapes
to put our content inside. So first, I'm going to make
it the very top section, which I like to do the date, the weather and the
location at the top. So I will make this box a
little narrower for writing in. And let's do two side
by side right here. Oops. There. I'll put some text prompts on
them momentarily. Let's put a radio there. I'm going to add
another one right below it, make it full width. So that's going to be our
starting heading section for each journal entry. I'm going to add
in some text now, so hitting T on the keyboard and we will go with our font that we're using
for this project. I'm also going to make
this font quite small. I'm going to go
down to size eight just because this is meant to be labeling sections,
so I'll zoom in. So we're just going to I'm
going to put the date. Okay. Here. I'll put that
in the corner. And then I will
duplicate it and put weather because I do like to remember whether it was
sunny or warm or cloudy, whatever weather it's happening. And I'll put another
box down below, and this will put location. And location when I'm
filling this out, sometimes I'll just
put, you know, London, but also I could put
from my hotel bed at the London Hotel or this coffee shop on
this street in London. So it's kind of fun
to just remember where I was sitting
when I filled this out. So we'll zoom out again. And I'm basically going to make a big section and then two
smaller boxes down below. So we can just repurpose
this little box right here. Make it about that big. And then I will repurpose this one. Put it
right down there. I'm just using the
guides on Canva, which like to snap
to the right size, which is very helpful when I'm designing little templates
like that. There we go. I'm going to go again
and label these ones. You can call them
whatever you like. So my preference is to have this bigger section just be a bullet point list of
things I did that day. I'm going to call
it today's events. Min it up. Then down below. I'm going to do high points
and low points or maybe we'll we'll do it British
and go best bits. And then we'll do
the worst bits. And hopefully, there's not many, but there's always
something that kind of goes wrong when traveling. And I don't know. It's
even nice to remember those parts because it just reminds you that
you're very resilient. Worst bits. And if there's no worst bits, you can write nothing with a happy face right in this box. So that's it for our
daily journaling section. I think it's very simple
but very effective. And like I said, I
prefer when I'm very tired to just make a bullet point list of all
the things I saw, highlight and a low light, and that's enough
for me to remember. So I want to do this for
eight days, as I mentioned. I'm going to highlight
all of this and copy it with Command
C on my keyboard. And according to
my little mock up, we are going to be doing well, I guess, just the next
eight pages of this. So I'm going to go
through and paste this. Easy. If I had been really
thinking that through, I probably could have
done it a lot faster, but bear with me. Again, spatial relations, I
need to do it step by step. Okay. So that's it for
the journaling section. And as I mentioned, I want
the last four pages to just be a bit of a
placeholder for souvenirs. So I'm not even going to
design anything fancy here. I'm just going to
leave the page number, and I'm just going to add
a heading to each one. So we'll copy this, and I'm just going to make a
little bit smaller. Just going to write souvenirs. And then let's put it at the
top, roughly in the middle. And we'll just do that for
the rest of the blank pages. There we go. So now
that we have all of our interior pages designed and figured out and they're oriented
the way they should be. I'm going to add one
extra page at the end, which is going to be
our cover design, which we will cover in
the next lesson. Okay.
7. Designing Your Cover: In this lesson, we
are going to design our cover for our little
travel journal booklet. So I'm doing this in
the same document as the other pages because it's
going to be the same size. So I just tacked it
on here at the end. Now, in terms of designing
this, obviously, we're going to have the front cover on
the right hand side, the back cover on the left. I'm not going to do an
interior print for the cover because I just don't feel like it's necessary
for this project, but if you had something you
wanted on the inside cover, you would just do that on a
second page right after this. Now, as I'm going
to show you when we do the printing
steps together, I'm going to be
using a different kind of paper for the cover. I'm going to use a thicker one. So I'm just going
to keep in mind whatever printing restrictions I have based on the
printer I'm using. Not all printers can do
edge to edge printing, but some can, so just
check if yours can. And if it can, then
you can design your picture or your cover
right to the edge of the page. But as it is, I'm just going to do something a little
bit more ink friendly. That's maybe just
more of a white background with some
graphics on it, but by all means, be as
creative as you like here. So I'm going to start with that text box so I can
preserve our font, and I'm going to do just the
title of our book booklet. London 2024. I'm going to make
it a little bit bigger. Roughly center it. And I'm going to
put travel journal. Make this a lot smaller. So bare bones. Here we go. That's all you really
need, I guess. But I'm not going
to bother putting my name on it because it's
not like a book from me, but you could put
your own name on it. I think I'm just going to go into the Elements library and find some London themed clip art that I'm
going to put on here, and I think that'll just
be cute for this project. So we're going to
go into elements, and I'm going to type in London. I'm going to go to graphics
and lots to choose from here. But as you may see, a
lot of these items have a little crown indicating
they are pro elements. Now, I do have a pro account, so I could use
these in my project because it's just a
personal project, so you can use the P elements,
however you like for that. But if you don't
have a pro account, you certainly don't need one. You can just go into
these little filters right here at the end
of the search bar. Click on free. And that will filter out
anything that is paved. So you can see there's lots and lots of fun London elements. Of course, you may be searching for a different
city, of course. I think what I'm going
to do is just like a collage style just
out of a couple of different little
graphics that I like. I'm going to use color graphics because I have lots of
color ink in my printer, but I'm just going
to select a few that I think are cute up front. All right, I just chose
a bunch of these. I think they're all
by the same designer, and they look almost
like stamps or stickers, and I think they're
very charming. So I'm just going to scatter
them around my design. And resize them just to look a little bit like I don't know, like a passport booklet. It's got a cute travel vibe. Okay, so I've made
my little collage. I think this is
actually very cute. I think the only
thing I'm missing is I'd like to put a box behind this text just so that
it looks a little bit more substantial like the
rest of the elements. So I'm going to use a rectangle, and I will just resize it
to fit behind the text. And I think I'll
change the color. Maybe we'll do something. Yeah, actually, that light
blue looks really cute. And let's add a border to it. And I'll make the border. I actually want to
make it the blue that's in this text England. So I'm going to use
the dropper tool, add new color, pick a
color from the design. Let's use that color
right there. Ooh. Color is the wrong thing. Okay. I think this is cute. So this is going to be our
cover for our little notebook. As I said, make it
however you like. I think that doing a collage style for this type
of project is really cute. If you wanted to make the
background full color, you just click on the back
and then pick a color for it, so you could do it full color, which I think is
also very lovely. Just for the sake
of conserving ink. I'm going to do it white. But it's up to you
and your printer. Now that we have our whole
little project design, I'm going to export
this as a PDF. So that'll be share download, and I'm just going
to select PDF. When you do select PDF print, it basically the
difference is it gives you the option to change
the color profile, which is RGB or CMYK. But you can only click CMYK
if you have a Pro account. However, I don't think that's a big deal because I don't think Canvas conversion process
for colors is very good. So I let my printer
do it instead. So I will just download as
RGB and download the PDF. And then we'll print
it from there. In the next lesson, we will
talk a little bit just about printing and paper
choices for this project, and we'll get it all ready to start doing the binding
steps afterwards.
8. Printing Tips: What we're looking at here is the downloaded PDF
from our projects. I just have this open on my desktop so that we
can print from here. When I do the print window, we can see all the
different pages here. I'm just going to talk to you about how I'm printing this. I don't have a printer
that automatically does two sided printing. If you do, by all means, you can just use that feature. I would just leave
off the cover, so don't select that page and then just double sided
print all your pages. However, I have to
do it manually. That's not very
difficult. Just means I'm going to be printing
one page at a time. First, I'm just
going to do range. We're just doing one to one,
we're printing page one. In terms of the other
settings, again, your print window
might look different based on your printer
or your computer. The things that I'm going to be looking for first are scale. Automatically my printer will just scale it to fit the page, but I want it to be 100% because we designed
it to be 100%. We designed it on an 8.5 by 11. That's just going to make
sure that everything lines up the way I wanted to. Next, I go down to printer
options and print settings, and I like to pick plain paper, but I go to the highest quality. That just means that
everything's really crisp. For anything that I'm doing that's a publishing
quality thing, I like to do high quality. And in terms of what
paper I'm using for this, I'm actually using a 28
pound printer paper. Typical printer paper is
about 20 pound paper. It's just a little bit thinner, and this one is just a little bit more of a premium paper. I prefer it for
actually writing on and doing little book
binding projects, but by all means, use whatever
printer paper you have, or you could use colored paper. You can get very
creative with it. But I would just say
for the interior pages, I don't use a card stock
or anything like that. I'll just use a regular paper. So I'm going to print this. Then I'm going to go and put the same sheet
back in the printer, but flipped and print
page two on that. And I will do that back
and forth for each of our eight interior pages, which is a little tedious, but actually isn't
very hard at all. Just takes a little bit of time. And then I will print
our cover page after. The cover page, I'm going to
print on a heavier paper. But any kind of cardstock or heavier paper would be great. Or of course, you could just use your regular printer
paper as well. There's no reason you can't. It's just It'll be a
little bit more durable if you can use a heavier
paper, but no pressure. Okay. So I will print all of these just in the
way that I described here. And then in the next lesson, I will sit down and flip the overhead camera
and we'll look at folding and book
binding options.
9. Bookbinding Techniques: Here are the printed
pages for our project. This is the cover
as it printed out, which I think looks quite nice. We're just going to
set that aside for a second and here are all
the interior pages. As you can see,
they printed out, that's how it's going to look. Now all we have to do
is fold and bind it. The first step is just to
fold all of these in half. That's why we designed
the full scale of the page. We don't
have to trim them. So in order to do that, I'm just going to be
using my bone folder, which is a book binding
tool that is basically just a hard edge that
lets us do crisp folds. You could also use
your fingernail. You can use an old credit
card or gift card, something rigid to
help make those folds. I'm just going to
do that one by one, and then I will fold the cover and then we'll talk about
some options for binding. Okay. Now we have our
little booklet folded. As you may see that some of the pages are sticking out here, that's pretty normal when
you're folding a signature. That's basically what a section of paper like this is called. You could leave it as is, or you could use a
paper cutter and trim off that
couple millimeters. It's just more about an
aesthetic preference. I'm probably going to leave
it for this little booklet. Let's just talk about the
different binding options. Binding is just how
we're going to secure this side so that when it opens up, it doesn't fall apart. Now, a couple of common
methods for doing that is either to staple it or to sew it for a
booklet of this size. You're going to staple
it, you may find that a regular stapler can't actually get all the
way to the middle here, in which case, you
would want to use something called a
long arm stapler. I actually have one of those. This is what it looks
like. This is one I have. It looks like that's
like a stapler with a long arm, quite
literally what it is. You can actually fit
paper all the way up until here to staple
it way over there. That is one option
and I would just do two staples on a
booklet like this. That's pretty quick and easy. But stapling can be a
little bit imprecise, but that's just one method. If you don't have that,
but you have other tools, another option is to sew it. That's what
we're going to do. There's a couple of different
ways you can sew it. Now, this is just a very
simple book binding, so we're just going to do
something really easy. And I'm going to
be using this tool right here, which
is called an all. It's basically just a
pointy metal stick. You can use it for sewing
or for book binding, and it's basically going to
poke a hole that we can then thread string or thread or
something else through. Because of the size of
this, you don't have to do very complicated binding, but you can basically do as
many holes along here as you like in order to
bind your project. What I'm going to
do is two, one, two holes in the side here, and then just wrap my
string through it a few times and non it and
that's a very simple binding. Other option is to do many
stitches down the side. You could either do that
on a sewing machine or you could do it by hand. This is an example of
what that looks like. This is just another
little journal I made. It may be a little bit hard
to see, so I apologize, but there are holes every centimeter all the
way down this. Then I just sewed it with a stitch going back and
forth by hand and tied off the knot on the inside of the signature right
in the middle down here. That's another
method that is even more secure that has
a lot of stitches. Those are three methods
that you could use to bind this particular project. Like I said, I'm going to
keep things a little bit simpler and I'm just going
to do two holes on this one. And I'm going to get
started punching the holes in it just
on the interior pages, and I'll use that
as the guide I use for the cover when
it's ink is dry. I'm just going to fold this open to the middle of the pages. And now we have
the helpful crease down the middle to show
us where the center is. Now I'm going to use
my ruler and just figure out where I
want the holes to be. I think I want them
to be here and here, but I'm not doing it
super mathematically, so we don't have to
worry about it too much. Is it just for personal use. I think I'm going to do it at
2 " and 2 " from each end. You may want to mark
this with a pencil, but I'm just going
to go in with the all right on the crease
and make the indent. The thickness of your
paper and the number of pages will indicate how difficult it is to
punch through here. Don't be hard on
yourself if it takes a little bit of practice to
get this to be really clean. I do have a mat underneath right now that
is like a cutting mat, so it is going to
absorb the impact of this little pokey hole two one, two, right there as well. When I take away the ruler, I've now punch some
holes that you can see hopefully there and right there for my needle and
thread to go through. Pre punching the holes with this all is just going to make it a lot easier to thread
your needle through. However, you could also use
a very small hole punch. You could use a
pencil or a pen to poke it through if you don't have too many
sheets of paper. You could also use the needle for sewing
itself if you have a thimble or something else to protect your
fingers while poking. You don't necessarily need
this specific pokey tool. It is obviously very specific, but it does make the
job easier if you like this hobby or trying
to do a lot of them. Okay. I actually
reprinted this on paper that's a little less
prone to bleeding. Now we have this nice
cardstock cover. We will start just by
folding it in half like we did for the inner
pieces of the book. This card stock is where this bone folder is
really helpful because it is a little stiffer than
just regular paper decrease. Here we go. Now we have our
very cute little cover, ready to go, here's the inside. Just a little preview of
what it'll look like. Like I mentioned here, we have
those pages sticking out. Again, you can trim them
if they bother you. I'm just going to
keep these lined up, open them up and just
punch through these holes again just to get the hole in the cover card stock as well. Okay. Now we have the two
holes all the way through. As I said, if you were going to be doing multiple stitches, you can punch more holes
as you through here. It just depends on
the style that you're looking for for your
little booklet. Now, I'm going to use a
needle and thread for this. I'm using this really high
contrast burgundy thread just so it's very
easy for you to see, but you could use a white thread if you want it to
be more invisible. This is a thicker weight thread. This is more of an
upholstery thread actually. It is a lot thicker
than just the regular kind you'd
use for sewing. But you could you can make these holes a little bit bigger.
You could use a ribbon. You could use twin. You could use any
string honestly. You can get really
creative with it. I'm just going
tothread this needle and we are going to
begin our book binding. I'm going to just punch through the hole that
we made right up here. It goes through there,
comes at the other side. I'm just going to be careful not to pull it all
the way through. I'm going to leave a tail
there as much as I can. Tail than that. Then on this side, we're
going to do the same, try and find that hole
that we made before, just like that, and
pull it through. You can tie it off
like this, but I'm going to do a double loop. Just put it through the same
holes again one more time. Just to give it a little
bit of extra reinforcement. Okay. There we go. Now I'm going to
pull the two ends taut and then they will
meet in the middle. I can take the needle away now. We're just going to do a
knot here in the middle. I'm just doing a
regular double knot. It doesn't have to
be anything fancy. Maybe tie it three times
so it stays super secure. There are lots of
different kinds of knots you can do
in book binding, but they don't have to get super complicated if you don't want it to. There we go. We'll do one extra loop just
to be sure. There we go. Now we can just trim the excess. And that's it for
our binding as as. That's it for our
little travel booklet. You can see that now
it is perfectly bound, nice and secure, and the pages are in the
order that we intended. As you can see, this
is the size 12 font, so it is quite a large font, but it is still a
paper printing size. But you can go down to a
size ten if you prefer to be a bit more like a
novel font size. This is the size eight
font just for comparison. We have all these sections. And at the back, we have our souvenir pages for
taping in little souvenirs. That's it. That's our
project. I hope you liked it. In the last lesson, we're just going to chat
about wrapping this class up and some things I'd like to see for
our class project. Okay.
10. Class Project Instructions: Well, thank you so
much for sticking around with me to the
end of this project. I hope that you've
had some success in making something really
cute for yourself. Now, for a class
project, I think, obviously, I'd like to
see what you've done. So if you don't mind sharing, take a picture of
your finished project and upload it to the class so that I can take a look and your fellow students can
be inspired as well. I'd be really excited
to see what you create as a result
of our guide today. I'm very excited to be
using this on my trip. I have to go make some
more custom pages for my actual trip details, but I'm thrilled about this because I always
travel with a journal, and I always feel like, why is my bag so heavy and it's Oh, there's a hard cover
journal in here. So this is going to save me
a lot of weight in my bag. And also, it's going to make a wonderful souvenir for once the trip is done because it's only as long as it needs to be. It has space for the extras, and it can sit on my shelf, not take up too much room, and I can hopefully build a collection of these as
I continue traveling. I think it's a really
fun idea for a hobby as well to make these sort of
little adventure journals. So if you enjoy
learning with me today, I have lots of other
classes you could check out in the realm
of graphic design, creativity, entrepreneurship,
lots of things. I teach lots of things
that you might enjoy. I also have a YouTube
channel where I do content about
my art business, studio blogs, all sorts of fun things there that are
a little less instructive. So you can check
that out as well. I'll put the link
here on the screen. And before you leave this
class, first of all, if you have any questions, please leave them in
the class discussion. Happy to answer them.
We can chat down there. If you want to leave a
review for this class, I would really appreciate it. Not only do I read
every single review and share the really
nice ones with my mom, but I also really appreciate
the feedback that I get from them and they help
other students decide if they want to
take my classes as well. It's doing me a real solid if you decide to leave a review. That about wraps things up. Thanks for joining
me for this project. Really hope you enjoyed it
and made something cool. Good luck with your
creative work. Happy travels if you
have a trip plan, and I'll see you later.
 Rebecca Wilson, Artist