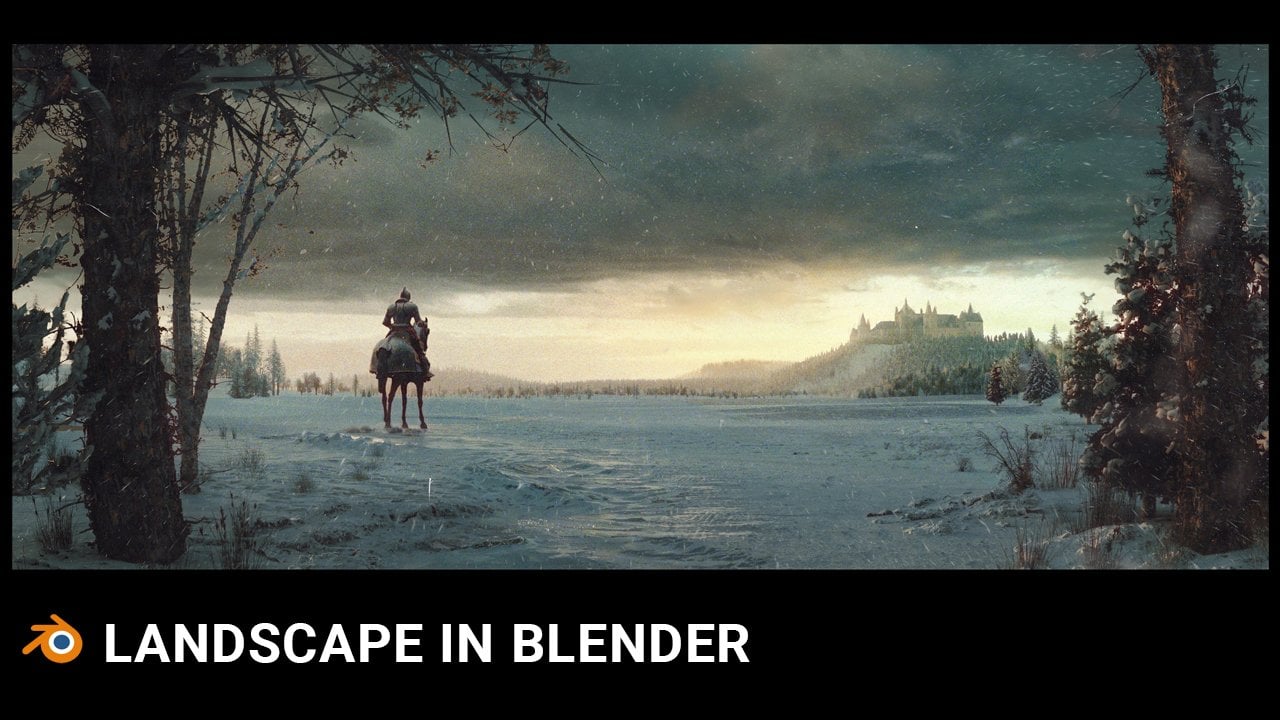
Transcripts
1. Class Introduction : Hello, and welcome to a new
step by step lender Tutorial, where we will create the
scene from start to finish. In this tutorial, I will show you my workflow
for creating cinematic renders and share a large number of
assets with you. Since the buildings make up
a large part of the scene, and I'm using my editing
building asset pack in Tutorial, I decided to split
Tutorial into two parts. In the first seven lessons, lasting about 1 hour
and 20 minutes, I talked about how I created
editing building asset Peck. True, I will share the
asset pack with you. I think the storia has much more value if you
learn the process of creating assets rather than just inserting
them into the sea. From lesson eight, the creation of the dark scenes begins. In the following 16 lessons
listing about 3 hours, we create this scenes
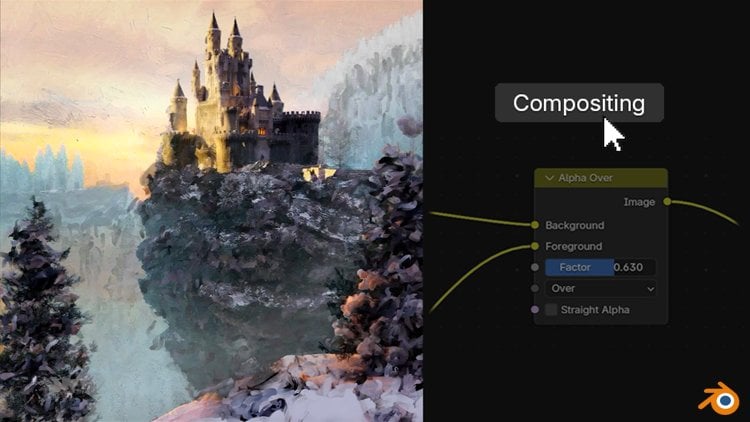
from start to finish. The post processing part
was done in after effects, but also in Blender compositor. I recorded the
after effects part because it is part of
my usual workflow. But after that, I transferred everything into the
Blender compositor for users who only use
blender so that only blender is enough
to follow the tutorial. In addition to the editing
building asset pe, I will share with you the
neon sign asset pack, as well as the garbage
and ground photo scans in the final vendor file
where everything is together.
2. Preparing the textures: Let's now build one of these
assets and as you know, I build 212 these assets. For this practice, I decide to build this one with.
Let's see how this look. This is solid preview. If I press z, I can now
switch to render preview, and you can see how this look. First thing we need to
create this work is texture. I found this texture
on Google Maps. You can see how this look. Basically, what I do, I take a screenshot and I
save this as texture. I will also share this
texture with you, so you don't need to do
this and this is how this. But I will also quickly show
you how I made this texture. Basically, I have
one small program, which is called light shot. You can find this pre program online and you can
starle this quickly. And what I do, I basically I will just call
the address of this folder, and I just press
print screen on I try first line up this
and now on my keyboard, I will just press Print Screen. I just save this part. I will call this test, and let's now save this. But of course, you don't need to use texture from Google Maps. You can find
textures on a lot of website and most popular
website is texture.com, but because textures.com
is not anymore free. I talk before what I think
about not free assets. I cannot share this
assets with you. This is a reason I
use Google Maps. And one big advantage using Google Map texture is that source of these
textures are limited. Basically, you can
find million of these buildings and you can
take any of this you like. You can convert any of this
building into a texture. Basically if you like this part, you can just take screenshot
and you can start modeling. Only one thing you need to
avoid here is sunlight. You can see that we have shadows
here and satellite here. You need to avoid
this For example, this part here will
be good as texture, but this one here. It will not be good because we will get all these shadows here. For example, these four buildings
here have nice texture. If I do my assets now, I will just try line
up with my camera, and I will just go with
print screen and maybe take screenshot of
this part here. One note, this is not a
high resolution texture, but I also don't need the high resolution texture
because for example, I will model only this part
here and to make building, I will just put this on repeat. This is not building
pack, let's go. You can see it
basically that we have here maybe five textures, we have texture for
this part, this one, and this and all these
are just repeat, and if we now go
to render preview, this look pretty good. But if you, for example, Zoom, place camera to here, you can see that this is not
a high resolution texture. I don't know why someone will use camera, for example here. This don't have sense. When we use buildings, we put camera pretty long
from this building, and that's the reason why this
resolution is pretty good. But let's back to this texture we download from Google Maps. This is our texture and we
need fixed few things here. We have this tree here, and I will show
you how I do this. For this use photoshop. I'm not photoshop expert, but I just do a few things here. First, I also try to avoid even we don't have sunlits here. I also try to make this
texture more flat. I usually go to
camera Row filter. You don't need to
use photoshop for this any graphic editing
program have these sliders. What I usually do, maybe
if this is too dark, I just increase a
little exposure. I like to avoid the shadow, so I usually move this right and these highlights to
remove this highlights. If we go to right, we get more highlights here. I will move this to left. If you want decrease
texture here, you can also add a
little more details if the next step is to remove this tree from this image
and also this part here. This day is very easy
to do this in photoshop because we have
this AI tool here. Basically what I need to do, I just need to
select this part and I just click here to
generate the feel. You can see what we get now, basically, we remove this part. Now generate feel and generate. Let's see what we will get. You can see that we remove this three and this look pretty good. We always get three options and you can choose one you like. Just to be clear with you,
this is not a Tutorial. This will be blender tutorial, but I just want to show you how I get all these
textures because textures is something we will
use to create these models. Let's try remove
these branches here. If you don't have a photoshop
to use this AI tool, you can just try find
buildings without this mess. For example, this one is
clear here and also this one. This is before and
this is after.
3. Asset modeling: But let's now start
with Blender, so I will close these files. And I will open new file. Click. You can just
click here or you can go with click and click
here to blender four point. Now I will copy address of this folder where I want
to save all these files. I will go with file save Let's just call
this modeling practice. Now I will press A to remove
all these things here. We don't need and delete. And now I will go
with Namped one. So with Namped one, we go to front ptographic, or you can go with view
viewport and front. Now I will go with shift A, and I will go with images plan. If you don't see this,
you need to go to it references and you
need go to dos and s. Images and just
enable this add on here because this is
add and I will now go with shift image
images as plain, and I will navigate to the texture here and
let's use this 58 here. This is number 58 because I I first made 72 of these screenshots before
I start modeling. I just choose this
one with number 58, and we will also
maybe model this 73. But just to no reason why
I put this name here. You can see that this is
not line up as we want. I will go again with umpt
one and I will go with r x. If you go with rx, you can rotate this on x xs, but I will press r x and night. To line up on 90 degrees. Let's first check normal. If you don't know, blender have one correct
and incorrect side. If we click here under overs, we can check phase orientation. You can see that behind this
red and red is not correct. We want in front of
us this blue side. I know that this is
correct and I will now just turn this
phase orientation and we can now click here
to go to material preview. Or you can just press z to open this step here and we can now
click here, material plea. And now we can see
how this looks, so we can start modeling. And to start modeling, we need to go to edit mode, or you can click here
and go to Edit mode, you can just switch between object and edit mode with
tab on your keyboard. I will go to edit mode, and we have here vertex s
edge select and pase select. You can skip between this 12
or three on your keyboard. For this, I need edge select
because we will now with loop cuts isolate
the parts here. First thing I will do here, I will go with control r, and I will just move this left to separate
these two parts, and you can, for example, now go with three to
go to phase selection, and we can now if for example, just move this, we get this. We want extrude and the
shortcut for extrude. If for example, select this
phase and if you press E, we can just move this out, or you can also use
this arrows here. And let's now go back to front putographic
Q with amped one, and I will go again with
two to switch to select, and let's first model
this right side here. You can see that
this is stretched. The lines are not straight here. We have big mess here and
we can fix this UV editor. But let's first add
Q loop cuts here, for example, to this line here.
4. Fixing UV: You can see that this
is not straight here, so let's now open
UV editor here. First, I will just split
this window to half here. When you see this cross here, you can just move this on right and let's open shader editor, because we will also need to
improve this material later. And if I press n, I can remove this step, I don't need and on left, I will open UV editor here. Let's now try clean
this mess here. We can, for example, use
this white concrete here. We don't need to
remove this so we can add maybe another loop cut here. For example, we can go with E or E Y to extrude
this on y axis. We don't need y for now, but in some cases, you will need also
after E press axis, where you want extrude this. Let now when we have
selected this part, we can for example, press A, and we can now reproject this to this area where
we have concrete. I will go with G
and move this do. Because I want to avoid this part out of this image
and also this part here, I will just press S to
scale this a little. Let's now fix this
stretch part here. So I don't have any clean
part with this bricks here. Maybe we can, for example,
reproject this here. Let's see how this look,
but this is stretch, I don't care too
much about this. I will just also project
this here on this. With the er, you
can rotate this a little to line up
with this part here. One thing you can also do, we also have here in the UV editor vertex
select edge and phase. You can just with select
this part here and with G. If you press G,
we can move this. And we can also press S
to scale this a little. Now we don't have
this stretch part, and I forget to remove this
part here from my image. We can also fix this quickly. I will try isolate
this window here. Now we can select only this part here and let's now just move this maybe on left to
avoid this flag here. Let's also do this here. L et's now fix this part here. I want to isolate this
concrete or tile part here. Let's go again with
control R and to cuts, and I will now select
all this part and I just want to avoid this
bed projection here. You can see we have
door on this part. But let's select this and
now with holding shift. We can at same time select
Wit shift, we add selection. I want to select this
and this top part. With shift, we can
basically add selection. But you can also if you have
a little more experience, when you select this part, with, select all parts
between this part. If I go with control, I will select also
this one here. Now I also want to
select this part here. I will go with shift here and control here and maybe
shift here and control here. Now I will go with E Y
to true this out because this part on this image is that let's open this texture here
so we can understand better. I think this is
not the case here. Maybe a little out
of these bricks, but let's extra this, but not too much as I do. Maybe just a little. We fix
this UV projection here, but now also fix this part. What we can do, we can
basically press A to select all of this and if you just press S, you can see that we don't
have too much control. This is very sensitive, but if you press S
and after S shift, you can be more precise. Now it's much easier to work when you hold the
shift in the same time. Now I will just go with drug mouse and this
is called box selection. If you press B,
you also get this s. This is basically
shortcut for box selection and
now I will press G. I will now press S to
avoid the bricks here. We can also select
this part here and S. Just to be sure to avoid the bricks here
and also we have. We can move this part. Let's
again avoid this flag here. I can now press G to grab and if you just want
to move on x axis, you can just go with G and x. You can see that now this
is perfectly straight here. Let's also fix this part. I will go with
control r. Basically, we line up this texture
with what we do now. Let in this step also
isolate this wind of ski. I already isolate this one. Let's now do with
this middle one. Now we can continue line
up this white part. I select all of these three, and now I will just
select this as just be sure to project this on white color and avoid
all these bricks. And Let's now fix
this bricks here. You can see that we project also this part,
we don't want here. We also need to fix this. Let's start. Let's
select this one. You also want project as
many of these bricks. You don't want to do this, for example, we have now
only two bricks here. I will try take as
many bricks here, but I also want to avoid
this white part here, and I also want to
avoid this shadow here. If we go, for example, with test y. I don't
want this shadow here because blender will when
we go to render preview, blender, will
create shadow here. This is also important. So try avoid shadows
and highlights. Let's select this one. Scale this down. We can also
you can see this line here. I also want to move
this little down to make this parallel
with this line here. Let's fix this one. G to move this down
to scale and S y two, stretch this little on y axis, and maybe try make this
little more parallel. What you can do, also, you can just project on
this area on top. Basically we have
bricks here and here, and we will get basically same. We can maybe make this little bigger and little
stretch on y axis. Now we can also fix
this white part here. Again, just one thing you can also do we can basically select all these parts
in the same time. If you now press S,
you can see that we stretch from origin, which is in the middle
of these objects. E go in center. But if you switch
here from not here, from bounding box to
individual origin, you can basically stretch
from individual origin of any of this part
here, and you get this. Basically, we can quickly
fix with this tool here. But I will do this
manually so Let's now just press S and we can play
with each of this part. S and S is what I use now. We fix this part and let's
now play with this one. What we can do here because I select all
these parts here. We can basically just
fix this part and we can select this top line here and we can basically
go with G Z and move. But before I do this, I see that I have
this part here. We can also model this
and add more details. I will go with Control R, and let's isolate
this part here. Basically you
modeling according to the details you
see on this photo. We can see that we
have shadow here, and I want to avoid
this V editor, so I will select this part and maybe we can
just go with S Z, scale this axis and
I will go with G Z. Now I will use the
individual origins and just scale this. Little here. Basically, we get only this
bright part of this texture. But later when we add bevel
and when we go to cycles, preview blender will create
shadows and all these things, and this will look pretty good. But I also want to
extrude this out, so I will go with E and y
to extrude this on y axis. One thing I will do
before I click anywhere. I just want to create bevel, so you can go with Control
B and with scrolling mouse, you can add bevel. I don't want bevel
this part here, so I can go with E select and with withholding
control and just drug, I can remove this
part from selection. This is not so important, but I don't want to create more lots I need for
this or more geometry. I can now just go
with Control B. I now see that I forget press
record when I do one thing. But what I do basically, I just add loop cut here with control R and fix
this projection here, and also I add one loop cut down and what I do I basically. I also add loop cut to
isolate this door here. Oop cut here and also
this window here. So just add one cut here and also one loop cut here here and here to
isolate this part down. And now I can
continue with fixing. I fix this UV editor, and let's now with shift. I will now select this part and just the same
process as before. Scale little down
and maybe err to line up this at with shift. Holding shift, you
can select this part. Scale to line up this a little. Let's also fix this part G to rotate this
ale and let now. I think I reproject this before, so let's now fix this one. We have four phases here. A to select all S
to scale this down and maybe G to move this up
and maybe to rotate this sit. Now this part. I can
also project this maybe here or let's project
this to this area here, S y and let's go with to
rotate this a little. Now this great part here, A to select all G to rotate and also the
four phases here. A to select all G. And also this part here. A, G and maybe r to rotate. Select this part and
with holding control, we can select all this. Now what I will go
with E to on y axis. If you want, you can see that
we have stretch part here, so what you can do with control. Select first part and
with holding control, we can select all
the sloop here. Or you can also use old. Basically control is
for shortest line. If for example, click here
and if we click here, Blender will find shortest
line between these two phases. For example, if we go with
control and click here, this is shortest line and now if we again go with control, Blender find this line here, but we need to click
control a few times. But if you go with, Blender select all
one loop here. But if you go closer
to this edge here, Blender will find now
this loop. We want. Now we can go with Q projection, and we can fix this
part, for example, if project to this G, we can just project to
this concrete here. And now we fix
this stretch part. But if you want, you
can For example, select maybe just
these bricks and now, I will go with UQ projection to reproject this
again, every night. Now you can just project
this on these bricks here. If you want to
keep these bricks. But let's now fix this do
this door is to stretch. What I will do now,
I will try go with S Z because we have this
part down, we want to avoid. I need to stretch this door. This is the only way I
can fix this door here. Now I will go with G. I just want to make this parallel
with this image here. This will not be perfect, but it is much
better than before. You can maybe move
this little up. And Let's now also
try fix this door at. We can now add line loop cuts
following this door here. Let's add one more
here and one on top. Now we can again start
fixing this mess here. We want project
this on this green. I will just go with S X to
scan this on x axis and let's see so we can go with S Y and just be sure to project
this on this green color. You can see that we
line up this part here. Also here S y, just to avoid this glass part. We can add one look at here, and let's also
project this part. This don't have sense to
be glass on the bottom, so we can also. Project green part. G project down scale. We can now also maybe
extrude in this glass part. E y and extrude this
inside a little. If we now go with
tab to object mode, we can see that this is
lined up pretty good. We don't have any
stretches anymore. Wit shift, you basically
add one by one selection. With control, we select short line between
these two phases. But if we go with both, control and shift and if we
click to this edge here, we will select
basically everything between this one
and this one here. That's what we need here. Now I will go with
A. S to scale, S Y, G and to rotate this And just project this
to this green part. We can also go with S x
to scale this on x axis. Now again, control shift and click here to select
everything between. Now let's try line up
this a little better S y. This is better than before. If you want to add more details, you can now start
isolating this part here. And fixing V, so we can add
maybe one look at here. But I think this is maybe too
much detail for this thing, which is not which will be
usually far from camera. But let's also add
these details. I will go with S Y again just to be sure to project
everything on green and e y, maybe you can extrude this out. Let's now avoid this green
part from this glass. Move this here and
move this down. Okay. We have a little green
part here on this area. Let's now do same with
this window here. I didn't extrude this and I also forget extrude
this window here inside. I think I can fix this
if I now again go with Z and material preview
again with control shift, select everything inside
here and let's go with I'm not sure what I
didn't select this part. But what we can do, we can basically select
with box selection. This just drag your mouse and we can basically
select everything here. Let's now go with E Y. This is not correct from
one reason when we use this box selection
because we are perfectly on front
portographic view, we cannot select
this side part here. We can select this only
if we are in x ray mode. We can be in same time in x ray mode and in
material preview, and we can now just drag
and select all this part. And this top parts. Now you can see
that we select also the side parts here because
we are in x ray mode. Let's now go with Y and now
we can move everything here. Let's now again with old select
all this sop projection. I will just we are here
in individual origins, and now we need bolting box. We can now just project this
on this wide part here. Now we fix this
stretch part here, and let's now play with
this windows, Numpd one, and let's select hold
this part, this window, and let's select also with holding shift,
we add selection. Let's select ad also this selection here and let's add also this selection here. Now E inside. Let's now fix this
bit projection here, so I will just move thistle. This little on right side. This here and I also want to line up
with this stretch image. This part here, so
I will go with G Z. Stretch little this
down and with R, maybe line up this
little better. Again, of course, you can
fix this projection here, you can see that we don't
have anything green here, but that's because this
camera angle cover this part. We can basically
select this part here. This makes sense to make
this green part here. I will go with Z and project
on this green part here. And also you can do it
on all these windows. I think this part is too big, so I will just take
maybe this one A, z n, G and project
on this green part. Project is down. And maybe also this part of. We can select all this
with shift toward selection and just reproject this on this green rain here. You can see that
this middle part is projected on left because
this image is stretch. This is middle of
this window here. Basically we can just
reproject this here, and we can now fix
this part here. Also this part should be green, so this window don't
have this middle part, but we can make it here. Let's also fix this part here.
5. Materials improvement: Last thing is these
two frames here, one here and another one here. Z n t. You can also maybe
project this here in middle. Now what we can do now, we can select all these
glass parts here. I will create new material, so I will call this
building base. We rename this material
now to building base, and I need now glass material. I will under material tab here, click plus, and I
will call this glass. What we can do now, we are basically now in shader editor, and we have selected
this glass and we can now delete
this principle, and we can go with glass. This will be glass material, and we will improve this
glass material later, but now we can now
select all these parts. We want to assign
this glass material. I will go with control shift to select all this part and now to switch to another area shift and control shift again
to select all this part. Now again, shift and
we can now go with just control or control
shift here because the same now again shift switch
to another part control. Shift Control shift control. Shift control here. Shift is to add selection again, and control is to select
shortest line between the three. You can go manually 123, but you can also go
with shift and control. Shift control. Because we have all
this part between, we can go with control shift
together and click here. Control maybe shift control. But if you are not beginner, you can just go control shift and select all this between. These are parts I want
mark as glass and assign as glass and now I will select glass shader, click Assign. We have glass shader which doesn't look good
in material preview, but we will improve this later. I just want to fix these
little parts here, so this should be green also. You can see that we have
big mess here in UV editor. I will go with shift and control to select
this part here. Because we have this
mess in UV editor, I will go with UQ projection. Again, to reproject decent
let's project this on green, and this part should
be also green. Q projection. Uniting and rotate this
project this here. If you wonder what is this
projection we see here, that's basically
default mode caps, which comes with blender, so you can change this
here to see how this look in another HDRI
or this mode cap. I will back to this default one. But we are now in
material preview, and let's now switch
to render preview, so we can go from EVE to cycles. Cycles is more realistic than But the first minute
go to render preview. Let's see in ev how this look. Now it's same, but we
will now load the HDRI. I will go to cycles, switch to GPU, because you
don't want too much samples, you can see every time you
make change blender calculate to this 1024 samples. This is too much
for just preview, so I will go maybe to 33. Here is final render, but we will not do
any render here, but you can also
reduce this down. You can see this
gray color here. That's because in
world settings here. By default, we have
this gray color or lighting from this
gray color here. But I once switch this to HDRI. To download HDRI, you
can go to Poly Hen. Polyvn.com and you can go
under assets and HDRI, and you can just choose
any of these HDRI. You click here and just download this one K is enough just
click here to download, and then you have this HDRI. Downloaded, but I have a lot of the HDRI already downloaded. I can just click here and I can click here to
environment texture and now I can open this texture, but you can also go to world and you can see that
this is basically same. This is just a simplified
version of this node here. And I will also click here. I have a lot of this here and I will choose
maybe this one. But I don't see
this in background, so I can click here and I can
go under film transparent. Now I will just see
lighting of this HDRI, but not HDRI in background. But first, you need to
go to edit preferences, ds, and you need search
for node angular. Search for node and
activate this node angular, and now you can go with control. Select this node and control T. And you get
this mapping node. Basically, what this do. I will for second enable this. If you slide this z axis, you basically rotate this world, and this also affect
your lighting here. You can see that we now get shadow Okay Let's keep like this and we can now
change strength here, so if we want to add more light, we can just tap here
three or maybe. For some reason, I unplug this because I pressed
before control. Be sure to plug this surface. Now if you want more light, you can type here, maybe 35. If you want less light, you can go maybe 0.2, but I will take this maybe one. Maybe 1.5. Let's now
improve this glass shader. First, I will go with
Shift A and I will search for transparent BSDF, and if we have
enabled node banglar, so you need to go to edit
preferences add on and search for node and click here
to activate node banglar. We can with holding control
shift and right click. We can mix these two shaders, or you can just search for mix shaders and you
can mix these two shaders. Now we have basically
transparent glass. But I like to go
a little more on left because this glass
is already transparent. With this, we will just add a little more transparency
here, maybe 0.2. Now I will go with
image texture, and I will also plug. So now we have basically
white color to glass. But what I like to do, I like plug this
also in color input. So we basically back
some of these details from this image to our glass. You can see how much
details we have on this image here and if we
just plug this to color, here we basically back some
of these details here. Details. If we want to
emphasize this even more, we can go with mix this
glass with diffuse. I will go with diffuse BSDF
and what is co roughness. If we plug this here, If we now with control and shift and if we
mix these two shaders. Now with this slider, we
can decide how much we want these details and how much
we want this glass shader. But because we also have
roughness zero to this diffuse, this will also look like glass. I will not go to maybe 0.1.
6. UV and materials: Next thing, I will do here, I will import another texture. I prepare for you.
Texture folder, we have this concrete
texture here. I will now drug and move
this inside blender, and let's now go with
control shift and click here on this node to
preview only this texture. This look good, but this
texture is stretch, and you can see that
this is stretch. I now, for example, go to edit mode, you
can skip this part, but if for example, select all these parts here and if you can see here that this is stretch and if
you now, for example, want to scale this, where we back to this texture, you can see that we destroyed
this main texture here. I will go with Control Z to undo this and now I back
this UV projection. To be able to change this texture without
destroying this one, we need new UV map. So I will click here
under UV maps and I will call this I will just
keep this Up name. If we don't have plug
anything here, for example, if I go with Up and if I don't
have plug anything here, blender by default, take this
default UM or first one. So we can keep this empty, but we can just plug this here so that we know
that we use this UV map, but without this blender also by default takes first UV here. And because we don't
have plug anything here, Blender also use this UV map, but we need another UV
map just for concrete. So I will call this concrete, and now I will go
with another UV map. And I will select this one here, and let's now plug this here. In UV editor, we basically
work with this UV map here. If I, for example,
go to edit mode and, for example, press A to
select all and also A here. If we move this, you can see
that we now don't destroy this main U map or main texture here because we now working with this
concrete UV map. I will go with control
shift and click here. Now I will go to A,
and Q projection. Now when we scale this, you can see that we play only with this
concrete texture here, and we keep this
texture untouched. Now I just want to scale this
until this concrete look.
7. The missing part: This will be a quick
update from future. It seems like I forget record one part in which I create
this building base material. Let's delete all this, except these two textures. Let's also delete
this concrete map. This is what we have
in beginning and now, this is texture of
this building here, and we have also this concrete texture which look like this. I will go with F 11, and this is how this concrete tur you can download any
concrete texture from Internet. It is not so important. Now because these two textures are not the same dimensions if we go with control
shift, in here. If we want, for example,
scale this texture, if I go here under UV editor, and if I now go to edit mode. If I for example, scale this texture to make
this look better. Now I destroyed
this texture here. You can see what we do. I will go with Control Z. I make this U and to avoid affecting
this main texture here, I will create new one, which I will call concrete. Now I will go with UV. This first texture is
this main texture, and I will plug this here
and now I will go with. I will select this
concrete texture and I will plug this here. Now, when I select this
second UV or concrete, I can go to edit mode, and I can now scale
this concrete texture. Without affecting
this main texture. Let's now improve
this texture here. What I do last time is what we usually do in
blender to improve texture. We can go with color
ramp and we can use this concrete texture
also in roughness input. I white part let's go
with control shift here. White means rough and
black parts means shiny. You can just now play if you want to make this bricks shiny, you can just move this right or you can add here
more black color. But we don't we want to
keep this pretty rough, so I will maybe bring these
black colors more to white. We can also add little of
this concrete in cool input. What I can do, I can go
with another cool here. And let's plug this here. Now I can multiply
this two textures. If I go with control and shift, and we try click, I can mix these two textures, but I let's isolate
this texture. I want to keep on black parts
of this concrete texture. To keep only black parts, I can go with multiply
blending mode. Let's back this material and
You will see what I get, so If I move this
closer to left, I choose this first texture. If I go more to right, I add more of this
concrete dirt here. And we can now use combination of these two
textures also for bump. So I will go with bump. Let's plug this to height
and this two normal. But because in bump, we want to plug only non
color data textures, so we can go with cool and this will convert
this to black and white. This is version with color and this is black
and white version, so we can use this to bump. Now I will just bring this, and I think I want in this, you can see the bricks. Let's try in this. I think now this look. We can
now just scale this down. Okay, so I think
that's basically all. I forget to record, and now I create this
metallic version, so I can just click here to plus and I
can choose this building. 58 texture, and now I can click here and make
another variation. And you can see that
we get this 001, reme this two metallic two. Now we can use also the two
add little metallic part. I think I record this part. Now we have another version and now we have metallic
version of this base material, and now you can go
to edit mode and, for example, se this
part and click assign. But I think I record this part so you can
skip this for now.
8. Continuation of modeling: Now I will go with
amp at one end. Let's now try isolate
these parts here. Let's see how this look. I want this door move inside. But let's first move inside, this big metal part here. We can first reproject
this and now I will it this main
material here and just be sure to back this
main UV map because we now don't play
with this concrete we play with this main UV map. Now et to scale this S. Let's now scale this to here and Just be sure to project all
this to metal part. Now I can go with y to
move this little inside. Now I want move inside even
more these doors here. I will go again to
arterial tribu and let's add one loop cut to about
here and another one here. Now we can select all this part and we can go with y
and move this inside. I will select all
this part here. And withholding shift, I also want this part and Q projection. Let's now back
these bricks here. Z 90 scale this down and just project
to these bricks here. Let's also fix this top part, which is also stretch. I will go with click here
and with control shift, I will try to select
all this part. This now works, and I
will go with projection. I'm not sure why
Let's try go with. This part here is stretch a. This should be like this. I'm a little confused
because scale is one. But let's go with
project from you. And I think I get
the same problem, but I will just try project this here to
see how this look. We can also we have better
part of this texture here, so we can go with z 90 and can just try
project this here. But we can see that these
bricks are too big, so I will add one c in mile. We can for example, I will select all this part, and now I will Go with as to scale this to
make this bricks smaller. Now we can just select
this right part here. This left part here. We can basically
just move this down. I think this don't have too sense to rotate
bricks to this direction. Let's go again with A. Let's project try find
one nice piece here. Okay. This look now bet. Let's now continue with
extruding all these parts here. I will go with amped one, and let's go to edit mode. Let's first make this
extrude these doors inside. First, I will isolate this and so let's isolate
this window here. But let's this door inside. E move inside, and
let's reproject this We see only one
small piece of this door. I just want to avoid
these corners here. Now we can fix this part. Maybe we extrude this too much, so I will make this to
here and let's now. I forget select this part here. G Y to move this back
and now we can again, you can just all, select all
this loop and projection. And now, I just
want to project to this metal plaque here. So Z 90 this is now better than before. Let's also select this part here and we can project
this to this white area. Here, and I will in this area, I will avoid this white co here. If you want, you can
even, move this inside. And we have another
type of door here. Avoid. Let's go select
A and scale this down. S X. Just avoid these
bricks. We can see here. We can extrude this white
part little inside. Let's add one loop cut here. Just select this part here and let's now scale this inside. Okay. Let's try line up
this with this part here. And I want to extrude
all this part out. I will select this part here
with control shift this area and shift and control this area here and
also this area here. Let's go with E Y to this out. The windows here, you can
see that this go inside a. We can now select this area. Et reproject this
be scale this down. We can again add I will fix this part here.
Let's see how this look. First, I want to add
one look at here. Let's select this area, and let's now go
with Q projection. And S x to scale on x axis. S Y, and let's try now
rotate this with S Y again. Now I will just create
frame to these two windows. Control are here, one
in and one on site, and another cut for this part. Also one down. Now we can just reproject this
area to make frames here. Select this middle part and let's maybe reproject
to this area here. You can see how this
look and we can also do same with
this part here. We can now just select First, I will select all
these parts here. With contro ****
select all this area, and now I will shift, I will skip to another area
and control here and now. All inside, and now we
can select this glass. With shift and
control and now E Y. Move this even more inside. Before I click anywhere, I just want to assign
this glass material here, go to material properties, select glass, and click assign. You can see that we basically
assign this glass here. But I move this at inside, so let's bag this here. Now we can just assign
another part of glass here. We have glass to this area. I think this is also
glass and this part. I'm not sure, but we can
assign this also as glass. All this part here is glass, and let's also assign
this glass and we can assign this glass
with more diffuse. It will be also glossy, but we can see
this texture here. I think we are almost
done with this part here. We can just fix this
with control shift, we can select all this
part Q projection. Scale this down and maybe
reproject to this black area. If you now switch
to render preview, we can see how this look. We can make this metal material. If we now select this. No, I will just click first
plus and building base, and I will make this metal. Building base metal. Now we can select all
these metal parts here. We shift control shift together, we can just piece by piece, assign this metal material. Assign and maybe this part here. Basically, I go with shift
to skip to another area and now control and to
select all this area, but you can just
go with control to select shortest line
between two phases. Shift and control
down shift control. L et's now assign this
building base metal. Let's now change this
view poor display color. Let's set this to green. We know that this metal
material to this area, and I will also assign
to this area here. We can also assign this as
metal and also all this area. If you select more
than you need you can select with holding control and just
remove this selection. I removed this part here, so I can just go
select this again and assign this material. Now when we have
all this selected, can you can again go
add metallic to this. But one thing you can also do, you can basically add
this concrete texture to metal to define this
metal texture here. Let's see how this one look. I will go with another cool. I don't need to touch these
cos I use for roughness and. Now I will plug this here. And let's see how this look. All white part, White part in
blender means value of one, and black part means
value of zero. Because if we want more metal, we need move this to one. Basically, if we
plug this metal. All this white part from this
texture will be metallic. You can see that we get
a lot of metallic here, but if you want to reduce this, you can for example, slide this or to write. Again, in real world material
is metal or no metal. But because we have a lot of dust dirt and paint
on this area, I think this have sense to put some variation in
this metal texture. Let's see how this
look in render p. We are almost done with
this texture here. I think this bump is
still too intense, so 0.1 is enough. But one thing is to increase realism here
and that's bump. We have all these
sharp corners here. We just need to go
to edit mode and we need manually add
bump to this area. What we can do, we can
go with A to select all and control B to add
bump to all this area, but this will create a lot
of unnecessary loop cuts. I will go manually and I
will go with edge select. Same as for phase selection. W select first edge here
and with holding control, you can select all
these edges between. First, I will select
this most extruded part to add stronger beavel here. I will just select
the parts here. Let's go with this one. Basically, again,
I go with shift and control to select
all this area between. Shift here to switch to
another area and control. Shift control. Let's
level here, shift, shift control, and we can
also this top part select. And maybe this part here. Shift and control
and just click here. We can now add one
bigger level and later we will we will select
all this smaller area. Let's select this one here. Now I will go with Control B. And I will hold shift
to move this slightly, so I can now be more
precise with shift, and I will add two
loop cuts here. Maybe two is even too much
for this low poly object, but for this part, I will add two loop cuts. Now if we go to render preview, you can see that we catch
this light on this area. We get this nice reflection
here on these edges. Now I will just quickly add the devel to these
smaller parts here. Control to select
all these lines here and shift control here
and shift control. Now I will go with control
B to add one bevel. With scrolling mouse up, you add more bevels. I think this is enough. Basically, this is
a final result. This is how I created
all the elements. I will go to act browser, and now you can save this
piece in your act browser. I build this building
with all these elements. First, I create model
all these elements, and after that with
all these elements, I make these buildings. And this is ground,
so these elements are all elements for ground. For example, if I and one
thing we need to fix here, you can see that if you press n, you can see dimension of this. And you can see that
this is very small just 0.3 meter on Z axis, and we need to scale this a lot, these door are about two meter. We have maybe 5 meters here. So we need to scale this a lot. F and now control A and apply
scale to the scale to one. Let's try maybe move
this object here. A R. I think I
make this too big. Let's go with control A
and apply all transform. O Z axis is forten That's because I didn't
apply to transform, so we need to 5 meters
five or 6 meters on axis. Now if we want building, we can just play
with this new asset. A. And some of this
part can go on repeat. If I go with Control R, I can just increase this RA modifier to make
this thing go on repeat. But I talk a lot in
instruction video. When you download the asset
pack building asset pack, you will find about 40 minutes
long instruction video, so you can learn a lot
about this asset pack. If we for example, import
one whole building here, let's go with non plash key. Basically, you can see that
this building is just consist of pieces ground and from this building base and for all these categories here. Basically all these
buildings are built from this assets here.
9. Asset two, fast modeling: Didn't save my last update, so I lose all this information. But this is not important now because I record everything. I just lose all these bevels
and these tiny things. Before we start
working with Acine, I will just model another
part with this texture here. But this will be very quick because I just want to
show you that now you don't need to spend
a lot of times in this object because we
have all these materials. What we can do now We can basically go with shift
image images as plane. Let's now load this material 73, and I will go with x 90
to rotate this on x axis, and what we can do now, we can basically
remove this material, and I will go with
building base here, and I will just rename
this to building base. 73, because I call
this material 73. One thing I need to do now, I just need to replace this 58 material
with new material. Because I already lode this, so I can just change this here. And one thing you can note here. We basically have this
because this is new object, we get the f UV map. But in new object, we don't get this concrete U and lender tell here
that something works. You can see this red
color and to fix this just add new UV here. Concrete. And now you can see that everything
is okay now. But if we go, this
look pretty okay. But what I like to do, I just like reproject
this with projection. And we can now
reproject this heat. And now I know why
this is stretched because If we swish
to concrete M, you can see that
here is not stretch. That's because I get
all time this problem. And you can also see that
when we select here, we also get this
in this UV editor. So when you can move this
middle mouse button, and when you move
this all to right, you can basically see
with which you work. Now, we come back to
this material here, and let's see how our
roughness look here, so this is also k. We can
just quickly start modeling, and I will now back here
to this image here. I will now just
try line up this. We can delete all the top part. Select this edge,
delete vertices and we can just isolate
this part here. And this part on bottom. Delete so delete vertices, and let's now select
all this part. And Let's select this ma because we work with
this main texture, and now we can go with G and we can just
try line up this. This look pretty
good and now we can basically just maybe
extrude this E Y. We can go again with
Control B to bevel this. Let's now line up this part. Now let's see this ness. We can extrude this on y axis, and we can on even more
to get these steps here. Now we can s maybe this t too. And maybe we can bevel
even more these two parts. Also, let's line up all this middle part. T line up this. But let's isolate this window. Now we can go with D
out and control again. If you want to move this down, and you can see that we
basically stretch this texture. To avoid this, you
can go with double tub G. W double tub g, you activate this correct
phase attribution. But you can also keep this activate all time
and you can move this. But just be careful
with this option. Sometimes you don't
want to activate this, so you can go with double tu
G and you can slide this. Now I will select this glass material glass part and go with Y, move this inside. Now, I can again go here
and I can search for glass. Let's select this
glass more diffuse. And click here to plus
to create new variation of this 73, rename this 273, and if we now assign this here, we get this because we need
to change this 58 to 73. This concrete now world because we add this
to hold this object, and now we can just back to
material preview assign this. We have this glass part here. We get this model very quickly because we
have everything. We have all these
materials already set up. And now I will just delete this part here,
delete vertices, because I'm not in X
remote, I get this problem, so be sure to go to Xramde, delete vertices, and
now we have this part. What I like to do when I have
this part with clean part, which can go to repeat, I can go with add one cat here and now I
will select all this, the x and p separate
by selection. Now, if I go with click and set origin to Geometry.
I have two parts. One with this glass and one
which can go nice on array. If I now add here modifier, I can basically make
whole work from this. We can see this same here because this texture
is not perfect. We have shadow on this side, but maybe we can try add here, and maybe we can
delete this part, delete vertices, and now this is a little better we
avoid the shadow here. Now we have three assets, we can re next time. We have now nice building base. With this, we are done with
this first part of Tutorial, where I explain how I
build this as assets from my asset
building asset pack the next part of Tutorial, we will just use this
building in our C.
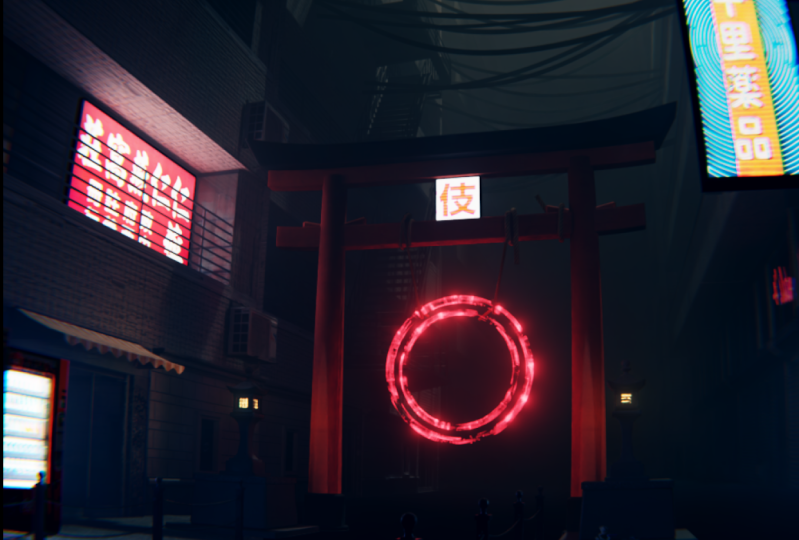
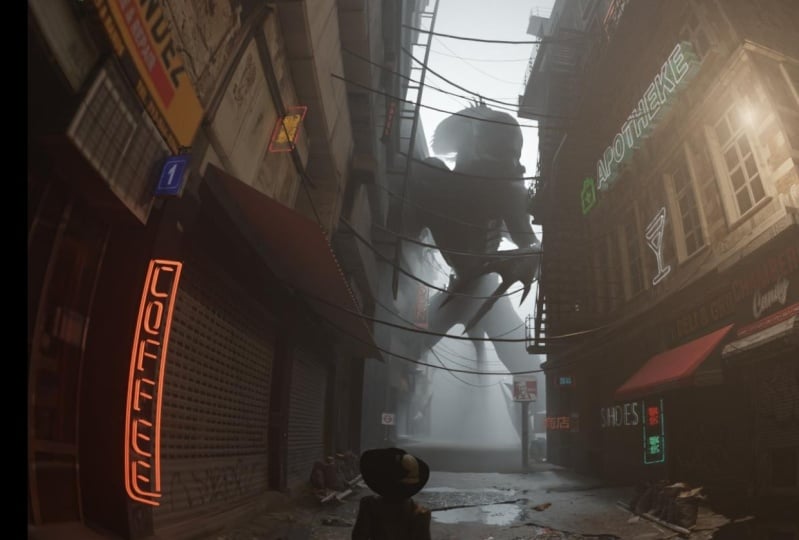
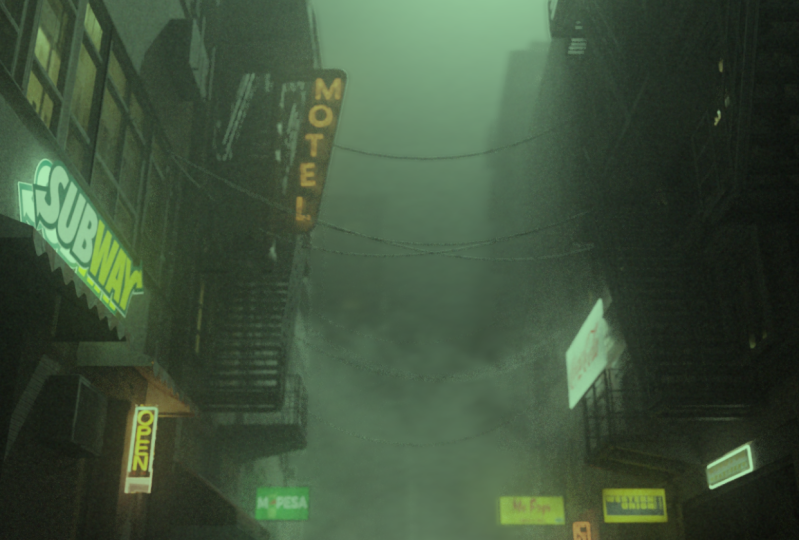
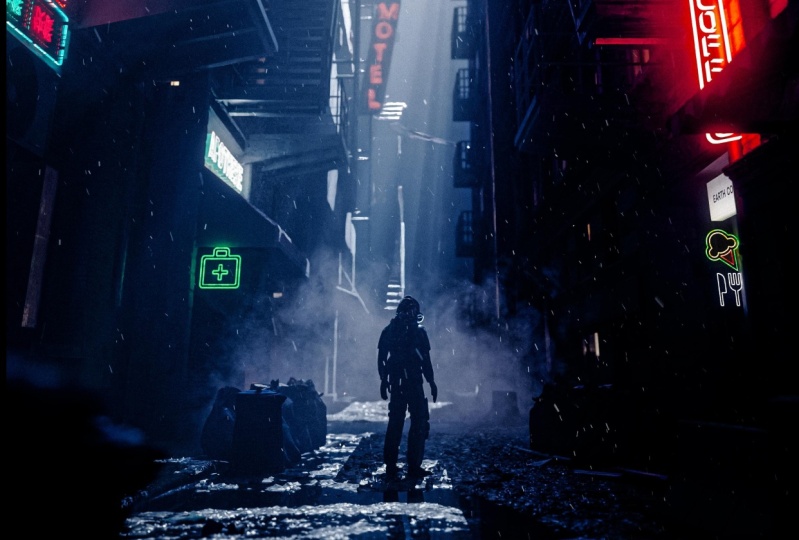
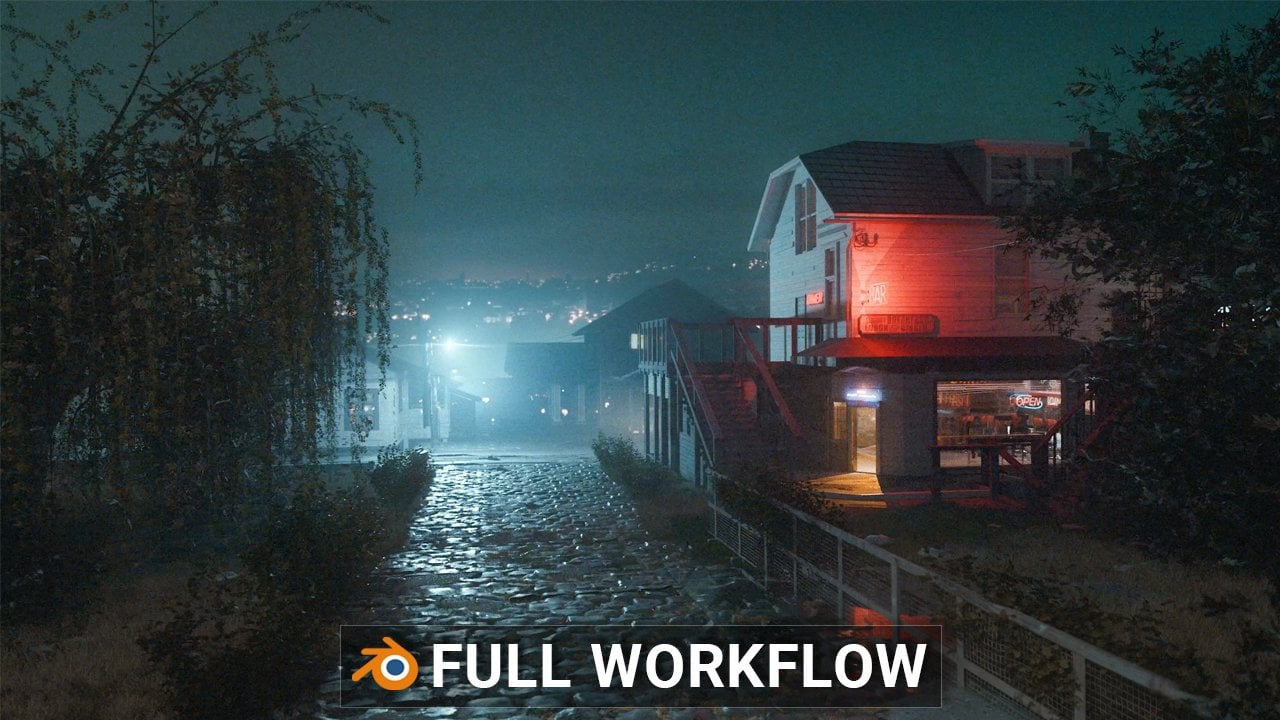
10. Dark alley scene - Introduction: L et's now start with
the main part of this tutorial with building
this dark all sine. This is my render
folder and from time to time I save
some of this render, so I can compare before and after and you can see how
progress of this look. This is one of first render and you can see that
this look very bad, but then I start adding details and re render
this and again, go to post processing. Most of these things
happen in post processing. You can see how look
render from blender. This is rendered from Blender, but I also export Blender all these maps, for
example, emission, glossy direction, mist shadow, and later when I combine
all these things together, I get better and
better resolved. Of course, I also
use some overlays. For example, you can see this. You can see how
this work progress. And also I add new assets, of course, and I
change this guy. This one is very bad. Later I add this one and
I also add this head here and new lights and also new
assets to new non sin assets. Boke step by step, this become better,
and I hope I will show you how I get this
in this tutorial. Mm. So this is last result I get and
this is my final result. In this tutorial, we will do a lot in post processing because you can see how this look
directly from Brender. And I think when I use a lot
of volumetrics in my scene, I need to do a lot
of post processing. For example, when I do my last
autorial, the oldest few, so if you this tutorial, I didn't do too much
in post processing. Basically, this result here
is almost from Brender. I just do some color correction
in to after effects, and that's all what I
do in post processing. But when I use mist, I realize that I
need a lot of doing post processing because
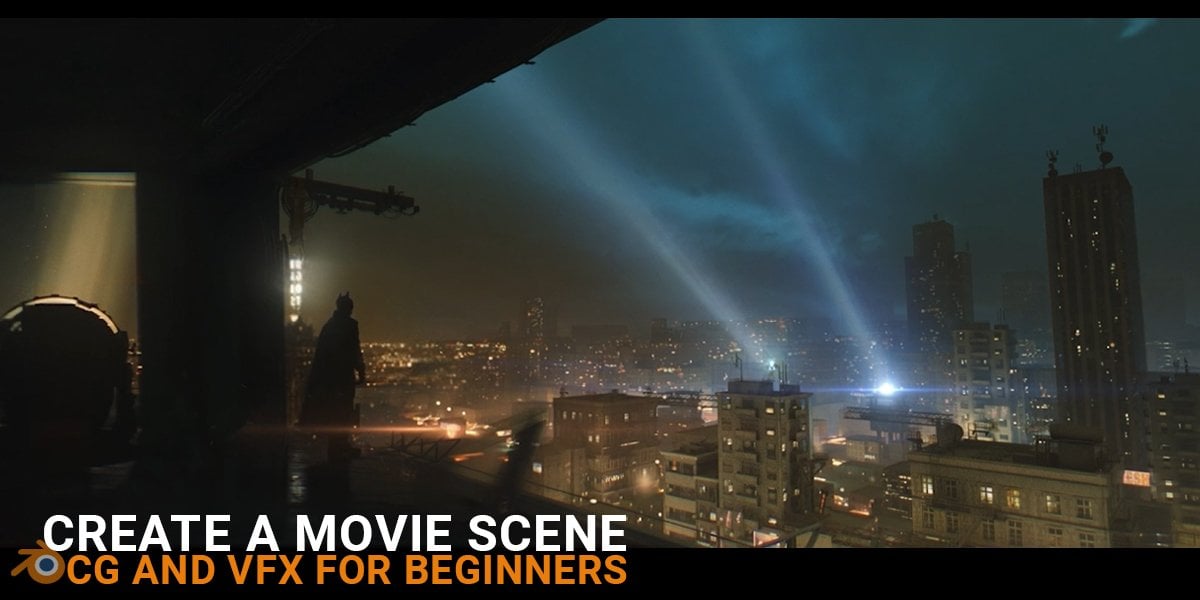
these look pretty bad. For post processing,
I use after effects. But because this is
blender tutorial, I will try as best I can
do in blender composite. I think in this tutorial, I will go parallel
with after effects, and I will also try that effect in blender
compositor because I know that a lot of you
don't have after effects or don't use any other
post processing program. It will not be same like
this one because I also use some paid don and
Color Correction tool. We don't have in Blender, but I will do my best to try do something
similar in Blender. This is how my blender
file looks like. I think I will share this
blender file with you, but I will just
adopt some things. For example, this guy here is from Blender market
and I paid $5, and I use this guy a lot
basically every time when I try remove this guy
and another one. I always back to this guy
because I don't know. I like this post and
always look nice in rent. Let's this guy, so But I think most of you also have in your
Asset browser human model, so you can use any of this, but I will replace this
guy with free model. Just know, this is not affiliate
link or paid advertise. I just use this
model a lot in myc.
11. Buildings asset package import: Let's start with
new Brander file. I will copy address
where I want to save this file and I
will go with Brander. File file save and
let's save this file. I will call this coy. Tori. First, I will delete this cube and point
lamp. We don't need this. Now I will go with
select camera and I will press n. On X axis, I will set this to 90
degrees for beginning and I will press Nampa seven
to go to top ptographic, and I will line up this
with worlds world axis. On Z axis, I will set
this to zero to line up. Here will be our buildings. If we go with amped one,
you can see that this is camera on 5 meters on Z axis, and I will set this to one. I want to get this effect that cameras pretty close
to ground and we look a little up because I want to put in focus all
these buildings. I do this artwork to
promote my building ASPE, and that's the reason why I want to put these
buildings in focus. I want to go with camera
down and look a little up. Last time I go with
this rotation value. First, what I usually do. I split this window here. And on left, I will
press Nap zero. We go to camera view and we can see what we do on left
and we can work on right. I will press n to
remove this step here. But before we start with
the blocking scene, I will go to cycles GPU and maybe set this to 22
and also for final vendor. We want to speed up this ale. For resolution, I go with 1201600 to get this
vertical aspect ratio. And let's now create ground. I will go with shift a
plane. Let's make this big. Let's move this about here. But before we continue, let's talk about building
asset pack because we now need important buildings in our s. I will share this
asset pack with you. When you open this asset pack, you also get this
video instruction listing about 40 minutes. If you have time,
my recommendation is to watch this video. Phone. You will learn
a lot how this work. I also talk here how to
add this to Acid browser. But if you don't want to
add this to Acid browser, this is also k, you can just
open this blender file. And you can from here. If you want, you can click
here to material preview, but it will take some time, maybe a few minutes depending on your computer to load
all these textures. But to copy one of
these buildings, you just need select
one of this object, for example, this empty, and if you scroll mouse, you will see this
selection, this gray part. For example, when
I select this one, you see this selection. You just need to go with right click and select object
and you can basically copy this object and you can
paste this in your scene. Building is here. You now just need to
select this empty cube and you can place this
into position. But I will not do this because I save this
to Act browser. And now I will open
asset browser. So this is my recommendation
to save this to asset browser and you can
use this very quickly. You can just drag and
drop this to your scene. So I save this to this holder, and now I can just choose building I like and I can just
drop this to my scene. And I get double of
each of these assets. I think that's because I
have backup of this file. So I have this file here, and I also duplicate
this. I don't know here. I'm not sure why, but Blender basically saved this
file two times. Before we continue, I just want to explain how
Asel browser work. So we have here
building blend file, and we have here Asel browser where all these
buildings are saved. So this is main blender file where I store these buildings. And when I take any
of these assets, and when I move this
inside my blender file, you can see what we get. If I click here, I only have this
collection, which is empty. Basically, if I, for example, need to turn this light on, I cannot do this inside
this blender file. Basically we don't
have anything to edit. We don't have any material here. There is one thing we
can do to change this, but don't do this now because this is not
correct in my opinion. If you need to edit
this building, you can do this inside
this blender file, but you need to make
this instance real. So basically, what blender does venue drag and drop this
from asset browser, Blender basically
just make instance of this object and
place in this scene. So this object
look like is here, but blender just copies settings
from this blender file. And for example, if I change
this is building nine, if I select here, building nine. And if I change light
here, for example, if I switch from the
version tonight version, so I will go to
shape the editor. Now I will switch from
the version tonight, you can see that now I
turn on these lights. Blender will basically
turn on also lights here. But I think we need to
reload this blender file. We cannot see any changes now. If you need make change
under this blender file, you need press F three, and you need for make, se he make instance real, and now you can see that we get all this wether basically
copy from this blender file, all these assets and
all these materials and now store this
inside our blender file. But this is not good
because we now get a lot of things in our scene and
our scene is now heavier. Because we want to
keep this optimized, I think I don't want
to do this here. I will go with Control Z. And I will remove
this building here. Instead of do this here, I will just go under this
blender file and I will just turn on light because
now I need this light on. Now when I back with
Napa slash key, I know basically that these
buildings have two materials, two different materials inside. One is night Apartment one
and second is Apartment two. For this number one, I Now I will just
move this to left. If you want, you can just click here to preview so you can see that we switch from
day version to night, and I will increase this value to five because I know that this value of one is
not strong enough, and's this is material. This is night
emission apartment. I will also move to left and
maybe increase this to five. If we now go just for
test to render preview, I think all this building
should have light on. I have a duplication
of this material, so I will also
move these to left and go value of five here.
12. Scene blocking: Now I will open dark
all blender file. I think this should work now, so I will go to render preview and I will try to import
one of these building here. You can see that this when we change in original blender file, this also affect
our asset browser. Now we don't need to make this instance
real and change any of this material inside
this bender file and we will save
a lot of memory. Let's now start blocking scene. Here on left, we
can see how this look and I will now
go with MampD seven. On left, we want render preview. But I will set this
maybe just to ten. We have just nice
preview and I don't want to slow down my
computer too much. Now I will search for building, which looks like which
fit in this scene. I want a lot of these structures here and these stages and similar things. I think this one is nice, so we can bring this here. Now I can just start
placing this in our scene. On the right side, we
don't need to render p, we can just be in solid. I just want to avoid
these intersections here. And I will not take look in my original or
last blender file. I will just randomly
drag and drop any of this building because I don't want to make the
same copy of this. But one thing I
need to set here, I will select camera and I will go to camera settings here and last time I use 30 millimeters
for focal length here. Here you can see difference. This is my re file. If you want to use
this free program, you can go to Google and P ref. And you can download this
from this link here. Next time when I need reference, I can just drag this
and place here. I can in any time just Zoom
and look for references. For example, this
camera angle here is If you want to
get similar look, you need to go with maybe
panoramic and you need to go with eight
something like this. You get all these distortions
in this example here. All these references
are something I save from time to
time on my instagram, when I like something I just save and also on
the pinches here. But let's back to
our blender file. I will go with np seven and
let's move this camera. Let's make this to
30 millimeters. So this is still
and I will go with p. You can see that we catch
on h of this building here, and I will move
this to about here. You can see how
this look on left. But if you want to
dark this area here, you can go to camera
settings and port display, I think you can just
increase this wall to 100. We can now see only
inside our camera. Let's try more nice
buildings here. I like the tape, so I will import this here. I will go with Z n to
rotate this on Z axis. One thing I need to do. You can see that
this camera is on x axis perfectly on 90 degrees
and last time I go up. I said before that I want to look up to see more
of these buildings. I will increase this
notation to check I go with 100 t. Now we can see more
of these buildings here. But I think I will
move out and let's Move this to about here. But I will place
this building here. Maybe I can found a
better building for this. Let's see our reference. Let's make a little
more space here, and let's search for another
building. Maybe this one. Because I also say these assets separate, not just buildings, I can just go to
under decoration and I have this stage here, so I can easily add the
stages to this building here. I can just drag this here, and I will go with
Z 90 to rotate this and I can just
place this stage here. Let's search for
another building. I will this to this
building asset pack. You can choose any
of this building, but this last two are very old and I like this for this scene, so I will place one here. And z n to take this. We have the nice stairs here, so I will place this one here. With all these stays here
and all these details, we get nice silhouettes. This is the reason I like these buildings
with these things. Let's maybe this in front. We have some empty space here, so I will bring this
building here and I will go with Z. I can go with G Y, G Y and Gx to move
this on x axis G Z, to bring this little up. Let's see how this
look. Maybe we can place this in
background somewhere. Maybe we can go with n
and place this here, le more in background. Wit Num I will now scale this up and let's bring
this about here. Let's use another one
with these stairs here, so I will place this here and let's place this
here in fore ground. I will place this one. If you want, you can also
duplicate this with all D, and we can now place. For example, one here, because this will not be
so visible in background. We can keep the
nice lights here, so we can just move a little inside and we can keep
this building here. But this will not
be so visible in background because we
will add volumetrics later and we will basically see only these front buildings and all these things in
background will be blur. The reason I don't see
this building here, I think because of clip, so I will click here to view
and I will type 10 here. Or I think under this
is viewport clicking, this is what I see when
I select the heres, but let's try under
camera clipping. We need to add 10
here, not here.
13. Ground, cables and details: And now I will import
my guy in scene, and I didn't decide yet which model I
will share with you, but I will share with you
one free model of human, and you can use this
one I share with you or you can use any one you like. I will paste this here. L at time, I place this
12 meters from camera. If you want to get similar proportion in this render here, but you can also place
this human where you want. If you want place closer
to camera or further, you can do this is
not so important. This is all about
look you want to get. But last time I placed the
12 meters from camera, I will go with cube and I will
type about 12 meters here. And I will move this
camera a little out. Now it's similar like in my last C. In my last blender file, I use concrete or ground texture from let's see
from Quill bridge. This is model texture I use. What I do basically, I go to Quicksel bridge and I download a lot of these
assets I like and I save this also to my asset browser
and the next time when I need some of this basically
just drag this here. I can I will now switch
to material preview. And now I can just
drag this asset. For example, this material. Here and I can change
quickly to new material. I also download a lot of these
assets, not just surfaces. I'm not sure, but people talk that Quick cell
bridge is not free. But every time when I
open this application, I can download any of
these assets for free. I think you need to sign
up with Epic game account. If you log in here or sign up with Google
account or Facebook, it will not be free, but
for me it's always free. I use this more than maybe two years and
every time when I open, this is completely free. But I don't to use
this application. Even you have blender. When you have excel breach
add on inside blender, you can just click here and you can download this side blender. This just don't work for me. Every time when I click here, sometimes I get this material inside blender, sometimes not. What I do, I basically spend a few days downloading
all these assets. I need and I download
this to my computer and then I save this
to asset browser, and now this is
quickly and easy. I don't need to
download anything from Internet and use this son, which don't work for me. But because Quick cell
bridge is not free, and I read these facts. I cannot share these
assets with you. I will find one free
material for you, which I will apply
to this ground here. But let's for now just make
this treat a little better. I will go with control r and I will add maybe one
cut with control B. I will go with g x to line up with
this treat a little. We can now go with
easy to ext this down. And get this nice edge here, so I will go with GZ
and with holding shift, I will bring this little up. I just want to get
this nice edge here. You can move this
with Gx if you want. On left side, you can
turn off this overlays. We don't need all
the overlays here, and we cannot see too
much of this edge here because we need Bevel here to make
this more visible. I will grab this go with
control A and apply scale. Select these two edges and
let's go with Control B, and maybe one cut here. Later, if you want
to move this inside, you just need to
select all this. You can again go with Gx
and this will also work. With this object here,
I go to local view and I do this with
Nampa slash key. This is how I can
isolate only one object, and you can select
this object and go to local view and Tg local view. And Let's now continue
with adding details. If we look at this reference, we can see that I add
these cables here, and I do this with
simple curves. You can find a lot of paid
addons on Blender market, which for for the, which works on cloth
or geometry notes. Basically, you just place origin here and another
one here and blender. This add ons create
these cables, but I do this manually last
time. I will do this now. I will place origin here, and I will go with
curve zer curve. Let's go with
Numpad seven. Z 90. Let's move this here and Z. Now I will go with
tab to edit mode, and let's now
select this here z. Now I will just move
to this building here. More inside, and
let's move this here. Now we need select both of this and we need
click subdivide. Now we get extra point in middle and we can
just move this here. If you press S two scale, you can stretch this. One thing I like to do I want to line up this little so er y. Because you can say
what we have here, so we need to go with er
y two line up this salta. Now we don't see anything in P because this don't have
any depth and we need to go to curve properties
here under geometry bevel. We need to increase this
bevel with holding shift, we cannot here. I will just create
black material here. I just call this black and I
will now choose black color here and I will bring
roughness on left to make this more shiny because when
you make this more shiny, you get more highlights on these edges here,
which is nice. Let's just bring this
thickness little down. I think this is value
of 1.1 centimeter here. But we can also type here
two CM, so 2 centimeters. Now what we can
do, we can go with dy I will go with SZ to
stretch this little on Z axis. I will now just if you want
to change depth of this, you need to go with D y. Basically with s d, we make another variation with all D. We just make instance
of this object, and now we can maybe make one of one centimeters thickness. I will also now move this little down and maybe
we scale this down, and we can now also
play with r x y, x to scale this on
x axis and just make a lot of variation
of this A to D y. Place some of this do. L d y, and I will select both of these
and let's go with y. Maybe something like this. Sx alter divide. Let's place some of this down. Let's go with test z so we
can stretch this source on the axis and dy. Place this here. X, you can do with you want. If we press F 12, we can always preview how
this looking render preview. Sometimes you need to wait
a more for first render. This is what I have for now, and this guy is not on ground, so I will fix this
14. Neon signs and decoration: Another asset pack
I use a lot in this project is neon
sign asset pack. This is also my asset pack, so you can see all
these neon signs here, and I will now play with this, and I will also share
this asset pack with you. Let You can also place
this under asset browser, but you can also just
open neon sign asset. I have here ne se asset. Now I will just start
playing this assets here. I can basically place same
assets I used last time, so I can place this
gar logo here. I will go with old r to clear rotation because when
you stick to these buildings, you can see that this
change rotation. But if you press old r, you can basically cle
rotation to zero. Let's place this
logo maybe here. We have a lot of this.
You can use any of this. I think I used last
time this one. Yes, we have this one here. Let's place this here and
the old R to clear rotation. Now I want to go with z z minus night to opposite direction and
let's try to place this here. But I think I will
place something here because I want maybe some
store here or something, and we have only this clean wall here, which I don't like, but for now, I will just place this asset here, neon sign here. And Let's also
place this coffee, which is in front. I will go place this here R. But you don't need to
follow this image. You can maybe you can get something better than
I get last time. And I like also this
hotel neon signs. You can see this in
background with this arrow, so I will place this somewhere
in background or tar to clear rotation and scale this
zn to rotate this. Here. Maybe we can make this big. Let's save this file. Let's just put some of
the assets in background. We have this hotel. N sign here and maybe we can place this
ice cream in background. R to clear rotation and let's place this here and with G Y, we can move this closer. We can also place some of these billboards maybe
here and just make this. United to rotate this and let's place this
somewhere in background. G Y and maybe we can bring
this little up about here. My this open sign in maybe. And some random may be here. This Western Union, and we
should rotate this z 180, but I think this
will not be visible. Let's place one here. G may be somewher Z. But later when we
add volumetrics, all these things will
not be so visible. This is before and after. With J, you can switch
between these slots. Next time when I need render, I will set these 24, and when I press 12, I will render this slot four. Basically, I have slot one, two, three, and I can
compare before and out. We can also with these assets under building asset
p and decoration. We can place maybe few
air conditioners here. For example, this
one and Z mighty. No Z -90. So we can
place one here. T St
15. Asphalt: It is another day here and
this is what we have for now. Let's now upgrade
this ground floor or let's place here
asphalt texture. I searched little on Internet and I found this texture here. This is on bg.com. I just click here and
search for sword. You can download any of these textures if you
like more than this one, but this is what we will
use in this storia. Without registration,
you can just click here and
download, for example, one K or two K. I will
use one K resolution, and I already do this. If you click here, You
will start download and this is and I made this texture folder and here you can see how
this texture look. I will now go with Control
C to copy address of this folder here and I will just select this
ground floor here, and I will now go
to Shader editor. Let's also split this window. When you see this cross
move this on right and let's open here UV editor. Now I will just call this AS and Let's switch
to material preview. Now, when we have
enabled node angular, we can just select this
node and we can go with control shift and T. Hold control shift and T in
same time and now I will just paste the address
of this forder here, and let's now select this color roughness one of
this normal displacement. Let's now click here, principal texture setup, and the node wrangler will
connect everything in right place. Now
we can go with. Let's go with P
zero to camera vi, and I will move to see better, and now I will go with tab A to select all and
now we can go with Q projection to
unwrap this and now we can press A left
and S to scale this. We can also switch here to render preview or
material preview. Okay let's switch to
material preview. Let's now try to make this
to about real world scale. I will scale this even more. Okay, let's scale
this little down, and I think this should be
about real world scale. Let's now upgrade
this texture here. If we go here under material, we can click here preview, and we can see that
this doesn't look good. Let's see what we can do here. I think we need to play
with this displacement. We get the default numbers here, but this is way too much, so let's bring this to 0.1, and let's bring this scale 2.1. This is still too much, 0.05 or 0.03. Maybe 0.02. I still think this is too much, so let's bring this maybe 0.005. Make this more glossy. I want to make a fact that this ground floor is
wet because of rain, so I need to increase
this roughness, or I need to add more black color to
this roughness input. If I go with control shift here, I can see how this looks rough and I will
now go with cool M. Let's place this here and now I will go with control shift and
click on this node, and let's move this on right. When we move this right, we get more wet floor here. But this is maybe a little too intense, I will
just bring this. I will just add little
more white color here. If we move this all to white, you will see we get
rough texture here, but I want pretty
closely texture here, so I will bring this down. Let's now press F 11 to bring this image preview here and
now I will go to slot two, and I will go with F 12. This is before and after and let's just make
more contrast here. Let's see how this look. I will move this white color
maybe a little on left. And I will add
little black color here on whites and
let's now make test. This is what we have
for now and I will now do one thing I
didn't do last time, I will make this
little more bright. I will go to here under image editor and I will just go with search for render result. We can do this in real time. If we go render properties
and under color management, I will just increase this
exposure and also gamma. I will not go too much
so I will set this 0-1 and maybe this to 1.5. Now we can see better
what we do here.
16. Puddles, pebbles, garbage: Let's now add all this garbage here and all these
imperfections. I will share with you
the ground photo scans. I made these photo
scans a long time ago, but they are still useful
and this is how this look. I will share this
blender file with you, or I will maybe upload this
and I will past link here, Google Drive Link. I'm not sure. Now, when you open this file, this is how this look and
if we go to render preview, or this is material preview, but you can also go
to render preview. And you can see
how this. You can take any of these photocans. Basically, this is just
ground photo scans, people and similar things. You can take any
of this you like, but I will try go with this one. I will go with copy objects. Let's set this to slot four. Now I will back to
T view port and let's now just place this here. I will switch here
to render preview, and let's now go with
paste object here. And we have our object Here. Let's now move this right. Now I will go with paste key
to isla atonic this object, and let's see how
this geometry look. I think this is pretty
dense, geometry, so I will press A
and mesh clean up. That's in my geometry
and maybe I will delete half of the
vertices here, so I will type here 0.5. Now we delete the half
of these vertices, but this is still
high detailed object, and I will go with Ma Pestsk. Again. Let's now just
place this in our scene. I will go with G Y, and I will go with G Z
and with holding shift, I will move this light. I will just intersect
with this ground. You can also go with D X and
Z to rotate this on Z axis. You can also switch
to solid preview. I add here this green Por color. I need to select this
and you can see this up display color so we can
easily see what we do here. And Let's go with all the X. Maybe scale this down and g z. Before I continue
playing with this, I forget one thing, I want to add these
water puddles. You can see here, and
we can do this easy. What I will do now,
I will go with shift and right click to
place origin here, and I will go with
play let's scale this S S y. I will
now call this water. I will also add the under
view for display blue color. Let's just quickly
create water material, so let's move this here. I will just go with
glass and transparent. Shift. Shift and transparent, and I will just go
with shift click. To mix these two shaders and
let's plug this surface. Let's move this more to glass, so you can see that we have
a lot of transparency here, so let's maybe set this 0.2, and we can also
add bluish color. Now I will select this
water and I will go with G for z axis and
with holding shift, just move this little down. We now just need make holes
to make this water visible. I will select this
ground here and I will go with tab to edit mode, Control R and move
this about here. Let's disable this render
preview because this just slow down our computer and I will
switch to material preview, and let's now one loop cut here. Now I will select
this part here and let's go with subdivide. I will add one cut in the middle to make
this more square. Now I will select
these two phases and click subdivide few times. I will go one more time. Now we need to make holes here. To do this, I will use
proportional editing and I will select
this vertex select. But you can also go with phase select and let's now
just with holding shift, select few random phases here, and now enable this
proportional editing. Now if we press G, We grab this and now we
can move this down or up. But I will first press g and I will press shift
to move this slightly. Now I can be more precise, and you can also
scroll mouse up or down to play with
this brush size. One thing you can also do, you can also play with
the brushes here. I will maybe try this random. Let's see how this looks. G shift to move this slightly
and let's move this down. You can see that we get
different effects here. But for now, I will just move this photos right
to see what we do. I will go with
control Z because I don't like this brush here. Let's first move this right
let's now go with tab. Let's go with this smooth brush. G, Z move this G Z and shift
and move this slightly down. M one paddle here, you can see on left how
this look and let's maybe with holding shift,
select view of this. I think we need to
make this bigger, so I will go with S X.
Te to go to edit mode, and let's now go with G Z. Let's try play again with
this random Brush here. Let's now try with this route. And you can also
scroll mouse down to make this brush smaller. Now when we have
these water puddles, we can play with this
photo scans again. I will go with G
Z, move this down. A to D x G Y. Z to rotate this,
maybe scale to make this smaller to dy again. Let's place few in
this tans here. L et's also play this
view of this here. So G Z to bring this up Z. You can also go with S z to scale this on z axis.
This will not work. A to D x and let's place
this one here, r z. What you can also do Let's go with Sx to scale
this on x axis. We can also try rotate this. If we go with x, no to
rotate this on y axis. And if you now press J, we can see before and after. And Let's now open
another blender file. I will also share with you. I will close this ground photos. I will now try
found photocs here. I think I call this garbage. I will also share
this blender file with you and you can open this. This is what you get. This
is basically just photos of t. We can just grab a few of This is moly per and
some random things. I will select a few of these things and I will
go with copy objects. Now I will open my blender file and I will place
this object here. Before I click anywhere, I will just press M, and
I will call this garbage. For example, because we will put a lot of
these things here. If we make this in
one collection, we can select this easy so we can for example
later.'s go here, right click and select objects. We will select everything
in this collection here. Now I will press pass slash
key to see mesh density here. I think this look, maybe we
can reduce little this one. Mash clean, that's
miometry, 0.5, maybe 0.1. If you press L over this object, you can hold this
mesh and me clean, that's geometry maybe 0.3. Let's now place
this in our scene. I will go with G Y. You can just random
replace this object, so I will go with G Z and I will intersect this with ground. Let's make this object
bigger and now we can go with By may be placed
view of this in distance. This is how this looks. This is before and
this is after. Last time, I also use three
objects here on ground, this trash photos this
is also my photo I will go with copy object and because I will share
this blender file with you. I will just replace
this guy here. You can just open this
blender file and if you want, you can just copy this trash. Now I will add field here. If we select camera, You just need to go here
under camera properties, and you just need
to enable depth and field and select focus object. Focus object will
be this guy here. Now if we go now when we
go down with this F stop, we will basically get more
depth and field here. You can see that this work
under material preview, this also work under
solid preview, just need enable
that field here. But let's jump to
material preview here. And that this value
of 0.1 is too low, so I will bring this to 0.5. Even this is also too low. The last time I also add this
one even closer to camera. I will just copy this object and I will paste this
here close to camera. But you can just go
with all dx and you can just move this
manually here. You can see that maybe
this is not visible, but I also play some
things close to camera here so we get
this blue effect here.
17. Import assets from Sketcfub: I also place this trash here so you can
see how this look. This is photo scans, I download from Sketch fab and I will also show you how
you can download this. But for now, I will just copy these objects and
I will paste this in my C. So I get these objects here, but I'm not sure if I if I can share this
object with you, so I will share
this link with you. So you just need to go here
under Sketch fab garbage, and you just need to
taste this link here. Now you can click here, download three D model. I think you need to
make free profile, so you can just log in
with your G mail account and you can download
any of these objects, but I will go with FBX. Let's now open this object and I will go with extract files here. So you can now copy this
address and under sourced, we should have here
our FBX object, and I will extract this again. Okay we have here
texture and FBX object, and what you can do, I will for now just open another blender file to show
you how this w. Let's copy address of this
folder and Now I will delete all these objects
because I don't need this file import FBX. Now you just need paste this
address here and we have here our FBX object.
We get this. First thing, I usually do, I go with tab to edit mode, and you can see that we have
a lot of vertices here, let's reduce this
with mesh clean up. That's im geometry, maybe 2.1. You can also go
with maybe F three. Merge by distance. We can merge this closest
vertices here. For now, I'll remove only one of this because blender will
merge by this distance, which is 1 millimeter. I will increase this
to 1 centimeter. Now I remove only nine. Let's now remove any vertices which are closer
to 10 centimeters. Now we remove more than one and maybe I will
increase this 2.3. So we now remove 24,000. I think this is now okay. And let's now just check
a this texture here, so I will go under
Shader editor, and you can see how this look. Because we don't have any normal map here.
I will delete this. Let's now go under preview here, and let's switch to
material preview. First, I will check this
texture and how big it is. This is 2 megabytes which is, so I will not do anything here. But we can just add some
roughness detail here. I will go with cool Let's plug this here and let's
see how this look. All black color will be shiny, so this will be pretty shiny. All this part will
be pretty shiny, so I will reduce this a little. And we can also add some bump
details from this image. Again, just plug this to
height and this to normal. We get a lot of bump here. This is too much, maybe 0.1 and 0.1 here. Now you just need to
go to copy objects and you can paste this
object where you like. You can switch to material
or render preview, and you can play with
these objects here. This is my blender file
we're working on now, and I will just go with
paste objects here. You will get something
like this or G y scale this because this is too big and just a
z rotate this on the axis. Or you can go with G, y. For example, one here. You can just go with
D X and Z to rotate this on z axis and maybe
place one here in distance. But I will for now dealt this. Now when you know how to
download things from Sketch fab, you can search for a
lot of free models. For example, you can
search here for garbage. You can choose any
of these models. I think if I click here, download, I will get
more free models. When you see this icon here, you can download all
these objects for free. A and you just need
to check which model, you can find here,
usually FBX OBJ. So if you go with file in port, you can see all these
formats that bender support. You can also go to CG traders. These two are most popular. These two are two
most popular website where you can find a
lot of free objects. For example, if you search here for garbage and click free, you can see that we can find
here a lot of free models. I also have this models here. I just model this last
time very quickly, so I will show you how this look this concrete barrier
or something. I will switch to material previ I'll just quickly show you how
you can model this, but I will share also this model with you so you
don't need to do this. Let's scale this
little on y and little on x xis and little on. Apply scale. Last time I
just go with control here, select this phase S X. L et's
now also scale this S x. Control B to bevel this and this is mostly
I do last time. Scale this a little
more, maybe control B. And you can with just select all this loop here
and maybe level this. Extrude this little down. You can also level this part. That's basically what I do, and then I add this concrete because in
these buildings here, I use a lot of this concrete
ture when you click new and when you go with
shift and image texture. If you search here for concrete, you will find this
concrete texture. You can just plug this
here to base color. Last time, I also mix
this with mixed color, and I also add this
brownish color here. I will make this more dark. We can also go with
blending mode. With this blending mode, we
will basically put the color over this concrete AI material. Let's go with maybe
u saturation value and bring saturation and value
down, something like this. But let's first go
with projection to project this little
better and again, basic things with color ramp
and plug this to roughness. And the two bomb. To height and this to normal, and we have a lot of bump here, so let's bring
this 0.1 and this. This is how I get
this basic model. I just put some seams here because this can be
sometimes visible in render, so you can just go with control R. Control B s down all t, along normals, and you want bevel here to make
this visible without, this will just be cut here. Select this part, Control B
maybe add one level here. When we now switch to, so you can see how this
level here is visible. And if we go all to 90 degrees, this one here will
not be visible.
18. Lighting, passes and rendering: This is before and
this is after. Now this is before
and this is after. Now is the most
important part lighting. This will be very quickly
because for lighting, I just use two objects. I will set this 27, first, I want to create
volumetric effect here, so I will go with shift,
and I will go with cube. With this cube, I just
want to co who s, I will scale this on axis a X. Now I don't want to make this to be this
visible in render, so I will go control a apply
Skage first and I will set I will select this object
properties and visibility, I will set this no
visibility por display and I will set this to bounce. Now I will click here and I will create new material and
I will call this volume. Now I will just delete this. Let's now go to render preview, and now I will go
here with Shift A. Search for principal volume, and I will plug
these two volume. Now this will be completely dark because this
value is too intense. Last time I go with 0.0 75. I also bring this anatotrophy
to about 0.3 or 0.4. Now we have a lot
of mist here and we need light which can go
through all this mist. For this, I will go with
shift and light point. Let's bring this up. To about here and
maybe to about here. Now, I just need to increase this value until I see
through this volume. I need million of
this power here, so I will maybe go
with 1 million. 60 and I think I will go
with 10 million here. Yes, this is value
I used last time, so you can see the
effect we get here. Now you can basically
play with position And you can see where I
placed this last time, so behind this
building and here, let's go with a numped
one to see position. So let's now in similar place. But you can of course play with this and you can
also add here color. But because I will do
this in post processing, I will not play too
much with this. But you can see that we
get different effect when we place color here, and I will just
place this 20 Okay. I think this look good for now. This is how this looks. So this is before
and this is after. And you can see render
time before was 20 seconds and after is like over 1 minute, you can see how this volumetric
increase render time. I think this guy is too close to camera compared with this one. So now just move this further and I will
make final render. G Y, Let's place this here. For final render, I
will go maybe with 400. But before we make final render, we need render more than
just one render pass because we need to convert this very bad render to something which look
similar like this. We can do this only with passes. We can export from Brander. The passes I need I can
enable here under layer, and I need mis pass
But I cannot just click here and I cannot
think everything will be okay because miss
past have properties. We can change underworld. Te. We can by default here. Miss pass from 5
meters to 25 meters. I think we can switch here
to material preview first. When I switch to
material preview, I can click here and I can Preview here passes. We can see now here combined, but I will now switch
to mist pass here. You can see how this look
when we change this value, we get more depth here. Because I have very
close object here. Near camera, I will set this all 20 to get more depth here, and I will now just quickly
measure this distance. You can use this
measurement tool, but I will just go with
cube and let's see how big how much distance we have to this
last building here. Let's scale this here. I will go with value of
about 100 meter here. I will type here 100 meter, and you can see
that we basically get gradient 0-100 meters, so we cover all scene
with this mi path. Now I know that this
mi path will be good and I will now back
to layers here, and I will enable also glossy
direction ambient occ here. I will also enable
emission path, so must be here
so emission path. Now to download these passes, I will go to compositing and I will click
here, use nodes. If you have enabled
this backdrop, you can go with control shift and click here and
you can activate this backdrop and
you can press V or V out and O V to Zoom. And we can now review
all these passes. If I go with control
shift and click here, I can preview these passes, but we need to re render this again because we activate
these passes after render, so we need now go
to render image. Now if we go with control
shift and click here, we can preview how
this passes looks. You can now download
this one by one, but this is not my suggestion
because for example, you can go with F 11 and you can search for UR node because this is UR node now and
you can go with file, save S and you can
save this one by one, but you can also save
all this automatically. I will do this now. But before I do this, I just want set this
to PNG 16 bits. I'm not sure if I select
this at the beginning, but just be sure to
select this because we need more information
here and Now I will go. I will just make
folder render two. For example, and I will now copy this and let's
make this to composite. Now I will search
for file output. File output and let's
place this here. Now I will click here under
nodes and properties. Now we have image output here. But let's first set this
folder here, so Accept. All this we have here, we will save in this folder. I will plug image to image. You can rename
this, for example, to main like main image, and let's now add
another output here. I will call this mist
Let's now plug mist here. L et's like this again, and let's add new one, which will be GL for
glossy direction. Let's add AO for b into pluion. Let's pug AO here and let's
add one more and this will be for emission path. Let's plug M here. Now we need go again with red image and let's do this now. Render image After
rendering this, we sh get all these passes here. After one or 2
minutes, we get this. This is all passes, we
need in post processing.
19. Post-processing introduction: This is what I get now
directly from Blender and this is what I get last
time with post processing. Even this image
look better for I and more pleasant to watch
this image is more realistic. For example, if you just go to Google and search something
like Mist in Town, you can see that mist look similar to this image on left than this one on right. But even this image is more realistic and more
physically accurate that we want to make
something like this because this is art and art is
all about cheating. We want to make
something more pleasant to I than just realistic. For example, if we
go in my pe re file, you can see that
all these artworks are basically just cheating. All this is done
in post processing because all you can see
here is not realistic. For example, you can see how
this person is dark here and you can see all
this globe effect. For example, here, you
can see contrast between blue and red color
and all this folk, you can see this renders, all this is done in
post processing. If you want to make
something super realistic, it will not be good
as this renders. Basically, to make this
image like this one, we need to make few things here. First, we need
isolate this man more from background
because for example, if you just look this images
here, like small tans. You can see that we cannot
even read this image here. We can we need to put a lot of effort to see
that this guy is here. But if we for example, look this mis pass, you can clearly see this
silhouette of this guy here. To make this image better, we need first to know
what we want to do. First thing I need to do here is make this
guy more visible. We can do this if we
make more conscious between background
and this guy here. Something like you can see
in these renders here. You can see contrast between the main character here and background and also
in all these renders. Sd thing I want to do here is make more depth in our scene. We can also do with
this mis pass. In this image here, you can see a lot of depth
because you can see this dark part in foreground and this bright
part in background. We need more depth also in
this final render here. These two things
are main things. I think, but to
improve this image, we can add a lot of
cinematic things like glossy ground and shadow. We want to highlight
this shadow and make this ground more
glossy like I do last time. And of course,
this globe effect. You can see in a lot of this
render this globe effect. I also want to add this
always look cinematic, so we will add a lot
of this misted later. Glossy ground be in background, and we want to make more depth separate foreground
from background, and we want to put this
guy more in focus. So we need to make
more contrast here. Now when we have all list we want to do and when we
know what we want to do, let's now start
with after effects. But as I promise when we
start this tutorial, first, I will do all this in after
effects and later I will also try do what I do in after effects
in later compositor. But if you don't use any of
this program just blender, you can also just watch
what I do in after effects and later when I finish this part
in after effects, I will try to convert everything from after effects to
blender composite.
20. Smoke in post-processing: Now open after effects, and I will copy address
of these folders so I can import all these images
in after effects. I will click a new
composition from footage, and I will now just import all
this inside after effects. But for now, I will
just keep this main. So we can start with this
main combined footage here, and I will say this to full. First, I will start
with isolating this guy from background, and for this, I will use one
package of fog overlays. This is how this look. I have this folder I save
all this overlays. I found the from time to time. And I have this folk
overlays from this guy here, so you can I will share this video with you
and you can just go. And you can watch this
video if you want, but here I found this
link and you can just click here and you can download all this overlays for free. I will use maybe two of these, so I will go with this
fog six and F ten. I will just put this
in after effects and I want to separate
this from the passes here, so I will click here to
add the new folder and I will call this fog
for just overnights. I will just move in this folder. Now, for example, if we set
this over this composition, I will press cups to refresh this and I will
press S to scale this down. I want to place this
behind this man. I will scale this even
more down and place here. Now I will set this to
screen blending mode. Screen will delete
all these blacks and keep only white colors here. But how we can put this in
front of this guy here. We can do this with miss pass. I will now bring this
missed path here. I will rename this I
will click here to miss one because we will
make a few of this, and I will now back to
this composite here. Now I will go with levels. This level is similar like
color ramp in blender, so we can play with
the blacks and whites. If we now, for example, move more to right, this looks like we move
in three this pace. We can basically use to t to tell after effects
where to put the fk here. I want put this
behind this guy here. I will now just move this until this guy is almost
completely in black here. Now when I disable this, I can I can click here and after fax to use
this as mask or. After a fa in blender, this is for, I will
just click here, and I will enable this. First, I need to enable this main path here and
I make one mistake. I need to one, not dismiss PNG because this Miss PNG is without
these levels here. I will set this to miss one and you can
see how this look. If I now click here to see to p here and I want to
isolate this guy. I want to put this
guy in black because this fog overlay will be visible
only in this white area. I want this right and let's
see how this look now. If I play with this, you can see that basically I put this fk more in distance. This look pretty
good and I will now press S and maybe
scale this to 18. Maybe bring this little down. Now I can also set opacity
because this is too intense, I will press maybe 250. Let's now quickly put
more f in background. For this, I will
use this for ten. Now I will go with
S. Scale this, may place this here. Screen blending mode to remove this black black and let's
scale this little more down. Now, if I set this again as
Luma made with this pass, which I control with this mis
pass and enable this here. I basically get fog
on the same position, but I don't want I put
this more in the t. I will go with Control C and Control V to create
another mis path. I will click here to preview. If I click here, I can
only preview this. I can basically disable this for second and preview
only this mis pass, and I will now play with this. Let's place this
more in distance. Now I will disable this again, let's place this here
and let's now set this second mis
pass as mat factor. You can see that I basically
place this more in distance. But you cannot see this
effect clearly because this F six is on 50% opacity. If I set this to 100,
you can see this better. But I will set this to 50
and I will say this f, which is more in
distance to maybe 20. I will press t and I
will say this to 20. Now you can see this effect, we have this in the foreground, which is more visible and one
layer of fog in background, which is less visible. If I now click here, I can isolate preview
only this main pass here. This is basically
before and after. I will also show you how you can do this in blender later. You can see that this
already look much better. Because we now can clearly
see this guy here. What you can also do you can
blue this fog, for example, if we search for fast box blue, we can just blue this fog, for example, with
the value of ten. Let's save this pile. I will just call this tutorial
and I will save this. Let's now continue with post processing with
this glossy direction. Pas, we can just
back some details, and we can back this
glossiness here. I will go in after
effects and I will just put this glossy
here for this, I usually use screen
blending mode. This is to intense, I just want back some of
these highlights here. I'll press t and I will
just go with maybe 10%. This is before and after. Last time I add the more this glossy part in for ground than in background. We can do this easy. I will just duplicate this. Let's rename this
gloss for ground. And what we can do here, let's now set this to
100 to see this better. We can also use this one of these mis pass to set
this only in foreground. And let's enable this. This is background
and I want inverted. We have here inverted option, and we basically now put
this only in foreground. Let's try with this misted one. I will use this first mist which is a little closer
to for ground. This is mi one and
this is mi two, which go more in dts. But this is too intense, so I will just use 10% of this, so this is before and after. If it disable both of
this in same time, you can see before
and this is after. This is before and after.
21. Shadow and ground: One I talked before is shadows. You can see that these shadows on ground look always
somatic and nice. We can highlight this with
one pass we don't have here. But I will try to
render this path now. But to make this
shadow more visible, I will also try increase
this glossy part. We now need back to Blender
to get these two details. I want more glossiness
on this part here and I want shadow to this ground here. We are now again
in Blender and to increase the
highlights on ground, we need one light which
go from this direction. To this guy here. I will go with shift light area. I will bring this little
up and I will go with R x, and I will rotate this
in this direction, and I will increase this maybe
to 20 to scale a little. This now is not so visible. We can see this highlights here, but this will be even more visible in this glossy
direction path. We will use this
glossy direction path updated glossy
direction path to increase highlights
on this area. But we will not use this area lamp only for to
increase this glossiness. Here, we will also use this
to get shadow from this guy. When we have light which come with this direction
and heat to this guy, it will make shadow on ground. But this shadow is
not so visible here, we can increase this
shadow catcher pass. But we will not do in this
scene because for example, if I select this ground, and if I said this
let's go to visibility. If I said this to shadow, this ground is not anymore
visible in our ender. What I do last time
to make this visible. I basically copy
this light here, I copy this guy and I
copy this ground here. I just go with right click
and copy and what I do, I make another scene. With these three objects I
need for shadow catcher pass. One thing I forget I will hold shift and I
will also select camera. I also need camera
in same position. With these four objects, this guy, and ground and camera, I will go with right click. Copy objects. Now I will
basically duplicate this scene, but with only these
four objects. I will click here and I will
click here to copy settings. Get empty blender file with all these
settings we have here. Copy settings, and we get an empty blender file with all these settings we need, and we can out paste
this object here. Now I will also go with Nam Pe zero to camera review and
what we need to do now, we don't need to export
this render pass, we need to export
shadow catcher. I will go here under layer and I will enable
shadow catcher pass. I think we can also preview
shadow catcher here. I need to select
this object and I need set this as shadow catcher. We have this guy,
which cast shadow, we have light because
without light, we don't have shadow and we
have shadow catcher objects. We basically set this
as shadow catcher. Now we need go. We
can rename this, for example, scene shadow. Because this scene is only for shadow and now I will
back to main scene. I will now go to compositing
and what we need to do now, we need to duplicate
this because this is seen render layers. We need to go with if D. And we need to set this
to sad scene shadow. You can see that we lose all these passes here because we set only shadow
catcher in this scene. For example, if we
back to this scene, we can see that we enable on this shadow catcher pass here. We don't have missed
glossy direction this passes so I will back to scene and I will click here and I will add
another output here. I will call this shadow. Now I will just plug this
shadow catcher to this shadow. Now what we need to do, we need to go with
render image again. After rendering is done, we can see what we get so we basically get more
glossy part here, which will be automatically
visible in after effects. Sometimes you need to refresh, move your mouth and
to refresh this. I think this is
maybe too intense. But we will fix this later and another thing we
get this shadow pass. Let's import this
in after effects and I will set this maybe here, and I will now set
this to screen. Multiply. Multiply will screen or blacks and multiply
ignore whites. I'm not happy with this because this shadow is visible
only on this glossy part. I think because this
part is pretty rough, I'm not sure why
I put this rough, so I will improve this now. I will set this to
solid preview and t's improve this material
because this look pretty bad. But one thing I
need to do here is I want to make this
ground more glossy. Let's isolate only this ground. I will quickly just skip
to material preview, and let's make this more gloss. I will also move this
closer to black. Let's now again re render this. One thing which is
also important here. When you make this
light source bigger, you will get soft shadow, and when you make this smaller, you get this hard shadow here. I will scale this a, maybe also in this
seen shadow path. I will make this maybe
soft shadow here. I think this glossy direction is maybe a little too intense. Here, you can see that we get
a lot of glossiness here. I will bring this maybe to ten. And maybe we move this
little in background. Now I can go with
and render image. I think I want to make this
smaller in this shadow, not bigger to get this shadow here is too blurry now and I don't
get too much information. To make this sharp, I will make this area smaller. And maybe more intense. I will now re render this. This now look better, so we
get more information here. Let's now back to after effects, and let's refresh this. Let's first add increase
this glossy for ground. I will duplicate this with D and I just want increased
glossy on this part here. For this, I will just
use simple mask. Let's set this to
maybe 62 better, so I can just make
this simple mask. Now if I press M twice, I get this mask feather, I will set this to maybe 100, and you can see
before and after. I will go here, maybe 150. Let's now back to this
shed of pass here. You can see that this dark
and little hole image. That's because you can see that this is not
completely white. We have a lot of gray color
here and we want remove this. I will go with levels. Let's isolate only
this mask here, so I will move this white on left to
make this more bright. Now I will just maybe
use a little blue here. I will go with fast box Glue. I will set this maybe to ten. No, I will go maybe
just with two. This is before and after. This shadow here is
not so good example. We get something,
but not too much. You can see this shadow here. This is not so visible
because we have this water puddle here and in this area where this
should be much more visible. We have this water, so
this is not so visible, but I just quickly open my last after effects file to
see how this look here. Basically, I think in our case, I make a lot of puddles here, this is how this shadow
pas look here and this add more to this
image we do now. You can see how this look. But let's now close this and the L et's back to
our after eff file. But I will also try
again, improve this. I will remove some of
these puddles here. Just for now, I will go
with GZ to move this down. I will select this
ground and I will maybe just remove some of these
puddles from this area. And I need to enable this proportional
editing and smooth. GZ, let's just remove some of these patterns because I get
a lot of problem with this. My maybe I will just scale this in UV editor to get a little more details
on this ground. This process of duping between after effects
and blender and trying fix things and taking things are
something I usually do. You cannot be satisfied
with first version, you always need to try get some details and to try
to make this better. You can see now when we
remove some of these puddles, we get this shadow
basically look better. We can again play
with these levels, maybe add more
black colors here. You can see how we increase this effect when we
move this on right. We can add may even more blue. This is before and out. Maybe this is
little too intense, so I will bring this on left. Again, because I remove
a lot of puddles from this area because of to
highlight this shadow here, I can again just make more
puddles on this area here. G Z and maybe make
more paddles on this. But I think this is
enough for today. I will continue tomorrow. I'm here about two or 3 hours and we will continue with
post processing tomorrow. This fora this is
before and this is out. You can see that this
start become better. Maybe this shadow
is too intense, so you can always
press and bring opacity maybe
slightly to percent
22. Emission and glow: Hello. It is another day here, but two weeks later. The reason why I skip from this Dark Cali project
do is because I see this nice animation from this guy here and you can find this video on YouTube
if you are interested. I was so impressive
with this video, so I decided to make my
breaking bed animation, and I started with one shot and I finished with ten for now. This is how this look. This is just test versions. It is not finished yet. And if you wonder how
this will be at the end, you can follow my
YouTube channel, and I will also make
I have plan to make breakdown video and maybe
also tutorial about this. I don't want to show
you everything, so just follow my
YouTube channel, and you will see
final animation. This is last shot. But let's close this and
let's continue with tutorial. I will try to remember
where we stopped last time. This is after file. I think we'll stop last time and let's see what
we have for now. Last time we make
this glo ground and shadow This is before and this is a and let's now
play with this emission path. You can basically highlight
this emission here, and we just need set this to screen and you can
see before and after, but I will keep this
maybe just to 20%. One thing I usually do
with this emission path, we can highlight globe effect. I will go with
control C and control V and maybe this to globe. For this, I will just go with
Gasi We can, for example, set this to 100 and you
can see this effect, this is effect we get, you can see this
globe effect here, and this is before and after. We can maybe duplicate
this one more time and maybe set this to 300 to
spread this even more, and maybe we can set
this maybe just 10%. This before this emission
pass and this is. One thing I sometimes do, when I don't have
this emissive pass, you can just go with
new maybe solid and let's set this to
red color or orange. Let's this maybe 50% to opacity. Now I will just drug
some simple mask about this area here,
this neon sign. Let's simplify this mask. We can try set this two
screen, and with twice, we can open this mask
properties and we can add feather here maybe
200 or maybe just 50. And we get similar effect. But this is to intense, so I will set this
maybe just to. But this is just for test.
I will now delete this. Let's see what we have
from passes here. We have this ambient occlusion and with ambient occlusion, you can highlight these details and usually for
this use of light. This is before and after. But I want maybe just keep
this in foreground here. Let's check our mask. We can use this one mask. I will set this I will rename
this two missed one front. Now we can find this front and let's now
enable this mass here, so we can see we get. I think we get opposite
of what we want, I will click here to invert. Now we have this ambient
occlusion only in for ground. Let's now say this
maybe th percent. This is before and
this is after. We can see that now this pipe
is much more visible and some other details
like this part here. Maybe I will reduce this
may be just 50%, 15%.
23. Details in the sky: Next, I will try add some
for details we can see here. We have just flat area here. Let's see how we can do. Let's try with this Fk ten, and I will now press
to scale this down. I want to rotate this
to another direction, so I will press R, and let's type here 108. 180, and I will
now bring this up, maybe again S to scale. Now I need another
mask because I want this only
where the sky here. We don't have this mask, so we can go with control C and Control
V to duplicate this and we can
rename these two sky. L et's now just preview this. Now I will just
with these levels, isolate everything, and I
will just keep this sky here. Let's now set this
to mystery sky enable this mask and we
have now only in skies. Now I will set this to
screen blending modes, screen blending mode, will
remove these black parts here. We get this, but
maybe I want to make this black and background
white. Let's try. Co with invert here, this will just invert
color and make this black. But now I need also change
from screen to multiply. Let's now press S or t for
opacity and maybe 50%, and now we get
some details here. But the last time I get this white clouds here
and on gray background. Let's try do this now. I will back this to screen and I will
just remove this in. Now we just need
more dark background to see this sky here. I will increase this opacity
and now move this down. Maybe I can get if I go with
solid maybe dark gray color. Now let's now use this Ms sky mask to send this only very
sky. Let's enable this. Now we have this gray
color here and I will just use this solid
on this area here. Mm twice and maybe big
weather maybe 300. And Let's now try this for here. Now this is much more visible, but maybe a little too intense. Let's now bring
opacity to maybe 70%. Maybe this opacity
to this gray solid. I will press t and maybe
just f p over seven. I think this is similar process. I get this detail
here last time. We have some small
highlights here. That's because this sc here
mystery sky is not perfect. Let's try move this ever. Further, But sometimes we need to adjust this mask or mis pass properties
in blender. I think this will be better
if we open this blender file. This mis pass is not perfect, sometimes we need back to
blender and re render this. For example, I think in
this case, let's see. I said this to 16 bits. But I think if we update
this mask here, for example, from zero to dismiss pass 0-150, we can get more control here. I don't have too much
control in distance here. But again, process
of jumping from after effects to blender
is something normal. I don't have too much time for now to tweak all
these tiny details, but this is how I can improve
this tiny detail here. Or maybe we can just
try with Brewer. I'll this to see is this effect. This part here. Yes,
you can see that this is before and
this is after. Maybe just one pixel here. I will now show
you how we can get volumetric effect in after effects without rendering
this in blender. I will now go with here
with new adjustment layer. Let's call this volumetric, we can place this all down after main path here and we can
just go with gasian blue. I will set this to 300. I put this to wrong g layer, so I will go with control Z, and let's put this here
and I've said this 300. I think we can also
keep this on top. Now I will just go with and maybe I will keep
just 10% of this. You can see before and after I will go all
down with this. This is before and after and
if we increase this to 300, you can see that we get
this volumetric effect and we soft this image a lot. I'm not sure why this happened. I think I move some
layer here maybe. But I think this is not
important for now because we need to switch to
blender post processing, and I will show you one
thing I do last time. I want to make this foreground to make this g in silhette. What I can do here I can go with new adjustment layer and
I will call this dark. Now I will go with
lumetric color. I will set this maybe
two minus five. Now we basically get dark image, but I want to keep only in
foreground and for this, I will again switch to mis one front enable this mask
and I need again opposite. This is before and out. I will again keep
maybe just 30% of this before and after. Maybe 40. This we just put more
focus to this guy here. We make more contrast between
this guy and background. Let's now add some grain. For this, you can find the overlay on Internet
and just put on top, but in after effects, we have a grain effects.
I will use this. I will set this to top. And maybe I will call this gray and I will search here for gray. Let's say the two final
output and maybe here 2.6. This is before and after. Now I just want to add some
color correction here. For this, I usually
use one page don, which is film core. This is not cheap add on, but I will show you free option. You can use and I will also
show you how this works. We just get more cinematic
look color palette or gray. Here I have some
predesignated options and you can see how this look. All this is too intense. Usually, I use this because this always look cinematic and I will say this maybe just percent. In this case, this
is not too much, but I like this effect. But if you don't
have this add on, you can just use adobe lots and I will
show you how this looks. This maybe CC for color
correction and let's go with metric and Under creative, you have these three lots here. This is first one. And you can choose you like. I think this first
one look nice, but it is too intense, so I will say this
maybe just to 20%. Let's maybe duplicate
this 11 more time and let's another one. I think this one look nice, so we can increase opacity. We have a lot of contrasts here, but we can reduce this again 30% and maybe we can
bring little exposure. This is before these
two s and this is.
24. Boke effect: All this is too intense, but I want to show you
one more thing here. You can see this nice boe
effect I get last time. Let's see how we can do this. For boket effect, we need
strong lights in background and let's make this now. I will go here in the background and I will
switch to render preview here. I will go with Shift click
and u. I'm not sure. I switched to shadow
catcher here, so I need to go back to combine. Now I will create new
material and I will call this maybe white missive and I will emission no plug this here and maybe 50. We can see something here. Now maybe the x, scale this move this down
and just place few of this. G Y. I will sit this 102 c d. I will know, maybe duplicate this
material and this red. Red emissive and let's now, set this to red
color, shave the z. Shave the x, scale this down, and maybe shalate this one here. And I will go
render image again. This is what I get after rendering and maybe
this is too intense, but let's see what we get
if we go to after effects. Now this automatically update. But if this doesn't happen, you can just click
here reload footage. Last time I do this in
photoshop and I will show you why because in photoshop
I get boe effect I like. But I think in after effects, we have one effect which
is call camera lens, blue, and let's see
what we can get here. This also look nice and maybe we can set this aspect ratio
to two to stretch this. When I set this to two,
this go from left to right, I want the opposite to
get anamorphic lens, but this is not this option. I think maybe this one. I'm not sure now, but you can also change type of this bocet. Here, this is okay. We change something
with this option. Now again, we want to just
put this in background, for this us mask. Let's try with missed two
mask and enable this. This is effect we get with this and we can maybe just bring
opacity to maybe 70%. We get this nice effect here, but I will just save this file, and I will try open
this in photoshop. I will go with composition, save frame as file. I will call this final one. And I will hit. I'm not photoshop expert and I know
that photoshop is not cheap, but I just want to show
you what I do last time. I will duplicate this so we can compare before
and after later, and I found this option under
filter camera row filter. We have this new feature
in photoshop lens blue. I will now apply this. Now we get all these options
here and you can see if we increase this amount. We can preview this range. Now we put in focus this
for ground want to move this and we need to play
with this slider here, this is focal range. You can preview this here. Let's now play with
these options here. With this second I get
this rounded bouquet, which I like a lot, and we can also play with
these settings here. This is maybe a
little too intense, and let's play with
these values here. This is maybe too intense, but let's highlight this detail or now and we just
missed the past, now need back this
foreground in focus. I will now go with file
save copy and may PNG. And I will under render
to save this boe. Now I can import this
file from photoshop. We have this bouquet, Let's at this on top. I will again use this maybe missed two mask
and let's see how this. I will create new mask here. Rename this to Mr. Bok. Let's put in focus
only this background. I will tweak this setting here. Now we can change
this mask here. This is before and
this is after. Let's now compare with
this camera lens blue. We can see before with ns blue and this is with photoshop. We add too much blue here. Now all this guy here
look like miniature. Maybe we can just
create mask to affect only this area here
because I don't want this effect on sky, maybe just only on
this area here. I will try mask this part here. I think we need the grain
after this effect here. I will put the
grain on top here. This is not perfect,
but just to know how I get this nice rounded
bouquet effect here. This is all for after effects. Now we can jump to
blender and we can duplicate what we
do here in Blender. What I do now in after effects is similar
like I did last time, but last time I just have a lot more time to tweak
all these settings. In this tutorial, I just want to show you technique I use, but I don't have
too much time to tweak all these settings
and make this even better.
25. Post in Blender Compositor 1: Let's now open blender, and we can now try make this
post processing in blender. Now I will go to compositing tab and I re render this before, so I don't need to do this now. Let's see what we can do here. What I usually like to do, I like split this window
here and on left and right, just press and to
remove this tab here. Now I will just
remove this right. Now I have clear
picture here and I can preview what I do on.
I can preview on right. Now, you can see this AO pass because MBA occlusion pass
because it is connected to UR. You can just click with
Control shift and click here. To plug this one more time. Every time you click,
you go down and I just want plug this first
one image here. Let's start from
beginning last time, we create this dark in
for ground effect first. Let's see how we can do this. First, I will go with mix here, and I will plug main for this image input
or main input here, and I will go with you
can go with curves. And Let's now make this
second input darker. Now if we go to left, we have this image input and
if we go with all to right, we have this second input, which is image and
with this curve. This is basically darker image. But we don't want this slider, we want to plug
something in for here. In ftor, we want to plug this mis path here.
I will go with cool. Colm let's plug this
miss path here. L et's preview this
with control shift and click on this node. We can just preview this. Now I just want to
isolate this for ground. I'm not sure why I don't have this nice range like
in after effects. Let's try it this plane
maybe to solve this ale. Now we can back this node to viewers Control shift
and click here and to plug this here and let's
now use this as ftor. We just need to invest this
like in after effects. Now you can see that we have
dark part in foreground. But we can also get more control over this
if we go again with. Mix, and now if we to second input here
and to first input, I will this image here
without any editing. This is what we have
at the beginning, and this is what we
have after adding this dark part in foreground. Now we have much more control. If we want 50% of this, we can just move to 50, or if you want more tense,
you can just move to. L et's keep maybe 0.80% of this. Let's see what next
is volumetric. We get this with blue effect. What we can do here, we can
go again with mix color, and I will plug this
to second input, nothing change now because we
have two same inputs here, but if we now go with
blue or just blue. I will now say this. Last
time in after effects, we said this to 300 and
let's try go here maybe 300. Last time, we set this to 30%. Let's see if we type here 0.3. We get this volumetric effect, but I think in render this
is too intense, maybe 0.1. Or even less 0.05, just a slight effect. If you press M here, you can mute this last node so you can see before and after. Let's see what is next fog. We have this fog overlays here. And Let's now import
fog fog texture here. I have these textures
here and let's try with this maybe fog ten. No to after effects, let's import this to blender. Let's now place
this here and now we if we plug this here, you can see we get
to big texture here. We need to scale this down. I will go with control shift here to preview this and
I will go with scale. And I want scale
this to render size. Basically blender will take these dimensions and put here. But now this is stretch, so I want set this to fit. And Let's now go with mix. This will be second input and
this will be first input. Now we can again
just choose between one value of one or two, but we want mask again here. But let's first bring
this to position here. For this, I will go
again with sh the duplicated scale and I will
now set this to relative. Now we can type here 0.8
because this is too big. I think here we can
move this down or. Yes. Let's place this to ground. Now we need mask which
go after this guy here. We want this fk after this guy. I will again go with I will duplicate this color ramp with shift and let's plug
again mi pass here, and with control she, let's
preview this mask here. I want isolate this guy. I think with this spine,
this is too soft. Maybe we can not constant, we need We need back this two linear and let's
see what we can do here. Now, I isolate this guy and let's make maybe this
little more soft. Let's now just try to
use this mask here. Let's see what happened here. We need to set this two
screen blending mode as we do in after effects because we want to remove this
black color here. Let's set this two
screen blending mode to remove blacks and now we
have only this fk here. Now we have two ways to
make this more transparent. If you just bring these white
colors closer to break, we will make this
more transparent. But I will not do
this because maybe I will reuse this mask later. Let's do as we do before. I will go with shift. Mix and let's now plug this
two second input, this mist and this one
here is without dissed. Now we have again
option one without mist and option two with
misted and we can choose how much we
want dismissed. We want only 0.03 about this. All this is too intense. 0.02. Let's see next. Fog, we have this
glossy direction pass. Let's again go shift a mix. This is value one, and for value two, let's plug this glossy
direction, which is here. Again, we have this slider. But now we want slider, we just want to set this first
to screen blending mode. Let's see how we
do this last time. Use just 10% of this
and set this to screen. This is before and
after and let's see. This is the same. But we have in this glossy direction
path too much noise. If we preview this
glossy direction path, you can see how this look and maybe we can go
with the noise here. And let's try plug this denoise here and
let's see what we can get. We now de noise
this and now this look much better. Maybe 0.05. We get these nice
highlights to these cables because these cables have a lot of small value
of roughness here. We put these 20.18. If we move all to right, we will lose all these nice reflections
from these cables. This is still two to 02 maybe. And with M, we can
see before and after. For example, if we
select Maybe we can select all these
layers and we can press and we can see
before and after. Now blender need more time to calculate this,
so this is after. Let's see what is next. We have this shadow pass. I re render this shadow pass in this layer or a shadow
C. We have this here, this shadow catcher, and
let's now again go with mix. And now we want to mix this final result with
this shadow catcher. Let's plug this to second input. Now we want set this to
multiply to keep only Blacks. I think all this is now slow because of this
the noise here, but let's keep this
for now and you can see what we get and let's
now just move this to left. I think I want to
go with color M. Let's plug to this shadow catch
to preview how this look. I think we have a lot
of gray color here, even this is not visible, this is not white color, so I want this more to left because this make
whole image more dark. We have some n shadow here. Let's maybe increase
this little more. Maybe 0.7. A
26. Post in Blender Compositor 2: Next is glossy direction. Pas we put in
foreground on here, so this is before
and this is after. Again for this, we need
a little more work. We need to make mask here, but let's first go
with mix collar, and let's now again plug
this glossy direction. Pass here. We have this glossy direction and let's plug this to second input. Now we have a lot of
glossy direction pass. For now, we don't want
just this slider, we want mask over this area. The shortcut for creating mask is under image editor here, and we can now set
this two mask. Now I will render result. But you can also
search for U node. If you don't see
render result here. I have this composite here, so I can see this render result. Let's back this
to render result, and now we can create
mask and let's click here to new and I
will call this round. Now to create mask, I think we need to go
with control. Let click. Yes. I will now just make
mask around this area. Let's now close this mask here. I think we have here
feather scale feather. Yes, we get this green feather, but I'm not sure why this doesn't work
because of normals. I think we don't
need to fix this, we can just go with blue effect. I will now search here for mask, so we can find here this mask. If we click here and ground
and with control shift, we can review how this mask look and this look good for now, but we need a lot
of feather here, so I will go with bluer. To blur this maybe value of 50. Now this is more soft. Now if we plug this, let's make this node here, and if we plug this two factor, this glossy ground will be
only on this area here. Now you can adjust and
play with this must, maybe we can delete this point here to make this more simple. Now this mask should
update also here. All this is too intense. Now we can just go
with color ramp. We can just bring this white co closer to break to
fade, this effect. This is before and this is out. Blender now become
a little slow. I think this is because of the noise we use for
glossy direction, we can maybe for now just plug this directly here and
we make some noise here, but later we can just replug
this here and this here. Let's see what we do last time. We get this globe effect with this emission
path last time. We can also do this
if we go with mix, and we need for
now emission path. We have here emission pas. Let's plug this to second input and let's set this
to screen by mode. Now we increase this neon signs, but last time we go with blue with gaussian blue and we
can set this maybe 2100. You can see that
now this is fast, this the noise was
a big problem. Let's set this maybe 50. Or maybe we go with 200,
we get a lot of this. Let's maybe to 70 and let's now choose how much
opacity we want here. Let's see what we have here ambient occlusion in for ground. Again, mix color. Let's search for
ambient, plug this here. Let's now Let's set
this two screen, soft light blending mode. Light, but now all to intense, we just want this in foreground. Let's use maybe this mask
here. Another mask here. This one is not so
visible. Let's see. Now we get more
ambient occlusion here and this is to intense, I will go with mix color.
Let's pug thee two. This one with ambient
occlusion will be input two and this one without ambient
occlusion will be input one. Now we can choose how
much we want this effect. Maybe just 30%. Let's see what we have here. Now we have this sky. But I think I will skip
this part for now. What happened here, no, I know, I delete this fog texture here. I see that I don't have any
texture above this part here. Let's try quickly fix this scale this down
Air for a t 180. Let's place this
here, maybe S again, maybe just scale this more down and let's
set this to screen. We also need not fog, we need mi sky. Now we place this in background. Now, all these layers here are just grain and color correction. I will now to blender and
let's try add grain here. Because we don't have any grain. I blender, we can try make
texture with noise texture, but this is not a good solution. I will try found in my grain. I have this nice over here, and I think I will share this link two if this
link still works. This link still works,
but you can find a lot of similar
packs on Internet, and let's import
one of this grain. Let's try with this
horizontal one. Let this into blender. Let's preview this again. Again need to go with scale. Render size fit. Now, in this case, I I will go with fit and now because this is too small, you can
see how this look. I will go with shift and maybe relative and maybe 1.5,
to make this bigger. Let's now go with mix. Again, this will
be input two and input one is our last node here. We again choose between
these two images. But for this, when you see
this gray mostly gray, overlay, you want
overlay blending mode. So Scream blending mode remove blacks, multiply
blending mode, remove whites, and the overlay blending
mode remove gray color. Be this texture here
is mostly gray, overlay will remove
all this gray color and keep only the
whites and blacks. And you can see this grain here. I think this image is
not so big resolution, so we get maybe
little to blue grain, but let's now keep maybe just
0.2% of this or maybe 0.5. This also dark and whole image, so we can go with curves. We can maybe just back
some exposure here. But let's try found something more interesting and let's
see what we have here. Let's maybe try with this one. We can add another one or we can just try replace this one here. This one is too intense, and we need scale this, maybe 1.8 to make this
to cover all this part. This one is a little
more visible, so I will keep this one here. But you can also maybe add
some of these scratches here. Let's try this one. L et's try again go with mix. This is first input, this input. This is second one, and I go with scale scale
to and their size. For this, we need horizontal
image, not vertical, and this is a reason why
this will not work so good, but let's maybe
over blending mode. We can again go shift
the scale this to relative and maybe
make this image double maybe 2.5 and keep
maybe 0.2% of this. I will not play more with this. You can play with this overlays and you can
put everything you want. This is just technique
how you can put this. The last thing here
is color correction. For color correction,
you can find with shift. Under color, you have a lot of these adjustments
and adjustments, you have a lot of
these options here. Let's try with
color balance here. Lift gamma again, I think
this is let's try this here. One of the shadows, one of these highlights. Let's move this here. I think this one is highlights
and this one is shadows, and this one is mid tones. But this is too sensitive
and you need to be careful with
these sliders here. When you find
something you like, you can also play
with this slider, this slider is
basically opacity. Now if we go with F 11, we can open image
editor and because nothing is plugged in
this composite node, we have this composite node
somewhere here. It is here. But here is plug on this image, and if you want, you can p this final
node to composite, but I will not do this because
now we can compare this. This is before and if we type view node,
we can see after. Before post processing and
after post processing. This is final result
from after effects. I missed something with
this missed pass here. I will not found the error here. This is all for this tutorial. I hope you learn something
new and in next tutorial, I hope this will be
breaking tutorial. And one little update. This is when I do
this last time in lander compositor for practice to make practice
for this tutorial. I just put one of this store
from my shops asset pack, and you can see that
this now look much better with just replacing
some assets here. This is what we do now and
this is what I do last time. I think it's all about
tweaking settings. You just need to try things. For example, remove
some of buildings, play some another assets
and play a lot of with all these settings in after effects or
blender composite. Now definitely this is
end of this tutorial. Thank you for watching
and see you next time.
 šime Bugarija