Transcripts
1. Welcome to CSS 301: Responsive web design: Welcome to responsive web design, CSS 301. This is the final step in your CSS journey, where you're going to learn about responsive web design and how to produce a website that looks great on all devices. In this course, we'll be taking basic CSS and changing it based on the device size, which is basically applying a small amount of logic to our beautiful websites using CSS. So you know, when a website has a sidebar on desktop view, but then you shrink your browser down and all of a sudden things sort of go away and menus show up in things hide. That is responsive web design. That's what we're going to be doing in this course. Hi, I'm Caleb Italian. I've been making websites for 20 years. I've been teaching online encoding for about eight years now. And today I'm going to be instructing you through CSS 301, responsive web design. If you want to make beautiful websites that look good on your desktop, laptops, TVs, tablets, phones, pretty much any device. Then this course is absolutely for you. Welcome to CSS3 u1 responsive web design. And I look forward to seeing you in that first lesson.
2. The viewport meta element: All right, to get started with responsive web design, we need to actually make sure we have a meta element inside of our HTML page. So I'm just gonna create a new file here and changes from plain text to HTML. And I'm using VS code. This is just the text editor I've chosen. And if I do HTML colon five, and I'll make this just a touch bigger. If I do HTML colon five, I see this m at abbreviation. I can then hit tab and it gives me everything I need. It gives me the HTML language, which is nice. It gives me UTF-8 for character encoding, which allows you to have things like emojis on your page. And then we have this line, and this is the important one. The meta name is equal to viewport. Content is equal to width, is equal to device width and the initial scale is 1. That is important. We wanna keep that exactly the way we see it. And what this does is it allows our browser to say, okay, so this is going to be a responsive page. So if you have any pages that you're working on, any websites that you're working on and you want to make them responsive. Make sure you add this to the head section of your page on every single HTML element or element, but every HTML, make sure you have this on every dot HTML file that you have. And that will make sure that your CSS acts the way we want it to act with responsive web design.
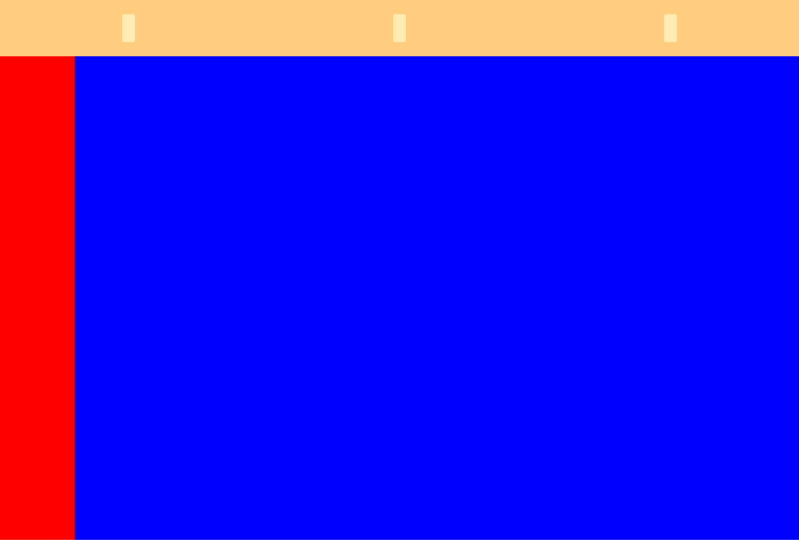
3. Media query syntax: Okay, let's take a look at the media query syntax. So what I can do here is we can do this in an internal style with the style attribute or not attribute the element. Or we can do this inside of external CSS. I'm gonna do this right inside of this document so you can see exactly what I'm doing with the HTML and CSS side-by-side. So typically we would select an element like our body. And we could say the background color is going to be blue. And let's save this page as index.html. And mine always changes here. Let's change it back to regular HTML, not Django templates. And so this is going to give us, the body, body element is going to have a background color of blue, k. This is going to be ugly, but this is going to be a good demonstration. So let's head on over to a browser. I'm just using Chrome here. I can go over to File, Open File, select my index.html. We have a blue background k. This is pretty ugly, but he gets the point across here. Now what I can do is right-click inspect. And your panel might look a little bit different from mine. I think mine is just dark mode. And that's going to be my setting somewhere. Settings. Settings, settings. Yeah, theme, dark, light requires a reload. I don't want to reload, but yeah, you can change it there if you like. So what this is doing is allowing us to click this little button here, that toggle device toolbar. And this is going to change the width of our page. And this makes our page responsive. And so it's a lot like shrinking your browser left and right, but this actually does it properly, so it gets a little more accurate this way. We can also say responsive, but also hey, let's try like an iPhone or an iPad Pro or things like that. And it'll automatically size it for us. Or we could do just responsive and a regular width here. So most things go based. Most responsive web design works off of the width of your device, not the height. And let's go ahead and reset this to 100%. That's huge and let's just make that smaller. So okay, nothing happens here. Responsive web design is when we say when that device width is a certain width, either larger than, smaller than or between two sizes, change that background color. And so it looks a lot like this at media brackets, max width. And then what width do we want to give it? Let's say 640 pixels. And then we can also say in here. So we're wrapping a media query around more CSS. Make that body have a background color of red. And so at 640 pixels and under, because it's going to have a max width, we learned about that NCSS to well 1640 pixels and under is going to change that background color to red. So let's go ahead and refresh this page and responsive. Let's go ahead and changes to 641. Nothing, 640 goes red. And we can see when I drag here. Now this is a really good example. It is an ugly example, but it is a really good example of responsive web design. So let's take a look at that syntax once more. I have my regular styling up here. What I normally want to happen, it could be on the body, could be on classes, ideas. You'd be selecting By Attributes, anything you like. It's your regular CSS that goes up here. And then underneath, we do media brackets, max width, the width that you want, curly brace, and then your regular CSS in here and then end that curly brace. And we can actually collapse this as well. So it looks a little more like this. And we just put our CSS or regular CSS inside of there.
4. What is mobile first?: Okay, let's take a look at what mobile first is. You see a lot of people saying mobile-first. Well, well first, what is mobile first? Mobile first means you were making a website to, to look great on your phone first. So what I did here was I styled this based on absolutely no rules whatsoever. And we know if there is no media query rule that this styling here is just going to be applied. Blankets over every device type, every device width. And then what I said was, hey, actually when that maximum width is 640 pixels or under, That's what max-width means. Then change this. But Mobile First is the idea of doing this opposite. So mobile first would say, hey, make that background of the body red. And then with a minimum width of 640 pixels, change that background color to blue. And so all we're doing here is reversing it. We're saying all the time, make that background color red. And then on a minimum width and up 640 pixels and up change that background color to blue. So from that last video to this video, I'm going to refresh this page and we're going to see that nothing actually happens. So let's make this bigger. And it stays blue. And then we make it smaller, smaller, smaller. And when we get down to 640, you can see it goes to red. And so that does the exact same thing as what we did before. Only we swap where we're writing our codes were saying, hey, everything here needs to be for mobile first. And then on a minimum width an up, we actually want that color to change. And so now we're writing code for phones first and adjusting for a desktop. Whereas in the last video what we did was we wrote code for a desktop or tablet or something big. And then we said, hey, actually when that min, when that page width is small enough, change it. And so one is desktop first, one is mobile first, and this is mobile first. You're often going to see people saying mobile-first is better. Honestly, you're going to see more people writing desktop first css more than you're going to write a, more than you're going to see people writing mobile-first CSS.
5. Responsive images: Let's take a look at how to make an image responsive, because by default they actually are not really all that responsive. And so let's go ahead and open up a new tab and let's go to an Splash.com. And let's look for some sort of painting. Sure, good enough. What I'm gonna do here is I'm going to right-click. Copy this image. No, copy the image address, not the image, but the image address. And then I can open this up in my browser. And we have this image. Cool, that works, that's what I want in our HTML. Let's go ahead and add an image. So we haven't image in here. Img source is going to be whatever that URL is and that, all, that, all it is going to be painting. When I go back to my page here, I see this image. And this image really isn't responsive until the page gets too big and then it becomes responsive. That's not always what we want actually with responsive web design, most of the time, what we want is to say this image is going to be like 50% of the width all of the time. And so that means even right now, 50%, well, it's clearly not 50, 50% percent would be somewhere around here. This should still be shrinking, but it's not, it doesn't shrink until it actually reaches the maximum viewport width. Even then, it doesn't really acknowledge that they're supposed to be a border, not a border but padding or margin around the body on the right side there. So things are getting a little quirky here. And we can, we can make this work better with a responsive image. So what we can do is instead of changing our body, we can change our IMG. And we can give this a width of, let's say, 100% and a height of auto. And that's just going to Auto calculate the height for us. Now we didn't want 100%, we wanted 50%. And let's just make this bigger refresh. And you can see that image got smaller and it stays at 50, 50% percent is right in that middle of that X, i believe. So if we go straight down, we can see that that's 50% and it's going to stay there no matter what size the pages, it's going to stay there. And so that's responsive. Now what we can do is we can make this even more responsive. And we can say, when the page has a maximum width of 640 pixels, we can make it 100% width. Now, I might have lost you there. So in the last lesson we talked about responsive first, mobile-first responsive web development. Let's mix and match these a little bit. So now let's do media. Max width, 640 pixels. So it's a lot like this, but the exact opposite. So the syntax is the same, but this is saying from 640 up. This is saying from 640 down. Select that image and give it a width of 100%. Now because we know how CSS works from the top to bottom, we can say, select that image, give it a width of 50%, give it a height auto, close that image. We don't have to specify height auto down here because all we're doing is overriding this width here. That's all we're overriding is going to automatically inherit height of auto. So it's a lot like writing. Height is Auto. But our browser is going to inherit that anyways from the code on line 13 here, so we don't need to write that. Let's go ahead and save, refresh and look at that. Whenever the page goes Read, the image gets full width. So 505050, fifty zero hundred percent, all the way down. And so now we have a really responsive image.
6. Responsive embeds: Welcome back. Let's talk about responsive embeds. So in this video, we're going to take a video, an iframe, and we're going to make it responsive. Now here's the thing, is when we go to Youtube and we click Share and we get that embed code. This is not responsive by default. And so if I go back to our page and let's just throw it underneath our image here, HR. And let's paste that. We're gonna see it has a width, a hard-coded with a 5-6, hard-coded height of 315. And then a bunch of other junk in there that we don't really need to know about. The SRC is the main one here. This is our YouTube video. So let's go ahead and refresh this page and let's scroll on down. And we have this video. Now let's say we want this to actually be full width. What we can do that by saying width is equal to a 100%, but then we have to figure out a 100%. What is that height? What is that aspect ratio? All the time we have to figure out that aspect ratio non-stop. And we can't possibly do that. But what we can do is write some clever math to do it for us. And so I'm going to tighten this up so we can hopefully see us all on one line. Now move this up. Iframe is gonna go above the image and the HR is going to go the iframe. So let's go ahead and minimize those. Now what we want to do here, and this is somewhat of a CSS trick, is we want to wrap a container around this. And so I usually just call it a container and iframe container, something like that. And really we just need to be able to select this container and select the iframe at the same time. And so what we wanna do here is we wanted to take this container and we want to give it a position relative and hide the overflowing. We learned about position relative and hiding overflow and width, what we are going to be using next, all NCSS, one-to-one NCSS to O1. So you should be familiar with these already. So let's go ahead and grab this container. And let's say position is relative and the overflow is going to be hidden this way, we just don't show anything that's outside of this box. Let's give this a width of 100%. This is going to be the entire width of our iframe. So instead of saying, Hey, respect to with the 560, eventually we're going to say make this a width of a 100% of our page. Now here's where we get a little bit tricky. We're going to say padding, top is 50, nope, 56 dot 2-5 percent. And this is going to get a little bit weird. And the reason we're doing this is because if we say 16 by nine, so if we go 16 divided by nine, nope, that's the other way round. So if we say 16 by nine, it's supposed to be nine divided by 16, we get 0.5625. Or if we multiply this by 100, we get 56.25. And so this is just a little bit of basic mathematics right there. So we took nine divided by 16, that's our aspect ratio, or 16 by nine. And then it gave us a decimal and then we said times it by a 100 to give us the actual number. This is our percentage. That's gonna give us a padding top of 56.25%. Now what we want to do is select this iframe, and we don't always have access to this iframe. So let's not give it a class or an ID or anything, but let's say any container that has an I-Frame inside of it. We could say position absolute, top 0, left 0, bottom 0, right 0. And this is just going to stretch it out all the way across. This, which also has extra padding on top of the head as a 16 by nine padding on the top. Just for good measure, let's go ahead and give this a width of 100% and a height of 100%. Technically, this is not going to be needed, but it doesn't hurt to have it in there. Let's go ahead and save this page and let's go back to Google. And when we refresh, not only is the iframe going to be on top, but it's going to take up the entire width of this page. So let's refresh and find out what it's doing here. Look at this huge, huge video. And so we can make this responsive by doing this hello, hello, hello, hello responsive, embed, responsive YouTube video, which is really nice. So actually what this is doing here is creating somewhat of a nice demonstration. So we've had an ugly desktop site right now. But if we scroll on down to mobile view where the background turns red, things start to click together and it starts to look a little nicer. And that is exactly what we wanted to do. We want our site layout to change, for the most part with some bits and bobs here in there. We want these things to change based on the width of your device.
7. Multiple media queries: Alright, let's take a look at multiple media queries. So let's go ahead and create a new box. And it's just going to be called box and we're not going to do anything with it yet. And inner HTML, let's create box and here gives me this m it abbreviation, slam that tab key and we've got a box. So let's say this width is going to be 400 pixels, the height is going to be 400 pixels. There's going to be a border ten pixel, solid black margin, margin, margin, margin 50 pixels and auto. So it's a line that in the center. And we're gonna change the background color, enormous change background color, sport, and that's boring. Let's change the border radius. And it's going to have a border-radius of nothing by default. So now what we can do is we've written these media queries, one for min width, one from max width. We can put these together. We can say add media. Let's say a max width of one hundred, ten hundred pixels and a min-width of, let's say 700 pixels. And then we can select that box again. And we can change that border-radius to 50%. So this is going to turn that box into a circle whenever the width is between, not 100, but let's do 11000 pixels and a min-width of 700. So between seven hundred and ten hundred pixels, this is going to be a circle. Every other time. This is going to not have that border radius. So it's going to look like a square. Let's go ahead and refresh, open up Chrome, refresh our page. And we have this box. So let's do this. So we're at 537 right now. If we go up to 700 and just slowly scroll that up to 700, we're going to see yep, 700 changes to a circle. And then it's gonna go all the way up to 1000. And then once it hits 1000 is going to change from 1000 to a square. So this is saying anytime that this responsive width here is between 1700, make it a circle. Now again, this is an ugly example, but this is a powerful example to show you that you can use max-width and min-width together.
8. Making a responsive layout: Okay, let's work with something real. We need to create some sort of layout and make it responsive because what we've been doing so far is fun. It's cool, but it's not really all that applicable in individual pieces. What we want to do now is create some sort of flexbox layout and basically change it so that it, when it's viewed from a phone, it actually snaps together nicely. So let's go ahead and create a new file. Let's call this flexbox dot HTML. And we change it from a Django template to an HTML template. And let's do HTML colon five. And it gives us this. That's exactly what we want. And let's go ahead and create some sort of HTML layout here. So we have some sort of container called our grid or our layout number sign layout because it's going to be an ID. And let's say we have an ID for NAV navigation in here. Another ID for sidebar, Sidebar in here, and another ID for content, content in here. Now this is now going to look like anything at this point in time because we haven't applied any CSS. Let's go ahead and apply some CSS. Let's use flexbox. You could alternatively, instead of using flexbox, use Grid as well. I'm going to use flexbox because it's a little more popular these days. But grid is also really good practice. So if you're looking for good, good practice, I would say, hey, try this with flexbox and after this video, also try it with grid. So let's go ahead and select this layout. And let's say it's going to be display flex. And we're gonna wanna make sure that this wraps. And we've learned about flexbox and CSS 201 as well. So you should be somewhat familiar with this, but I'll take it slow and just in case you aren't. Flex rap, we're gonna say wrap. And what this is going to do is instead of making all of these side-by-side, say, hey, when these elements are too wide for the page, bump them down onto a new line. And so let's go over here, reuse this tab File, Open File, flexbox dot HTML, and we don't see anything useful. However, these are side-by-side, so it is actually doing something useful. It's just we're not quite there yet. Let's go ahead and select that nav by its ID. Now, let's give it a flex basis of 100%. Let's give this a border. Bottom. One pixel solid, add an OCC, see something like that. That might not be dark enough. Aaa little darker. And let's refresh. Okay, so the navigation is up there. It's it's bumping things down now because as we said, flex basis is a 100%. Let's make that sidebar. Let's give that 20% width. So let's go ahead and select the sidebar using flexbox. And we again, we don't use width your weeds flex basis. So flex basis is going to be 20% and border right is going to be one pixel solid. Let's make it match the navigation AAAA. Okay, and that's coming together nicely. And then the content is just going to expand the rest of the page. Actually, it's not going to by default. But we can make it expand the rest. So let's go ahead and select content and give that a flex basis of 100% minus 20%. So it takes up a 100% of the page, not a 100. We want 80% in there. And just so we know where we're working as to border one pixel, solid red. And you've seen me do that pixel a lot. Oh, okay, so this actually runs into an interesting thing. This bumped it onto new line. What we forgot to do, and we learned about this and CSS to U1 as well was let's select everything. And let's say the box sizing needs to be border-box. And this is just going to put it back in there. And so what that did was it said, hey, there's this red box. It has a width of 80% plus one pixel on either side. For that border. What border-box did? Box-sizing border-box. It said, actually you're 80% including that border. So with the border it's 80% and then just sort of bumped it in there because this is pixel precision layout. It's now it's touch this up a little bit. Let's say the body needs to be because I just want this to look somewhat decent. The body needs have a padding of 0, margin of 0. And the navigation should have a padding of 20%. Nope, nope, 20 pixels, not 20%. There we go. See the same thing with that sidebar and see how that looks. Looking pretty good and they see the same thing with the content. Okay, so we've got some sort of layout there. Let's give that sidebar and the content a bottom border. So sidebar and content. And all I did there was in VS Code, I clicked in one place and then I did, did Command click in another. I believe on Windows. It's you click in one place and then it's alt click in another place. And we can do border. Bottom. One pixel solid AAA. Okay, cool. So we have some sort of layout here. When we make this responsive. It's going to, yeah, it's not going to work the way we expect it to work. It's not quite there, it gets a little weird and that's completely expected. But what we can do say at, let's say 640 pixels, and we can make that sidebar actually span the entire width and bump this content down just a little bit. And so we can say at Media, and I'll just move that up. So you can see that on my screen at media max width 640 pixels, let's select that sidebar. And let's give it a flex basis of 100%. And let's remove that border rate. Border rate is going to be 0. And let's also grab that content section which has a flex basis currently of 80% and give it a flex basis of a 100 as well. So it's going to bump it down. And so what we can do here, because this is basically the same code. Let's select both of them. And let's just make this a little bigger, refresh. And when I make this a little smaller, we can see it slides down and you can see how it bumps there into its own little line. That's really nice, that is responsive web development in a nutshell. Now we could go even further with this. Let's go ahead and make this just a little more zoomed in. Now what we could do with this is when we get down to, let's say 480 is good and I say 480 pixels, this is getting to be somewhat of a smaller device size at 470 five is actually the vice ISIL will use, will use that. Let's hide the sidebar. So now we can create another media query at media max width 475 pixels. Let's take just that sidebar and do display none. Let's hide it completely. And so I'm going to refresh the page where it for 80 right now. And if I'd go click here and just down arrow, down arrow, down arrow, down arrow, down arrow. And it hides. You can see that I'm switching between 476 and for 75, and it is hiding For me, it's doing exactly what we wanted to do. Now that my friend is responsive web development. In a nutshell, that's really all it is, is when you make a page smaller or bigger, you're going to hide something and you're going to basically make something, take up more room, less room, or hide it, or possibly show it if it's only supposed to show up on mobile.
9. Your project: Your project is going to be with flexbox or grid. You can use either one, whichever one you're more familiar with. What I would like you to do is sort of take off from that last lesson. But I want you to create some sort of page layout. Use flexbox or CSS grid, whichever one, again, you're more familiar with. And then make sure you have a navigation. You've got a sidebar and you've got some content in there. And then when you make your page smaller in width when you use responsive web development or that responsive toggle in your browser. This button here, when you use this and you make your page bigger or smaller, I want you to actually do this so I get bigger. So this takes up not 20% but a 100% and then hide something. Basically, I just want you to play with responsive web development, but using this layout as an example is a really, really good example, really good usage of responsive web development. So go ahead and give this a shot and feel free to reference any my code here. You can pause this video at any point in time and you can take a look at what I have written. Go ahead and give that a shot. Have some fun with it as well, and it doesn't have to be laid out the exact same way I did it. You can lay it out whichever way you like as well. Have some fun with it, make it your own. But most importantly, make sure you have a little bit of experience under your belt before you finish this course with media queries.
10. Summary: Hello, welcome, and also congratulations on finishing this course, CSS 301, responsive web design. This was a fairly small course. The bulk of CSS really is learning, you know, things like display none or border, right? 0. These are called declarations. All we did with responsive web design is we said, hey, add this meta element in there that tells the browser that this is going to be a responsive sort of page with CSS. And then we said, right, some sort of media queries, some conditional logic. So when the page has a maximum width of 640, so it's 640 or lower. Apply the styling, or if it's for 70 and lower, apply this styling. That's really all it is. And so that is responsive web design in a nutshell. Thank you for taking the time to take this course. I hope you enjoyed it. I hope you learned something new. I hope you had a little bit of fun with responsive web design. It's a really, really important thing to know. Don't forget, you can always ask for help in the learning to code Facebook group. You can also follow me on Instagram at coding for everybody, or at Caleb Italian, or on Twitter at Caleb tell. Or you can even follow me here on skill share. And you can just go to my profile and click follow. And then you can see whenever I have a new course and I've been producing a lot of courses lately. So hopefully you'll get some good value out of that, out of your skill share premium membership. Once again, thank you for taking my course. My name is Caleb Colleen. It has been a pleasure teaching you Responsive Web Design. I hope to see you another one of my courses, but if I don't happy coding and have fun out there.
 Kalob Taulien, Web Development Teacher