Transcripts
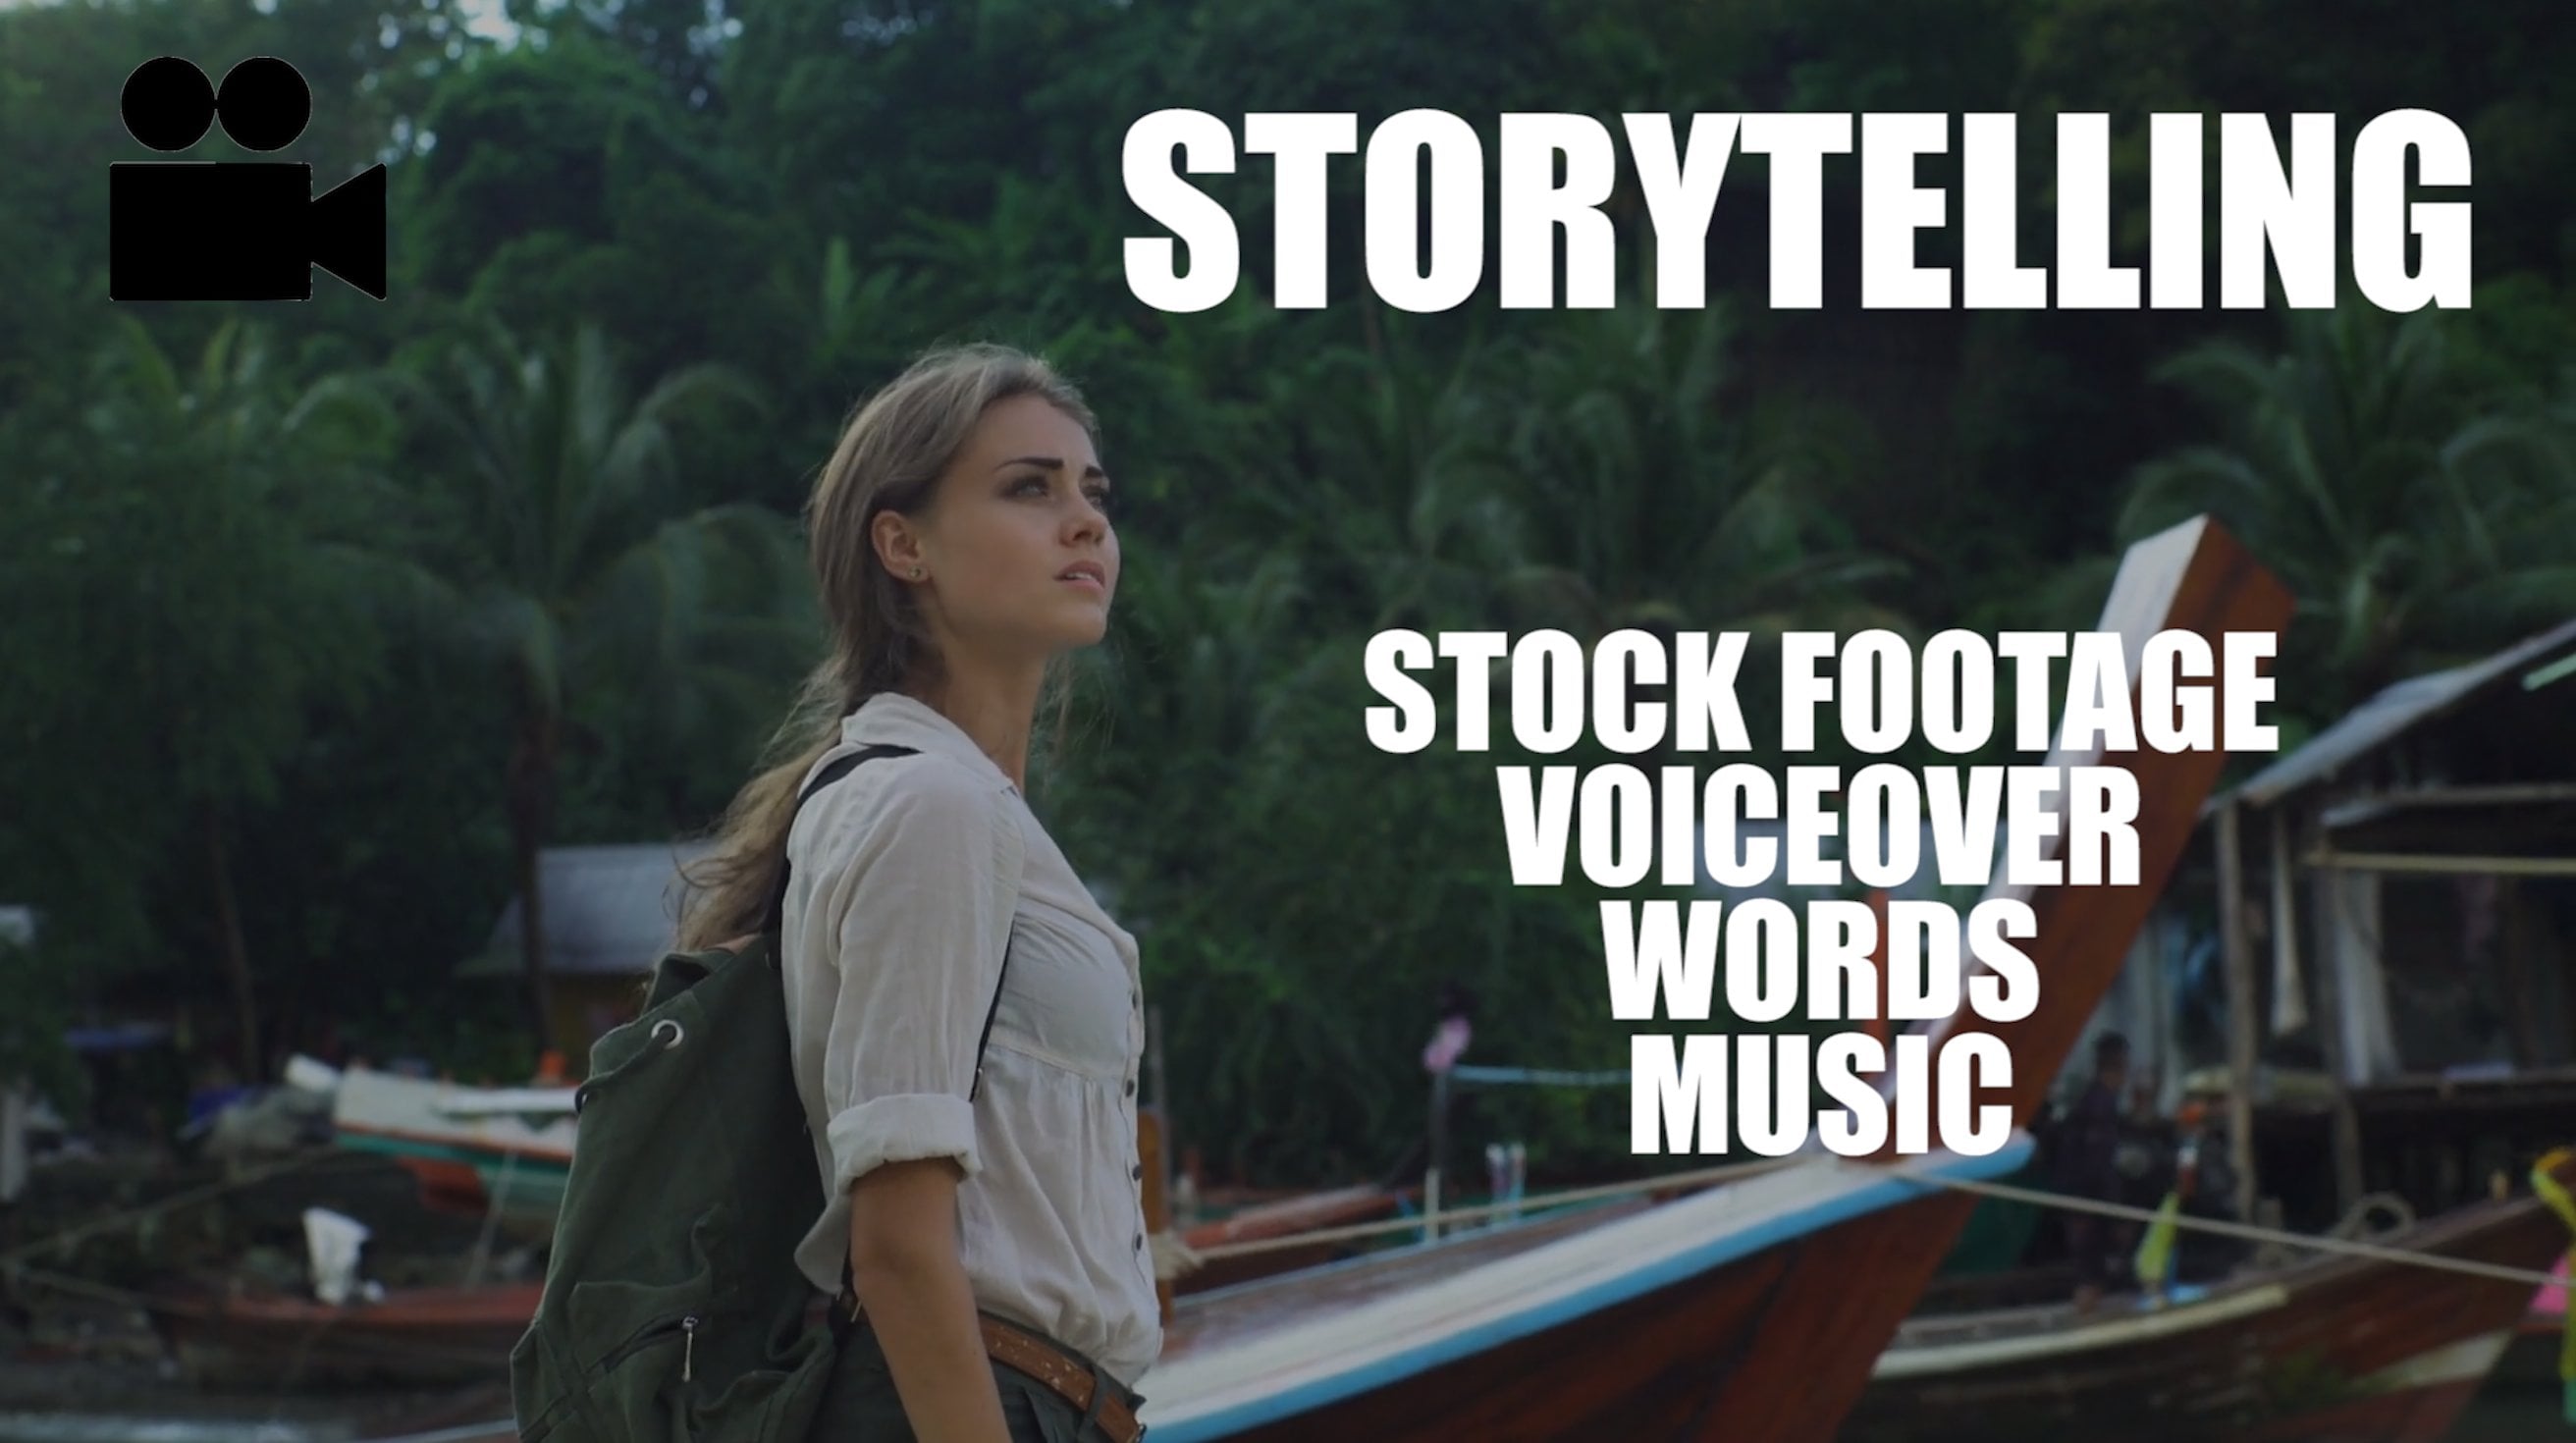
1. Introduction: Hi, everyone. I'm Nikki and I'm a graphic designer from Dissolve. The title of this class is Creative Storytelling using Stock Video. That means we're going to learn how to use stock video to flesh out and tell a story visually. Dissolve is a website that licenses high quality stock footage for use in advertising, and television, and any sort of video projects. Sometimes it's difficult to shoot all the video that you need yourself, and by using stock, you can really start to fill in gaps and set an emotion for your video projects. Today, I'll be going through a project about my greatest love and I will help you find the perfect clip on Dissolve, a few tips about searching, and then we'll go into a couple of tips on editing and how to make a story with stock all fit together and flow nicely. Your assignment for this class is to create about a 10 to 30 second video on your greatest love using stock footage. Three main skills that you'll learn in this class are how to add emotion using stock, how to show what you say, so adding a visual to go along with what you're trying to tell people in your story, as well as filling gaps in time, so you can show time passing and help set the stage using stock. This class is for anyone that's interested in video. You don't have to have a lot of experience. We're just going to do a little bit of basic video editing, just really anyone with a creative mind. Maybe you're just getting into video, you're more of a print designer, you're interested in this kind of new medium, you're in marketing and you're interested in how can I create a video to promote my company or my product, then this class is for you. Communicating with video is so powerful because it just gives you another angle, it's able to provide a different kind of emotion than just written or drawn things. It's engages more of your senses, and it's a lot more entertaining for someone to watch.
2. Project: Your Greatest Love!: Your assignment for this class is to create about a 10 to 30 second video on your greatest love using stock footage. Students should do this project to understand how they can create a compelling story using stock without having to shoot clips themselves. These are important skills that will help you if you're going to be creating something like a brand video for marketing, advertisements all kinds of things. You'll start to learn how you can use stock in place of a big high production value shoot. This project will take maybe a day, three or four days depending on your skill level with editing, and how much time you want to commit to it. But I'd say about a day to find the perfect clip and edit it together. Some ways of interpreting your greatest love, which is actually the most exciting part of this class, I think, is it doesn't have to be your high school sweetheart, no one cares about that. Doesn't have to only be about love. You have to think about all the different emotions that things make you feel. So, like you're really pissed off at your cell phone because it keeps freezing but you love your cell phone. So, you have to think about love as a broad term and then the other emotions that something can make you feel. So, the trick will be finding something that you have something you want to say about. So, you have a story to tell about this thing that you love. You have either it's like time passing and it's a journey to find something or you just really want to express specific emotions about this thing. You really have to find an angle so you're not just making a 10 second video about cats. You have to say why you love cats or the emotion that it makes you feel or have an event happen for the story to be really compelling and not just a string of clips about cats. So, I'm going to be showing you my brainstorming process for how I came up with my concept for my project, which may help you get started on coming up with something of your own. A good project is something that people are going to want to watch. It's going to evoke an emotion from them. They'll be entertained by it, whether they laugh at it or they cry because of it. It's not really about seamless editing or perfect clips. It's just trying to convey an emotion and have the viewer receive that from your video. So, you can interpret your greatest love a little tongue in cheek. I'm going to be telling the story of one of my favorite foods. So, think conceptually about it, use your creative minds and come up with something that you really feel passionate about or that you can tell a funny story about.
3. What You'll Need: So, the first thing that you're going to need for your projects is your idea. You want to start with knowing what kind of story you're going to tell. Whether it's going to be time passing from start to finish or just a pocket of time and you're just going to really show one emotion about something. Coming up with sort of how your video is going to work is going to be the most important part. If you're a little bit stuck for an idea of what you'd like to make your video about, you can start by thinking about conversations you have with your friends, the kind of things that you'd like to look up on the Internet. Maybe scroll through your Instagram feed and see if there's anything that comes to mind, looking through your email like what kind of marketing emails do you get. That'll tell you about what kinds of things that you like. You can go for a walk outside and see if there is this thing that sparks your imagination. I like to start by kind of just quickly jotting down things that I can think if someone asked me what are my top ten favorite things, just start writing down. You'll come up with crazy ideas, some concepts, some actual physical things, all kinds of stuff. So the second thing that you will need for your project is some basic video editing software. We're going to be using Adobe Premiere which is- you can use whatever you're familiar with, but if you've used things like Photoshop and Illustrator in the past, I would recommend using Premier because the skills transfer fairly easily. The third thing that you will need for the class is an account at Dissolve which you can get by visiting dissolve.com/signup and you can register for a free account. So for the purposes of this project, we'll be using watermarked comps and they'll work really well because you'll be able to download all sorts of clips and experiment with them and figure out what works best for your story and they're available for free. We will be using Dissolve down the line for- in actual projects you are able to license those clips and they won't be watermarked and you can use them in your projects. But for this class, we're just going to use the comps. If you'd like to add music to your project and we recommend that you do, we've included a lot of links to different sites where you can license music for free under Creative Commons or a couple of places where you can license it for a very little fee. So now that you know what you're going to need for your project, we'll jump into a little bit more about what stock footage is and then I'll start working on my project.
4. Why Stock?: Most people think of stock footage as a generic clip of a subject or topic, a wide office, or a really crisp salad, but really what it is, is just any clip that someone has shot and made available for licensing. So, it can be super authentic. We seek all clips with high production values and up-to-date styling, modern models, not necessarily people that look like they're acting, so it's a lot more authentic and just much more natural than you would expect stock to be. There are five main ways that stock can help you with your video. The first one is that it's super easy to insert professionally shot video into your project. So, you don't have to worry about things like cameras and lenses and lighting because we work with high-quality professional filmmakers, they've taken care of all this, and you know that you're going to get a good quality shot. So, on that note, the second thing is that you don't have to shoot it yourself. You don't have to know anything about cameras, you just have to know how to find the perfect shot. The third thing about using stock is that it isn't as expensive as it would be to shoot it yourself. So, even if you're doing something locally and you need a shot of someone walking down the street drinking a coffee, you can license that clip as opposed to having a whole crew and going out and setting up and spending a day to get that 10-second clip. So, the fourth thing about using stock is that you'll have access to a lot of models and locations that you wouldn't have had otherwise. All of our commercial clips have model releases, so you don't have to worry about making sure you have permission to use that person in your advertisement. You don't really have the budget to travel around the world, well, you can license clips from all the kinds of places that you want to show. So, that gives you both creative and logistical advantages because you can show whatever you want. You can be a lot more creative and not have to worry about your budget too much. So, the fifth advantage is that you can really use stock to do we're going to do today, and that is to add emotion and to show what you say, and to fill in story gaps in your stories. So, the biggest thing you need to know about stock is that you're licensing clips. So, I'm going to talk a little bit about what that is and what you need to know about that. So, a license basically gives you permission to use the video. It doesn't mean that you own it outright, it just gives you permission to use it in your project. For the project that you're working on in this class, you don't really need to worry about licensing because you're going to be downloading and using the comps from our site. So, in real life, if you're using stock in your commercial projects, it's going to be really important to think about editorial versus commercial licenses. If you want to know more about licensing, you can visit dissolve.com/licensing. So, the same thing goes for licensing music. You're going to need permission from the creator or license something under Creative Commons. We've provided a bunch of links to places where you can learn more about licensing music and find music that you can use in your project. So, I'm going to get started with my project. I'm going to start with brainstorming ways, maybe be a little tongue-in-cheek about what mine is going to be about, start writing down some things that maybe are my greatest love, and start seeing what we can come up with.
5. Coming Up With Your Idea: So, I'm going to take you through my list of things I was coming up with while I was brainstorming for this project. So, I started my list with one of my favorite pastimes which is swimming. So, I just sort of thought about activities that I like to do, that kind of brought me into things like I hate wearing shoes. So, I have written down here "sandals". I also wrote down things like "taking off socks" because socks are the worst. Things like "singing in the shower" or "dancing really badly". Then I started thinking about different kinds of foods that I like or things that I'd like to cook in the past, and that brought me to what I actually decided to make my video on, which is giant pretzels. I started off my brainstorming with just sort of items and activities and things I like to do. Essentially, I did land on an actual object that I'm going to tell a story about. The most important thing when I was choosing my topic for my video was something that I really felt passionate about that I could tell a story about that I thought people would be interested in watching, as well as something that I knew I could find clips for. In terms of my brainstorming process for this, I sort of started out with a list. I found that it was easier to just write things down, maybe doodling is your thing, but generally, I found it was easier to just come up with loose ideas and then start referencing the clips to help me flush out my idea. It's a little bit more difficult to start out with an entirely finished idea when you're trying to create something entirely out of stock because a lot of it is going to depend on what you can find. Where I'm from, we don't really have pretzels available on the street. So, I mean, maybe I could go tell a story about finding them, the emotions that they make me feel, memories that they'd bring back when I eat them or something like that. You want to think about why you love this thing. It's kind of like when you have a smell or a sound brings back a memory. Maybe you can use something like that and say, "This thing makes me think of this." It's really about how you feel about this thing or this concept. I find it's a little bit more open-ended when you just go start looking because you're going to find things that you didn't expect to and that will probably make your video a lot more creative, then kindof pigeonholing yourself into saying, "I need this clip of something." You don't need to spend too much time brainstorming especially, if you're getting stuck. Often, what I'll do is if I find a clip that I like and I think that maybe I could build a story around this, there is the option to see more clips from that contributor. So, you can get a clip that was shot maybe in the same shoot, in a similar style, and it'll be a lot easier to build a whole story around if you have a couple shots from that same contributor. So, now I'm going to show you how I'm going to refine my story by searching for clips on Dissolve. I find when you're looking for clips, just starting super general really helps, so it also helps to search by keywords as opposed to phrases. So, I'm just going to start off by searching. I'm going to just start with pretzel here. So, there isn't a whole ton of clips because it is such a specific topic, and I see there's lots of small hard pretzels, gross. That's not what my story is about. When I had the idea for this project, these are the clips that I had in mind because I am so familiar with all the clips that we have. I know that we have these really cool creative looking hand-held shots of these pretzels and that's kind of what I had in mind, and I think that that's what I'm going to build my story around. As far as what my story is about, I'm not quite sure yet. I kind of like the idea of someone going on a search for the pretzels. I want to tell people that my life was not as exciting before I found the pretzel, before this glorious thing came to be. So, I'll start showing it with the emotion of how I felt before I had a pretzel, and that was sad and hungry. So, just by searching those general terms, I'm going to come up with maybe a couple of things that might be interesting. This one's cool of this girl. She looks like she's longing for a pretzel. This one's kind of interesting. This looks like a really nicely shot clip. So, that might be something I'd want to start out with. Now, if I'm imagining it's a journey, so a person is kind of sad and alone without the pretzel, and then maybe they decide to take a trip to get to their pretzel. So, obviously, pretzels, you think New York. I'm going to maybe see what I can find just by searching "New York". You can also narrow it down to specific things like aerials or taxis, Time Square, things like that, but I definitely encourage you to start with super broad terms and keywords especially when you're just coming up with your idea. It's going to provide you with the biggest range of results which will help you narrow it down. Three steps that you can take in terms of finding the right clip, first, I started by simply just dropping in what my story is going to be about to see what clips I could build it around, and then I thought about what kinds of emotions I might like to tell. Think about just your classic story arc. Starting before I had the pretzel, I'm going to do your climax and then your pinnacle moment when the pretzel arrives. So, just thinking about those general ideas of storytelling, if you're going to do something that happens from start to finish. Then I just wanted to do a word association type thing. So, in my notes I had jotted down, what do you think about when you think about pretzel? Well, you think about street food in New York and those things. So, you're going to want to start searching super generally for things that are associated with your topic.
6. 1. Adding Emotion: So, I'm starting to have an idea of what my pretzel video is going to be about. I know that it's going to be a journey, start off where I don't have the pretzel and there's like a sadness before. So, we're going to start by thinking about how we can add those emotions into our video, which is one of the things that stock can help you do. When you're thinking about how to represent those emotions, whatever it is that you're going to show in your story, you want to think about big terms or metaphors, like a word association thing. Sadness can be an empty bed or an overcast a day or an empty swing set, just things/places where you could feel that emotion, just things that generally make you sad, but it's a lot about big concepts and metaphors. So, we're going to take a look at a video, a before and after of a story of two people falling in love, and we're going to show you what it looked like before stock and then we'll show you what it looked like after and how that impacted the story. Okay. So, we get Jerry, we get Emily looking at each other, love at first sight thing, that's cool, but it could be a lot more interesting. It's just a short clip, but we can think about things like how does love make you feel? Does it make you feel scared or excited or like joy and passion? And how can we represent those things? So, it could be like passion is fireworks and you feel like falling in love, that sort of thing can be a metaphor. So, what we did is have a little after where we interjected stock into it to round out the story and it has a lot more emotion to it and is a lot more engaging for people watching it. So, you can see that just by the way it's edited with the music and adding a couple of more visuals just to get that feeling across, rather than just looking at Jerry and looking at Emily, you really understand the feeling that they're feeling; the exploding fireworks, the blossoming flowers, that sort of thing, they're all just metaphors for the way Jerry feels about Emily. In terms of adding emotion, it can be both the subject of the clip and the way it's edited. So, for instance, in this one, you saw Jerry and then the music picked up and the pace of the editing picked up and you just saw flashes of clips and it built excitement. So, you can even add emotion through the subjects in the clips that you choose and you can also add it through the way you edit it. It is a combination of both. When it comes to which emotions will work well with stock and with your project, really, almost any emotion will work. Obviously, love is what we're focused on, but things like sadness, depression, loneliness, excitement, being scared, all those sorts of things will work. What's most important is that you can think of different metaphors to represent it. If you're thinking really creatively about this project, you won't just be thinking about love because sometimes your love can upset you and scare you and that thing. So, there's all sorts of emotions that can be built into your project, not just love. In terms of how many emotions you should try to be getting into your video, it does really depend on what your specific story is, but it might be a little bit more compelling to have something more than just showing passion and joy. Like for instance, in my video, I've decided that I'm going to start out with it being sadness transitioning into a little bit more excitement and joy. So, I definitely think it'll probably be a little bit more well rounded and more interesting story if you can transition maybe from one emotion to another. So, I'd say get at least two or three in there, but depending on what you choose for what you want for your story, it could just be all about one thing. Okay. So, when I was thinking about adding emotion to my story, I know that I want it to be a journey, start out a little bit sad because I haven't got the pretzel yet. So, I thought it was interesting I found a couple of clips of a sad, unhappy girl, and again, I'm thinking about, it's a story, so I want to keep the person in it consistent. See, I am going through some of these other clips that I've saved. A lot of the things I have revolving around sadness are intended to also set the beginning of my story, so I do have an actual person in it because I wanted to introduce you to who my main character was as well. But I think that when I'm looking at some of the ones that I've chosen here, one of the ones that maybe works the best is this one here because it's a really well-shot clip and she's kind of looking dead-on at the camera. So you're immediately engaged with her. So, I think that might be something I'm going to use to represent sadness in mine. No, in terms of what happens when I get through the journey and find the pretzel, I've thought about there's some cool clips of fireworks that might be like celebratory, that sort of thing, I found this interesting one of this apple exploding which I thought was maybe interesting because my story is going to have something to do with New York, this excitement. But actually, my favorite clip that I found here to represent excitement and joy is this cat jumping through a ring because it looks like it's achieved ultimate victory and it just shows, I don't know, imagine the feeling that cat is feeling, that looks like a challenge. So, I like the way that that represents, like accomplishing something in like a huge amount of joy. So, I think I'm totally going to use that one. Emotion is probably the most important part of your video. It's going to make it the most engaging, it's going to make people feel like they've got something out of it, especially in terms of how you're going to translate this in the future. You're doing something like a brand video for a product, you're really going to want to show an emotional tie to that thing that will really help people feel that emotion or something like that. So, when it comes to video, it's going to be the most important part. It's also a good way to judge whether or not your project was successful, whether if people can get the feeling that you're trying to convey. So, this is going to be one of your most important steps in terms of finding the right clip to represent those emotions.
7. 2. Filling In Story Gaps: So, the second thing that stock is really good at helping you do is filling in story gaps. So, I have another before and after example to show you, and this is about someone named Sheldon scheduling a meeting. So, this is a good example of, you can see he schedules the meeting and then he's at the meeting, but all of a sudden, like it said, it's nighttime and wait, I thought he was scheduling with the LA office. Well, where is he? Something's a little bit missing here, so we can think about, okay. First let's talk about where he is, when he's scheduling his meetings, sort of set the scene. And then, let's talk about how he gets from scheduling that meeting to LA at nighttime. Well, obviously he's going to have to, I don't know, take a cab from the street corner he's on, get to an airport. That sort of thing. So, there's a lot of ways we can make this a more complete story. So, we've added a little bit of stock here to fill that out. We'll see what it looks like. So, that's sort of you can see, okay, we understand he was in New York. He's scheduled a meeting. He went to the airport, checked his bags, flew to LA. That took all day. So, now it's nighttime and now he's at a meeting. So, it's super easy. We didn't have to worry about showing different models from people. It was really easy to show different scenes to help complete his journey from a street in LA to a nighttime, sorry, a street in New York to a nighttime meeting in LA. Some common examples of story gaps that you can use stock to fill would be time passing. So, like in this example, time passed from morning to evening. The other one would be sort of an establishing shot. So, setting the scene that your story will take place in, whether that's an aerial of New York or something like the front of a restaurant, because you're about to show something happening inside a restaurant. Just kind of setting the scene. Another thing will be travel. So, going from place to place, and whether that's from going from New York to LA or going from home to office, that sort of thing, it can be big scale travel, small scale travel. When you're thinking about your story, which comes first, the narrative or the clip? Well, really, it could be either. So, if you happen to have a super solid idea of what your narrative is going to be then you can start looking for your clips based on that and showing sort of filling in your story gaps based on that. But if you happen to find a really cool clip that you want to incorporate into your story, you can build your story around that and fill the gaps in between each one of the clips using other clips, and you have a little bit of a better idea of what you need to fill in. So, going back to my video and how I decided to use stock to fill in the gaps. Because mine is going to be some sort of journey and story, I have a lot of gaps to fill in because I've decided that I want to use this clip of the sad looking girl who looks like she really wants a pretzel, and then also these really awesome clips I found of pretzels. So, I thought of the idea that maybe she's at home alone at night and maybe is kind of hungry, and then she decides she's going to go on this epic adventure to get a pretzel. So, the beginning of my story is that while she takes a look in the fridge here and doesn't really find what she's looking for. So, it's late at night and she's like, "You know what? Screw that. I'm going to New York to get a pretzel." So, she's, you can see on her iPad here, she's going to book a flight to New York. Okay? So, what's the process of her getting from wherever she is to New York, and that's obviously an evening. So, here is the sun rising, some cars passing, that's going to show maybe getting to the airport. I happened to find this really cool clip of some headless people, so their heads are cut off, which is really good to kind of keep your story consistent with. I mean, it's difficult when you're using stock because there's often different models, but if you can show clips where you don't see their face or show them from behind that will help make your story more consistent. Then I found here some pretty good clips of airplanes and stuff like that. Similar to the before and after that I showed you, I'm going to do some establishing shots of aerials of Empire State Building and stuff like that. Obviously, when she gets to New York, she's going to take a taxi, want to have some of those kind of clips. Again, time is going to pass from morning to evening, so you want to think about that. Something that can really help impact your story and really give it more of a setting is using kind of a three shot rule. So, I've picked out a couple clips of taxis and traffic. There's this overhead shot here were some cars pass through, but then it's always nice to show different perspectives of that. So, I might show these cars passing and then maybe someone eventually will be getting out of the car, but also showing that from inside. I found this really cool clip of night ride inside a taxi. So, showing the car from the outside, the traffic passing, and then showing it from the point of view of the person inside the car. That will definitely help communicate that this person is taking a taxi and they're inside it. I'm also going to do that with maybe here when she's booking a flight. I found a couple different clips of someone using an iPad, so that could be cool. Showing it once over the shoulder, showing it close up to really kind of building on that. So, it may not necessarily be the same clip. You might have to find a couple different clips. But for instance, if you're showing someone on a computer or on an iPad or something like that, you could show one shot from far away, straight on, one shot over the shoulder and then cut to maybe a clip of them typing. So, it's sort of multiple shots of someone doing the same action, but all from different perspectives, and it's a lot more interesting than just seeing one shot of someone on a computer. It will help your story be a little bit more well-rounded.
8. 3. Showing What You Say: So, the third thing that Stock can help you do is quite literally showing what you say. So, we have another before and after video here, that can show you how we can use Stock to represent concepts, words, that sort of thing or go along with some audio that you have. So, that was a good example of having some written text, you can totally see how, by having the video to go along with it, it definitely had a big impact and amplify the message that you are trying to convey with the words. That can also be the same situation if you're using a voice-over. So for instance, in my video that I'm doing I've chosen not to have a voice-over but perhaps you want to have a voice-over in yours. You can, as opposed to having a lot of metaphors, you can literally show what you want to talk about. Like I am literally showing a pretzel. The idea is, by using clips to either enhance just text or audio that you have. So, it does have a little bit of a metaphor but it definitely enhances your message. So, in my project, I don't really need to show what I say because I've chosen not to use any text or any voice-overs but perhaps in yours you do. If you've chosen to do a voice-over of I don't know, a speech of some sort or something like that. That will be cool and you could have visuals to go along with whatever the audio is. I do have another example of how that could apply. Perhaps in something like an explainer video, if you do have some voice-over to go with it, you can illustrate those concepts using video. So here's an example of an explainer video for an app that we have that illustrates showing what you say. We all have things in our lives to be grateful for. When we take the time to look around and reflect, those things become clear. We have the freedom to roam, to explore. I'm the CEO and co-founder of Goodpin, a new mobile app that lets you experience or participate in the good going on all around you. We all have things in our lives to be grateful for. When we take the time to look around and reflect, those things become clear. We have the freedom to roam, to explore, to simply enjoy the world around us. We have friends we adore, people we connect with, celebrate with, the ones we share our life with. We have moments that can only be described as pure joy. Then we have moments of inspiration when we're motivated to do better, try harder, to be the best we can. Goodpin is a new mobile app that lets you experience and participate in the good going on around you, wherever you happen to be. Goodpin lets you act on all of these moments while you are in them, and give to a cause that matters to you. When you share your gig with your social channels, you can watch as your network joins in, supports both you and your colleagues. Download Goodpin today and join the movement. So, that was a good example of how we were able to enhance a story. We had a talking head video, that's like okay, interesting, cool story but boring. So, we were able to pick videos, pick Stock clips and create a much more interesting visual to go along with the voice-over that we had. So, that could also apply to your projects, if you've chosen to use voice-over as your audio.
9. Finding the Perfect Clip: So, I'm going to go through a couple tips on how to find the perfect clip and a little bit about how the site functions that will help you find clips to develop your story, save them, and download them and all that kind of fun stuff. First thing that we've sort of touched a little bit on is how to search on Dissolve. So, when you get to the site, there's a big search bar. If you're a little bit overwhelmed with searching right off the bat, there are some browse categories down here that kind of can help you get into the clips. It is a little bit easier to search by keywords as opposed to entire phrases. You'll have a little bit more broad result. So, for example, searching like kid is a good way to start if you're looking for clips of a child doing something. Something to keep in mind is there's a lot of synonyms. You might want to try searching for a child, or a boy, or a girl, or that sort of thing to help you find exactly what you're looking for. So, keep in mind that there could be multiple terms for what you're trying to find. So, in terms of searching, if you want to sort of narrow down the results that you get, one tip you can do is say you're looking for clip of a child. Let's search "Child". Let's see. Well, there's 33,000 results. That's a little overwhelming and this is kind of cool like there's a child on a playground. So, maybe I only want to see clips of a child on a playground. So, I'm going to search "Child and Playground". That narrows it down to 700 results which is a little more easy to use. Just kind of break it down into the keywords and search by those as opposed to the entire phrase. Now, we're going to talk about how to use your clip folders in terms of when you're finding clips how to sort of collect them into a place where you can review them and see what might work for you. When I was thinking about my project, another thing I sort of thought about when I was talking about Pretzels is you know, what goes well with Pretzels. Obviously, beer is very common. So, that was one of the things I searched and looked for clips on. You can go through here, and in your search results, there will be a little Save for later icon. We can save it to a clip folder. So, you can either do that directly from your search results by saying, this is a cool clip of bottles. I'm going to save it for later, and then you'll see there's a little message that says, "Your product has been added to your clip folder". You can also add things to your clip folders right here from the product detail page so, you can say, "Save to clip folder" down here right under the video and it will do the same thing. So then, to navigate to your clip folders once you have saved things there on your main menu bar under your name, there's a little dropdown and then you can go to Clip Folders. Here, you will see these are all the clips that I saved for this project that I thought might work for me. So, you can see here's down at the bottom, the bottle clip that I just saved to my clip folder. So, one really cool feature that we have in your clip folder that will sort of help you flesh out your story and kind of build your storyline in which clip comes before which is you can actually just drag and drop your clips. So, you can create a storyboard in your clip folder just by saying, "Okay, well, I want this to be my first clip here" I know that, so, I'm going to put her in the beginning down there. So, I know that she's going to be sort of my intro shot and then, I've got this clip of an iPad here. This is the same girl, she's using iPad. That's awesome. I'm going to drag these up here and you can sort of start to build your story just by dragging and dropping and using your clip folder just like a storyboard. One thing that's really important when you're searching is we sort of touched on it before using clips from the same contributor. So, I'm going to show you how to search that way. So, if you found a clip that you really like, I've decided I'm going to use this serious woman. Down here on the right it says who the contributor is, and you can either down here, you'll see more clips from them. I'm like well, none of these clips are maybe something that interests me, but I can click here to see more by that contributor or I can also click on the contributor's name and it will take me to a selection of search results that are all shot by that contributor. So, I can maybe find something of the same model or something that's listed similarily or the same subject which is pretty helpful. Bevan Goldswain is a contributor that I want to find clips from and I can just type his name up here, and I can also search that way. Okay, so now that you've sort of arranged your clips that you think you want to use in your clip folder and sort of set out a rough idea of what your story is going to be. You can download the clips just by clicking them, and then on the clip detail page, you'll see just below the video into the right of the clip folder is download the 720p comp. So, that's how you're going to download them. It's literally just click and it automatically downloads. So, it's pretty easy. I'm going to click on this one and I'll download this comp as well. It's that easy. So, we talked a little bit about sort of having multiple shots of the same action. For instance, the person using the iPad. So, another way to find similar shots would be just scrolling down here underneath the video, there's keywords and you can see this one has things like tablet, touch screen, that sort of thing. So, I can see that there is iPad here because I specifically wanted to be using the same device. So, I can click on that and it will bring up a bunch more clips of people using iPads. So, that's another way to help find multiple shots of the same thing.
10. Tips for Video Editing: Okay. So, now we're going to go through a couple simple tips for editing your story together. Video editing in itself is a whole career, a whole Oscar category. So, we're just going to kind of touch the surface. There's so many different ways you can edit things. So, we're just going to go through a couple of key things that will help make your story a little bit more cohesive. So, we can see here I've got together all the clips that I want to use, and you'll notice that I have different clips underneath and some on top. That's just when I was going through the process of deciding which clips to use I'd say, "Well, so here I've got the clip that I chose to use, which was the girl looking at the camera," but below it, you'll see that originally, I had thought, "Maybe this this girl might work," but I decided. The lighting in the clip isn't my favorite. It's not my favorite clip. So, I just threw the process ended up with a bunch of different layers of footage in here. First thing we're going to talk about is cutting to music, and that's probably going to be the most important and easiest thing that you'll be able to accomplish with your project. The song that I chose, as you can see here on my timeline, starts out a little bit slow, and then turns into this. What you can even see here in the waveforms is like a super loud, intense song, and then dies out a little bit here in the end, and that's also went along with the story arc that I wanted to go with. So, one of the most simple ways to make your clips in your audio work together is by timing your edits to the pace of the music and to the beats. So, you can see here that I have the audio slows down, and it picks up right here. You can actually see that in the waveform. So, that's where I've chosen to put this cut right here, and that's where in my story I have goes from her booking her flight, and right when she clicks here on the iPad is when the audio changes. So, timing things like the action in your clips to the audio will definitely help. Just listen to your track and see how it plays through. Similar to a story arc as the music is building, the action is building, and then something really happens on specific beats will make your story a lot more compelling. So, another thing when it comes to timing your cuts to your audio, as she's pulling up in a taxi, and you can see right here the audio is building. So, she pulls up in the taxi, and then I've paste a bunch of really quick clips. Sorry, really quick cuts to the audio, and it flashes back and forth to build some excitement to her actually walking up to the pretzel stand. By using the quick cuts and your pacing, it will change the way people feel about what they're seeing. I have these really quick cuts down here, and then more in the beginning where the pacing of the audio is a lot slower. You can see that my clips are on screen for a lot longer, and then they change on a beat here. So, by having the audio show the waveforms, it makes it a lot easier to make sure you're cutting on beat. So, something we covered when we were talking about looking for clips is using multiple shots of the same action or object to build excitement and round out your story. As you'll see, I have the clip of the girl, front on looking at her iPad, cuts to a close up of the iPad and her finger. It's always nice to start from farther away and work your way in, or start from close in and work your way out depending on what you're trying to show as opposed to cutting from a bunch of different angles just make it a progression. Then, I also have it again down here where I've done. She lands. She's inside the taxi, then we go to a clip of the street, so we're starting inside and working our way out. Then outside, she's getting out of the taxi. So, it's again three cuts of the same action that build the story. Most importantly, I've done that with the pretzel by showing it. It's initial reveal is this clip I've got here where it's got the light shining through it, and it looks like this amazing thing that you found, and then it zooms in. I've decided to do a fade transition because that is what went well with the music there to another shot of the pretzel, and she's paying, and then cut to the clip of her handing the money. So, again it's like a progression of the story, see the pretzel, multiple clips of the same action happening of her buying it. Either you're creating an entire story out of stock like we are today, or your using stock to fill in gaps in your story, it can be a little bit challenging to find clips that use the same model or a similar looking model. So, one thing that can be really helpful for that, what I've chosen to do is sort of set it up at the beginning with the one girl and you know who she is, and then I was able to find another clip here of that specific model using the iPad, which was really helpful. But in the rest, like for example, here she is walking through the terminal. Well, you don't know that it's not her because you can't see her face. So, by cutting to avoid models faces or picking. When you're choosing what part of the clip you're going to use, you can think about that like maybe the entire clip itself did show their face. But for a couple of seconds, the camera was down and you didn't see it, you're like "Awesome, that's that part of the clip that I'm going to use." Then throughout the whole thing, you never really actually see her again. Because right here, you do have the subject walking up to buy the pretzel, but you show her from behind, so again, you don't know that it's not her. So, that's really key in keeping your whole story consistent, and that also happens if you're not using stock for your whole clip. Maybe you have a story that need a filler clip of someone using an iPad, so you want to use a clip of someone you don't see their face. So, something that's interesting when you're using stock is, we sort of talked about clip lengths before, and that you didn't really need to worry about how long the clips were because they were all about 10 seconds, 30 seconds. You don't need that whole 10 seconds for your video. So, when you're thinking about what part of that clip you're going to use, it's a little bit subjective because it depends on your story. Say you want the exact moment where the person blinks, and you don't need the rest of it, so you can cut that out. Now, as we talked about trying to find clips from the same contributor, and so you'd have a cohesive look and color, and things like that, sometimes that's not always possible. You're not able to build an entire real or an entire project out of all clips from the same contributor unless magically, they happen to shoot all of those clips for you. So, you're going to have to do a little bit of color editing to make them blend together without it standing out, and you're being able to notice that those were all shot by different people. So, for instance, my first clip here you can tell that the color is totally different than the second clip here where it's actually quite green, and in the first clip it was a little bit more blue. Highlight a little bit. It was a little bit more rich. So, what we can do there are some simple color editing tools that are built into After Effects and Premier. You can also get some third-party plugins like Red Giant, things like that, that have awesome things you'll be able to grade the whole things. We're not going to get too much into that, just know that color is going to be something that will really make this go together. So, I can look under my video effects, and there's some color correction tools here. One of the easiest to use is going to be the fast color corrector. You'll probably want to start off by doing the white balance. It's really easy. There's little eyedropper her, and then you can pick the most white spot on the video, and it will balance everything else based on that. I did say I wanted to make this one maybe a little bit cooler. A little bit more towards the blue spectrum because there was a little bit green to try to match the one before it, which I can also go back to and do some white balance. Then, I'm going to choose right the whites of her eyes to make it a little bit more neutral because it had a little bit of a color tone to it, and see if I can get these two just by playing with these to seem a little bit more cohesive, starting to transition to be a little bit closer together. So, then you're going to want to go through and adjust it for each one of your clips to make the whole thing feel a little bit more cohesive. So, maybe this one, I might want to make it a little bit darker, so I can transition from this fridge clip into this clip where she's using her iPad in the dark. So, you can just play with all these dials until you get something that feels right. It's going to be a lot about how it feels, and each clip is going to be different, so it's going to be a lot of playing around. But, like I said, these are super simple color tools. There are a lot more things you can get a lot more in-depth with and isolate specific sections, and actually put like a color grade to your video and make them all match, but you just want to start. If you're just getting into it, just start really simple with the built-in tools in Premier. They'll be really helpful.
11. Nikki's Project: Pretzel Quest:
12. Final Thoughts: Okay, so, throughout the whole class, we went through a lot of stuff, we talked a lot about what stock is, and why I can help you with your video projects. We talked about why it's sometimes easier to use stock than shoot it yourself, especially if you're not familiar with shooting video. We talked about how stock can really add emotion to your project and add emotion to your other video projects. You can use it to show how time passes and fill in story gaps. It's really useful for setting the scene and for getting those hard to get clips that you can't shoot yourself. It also will help you show what you say, so if you're using an audio recording, and you really want to add some impact to it, that you can't get just through audio or just through text, using video to enhance it, using stock is super helpful. Now, you've taken a look at how I edited and put together my project, which happened to be a quest about my search for the perfect pretzel, an epic journey, and hopefully, it gives you a little bit of inspiration and ideas for your project. What's most important is just think creatively, don't let yourself get stuck in too many holes, and just let your ideas come to you as you're searching through the stock. It will be a lot more helpful than saying, "This is my idea. I really like it to come naturally and morph into the right thing." So, now, it's your turn to get out, start the searching through the stock, find that thing that you want, that you love so much, you want to make a video about it, start putting clips together, experimenting, adding music, and seeing what you come up with, and start sharing things at the project gallery. Super excited to see what everyone's working on and definitely going to be looking through there, commenting. If you have any questions at all, I will be in there responding to them, helping you out if you're having troubles coming up with an idea. I really encourage everyone to not only look for my comments and feedback and questions, but to really comment on your peers' work. In all kinds of creative work, it's always helpful to have some other eyes on it, giving you feedback saying, "Yeah, I totally feel that emotion when the cat jumped through the hoop," or, "I'm not really sure about this, what do you guys think?" Putting out questions to other people and having other people comment, make sure you're active in there, you'll get a lot more out of the project. Okay, so, I want to wish everybody a lot of luck on creating your own story, on your own pretzel quest to create super emotional and engaging 10-second video using stock. I hope that you guys take everything you've learned in this class and put it forth into all the rest of your video projects. There's all kinds of things you can do using stock and using video and it's a super exciting new thing that I think everyone needs to learn a lot about, needs to know a lot about.
 Nikki Stephens, Graphic Designer & Video Editor