Transcripts
1. Intro: A Little Bit About Sandyseyecatcher: hi and welcome to our cause. Modern vintage. A new tutorial in our creative poetry. Serious. My name is any D and you are watching attendees Eye catcher TV. If you have watched any off my other tutorials, then you already know My husband met Envy Regime later when he assists me with our photo shoots. Classy will also give you the technical aspect off our lighting fed APS a little bit about us. As you can probably tell by my accent. I am originally from Germany That's right, met from the okay, and now we are here in the Great City off San Jose, California I've studied photography in London and received a diploma, was married in 2011. Furthermore, Trained was amazing photographers in L. A and New York until I realized that I not only love photography, but I also love to teach photography in our photo studio. We have let over 50 photography workshops specializing in creating conceptual photo shoots and to photograph vintage set ups. Waas requested a lot by many photographers, models and clients. If you look on Pinterest, Facebook or instagram, you will see there are tons and tons off images that resemble a vintage style. Models request them a lot to show a different side off themselves in the portfolios and capitals, request more and more engagement shoots in the retro style and even love to design vintage weddings. So let's talk about the why.
2. Why Is "Modern Vintage" Photography So Popular?: when I gathered ideas for this tutorial on New from my own experience that many people adore vintage died images photographers would confess. They love to convert images to black and white off back needful, setting up Hollywood glamour and thin whilst that shoots models would send me pictures off the vintage closes and had even ideas for sessions in a very specific style. And while I was editing the STO Toria, the marvelous Miss Maser, a TV show by Amazon Prime featuring a woman becoming a comedian in the fifties, they won eight Emmys. And when you think about it, there are probably 20 as our shows right now that I set in the good old days or featuring vintage elements. So it's evident that the demand is there. People are hooked on retro style. It's which means it's an excellent opportunity for photographers to learn more about the stronger and to cater, better toe the existing clients and maybe even attract new ones. Nowadays, there are also vendors online who specialize in vintage renters. You can choose specific items, they load them up in the van and come to the venue for setting up all sorts off concepts the Roaring Twenties with the typical a great gets peace style Hollywood glamour, The fabulous fifties are swinging sixties. There are so many great seems that clients laugh. The can dress up feel like a Hollywood starlet or adventurous movie star while it's being captured in a fresh and different way. And, of course, in this tutorial we applied all those looks without the help off another company. And even without a stylist and makeup artist, we want to show you that it can be I done on the budget. However, in case you want to go for a more significant seem, it's good to know that there is help out there. But back to the why. Why are people so in love with retro styled photography? TV shows and movies, I believe mirrors our need for a simpler society with less complicated technology and maybe less overbearing social media overload. Also, when you see such images, everything looks so perfect and classical nearly appear unreal and somehow magical. Similar hope people love to be told stories around the campfire, all the longing for fairy tales and adventures like in 1000 and one night or Grimm's Fairy Tates off the equivalent Disney version of it instead off the dark, offended See, we like being immersed in this dreaminess off a previous era. And although I'm grateful for new technology and the invention off mobile phones and the Internet, I mean, obviously I'm grateful as otherwise I wouldn't be able to develop this cause for you. What's. Nevertheless, I get excited when I think pictures off son of a from the fifties and I bet so you when you look at images at your hometown, your country or from your family and relatives. People looked so fancy, so well styled, and I can't help but wonder how they did this. They went through dark and difficult times, yet they look so glamorous and mysterious. It's really intriguing. I don't know if you can feel technically, you know, static about the time where you weren't even there. But that's how I feel about this. Plus, come on, who's doesn't think it would be fun to have a time machine and to go back to the past to check it all out, or at least to see how your parents met And yes, back to the future is a great example for including retro set ups and later ever give you some homework. That might be been a Fisher for you to explore even more ideas off course. It would be fun homework. I mean, it's going to be watching movies and T visuals. But how does this all relate to photography? I mean, pretty much the same way. People laughed to dress when Zika and to explore house. I look in the whole difference diet and the positive side effect. If it is done classically and not too much like a cosplay or costume party, which might be a little bit cheesy, then these images they will be just forever classic and also timeless. Couples can look back to the wedding images, and they treasure them like fine art images. Because I won't show like new mobile phones or wardrobe items that look like 2018 for example. I mean, probably at the moment we don't even know what that means. However, if using bag off people who get married in the eighties and now look at the images, they might be like, What was I thinking? So I think the big selling point for vintage setups nowadays is not that different to the people who went to see movies in the past. Even in the years off the Great Depression, when money was undoubtedly an issue, they would still managed to get a few cents together to escape their reality for a little bit, looking up to a hero and dreaming off being like this person are being swooped up in some whimsical Romans or just being immersed in an adventurous movie or being thrilled by Doc Horror show. I mean people that just laughed these tiles off escapism. So just was different that nowadays, our everyday client, they can becomes the hero, the princess off the adventurer. They can be actively involved in the shoot with a little help off hair and makeup and wardrobe and specific posing. And we is a photographer's. We can design those set ups easier than ever. Thanks to the Internet, we can get our hands on pretty much anything and the equipment this way more affordable, which means we can create special memories for our models and clients that they can keep forever. Plus, we can do it all on a budget. So there you go. If you want to offer a modern vintage category of photography for engagements and weddings or many sessions than this cause of for you. And with that, let's talk a little bit more about you and what you should bring to this cost.
3. Requirements For This Course: good news. First, you don't need a lot. As I mentioned before, all of our setups are possible on any budget. For example, you can find similar backgrounds that we used for around 15 to $30. Or if you want to spend more money for $200 if you don't want to spend any money, that's possible, too. Then you just spend some time designing your own set up. Anything goes. Same with the lights were using low and strokes by bones there about $400 each. And, of course, you can shoot with high end ones like Pro Photo or Super Cheap Lights, for example. You know fresh guns there about $60 each and the most affordable alternative natural lights . Even this work for so many sets. As you will see. Furthermore, we shot in a studio. However, these set up there so small you can easily recreate them in the bedroom or even in the garage, and to prove the point that shooting anywhere is possible. One off the sets is shot in our staircase off our studio building, and I remember taking our action group inside there once, and I looked at me like, uh, you're crazy. But then they were surprised about the quality off the natural light, and they didn't even want to go back into the studio. So as long as the location isn't a dead giveaway off modern times, anywhere goes. Maybe there is a rustic looking door in your neighborhood, wooden panels or a brick wall tested. You would be surprised. Just make sure that it's safe and that the are no sharp objects where your model could get hurt. What streets posing. So safety. First quality off life, seconds and okay, ish looking locations. That and I promise you you will get great images. Same was equipment again. I like to keep it simple creativity. It starts in your mind. And I think that so many photographers that just get too excited about new equipment and accessories. It becomes a natural excuse why they can do certain things always outfalls next gadgets instead of thinking how to increase the usage off the stuff they already have. I mean, don't get me wrong. I laugh gadgets as much as the next photographer, and I love playing with fun things like gels and Goebbels. But regarding camera gear if you think about it, I mean having a modern. The camera is nearly two perfect for this kind of interred shoot he wanted works as a way around how to achieve a noisy look. And maybe you want to manipulate your lens so that it's not so shop, but more about this later and again, just so that you don't feel stressed for this shoot, you don't need too much equipment. I should mostly was to prime lenses 1 50 millimeter and 135 millimeter on the full frame body, so nothing toe white. But what you do need, though, is a basic understanding off your dear Zola and lighting, meaning you need to know how to use your camera's manual function, and you should have some practice with basic lighting and, as mentioned access to lighting equipment. So we do explain essential beginner subjects, such as basic lighting diagrams and portrait tips like the recipe off great portraiture. The majority off the material will assume that you took some portrait's before, but as I promised, I keep my sets very simple so that it's beginner friendly while it's teaching exciting design so that you can achieve the same results if not at first, then definitely was a little practice and a few advanced and don't need any lighting set up Refreshers. Then off course, you can skip those sections, easy as that can go straight to the shoots if you want. But let's talk about how to practice. Practice doesn't make perfect the right way off. Doing it makes perfect. Yeah, I know this sounds strange. So here is what I consider the best way to practice copy. Like an artist. Photographers. They're always cringing. Assays is, however, here we actually try to copy a certain look. So don't worry. You're not stealing anybody's work without credit. I don't like this either. When I say copy, then I means the following. I find my inspiration and I create a mood bought, and we will also talk about this a bit later. But then I will set of everything in the exact same way until the image comes out close to the look I have on the mood board or in mind regarding lighting and exposure or general style. And then I make it my own, because idea is not to have the exact same image that would be really boring, but it's not even possible toe have the exact same image because you will never get the exact same model and the same look and so on. But you also want to bring in your personality and your story into your image. Maybe you like the style off a certain set up, but you prefer a more moody expression because that's your thing, or you look at the set up and you're like, Oh, no, this is far too kitschy for me. But I like the idea off the model laying on the floor with the stress that I found on a flea market. Then, for example, this in itself gives you a whole new idea, for you are short. So this way you are staying true to the genre or era, but also to yourself to create fine art images with your own modern vintage style.
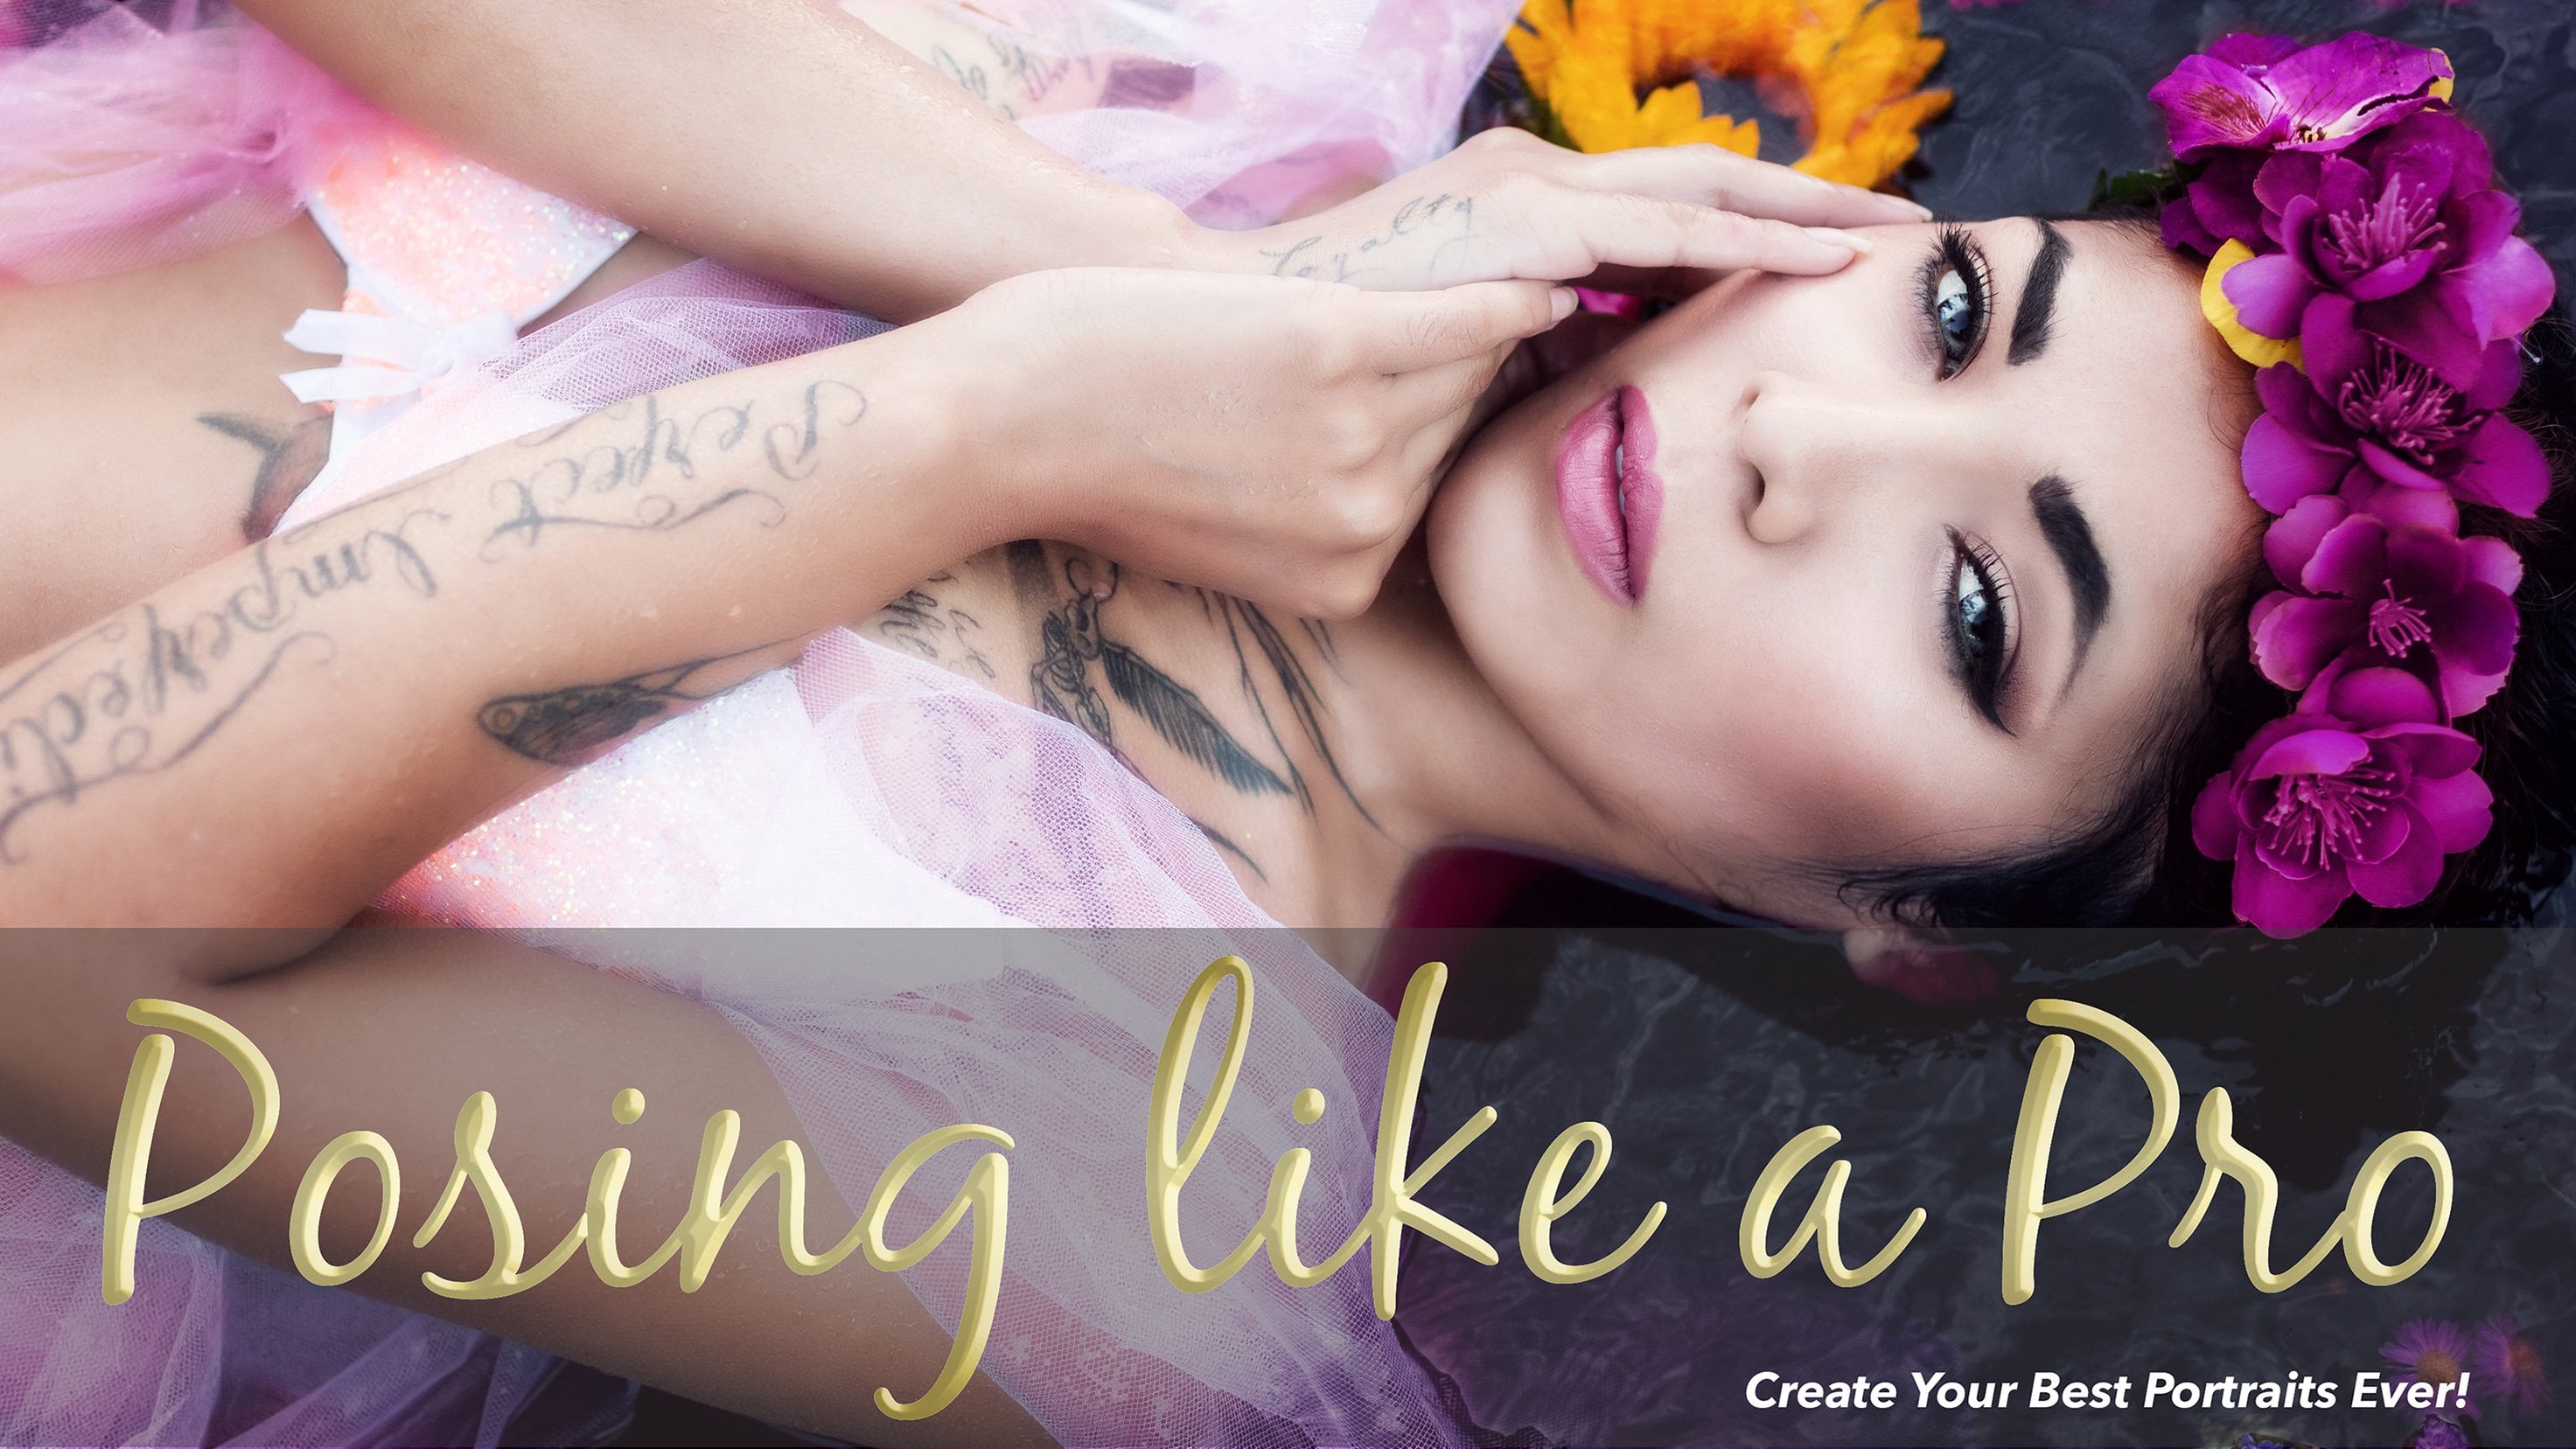
4. To Photoshop Or Not To Photoshop...: and a purple style at the end. Off the tutorial, I will also show you a few tricks and adobe bridge and photo shop on how you can finish off your image with a particular color caste and how to convert your pictures into different black and white versions again. You don't need to be a super proto understand these techniques, but I also won't cover how to upload your images or how to create layer either the same way . How I will not teach you manual camera settings. So if you have any problems or any questions, then please don't hesitate to ask me anything in the Q and A. And if you are a total post processing newbie, no worries. So a new to me, you will find causes where I have a bridge, light room and full to shop for beginners. So if the subject interests you and you want to learn more about it than these courses are there for you, and if you have any basic retouching understanding, then my technique, there are no problem for you at all. And if you hate for two manipulation, that's also no problem than you just ignore the post process infection. But to be honest, that would mean that you need to get your hands on a good old film camera or Polaroid camera, because the modern day camera that was as I was not give you the vintage look you are after . And of course, there are also presets and filter available. For example, if you upload your images on Instagram, so that's up to you. If you like these kind off looks, I prefer my workflow, Enbridge and photo shop, where I have better control about thes looks. And within those programs, I would give you some tips how you can style eyes, your images, however, the application and how much you like Toe added your images that is up to you. So go ahead and try one to all off the following photo shoot set ups. And if you would like to share your images with us, please join our Facebook group posing like a pro. I am looking forward to seeing your results all right now that we covered your end offset bargain, let's dive into it and talk about the things that you can look forward to in this cough
5. No Worries - Learning Will Be Fun: In this course, you will learn a lot off different things. We will talk about the seven ingredients off great portraiture. You will see me at life shoots with two very different models and 20 set ups, including posing and lighting tips. So these shoots they're not scripted. You would see exactly how I'm working and how I instruct the models to get specific results and how we built sets and use props and insides of sets. I include pop ups at times when I feel more information might be useful. If this information flies by too quickly, please. It's the pause button, because I do try to cover a lot of information so that you get the best value for money. We also include some funky things like gels and go balls and just filters and even smoke. So if you have seen any of my other tutorials, like the magic of color and Gels or create backgrounds with Goebbels, then you would see how versatile these things really are and even look awesome in the vintage shoot. We will also talk a little bit about history and how things changed Over the decades. However, I promise this will not be your boring school history, but off course, in relation to photography. I was debating with myself if a shot includes the research because most people fall asleep when someone says history doesn't now, me, too. But considering it's about recreating a vintage design, we need to look a little bit into the decades to create a reference to what we want to shoot. Like, what was the look and feel off the time, what the people enjoy and, of course, the technology or photographer in the glamorous Hollywood era. How did lighting work and why did Hollywood prefer a certain type of woman ends on little fun fact that will help you to guide your shoots into the right direction and off course. There's always autistic freedom. So that's why I call this shooting site modern vintage and not authentic vintage. But then again, there is not that much freedom. As you will see later on in the nature. I promise there won't be any history test at the end, so no worries. But I am pretty confident that you will remember most off those fun facts for your shoots, and you will have no problems in setting up your sessions. So let's talk quickly about the coverage off this cause and the reason why I decided to set up a venture shooting sets that resemble roughly is of style off the twenties to the seventies.
6. Modern Vintage Sets: Why To Shoot Sessions From The 20s To The 70s: the first image ever that showed a person was taking in France in 18 38 by Louis Daguerre. It's a pretty good image. It's a street scene with a house, and you can see a man getting his shoes clean by what I guess is a professional shoe cleaner. However, the image was fairly small, so even when you zoom into the picture, you can only make out the shape off the person, but not exactly what they were wearing at this time. So authentic referencing is only possible since the affordability and popularity off newspapers since the 20th century. So also technically, the first newspaper publication in England happened in 16 66 and was called the London Gazette and in America in 60 90 called Public Occurrences, or ever Only the industrialization made newspaper prints profitable and accessible to the every day person. So according to Wikipedia, the boom started during the early 20 century before the rights off television. So the average American read several newspaper per day, so therefore, it's a lot easier to set up shoots from this era on what, as there's just more recorded information available and to be honest, it's also cheaper as outfits are less elaborate. From this time on, so before the 19 twenties we can only speculate how people looked so we can go to museums and we can see relics from things people wore on the Titanic, for example, or in European castles and so on. And we can also look at paintings, so this in itself is problematic in two ways. So first of all, only the rich could afford paintings. So we have little knowledge off ordinary people. We would need to gather books or lets us to find out more information. And I mean, we kind of single. You know how people looked in the Renaissance and the Victorian or at Wadi in times due to TV shows and movies. Or maybe you even went toe vintage Fair or Renaissance fair. But I am not a history expert. I can only look at those characters and be like, Yeah, that looks right with me because I don't have any evidence to compare it to second off all pain. Things like any at form, has subject to personal taste and interpretation off the artists. So, for example, society often discusses if men were attracted to latch of women in baroque times due to the pain things off Peter Paul Rubens in the 17th century. So this Rubenesque designs. They became recognized as one off the dealing style for this era, and they were bored and graphic er and mostly featuring fleshy women. So the problem is, we don't know if these paintings are really indicating man stirs. I have a curvy women or, if they're just reflects a higher clientele who had money and could also fought food. Or if it's reflecting the talent off the artist. It's rumored that Rubens was more interested in the challenge off painting a fleshy body with all the forms and shapes and contours and shadows. It's more interesting, apparently, then painting of cellulite free skinny body. But don't get me wrong. If you are interested in those eras and you can find a fatigue or a model that can provide such amazing Bihac or Victorian dresses, then by all means shoot it. Because I'm British was this will look awesome. However, if you don't have such connections, then it will be easier to offer vintage sessions from the roaring twenties and up. So the outfits ala a lot cheaper and require less authenticity, so are easier to come by. Oh, and you are wondering why my vintage set ups end with the seventies. Well, that's because I was born in the eighties, so this era fields way to reason for me to be considered vintage. And maybe you feel the same way about the period you were born in. It's up to you, which styles you'd like to cover. Plus, I kind of feel off tended. If you think I'm vintage, Come on, I'm not that old. However, when I was looking around for photo shoot props in our antique shops in San Jose, I did actually find a toy calculator, the same water that I had in the eighties. Super strange to think off my toys vintage. But then as a point. This I am just not a big fan off the eighties because I think we looked a little strange. But of course, if you like the style off the eighties or even nineties, then that's easy to replicate. You will find many closing items in stores right now, and if it's not, wait a few months because these trends, they come back on a regular basis. And if you truly need more inspiration about those times, think big short up heads and hair like Farrah Fawcett hair and watch an episode off Dynasty for authenticity from the eighties. Awful Fund, the new show that's available on the CW, which bears a lot off eighties elements. Alternatively, you can also watch an episode off the Goldbergs on ABC or glow or stranger things both off them on Netflix. And if you need help in the nineties department, I recommend the one and only Beverly Hills 9021 old Would you mind to find on who on Netflix and fresh off the boat, which is on ABC So speaking off shows, let's find some more inspiration.
7. Vintage Inspiration: Create Concepts And Mood Boards: in the section I want to talk to you about the time and movie development, the zeitgeist, And was that the limitation in camera technology? We will look into vintage Children's and D visuals and how much artistic freedom we have in recreating these styles and peace. Watch a few off those list of movies to get a better idea off the era. I will include a wide range. So if certain flicks are not after your taste, you don't have to sit through the whole thing. Just pick a few scenes. Alternatively, you can also look up the websites or Googles and mentioned photographers also Hollywood starlets. Our TV shows just to get a better overview. And after doing so, you will have a more precise concept realization in your mind. So from here you can start who collected all inform off mood board, which is a great way to brief your modern. If you read my book posing like a pro, then you might know that I don't like the bird vision. Having a vision nearly sounds a bit like I'm breaking, and also it doesn't help my motor to understand what I want from her. However, having a concept that's a whole as I think so it was a few words I can describe the shoot and the era it's supposed to be in. And then Photoshopped. I can create a template with 5 to 10 example images, which you can find on instagram, pin to rest and so on. So this template is called Samoud bought. In this way, the model can evaluate if such a shoot is interesting for her end of it Fitzer style or portfolio or look book. And then I can brief for further if she likes that. So if she does her own makeup, then I can let her know which things were relevant for this era. So maybe Ruby red lipsticks was a golden age of Hollywood or exaggerated eyeliner for the sixties and so on. So the same was 1/2 style and the wardrobe. So you see, there is some research to be done to go from having a vision toe having a concept, and I believe this way you will create the best results. And was that let's travel through time
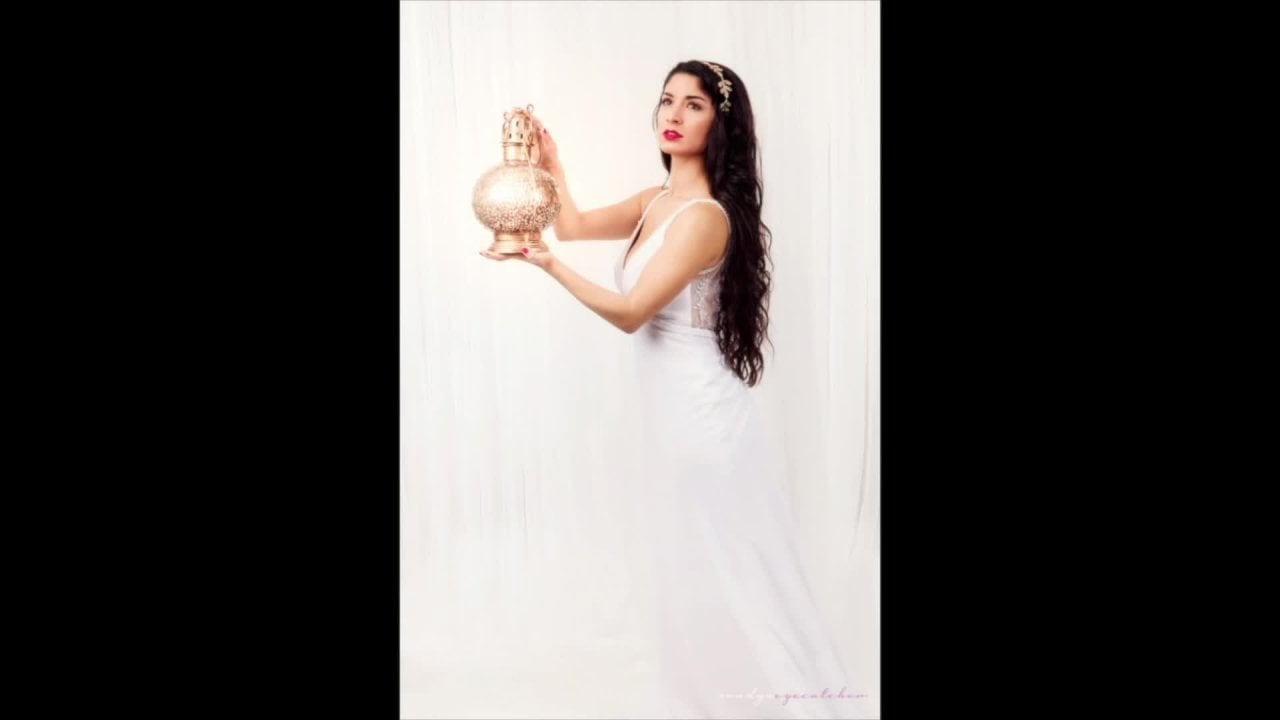
8. "Time Traveling" Through Hollywood: I wanted to know more about the exact period for classic Hollywood images so that I could refer to the precise date. And so I go with World Hollywood glamour time, period and came across this paragraph so as to when the actual golden age of Hollywood commenced or ended is very much a matter off opinion. Some say the Golden Age started with the end off the silent movie era and as US route its beginnings in the 19 thirties. So, generally is a period off 1932 the late 19 fifties. It's thought to be the Kierra off old Hollywood, so that shows that even with modern newspaper and better technology, we still only get a rough understanding off the past and those time frames. They're not 100% of fines they developed slowly due to certain events. So on a side, note the paragraph about the golden age of Hollywood that waas by vintage dancer dot com and let me toe the website where I was blown away. It is the website for you if you want to learn anything about vintage fashion and the feet behind this, so as I have specialized in women portraiture I can't really tell you a lot about men dress codes. But here on this website you will find anything from Victorian to steampunk to the seventies and in between fashion for man, fashion for women, different wardrobe styles for inside and outside the homes, everything. So anyway, styles and trends are flowing. Process you can compares is with Facebook. Nowadays. We know when it was invented, but not so much when everybody started to get hooked. Was it in 2010? 12 4014? Many trends don't really happen overnight. They Greep around until it appears that all of a sudden everybody does it. Also, for each decade you can create a variety offshoots, depending on the look that the client prefers. Maybe your client like the extra bargained flapper style or more girl next door natural twenties look. And another thing, if the planning off the shoot is up to me, I often don't like to go with the most common style off that era because it can quickly look more like a costume party than a classic shoot, and you might get stuck in creating a greater variety. So that means that for example, when your client comes in with a hairstyle in this way, Flook House a flapper girls would were it. Jackson. You're a little bit limited and creating no more looks unless you have a hair stylist on board who can then styles a client. Yeah, in between your sessions and then give your client a whole new look. So SB said, Often we can't define the exact win often era. We have to accept that lots of styles melt from one era into the next. So my shooting timeline. That's just a rough guidance for you because it's supposed to inspire you, but it's not set in stone. So it was a different dress. You could use the same backdrop and place it in a whole different era, so, as a quick overview are, just walk you through the chutes that we have planned for you. So first will be the twenties, which is shooting anywhere in the staircase. It's kind of a newspaper Look, then we go in the twenties, toe a whimsical music look because I have some old school instruments. From there, we go into the thirties, where I have a modern vintage Indiana Jones style from here, we will go on to the floor and create the Holy Grail style still in the thirties. Then we go into the forties into Hollywood glamour so starlet and classic Hollywood Look. Then we will also do, Ah, Grace Kelly inspired look and off course because it's the forties. We also want to have, ah, Hollywood vintage through in set. From there we will go into a train station set that we will cause the vintage traveler, and we also have a really fun global that has airplane on it, which I placed into the forties. Because off the wasp woman, however, you will also see later why it's not technically only in the forties. From there we will go to the fifties. We have, like a just clap rock n roll zing that's inspired by cigarette girls and kind of supposed to be this nightclub or lounge. And then we will have some kind off post cut Romans just because I think post cats are vintage thing, also from the past. Then we have some other inspired book covers, like a TEM pie, a book that ahead and also some stained pages for some other classical looks in the sixties . We have two typical had Disney inspiration because that's when princesses they become more popular, Do toe Sleeping Beauty and Cinderella. Then we have a set in the sixties that's an exotic adventure in the bazaar, inspired by 1000 and one nights and then another one where it's kind off dreaming off Genie also inspired in the style from the There we will go into a more flower power design with our vintage rolls backdrop, which is like a graphical flower backdrop, and we have another one for our seventies shoot one that's kind of more detective based. And then from there we will go into more gels, which creates the school fever. And the last set ups that are placed into the seventies is a flower bed, which has his toe picker Gordon Brown, then touch tones. Also remember that looks can change even within one decade. So it's not just over the twenties to seventies over oil that that's even was in just one error. That looks can change. So this is pretty great because this gives you plenty off shooting options
9. Quick History Of The US And Hollywood's Movie Industry: From The 20s To The 70s: all right, so let's travel through time. So the twenties were called the Roaring Twenties. That was a time of celebration. So The Great Gatsby is dire. The flapper Gerdes women's riots afford of the newspapers and mass production, plus the permission off alcohol, which led to nightclubs and one off the most famous dances. The child's so big movies in the 20 for the either class was Charlie Chaplin. Lajong was Pridget Helm and Piccadilly with Anna May Wong, which was very unusual for the time. A starlet with Asian heritage and, of course, the rise off Marlena Dietrich to international stardom. Also, you have today's modern shows, which are set in this time so you have 1922 Boardwalk Empire lost because the air cover the cable girls and peaky blind us The thirties waas The error off the Great Depression The stock market wasa seen off reckless speculation where everyone from millionaire tycoon to janitor placed all their savings into stocks, reaching its peak in August 1929. By then, production had already declined, and with less workspaces, many people became unemployed or had to live with lower wages, leaving stock prices with much higher than the actual value until it all came crashing down Hollywood's industry and enable people to forget the world for a while, thanks to the arrival off sound and the affordability off the Saturday double features, So two films was a price off one. No more life acts on newsreels before the movie. These things were replaced by a greater variety off Hollywood's entertainment industry. Horror, especially monster movies, adventure, comedy, romance. People love to look up to a hero who could to feed the monster. Always brave like as an adventurer, the firm's became more predictable. Hollywood recognized people's need for a clear hero and villain storyline because viewers needed to regain the feeling off triumph even if it was fictional. A little fun fact to understand the costs off living in the thirties, so a double feature ticket would cost 25 cents, and in comparison, in 1942 it rose to 30 cents. In this time, the typical American house cost about $3700 a new car would cost $920 and the loaf off bread would set you back nine cents. So for a movie ticket, you could potentially by three loves off bread. Yet the movie industry was booming, seeing a different word, even if it was just for a little bit. Waas were surprised. Big movies at the time were gone with the wind was Clark Gable and Vivien Lay. The visit off us was Judy Garland, Dracula's Bela Lugosi and Helen Chandler and night at the Oprah s. Couch remarks Frankensteins off Frankenstein was Boris Karloff. Jezebel was Bette Davis. King Kong was Fair. Ray and Robert Armstrong. Modern times was Charlie Chaplin bringing a baby with Castro in Happen and Cary Grant and Little Women was Catherine Happen. Ninotchka was Greta Gabble top head Swing time Flying Down to Rio with Ginger Rogers. The gay divorcee was Ginger Rogers and Betty Graber. It's a Wonderful World with James Stewart and Claudette Colbert, Hells Angel and Bombshell and Dinner at eight was Jean Harlow that people loved a wider variety off movies that becomes clear when you compare these two guys and they're raised Tofane. So Eifert Hitchcock and where Disney, the master off suspends, directed the man who knew too much in 1934 and 39 steps in 1935 and We'll Disney. He started to create family friendly movies and brought the first animated Disney Princess to life. Snow White and the Seven Dwarfs was shown in 1937 modern shows, which are set in this time Now The Lost Tycoon, Babylon, Berlin and a really big hit from the eighties. Raiders Off the Lost Ark. Indiana Jones with Harrison Ford. So for these men's Hollywood dilemma, even in times off war, actors became big movie stars, from film noir to thrill us to love stories, Hollywood End America Society, They became braver and The Roll Off Woman developed further. So for the first time, women were trained to become military pilots. The so called Wasps Women Air Force Service pilots, big movies off that time work as a Blanca with Humphrey Bogart and Ingrid Bagman. It's a Wonderful Life was James Stewart and Donna Reed. Citizen Kane was awesome. Wells. The great dictator was Charlie Chaplin. Notorious was Alfred Hitchcock, Cary Grant and Ingrid Bergman. Less he come home with Elizabeth Taylor just to name a few. Another bake. It was some sun and Delia will say the lama. So here the llamas, a woman, many critics and fans alike regard as the most beautiful ever to appear in firms and who perhaps had one off the most fascinating but also tragic lives. So a little bit more about this later modern shows that are set in this time our agent kata agents off Shields and Manhattan, the fabulous fifties rock n roll. And after war fan, the fifties was a time off increased economic prosperity. More people had money to buy cars, suburban homes and consumer goods. Due to this prosperity, women were encouraged to leave the workplace and focus on home and motherhood, which resided in the baby boom. So the high birth rate unparalleled in American history at it more than 50 million babies by the end off 19 fifties. So good forward Disney and being ahead of his time in catering to Children because animated movies they became a financially good mind. But this wasn't the only change. So the movie industry they kind of split. So one side focused now on family friendly folk style of entertainment, even featuring ever expressly while the other societies I still focused on providing this escapism in adventurous like Western, for example, and also these epics roads so it's a big decayed for so spends and drama, so that might be because safe and prosperous society was also a slightly bored society. So, personally, I wouldn't be surprised if a woman that became independent in the forties and earned her own money now kind of Fed confined being a stay at home wife. So that might explain that a man for Romantic and also for thrilling movies so some movies were some like it Hot was Marilyn Monroe, Gentlemen prefer blondes. Also was Marilyn Monroe. Dial M for murder from Hitchcock was Grace Kelly and The Rare Window, also with Hitchcock and Grace Kelly and James Stewart. How to Catch, Receive and as a Hitchcock. One was Grace Kelly and carry Grand Vertigo. Very famous Hitchcock movie was Kim Novak. Rebel Without a Cause, Obviously, James Dean and Natalie. What I Love Lucy was Lucy Boy, A Streetcar Named Desire was Vivian Lay and Marlon Brando. And, of course, in The Rela and Sleeping Beauty by Ward is name modern tools that are set in this time American horror story. The freak show called The Midwife Doc. The Crown, the Marvelous Miss Maser, Masters Off Sex and Bates Motel, the swinging sixties from bombshell bond girls to twig ease and hippies, plus a decade fitted with huge events. The Vietnam War, civil rights protests, the ass in ation off the US President John F. Kennedy and Martin Luther King Cuban missile crisis and the first man who landed on the moon. So movies they became even more adventurous from spies toe Western to musicals, horror, fantasy, sci fi and sets placed in exotic places. End, of course, sexy leading women. So the big movies from back then, Ah, Cleopatra with Elizabeth Taylor Lawrence off Arabia was Peter or Tour and Sharrif, Oma Dr No and Goldfinger. Big James Bond movies with Sean Connery and The Bond Girl. So breakfast at Tiffany's was Audrey Hepburn. Cycle was director Eifert Hitchcock again? And generally West Side Story was. Not only would the 2001 Space Odyssey, the director Stanley Kubrick, a very famous sci fi movie, the good, the Bad the ugly was Clint Eastwood and the Sound Off Music and Mary Poppins with Julie Andrews, just to name a few. Also, TV shows became no more and more popular. For example, dreaming off Jeannie with Barbara Eden and Larry Hagman and be rich with Elizabeth Montgomery. Modern shows that I said in this time again, American horror story is this times The Asylum Aquarius, The Astronaut Wives Club Met Man, the Man in the High Castle Public Ma Roads Vegas from 2012. And based on Stephen's King's novel 11 22 or 63 seventies and Flower Power from disco fever to graphical boy designs, it wasa colorful time. In some ways, the decade wasa continuation off the sixties women, African Americans, Native Americans, gay and lesbians and as are marginalized people, they just continued their fight for equality. So the decade broke even more boundaries off all kinds. The disco style was invented, and with the elements off every 60 subculture like hippies and drag queens and bombshell goods and everything in between. All of those produced something totally new and different. So movies were not just movies anymore. The seventies became the block buster era, so we're technically is a bird blockbuster that refers to the 19 forties and the aerial bombs that could literally bust the whole block. And it was also used for the first time in the entertainment industry. So Wikipedia says its first known and news and reference to films. That was in May 1943 when Advertisements and Variety and Motion picture Herald described the RK often bomb Medea as block pastor off all actions room service shows. So there you go, however, the huge Hollywood mega production blockbusters as we know them now. They became popular in the 19 seventies, so according to Wikipedia in 1975 the usage off blockbuster for films that coalesced around Steven Spielberg's jaws. So it was perceived as this new character hit. So it was a fast paced, exciting, entertainment, inspiring interest and conversation beyond the theater, which then later would be called Bus, and it had also repeated viewings. So this food was regarded as the first film off this blockbuster era and found that the blockbuster film Drawn Ra and two years later style waas that even expanded on the success off Jaws, setting box office records and enjoying a CIA trickle run that lasted more than a year. So if it's crazy to think about and more big movies, we're off course. The Godfather was Marlon Brando and I. Pacino. Then you had alien with Sin You re Viva and Tom Skerritt. Then you have Rocky off course with Sylvester Stallone, Saturday Night Fever and Grease, new dance and musical movies with John Travolta. Then you have Dirty Harry. Chinatown was Jack Nicholson and Faye Dunaway Carry That was, obviously by Stephen King and with Sisi's Classic and Hello Win was Jamie Lee Curtis. TV shows also evolved, and the Jonah off detective shows was born with Colombo. Co. Jack the Streets off San Francisco, Charlie's Angels, Starsky and Hutch. The Rock Fought Fires. Quincy. How to Hot Ends her wife, I've old modern shows that are set in this time. They are the seventies Show the Americans, Pen M Fargo and Life on Miles. All right, so now that you are set with a little bit off Hollywood's history, let's look into the history off photography. How was it even possible to capture the golden age of Hollywood? And how that this progress into the photography studios off today?
10. Photography Through The Decades: remember when I told you about the first photograph? Was a person on it taking by Louis Daguerre? Well, he wasn't just any photographer. He made practical studio photography possible with a specific process named after him the hero type. It was the first publicly available photographic process, introduced word white in 18 39 and for nearly 20 years, the most commonly used one. So this process, it was quite complex, but it roughly went like this. So to make an image, daguerreotype pissed would polish a sheet off silver plated copper toe, a mirror finish. Then he was treated with fumes, either chlorides and bromine or iodine fumes that made its surface light sensitive. After that, it was loaded into the camera and exposed forest long as necessary, like a few seconds for brightly son that day, and then also a lot longer if there was less intense lighting. So once the plate was exposed, it wasn developed over hot Makary and fixed by a solution off chemicals and then washed with distilled water. The option it step was into color, the image by hand. So if you want to know more details about this process, have a look online for aguerro type. It's really quite astonishing how the Atis came up with this process. And by the way, if you want to research more about the history of photography, then you should check out yourself. Niece, You Anethe. Nowadays he is considered as the inventor off photography, so the Gara type that gave way to the photographer few studios. But the process off course became even more sophisticated and with that also consumer friendly. So over the following years during the 19 thirties celluloid firm that replace those glass plates and well said, I have so increased progressively over the next 20 years, which made it easier to expose portray its wherever. Photography was still costly and portrait's, especially the colored ones they were considered look, series items. And also, you know, that message for developing color photos were available as early as 18 40. They did not become widely available answers in 19 sixties, and even then photographs were still often taken in black and white. That was just cheaper. So if you want to be truly authentic with your vintage imagery off the twenties to late fifties, yeah, black and white, that would be the safe option the image, exposure and development. They weren't the only difficulties back then. So another huge hurdle waas off course lighting. So the subject really back me when I started to explore in such photography, Not only did I want to understand the when and why off errors so that I could create this authentic set, but I also wanted to know when commercial photography even started. So I already came to terms with the problem that I had to create my own in terms off lighting, especially for the golden Age of Hollywood. Because, let's face it, I would not hurt massive Fresno's in our studio just so that I could achieve the real look . So I needed to work, save and off course also budget friendly. So for this analyzed the images and their characteristics. So there was lots of contrast slightly over exposed and some images had the soft fit equality and, of course, lots off broad lighting and the paramount lighting the butterfly shadow. And we will also talk more about lighting techniques later, and you will see how to achieve these signature looks with tropes or even with flash guns, which is no problem But it also started to intrigue me. I wanted to find out when this modern photography studio era exactly started. I mean, would it be authentic to shoot any off my vintage sets with Strop's? So I go get around to find first studio photographer. Ah, first photography stood you in the more or Heck, even when the JC Penney portrait's open there has the only photographic chain that I know here in the US, but I couldn't find any satisfying answer. It will always threw me back to the Gabba, saying commercial photography started in 18 40 which, of course, it's technically right. But I was thinking more off the modern day photographers working with films, not chemically enhanced states. So I My research was inconclusive. Then I realized I looked at the subject the wrong way rather than in searching for the back end and looking for photography studios. I needed to learn when it was even possible for them to buy equipment. And I have to admit, I was shocked to see how early all of my favorite photography companies were founded. So in the cost materials, there is a list for you because it will make things a lot clearer. So when you look at this list and you will see the camera era started was Forked Lender in 17 56 kite size they designed Lens is already in 18 46. Roscoe created color filters and Goebbels in 1910. Big camera manufacturer. They followed soon after. So, like I was founded in 1914 Nikon in 1917 on Nikon. The pencil you said Cannon in 1937 and hassle Black during the Second World War, just to name a few stroke technology that became consumer excessive in 19 sixties and things to opening off pH and Adirama photographers could find any professional equipment in such mega stores. So with this timeline, you can see why is the going edge off Hollywood waas possible? There was already a lot off technology around, and it blows my mind that some office they'd spec all the way to 17 56. It is also interesting to see how many things were manufactured in Asia and Germany, but very little was actually made in the US, considering that's where Hollywood positioned itself. So, however, what is more important if the development off the timeline to the photography studio as we know it. So Strop's and modify us. They started to bloom in the sixties, and technology got more affordable in the seventies, when professional photographic equipment became accessible in such mega stores as has had, such as being Age and a Rama. So what does this mean for shooting with authenticity? So as my definition off modern vintage ends in the seventies to be authentic, I should only shoot vintage looks from the seventies was my strop's. However, there is a loophole just because stroke photography took off at this time and made it possible to work in the studio instead off on a film set or outside. It doesn't mean that flash photography didn't exist before that. So the ever first Elektronik strope lie it that was actually invented in 1931 by Harold or Gene Dock at Gotten, also known as Papa Flesh. So there is an interesting article online at the BBC, where it says Harold at kittens, a man who froze time. I included the link in the cost materials if you want to know more about his inventions. But flash photography was possible even before that, so the problem was just the lights required flesh powder and potentially they could explode . So toe Answer my own question. I could have shot all off My set ups was flesh, but I would have needed lots and lots off money because they were really expensive. And also potentially, I might have blown up my studio. So the invention off stroke photography opened up a whole new era off creativity and made photography possible anywhere and at any time also is the most important. It became safe and beset. Let's talk a little bit more about the seven ingredients off. Great portraiture were lighting and exposure. Vidas cast a little bit more.
11. Overview: The Most Important Ingredients Of Great Portraiture: all right. So, technically, this recipe isn't mine. I'm a big fan off the photographer academy and my Klegon, the founder. He came up with the following seven ingredients. So for great portray, Dzyuba needs a story lighting style, exposure, composition, posing and post production. I loved this concept because it's simple to remember yet challenging to included oil, so let's look at each ingredient a little closer.
12. Ingredient No 1: Storytelling: If you have watched any off my other tutorials, then you know that I love story telling. While all other ingredients can be discussed regarding rank and importance, the story off your image should have top priority, and I think it's in this tutorial even more relevant than ever. So you want to draw your viewer into your vintage look, and that's why I gave you all those movies and TV shows so that you can do them as your homework. However, the story is also the part that scares my students, and most because what does it mean? Technically, we can learn photo shop or camera set ups for the right exposure and lighting techniques. But how can you include a story into your images? Well, fear not, because this is actually easy. Just ask yourself the five W's who, where, when, why and what? So who is the person in your image? And you should ask yourself, Why should the viewer care about him or her? So that means you will have to achieve this was facial expressions or posing, and an intriguing set up? Second would be where is a much supposed to take place, so it could be with some simple props or backgrounds that you design scenes and locations. Then you can say when it's the image supposed to be. So it was a little history. Know how you can let the viewer travel to the past? Next question. Why are you doing it? So now is the time to show the viewer how much you love this vintage photography with the right mix off attention to details. This could be in lighting or posing or post production. So now it's the time for your style to show through. Maybe you do it because you just love find hot or cinematic photography, or you want to cater to your client. So this is up to you. And then, most important, what is the story off your image in the first place? So the last question I usually ask first, but here, I need to dig in a little deeper arm. So usually I would answer this question like this. The what off your story can be taken literally, figuratively or abstract literally means that your image could show something that looks like a movie or a TV seen. So, for example, what is your story about. It's about 19 thirties female explorer looking for the Holy Grail and the props outfit and posing that makes the viewer feel like he is looking at a firm seen not just a picture. Figuratively, That means that the story off your image could be anything where the viewer wonders O R chaos about something that's packs is or her interest. So the story could be about to close like commercial advertising, for example. Or maybe it's a designer who wants to sell his fashion was an interesting concept. Also, the story could be about the modern or the client was different expressions, maybe moody or sexy or playful or fun and so on. All the story could be an editorial story. So in Mega Zins you will often find thes editorial spreads at the end off the magazine. It was very hip or edgy moderates who will celebrate a certain lifestyle. Abstract means the story isn't about any off these points. It's about the artist. So, for example, I'm a huge fan off J kicks and I just laugh. It's gel photography, and I'm always intrigued. I'm like, How does he do? It s So instead of thinking about the story off the scene. It's a model of the fashion. I really think about the Atis and just how he does it. So you get the idea. You want to connect with your viewer in one way or another, to really draw him in her into your image, and you want to intrigue them. Otherwise your image will be just for gotten all right. So far, so good. You might be already familiar with these points off storytelling, but now you want to go one step further and you might suspect it already. In the vintage photography genre, we can tell a story literally, figuratively, abstract or authentic. Authentic. What does this mean? Especially when I already mentioned that it's difficult to own A is the fundamentals concerning Fresen alighting film cameras and the care developing so well. Let's see
13. Storytelling And Authenticity: The big question is here for whom do you shoot? If you're shooting for a client, then you don't need to worry too much about the authenticity off your style. Most importantly, your client wants to look good, maybe dreamy or adventurous or glamorous in a vintage set up. They won't know how the lighting really was back then, and perhaps even the choice off wardrobe isn't technically correct. All they want is a beautiful image off themselves that is flattering and exposed and attractive. And that style. The problem starts when your client isn't your only audience anymore. If you sell Wall Art and your client has lots of friends that visit the house, then that's one form off exposure even more so if you hand out digital fights and your client has many Facebook or Instagram followers. Or maybe you are already quiet. A well known photographer with many fans or was featured in magazines and art galleries all off a sudden authenticity plays a big part in your photographic concepts because you will reach too many people who might know better than you when I started to post sneak peeks off vintage sets that have done for this course. I did this very vaguely, luckily, because otherwise it could have bean embarrassing. In this course, you will see one set where we use the spiffy gear light plaster, a global that lets you project images onto your background. And the picture is often old airplane that I assigned to the World War Two era. Plus, my model looked like a forties woman Air Force Service pilot waas for short and together. It looked right, however one off my instagram for all of us. If you are watching this, you know who you are and thank you again. He pointed out that this airplane resembled the look off, make a Russian airplane that was used in the cord war, so my time frame was totally off. So in this case, I was lucky I was mocked or critiqued. But if I had placed this image into an art gallery with a tightly referring to W W two, maybe some us might have been like, Oh, man, she's clueless. And the more famous you are more something Lexus could destroy your credibility. You don't believe me. Just have a look on imdb and see what people criticize about shows and movies. When the creator gets the details wrong, many viewers stopped watching the show, and sometimes it's takes bizarre forms. For example, the Man in the High Castle that's a fictitious show about the U. S. In a parallel world in the sixties where they didn't win the war. But the Germans and Japanese did so. It's clearly fiction, however, the number off people that common on particular technologies and discussed if they were placed into the right time and era, even the baiting. If Germans would have driven a certain tank at this time, that's beyond me. I mean, it's fiction, and it gets even more strict with shows that are set in our reality, like a cup show or detective show that gets a rang on the uniforms. Wrong. People literally stopped watching the show. Due to these errors, this will bring me to the point off artistic freedom. Personally, I love the mix off old and modern, for example, I love how many shows include vintage cows. It makes the reality a bit more timeless. Like supernatural scout Off Choice is a classic impala and burn orders. The main star drove a classic charger and then Once upon the time, the vintage vehicles became even characteristic off the main heroes and villains. So the evil queen drove a classic Macedo's the Future Heroin heads, this ratty yellow beetle. All of those cast became iconic. They became nearly a character off their own. So the TV show supernatural, even when so far that one whole episode was filmed from the cast point off view. That was a tribute to the fence off this car. So you see how important those states heads are in your setups. Then you have shores was even more of in touch crossovers. So the show Riverdale that are set in a modern time. Yet the character styling and the local Dina that resembles a classic fifties look and the show Rain went one step further. So the story featured a young Queen Mary off Scott's, and they included lots off modern elements into the era. They played modern songs with a string quartet, and the cinematic vibe and characters. Wardrobe was just stunning, however, it was not a cent ticket. All where the promotion reports there was still somewhat accurate at the Renaissance era. The following episodes they just became more artistic and personally, I loved it. The stylist would buy Lacy Blouse is from modern boutiques such as free people, and would combine it with old fashioned belts and timely, appropriate big skirts. For somebody like me who loves to style those sets on a budget, this was right up my street. However, I also found a block that didn't like the style due to the lack off authenticity, which also found very interesting the blockers called rain Fashion Disaster, or dear gods. Kill me now and it's a fun Attica, where somebody hates the closing that I love. So I included the link until the cost materials. If you like to read it, so is the main point to take away from here is Atis tick Freedom is allowed, but bear in mind. Some people love it, and some people hate it, and that's completely normal. If it is a loose interpretation off the vintage era, make it clear so that people don't get offended oil to keep in mind. There is a limit to it. So during my research, I stumbled over the show que very girls, and here it got a little bit odd. So this show is said to be in the twenties, but place riel. Modern music not like a hint off contemporary music. No actual pop songs. And this did not go down well with the reviews on IMDb. So whatever story you want to tell, literally, figuratively, abstract, authentic. Keep in mind that a tous stick freedom is supposed to draw your viewer into your concept and not to scare them away from your art form. And how can you achieve an even more authentic look? Let's talk about lighting.
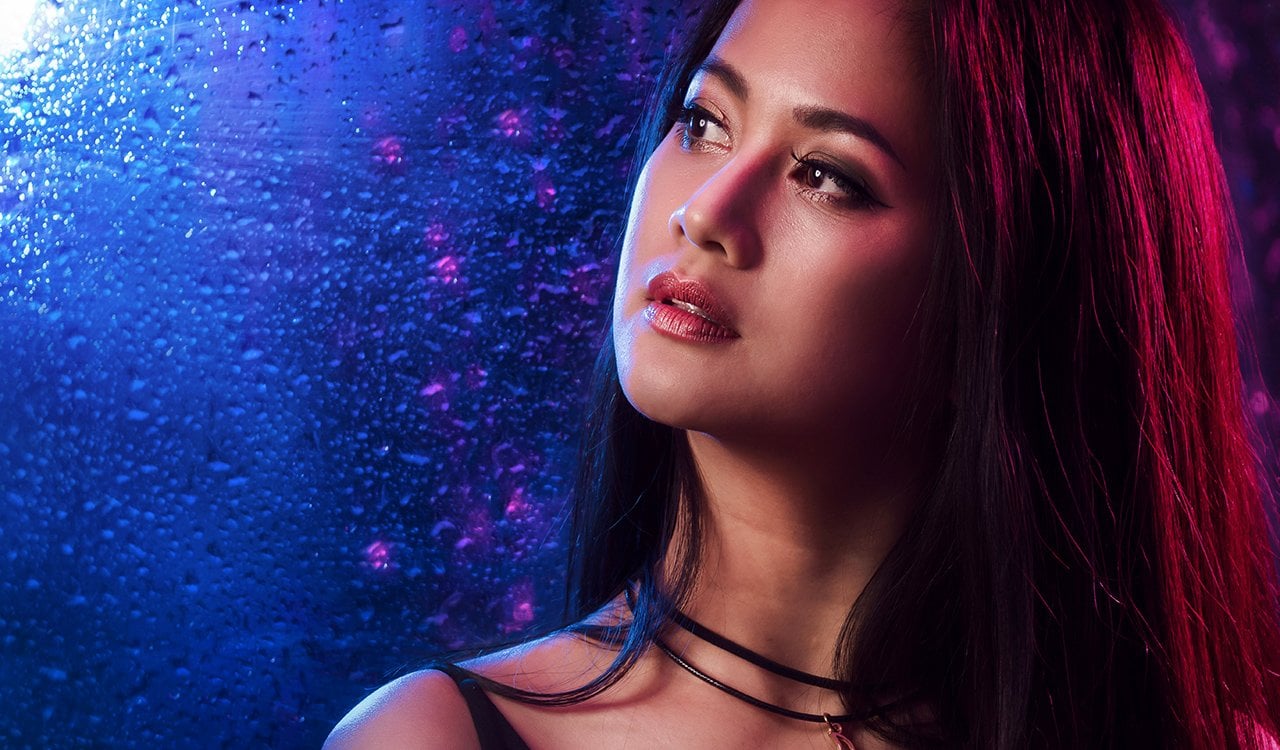
14. Ingredient No 2: Lighting: all right. You already know that lighting Waas a bit off a challenge in the olden days, and it was mostly hot lighting big and heavy, Fresno notes. We established that modern studio photography was set in later decades, which means back in the golden age of Hollywood, the photographer would come to the film set. And would you see existing lighting, which waas challenging? Because if you look at the rare behind the scene images, then you will see how big these lights were and they were not easily movable, so they had also no modifiers on them. If they were supposed to light a wholphin fed, then they just needed to be a sprite as possible to light a match off the set. And as you know, any modifier and softening will decrease the light output. So this means the light was very harsh and contrast id, so the position was also often too high, which means typically they were mounted on the ceiling or at least way up. So in Patrica, we actually want to have to sketch light in the pew per a 10 o'clock or two o'clock. If you imagine the pew per as the clock. So we want that the eyes appear life and not hollow. But for this to work with this light, you have to have lights that up that comes in a 45 degree anger if the client is looking at you. So basically you can compare this whole set up with shooting in the midday sun. So most photographers, they would just freak out. But there were also tricks to work around the set up and to use it to the photographers advantage. So posing comes into play with this light set up often the actress. They wouldn't look directly at the photographer. They invented this alluringly looking away polls. Because this way it wasn't really noticeable that the light was so high. If the actresses face had not really deep eye sockets, then she could also look into the camera and the missing catch Light created. Send the stock and moody Pew Per and was the right expression. The local. It appeared dreamy and mysterious or psychiatry. However, if a person's eyes are set further back, then this will be less flattering because you will create the raccoon look. So this refers to light that comes from above and Withrow deep shadows beneath the ice, similar to the black stripes around the eyes off a raccoon. So if the photographer knew all these lights, then it would work to his advantage. So the strong shadows that lead to one off the most iconic looks off the era and was even named after the film studio, the Paramount signature lighting style. And you might also know this look nowadays under the name butterfly lighting and the name Butterfly Light that derived from the shadow that falls under the nose, which resembles a butterfly. To achieve this type of lighting, the model was placed straight under the light, and here they were allowed to look to the camera position to create the butterfly precisely under the nose. And again, this would not suit face with deep high sockets due to the shadow, but otherwise it would accentuate cheekbone and also creates this look off long eyelashes. You could also create catch lights to make the I appear more life if the model tutors that had slightly towards the light. If you wanted to shoot the model in a more masculine way, then she would be lit sideways while facing into the other direction so that a larger area off the face is illuminated. Brought lighting is usually used for male portraiture, but for actresses was distinct features. It works as well. If the photographer wanted to make them appear even more powerful, he or she would shoot from a lower anger. If the actress would look into the other direction, meaning that there is no less illumination on her face, then the photographer would make her more feminine and slimmer as more shadows, contours of face. And this would be called narrow lighting. So these techniques they resided in the next signature lighting styles. Once again, all in regards on house of Subject or the light could be positioned. So here is easier the loop lighting or the Rembrandt lighting loop lighting. To achieve this look, the key light was placed slightly to the site off the subject, so that the shadow under the nose became a small loop. So the shadow does not merge with the shadow off the cheek, as this is considered Rembrandt lighting, and nowadays, butterfly lighting can be easily transformed into loop lighting by just blow rings and light and slightly moving at over and this technique of most flattering was average and over shaped faces. Rembrandt lighting. The technique is named after the Dutch painter Rembrandt Fund Rin, so his painting fed a particular style. He used skylights and high windows to illuminate a subject, and the slighting technique is known for creating this triangle off light on the subjects cheek and to create a similar effect. The key light or the actor, depending on what you can move was placed father away to the side. And then this way this. It wouldn't be the loop and lighting style, but this way the shadow from the nose connect with the cheeks. If the actor places ahead until the right direction and creates us trying ER, and as these photographers work was hash right and tungsten lights, it was actually quite easy to position the actress in the right way, similar to modeling lights on today's strop's. The results was immediately visible, and there was hardly any guess work on how to achieve a certain look, so that was great in comparison. If you wanted to create a particular look with flesh guns, which was possible due to the similarity and light quality, then it just might require a little bit more trial and error to get the right lighting effect, because you don't have those modeling lights. On the plus side, your model also doesn't have to worry about meriting makeup, because I can only imagine how difficult a photo shoot must have been back then because being under the hot lights in Los Angeles in the summer, maybe while all being glammed up, that couldn't have been a comfortable shooting experience. However, there is one more fun fact why bright lights have an advantage. So if the image was a little bit overexposed, it makes the skin appear more sir Key, especially in black and white photography and people was paid skin, so it flattens away most wrinkles and even small ibex and on top off that they were already companies founded that offered filters. So the software it I was one off them. That was used to make the actress appear even more glamorous and with smooth skin. And if that wasn't enough, that there was there, the option off photo manipulation Wait, you thought that was only possible in times or photo shop? No. Even back then, the photographers would use Dodge and Burn. They would scrape and airbrush the images, and then they would have the perfect negative where they then had the perfect image. And sometimes I even had to copy the negative and it was already too scrapped. Then there to photo grab it again. And then they had the perfect image so forth of manipulation was already a thing even back then, and one off the most payments. Photographers who knew all the tricks off this era was George Hurrell, who worked for MGM Wanna Brothers and Columbia and his pictures. You might want to check out because it's pretty great. He nearly photographed every big name in Hollywood, from Joan Crawford to Clark Gable, Jean Harlow on away. Wong Greta got Abu Normal Shira, who was rumored that she refused to work with anybody else than him. And at one of brothers, he photographed Bettie Davis and Sheridan, Lauren Bacall, Olivia The Happy Land and Humphrey Bogart hurts photographs at Columbia even used to build Rita Hayworth's Correa as a photographer's back. Then for MGM would have Bean, Clarence Sinkler bull and last low willing Our and even one off the rare female photographers rules Harriet Louise or lose worked for MGM and an honest Ah, Baja. He worked for RKO and build walling for Paramount and Universal. So all these photographers, they had one as a really important job. They were in one way responsible for casting off actors. So instead, off screen test, which were expensive, they would use photography instead. So if the photographer indicated a particular actor or actress, I didn't photograph well, Well, that potentially meant that person had no future in Hollywood. And it waas advantages for a woman toe have a certain look and style, and then that can let me to think what was considered beautiful in the golden age of Hollywood and Waas Hollywood racist.
15. Stereotypes And Discrimination In Hollywood (Due To The Limitation In Lighting): in this section. I don't want to offend anybody or want to appear controversial to get your attention. But I did get it. So didn't I? So this has nothing to do with one political view versus another. But if you follow the news in the last years or even in the last weeks, then you know we are trying to treat everybody equally or it least raise more awareness for equal rights. But let's face it, we are not quite there yet, so I won't stand here and pretend in the golden age of Hollywood. Everything was perfect in here about the time with segregation was normal and the time that was the years away from Rosa Parks or Martin Luther King to inspire a whole new generation . What I'm about to say it's not to sugar coat Hollywood, and it's also based on speculation. I mean, I wasn't around to witness anything but limitation off lighting that made me wonder. Was the idea woman by society's norm, the one we think that men were attracted toe while she simply one that photographed well and was that defines the look off a whole era like similar to the woman and Rubens Time. Hey, De Llama was one off the biggest Dalits in Hollywood, which is strange because when I heard off her for the first time, I didn't know any off her movies. There is a great episode by the TV show. Timeless was the show's main characters, traveled back to the Golden Age of Hollywood and able to meet he the llama. And that must have been quiet. The compliment for the actress who was cast for the role. It's a dilemma considering that when you browse the Internet, you will find the following statements, and I am the B. It says. Hey, de Llama, the woman many critiques and fans alike regard as the most beautiful woman ever to appear in Soon's. And in Wikipedia, it says, writer how Art Shop interviewed her and gave his impression. Haiti has the most incredible personal sophistication. She knows a peculiarly European heart off being womanly. She knows what men want in a beautiful woman. What attracts them, and she forces herself to be these things. She has magnetism, was warms something that needs a Detroit, nor gobble has managed to achieve so heady llamas life that reads like a Hollywood movie itself. It's beautiful and also tragic. So here the Llama was born as hit Quick Fr Maria Kiesler in 1914 and then August off 1933 Lama married mender, and she was 18 years old and he was 33. So in her autobiography, Ecstasy and Me, she described Mandel as an extremely controlling husband. So she fled from him, dressed as a maid, and she went to Paris. From there she went to London, where she was discovered by Metro Goldwyn Mayer in 1937 who offered her a role in Hollywood . So before Hollywood, she already had some success as an actress and Czechoslovakia, including the controversial movie Ecstasy. Who has? She had the brief nude scene, So this movie was considered artistic in Europe and scandalous in the US Nevertheless, she became famous in the US later on, with movies such a sums on and Delia in 1949. Even more interesting, she wasn't only beautiful but incredibly intelligent. So, together with composer George Gentile, she developed a radio guidance system for allied torpedoes, and this technology was the foundation for Bluetooth and WiFi inventions. Sadly, she never saw a penny for it, but she was honored in the National Inventors Hall of Fame in 2014. So her film career that actually ended in 1958 following her six and final divorce in 1965 . And she remained unmarried for the last 35 years off her life and died in Florida in 2010. So it's fascinating, isn't it? And most likely you will agree that she was indeed an exciting and also beautiful woman. However, when everything online says she was the most beautiful woman, how would its head draws this conclusion? Was there a pullback? Sen. Who decided this rankings? Because when you look at the type of woman in the Hollywood era, didn't quite a few off them look like here? The llama like Rita Hayworth, Vivian Lay, even Elizabeth Taylor? It definitely seems like Hollywood had a type. If you look at the similarities like slim paid skin, bring net chin to shoulder length and slightly curly hair. Facial features with sharp eyes and strong cheekbones and distinct noses and over facial shape, maybe hard shaped, but not to round faces and very symmetrical and proportioned. So if we go back to the lighting. We will see now why these actresses became the photographer's dream model. So the doc ham and it waas much more forgiving. When not correctly exposed, the lights wouldn't reach out the hair. So if you look at images from blonde women off this time, you will often see overblown highlights in their hair as the light would shine from above. Directly on that and off course was high intensity, so this was very difficult to print a little bit too bright. That was okay, but full on overblown highlights in the hair that would just look like part off the hair was missing. So the darker hair also offered a great contrast to the white skin, especially in times off black and white photography, because it made the actress look more intriguing and mysterious due to the contrast off hair and face. Who is the exception? Hitchcock off course. It's a known fact that you preferred blond actresses. He even said Blondes makes the best victims. They are like virgin snow, the chose ups of bloody footprints. So, of course, maybe the directors back sins had a favorite type off woman, and we're responsible that this became the new norm off society, however, especially in Hitchcock movies, lighting was also a big challenge. So he is opposite was true to the washed out lighting. So in film noir or any thriller or horror genre, you don't want to blast your set with all those bright lights here. Blond actresses easier to separate from the background. So if you have a brunette actress, you would need potentially another hair light or accent light so that the person doesn't make it into this doc. And mysterious background, however, was brighter here. A separation like might not be needed, so that might be easier in this scenario. The right hair length that was also a sing off the time because typically the hair wouldn't reach over the shoulder toe, make the neckline visible, and this elongated the actress in appearing a bit taller and even Muslim and graceful. Another thing waas strong facial features. So due to the little control photographers had over moving those big lights, lighting could easily appear flat. So if a model or actress had a great nose for the typical butterfly in shadow, then she would also need the find cheek bones because otherwise the face would like as a definition. So you needed cheekbones to throw a natural shadow so that the face looked controlled even in harsh light. And if the cheekbones were not well defined was an even the prettiest phase, it would look like a pancake and just would look washed out. The same would apply the other way around. So strong cheekbones, but a flat nose, also a no no, as the butterfly shadow wouldn't appear strong enough. So during all of my research, I only found one actress back then was Asian heritage. So I wonder if it's due to the lighting set ups where photographers couldn't flatter an Asian actress who were usually would have softer features and not the European noses. So it's not that Asian actresses were not pretty. So I'm just wondering if it's if their like off fame is due to the limitations and lighting . The same might be true with African American actors and actresses. I mean, it's not like they have abandoned Hollywood. Sadly, they're just not well documented with glamorous photography, and that although there were quite a few famous actors like Hetty McDaniel and Butterfly McQueen, there I became famous was Gone With the Wind Also, Paul Robeson was Big Fella Dorothy Dandridge in Carmen Jones. Louise Beaver imitation off life just to name a few and similar to the Asian actors, it might just have been more difficult. Two lights of facial features in a flattering way because one issue is that dark of skin that's a little bit more sticker and therefore appears more shiny and reflective, especially on the harsh lights. So while it would work in my favor, for example, toe overexpose my skin as it gets an Ritz off little ringers and so on. It was dark of skin. It's problematic because areas that are not perfect they can become even more accentuated. In contrast, the light also, if the light is two brides and even the skin off a darker person, appears white washed because that has given will also look brighter under extreme lights. So it's just not that flattering for people with darker skin with this kind off light, and I know it sounds out, but I think the Hollywood type makes a lot of sense with the limitation off Hollywood lighting in mind after I photographers needed to get the most flattering images. So that's the style it's didn't just look with in person, but good on film. Six says. That's true, even back then, And luckily, studio photography as we know it developed. And now we have the power to flatter anybody, no matter their heritage, the skin or their body type. And how quickly time was changing must have Bean especially strange for George Carol Remember Hollywood's most famous photographer when he returned to Hollywood in the mid 19 fifties, he left Hollywood briefly to make training films for the United States Army Air Forces. So his oiled style off dilemma wasn't in fashion anymore and recording to Wikipedia. The new style of Hollywood glamour was earthy and gritty, and for the first time in his career, her railed style was not in the mend. He moved to New York and worked for the advertising industry, where glam awas the Valued, and he continued his his work for fashion magazines and photographed for print advertisements for several years before returning to Hollywood in the 19 sixties. After 1970 this most prominent work Waas as a photographer for album covers. He shot covers for Queen Fleetwood Mac and prime academy. So even a prominent photographer like George Hurrell had to reinvent himself and had to adjust to certain styles. And, yeah, let's talk about photographic style.
16. Ingredient No 3: Style: What is your Styer? It can include everything from technicalities like exposure to opposing toe the composition to post production or toe other ingredients was a model. The props, the concept, the time an era it's supposed to be in. And lighting is most likely not apart off style, because even if Paramount lighting, it's like your signature move. Or if you only ever using flesh guns or maybe speed lights. It's not recognizable enough because many photographers work this way, so you need to include a little bit more, and I have struggled a long time, was identifying my style. It even got weirder when people message me to book shoots saying things like, I really love your style And that was embarrassing because random clients and models were complimenting me on something, but I didn't even understand myself cans away. You do things naturally reflect a style. Yes, it can. In fact, it can invent a whole new Jonrowe off art. Think painters like Dali, Picasso ovens and fun go the way they painted came to them naturally. I mean, I'm sure that they also learned the techniques first, but how they implemented them that was unique to those Atis and they didn't think, Oh, in which style will I paint this image? Today? They just thought off a concept and started to paint it, and this way it became a P castle and so on. So if you struggle in identifying your style, sit back, look at your images and think, What do they all have in common? When I did insists, I thought off my images as smoothie. And I prefer to capture darker images, less high key and not a lot off smiling models, and then are worried that my style was to a more. But that wasn't the right definition. So when I looked further into the images, I noticed I used a lot off both colors and contrast, and I love to show women in a different way than the everyday itself. So from this I developed a slogan. Color contrast. Confidence be different, be eye catching. And I recommended you work on a similar statement, not only as an advertisement for your clients, but also for yourself, because once you recognize your natural style, you don't want to stray away from it. So if dive adored Ali painted like it was natural for him for one day and tried to copy Picasso often go the next day. Then it wouldn't have Bean his style anymore. But that doesn't mean that you cannot progress. There are always new technologies, and we said that even George Terrell had to go with the times. But it's possible you can improve within your style. In my case, my images. We're not only strong and color and contrast, they looked cinematic, and I don't hate us so that I can brag. Oh wow, my pictures. They're so awesome, So cinematic. Maybe you look at them thinking this is far too extreme for you, but maybe you like it more soft and natural, and that's totally fine. So to me, my style comes naturally because that's where I draw all off my inspiration from movies and TV visuals. And I just laughed, analyzing them and trying to understand how the producers and the directors are. They achieved a specific result. And then I see if it's possible for me to achieve something similar, but without the $1,000,000 budget. So it comes natural to me because ever since I can remember, I loved movies and while as I got my age, would hang up posters with boy bands and so on. I would ask our local video store for posters that they didn't need any more, and that would even collect postcards with iconic motives like Marilyn Monroe or Hitchcock or a James Dean. And I was too young, really to understand any off those movies. But the fifties and the artwork that really fascinated me. So maybe you already know your style, or hopefully my tips could help you find it. Just make sure that you implement a new concept, like modern vintage in a way that you don't look like a whole new photographer. And there's a great tutorial on YouTube by Robert Harrington called the forties Glamour Portrait, and he laughs a contrast and look off the lights from back then. But he Maris, um, with speed lights, because that's the thing. And I think that Hiss portrait, say, really nailed this old school Hollywood look, but was a modern twist. So if you want to learn how he implements, beat lights and exposure for his style, then check him out. You will find the link in your cost materials and saying that he is using exposure a little bit different than I do. So let's talk about exposure
17. Ingredient No 4: Exposure: SB said before, There aren't many behind the scenes images from the Golden Age off Hollywood era, which means we don't have close up shots identifying what kind off settings were used in the daycare era. We know that the exposure had to be quite long due to those Polish light sensitized plates . But of course, with the beginning off film and increased IA so you could photograph a lot faster. So I pretend that they shot like an everyday studio. Strobe was a shutter speed off around 1 125th off a second and the natural light or tungsten light in regards to the lenses. So meaning that if you are shooting with 135 millimeter, your shutter speed shouldn't be under 1 135 off a second. And if you're shooting 50 millimeter lens, then your shutter speed shouldn't be under 1 50 years off second. So here I honestly don't know when this rule was implemented, but I feel it makes a lot of sense so longer. Lenders Ah, lot heavier and therefore introduced camera shake, which makes the image blurry when the exposures to long Personally, I rather up my eyes old and keep a shorter shutter speed. In my videos, you will see that I'm continually giving the model feedback by telling them that they are doing great. And this talking leads to even more camera shake. So typically, I don't go under 11 hundreds off a second. But that's of course, up to you. The next thing we don't know too much about if the Apertura used in the Hollywood era. So Robert Harrington admits in his stamina and be an age that his research was inconclusive . Easa, but reckons that an aperture between 5.6 and F eight was probably used because off the detail that a scene on the closes in the Hollywood Pictures, however, I wonder. At the same time, if a lens off 5.62 F eight heads the same sharpness and steps off fears vixen as it would be today. So maybe Ah, 5.6 looked like an F four. I don't know. I wouldn't say that it's a big no no. If you wanted to shoot with a wider aperture to resemble a softer look, especially when less steps off you, it's a signature off your style, so I would say that's open to you. So I feel here. It's very open to interpretation, how shops the lens is really worth accent and maybe even a soft food. I was used and so on. So Robert Harrington says that he likes to get more detail in camera and might soft in the background and post production. But if you have another workflow, I say go for it. But now you have a good idea off how authentic you want or need to design your shoots so you will see in our sessions that I apply. The era starts very loosely.
18. Exposure Manipulation: Lens Softening, Tonality Understanding And Lighting: and for our 20 century style, I used natural light but cranked up see Aiso to introduce more noise. Otherwise, images like this, even in black and white, they will look fake because they are just too crisp. Alternatively, you could also manipulate your lens. So is about holding a soft foot in front of it. Or you could also breathes on your lens and then quickly takes a shot. Or you could lightly spray hairspray on a cheap UV filter or even put bustling on such filter and attach this in front off your lens. All off these ideas. They are perfect for manipulating your lens in reducing its sharpness and to get closer to the style back. Sen. Another important factor. Your camera things in 18% gray, but your eyes that gets easily distracted by color. Therefore, I recommend that you train your eye to see the tonality instead off the color, and it takes a little bit off practice. But there is an easy way to learn it. So take your camera outside and think about maybe five easy motives. Your car and animal street scene, flower part or a brick wall or something like that and then you have to look at this motive , so really, take it all in from whatever you picked. That could be the colors of shape, the texture lines, anything you can sink off, and now you have to change your settings. So on your ideas allow you can adjust your color setting to a monochromatic. And if you don't know how, you might have to check your manuals and now take your picture. You will be surprised that there is now a whole different tonality visible, so the flower that you consider it may be bright and Chinese. They might look now flat and dull and black and white and the boring streets in that. Maybe all off a sudden looks interesting and black and white and was a little practice. You can train yourself to look at a scenery in both ways. You can look at it in black and white tonality and in color. I remember using a background once in our Hollywood glamour workshop, and everybody gasp like technically, it waas a vintage design, but it was orange, so it looked kinda tacky, but I come everybody down by asking them to change the setting toe monochrome on the display, which was interesting because none off them had ever thought about that, and they loved it. So all of a sudden, the tacky orange was replaced by an interesting tonality and backdrop design. So try it and see if it makes you shoot a scene where you might have been like Oh, no way, that looks awful. But maybe now, in this black and white tonality, maybe then it looks totally awesome. Just one important note. If you shoot in raw, your image will be still available in color later, but your LCD will display black and white. But if you shoot in, Jay Pek, your photo will actually be captured in black and white, and you cannot convert it into color anymore. However, if you are camera can shoot and Raw and Jay Pek, then you have both options. You have color and black and white, and you can also change your white balance. So I keep mine for all the shoots, usually in flesh, because this way it just gives me a warm a tone. And if I stick to the same balance, it makes my book editing easier. However, if you prefer a cooler tone in your black and white setting. You can switch your white balance toe daylight. And, of course, you could also set your white balance manually. If you want toe dial in the exact Kelvin number that fits. Maybe your style, However, it's rare that I waste my time but set on the shoot itself unless I work in a really tricky lighting environment and if I have to show my resided toe the client straightaway. So usually I prefer to adjust the balance in post production when I brings a world concept together for our 30 style, I used a large soft box symbolizing the non direct stage light yet softer and the wider Apertura for less steps or feared. And here it's less about the authentic lighting technique but more about the era who love to dream about adventures. For our 40th style, I used a beautician as my pretend Fresno and its way up higher than the usual 45 degree anger to achieve this butterfly and black pupil effect. However, in reality, these lights and any soft box really it's the time to be close to the model. But to actually see the model behind the light. You would also need to be very close to the Modern, and this would be indeed authentic because the little images that we have busy behind the scene there, you can see how these photographers and filmmakers worked, and they were indeed incredibly close to the model. However, I don't really like that. I prefer to give my model a lot of space, and usually a work was along my lens, and this way it just makes less uncomfortable because I'm not invading her personal space. Therefore, my lights are typically feels away, and with that, there are also different and light quality. So you might like to work a lot closer to your model or was close. Ally. It's and then I will give you a softer output, also from the forties. Unwatched. Photographers also love to use Goebbels to add more interest to the background. So Goebel stands for go between object and means that something was placed between the lights and the subject off the background to add a shadow onto the background. And this way you could easily at some drama was even simple things like a flower pot, for example, if you would like to know more about the subject and how to expose Goebbels correctly. Then check out our cause. Creative photography, Lighting Create backgrounds With Goebbels, it's simply the best way to create backgrounds on a budget. So the light bluster from spare figure lets you project slides, which you can see in our 40 section. And Last Delight has equipment for interesting looking shadows. So if you convert these images into black and white, then immediately you were creates distinct from while look for our fifties and sixties era . I use even natural light because now it was actually possible to shoot outside off a film set. Or I like to use a big soft books again to mirror daylight and for 70 sessions. Well, as you know now, the technology is so far advanced by then any setting goals as long as the concept allows it, you now have all the knowledge for authentic story lighting and exposure scenarios, so have fun playing with it. And if you want to focus more on the era and concept instead off the right technology, I won't judge you at oil. So for me, the concept is more important than the use off time appropriate technologies, and now you know all the rules, so have fun bending them
19. Ingredient No 5: Composition: all right, I allowed you to bend the rules. And this is also true for the subject composition. However, you can only bend the rules on purpose not because you don't know them On Instagram, I see a lot off strangely cropped portrait like horizontal the phase a straight in the middle and crop through this road. And this makes me physically uncomfortable to look at. I don't know why. Or maybe I do, because there is a reason why the right composition is a big deer. You can even buy books about it that won't teach you anything else and composition. That's how big's A seem really is. So if you feel that you need help in this area, then please get a great book and stop catting people's throat. Okay, I'm melodramatic here, but as a general rule, you don't want to crop at odd places. So, for example, don't crops through or just before joints. So for our book posing like a pro, I created this at work. So you get a better idea In regard to our modern vintage concept. Any composition rule is authentic in usable as these were principles invented a long time ago, so the golden rule off Certs was already used by painters and was said to be invented by John Thomas Smith in 17 97. And if you use light rooms and you might have seen different overlays for the crop section that help you to find a better position was in your image. One off these overlays is the composition principle called the Golden Spiral, also known as Fibonacci. Spiral and the state's back all the way to the 12 century. And it's hard to mathematical for me to explain it or, to be honest, to even understand, however, the website where I tried to find more information that said at the end. So let's just say it's a mathematical equation off aesthetically pleasing composition. So thank you a to photograph e icon dot com, because I would sticks to that. It's not important, really, that you know the mass behind it, but it's great to know that the golden spire is an interesting way to design your images. If you prefer to find a great crop and composition in camera, or if you like to define it in post production, this is up to you. So while iron shooting. I focus more on my models expression and sharp images, especially sharp eyes, then on the right crop. So I showed a lot wider than I really need toe. But this means I have more options later because if you cropped to tie it and in postproduction, you realize our man. This picture would have looked really cool with the horizontal crop, or I wish the model has bean a little bit more. You have being placed at society in regards off the rule of Sirte's. Then you are out off lack because now you cannot change it anymore. So you are free to use any composition as long as you know why you are doing it. So, for example, typically you also want your subject looking into negative space, because this way it's just a little bit more pleasing. However, if you want to make your viewer uncomfortable, you can squeeze your subject with the site off your composition and then let them look to the edge and not so free negative space and the second season off The Handmaid's Tale That's a TV show on who that used is a lot because the characters, I kind of feel trapped in the world, and it's a great cinematic move to show the desperation through this really impactful and uncommon framing by just placing them to the side and looking them into the edge. So generally a bull's eye provisions in there tends to be the most boring position. So if you're positioning your subject pangs smack into the middle, if you do it for a specific reason. Great. Otherwise, keep in mind these rule off Certs oh, are the negative space or anything that gives you a picture meaning within its framing. Also, think about the big picture because sometimes it looks better to zoom right out and show more off your subjects environment. Or if you want to focus on the emotion on your subject, then you zoom right in. So, if not in cameras and later and post the most for gotten images are the ones that are neither here nor there as a factors to think about for intriguing framing or compositions are framing was lines, diagnose shapes, forms, textures, patterns, color contrast, symmetry and space
20. Ingredient No 6: Posing: posing wasn't brand new two photographers in the golden age of Hollywood. Once more, it dates back to the era off painters similar to Rembrandt's lighting technique and the rules off Certs. Thanks to a previous discoveries, photographers already knew about things that worked and things that didn't work. And, as we said before, they used the limitations and lighting toe the advantage. So if the model couldn't look into the light or into the camera due to the black shadows are not having a catch light. Then she would look into the distance. Remember that, we said the lights were often really hot and bright, So first of all this would make her face very sweaty, and the makeup would melt away. And also, when too much light hit somebody's eyes. It's very uncomfortable, so they would squint the eyes for protection in those introduces on flattering ring herds. So looking away in itself would have been very boring, so they invented this alluring glands into the distance. So all of a sudden that made the model look not bought and incredibly dreamy, always the right facial expression. It would be psychiatry, so they used to the advantage. If he wanted to have a stronger look, then the actress would be shot slightly from below and broadly lit, and furthermore, her body would be tilted in the seeker off, as this is a technique that was typically applied in male photography. If the photographer wanted to capture the actress in a more feminine and petite way, then they would use the narrow lighting toe slim her face down with shadows, and they would also shoot slightly above her eye line, for example, of the photographer will standing, whereas the model was sitting. Rules that we know today were also used back then. So as we said, the characteristics were dominant facial features, a k, a strong nose and even though strong, they were not allowed to look too large, just strong enough. So the angle officer face was important. So a little bit to the side that was okay. But not as much that's knows, would cut cheek line if the faces turned too much to society than the proportion off. The second cheek is a symmetrical and due to this angle off this face and smaller second cheek, the nose appears a lot larger, so very unflattering and a big no no. So it was a smaller nose. You could shoot the head in the profile position. But most positions were just held while turning the face ever so slightly to the side that it would look slimmer and that it would also show this strong jaw and neck line. As we said with some artists, is a hand position, played a big part in the posing and was, as artist didn't play a big role at all. So one small if they wanted to make the actress appear more powerful regarding traditional mayor poses, then they would show the back off the hand. And a more delicate and graceful way is to show the site off the hand. So think ballerina hands. So with the simple change and hand position, they could switch between powerful diva to very vulnerable and sweet girl. Depending on the role the actress was portraying or dish inning, for you can see how wide ranging the subject ISS. In fact, if you would like to learn more about posing than check out our costs posing like a pro, which comes with a 200 page PdF, and it's a book that you see behind me where I describe poses for every body part in detail . However, in regards to our concept off modern vintage, I sing supposing tips I mentioned as the most important. Keep in mind that those styles became more progressive over time, and these images became not so dreamy anymore. But they also became stronger. So Robert Harrington mentioned in her seminar a photograph from Kirk Douglas pulling on a rope, closes and much, had lots off tension and opened a new era for Reggina and less alluring blends into the distance images. So women became so fam Fattal bond, girls, bombshells, trig ease. And with each new eras, a style Waldroup ends opposing changed time. Appropriate or not, I laugh when women feel empowered in the modern vintage Royal and I engaged in the shoot, so I talked to them all the time, reassuring them that they're doing great. And if I fear they are untrue off the facial expression that I want to achieve, then always reminds them by telling them a little story like Imagine you are sitting in this bazaar or imagine your future dream. Prince is coming through the door, things like that so I keep them would sort for or bring out a little smile so I can play a little bit with expression. So if a model is insecure about the hand position, I instruct them to turn the hands in the grace for position, and that also gives them lots and lots off props. So this way the hands have something to do, and it elevates my storytelling.
21. Photographing Anybody In A "Modern Vintage" Style: so you can see these sets don't need experienced models. They are designed to fit you everyday client that loves the style of photography. And it's perfect. Of course, if your client loves the stars so much that they can provide their own wardrobe because coming back to the problem retro versus vintage it's incredibly difficult to buy vintage outfits. First off all, they are rare arm Because of fabric. It's fragile asi years and tears easily, so well preserved items are usually very expensive and even more problematic. It's incredibly difficult to judge the right size because they were different back then, when we now refer to Maryland Monroe as this curvy woman who will fashion size 42 or 10 to 12. Nowadays, this would have bean inside 38 or 8 to 10 because people became bigger over the years. Hence, wardrobe sizes became smaller to complement women. I realized this when I visited an antique fair, and I thought I was the luckiest photographer. I found a real 50 stress in the size, my moderate stated, and I guess technically it wasa nightgown, but it was beautiful and sheep. However, when my model tried it on It was super tired and my model was very slim and the dress was long so it couldn't have been made for Children. And it really made me question the sizes people wore back then. So the 50 size large became modern day size petite, which sounds way more flattering. So it's best if you have moderate or clients that can bring their own retro or vintage inspired wardrobe. I was lucky to book two great models for our tutorial. And not only that, they brought awesome outfits. They totally resembled the golden Age of Hollywood. One off our model is a look alike off Rita Hayworth Greer Gas and with a touch off young Barbra Streisand and the other model is a mix off Lana Turn a Veronica Lake and the young near Pharaoh. So with these models, we wanted to give you two option off. The more traditional look. One model has a typical dark, curly hair style, and the other one and more Hitchcock preferred look, so she is a little bit more blunt, However, Don't forget that we said was today's better lighting scenarios. You can make anybody a retro style, so any body size any skin color or heritage, It's possible flew in our studio. We shall pinup inspired sessions with the Chinese and African American model or Hollywood glamour was the Vietnamese model. And of course, these chutes don't just apply to women. That's just my approach, as my clientele is 95% women, but also to men or if you serve the LGBT Q I A group. Then off course, all of those elements apply here a swell. And with our Indiana Jones set up, we also included Agenda Bend as our Indiana Jones is female. So this way you can find an unlimited amount off options off mixing tradition and modern styles, which is a lot of fun. And with that, let's go to the shoot.
22. Inspirational Sets For Anybody On Any Budget: in our sets. We try to include a smudge inspiration as possible from dreaming, alluring to adventurous medical and classic or non descriptive items like H papers, musical instruments and flowers that could fit any era. And keep in mind that if you love to go with an extreme style like the twenties flapper guards with a signature wavy hair or a sixties pompadour style was heavy makeup, then this look, we're constrict you to this era only, and it will limit your ability to shoot a greater variety unless you have a makeup and hair stylist on set. Who can change the looks on the spot. So my models that their own hand makeup to keep things down to Earth for you. So as I promised that this would be all done on the budget. So here you go. It's possible. But I also asked them to apply not too distinct signature era look so that we could shoot a great variety for you. So nevertheless, of course, this is up to you. If you want to shoot a typical twenties inspired look, you might want to channel the Great Gatsby or, if you want to do pin up That's a completely different look, and it also requires an entirely different set off posers. So I would argue that pin up is better suited to the boot. One niche in photography instead of portraiture due to the stronger pronounced sensuality or cheeky sexiness. So if you're interested in this genre, there are probably causes that offer only pin up because this is a really big standalone subject. However, I do feel it needs to be addressed due to the appropriate time period where it's in. So I decided to include this image, really to at least give you some inspiration. And that's a huge cinematic subject is fin wow. So this was addressed in our cause, the magic off color and jails and I will attach this shoot to the bono section. Also, you will find even more historical information in your cost materials to come up with even more ideas, and that's it from my side for now. So Met will tell you more about the specific lighting set up so it shoot and you will see me instructing the model. Plus is the images taken real time and also the edited versions at the end off it shoot. So I hope you enjoy the sessions and have fun
23. Inspiration For The 20's Sessions: Our studio staircase was built in 1927 so we're lucky with regards to authenticity. And even more importantly, it just has this beautiful, timeless, natural light quality as well. Stylized, more sense. Later we started simple and in regards to a model styling. She has slightly Kili have red lipstick, and addressed is a fairly neutral vintage style. You can include old fashioned props, and don't forget to manipulate your lens or at least increase your ice. So for that authentic feeling, the musical instruments are owed to silent films where music was played over the movie from the late 19th century to the 19 twenties. Music from a pianist or even an orchestra would accompany the films, which had otherwise no dialogue. We put this session into this area due to this classical romantic look. Natural light and true vintage musical props, zither and mandolin are really antique instruments. They're broken now, and they can't be played anymore. But for a shoot, they look beautiful. Flea markets the best for these budget friendly finds. The paper with musical notes of the model is laying on his gift paper from Marshall's, which is a department store. It costs about $3. The Styrofoam can be found in Lowe's or Home Depot, which are home improvement stores and is fantastic for designing backgrounds on a budget. You can attach things you can paint it. You can use the white side as a reflector. There, really awesome to add more interest on the floor will often throw in other items in an intentionally random fashion that is aged paper with tea leaves, flowers, flower leaves or glittering items, all depending on the concept.
24. 20s - Shooting Anywhere: "The Staircase" (Old Newspaper Look): This is to prove that you can shoot vintage almost anywhere. We're lucky that the studio was an old building from the 19 twenties on the stairwell looked really vintage just on its own without anything else. There was some windows there to provide some natural light, but it was still quite duck. So in a situation like this, you're gonna want to use something like a 50 millimeter lens F two point. Oh, and maybe a little slower shutter speed and pump your eye so up for the extra beauty sensitivity. And it's also gonna provide a little bit of noise. Digital noise? No, always so great. But in times like this, it can actually add some atmosphere to the picture. So try and take a look around and see if you can find any old buildings in your area. Maybe find some stairwell, some walls anywhere that looks a little bit vintage, and you can make great use of it. Let's go and take a look. How the shoot turned out. Yeah, you can grab so sexually school. Thanks. It's that's quote. Yes, exactly. Yeah, that's cool. Awesome. And you little bit this way and relax. One also selects bound, So it's a little bit more symmetrical. Very nice, Awesome and extra. Can you stretch out one back? Yes, a little bit because we want to be a bit more on an angle. If I can just t Is this cold? Actually, I would probably see your feet now. So if you want to just take them off naked, it's fine. Just drop them. It's not dangerous. There is. It looks. And if you can even school, like in the middle great. And come even more science with Yes, perfect. Beautiful. And you, um, rest fuel head on, both off your hands. Ankle. Awesome. On relaxing hands down. Kind of just like around you and me. Perfect, actually. Really? The same wall together? Yep. Michael. And if you can be more even on your typical Yeah, that's great. Just have your head. It is just perfect. And you can Alexis put chicken and just put it down. Yeah, that's good. And Senator is this and so meses Handzus. Well, that's no, no one was good, but yeah, nothing. Yes, it's great. And look out of suspended like you hear on one side and you're just slightly. Thank you and you can relax this hand down. And also on the mask. Yes. Perfect. Cool. Yeah, that's great in excess. And now just use this. Great nice.
25. 20s - "Whimsical Music" (An Ode To Silent Movies And Their Music): for this whimsical music set, we're using gift paper, which is a very cheap way to create some awesome vintage backgrounds and pages of a book dipped in water with tea leaves to make them brown and vintage looking. The model can lie down on that with on old musical instrument. If you confined them. Flea markets don't have to spend a lot of money to make that work. The lighting in this case is all natural light. We have a window coming from the right side, which will spread the light across and using 50 millimeter lens with a nice wide aperture for shallow depth of field F 1.8 and shutter speed 125th of a second and I so up to around 500 depending on the ambient light in your room. So let's go to the fly on the wall and take a look. How it all comes together and kill Cerise again. Very cool. Yeah, stay. Lexus was this hand can grab your hand, get it even down all the way to your shoulder. Yeah, very nice on drop to me. Perfect and lo kinda up to the ceiling this way. Perfect and close your eyes and can you help to put it is a very left or right just on the ground. Okay. Here. Very nice. Maybe like one arm. And you're here again if you can, without charging yourself. Careful. That's a shop. Yeah, that's better. Yeah. Awesome. Beautiful, Beautiful. I don't think we got you. That's awesome. So you can relax.
26. Inspiration For The 30's Sessions: Indiana Jones is technically written in the eighties, with Harrison Ford playing the lead, but it was set in the thirties instead of another dreamy and classic newspaper look. We wanted something that reflected the change of the era. The moviemakers became more adventurous on people, loved movies with more thrills, a well needed escape from their reality. The roles of women progressed. And so we decided to set up a gender bend, a female version of Indiana Jones and Explorer who is looking for adventure escaping Nazis . Finding treasures on the Holy Grail. You'll find similar backgrounds on Amazon or eBay for around $20. Alternative background designs would be stained book pages, maps, wooden panels and so on. The vinyl floor is from the backdrop outlet on the suitcases. The one Sandy mentioned already vintage, not retro. But all the other items are retro lamps, a compass, maps and so on. A big soft box symbolizes window light. Natural light or harsh flash is optional. For more or less contrast, a hell light or accent lights mirrors a stage look. The posing in this story is more intense, like you'll never know when the Germans are going to find you. However, it also works in a dreamy way, which will cover in the next session. We bought the set to the floor and pretended the model is still dreaming about the Holy Grail. Posing includes a softer expression. The body position is more feminine, but the styling is still in the adventure Adventurers Explorer style. We used a big stuff box for window light. Natural light is, of course, optional due to the potentially limitless amounts of props you can include here, such as lamps, guns, letter letters, books, suitcases, other mysterious items. This is a very fun set up. Being photographed from above is also very flattering for larger body size is due to the compression to just keep in mind that you want to prop the model's head on Ah, little cushion so that the head doesn't sink back into the ground, which would look like a bit of a flat pancake and create double chins as well, even in very slim models, another no, no. Always shoot down from the model's head position, never shoot upwards by standing at the models feet. If you do that, then she will look bigger for us not plus you never want to shoot into the models nostrils . Which is how a look of you shoot from her feet. Andi, when you're on the stepladder, shooting down always remember to have the strap on the camera so you don't drop it onto the model by accident. Remember safety first.
27. 30s - "Indiana Jones" Style (The Female Explorer): Okay, so for this set up, we have a vinyl floor that it's got a wood effect that's from the backdrop outlet. And we have a very thin vinyl background with that kind of vintage style there that came from eBay and in terms of props, very simple. We found an old suitcase and antiques fair Theglobe came from an estate sale on the pages of the book have just been dipped in water with tea leaves to get them very brown and old looking to just use your imagination there, where it comes to finding props for the scent. His a bird's eye view of the lighting set up. So model in the middle are key light is the Boeing Gemini with a large stuff works and that it's slightly feathered. That Means is not pointing directly at the models of the light is a little bit feathered, and at the back you can use an optional beauty dish with a diffuser is a kicker light with just a low power toe? Ad highlights to the hair on the jacket from the bank in terms off lenses, camera settings. So in the studio, always using 125th of a second, and I so 100 measuring the light for the various aperture. So for Canon 50 millimeter, 1.4 using F 3.2. And that's your standard kind of portrait lens for a bit of a wider angle or an option to zoom in. We're using the Sigma 24 to 1 and five millimeter F four. So let's go and take a fly on the wall of you of the shoot to show you exactly how it all comes together on has always pay attention to how Sandy directs and poses the model. These are all tips that you can just copy and use in your own photo shoot, regardless of the style. All right. So, actually, I have few sit the tiny but not this way so that your knees go. Yeah, perfect. And then just stay like this for now and just look up to the light. Cool. Thank awesome. Very nice. And look up again into the light on your Kendra's play with the glasses. Yeah, that's cool. Very nice. Perfect. Very good. Just like one more time. Just looking down and yeah, just whatever. Comfortable. I'm sorry. Yeah, I know. That's what makes it so tricky? Because the thing in the middle of yeah, and now just bring your eyes up to the ceiling. Very cool. Very nice. And if you can put the globe and even closer Yeah, as close as possible. Perfect. Very good. Take the glasses down for one and just maybe holds them in one hand. If it and bring your face just a tiny bit towards me. Perfect to the kind of world that kind of like you're studying it. The whole said supposed to like you're looking for the Holy Grail. So you're very Indiana Jones and looking for something I know. I think the smaller one would have been great. Merkel. And while it's doing that, just angle your body again. So it's a little bit more on an angle. Perfect. Yep. Who? And if you can sit even high up as high as 2 10 Perfect. Very cool. And maybe also lift the map a little bit up. Perfect. Very corn. Just look down. Perfect often. Cool and look after the light and look down to the map. Awesome. Perfect. Yeah. Cool. Just look. Bounces a map. Cool. And if you can angle your needs. Just a tiny but this way. Perfect that girl and that you turned it the other way around and always is just a tiny with clothes. Perfect. My great weight. Yeah, that's great. Just down. Yeah. And you can just bring the head down onto the floor just looking down and try to angle yourself against this way and very kind off like you expecting somebody is coming from the side and yeah, yeah, yeah. Perfect. Awesome. Yes, that's good. And brings us, like in if you can nearly like, you're jumping up any moment. Yeah, kind of like you're ready to attack Somebody brings a gun down again. Perfect. And just looking to the book. Perfect. Often, Yes. All right. Cool often And also brings us I'm a little bit Get perfect. Cool. And look out off the door. Yeah, and lower your I'm a little bit down. Perfect. And maybe even open your hands. I see it a bit. Yeah, perfect. Quick and does the same thing. But just angry. I am. So I sees a Yep. Yet? Yeah. Perfect. Very cool. And maybe close a town and just have it, like in your open hand and open your hand even wider. Perfect, teeny tiny pistol. Oh, and just bring your color on the side out this well, more even. Yes. Perfect. They awesome. Yeah, that's great. Cool. Also. And again, Kind of like you. Nearly like you. Afraid somebody is coming right through the store and just your eyes to the side. Yeah, yeah, yeah. Okay, let's do if you're standing once. Yeah, that's cool. Just bring your face a tiny but what? Me and perfect. Awesome. Relax it down for a second. Yeah, way more your size. Teeny tiny gun. Teeny, Tiny 14 Julia you want? Yeah, you can just change it up. Whatever feels good and drops us down everything that you have. And I just take a few where you just cross your arms can a very bossy for effect. Very good. Come again? Just a tiny But this week. Perfect. Awesome. And just look out off the door again. Perfect. And actually turn yourselves a friend. Then just look over your shoulder. Yeah, Go. Yeah, that's cool. Stay Lexus. Very nice. Yeah, that's cool. Also, if you can change it, come just again. Just a tiny with perfect Perfect. That's cool off my nights often
28. 30s - "Dreaming Of The Holy Grail" (The "Indiana Jones" Adventures Continue): So for this shoot, you'll be photographing the model from above. That means you'll need a stepladder and again, various props that you can bring in to recreate this vintage looks or the fake wooden floor we found on Old World map. The pages of a book that have bean browned in water with tea leaves, fake guns, anything you confined on antique markets and places like that. Um, the stepladder will enable you to have a breads eye view of the model so you can step right up there and look straight down. Make sure that you're wearing a strap on the camera. See, don't drop anything on to the model from above. The lighting set up for these lying down chutes is very simple. Use one key light with a large soft box. It'll be angled at 45 degrees, slightly feathered away from the model, so it's not direct. The 50 millimeter lens works really well here at F 3.2 or 3.5, and the standard studio settings of 125th of a second shutter speed, and I so 100. So let's go and take a fly on the wall view of the shoot to show you exactly how it all comes together. And, as always, pay attention to how sandy derricks and imposes the model. They're all tips in there that you can copy and use in your own fruit photo shoot, regardless of the style. Yeah, that's cool. Bring your arm. And, like, one on your belly and the other one over your head, like over? No, Like, like, actually on your head. Oh, yeah, yeah. Perfect. Yeah, that's great. And you can just move around is away. Cool. And this is little gun next to you. Can you grabs us? And I cannot I don't know, kind of. Just hold it and just get this, Um, And again Perfect. Because I'm so tired, Teoh. Very nice. Oh, there's a water gun. Yeah, e I don't know. I bought it on a flea market years ago. I don't even know. Oh, that was supposed to work. Saiki e. I don't even know what this is for. Oh, let me just move you Now I want to know how to do it. Yeah, I don't think it's working. I think that's why they probably got rid of it. Cool. and just turn with your face. That school. I just Yeah, school. Just a short and can you would try, Like where your head is on this. This is little true thing. So it's kind of sticking out there. Can you see if you can arrange your hair that it's on this to where you're lying on so even more here? No, no. Just bring your hair over it. Yeah, that's good, because it's sticking out. Yeah, I think that yet. No, No, that's cool. Perfect. Yeah, that's big.
29. Inspiration For The 40's Sessions: an easy set up to copy. A typical Hollywood error look is a vintage couch and a set of like here curtains. The kitchen is, of course, not vintage or retro at all, but it's generic. Enoughto adds some texture onto the background. You could also add another background or use a gobo onda. We'll show you the easiest choice, as it might resemble a set up that you could even do it home. We were very lucky to get our hands on a very budget friendly vintage French sofa, but you could do the same set on an Ottoman or even your own couch that you cover with a retro material like tool or fake fur. And immediately your set is believable. You will see the for option later on in the video. It's another great way to add interest with texture here. You might also learn the effectiveness of changing your camera display to monochrome. You might look at the set thinking whom the colors are not so Hollywood, but in black and white. It's a totally different story, and Sandy included both image versions, so you get a better idea. The lighting is not the classic portrait center. It's higher than the standard 45 degree angle, but, of course, due to modern technology, were able to place it where we want starting sideways, which is either broad lighting or narrow lighting, depending on which way the model angles of face. And when we bring it in front of the model, we can achieve the typical butterfly shadow or paramount lighting once more. If you love even stronger shadows, watch Robert Harrington's YouTube videos. He will show you Hollywood glamour only using flash guns. Sandy loves working with strobes and a beauty dish. So this is the set up that you will see here. Stepping through a curtain look was inspired by an iconic image of Grace Kelly when she opens up a curtain in a very majestic way, which I guess suited her perfectly and becoming a princess just shortly after her Hollywood success. In the original picture, the curtain is brighter, but here it's just a quick way to achieve a greater variety. Move the couch and immediately you'll have the next set up. It wouldn't be a classic Hollywood era if we don't include an idea of how a film set could look on a budget lighting is before your choice of friends. Nell's beauty dishes or speed lights on the lighting pattern that fits your model and concept. Broad, narrow loop, Rembrandt or Paramount? As for props, the little table belongs to a vintage looking dresser that we found on Amazon for around $90. It came with a mirror, which is a fun way to play with mysterious and voyeuristic scenes. But here we took it away so that we and the video camera went visible in the reflection. Retro items can include phone, cigarette holder headbands, flowers, books, fake guns and so on. The damask background is from the backdrop outlet, but a courtin go bows or other retro backgrounds that resemble the actresses. Trailer or themed film sense would work as well. Transportacion is another big storytelling device. By the way people traveled. You can immediately place them roughly in the right era. Horse carriage, steam train, propeller, plane Zeppelin, rocket, Cadillac or Toyota Prius. They will suggest a certain time. That's why in modern TV shows, they trying to give them main character, classic cars and try to minimize obvious items that are used at the time of filming a 2008 notebook or 2013 iPhone gives the show a dated look. So here we thought, including vintage travelers, might be a fun session. But how can you do it on a budget? Maybe you have a historic pot close by where you can find an old steam train. But if not, you can still give your view of the feel of traveling. With a few gels. You can mimic lights around the train station on a little fog in the can becomes our steam . Our model bought a dress that looked like a typical home dress of the time on. We had a retro trunk to complete the look. When suddenly thought about the set, she told me that she got in Narnia and fired from it, not from the secret door, but when the kids needed to leave their house in the time of World War Two and took the train to the area that was supposed to be safer. The story could be about such refugees in the forties, which with poses that a sad, thoughtful or melancholic we place this set into the forties. Timeline to follow up on the idea of vintage Transportacion, although it's sadly told you already. Apparently, the gobo slide by spiffy gear has a Russian make airplane, which is from the Cold War. But we kept it loose here toe with wasps from the forties, the first women who were trained by the military to become pilots. However, the styling is kept vague enough to fit to a later error by changing it to the red coat. It became more fictional, reminding us of that video game where in the world is common San Diego. In this shoot, you'll see the option of using gobo as an interesting background element, and you can switch it in a second by just adding a different slide. You can even buy, slide separately or use old film negatives. If you are you're eating of grand parents. Still have any in the attic somewhere similar to the explorers. Here we move away from the stereotype of the glamorous, alluring woman of the forties and focus on strong body positions or expressions
30. 40s - "Hollywood Glamour" (The Golden Age Of Hollywood) 08:50: So for a classic Hollywood movie set, we have a couple different options. Main thing to remember is that two things are very important. Number one is the main light is set much higher than usual. To achieve this stage. Look from back in the day, where huge Fresno lights were far above the stage. In fact, they were so high up that the modeling to raise her chin in the dreamy, distant look to get the catch light in their eye. Otherwise, there Isa black, which is a typical look from that time period. But also the lights are often a little bit too bright. This way. This skin looks most smooth. A slightly overpowering light hides any bags under the eyes or wrinkles. And also the light back in the day was very contrast. Isere here, a beauty dish with a bear reflector, works very well and in terms of the position, high above straight on light. We have it here for the butterfly shadow that is the shadow under under the nose or from the side for a broad or narrow lighting. Another option that you have, which is purely down to your taste, is to put a kicker light or hair light from behind. A very low power to achieve a more stage looks as if you had more light on an actual stage itself. So the power must be very low. Always remember the saying The light from behind appears twice as bright. So just to make sure that doesn't overpower anything from the back camera settings here we're using 100 35 millimeter lens F 3.2 to give ourselves a nice, shallow depth of field. Instant standard shut the speed of 125th of a second and I so 100. So let's go take a look Now fly on the wall and see how they set Comes together Kind of like half the arms Like this. Yes. Perfect. And just looking upto the light Perfect. Beautiful, Very nice. Very cool. Instead, accept and just look out off the door Perfect and just raise it and a little bit perfect. Very nice. And schools are the way with your body's this way so you can just lean on. I'm rest again. Perfect. And look up again. So the light perfect. Okay, nice and stay. Lexus was ahead looking slightly up and just look kind of passed me, like along the side. Perceptive ex, trickle down Beautiful, Very cool off. Very nice. And look out off the window. Perfect, actually. Change knows a hair so that it's in the front and bring in knows a little bit towards me. Yes. Perfect. Perfect. Very nice. So it's more like a butterfly light. So it's kind of right in front of her and flows us all. Yeah, nothing. That's good. And then basically, just look right into the life. Cool. Very nice. And just half your like your just your finger. Basically. Yeah. Perfect. And they look inside the light. Think and take your Yeah, a little bit this way. Yeah, that's great. Very cool on maybe, actually, just like one coming down and the as I won, like yeah, on your back. And then maybe you can grab onto one higher with society off your hand and one lawyer. Perfect. And I'll just use this. Yeah. Great. And look straight until the light again. Perfect. Beautiful. Can you tend even more? This is this is great. The upper one. Well, I know the changes. Everyone keeps the upper one Like where it was just very soft. Yes, yes. And now, if you can just the same This this one. Yeah. Perfect. Great, Great. Perfect. Beautiful. I don't like these typical people was start FIFA Allure. So that's what you are. No. So you're a diva, and you're like, the world is mine. That kind of expression. Now, that's cool. Perfect. Get the big vote. Yeah, give me the big Phil and look straight into the life again. Perfect. Maybe one more way. You're just on your body and your just leaning on the arm vehicle. Maybe not just like fallings, I hear, but maybe just very gentle can like Flutie's. Yes, yes, yes. Awesome. Matt. Fairness. You can also look at me, actually. Yeah, right now and look straight with a water perfect. And I actually have, like, all your hair on the front shorter if you can. Yeah, yes, yes. Beautiful. And just twist. Yeah, perfected it already. Perfect. And just sitting here again. Yes. Perfect. Very nice. Perfect, beautiful. And look all the way up again into the light. Perfect. And if you can come up higher and also probably inside, But then kind of Just be high. Yeah. Perfect. beautiful and Lloyds and just a little bit. And just look straight with the world one more time. That's great. Beautiful and out off the door. Perfect. Beautiful. Three nights. And if you can cross your hands Yeah, perfect. And maybe something like playing with your face again. Yeah. Perfect. Yeah, that's good. And now just a tiny bit off a smile, But still like the world belongs to you. Kind of like, OK, like I rule everything. Some of their That's my town. That's my hood.
31. 40s - "Hollywood Diva" (Grace Kelly Inspired) And "Hollywood The Film Set": for this variation of the Hollywood style movie set Shoot. We have a damask background fake wooden floor there and as the key light the beauty dish with a grid ford front onto the model and quite high up as well. To get that stage like effect, the lens were using as a long land 135 millimeter at four point 525th of a second shutter speed with Icer 100. And if you want to play around a little bit more, you can optionally add a soft filter to the lens to create a dreamy style effect. You can have a hair light at the back of right, a bit of separation to the background and for the second part of the shoot will have a pair of curtains as the background where the model will step through from behind. And in this case, we won't use a hair light. So the idea being that there'll be one spotlight is if she's walking out onto the stage. So let's see how that all comes together in the studio itself. It's and Texas hand just a tiny but up to a value cuffing. Yeah, nice and maybe bring the show to both sides. And then you can just holds us with some attitude. Or maybe not even around, but maybe more on your shoulder, like yes, yes. Perfect. Nothing. And look right out off the window. Perfect. And look into the light again. Perfect. And you can just drop the shoulders down and look out of the door again. Perfect. I think I've been compelled feelings up. Just controlled by your looks. Sure Rise something. Yeah, that's great. Just look out of the door. And like some real showgirl attitudes like tutta, just a nice You have to let to be more bitty. I bet you like in a year or two when she has a lot of experience and she's like, and maybe one Will you step inside again or you have a sister front, actually out and then really bring your body into shape? Yeah. Like, really leaning for what? Yeah. Perfect. Very nice. And maybe one more where you step inside again and kind of like one up one down. Just kind of like picking through Yes. Yes. Call and you can come out and relax again.
32. 40s - "The Vintage Traveler" (Train Station Inspired): Okay, So for our vintage traveler set, this is my favorite step because we get to use fake smoke and gel lights as well. So let's just take a look at how this is set up. The floor is our fake wooden floor with a vintage style box that the model can sit on black background. The key light is just a beauty dish with a diffuser to soften that up a little bit and then at the back. As you can see, there are two strobes with reflected dishes facing forwards back towards the photographer with colored jells on them. So blue and orange work very well together. We using Roscoe color affects gels to put on that. Now, depending on the thickness of the gel, you might want to turn those strobes down a little bit or up a little bit sore. Just experiment to make sure that you don't blow out those colors. Have your assistant take the aerosol atmosphere. Aerosol spray can stand off to the side but in front of those jails and spray that smoke around as the photographer as you are actually taking the images, and they'll just create this amazing, smoky effect So the settings for this take 50 millimeter lands or 24 to 1 and five millimeter lens and pretty standard portrayed studio settings F 5.6 125th of a second shutter speed, and I So 100. Now, let's go take a look at our fly on the wall. See how it all comes together and pay attention to house. And he directs and poses the model because you can use those tips in any photo shoot. Okay, Go, go, go. Four my And perhaps this hand, a little bit up. Maybe on your likelier Perfect. That's cool. And actually come all the way into the front on yeah, from the Chinese have a little bit. And then just play a little bit like these away with your angle sale at school and look out of the door and look after the feeling and look out of the window. Yeah, that's cool. And if you can just swivel yourself that you can put your arm also under the box Yes. Perfect. Yeah, that's great. Yes. Cool. Very nice. And just your eyes at me. But Stavis ahead. Hey there like this. And just look out of the door again. Yeah, that's cool. And maybe you just bring all your hair onto the front. Cool. Cool. Yes. Breaker it nice. Exactly like that. Just for a little bit. This way can look out off the door again. Perfect. I don't see you. Anyone under right at me? All right. And so you don't want awesome. More smoke? Yeah, that's cool. Coffee? Yeah, that's cool. Beautiful. Awesome. At three. A. You can also mean more forward if you want to. Kind of get perfect. Awesome on look after sealing and one more out of the door and stop within smoke colon. And can you come in the front again? And then kind of if you have your hand So that's a dress like its side not visible And then kind of more like edgy. Nearly like, kind of waiting. Yeah, that's awesome. And smoke again. That's cool. Perfect. Actually, it was the same thing, but this This this way? Yeah, cool off. Perfect. Beautiful. I went with Yeah, beautiful stuff. Does them. And maybe one more way you're just angle your body again. The pain you just have your arm on. Yeah, Perfect. That's cool. And just looking out. Yeah, school, Alexis. So correctly, like, just show me the other hand. So it doesn't think. Yeah, perfect. Often. And out of the window again. Perfect. That's cool. And through the same thing, just whether these legs a little bit forward. Yeah. Cool. Life on one way. Just cross your legs, and then you kind of can also rest on your legs yet taste up. So stop, say, like this. Yeah, it was pretty cool. Let me do some close up, Cecil. I just want to think about the position. Maybe this time with your legs this way and just crossing. Yeah, and then? Yeah, kind of like resting on that, I guess. Yeah. Yeah. You can spray and look out of the door and up to the feeling
33. 40s - "WW2 Pilots" And "Where in The World Is Carmen Sandiego" Style: To recreate this set, you will need one beauty dish with a diffuser as your key light and a black people background on the thing that makes this stand out from the rest is a little gadget called the Spiffy Gear Light Blaster that is effectively a projector. It comes with some slides on, and you attach a speed light to the back of it and any old, cheap 50 millimeter lens to the front, a mate of the background on. Then, when you trigger that flash along with the beauty dish, using a pocket wizard from your camera, then it will project a background on to the black paper behind the model. So in this case, we've chosen old vintage looking airplane, and it might take a little bit of playing around to get the positioning right off the light blasted to the background. The closer the light last is to the background of smaller. That image will be so bring it back so it spreads across the whole background. But of course, without that, it shines on the model, so you have room for the model and the key light on the light blaster as well. So let's just go take a flying the wall view of the shoot. Sure. You're exactly how it all comes together. And, as always, pay attention to how Sandy directs and poses the model thes world tips that you can copy and using your own photo shoot regardless of the style. Okay, so if you hold it just a little bit high Embassy. So it s perfect. That's great. Stay like this. Yeah, that's perfect. And bring your nose the tiny, but what's me perfect office? That was pretty funny. Okay, you can put the sound again. I think it's too reflective. And maybe just towards a head. Kind of just like on your hip. Perfect. Very cool. And look out off the window. Perfect. And maybe hold your own head instead because it's just a tiny bit O'Briant's and look a tiny bit about me. Perfect. Is it possible to 1/2 goes up even higher with the so nearly that I don't even see the white off the blouse. Yeah, yeah. Perfect. Perfect. Just a reflective Otherwise, yeah, that's cool, of course. And bring your nose again. Little yet. Perfect. Yeah, that's cool. Coming, tiny. But this way again. Just so you don't run out of my Appling. Ah, yeah. Stay exactly like this. Don't move vehicle and just look out of the window again. Cool. Actually. Cross your arms. Yeah. Yes, they like this for one second. Just and maybe like your hands fully on hips. Yes. Perfect. Let's go. But still have your head this way Because off the life perfect and laws the glasses a little bit down, but still kind of just looking this way. Yeah, perfect. Perfect. Very nice. And you can change until the red dress. Cool. And maybe those bills hands kind of like fine things against this way. Yeah, school And keep your face. Just bring your eyes at me. Yeah, And lowers again The tiny but down Maybe so It's kind of more like Yeah, perfect. Perfect. And now it may be just like on your hip as a revising
34. Inspiration For The 50's Sessions: a sexy but fun shoot and gassing in a lounge or nightclub. You could set this up in a darker, more smoky environment. May be using the fog in the cabs or the whole scenario looks more mysterious. Or you can keep it light. Haunted like we did. Singing, dancing, laughing. Everything goes the nightclubs. Glittering background, crumpled aluminium foil, kitchen foil on Styrofoam Or, alternatively, a glittery secret background shot with along the lens and a wide aperture to produce lots of okay, the illusion of a glamorous, glittering club atmosphere. The retro mike was bought from Amazon for around $40 but it cost. We forgot to bring the stand. So we think the whole scenario with the model holding the mic on to the top of the light stand and suddenly said, these real life shoots. So if things go wrong, you have to improvise. There are also times when water of items wouldn't have bean the ideal fit, and in this case, Sandy uses background clamps to tighten the models close behind her back. It's a neat trick, and as long as the money doesn't turn around, nobody would ever know the model for this shoot was also new to modeling in general, so Sandy needed to find tricks to get her into the right mood as this set was supposed to be about a sexy jazz singer. We even change the music to help them on will get into character lots of fun. This session would also work as a sixties Elvis tribute to return to sender. But here we placed into the fifties because of the models. More classic look at flea markets. You confined riel vintage postcards. We went ahead with retro gift paper version for another romantic shooting from above style . If you don't find anything like this in the next year, you will find some more do it yourself options. Sandy had a pop up book about vampires that she didn't use anymore. Potentially would. We could have placed this shoot in thirties, when movies about Dracula and Frankenstein were really popular. We could have dressed them all up with blood and gonna make it really spooky. But we didn't want to go away from this vintage vibe to a kind of ah, Halloween vibe. So we stayed with soft look and just use. It is another way to show you how to use background textures. In an interesting way, the next development from such a concept book might be that you develop a background from a generic book that you don't need any more. You can stay in pages with black tea and design a classic vintage background where many dresses and props fit to a big soft box or natural light can be used, and you'll see how different the results are. I can't really say which is better, as both work in their own way, a simple but very classic looking concept. As we said in the historic overview, the fifties were Time West. Styles included everything from bombshell beauties like Marilyn Monroe, little dressed cigarette girls in nightclubs and prosperous housewives. The entertainment industry addressed this by offering everything from Hitchcock to horror and drama to country movies and family friendly ones. So there is no big surprise that Disney movies became popular. Cinderella in 1950 Sleeping Beauty in 1959. The romantic princess style was a safe, family friendly movie and even offered a bored housewife a dreamy way to escape their everyday life. Ah, film Wyler is another great choice for this time, but we like the idea of the Dreaming Princess once more shot from above
35. 50s - Jazz Club And Rock n' Roll (The Nightclub Singer) 05:17: for this rock and roll inspired set. It's another very simple set up. If you confined a Styrofoam board from your department store, just get some regular kitchen aluminium foil and glue it to that board and crunch it up. So it's nice and textured. And for the lighting, we're just using a beauty dish that is quite high up on a bit of an angle to the model. Beauty dish has a grid, so the light is very focused and optionally at the back. You can have a hair light coming in again to create a little bit of separation. The lens because of that aluminium foil and the texture from all the crinkles we wanted a little bit out of focus. So use a long lens, such 100 35 millimeter with a nice wide aperture to get a shallow depth of field, meaning that background is out off focus. So let's head into the studio and take a look how all that comes together. Very cool. That was really weird when it's so quiet, doesn't Oh, that's a bit launches. No, l love. I don't know Elvis looking. Allowing Dr Central that's false. Beautiful. Yeah, that's cool if you can. Kinda like, moves like, Yeah. Perfect. Very Elvis. Okay. Now, like, really kind of sexy. Sexy, if you want to be told you Bipolar. You from secretary victory. Every single. Yeah, that schools on different awesome drops. A special thing. Maybe just one more with this one on the move. Also, a little bit. Yeah, actually, if you can. With a stand and the microphone coming a little bit. Me. Yeah, that's cool. You nexus. That's great. Beautiful. Can we know it was a tiny down? Yeah. Can you? Perfect. Perfect. That's great. Feeling a little into Yeah, that's cool. Beautiful. Yeah, that's cool. Very good. I do this again, Lieutenant. Spring. Yeah, of course. Very nice. Yes. Perfect. Perfect. Beautiful. Yeah, that's great. Gives me like some really good shape with your shoulder. It's like, Yeah, Elvis, you're so cute. Well, back in the day. Not when he was order. Yeah, that's cool. Beautiful. That's cool. Yeah, that's great. Awesome. Very nice. Beautiful. And just let your half life. That's cool. Awesome. Beautiful. Very cool. I think I've been compelled. Feelings are never family controlled by looks. Sure, Rise something
36. 50s - "Postcard Romance" (Romantic Look With Gift-Paper And Props): vintage. That's a very easy to put together with some really cheap props and equipment. So here we have a Styrofoam board from a department store, which is kind of soft, comfortable for a model to Lyon. And then on top of that, just some gift paper that is in the style of postcards. So it looks really whimsical. The shoot is gonna be purely natural light on. That means if you have window in our cases from the right hand side, 50 millimeter lens, if it can go all the way down to 1.8 or 1.4, then you're gonna get a nice, shallow depth of field. Use a step ladder so you can get them above the model and shoot down. Make sure you have a strap on the camera to stop that from falling and go around the model on either side to get different angles to. If you can find some cheap props such as flowers or maybe some old musical instruments he might have lying around, then they are great to throw in there as well to get this fifties vintage postcards style image, huh? Maybe, if you can like even more than angle that the suitcase. It's more Diack. Yeah, perfect. Very good. And close your eyes again. Very nice and look right at me. And maybe if you can just hold. It was one. And with the other hand, maybe, Like, like, a sleeping position. And now just close your eyes and look straight up here. Like to the letter? Yeah, very nice. Maybe even next to you. Kind of like, I don't know. How would you place it if it's just next to? So imagine you at the train station and you're waiting for your train. And you're sleeping on the floor, as one does. And you have your little suitcase go often. Ah, yeah, Perfect.
37. 50s - "Vampire Ode" (Pop Up Books Make Great Textured Backdrops): for this set will make use of pages Thorn from a book or a variety of books placed on the floor beneath the model works really well with natural light. If you take something like a 50 millimeter lens with ivory white Apertura such as F 1.8, then you get an eye shallow depth of field, which works really well to get those pages out of focus. If you use a flesh, take one key light with a big soft box, 45 degree angle to the model. So the light spreads really nicely across her and in this case, 50 millimeter lenses. Another good choice F 4.5 and standard studio settings of 125th of a second and I so 100 as a model is lying down. It is a hard surface, which it most likely will be. Then make sure you put a little pillow or something underneath the head, so she's comfortable. Spread the hair around, which not only gives it a more whimsical look, but it helps cover that pillow up as well. So let's take a little look at our fly on the wall and see how it comes together, read it very nice and actually turning with your face. And you can Alexis arm down? Yeah, Perfect. And if you can even lawyer Jim and even more. More, More, more. Thank you. Also rise Lexus and let me change. This was my and that comes straight again with your head. So I'm just next to you. Well, it's kind of like how treats natural perfect. Thinks I mean yes, cool. Nearly like you're from leg in this praying position and fills your eyes again.
38. 50s - "Stained Book Pages" (Beautiful "Old Fashioned" Imagery On A Budget): to create this vintage that will be creating your own background from pages out of a book. So first, find a book that you show you're not going to read any more. Rip out all the pages, filled the sink with water. Get some teabags, black tea, Yorkshire tea, English teeth. Always the best. Throw it in the water to make it all brown and muddy and then one by one, just throw the pages into the sink. Let him sit there for a while, and then when you take them out, leave them to dry in the sun, preferably for a few hours, and they'll be nice and brown as if they're really 100 years old. Then you just get a Styrofoam sheet from any department store and glue those pages to that sheet. In our case, the glue wasn't that strong, so we ended up having toe take them on, which you'll see a bit later how we get around that. Stand that up against your backdrop and you're good to go. The lighting is super simple. Once again, it's one key light, with a large soft box slightly feathered away from the model. To soften that light optionally. You can use a fill light from the right hand side, really just to fill in the shadows, so keep it at the lowest power of possible. You definitely want to make sure that you don't end up with a second key light in terms of the camera set up in the settings 135 millimeter lens together, and I scrapped. When you're using the strobe F 5.6 standard shutter speed of 100 25th of a second and I saw 100 you can use natural light. In this scenario. You'll see Sandy do that as well, in which case with same lands, you go all the way to F two and bring up the eye so to 6 42 for extra sensitivity. So let's go and take the fly on the wall view of the shoot so you can see exactly how it all comes together and has always pay attention to how Sandy directs and poses the model. Cool, beautiful, come and teeny, teeny, tiny. Maybe, if you like framing your face if you can. Yeah, cool. Beautiful. Very nice. Yeah, that's good. Beautiful. Very nice often. And then the other one time is just, like, very gently on top. Yeah. Perfect. Beautiful. That's great, Lexus. And just lower your chin. The tiny but down. Yes. Perfect. And now, just look out off the door again. Perfect. Very nice. Cool, Cool. Beautiful Off me. Beautiful. What? Very nice. Awesome. And let me turn the flash off. Off you stay like this. Don't move. Otherwise I get your just blurry. Awesome. Very nice.
39. 50s - "Stained Book Pages" (With Props): for the vintage book cover background. We've just used pages of a book that have bean dipped in water with tea leaves to give them a brown vintage effect and glued them to a Styrofoam bought that leans up against the wall behind the model for the background. This will be a natural light shot. Take 100 35 millimeter lens so you can get a nice, shallow depth of field with F 2.0, to make those pages out of focus for the second half of the set, we can move to flash with a quilt as a background as a similar effect with the long lands on a nice white aperture. To give you a shallow depth of field was means the model is nation shop, and that background is nicely out of focus. The soft box Your key light will be to the side of 45 degree angle, slightly feathered that will spread the light softly across the model while still giving a catch light at about 10 o'clock in the pupil of the eye. Now, one key light should be enough for this set. If you do want to use a fill light from the other side, such as a strobe with a reflected dish. You can do that, but make sure that it's it's lowest power does that second light is really only there to fill in the shadows. So let's take a fly on the wall, look and see how the shoot comes together and have your genitals. But down Perfect. Very nice kind of play was your hair in the way that you're just looking down? Kind of like you're brushing through it traffic beautiful. Instead, nexus. So just does the same thing that I don't like this, but more like this. So it's a side part off the hands that I see Perfect. That's great. Beautiful. Just looking down. Awesome. Very nice. And now just look at me. Perfect. Very nice. And maybe shift your raid a little bit. Usual, right? Yeah. Beautiful. Very nice. Maybe kind of like bringing your hands into your hearts. Kind of like a praying position And have your hip a little bit backlots, actually. Perfect. Go nice and have tea is perfect. And just looking down to your hands perfect. And just flipped your hair on your on. Your short actually on your back. I'm actually frontal again. Yes, on you have your hips a little bit backwards. Yeah, the shape awesome. Perfect. And a little bit off a smile. Perfect opponents and laws of flowers actually a little bit down. Perfect. And just look down to the flowers. Perfect. Awesome. And I was up to the ceiling. Cool, actually. A little bit up Prosecutions. I don't lose your face. Yeah, perfect. Who Little my and look after the ceiling. Cool and look out of the Dogan. Treat your heads. Yeah, perfect. A little smile again. Perfect. And the right of me. Perfect. And just I said me perfect And just look down to them Beautiful one where your hair like on either shoulder like all the way to the front. And then the twigs are kind of access to the side. Yes, that's great. And actually, your happiness which was get public beautiful, often beautiful And look straight at me And look out of heaven and look out of the door Perfect And took down again toeses Issa and just look in the f perfect beautiful little smile Awesome! And look out off the door. Yeah, I was been No, actually. Windows great and big smile like, Are you married? Boyfriend's Okay, like your future friends Charming of coming like big smiles. It's just they're out there waiting for you. Beautiful. Very nice. And half your hands crossed again, Like in front. Maybe a little bit higher, Like in your tummy. Perfect. No. And the flip down through him. Oh, actually, I'm not quite a handsome Don't do See a face and close your eyes. And from there, just cross your arms. Kind of like your cattle yourself in perfect and turn the upper body tiny but towards me. And with this, I'm even a little bit higher. So I kind of like your cattle. Perfect. Beautiful. Yeah, gorgeous. And fills. Right. Perfect. And if you can drop this from I'm down. But like, just grab all your hair just with the one hand. Perfect. Beautiful. And one more time if you can just really try to grab it always away up and nearly like a messy up do or something. And yes, perfect. Awesome. And just I said, need perfect little smart, perfect, perfect, beautiful. And just look down with the flower. Oh, Asthma. Nice, Beckett. Me
40. 50s - "Sleeping Beauty" Style (The Princess Look): For this set, the model will be lying down on a golden blanket surrounded by white or gold tool on a variety of cloths and material. It doesn't take a lot to actually make it look really convincing. And for all of that cloth to really fill up the frame of the camera, you'll be shooting from above and around the model, so the stepladder will be a good thing to have so you can step up there and and shoot downwards. Natural light will work really well with fairy lights if you surround the model around her head on the side, and they will really glow very nicely if you're using something like a 50 millimeter lens on a very white aperture like F 1.8 or 2.5. And if you do use flash, then real simple set up. Take one strobe 45 degree angle down to the model. Make sure you lower the light down. Compared to a ziff, the model was standing up feather the light a little bit, so the light spreads nice and softly around her. So let's go and take a look at the fly on the wall and see how this all comes together. Close your eyes. Very nice and looks tragically perfect and look a little bit to this white paper. Perfect. Awesome. Beautiful. Yeah. All right. Seems it tongue, but again, right? Even if you put them carefully to the side, they have a life off their own. Yeah, it's really weird. Come back here. Yeah, or you can just stuff it. Yeah, just stuff it under there or even under this. Good. That's quite no, that's perfect. Yeah, that's great. Just be careful with faith boom certificate. So let's see what that's like. Very nice and fills your eyes again. Perfect. And just look straight up yet Beautiful and look a little bit over to the side. Perfect. And have maybe one hand a little bit lower. Yes. Perfect. And then the other one No, I think the other one is nice. Just have it a little bit more craft, actually. Sorts very kind off relaxed. Yeah, perfect. Beautiful. And close your eyes for my home. Very nice. And maybe have not one off your hands over your head. Perfect. Beautiful. I'm close horizon and perfect. Beautiful. Now that's very nice. Close your eyes and just I said me, I think I've been compelled. Feelings are never used to be controlled by looks. Sure rise. So IM said, there's no one in There's no want the super natural roles fathers side.
41. 50s - "Pin Up" Inspiration Reel: so way I want to take you. - I just
42. 60s - "1001 Nights": The Bazar (The "Exotic" 60s): to create a more exotic shoot like this one. You can collect tool and cushions, pillows, various cloths of all different colors from your local craft store, which is what we did here, and basically throw it all in the mix for the model to sit in and some Christmas lights to spread around as well. Teoh. Give it some extra flair. We started off here with natural light coming from the window for the right hand side, 50 millimeter lens F 1.4, and then added. Flash with one key light with the big soft bucks again, 45 degrees angle down towards the model and this time F 5.6. With the flesh optionally, you can have a fill light from the right side as well. Just make sure it's a much lower power to fill in the shadows and not to be too bright. Typically, you'll be using a ratio of 1 to 3. Serve where F 5.6 on the key light. Use F 2.8 on the fill light. The last cool effect that we do here is half the model. Hold a speed light underneath that blue glass ball, so you can find a glass ball, a any craft store. If it's a color rather than clear, then it works much better. Just have the model hold the speed light and a pocket wizard underneath that try and hide it as much as possible. So when that flash goes off, it appears as if that ball is glowing like a crystal ball. And it definitely saved you some time later if you wanted to recreate that in photo shop. So let's get back to the fly on the wall and see how this all comes together in the shoot. Pay attention to how Sandy directs and poses the model so you can take those tips to your next photo shoot on half your year, even rotated. Perfect. Beautiful. And just look back at the lamp. Perfect. Very nice. And you can just relax it down again and just take one more times these little coins with your Kendra's, grab a few and just looking down again. Perfect. And I'll just eyes at me. Perfect. I'm just looking out of this window. Okay, very nice. And just bring your chin the tiny but down perfect. And now just your eyes back at me. Perfect and tiny Bit off a smile Nearly like you're sitting in the spas are And you're selling all off your merchandise on now you have all those money so just try to be, like, super happy about it. Awesome, Beautiful. And just looking down to your hands again Perfect and looking out of sister Perfect. And relax your lips Just tiny smile Beautiful, Awesome. Let me just move the tiny But around very nice nights and just I said me perfect often Hey , let me also just moved with its around. Yeah, this is beautiful. Very nice. And one more time. Just a year Little bits. It's very beautiful and rich in that little bit down. Perfect. And now just ice out of the door. Perfect. Very nice. And just look down to the ball again. Let me get that Pierce. Well, well, and not just I said perfect and kind of tried to look like you're a little bit I'm spooked . Yeah, like this is some kind off fortune. I don't know how you call it a fortune ball. No fortuneteller. Christmas boys. Yeah, that's perfect. Beautiful. And look down again. Perfect. Just a Lexus. Very nice and just I said me again. Perfect. And just sit yet and push your tin even more out if you can And just lower your chin down, found on down, down, down Perfect. And have your hand candle nearly like you're wiping your bangs away Kind of nexus. Perfect. And just looking down Very nice And just have this hand actually on your knees Perfect. And just do the same thing again. Yeah, that's perfect. One more time and not just your eyes.
43. 60s - "I Dream Of Jeannie" Style (Romantic "1001 Nights" From Above ): for this exotic set. With the model lying on the floor, you'll want to gather as much colorful blankets. Pillows Tool is you can find them in a craft store, maybe even in your own home. You might have something already spread it out across, so the model can lie down comfortably and so that within that shot you can see all of those different multi colors. And additionally, as you'll be shooting from above, at least for part of this, take a step ladder. Put it at the head of the shoot. Make sure when you're up there you have the strap on your camera. So when you're pointing downwards that you don't drop anything onto the model, the lighting set up is very simple. That is one key light, with a big soft box aimed at 45 degrees towards the model. You can feather it slightly, so the light itself is much softer, using 50 millimeter lens and F 7.1 in this case, as opposed to F 5.6 or even larger aperture. Here you can get a sharper texture of all that material that you've got lying under the model standard shutter speed of 125th of a second, and I so 100. You can do a great job here with natural light as well. If you use fairy lights on a flash than the flash will overpower those fairy lights, and you just won't really see them in the shot. So for this natural light works a lot better with a nice wide aperture. So again you can use something like a 50 millimeters lens. We can go all the way down to F 2.5 or F 1.4. Now, here you got a raise your eye. So to compensate for the lower light potentially in your studio, you could even try an experiment with longer. Shut the speeds to get those lights nice and blurry and big. But just be aware that you gotta have a very steady hand on with 50 millimeter lens trying not to go below 1/50 of a second exposure. Otherwise, you're going to really risk blurry shot. So let's take a look at the fly on the wall in the studio and see how this all comes together. As always, take a look at how Sandy directs and poses the model. Take all those tips away for your next photo shoot. Yeah, that's gorgeous. And not just looked right at me. Perfect. Beautiful. Walking up. Yeah. Just look like me. Very nice. You and your head a little bit. This weight with light? Yeah, gorgeous. And if you can with this hand, if you have it over your head, perfect. And just close your eyes. Very nice. And now just I said me. Perfect. Yeah, that's great. And basically, just looking up. Perfect. You want to drape? Also see lights around. Very nice. And look, kind of nearly like out off the windows. Yeah. Perfect. Beautiful. Stay exactly like this on Mount. Um, can you push these little lights even closer to Michele's body? Yeah. So they're nearly more around. Yeah. Yeah, that's nice. Beautiful. Exactly. Nexus coaches
44. 60s - "Vintage Rose" (Elegant "Flower Power"): for this set will be using a vintage rose background that we found on eBay, with lots of pink and red and white patterns on his own. It can look a little fake of everything is sharp and in focus. That's why, for this shoot, the best thing to do is to get some distance away from the background on the model and use a longer lens, such as 100 35 millimeter lens. The lighting set up is again very simple. We have one key lights of the 45 degree angle that is slightly feathered, so it's not directly on the model to soften that light a bit optionally. You can use a fill light as well from the other side. Just be careful to put it at its lowest power because you don't want to have a second key light. You just want to fill in some of those shadows and camera lens again. 135 at 5.6. If you're using the flash F two point. Oh, if you're using natural light standard shutter speed off 100 25th of a second, I saw 100. If you're using the flash. If you're using natural light, go for I So 6 40 for that extra bit of sensitivity. So let's get back from to the fly on the wall, See? Hours done. See how it comes together. Okay, Uh, necklace. Can you bring it out? Yeah. So it's not just house. They're cool. Perfect. Awesome. Very nice. Come a teeny tiny bit towards me. Perfect. Awesome. And stay like said, Let me move a tiny with bed. That's it. Cool. And that's I would kill for that half. That's so cool. Cool, beautiful. Cool. Right now stay. Exactly. Nexus. That's cool. Then it's look out off this window. Perfect. Very nice often. And just I said me. Yeah, after you have you are chin this way And just your eyes sudden if possible, Cool and just Yeah, lets them down. Yeah, let's go, Actually, look a little like a bride was dressed and just look out of the door again. Perfect. And just so you turned down. Down, Down, down, down, down. All right. And you can relax. I think I've been compelled. Feelings are never used to be controlled by you. Don't
45. 70s - "Detective Retro" and "Disco Fever" (Psychedelic Colors And Smoke): the basics of this set up very simple. We have a circus style, very colorful cloth backdrop and just a single key light, which is the beauty dish with a diffuser at a 45 degree angle to the model, meaning the catch light in the pupil of her. I will be at about two o'clock. The lens were using is 135 millimeter at F 3.2, with a standard studio settings, 125th of a second shutter speed and icer 100. That lands gives us a nice little crop to a 3/4 length of the model's body. Now, too, extend this set and make it pop even more. You can set strobes at the back, facing towards you the photographer with gels on them to add some color toothy overall scene. So we use Roscoe color effects gels, and they come in various thicknesses. So you just need to adjust the power of those strobes, depending on the thickness of the gel, to make sure that you don't overpower everything. Another thing that you can add to that set from behind with your assistant, which in this case is me is atmosphere Marisol. It's basically smoke in a can, and your assistant can stand at the side just in front of those lights with the gels on them and simply spray that smoke whilst you're taking the photographs and you'll see that in the video. It creates an amazing smoky effect with the color gels really enhancing and spreading that color all around the scene. So let's go take a fly on the wall view of the shoot and show you exactly how it all comes together. And maybe one was hands on hip and still looking out this way. Perfect. And if you can give me a little bit more shape with your shoulder so it's more angry is a way up or down and can you cross the legs? Awesome! Yeah, that's great. And lawyer chin a little bit down perfect. And you can just relax your legs again and maybe one more like just crossing your arms and looking out off the door. Yeah, cool and one more time out off the window and take your hip a tiny but bag if you can call and I'll just your eyes at me. Perfect. All right. That still is a job Hand at school. How's that look? Leave more seventies? No. Very nice. Then returns the orange, the tiny but down. Yeah, that's cool. Often Cool. Very nice. Awesome. All right, you stay for a second, or you can go a little bit out, but don't run away. And I want to remove this out again, and then just do the black from behind this a smoke again. All right? So just do whatever movement actually go tiny. But those are because of sister, your lie it. And then you just pray from beside again and you just move with Very good. Yeah, Cool. Coffee and cross your arms and look out off the door again. And maybe like a sinking position. Kind of. Yeah, that's cool. And maybe one way to kind of frame your face next. Yeah, that's cool. Cool. And maybe just hands on hips again and cross your arms again. Cook. Awesome. Interest rates is a camera. Okay?
46. 70s - " The Flower Bed" (Golden Brown 70s Look): I think I've been compelled. Feelings are never found controlled by I came. You don't Your looks sure rise something. So IM said, there's no one. Oh, this is so relaxing. Don't fall asleep, okay? I think that looks cool. I might have to change it a bit once I'm up there for this set. As you can see, we threw down a whole bunch of fake plastic flowers that we got from Michael's, which is a craft store in the area, and the lighting set up is very simple. We have one key light with a huge self box that is angled at 45 degrees down to the model and slightly feather to soften that light. If you've just done a shoot, whether model is standing up on your light is being a little bit higher. Just remember to bring the light down so it's lower and closer to the model 50 millimeter lens F 3.5 and the standard shut a speed of 125th of a second, and I so 100 for this set. Because the model is on the floor, you'll need to step ladder again so you'll be up on top of the stepladder facing down towards the model. In this case, always make sure that you've got the strap around your necks of the camera doesn't fall. And for a bit of a variety, you can come down from the latter and just walk around the model from various angles taken shots as well. Let's go and do the whole fly on the wall thing and take a look at how it all comes together and has always pay attention to how sandy directs and interact with the model. Cause you can use these tips in every photo shoot that you do. Yeah, just on statin when met has to push in more flowers. Because when you move, then they were just skip a bit. Flowers on me. Yeah, that's cool, I think. Probably like one arm on your belly and the other arm a tiny bit closer. Yeah. Cool. Awesome. Is that hair okay? Yep. I think that looks good. Except this one, sir. Tearing up or down on the side? Yeah, that's better. Kill and then you can use then close by and just push this even in a little bit. Because on the right side I see the tool again, Like under her head. Oh. Here. Yeah, that too. So can we stick something in this Gaps out. I think this one that you put in it goes down, right? Yeah. OK, that's cool. Oh, that's fine, Actually. Close your eyes all the way. Tough. And maybe Was this one, like, over your head again? Yeah. And then if you can just relax it, if that's fine. Very nice. Yeah, that's cool. Beautiful. Very nice. And just close your eyes. Yeah, Miracle.
47. "Modern Vintage" Reel: Film Noir, Hollywood, Monroe/Hepburn/Bond Girl Styles...:
48. Intro To Post-Processing: "Yes" Or "No" To Contrast...: well come to our seventh and last ingredient in our recipe for great portraiture. And here in bridge and photo shop, we can bring it all together. All we can even take our concept to the next level. So in modern, then the tratar graffiti we have two options is always stay authentic. Was a black and white version off the image All we can also apply a color film effect, and in both cases we have different options on how we want to manipulate the contrast and you might think. But how is this possible? Isn't a black and white image always a black and white in much? Nevertheless, if it was taken with a film camera, all the city s are in the monochromatic Dre peg Or if you converted a color in much with the help off bridge, light room or photo shop into black and white, and the answer's no. A monochromatic image can have as many tonalities as the color image, and there are literally dozens off forms how you can convert and adjust a black and white image. So it was a basic question you need to answer is, would you like more or less contrast. So this is one of the modern, been church conundrums. That hurts me the most, because if you remember my slowness, color, contrast and confidence, so manipulating my images into less contrast, that is a difficult one. But sometimes it really works so that you stay in the more gray scale tonality instead off a true black and white version. Which means your image is less gray here in this case, for example, and it has a proper white and black point, which you can check in leverage. Or so he had, obviously, also depends on the era. If you have a shot that is the Klassiker forties Hollywood lemma inspired in much was lots off contrast. Then you obviously don't want to ruins us in much by now, turning it into this more muddy grey scale and photo shop your once that it stays more contrast e the cure, for example. So, however, if you have taken more off a twenties era emerge than sometimes, this less contrast that can look a little bit more would squeal like the typical film look , especially even your shot was a higher eyes all on purpose to create this newspaper look, and that can be also yeah, be very interesting. So same was color images. Contrast, manipulation or color enhancement can bring images like this one year into a whole different direction. But more about this color conversion later first lets that was converting our images into different black and white looks.
49. RAW "Magic": From Black And White To Color: all right. First off, all as promised, when you are shooting your images in raw and NJ pick than the raw version will convert back into the color version. And I recorded this for you when I opened these images so that you see how that actually happens. So now you can see that slowly is a magic begins where the original raw version goes back into the color version. And I think this is pretty cool because, as I said before, this way, you already get the idea off the black and white and much. And yeah, it's just easier for your eye to see the tonality on your LCD in black and white because especially here was the curtain you might be easily like just looks a little muddy, and I don't really like it, however, in black and Wired, all of a sudden it's a whole different story. So let's open one off those images and bring it into a bridge
50. Black And White Versions In Adobe Photoshop: all right, So now we are here, life in bridge and you can see how everything was converted back from the original raw. That was in the black and white tonality. And now it came back into the color tone. And I think it's just really cool because especially when you should in Raw and Jay pek, you still have see it? Yeah. I mean, what would like better to elect black and white or color? And I also have to say, That's the black and white version you and J pic. That's not really a bad job from the camera itself. So if you don't want to go through the trouble and go into bridge or light from off Photoshopped toe converted into a black and white, if you like this version, then that's totally up to you. I think it's not bad at all. However, the idea to have the original raw that's off course a little bit better because you just have more options available to you so we can go through different things now in bridge or a CIA and and photo shop, and you will really see how different a black and white image can look. So first of all, let's opens its not into a C on but just clicking on this one, for example. And then I just kick on to enter or return. All right, So now is the image opened up in a CIA, and the quick and dirty trick would be to just lower the saturation Tu minus 100. And this way you will get the first version from a black and white conversion. That's probably fairly similar what your camera would do if you have some monochromatic setting. So that might be similar to the look that we already have. Let's create a snapshot because then we can just compare these. We just ditch this one and then not just create a new one and its causes one, and that's a OK and the issue is from here. As I said, this is very basic. I mean, you can still create, you know, more contrast or less contrast. So you have some options here and the basic panel. However, what you can do is that you now change over or color here. So, for example, of live lipstick isn't intense enough and so on. Usually we had this option here in H s L. Adjustments before where, Actually also said black and wide adjustments were here. You could just click on the box and then the image would be converted like this. But then you could say Okay, for example, the lipstick could be more extreme or less extreme. And then you could play here with so sliders. However, that does not work years over. If you Recchi anything because there is no saturation in the image Hey, see us like, yeah, what you want me to do? I don't see any color because you d saturated everything, so that doesn't really work here. So for this, if you just want the general ideas and nothing, go for it, you just to see how it would look with less saturation. And of course, you can also apply here these canned off the saturated looks. So if you don't go all the way to minus 100 then something like this would already go into the more vintage direction. However, yeah, as a general stand that for us, it's probably not so good. So when I click near like a double click, then just goes back to zero. So what was the better option from here is that like I said, this is Italian news that an a c I you have no preset. So if I click on here, then you can see that I have thes different options and here as a color options and also can click here on black and white and once more I think the adobe raw version that's pretty similar to the one that we just had. I mean, we can also see what a c ask things here about Adobe Monarch Room. If that looks any different and the fridge is closest down, we could also create in us a snapshot tm that students stressful. That we kind of compares is I think this adobe version is not too interesting to be honest . But if you go back in here and we clicked onto camera matching, you can do him more things off course. But I think the more interesting version as a legacy, because here, if we just scroll through, you see all these different film sets. So Akbar Fuji and so on the oil films and like celluloid film. But you could take your image on and yeah, let's good down to see that. Maybe something like here. This one, for example. Yeah. Yes. DACA lipstick. Let's see if this even more. Not a difference. Yeah. Here, for example. This wreck, replica room B and W are the Kodak. So you see that there are some. It's a very such a change. Yes, nothing media would say. So that's a this wreck replica, chrome one. That would be another look that you give to you. Imagine it's a little bit more, Matt. So if you just kick onto this one, for example, and closes down and go into the basic panel once more, then as you can see, you could change, You know, for other things that we could go here into the contrast or less contrast and so on. So it's a little bit of shame that you can't really see what happened here behind the scene . So if you create your own presets in here or maybe you brought presets, then you will see that all off those adjustments are actually in Yemen. And then you could do some fine tuning here. You don't really know what happened behind this whole ese are presets ing. But you could. Yeah, at more contrast. But nevertheless, the more interesting singers. Now let's say we like this look as it is for now, and when we go back into our age as L now you see it's not a GIs el anymore. It's no black and white mix, and now you can change the color scheme ones more. So if we say we wanted this really dramatic lipstick, for example, like pretending it's a super red ruby red lipsticks, and here we can adjust this further. So therefore, the preset is probably a little bit better this way, even if it's subtle and you don't really see a huge difference. However, if you click you onto this profile in black and white, at least it gives you the idea here in the ages, L, which is now called Black and White, makes so for this imagery made no difference. Sing Get so dramatic. However, if you had now maybe a background that was like a vibrant blue, then you could change your more equals and blues, and this way it would be less intense in black and white or more so. That just depends on the image. I mean, years this was already a black and white backgrounds or not. A lot of things happen here because off the wardrobe it's also a black dress. However, as I said, if you had now a different colored dress and then you want to play here with so sliders, that can be a very interesting option. So let's just create a quick snapshot off this a swell. So if you just go down here and then you just call it three than this would be now a dark lipstick. And just for the fun of it off cause you have here so many options to change No, your black and white image. So we could also go ahead and say, OK, we wants us now. Like really contrast. Yes, we said in the golden Age of Hollywood. So let's go here quite extreme, Mrs. Over exposed skin and maybe doing the highlights of tiny but down shadows maybe, but up something nexus. So here you can get this extreme idea, and then we can do it once more and just say, All right, this is more often extreme change, and then we can also go see as a way around, and that's Okay, maybe not quiet. So extreme. Let's try to make it a little bit more, Matt. Something like this. Maybe just knowing it's a bit down. Only also tiny but too extreme. So something like this in the basics here. And then you can decide if you want to reduce the clarity here a little bit to give it more as a soft effect. Yeah, I'm usually not a big fan to go either way too extreme, because I think all the way this looks very muddy and horrible and all the way this way. It just looks like really bad HDR. So I keep it usually between plus 10 and minus 10. So I think if you just wanted to create a little bit off a softer look, then this would black a swell. And we will also talk about this a bit more in 40 shop, but really quick way to give your image, um, off this kindof much look so that it looks once more a bit more like a fill in than we could just create this slight here. Also, we go down and the highlights, and then we open up the shadows, but not in the craft. We basically just drag a little bit up. So this way it looks a little bit more maps. So as you can see those readings, that's to help me. Because I, like, contrast, however, this this once more, just a different look. So that's great. And another snapshot and let's call it five and say, OK, so here you see already how many options you have, not even for the shop just being in a CIA or if you like to work in light room than, of course, all of these things are available in light room as well. So if you just flick out through here than we can see, this was pretty much just CD saturation, like Coward would probably very similar in camera. Then year, we changed us into the preset that now SCR gives us in the basic panel from here. We just changed the lipstick in our ages L, which was now the black and white mixed and then recreated from here. Our own version into this really high contrast image probably took crazy because I believe that things already burned out here. But just as an example, and from there we went into the more Matt direction and a little bit softer. So, yeah, as a quick and dirty overview, you can see already what's possible here in a CR, and that's resets us now. So I can also show you what can happen in photo shop. So if we bring this back into color, so now we're back to the original version pretty much next just to reset this one more. Okay, so this is now our original version and let's opens us up into a photo shop.
51. Black And White Versions In Adobe Photoshop: So now we are here in photo shop, and this is where I would normally do my black and white conversion. So as you have seen an A, C. R or in light room, you have so many options have to bring out already pretty quick contrast. Or if you want to have more Matt Image forever, I'd like to apply this last because first of all, I but two of my yes, getting rock flu, I would to maybe some softening or some frequency separation and so on. And as we said, if you are interested in any of those work flow techniques, then just check out one off my other tutorials. But for now, we want to just concentrate on the possibilities here in photo shop, in regard to the black and white. And once more, the easiest trick would be to go again into the U. N. Saturation. And here you could also lowers the saturation. So that's the same. Yes, we have done in a sea isle. However, the cool thing is now off course that you're not working on the image itself, but you work here on different layers, and that's why I can prefer to do these tonality changes in photo shop. So here we could go ahead and say, OK, as before, Maybe we want to have to. Slightly vintage tone was less saturation than we could lower here. The capacity or something that's also pretty cool is that we can change here, blending modes as well. So if you want to bring in our more contrast, then we just go into soft light. And then we have this little less saturation, however, in the blending mode soft light and was maybe 25% capacity. And then this gives us again a different tonality but lets the details for now and the real adjust mint here in photo shop. It's actually called black and white, and this will look now. Yeah, familiar to you, I would say, because one's more. That's very similar to what we have just done in a CR. And here you could also go in and say, OK, we want to have a lipstick like really increased, but offered No, of course not so strong because, and any red adjustment also will affect the skin tones because in the skin tones is always a little bit off orange and red. So I would say, Probably hear a C. I s that town because it gave you another slider are so to speak. So they were just no options, But again, a little bit we could change. Here's the skin because also brightened the skin this way and then maybe we go down a little bit and then we can see the before and after. And yeah, this would be an interesting look here. The next thing and this is now a little bit strange because once more it was a black and white. Let's get going. This one's not. You get more off a grayscale tonality, and then you can change. Here's the attendant. So that's pretty cool, however, what I kind of like often when I want to give my images more contrast, that will happen in this area yet the Grady in map. So let's just talk with us off so we don't get confused. For now. Let's just bring this out tiny, but maybe to the side, so that you can see the image of the better. And now we want to go into the Grady in math. So if you're colors are not your black, and why it? It doesn't really matter. However, if you wanted to reset them, then you can just press G. And then there were reset in case reality any as our color and then was X. Then you will have black here and white here. It doesn't really matter. It's just making things a little bit easier. So however, we will go now into the Grady in map, and then you will see we will also have a black and white image. And as I said, if it's not exactly like this now, if it's not black and white, but maybe it's the other way around. Or maybe you have a completely different color, depending on when you used photo shop last and then maybe you have read or whatever you did before. And as I said, if it's not in black and white, it's no problem at all. Just click onto black and white, and then you have the right adjustment, and then you have this really contrast, black and white, and usually that's my favorite look. So if you compare it basi really black and white, that photo shop gives you here in the adjustments. So if a talker off the Grady and map and I go on to black and white. You see that this is a lot more like a gray scale and much. And if a target us off and on again, you see how much more dominant the callus are. And if you wanted to see what your black point and white point is in such an image, then it's very easy. You just go on to your levels. And then here you just press onto this little back, Yes, triangle to the left, and then you go on toe old option, and then you see how much leg is at the moment in your image. And if you want to have even more contrasts with, like a true black and white and much instead of a grayscale, then you just pull the slider to the side. So now is the black is even darker, and the same you can do with the white. On this point year was auto up. You can press down, and then you can see exactly how much white comes into your image. So it was a true black and white image. You want to have one black point and one white point because then it's less gray, and it has this kind of contrast. So if I go here too extreme, then you will see how much white comes into the image, and this area will be now blown out. So remember when we did this crazy adjustment in a CIA? How very bright this area became was a light hits a spot here on the, um, and on the hand before it reaches the phase. So that's two. Bicker when you have anything in front off the face, whether there was a light its first, and then this really easily breached out. So you don't want to overflows this area because then it just gets ugly. If you wanted to, princess, because you will lose here. I'll this detailed. So don't go too crazy Just that you have this tiny bit off a white point, something like this. Maybe it's normal year was the highlights that they would reach out a little bit. I don't really worry about suicide, sings. This looks now good. And then we probably went a little bit over bought in our black point. Because we see here, there's just a lot off black. So let's not lose too much detail in the shadow, so we can just diet this back a little bit. So once more, if you just see the before and after, it's just a subtle difference now, with even more tonalities. And from here I could also brings us now into a group with command or control. Click on this layer with the Grady in map, and then I clicked onto my little group. I can, and then you see how drastic changes so that would be the black and white from the adjustment and houses A C. Grady in map was even more levels and the typical black and white point. And if I delete this one now, just get rid off this and go into the levels once more. Then you will see that if I go on to my older option, Yam was only the black and wide adjustments the grayscale. There's hardly any leg now in the image and the other way here as well. You can already see that's the white doesn't quite reaches this little trying. It was auto option. I don't have any white point in this image at all, so That's what amend in the beginning to say. Okay, how do you want to convert? You? Imagine you want to give it the true black and white local was a black point and white point all. Would you like the in much more natural in this grayscale look And of course it will look. Yeah, less contrast you However, as we said, if you did this on purpose, was this kind of natural light Look or you just want to create the soft image. Then there is no right or wrong, so just play with it and have fun.
52. Photoshop "Dirty Tricks": Use A Third Party (Nik Collection Silver Efex): Okay, so these were my tricks on how I would approach an image easa in the soft gray scale with my black and white adjustments, or was a more contrast? He look in my great aunt map wherever you can. Also do all of your workflow in photo shop. If you also want to do skin softening frequency separation and so on. And if you want to go then back into a CR because you may be liked the option to have some more sliders and hear, then that's also no problem. We can just delete this for now and create a new layer was Commander Control and J. And then we go into Filter and its housing. Since a few photo shop versions already, it's possible to use the camera raw as a filter. And that's pretty cool because and you can do all off your adjustments instead off in the beginning, where you can really apply them onto a layout where it's pretty much just your basic adjustment. You could go in here, say um, okay. We want to create a contrast and less saturated look, and we want to maybe change. As we said, more slights and here where we have oranges, for example, that we don't have in photo shop. Remember when I changed the reds here? It also change the skin tone and you see year. It's a lot more precise in a CIA, so this would be possible now. So if I just say, OK, then this will look would be now on its new layer. And the great thing is, from here once more that you have sees option was blending modes and you can lower the capacity so you can bring in any change and then say OK, instead of doing it right at the beginning was this be not applied on the whole image. Now you have it on a new layer and you know of your capacity. So that's another trick here in photo shop slash a CIA. But I want to show you something even better. So if adjusted leads us for now and create a new layer with command or control and J and the singles that you're like, OK, maybe you more off a beginner. You don't want to spend so much time here in a photo shop or a C out to find different adjustments are maybe you think it's better to have something like a panel like what we had was the presets where you could see already the effect on the image. Because here, of course, you just have to do a little bit trial and error and see what you like. And then you have two targets through here, and this might not be the best option for you. So in this case, there are certain parties available. What is that awful? Such a Pamela and what I quite like. It's a nick collection. So if I go into filter once more into the nick collection and you see 1/2 here, quite a few and then there is one called silver effects pro. And if we opens us, then you can see on the left side you will have already different effects, and you can see how they would apply it with the image, so that can be pretty handy. So now it was opened up and yeah, you can see we have sees high contrast. It looks here a swell. And if you scroll down, you see, some are a little creepy, like high key that nearly looks once more like this really bad HDR. So these might be more effective on landscapes and so on, because this panel is, of course, not only here for poor trades, but it's for everything right now. So here you have also more presets, like a classic vintage and so on. But these are all black and white images. That's what's silver effects, because it's pretty much yeah, Suva are a graze gay panna. And if we go through here, then one that I quite like If you want this Matt look that I mentioned in a CIA, then we could apply this one. And on the right side, you have different sliders here where you can also change the brightens, the contrast, the structure and so on. But usually I just leave them alone and the open it onto a new layer, and then I can adjust the A pass ity once more. So the problem was, Nick is that while Nick Waas, the company that first created these panels and then they were taken over by Google. But then Google stopped to support these programs so they didn't want to continue with such programs. And now they Yeah, I think that just gave it up. So for a long time there were no more updates. Which means that the last time when Photoshopped had an update, all these programs there sadly crashed. So I can't opens us now, as I would usually do, I would just go onto okayed. But if you want to use this program for the first time and the nice thing is set because nobody owns us now, for a long time it was basically for free. Years of Google just gave it out for free. And then I just found it, this one because the other ones actually bought before, but the as this one was for free. So there is no more support, but I can kind of work around it. So if I don't go onto okay, right now, I go into settings and here I have to go into after clicking, okay, and year by default. This would be applies if it'd effect to a separate layer. I think that was a default. But I changed us now to apply the fear, that effect to the current layer. And since I've worked around this way, it worked again. So if I just press OK then this effect will be on its lay on that we created already in Fort a sharp, so it will be just being applied to the same layer. So if we see now years now, the effect as a promised didn't crash, but it wouldn't create. Now will new layer that spotted it before And it would also cause this layer nick collection or server effects or something access. So that's not happening anymore, because now the effect is applied on the layer that I created. So yeah, it's a long story. Short. I think there is now a new companies that took all of those things over. So hopefully in the future we will have updates again because it's a pretty group ham unless you've just seen. So if you think this is not too extreme what I said us off course, you can love the capacity. The issue is that now you don't have to black and white image anymore, because the moment you lost the capacity this layer shows through, I mean, it's kind of cool once. No, it looks kind of in touch already, but that's not what we wanted right now. So if I just bring this up to 100. Now I can just Yeah, use a little trick andan easier. And I can, for example, just go back onto my adjustments again with the soft adjustment. Or if you want, you can also use the Grady in map. And now I can't lose you opacity because now I have black and white underneath. So now I could say, OK, I do like this much. Look, however, in this 100% it was maybe a little bit too extreme. So if I see what my black and white put would be, usually as we've seen before, we just clicked onto the adjustment and now was Nick Collection was a server effects. Now I've got this really nice Matt look, And here you could play with the opacity. And if you like this look, but maybe you don't want it quite to extremely Matt. Or maybe you just don't want to work with Nick Collection because now he worried that it might crash. I mean, you've seen how we can work around that, But nevertheless, maybe you are interested how to create something similar Lexus and four to shop. Then let's have a look. It's us. The next section
53. Photoshop Black And White "Recipe" For A "Matte" Film Look: So if you like this kind off matter, look, But you don't want to use Nick or you don't like it may be quite so extreme. Then we can create something similar here and photo shop. So for now, if I just click onto this layer and I just groups things together and then I just call this Nick, Let's me. All right. So, uh, effects just so that we know what this group is about, and then we can say, OK, we want to create something in this area. So first off, ever just charged with us off. So we have our kinda in much ones, man, and the never go injuries a black and white. And here we can already make it a little bit more extreme. So if I brings us down than ever, just bring the highlights a little bit down in the face, maybe about 16 and then I want to bring the yellows. Our because in yeah and Photoshopped This effects here. My skin tones a little bit more like we said in a sea as this would be the oranges, and I want to brighten these tones and the lip and everything, like this. I wanted to just backing down Maybe about 138 as we said there on any other colors and this image. So if you have now a background that has green, blue and magenta and so on, then this might be was wired to play bus. But yeah, I don't really have any other tonalities. So for now, that's okay. And the next thing I want to show you is what we can do in curves. So for this, I click into this area here into the scarf adjustment and once more, if you want us not imagine, that makes sense to lower the's spectrum. So you don't want to created a curve, like if you want to have more contrast, you would go in and you would lift this area and brings us down. This would be considered an S curve, and that will give you more contrast, which might work in images where you would like that. But here we said, we want to create this much look and the easiest way to do so is that once more you drag the highlights down and we don't really want that This just itself years with just the highlights down, and then we want to lift the shadows. But again, we don't really want that. It's now in the curve. So as I clicked on here, I've got these points. But I want that this stays fairly straight and only gives me a little bit off this much look. So I just want this down in the highlights and the shadow area I raised a little bit up. If you want to bring in some tinned into your images, we said you could do this was already shooting this image in atonality that's like a flesh or daylight is a lot cooler or warmer caravan tone. If you would just have your Jay Pek. However, here you could also say, Maybe you want this image a little bit warmer or cooler, and we can do is in a similar way so far. This I would go into blue and here we can play, either with the warm terms office acquittal means. So if I brings us down and the highlights that were created a little bit more for yeah, warmish yellowish tint, and if I would lift this area up in the shadows, then this would create a more bluish tone. So this is now a little bit too extreme, but yeah. If you just wanted to create a ever so slightly tint, then this would be possible here. So you could also create something in red and green, but usually for this kind of vintage. Look, I prefer the blue one year. So then you have this blue area in the shadow and the yellow area in the highlights. So this this one and the next thing we could do in regards to our Yeah, that's Matt. Look, if you don't want to use the curves, then we can also do this and levels. So for this, we open this area here once more that you've seen already before this in regards to the black point and the white Point. And here, first of all, we can drag in a little bit more. Contrast bonds more because I think a little bit, yes, fine. And also, it's a quiet. And then if we want to create us more, Matt, look, then we can bring in this output level here, this one down here. So here we can also just makes us a little bit more muddy over oil. If we track this into this grayish area and then you see houses gets now really soft if you go to extreme than this nearly looks like you have, like a white overlay on it or something. So we don't want this to extreme. But for this man look like a little bit this way in the same with the white if we go to extreme and gets to muddy. But you see already how it creates us much look very similar toe the cuffs. So I think we want to go a little, but this way. Okay, so this looks already pretty cool If you're thinking now, Yeah, this would not look, That's canonize wherever you also want. Maybe a little bit more contrast once more we can bring in radiant met. And again if that wasn't now in black and white, if you didn't have the same set up, we can always go in here and say OK, and this is not too extreme, because now I just kind of got rid off my matter Look. So I just died suspect down again. It's just give me a little bit more off a contrast and then I can still decide if I think, Yeah, it goes into the right direction. But maybe you want to create no even more in your level. So if we just go back into the woods, then we can also say maybe we want to create even more off this very much and soft look. Maybe now that we have more contrast, we can go in here and the more extreme So I think that looks already pretty cool. And the last thing you could do here is that if we look in tow, you just groups is together from now. If we look from this one, what we've done now into our next Siva, then you see that these highlights here in the skin, they are also very Yeah, I kind of Matt. So how could you do this? Either You work on the layer mask so you could do an overall adjustment. So if you just go back in, Yeah, we could say, for example, you want this area now really bright, and we could go back into course once more and see roundabout with this area of CIA. Say we want to click in here and we want a brightens us something like this. And at the same time we want toe makes us even. Walnut comes in, Maybe map of you know too much. Something like this, maybe. And now off course, it will affect the image over oil. But we can just wanted this in this area here. Right? So we can just invert this car off with Commander Control and I now all off this effect is gone and will be for brush. And now we have to change this year to a white color so that we can brush this effect in because moment, it's completely gone. And we said, We just want the CIA may be in this highlight and then was maybe 50%. So I'm just pressing your five. And now I have 50% off my brush. And now I could brings these areas back in where? I think this would be a little bit writer. Maybe. And then I don't affect your image another easy way. How you could just select those highlights if I just needs this one now. Equity introduced now another level. So it was the longest shortcut ever. Shift oiled or option command or control and you re created now layer from all off those adjustments that we have done so far. And then I can go once more into select. And then I find color range. And here I can just with the cinema Lessing, where we just painted this in verse white. As you see here, you can also select areas that half a certain tonality. And if you want to be more precise, you can even click in here. And we said, yeah, this better because we just wanted to affect this area, right? And then you can yet be. House is the fuzziness if we just diet, astound and less area is selected and if we bring this up, more area is selected and if I just press OK, then you can see the seas. Yeah, running ends where this area is now selected. And then we could do the same thing again. Now we don't have toe brush it in. Now this area is selected in any adjustment will apply to this area. So if we click onto this, I can now it will not affect my whole group. It will only affect this layer that I just created and now I can do the same thing. So I can just brings us up and makes us s brightest I want. And if I wants us a little bit more off this much tonalities and I can bring this down and that can bring this in Yeah, Then it gets maybe, but to muddy, but something next set, Probably a little bit too extreme. To be honest, bring this down ever so slightly. So this way, if you don't want toe, yeah, just the whole layer. And then bring in the adjustment mask and bring em back out in this way. You could also just yeah, select those areas where you want to have a certain adjustment and this is fairly easy as well. So this was he before this is see, after just ever so slightly that readjustments is so if we look at this whole image now, if I just close this down So this was the original. Let's bring in one more. So we can also see what your original black and white adjustment would have. Bean. So this is the original black and white. If you don't want to use the great and map, let's say we just clicked onto this one. So that would be that. What we have now our adjustment. You can see it's now this really soft much. Look, yeah, looks very good. I think in regards that it could have bean in this oil school film around. So I think that's pretty cool. And then if you don't want this and you also have the option to use the Nick Server, Yeah, collection, the new collection. So the effects proto that would be the proper name for it. So just wants more others with people's the Siva effects. And this was hours so you can see ours as a little bit more subtle and the nick want us a little bit more extreme. So that's how it would have come out this way. And that is really up to personal taste. So I'm thinking if I want to go but more natural things, this would be pretty cool and announcing what we could do. He as we said, we can bring all off this back into a c r. When press once more the long struck whatever shift odd option command or control. And ive I'm telling you all off these just in case you don't use a Mac. But if you use a PC and if I go once more into feta and into camera raw food item I can open this again into a dough became are wrong. And from here again, I could change know certain things so I could even have less contrast or even a bit more contrast something like this. If you still want this matter, look, as always, you could change it even more. But what I kind of like better in a sea as and in photo shop said, I can include Grail. So if I go into my special effects and I have since grain option year, and that's also filter for it. But one thing that's really that good, and here I just bring in a lot off grains or probably, yeah, do it a bit more extreme so that you can even see it on this recording. As I wise, it might be not so noticeable. So this is now very extreme. I wouldn't do it access. Usually that's just so that you can actually see it. So something that exists so you can play here with the amount of size ends the roughness, and then I just say OK, and once more because it's on its own layer, you can change the positive. I just think Lizzie's would images that look a little bit like Children if they are to clean. I don't think it's realistic, because at the end you really want to say, Okay, ones more. Is it supposed to be fashion? Then you can do whatever, really? Then that's up to you. But if you want to tell this modern vintage emphasis authentic, look, the nothing a little bit off grain that is just really even, though, if you if you shoot it already with a lot off noise and that's fine. But I think here, yeah, just give since this little bit off grittiness, and I think this looks pretty cool. So probably about 20 something. I would just leave it like this. And, yeah, so that's everything I can think about you in black and white and yeah, I hope you like these tips. And if you are not a fan off black and white, then let's have a look what we can do in color
54. Vintage Color Grading In Adobe Camera Raw: so, as we said before, it's pretty difficult. Was a modern day camera to get this vintage look. So if you don't like to do any post processing, it would be probably better to get a film camera, because otherwise, even if we use, are the right ingredients with the right models. All right crops, this vintage looking background and we even sprayed Hayes and slightly under exposed to image as well to get more into this vintage direction. I mean, if we scroll up a little bit at the beginning pictures here, you see, it's a little bit brighter and more Chris, and I think after that we under exposed probably half a stop and sprayed this fork and the can to just get this more hazy and a little bit more gritty. Look, because I think this comes closer to the look that we would have in the film camera. So if you have one, then off course, that's fine. Then you just shoot film, and this way you get in the small vintage look, however, as you can see, yeah, we're closed to this look, but not quite there yet, so we have to do some kind off post processing is and I train or bridge or in photo shop to elevators image to the next level. So the great thing is here because of shot. All of the's now in the same white balance ends the same exposure, and everything is pretty much the same. That means that I can do a bag editing in adobe camera raw because as a wise, especially if you want to edit you quite a few images, you might worry that you have to create a film. Look for each off them from scratch. But luckily, because every single see is the same, especially the white balance, it means that I can do book editing in adobe camera raw. So that would be a little bit more tricky if I decided now to shoot this different to this one. For example, if this one was maybe more bluish tin because I shot this in daylight and this in flesh and maybe this one in the manual Calvin setting, then that would be tricky, because then I would literally have to go into each image and adjust it. And then you don't really have the same consistency in your look so As we said before, if you have a certain style, then you kind of want to stick with that. You don't want to give your client or your model from the same serious now five different looks. So that would be maybe a little bit, yeah, a confusing for the client. And also be confusing for your own petroleo if you should. Once that, you should have probably a similar look to it. So as we said, t actually easy because I have the same white balance. And John, let's just see how you edit these now all together. So let's just pick a few. Let's go with this one and depends which had position you like better. Yeah, some are a little bit similar because I have the same prop, so we don't have to take all of the's. Would it take? Maybe one was a different prop, and then a little bit more edgy one. And then maybe one was a suitcase, for example. So if I would press now on to enter or return as we did before, I wouldn't go into adobe camera raw. I would actually open them up into a photo shop because, as you can see is these are not raw images. These are already converted Jay Pek images, and the reason for this is just because I needed these images for our costs, and it's a little bit easier toe export. My Pretoria when I have Jay Peak images in them and not raw in much is because these are just a little bit smaller. So I have a little bit less detail in these images than I would have in raw. However, it's not really a big problem to show you just the adjustment that I could do in Adobe camera Raw because luckily seasons quite a few versions in Adobe camera raw. We can also open now Jay Peak images. So that's always good for my students when they're like freaking out because like, Oh my God, I had the wrong camera setting and I was shooting in J pick instead of raw. It's not that dramatic. Luckily, anymore, because we can. They opened them in adobe camera raw and have most off the same sliders that we would have if we had shot them in camera. So I thought it just a fun way here that I could show use us as well. So effort said, If we will just press us now on to enter and return, we would go into four to shop, which we don't want. So in this case, we have to go over this weird, and then the images will be opened up in adobe camera raw. So here you can see nothing happened. Everything is here on zero. So we didn't do any adjustments yet. And as I said, the great thing is that you can any adjustment, you can apply no onto all off these images. So if we just start with the 1st 1 just to bring in some basic adjustment in terms off color, then I think he it's even more fun to play no overseas profits or these presets that adobe camera raw. Yeah, gave us. I think in the last version, it's they're pretty new. So if you just clicks us open than once before, you can see here color and black and white. And this time we want to go into color and to you even half now, little triangles that test vintage. So that's off course what we want to look at because it's where we have now a little bit more. Yeah, different looks then that we had before in black and white. So in black and white there were ever so subtle. I would say you can still play with them. It's fun to just see maybe a little bit more haze or a little bit more contrast in your black and white. Imagine, however, here when we go through the and we have really different looks and I assaults is yeah, uses this brownish Tim. That would be fun, all this green ashton. So I think those looks even better. So I just click on this one and then I can close us down. And as before, it's the little said that we don't really see what happened here behind the scene, but we can still go in and change even Los ing. So, for example, if you're not happy with the white balance CIA, we can still change those into ah, cool Latin or even war mutton. However, as it wasa sort, it's pretty cool. So I will not change your too much. Maybe a tiny bit cooler, something nexus, and then you can also change the tint and so on. So as before, you have all these options. See how you can change your highlights, your shadows and your exposure. And then we can also decide on the clarity is a Once more you can say, Do you want us here a little bit gritty or edit it softer and because I'm thinking us there , one toe resembles this film. Look, I would rather have yeah, a little bit softening, and then I would at some grain later to make it more gritty. But that's up to you. You can just play here with those slides. The next thing is once more that if we go into these tone curves, we can do the same thing as before, where we just Texas area down to bring an even more off this much film. Look, if you so desire as a wise, you know that I like contrast, so that's after you want smart. And here we can also change the channel and do the same thing. That it was our black and white image in photo shop, where we can change the color even more so Here we can also add more warms to our highlights, and we can go into the shadow area. And if we opened this app lenses, that's more blue. And this is a terrific film look that even used in Hollywood. Not where you just have to yellow in the highlights and more blue in the shadows. It gives you this automatic fill in look or movie look, so to speak. And once more you can decide how strong you want to adjust this year. For now, I think this is pretty cool because we just want to talk about Cal. I will ignore this as a once one now and here we are, back in our H f l adjustment. So ages l stands for you, saturation and luminant. And here we would have no more color in the much because if you remember the black and white one that had actually a black dress and a black and white background. So there wasn't really a lot off tonality to change. But here we could off course change are different sets here. So if I would just go into my red siem, then we can see if this is enhancing the lipstick, which may be bringing it a tiny bit in this direction, Not too much because we also don't want to affect the skin tone and then maybe go here into this area just a tiny but ever so slightly and so on. And again. If you have more background tones than you can change it, even for those things, that's and that's a way you have. You can change tonality and your cholera, and this is in your calibration. So that's this over here. And so I also sometimes go in this. I want to change my skin tone. So if I bring it matches this side, it gets this more brownstone. Not too much, because and kids green. And that's not what we want. That just ever so slightly, the skin tone becomes less that and more. I tend to look so I since this sometimes court and then off course, you have even wants light us on how you can change your tones, so this is pretty interesting. I think if you think the will look from this profile or this precept that used, if it's too extreme, then we can just dial this down. So, as I said, it's a little ashamed that we can see exactly what happened here. but we can at least change, so it's not quite so extreme. So if you go all the way to 200 then you want to that you have this effect for powers, and it's like Lee extreme. And if you only wanted ever so slightly just to give your images a certain tint, then you can play with this lighter as well. So I think maybe something like this is pretty cool. So if you look on to the before and after, I think that's already quiet. A drastic change and goes into the right direction off this food look ends. Nice Inglis. Now, if I just look onto command or control and a I can collect all off those images, all in ones, then I go onto this fear. Yeah, and then I can just say sync settings. And then I can click here on two things that I want year. I want to do all of those things because there is not. Yeah, an adjustment that would think wouldn't work on the's one. So everything here works fine on all of those images, and then I can say OK, if you only wanted to click onto a specific change. If you only wanted to adjust the crop grain or I don't know, whatever you did here, then you could also check non and then just target onto an individual. But for now, I just say OK, because I want to apply this Look on all of my images and you can see this is fantastic because now I don't have to go through each individual one and changed that because I have the same white balance all of these images have now this consistent look.
55. Vintage Color Grading In Adobe Photoshop: You can also decide now if you want toe, have all these images in four to shop so that you can do further adjustments and once more you would just go with command or control and a to select all off them. And now you can open all off these images into photo shop. However, as you probably hurt already in the recording, my laptop gets just really loud when I do all of those things at once. So I will just open now one image just so that it's hopefully a little bit more quiet for you. So let's just take this one, and that's brings us into a photo shop. All right, so here in photo shop, if you saw that you had already lots and lots off option in your black and white adjustment , you can imagine in color you have even more options year on how you can play with different tones. So if I brings us first off, higher ones more back into black and white because there's one more option that I haven't shown you yet, so you could also go into your image into adjustments, and here you could also change the same things that you have done in adjustments, but you could also just go in here into de saturate. It's just another quick way how you could convert your image into black and white if you didn't like any off these as options, However, yeah, we want to talk here about color so when as a quick color option year or tone would be in your photo filter. So sometimes even was images that are in black and white that can be found to play with different ends. So here, for example, we could at warm atoms. Or we can also scroll through these ones and the cooler fitters and so on. There's also CPR and even yeah, as I once like Deep Emirate and so on. So this would be also pretty interesting to play with in case you want to give your black and white images a different tone. But for now, let's just go back here with all toe option command or control and the that. We can just go back a few steps because we want to be back in our color in much So s we said in a sea already once more. If you wanted to bring in more off this hazy look, you can do this year in the curves again. If you wanted to give even Warton to your highlights into your shadows, then you have this option here as well. So if you would go and you're really extreme and we could also come up with a pretty cool look, same as before, this is not the only change you can do here. You could also go into your greens and see if that does anything interesting. However almost off the time, it just gets a little bit too extreme. So I kind of stick was my blue line or this is blue area here. But nevertheless, it's always fun to play with source areas here as well. So just once more, it's definitely possible to come up with different looks here as well. That was now the before from our A C arm and this is nausea after with curves. So again, a totally different look. Another thing we can do here in regards off tonality. This, of course, that you have different ones year, so we have the color balance and we also have selective color. So in color balance it works in a similar way as we just have seen with our curves. We can change your in the mid tones in the shadows or in the highlights, our tonality. So if we go into the highlights, then we also have since yellow and blue here and we can decide. Do we want more? Yeah, yellow and the highlights or more blue in the highlights So similar How you've just seen how it worked in the kerf adjustment. So I'm thinking to yellow that looks just now. I don't know. It's probably not very era appropriate, so I would probably opt here for Kula Tint, and once more you could play here was different. Slide us maybe a little bit reddish in the highlights books years well, and the same you could do with your midterms. Let's see if that effects us here. We are just ever so slightly, probably a bit off yellow, little red. Then you would go into this brownish tint and then once more, you could cruises with the shadows. So here, that's also really interesting how you can just effect with some easy slides here, just left, and right now you give your image of who, and you look so that's pretty cool as well. So color balance is one thing to change your image. Or as we just said, you can do some blessings in selective color. And here, most off the times, I just look into the nutrients. I mean, once more. If we open this up, you have all sorts off tones that you could change here, for example, once more. If you wanted to change the lipstick or yeah, let's say we wanted to have a bit more orange or you could see how your skin tones are doing in this magenta area. And this would be in the reds. So you can s it says half. He's selected colors that you can change whatever the nutrients is interesting. If you want to color, great your image overall. And it's a little bit confusing in the beginning to understand, because if we look at this guy ends Leider and we go to the left, you see, you don't actually at the end, so you don't actually at a bluish tint, you actually have a red tint. So if you go to the right, then you see that this is the yen comes into play, so it's easier if you understand. What if you imagine that the end is on the side. So here you actually at into this direction the yen are bluish or greenish tint, and on the side it should actually say Ah G b meaning it would be red, green and blue. So, for example, if we look at our yellows lighter again, if we go to the right, it does actually at the yellow. So the yellow should be on the side and every goats is the left. As we said this, it's blue. So that's just a little fun. Fact how you can maybe work yourself better around with these lighters if it's a bit confusing in the beginning, like, Hey, what do even change you? What? This is for Kala. But nevertheless, overall, I think it's really, really nice, because you can also change Yearsas. Yeah, look into this fear in look once more So, for example, if you didn't do the A C R conversion in the beginning, then the selective color would be a great choice to bring in the greenish cast, for example, off the yen and so on, So I think this is really nice. So if we go into the before how it wasin a CIA and now we have six more dramatic look with our selective color. So this is another way how to do things. Or if you want to stay in this kind off cough and level area, then you you have another option so similar to the curves where we could also open those up from RGB into red, green and blue. Then you have your one more times of choice if you want to affect your highlights or your shadows with yellow or blue. So once more you could just warms this app here ever so slightly. And then on the other side you would at the school ish tone. So that's another one and of course year. And this one same thing happens. Or here you get this. Yeah, a little bit hazy blue tint which are also quite like and then on the side you gets us warmish tens. So yeah, definitely so many fun ways how you can adjust your color. Another thing you could do is off course. If you don't want these kind off looks and you want to go with something. Yeah, that's more in this brownish CPR sepia tone. Then we can go into our U. N. Saturation. And here you have the option to color rise your image. So if we just click on this little box CIA, then we can bring this image into this CPL sepia tone. But just be careful that if you have since look overall, it can also look a little bit tacky. You know, kind of these pictures that you get in the more oil on market or something where you dress up as a cowboy. And then they put this see Peotone on. So that really depends on you. If you kind of like the style, know if your client or model likes of style, then of course this is fine because it does look oiled, especially if you want to add no even more grain. If you only want to go into this direction a tiny bird, but not fast or extreme, then once more we can off course diocese capacity down. And then I think this might be even a little bit better. So if we look at the before and after, yeah, once more, it just goes a little bit more into this vintage tone, so that would be pretty cool as well. And as a way how you could do a similar thing. Yes, if I just deletes us now. And we can go into this little cookie down here and click on that and we could bring in a solid color. And you rose up to you What you want to pick you? If you go into a similar direction with a darkish brown, for example, and we just go onto Okay, then we could play here once more easily with the capacity. If you want this matter, look, for example and this would affect your highlights here, for example, maybe not so extreme. Maybe something Lexus. And when you're not quite happy now with your color with the double click, you can go in here and then you could also change this. And now it's pretty much your life view. Now you can see what you're actually doing here, so that's a little bit use. And now was this little opacity and this young, different low Kia. Yeah, it's all very interesting. I think if you wanted to go into a cooler tent That might also be very interesting. Let me just bring this to the side. So a year you have also some options. But if you go back into this brownish tone, maybe a little bit doc about you, maybe and say OK, and then we could also instead off bringing the opacity down. Let's bring this up a little bit more extreme. From here. We could all to change our blending mode from normal into something that we find maybe more fitting. So, for example, we could go here in tow a soft light if we like this tonality. But it was even more contrast with that said before that. See, after you see how there is now a lot more. Yes, this brownish contrast, or you could also go into screen. Now this is again a little bit more hazy. Or you could experiment down here if it works, maybe with you. Let's see what that before or after you have also slice and not so much. But here you have also different options. So this, for example, Carla that looks even more these saturated now and goes into this CPR direction one more time. But just a little bit different. Maybe a little bit more natural. When this look up here where we thought, Yeah, might look a little bit like, you know, this kind of tacky postcard that you can get on on the fair or something like that. So you have all these different options and once more, if you think you might like this brownish tones, maybe just ever so slightly, then you can play here once more Embassy capacity. So that is pretty cool as well. One more time. You know this already? My favorite Grady and map. Yeah, of course. You can also change different tones, especially if you didn't set years. It's no into black and white. Now you see what happens if actually white. It's on the front and the sort images more washed out. And again, you could just keep it like this in dial it down. Then it gets us hazy. Look, which could also be interesting. Or you could also change now into the Grady and map a different color, for example. So if we go on to this one, then you would think Oh my God, How can this even local a minutes red and green. What the hell were you might be like. I would never use this. However again, if you just have this low opacity, then that's actually very interesting. And if you dial this up and then you change your blending mode one more time and go, for example into overlay, then again get justice, different tonality. And I think this is no far too hot and too extreme because this is no not really anymore film image. This is a little bit more, Yeah, contrast you. However, if you're working for fashion, then this might say they work for another in much. So just as a quick for us, you would just diet is down. Just ever society to give assistant And one more time. If you think Oh my God, these options there so confusing cannot see it all on the panel. Then we can look one more time at a certain party
56. Color Grading With Plugins And Actions: in photo shop. You have lots off options, how you can great your images into a certain tonality. And as we said, if this seems a little bit too confusing, then you can also opt for a certain party in terms off a plaque and so that you can see a panic so we can go in one more time into the net collection because you've seen already that we have different options here and one of them is, for example, the Anna look effects pro So personally, I have used this yet, but I think it sounds promising, considering that on a look refers toe on a look food cameras. So let's have a look at these looks. All right. So, as you can see before on the right side we have these adjustments here and on the left side . We could choose now these classic camera looks and your think in consideration how we already created thes tonalities and different color grade ings. We were probably close to thes looks because we also went for this. Yeah, greenish the yen, tinged with a bit more extreme are years all to this kindof hazy look And you can also have more brownish, tend or more bluish tend, so similar to what we have already done here. It's just, of course, a little easier, especially if you are a beginner that you have seen some nails with these previews. So this way you can already make up your mind and think how maybe unlike this look and then you just click on it. And as we said before, on the right side, you could a justice for us also. Sometimes you even have even more idea see on the side. So if we go from secular toe something like warm, for example, then we could also tends this image. Now into this, Seppi our direction one more time or even more extremes or years, even more. Matt look. And so on the same monsieur and quit areas. So if we wanted toe gives this image this Yeah, slightly horror greenish tint. Then this would be an option here, A swell for now. Let me just cancer this and assure you the as on a collection that I actually used a little bit more and this is the color effects pro for and this is not in terms or in regard to the vintage look. However, you also get your different yeah, ideas how you can style ELISA portray. So let's have a look at these ones. So once more on the left side, you get these previews, and you can see that they are my own recipe. And that's pretty cool, because in color effects, pros also give you a little help for skin softening. For example, you can pickier onto a skin, and then you can smoothing this already in this panel, and sometimes it's a little bit too extreme. And then it was the same trick as before. I have it on a new layer, and then I reduce your opacity. And this way it's an easy way how you can smooth the skin a little bit if you don't want to do it manually. What was frequency separation and so on? So this is one way, but the other things off course that these were just my recipes. But if you wanted to look into the color effects and not into the recipes and here you have the option to see it, oil or you could also say portraiture, for example. So if you click on portray then that's a similar sing we could see here if there's anything that looks more like a vintage image, and here, for example, we would have this film effects nostalgic, and here again, it's very extreme. But on the right side, you can change this even further again. You have here oil these options. This is not bad, I would say if we would have to snow on a new layer once more with using the capacity of things. This looks interesting because off this brownish tint and so on, we can just scroll through year again. This is a little bit more into the CP, our superior direction, but still can interesting, because there's a lot of contrast in that and so on. So that's definitely also interesting, especially for now, because in the collection is there for free. So you could just see if any off these ideas would be up. Yeah, to your liking, so to speak. So this this one and then we could see this one here, which says, already vintage and you you get even more haze or this kind off soft white ish been yet and so on and again. There are even more options down here, and this way it might look even your even more tacky, like what you would get on the can of a or something where you dressed up as a cowboy. Because now you also have, since White has been yet, however, it's a free for now, so it might not to just try it. And as a fed on a new layer, it will always look interesting if you just reduce your opacity or if you just change the blending mode. So from here, if you think you have a snick, that's one way. But I'm a little worried because it's maybe old fashioned, and maybe that doesn't get the updates anymore. Then you could also go into this one here, and I don't know if the same people from Nick behind us Skyland dot com because it looks or similar. You can just click here on any off these images, and then you can still just them for us on the right side. So this might be an option. If you don't want to go for a collection than Skyland dot com, they offer something similar as a CERT party plaque in and the other one would be to pass laps, so I bought us a really long time ago. Topaz adjust was probably one off the first wagons available for photo shop, and they also have pretty quick things, and they're also very cheap, with $50 you can also just download a free try. Adjust to test it and you are here. You also have just different previews once more when when you install it, you can see certain looks and see if you like it. For example, they also have detail extractor, where you can bring in more clarity and grittiness to your images and so on. So that might be also goes by to try and under plug ins. You see, they have all sorts off products of can have thes in studios, things where they give you clarity, detail, glow impression and so on. All you can use the one that I just refer to the adjust. I always thought this was pretty nice, especially in the beginning when I didn't know Photoshopped that well. And then, with the previews, I could see if I wanted to have a different color cast or if I wanted to have most happening and so on. So this is pretty cool as well. Another one is totally read or get totally red, and they offer not per se a certain party plaque in I mean that it is before us well, but now they offer this kindof pro retouch. That's kind of a plug in if you just wanted to edit skin or are they also offer actions? And here I found this one Rapley chrome. So if we click here on to learn more, then you see why. I think this might be interesting for you because you have one small Aziz filling effect. So it seems to be that they try to recreate these old school films, and it's a little bit more expensive than Topas laps. And it's not a partner. You will get actions, whatever this might be. Russ, why to play with us? Because sometimes in action also can just give you a different idea off look. So yeah, I think this is pretty cool. If you just want to give a certain for him, look to your images without the trouble off creating anything on your own, because sometimes maybe it's faster just to click onto an action and let me just quickly show you what I mean was said, When I go back into photo shop, I have my actions year and it's this little button here was a triangular or this kindof play button. And if you don't have your actions open, then you might have to go into a window and you will target this on, and then you get this action field, and when you buy such a package, then you can just usually installs and by double click and then probably you want to close your photo shop and then open it again. And then you have these actions in here, and these were the old ones from totally read that I could buy a few years ago. And what I saw it would be pretty cool is if we just look into one off those areas and how totally reds applied a film look and, for example, the one that I always liked. And I also mentioned it in our seventies photo session that in the seventies and in the eighties, look Waas famous, called on cross processed so totally red because they are totally read their cause this year the opposite. They call it cross grossest. However, if we just click on it, we can see what this looked us to our image. And because it's an action, we can actually look inside here and see how it came together, which is pretty nice if you just want to do something similar was out buying the action. But if you can like this look, we can look inside here and see for example, the first thing they did here was that they d saturated the image a little bit and then they went ahead and did see cross processing. As I said, what you can do with curves. So here we just lower thes lines. We get this hazy look and if we apply this kindof s cough, then we get more off contrast wherever. Here. It's not only the contrast that we can see in theology B, which is very extreme. We can also look into each off the section until you see know what's this cross processing . Thus So basically they went ahead and they just go from one color into the opposite color. So we can also manually change this now's and we would just change the action. As I said, You don't have to keep it like this. You can always use a lower the capacity or you can also change the action itself. So here you see what that means is cross processing is basically taking the color that's already in the image and dragging it to the opposite spectrum. And this this way you create us cross process look, and again you can always change it. If it's too extreme the same, we can check you in the blue cough. You can also see how they went ahead and really lowered thes highlights into this yellow look similar to what we have done already before. And when we look into the green one, you can also see they open this area up, and this way you gets a screen tint. So if you wanted toe yeah, create something similar and not using an action because you might not want to buy anything specifically. Then we can just go into curves and just do a similar thing. So we could just create this crazy contrast and say, OK, this is now not supposed to be an old fashioned, um Surtees era anymore. But now we want to go more extreme into a poppy seventies or eighties. Look. So first of all, we create this contrast, and then we can go into the red one and just change this image into the opposite spectrums . For example. We could go this way or we could also go this way, and here we could just play one small was all of these different tins. So here we could also bring in this green and now and lowers this down and really changes into the opposite spectrum. And once more with the blue. They just went ahead, and Kanna created this cough. Something like this. Off course. We could go crazy here, right? Because it's across processing. We could also go for something like this, and now it's like super green. And if we don't like it, we just reduce your capacity until we have some kind off a vintage tend. So that's just one fun way, how you can do cross processing, where you basically just go ahead and create some kind off a line where you just rack of the original color off the image into the opposite direction.
57. Vintage Action - How To Bring All The Film Looks Together: So now you already learned lots and lots off ways how you can change your image into a certain film tonality and also how you can kala great your images and the last thing I'd like to show you here, in terms of how you can bring it all together is another action. Let me just go back into Firefox to show you and it's card vintage film effect by Fallout 75 you will find it under deviant at dot com, so deviant at they have all sorts of things. For photo shop, you can download actions, you can download brushes and so on. So there's lots and lots off stuff that's fun to play with and some you have to buy and others off of free if you give credit. And this action I downloaded a long time ago, and I just thought, It's amazing how it brings all off SOS vintage effects together so you can also down notices, or you can just follow me on what I'm doing right now. So if you go back into photo shop, then I want to place this action, and I think it's all the way up here and it's called vintage firms over. Just click onto the button. Now the action has immediately applied on. Let me just close this so that you can see it a little better. So one more time. Because this action is in this group, we can just open it up and then we can just see step a step houses. Action was created by this person that put onto TV in at. And if I just total all off these off, then we can just go through them step by step and then I think it makes a lot more sense. So first of all, we have the saturation. So if we double click onto here, then received the first step was that there was 20 more in saturation. And if you want to look in closer, we could also look into each off these areas here in case anything else happened. But I think here only the saturation waas applied. So if we look before or after the I think that makes sense that looks more saturated. The next step Waas that there was contrast and once more if you open this up into brightness and contrast, then we can see there is more contrast, so the next one would be the centre fairly light, so we haven't quite talked about this forever. A lot of times, when you look at old skool images, you have since a bit bleached out center, and if we double click on here, then you can see how that wa supplied. And that was done by a Grady Int food in the radio mold. So that's why we have this sensor light with the scale of 110 and the angle is 90. Andrew halves US white to transparent color, which basically means that this would be white wherever it's not white, because the blending mode was changed into overlay and therefore we just have to say yes, but light effect. The next thing is no the opposite. Now we have to spend yet. So now, they are saying, is when you look at old Skool images is that you have suspend yet it could be the other way around. Like we said, it's a bit tacky. Refer. Tessa's why it is border because then again, it looks a little bit eighties or, you know, a little bit tacky how you would get it on some kind of carnival, but you get this kind of CPL look, but Doc have been yet. That's normally quite nice because that brings you of you are into the image. So I always recommend was any era to have some kind off of in Yet because adjusting it brings us image somehow together. Sometimes when I find easels of unnatural, strong, all the center fill light, I also lower it down because here I have no the problem that the blouse waas white. And if I look at the before and after, I start to lose a little bit off detail here, so it would probably not keep it at 50. I would just lower down overall. So it still has this little bit off a spotlight effect but doesn't bleach out my blouse here. Alternatively, I could also brush here onto this mask. Then that would also fix this problem off. Beaching out the same was a vignette. We could see the before and after once more. Then, if you say it's if it's too extreme. Record laws is all we could even say. He wants us a tiny but more and then maybe even with no 70% years. That also looks pretty nice. Similar to the center Fill light if you double click onto here. This was also applied with sig Radiant fit. This went here from transparent toe black and also radio, which means round 90 degrees and a little bit bigger and scale was 150. So that s one way to apply even yet the other way would be easier said in a CR you have see effects button where you can apply grain and you could also apply even yet there. So that's another cool trick now where we talked already about cross processing and this brings in the house of fun. So everything before waas pretty normal a little bit more saturation with more contrast, applying a spotlight, applying even yet nothing too exciting. However, now was this cross processing? That's how we bring in the stream Look and you know, already know How's it, Brooks? Because in a similar way is a maker off. This also applied thes different cuffs. So he didn't touch the Yeah, actually be one here that looks pretty straight. However, if we go into the individual ones and we see the red one has manipulated into the opposite direction. The green one is opened up here in the highlights again to have the screen ish tens and the blue one. That is as we did it before. You know the strict by now that the highlights were lowered into the yellow area and the blue shadow was lifted. So that's fun. Now you can see how this comes all together once more. If this is too extreme, you could lower. Here's the capacity, but for now we will just keep it this way. The next one is the sepia do saturation. One more time we go in here and you've seen the trick before. He Cal arrives the U. N saturation and then change the U into this brownish sepia tint. And one more time you cause also lower. Here's the saturation. He didn't just already, and Lourdes is too 50% the next trick. You also know year there waas a whole overlay applied. So if you have a click on here, then you can see that this is the solid color area. And we applied this before in brown or in blue and he went in and talks us pinkish Yeah, he called us Magenta. It's probably more for Pink Ashton's, and this is a clever idea because often when you look onto these old photographs, they have says he's a brownish was a slightly reddish tone, and this is pretty nice, because again, it gives you a much ah well different color cast, but not too extreme. So he lords us into 10%. And then he also change the blending mold into a screen. Because if you change, there's no into a normal. Then that's probably a little bit to magenta or two pink. So I think the idea and screen that works really well because it makes it a little bit more bright and has a pinkish tone. So if we look into the before and after altogether by just talking on this group, and this was the image, how we did it in a CIA, and this is now with this interesting action, and if you don't want to go in here individually to lower anything, we could also just go ahead and lower the overall capacity to something, maybe like 70 and look a TV phone after and this looks pretty cool. So here is a really great way how you can see how all of those things that we talked about came in together in one action and looks really vintage. And as I said, you could down does this action. Or you could try to apply something similar like this, so have fun.
58. Adding Interest With Color And Light Streak Overlays: So there is one last trick I'd like to share with you in regards. So you can bring some kind off color grade or lights Creek into your image to at some interest. And as you can see, I have your eyes is fooled us and they are all overlays. So, for example, I have one full Florida just was color in my just and that knows that Look a little bit strange when you just look at these images to like, Okay, what should I do with that? But it will give your imagine interesting effect, especially when you put this on was a low capacity or once more if you change the blending mode and the other one would be If you don't want to add the color grade or this kind of color, you could also have something that has some interesting light on it. So you had this light flare. Or maybe you want to add some broke out to your image and you could ease Ah, look around online. Maybe they also have sees things on deviant at or I have sees in. Let's go back to Firefox. I found some interesting things in the company called Scree Jew. So they have all sorts off things for photographers, also, if marketing templates and so on. But they also have some interesting overlay. So, for example, if you scroll down here, they have thieves guy overlays or, like this kind of sun flare and kind of different tonalities and so on. That's one way. Oh, I also found interesting things on raw exchange, and they also have different stuff, like ground fork and some funky Hello being things. And if we go down here, there are also textures and overlays and effects, so that might be also wants to check out. Or, if you don't want to spend any more money on has its effects may be already bought. Now plug in and you're like, No, I don't want to spend even more money on overlays than that's no problem anti. If we just go back into photo shop, then I can show you that you could also create your own overlays. So, for example, here I just photographed this guy. Nothing too exciting. But the great thing is that we have this different tonality and light information and back information, and maybe you also like the color. But if you photograph anything, nexus yourself, so you could also just shoot into the light. Or if you see any kindof interesting light rays or anything like that, you just take a photo. But now you don't want to see the texture. So from here you want to go into oferta into filter into bloom into gorge in blue, and then any visible texture. You just want to get rid off. So you really would use a big radius year to just get this light and dark information. But without any other textures, I'm thinking something about ah, hundreds would be probably, Yeah, that would probably work here. And then I just say OK, so was this image. Just go on to command or control and a to select and then was command or control. See copies, this image and then I want to go back. Look back into my image into this one, and then I want to apply this. It was commander control of you. I can now at this texture onto my image. So now, off course, this doesn't quite fit, So either way, I could transforms us this way, or I can also just turn it around the depends where you want to have a light ray or this color is away. So sometimes I think from these old movie set ups where we said that a lot off lights comes from above, Then the also might be more clear that comes from here and then the set, As you know, we only had to speak soft box and a little bit light coming from this way to create the stage look, however potentially there would be also more light coming from above. So here what just turns us around? Because I have more light information here. So this commander control and t I would just go in Yemen and first off all I want to extend its a bit this way. And then I also want to turn it and it still doesn't quite fit. So I would just bring this in the little bits this way and now I just put us across with shift command or control. I can just bring this out either this way, not even more transformed. Always shift order option. I can also just go in here and then just widen it altogether. But you, you could also just transform and in a way, that it fits to your image. So something like this, maybe, And then I just say OK. And now, as we said, you could just lower your a pass ity. So maybe something like 20 or something that would be interesting and again once you lost your capacity. And now you can also bring this image to the right spot because before it's obviously a little bit tricky to even see, So now we can say, maybe it should go a little bit more towards the site. And then we say, Okay, so that would be kinda cool. Or if we go back to 100% and we just change off lending knowledge into something maybe like screen, then we get this haze again and then we have kindof interesting. You are aged, look to the image. So it looks a little bit like this was a big stain on something like that. All we can see what it would do in soft light. And then again, it just gives us this new color look so that seen before, that's the after and again, you can always lower the capacity so that is the self made or do it yourself kind of style . How you can photograph anything, blur it and then see if you get these kinda cool streaks into your image. And this way it just looks now a little bit more aged. Or we can also go ahead and go into this one. That was one that I bought from the company. Call up and gassed that Missy. If I say this correct, So you're kulak gassed flares. I'm not sure of sister making these products, but that's what I bought all off those interesting light streaks. And let's see if that works for me much like this. One more time We go into Commander Control and a tow selectors image and was command or control and see the copy. And then we go back into our image and command or control, and we will paste this image. Same thing again. I have to turn it around because I want that this light comes from above and then was shift . Although option, I can just make it bigger from the inside out Office shift and command or control equity also transform it in any way I want for Now I just say OK, and same thing again. I could see if that works and soft light. And now it's just has this interesting yellow sunlight nearly from behind my model and the thing Now it's of course, a little bit too extreme, so I can just lower the capacity down and again. I could play here was different overlay but also work. Oh, I could work and hard light. That would be also interesting, and it's maybe a little more focused on the top off the head, so this would be interesting as well. So that's just another idea how you can bring interest to your image. Who sees really funky light streaks?
59. Comparing The Results...: I Right. So now you know all of these possibilities in Asia and in photo shop on how you can kala great your images and it's really up to you if you want to go more into the CPR direction or more Greenidge or more magenta, if you want to cross process or if you like. Yeah, more contrast, all this Matt film. Look, this is really up to you. So I hope that you have fun playing with all those different options and, yeah, let's just compare our riz ill so that you have one more time and overview off all those things that are possible. And let's start with the image, how it was in the studio, how we took it when we started our age and let me just creates us bit Lexus so you can actually see a bigger in Murcia. So, yeah, that was our first imagined reset, Although we had all the right ingredients was what rube and the kind off steam plant background and thes stained pages and the right model ends on. It just didn't look quite vintage yet just because off this modern camera and it was all too crispy, some from there we went on and that we under exposed image to get a little bit more off a muddy reside. And also we liked the idea off the haze. Also, you don't really see it per se, as if you would see it in the things that we've done with the gels there you properly see the haze. But he had just helped us to create this more gritty look, so it's just not as sharp as year. It's a little bit more grainy and this looks already much better. However, from there we went on and said, Okay, we really want to bring this image to the next level either. If you just want to stay in a CR or in light room, then you could do this a swell. We could just bring always these things and a CR to Gaza and say, OK, we create a J pick from Yeah, you don't even have to open for the shop. But if you want to go into Photoshopped for the next step, then this would be the possibility. So he has. That was the a c R. Presets that we applied, and from there we went into photo shop and opens this been touch action. Or as I said, if you wanted to apply something similar, then you could do this a swell. Then we played with some interesting light streaks that you might not like for this particular image year. But in the future, if you want to add some interest to your images, that's certainly an option as well. And then from here you can play with even more colors. If you want to have something like I said in this green Ashmore horror direction, or if you want to go into this more yeah, brown or sepia tint, then this is up to you. So here are my end result. So I stayed a little bit more natural, however, still in this antique tones, or these was once that I came up with, and I think I started out in a C. I was a preset that we applied, and from there I just did my general editing work floors where softens the skin a little bit. I applied dodge and burn, and then I rounded the look up with a vignette. So that was the way I went for in this tutorial. However, If you look onto these images that follow, you can see that Waas not always my style. So, as I said, it always hurts me a little bit if I have to go down with my contrast. So that's something I still have to learn that I don't always have to apply contrast that sometimes this much film look that can also look pretty cool. But yeah, you can see how I shoot. How did you shoot like this before? Where I had a lot more contrast and especially year. It goes a bit more into the fashion direction instead off the vintage looking direction. But as I said, the idea is not that you copy exactly my kind of style, if you like it more fashion or more old school than just play with swords, different errors. And now you have the knowledge to be as authentic or not as you want to be. So definitely have fun experimenting and trying to see if you like a more Matt style or more contrast in style. So from here, let's have one more time. I look into the things that we did in our black and white tonality, so that's interesting as well because let's see it one more time. That was the image, how it came out from the camera. Let me just make this bigger one more time so that will cjp exit my camera created. As I said, it looks fairly similar to the de saturated option that we did in a CIA. Remember where we just brought the saturation down? So that was our first look, and if I just makes us really big that you can see the before and after. So that's the image right out of camera. And this is the image that waas only de saturated in a C. I was nothing else. So you see, it's a camera that's a pretty good job in just yeah, creating some D saturation. So from their hopes from there we went and in and said, Okay, we want to apply this preset that makes us even bigger. So that was the first preset where we said, Okey, it's not really too dramatic. Miss grosses down. So he has this preset number one still very similar toe, just a normally saturation. And then we went in and said, Okey, let's try and other preset, which was still not too exciting. But then we went in and changed the, um, which was before the ages. L and now it WASI black and white mix and the least we could change. Now the red lipstick to makes us a little bit more dramatic. From there we went in and said, You are Why not try know something completely different in a CIA and recreated the super high contrast look. And then from there we said, Okay, let's try the opposite now and applying this matter look where we can go down with the contrast and three opened absolute cough to create this muddy look. And I have to say it does look cool, so it doesn't have to be always so much contrast this film look, and just especially when it's so much that really works here as well. The next thing we did then that we opened this image into a photo shop, and this was the black and wide adjustment where we didn't do anything out. We just opened it with this proper black and white adjustment. And then we said, OK, let's go ahead and try to create something with a recipe so the idea. Waas. If you don't want this image that very much and that was done in the new collection with Super FX Pro, then we could create something that was swan off a newspaper. Look. But you know, if I had to choose for myself, then of course I would do everything with a Grady in map because and I have my true black and white points. And then you have always this contrast. But as we said, this is completely up to you. If I just makes a smaller than you can see these different versions, how I usually work just so one more time that you can see a little bit. Yeah, what's possible in black and white. Then again, you see with these images here I like toe. Um, it's more contrast. Or was this one or this one? And then year? You have more off a grayscale image, and sometimes this grayscale that works as well. So it's really up to you if you want to create more or less contrast, I mean years just beautiful if it's less contrast, So as I said completely up to you and now you know all the tricks in Asia and in photo shop . So I hope that you have lots and lots of fun playing with always these techniques.
60. Thank You!: all right, this is the end off our cough. Thank you for time traveling with us through the decades, and we hope we gave you plenty of ideas for your vintage inspired shoots. For further inspiration, I recommend the book Cinematic Portrait. How to Create Classic Hollywood Photography by Pete Right, because it comes with great black and white concepts, styling tubes and lighting diagrams. And furthermore, you will also find inspiration by having a look at the books potash in. So, for example, this filmed one. And they're also, well, Disney film archives, the animated movies, Ingrid Backman, movie icons or 100 all time favorite movies and so on. There are also books featuring significant photographers off the golden age of Hollywood, such as George Carell's Hollywood glamour portrait, 1925 to 1992 by Mark of Vieira, or The Man Who Shot Gobble, the Hollywood photographs off Clarence Incredible by Terrence Pepe and John Coble. Also, if you would like to know more about posing than have a look at our costs posing like a pro , which comes with a 200 page pdf all off the tips and tricks you need to create your best portrait ever. If you have any other questions about this course, then don't hesitate to contact us in the Q and A or at Sandy at Cindy's Eye catcher dot com . And if you created your first vintage inspired images, please share them with us in our Facebook group posing like a pro because we are looking forward to seeing your results. So thanks for watching and happy shooting.
 Sandy Dee, Sandyseyecatcher