Transcripts
1. Creating Kirby! A Nomad Sculpt Tutorial: 321. What's going on, guys?
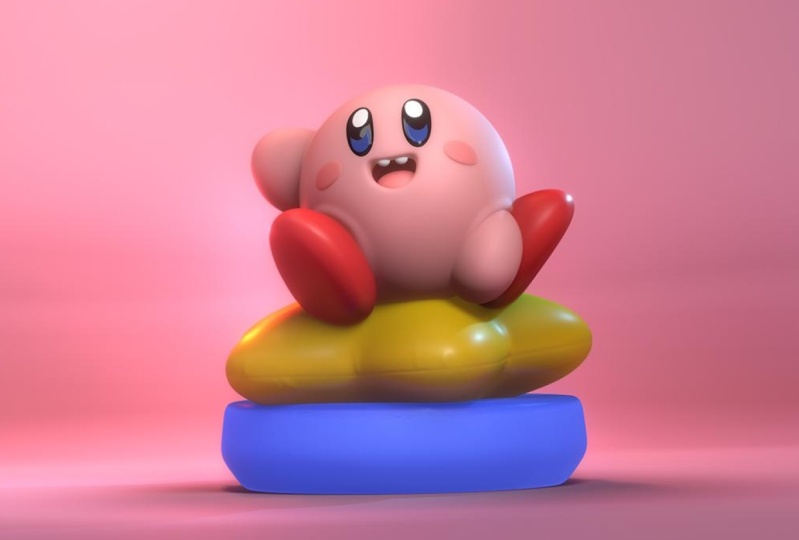
Drug-free Dave here coming to you from Brooklyn, New York. And today we're gonna do the lovable Kirby
Nintendo character. He's a fairly simple character, but you will see that
even simple characters, even simple scopes can
be quite complicated. So this is a good one if
you're a beginner, this is, this is good to sort of jumping to the character
design sealant. And then once you've
done with this, you can do like maybe an
advanced class or maybe an intermediate class is probably a good jump
half of this class. Of course, you know me, you know my flow, you know how I teach. I'm really excited
to get started. I hope you're ready to dive into making this cute little Kirby. Let's move on to the next
video class, project
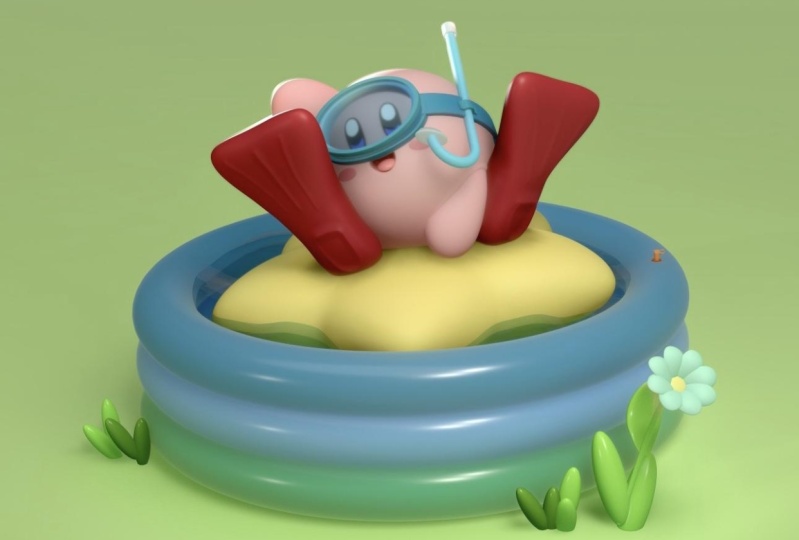
2. ClassProject: So what I really want to
see in this class project is not only just do
the regular Kirby, that's fine, but
I really want to see a Kirby out of
your own imagination. So I took liberties and Mason teeth, but you
can do anything, you can put some horns on them, you can make them a different
color and different shape. You can do different
shapes underneath him. Whatever you wanna do. I just want you to go crazy and just make something that's your own, whatever
that looks like. That's what I want to see
you in this class projects. So regular Kirby and then
your own version of kirby, whatever that looks like to you, That's what
I want to see. So there's a few tools
that I'm going to use throughout this
class that I always use. I'm going to post those
videos here so you can watch them just so you
have all the tools. Just remember to download
the extra material, like the reference image
in projects and resources. So that's gonna be in
projects and resources. You can download
the Kirby reference and also my environment. It's called an AI
glare environment. So that's just the ambient lighting and
stuff like that that I use so yours can match
mine specifically. And also we'll add the
my finished Kirby file so that you can look at it
and study it if you need to. So I will see you after
those two videos. We'll jump into getting started
and I will see you then. Here's how to import
the environment. So the environment is
here with the lights. You scroll down, you see
the Environment tab. Here's what it looks like
without an environment. So environment and just
the ambient light, it actually looks pretty good. So here's with the environment. So obviously if you scroll down, you can change the
exposure and things like that to the ambient environment
and the rotation as well. So in order to import your
customer environment, you just tap on environment. And you go to import. And you see there these
are all the default ones. But below these are all
the ones that I've added. So you just type import photos. And then you just import
whatever photo you want to use for your environment. And then once you do that,
it will show up here. I wanted to use this
one or this one. They will all affect your scene. So we'll go to our
default main environment. That's it. So here's a quick note. I will use a round edge tool or round edge brush in the videos and I want to
show you how to make it. So we just have a regular box here and I'll show
you what it does. So if I use the
round edge brush, I can just drag from the middle. And you'll see that
rounds off everything. So if I do this multiple times, just rounds the edges. So it's a very useful tool and I'll show you
how to make it. So we bring the
box back to zero. Take your smooth tool. So you click on the
smooth tool clone and just say You name
it edge or smooth edge. So smooth edge, it's going
to show up down here. That'll be your new tool. You can move it
wherever you'd like. So here, I don't
change anything. Here. We go to the next one. And then we have these options. So instead of dot, I won't lock radius. I leave everything
else the way it is. Let me go to Alpha. This
is just the default. That's fine. Fall off. Preset, change this to flat. So change that to flat filter. I don't really change
anything here. And then pressure. You want to make sure
that you uncheck, Use global settings. So uncheck that, change
both of these to preset and then make
them both flat. Okay, so now we go back
to the tool, tap, Save. And then you essentially
have the rounded edge tool. So you can just pull
from the middle. And voila
3. Getting Started: Alright, so the first
thing we wanna do is bring our reference image
into the app. Open up. No, my sculpt. You can open a new
project right here. This fear I always delete
just because it's really big. So let's just delete this. And at regular sphere. Okay, this one's much smaller. Alright, so we have
our scene is set. One thing that I
like to do is sculpt in what's called a mat cap. And that just makes it easier to see, easier to sculpt with. So we'll just go here to the shading window
and hit mat cap. You can tap on it and there's
all these kinda fun ones, but this one is the most
efficient for me for sculpting. So the next thing you just want to make sure that you go to this little camera
and make sure you're in orthographic and perspective. You just want to be
an orthographic. That way, if you tap front, the horizon line
should be straight. Okay, we can go ahead and
validate this fear as well. So let's bring in our 3D image. It's in the projects
and resources. You can download it. So you want to go
here. Reference image. You can tap on the
image, import photos. Then you just tap on your Kirby. And you can add. Now I'm going to tap
on this negative space here just so I can get
back to this window. I'll hit Transform. So this transform allows you
to just transform the image. So we'll do something like this. And then just tap the screen
and everything comes back. And now you're back
into sculpting mode. Okay, so Kirby, as you can see, is pretty much very spherical. So there's a sphere here
that's his main body. And we can use this
sphere for that. I'm just going to move it
up a little bit so it makes sure that you just
tap on the sphere, tap this little wrench
icon, the tools icon. And as long as you
validate it and all your tools should show up. If not, it'll have
a little thing up here that says validate. So use your Gizmo. This just moves
everything around. So we'll just move
it up a little bit. I mainly just wanted to be above this horizon line because eventually this line is going
to be here at the bottom, are straight on the floor. So we can want we can move them, move it up a little bit later. We'll just concentrate on creating the base
shapes of him first. And then we'll do the base
shapes with this yellow star, and then we'll do the cylinder. So that makes it really easy, easy that he's a sphere. Let's go to this tab here. We have sphere. Let's
change that to body. Let's go ahead and
add a new sphere. Let's move this up and over. And let's make this one small. So this can be his other
arm that's back there. So let's just stretch
it like this. You can turn it this way and maybe flatten it a
little bit that way. And make sure to
hit front so you kinda know where you
are and I'm just going to adjust it to be
sort of where this is, where it feels like it is. It feels like it's
something like this. But as you can see, ours
has some differences. The first difference is, this is a little, it's
not as pointy as this. This is a little more pointy. Let's go ahead and
validate this sphere. And then we'll take move. We're going to use symmetry. Okay? So the intensity have
pretty much all the way up. The radius is about
when 80 or so, it can make it a
little bit bigger. Move tool. We can
stretch this out. We can sort of make it a
little, a little pointier. One thing that's
going to help you, if you go here, the symmetry
option and scroll down, just hit Show line. Now you can see
the symmetry line. And actually we don't
want the red one. Let's see which one we want. Let's press symmetry again. You can tap the red
to turn it off. So we actually want green
because we rotated the sphere. So we want green that way. Anything we do here, i will
happen on the other side. So now you can just
make it zero point here by just pulling the bottom. Notice how it pulls both sides. And you can just squeeze
the top. Squeeze The sides too. If I wanted to, I could bring in the
other symmetry line and then that would be perfect. So if I undo what I just did, I could bring in the
blue symmetry line and then that would also match. So anything I would do here
would be on the other side. Kinda deal. I don't really think it needs
to be that complicated. As long as it looks like
it does in the image. I think that looks like a
fine little curvy hand. Maybe I'll just turn
it a little bit more. Let's hit front again. So this is in the
general position 0 now when it looks a
little too sharp, so I'm just going to
fix that a little bit. I don't want it
to look. I wanted to look nice and round and soft, so I don't want the
top to be too sharp. So we'll go with
something like that. I pull this part
out a little bit to make it a little
bit more round. Okay, so now let's add another sphere and this
can be the other hand. So I'm going to make sure I
hit front. I'll just go here. We can label this
one, maybe arm up. And then we can
add a new sphere. And this one we can
just name arm down. So we'll just use our gizmo and we'll kind of
move this into place. We'll make it smaller. Stretch a little bit, a
little bit smaller. And you could
actually, you could probably just clone this one. That might have been
a little bit easier. But it's good practice to
just make some new spheres. We just don't want to,
you don't want it to be too far off from each other. So I think that's pretty good. Okay. So if we're
looking at the front, this one's a little bit
more in front of him. So I'm going to twist
it this way a little bit down, a little bit. We can go ahead and validate it. So we see our red line here. So let me hit View. You see our red line here. So that's how we know what
the symmetry is gonna do. So you can see this
arm is a little bit flatter than the other ones, so I'm just going to
flatten it like this. Make sure you hit symmetry. Otherwise, it won't work
the way that it should. So I'm going to flatten
this out a little bit. So maybe something like that. Front again and I just
want to match this angle. So let's just use the gizmo and interest try
to match where that is. So it's kinda down, it's
tilted a little bit, tilted out a little bit,
something like this. What we also notice that
this is a little bit big. The sphere looks
a little bit big, so we can either make
the arms bigger or make this sphere smaller. Let's make the arms
a little bit bigger. Let's move this out and
you see where it is here. We can make it a little
smaller, actually. Something like that
looks pretty good. Looks pretty good. And this one is actually a little
bit further back. So let's turn it and let's move this one a
little bit further back. Now, there's one
kind of conundrum. See if we just want to
move it straight back. Notice how this is on an angle. This is not, it's not
directly this way. It's like a little bit tilted. So there's a few
ways to do that. You can change the whole Pivot. Now you can change
where the pivot is, which means you can
change where you move it. But, oops, let's go
back to where we were. Instead, in this situation,
I would hit a line. And you notice when I hit a line just aligns to the
whole project. So when you tap a line, up will always be up and then left and right will
always be left and right. And it's gonna be
according to this. It's just like this. Instead of aligning
locally to the arm, this would move it
straight where the arm is. He hit a line. It moves it's trait
according to the project. So let's just slide
this back a little bit. Like so let's hit front again. That's a little bit and
that's a little bit better. You can take it off of a line. We can still do things like
shortening, things like that. So you can still edit it
if you if you want to. But I think that's looking
pretty good so far we have front this is in the front of this a
little bit further back. We can put the eyes and mouth
and stuff like that in. So now let's do this at
the little shapes here. And we can actually use
fears for that as well. So let's add sphere, shrink it Okay, so let's go
ahead and validate it. And we just have to make
a similar shape to this. So the way that I'm
seeing this shape, it sort of looks like
a, like a sphere, but it's a little
bit more narrow, so I'm just going to
narrow the sphere. Like so. Okay, so now we have
our sphere there. Let's just trim it. So
I'm going to trim it right underneath
this line. Like so. Only because I just don't
want I want to make sure it's not too short. So then we have something like this and let's just remember it. So this is a shortcut here
for the box will remeasure. Because the same things
if you go up here to have this voxel and then we mesh. So let's just remember
like one-to-five. For now. Then you can either take smooth or you can take rounded edge. And you can round this out, just start in the
middle and then just pull it out from the center. And it will start to round up, round off the sphere. You can also take smooth and just kinda do it
that way as well. Let's voxel 3D mesh it lower. So we'll go like 65. And that will make,
that will make the clay. I'll
just call it Clay. More malleable. So now we use rounded edge and we
can do the same thing. Should be fairly,
should be more soft. Because we really
just want to get those nice round edges. So you might even have to
box where we merge Ramesh lower, school bit lower. You announced starting
to get pretty round. Let's take smooth. Just round out the sides.
Sort of like this. I think that looks pretty good. So I'm look like a
nice loaf of bread. So now we can
re-image it higher. And that's something
that I'll do often. I'll remission low so I
can get the shape I want. Get it looking
organically round. And then Vox room
as high as 200. Again, this is just a shortcut. You can box remember up
here, it's the same number. So now that we do that, let's do rounded edge and now
we'll just make this clean. We go closer, you see
those little marks. So just do rounded
edge a few times. And it will be nice and clean. Okay, that's looking good. So let's tap front. So
let's place this one first. So first let's make it
a little bit bigger. And let's just check out the profile of it
just to see maybe it will stretch it a little bit and it's a little bit more
rounded in the back too. So maybe we can just smooth. Sometimes you can
just smooth one area. Or if not, you can take
something like flatten. You can just kinda go over
the back a little bit. I really like to kind of
organically sculpt like this. So I'm just kinda
going over the back. I have symmetry on just making that a little more blunt, a little more round. And then I'll just take smooth and just smooth it all out. So you can go ahead and now
the back is nice and round. Might take move and just stretch out the
front a little bit to kinda get the shape looking
just like the drawing. Okay? Okay. I think
that looks pretty good. You might have you might have to flatten again like down here. Like I just want to make sure
that it's nice and flat. So sometimes I'll just
go and just look at different angles and just make sure that the different
parts are nice and flat. Okay, so let's take
this and place it. So this is here. It's up towards the
front, like this. And we'll just have to
twist it and kind of put it in the same position. Let's tap front again,
see where we're at. So we'll twist
maybe a little bit bigger and a little bit
more into the body. Might have to turn it this way to try to get that same angle. Something like that. But again, it looks like our
spheres a little big. So I'm going to make the
shoe a little bit bigger. Because as you can see,
it's right under this arm Well, let's put it a
little bit more in front. Front again, because the
model is actually his, his sort of tilted a
little bit like this. Bring it up a little bit. Okay. I think
that's pretty good. That's a pretty
decent, decent match. And the other one, Let's
just clone this one. So tap clone. Let's tap a line. That way we can just
move it straight over here in Tampa Line again. And now this part
is a little tricky. You just have to rotate it so that this point is
right around here. So you might have to just
rotate it the right way. And this kind of stuff can get
a little bit tricky and so you get used to the gizmo. Here we go. So that foot is right under
his leg or under his arm? Front again and kinda
take a look at it. So I'm going to move
it in a little bit and maybe up a tad bit more. I think that's
actually pretty good. I think that's pretty
good. So there's a little thing There's a couple of things
that you can do. When I'm looking at
this, this looks like a little bit more flat. You can adjust this. You can flatten the bottom a
little bit more if you want. I personally think
it looks fine. But you can always
make those adjustments if you feel like you need to. If you want to make the
feet a little bit longer, you can do stuff like
that pretty easily. And this all looks pretty good. This arm, I'm going to
turn a little bit more, make it a tab, it bigger. And I think I want to move
it down a little bit. I'm just looking at the
amount of space that's here. And also his arm goes down below the bottom
part of his body. So that's just something
to pay attention to. But I might have to
make the whole body a little bit smaller. A little bit smaller, and
maybe bring it forward. That might solve
all my problems. Let's bring this down
to where it should be. He goes. So it's like
almost right on right in line with where he's sitting. So I just want to kind of
match that right in line and take the shoe and
just move it down. Hey, that looks pretty good. This arm is looking
pretty good as well. Can feel free to adjust it. Any adjustments
you want to make. A little bit up a little bit. I think we're in a good
spot for the body so far.
4. Cushions, Mouth & Tongue : Alright, so let's make the star. So we use sphere for the star. Move it up. Go ahead and validated. And I think that will just
skinny it up this way. Like so. That's pretty good.
Lighter front again. And then I'll just
use move to make it a bit more starfish story. So I'm going to use symmetry. And with the move tool, I'm just going to make
it a little more, little more like one of
the parts of the star. So pretty much like that. And actually, you know
what I'm thinking? Before I do that, it's fine. I might just use the symmetry and put on the blue as well. So this way, up front again. So this way everything is equal in the front and the back. So let's just do the same thing. So maybe something like that. Remember, you can
always make it a little thicker if you want to as well. I think I'm gonna make a
little sharper. Here we go. So there's another
thing you can do. You might want to flatten
this a little bit. You can take the flattened tool and you can sort of
flatten out a bit. And then you can smooth it. Give it a little bit
more of that flat look. Okay. But I think that
looks pretty good. So now let's go to
the Scene menu. So here's our sphere. I'm going to put this, I'm
going to put this here up on top and just name it star. Now I want to add a radio. Now we've added a
radio and you can see that it's the wrong way. We really wanted to radial
out in a circle this way. So we have to change which
axis that we're looking at. So we go to the radio, and it's not this one. So we put that back down. And it's not this one,
that's the wrong way. So now you can see that it's
the blue is what we want. We just want five, but you see that
they're really big. So now we'll go to the star. So we're inside the
radio would just go to star. With the gizmo. We can figure out how to
get them closer together. So now we can just loops. We'll just move it
down like this. And you can go to the radial itself and then you
can move it back up. It looks pretty good. The only thing is
that the middle should be a bit
round, more round. So one trick I do, Let's hit Solo so we can see
which our original pieces. So just tap that piece. And then you can use move. And we're using symmetry. So we're just kinda, we
want to puff up the middle. So see how I puff up the middle and it's
gonna do the same on the other side because
we have symmetry. So I'm puffing up the middle. Go. Looks pretty good. The only thing that you
might want to do is also, let's see which one
the original one is. Like to work on that one. Sometimes you have to puff up
more than just the middle. I want it to look as
perfect as it can look. I think that looks a bit better. I just want it to
be nice and even. Okay, I think that
looks pretty good. Now we have a nice
little star there. I might save this star to
actually kinda like it. I'm going to go to
Radio, Validate, Join children will
just name this star. And I'm actually going
to save it. It's really good to save assets. Should probably optimize
it first, but that's okay. I'm gonna go to an export. Nomad only includes
selected objects, which is the star. Export it. And save to files. And I'll just save it in assets. And I'll rename it star
Kirby. So I remember Okay, so the star is actually
quite big at the moment. So we can go here and we can box where
we measured together. Probably around 200. So we, we mentioned
together, we'll do, we'll use rounded
edge to round it out. Make it nice and soft. Now we can decimate it. So we go here, we
go to decimate, and this is just adjusting the vertices so that
it's not so huge. Thousands something might be
the best we're going to do. I'm going to backup. I'm going to backup again only because I'm
not really worried about the size and this. I just want it to
look really nice. So I think that's
looking pretty good. I think I'm happy with that. So next we just
have this cylinder. So let's take this star. We use our gizmo and we'll
use snap and snap 90, that so you can
snap it in one of these directions with
these little hoops. You can snap it 90 degrees or you can type
in any number you want. And it will snap right now, 90. So if I go like this, oops, if I go to this tar. And sometimes it's weird when the gizmo is not in the middle. It's very confusing.
Just hit pivot, we set pivot and then
it goes to the middle. The pivot is the turn point, so it's like the center. So e.g. if I show you an example, So let's say we want this to be here
and we want to turn it, but we don't want it to
turn from the middle. You can always take
the pivot down, pivot again, and then it
will Let's take it off snap. And then you can see it'll
like pivot from there. So if you're doing like arms
or something like that or like legs and you put it high up so that
the leg moves more naturally rather than moving from the middle of the piece. But that's okay for
now for this snap 90, it'll snap at 90 degrees. We can put that underneath.
It's quite big. We'll make it a
little bit smaller. Maybe a little bit flatter. So let's bring everything
up a little bit. Okay? Alright, so the next
We'll just do the cylinder. For the cylinder
I think I want to just use I said that backwards. Oh yeah. Okay. Hopefully I remember
that at this app. So for the cylinder, I
think I want to use a leaf. So let's use the latest tool. And actually one of my thinking, so the laser tool
was just tap on anything and then I lay
tool is right here. We can do path. So the way the Leith tool
works is, let's say e.g. make a shape like this. And I tap it to make it
sharper kind of thing. So if I make something
like this and then I press that it makes like
a whole circle out of it. Like kind of
completes the shape. So it's very useful, especially if you want to
make glasses or something. You can just kinda like
you just have to make the edges of it even
the inside edge. So you'd make a chalice, something like that, and then
it completes it like that. Very, very useful tool. So let's use the
path and let's just make this shape so
we can come out a little bit just street like so. Let me make a little
bit of a bevel there. Then straight up. Then we can go straight. Do that. Then we can go straight over
back to where we started. Now the shapes are
gonna be round. That's why we have
to tap on them. The girl above me is always dropping things on
the floor solo. Okay, that's pretty good. Let's just try to
get this more level. I'm just going to use the image. But I don't think
it's that important, so don't worry too
much about it, but I'm just a perfectionist, but I think this is fine. Okay, that looks
pretty straight. So now I'll go
ahead and do this. And now we have a very
similar shape with the bevel. So I'm going to validate it. And then my box little
Ramesh, probably around 200. This will solidify the
shape. As you can see. I'm gonna do rounded edge, which at times might need to revisit a little lower,
but I think it's okay. You can also take
smooth symmetry and kind of give it
little bit more of a heavy-handed smooth
down, something like that. And I want to try to get it
in the middle of the scene. Sometimes they get a little
confused myself, actually. I go to gizmo and then
go to the gizmo options. Then I do move origin, it should move origin moves
things to the world center. So I think that actually worked. So I'm just going to bake
it just to make sure. So now it's in world centers. So that's exactly
what I wanted to do. So I'm going to flatten
it a little bit. If you don't want to
flatten the bottom part, you can use a mask. So I'll use Select Mask here, and I'll just use the rectangle. I'll just mask off the bottom. Now I can sort of sort of adjust this a
little bit as I want. And then go back to the
mask and then clear. When you do that, you might
have to remeasure it again, but it actually looks fine. So I don't think I
don't think I have to. So it looks pretty similar. It might be a little
bit different. I think it's okay.
I'm okay with it. There might actually be a way let's say let's go to front. Let's say you did want to. It looks like it's actually going in a little bit
from here and going in. So if I wanted to do that, I think I would take
Select Mask Rectangle. I'd make a rectangle right above the bottom part or
right above that line. Then I would take the
gizmo and I think you can shrink it a little bit. Oh, that's what I wanted. I pulled it down. It's kind of strange. So I take the green, let's go back to one. Take the green, make it smaller. And then do this. I learned that by
accident actually, and it's very, very useful. I think that's pretty good. So I'm gonna do select Clear. It looks pretty good. Stretch it out a little bit. So it's not so bad.
Let's go ahead and box. So remeshing it back to 200. I'm just gonna do round edge just to get it nice and soft. And use the Smooth tool. Heavy-handed approach. So it looks pretty good. I think it looks pretty good. So let's take gizmo and
move it up to the line. Like so. We have our little star pillow here which you can adjust or
you can just kinda leave it. In the artwork. He's a little off kilter. So let's see. So if we want to make it
just like the artwork, we would take this star and
sort of take it off snap. Which sort of make it
like that a little bit. Maybe even turn it a
little bit like this. Then we can take move. And we don't need the blue symmetry anymore because then it would match
the bottom and the top. So let's turn that off. And we actually don't need
the read anymore either. But we'll leave it. Let's just turn symmetry off. So now we can just push up. Let's make the move tool. The smaller can
just push up where the star is coming into
contact with the piece. That way it just looks like it doesn't look like
it's going into it. I want it to look like
it's resting upon it. You can also use
Smooth Tool as well. Okay, so something like that Okay, so now let's figure
out where we want Kirby. We'll go to our scene.
I'll wait a minute. There we go. So we go to Kirby. Oh, let's just name
this bottom blue. This is all Kirby. Not bottom blue. Let's bring him up a little bit. Towards the front. Actually, I think I want to bring him down. Alright, so I'm gonna
make sure I hit front. And this is one of the great reasons why we
have our symmetry here, because this will make
this process a lot easier for the mouth. Let's use, let's
use regular mask. And now the head is fairly small in size or density,
I should say. So let's go here. Multirate will subdivide it. Then we'll go to voxel. Let's re measured at 200. Alteration will be lost. So Ramesh it. Now it'll be a
little bit easier for us to, to work with the tools, at least we're using regular
mask this like little blob. And we want to use symmetry. And so this is
gonna, everything's going to happen on both sides. So let's zoom in and
make his little mouth. So I'm gonna do it right
around, right about here. Let me make this smaller
so I can get a little bit more of a fine detail. So next I'm gonna like that
is pretty good. I like it. Okay, so next, we can essentially go to
the little blob invert. And we can use our
gizmo to push this in. Push it in a little
bit deeper, maybe. Widen it. Just so it has some
depth like that. So I think that
looks pretty good. So that's to go back to
mask or select mask. Go to the Options and clear it. And this is what we have. It
looks, it looks pretty good. It's a little rough
around the edges, but we'll be able to,
we'll be able to fix that. So next, let's just voxel, remission it back at 200. Now let's take our Smooth
Tool with symmetry on and we'll just smooth
out this mouth area. Okay, that looks a lot better. It looks good. Might be a little big. So you can make it smaller if you want, but I don't mind it. I don't mind it
that size. So let's make the eyes actually, let's make the tongue first. So the tongue will
be really easy. We have the body
will make a sphere. Gizmo, bring it up. Ford. Smaller and just flatten it. It's probably pretty much it. He doesn't really have a,
really think he should have a in-depth tongue. So let's see if we
can go smaller. There we go,
something like that. Um, validate it and then if you want, you
can kinda move it. If you want to have
at the back of it. Whoops, let's turn on symmetry. If you want to backup
it a little wider, could do some stuff like that. Make the back a
little more wide. So another trick. You can take the flattened tool and you can flatten this
inside plane on the mouth. It gives it a nice
professional feel. It looks gray. Encrypted, doesn't
have any teeth. But of course you
could give them some TVs if you
felt so inclined. I might do that later. I don't know if I
want to do it now. Since I'm doing a tutorial, I should probably just try
to stick to being normal.
5. Eyes & ...Teeth?: Try to stick to being normal. This arm arm though feels
a little uneven to me, so I'm going to try
to adjust that. And actually we'll just
move it in a little bit. Angle it back. Let's go to the
front. Little pig. I'll just make it a
little bit smaller. Feels pretty good. Okay, so now let's
make some eyes. So this is where things
can get a bit tricky. Figuring out how to
make these eyes. Let's see. What's the
best way to do it. So I think if I was going
to make these eyes, I would make them sort
of on different layers, almost like pieces
of PVC or something. So let's see what
did we just make? So here's the we didn't
name a lot of these things. So here's the foot. Foot to rename everything else. So this is the tongue k. So now we'll do add. And I think I want to
add this cylinder. I think I'd like
to do a cylinder. Will bring it straight up. We use snap, snap it forward. And we'll bring it forward. Make it small. Clicking
on other things. So I want to use something
like this for it. So let's shrink it this way. Doesn't need that much. I
think that's pretty good. Maybe a little bit
more. Okay. So I think we can just stretch it. But it's actually a
little bit more round. So I think that's
good for the stretch. And should I mirror it now? I don't think I don't think
I need to mirror yet. I think I'll just validate it. So now I'm going to use
move because I want to make the top a little bit
more round on this. I'm going to hit symmetry. I also wanna do the
front end, the back. So let's do, let's go to the symmetry button
and I think it's blue note is why
we want y as well. We're using move symmetry is on. And now we can just kinda spread out the top a little bit. Maybe even the
bottom of tad bit. Like so. And it
looks a lot better. Okay. So now we can move this into position on
the head. Tilt it. Let's take it off
snap. So I'll tilt it. This. I'm just going to be
paying attention to making this look good. Now that I'm happy, I think
I'm gonna put it around here. Maybe a little bit over more. Something like that. Looks a little more official. I'm gonna move it back up and I'm actually going to take move. I'm gonna take it
off of the green. We don't need the green anymore. So let's tap the green symmetry. And all I want to
do is push it up. So I'm just going to push it up. It gives it a nice arc, arc. And then I'm going
to bring it down. And I'm going to try
to fit it to the face. There we go. It's pretty nice. If you want, you can give it a
once-over with round edge. It might be a little too small. That's perfect. So we hit
it with a nice round edge. I think that looks good. You can still adjust the size is a little bit if you need to. I think I like that. Bring
it down a little bit. I think that's perfect. Okay, So now what we can do is
take this cylinder, Let's name this eye black. Let's clonus. And name this one white So hopefully we can just bring
this up. This is a clone. Make it smaller, and just
kinda insert it here. Essentially just doing
that. You're just doing the same
thing. We just did. Something like
that. Now this one is a little thicker so we
can spread it this way. We can shrink it a little bit. And just kinda make it like
the way that the artists, if you find that it's
too much of a bend, what you can do is sometimes you can just take the green and just stretch it down and it sort
of flattens out a bit. So let's see now, a
little bit more, maybe. This way. Whole
thing a bit smaller. I think something like that
looks pretty accurate. Okay, so now let's clone
white and name this one blue. Blue. So this one, the clone I'm going to bring up. We have to make, it's very
similar to this circle. It's just like half of it. So what we'll do
is we have i blue, Let's clone it.
Let's name this one. I blew x. This one ring up. We'll use the green to
kinda open it up like that. Bring it back down. Let's move it up. So we'll use a Boolean
operation and we'll cut this shape out of
our original circle. So let's see. I think there's, I
think that's fine. I think that looks pretty good. It looks pretty accurate. Stretch this a little bit more and move it
up a little bit. Okay, I think that looks good. So I'm in it, so
do a quick save. So let's just do a quick save. And we'll take the eye blue X and the eye blue hide I blew x. If you're having issues to
hiding just this one layer, then just go to advanced
and uncheck these. So now that this one is hidden, we can voxel, rematch
them together. So we'll go here. We mesh, mesh together 200. You see that it carved that
shape out of auxiliary mesh. This one shape at 200. Take rounded edge. Give it a good once-over. And then this piece
I'm going to decimate because it's definitely way too big for just being a piece in the i 614 is pretty good. So now we'll just
take this shape. Let's go pivot, reset pivot. Let's bring this down to the I. Place it down here. I'm going to lift
it up and use move. I just want to I just want
to bend it a little bit. So right in the middle. It's going to bend
it a little bit. And hopefully that helps. Yeah, I think
that's pretty good. With these little round things. We can color them. Or you can add cylinders just
like we did with the eye. Actually maybe we
can decimate this. Maybe we can clone this one. Move it down below the eyes
and call it pink blush. Since we already did
a lot of that work, maybe we can just use this. So I'll bring it down, spin it, shrink it some. Seems like it's
right about there. So just take some
time and just kinda get it in the right position. Like that. It's a little fatter. A little more round rotund And then we can kinda
place it in the skin. I can I can I can't say
that about poor Kirby. Sounds painful. Let's bend it
a little bit in the middle. That looks pretty good. Movie trying to get things
perfect as I can get them. I think that's good. It looks like the only thing that's bugging me a
little bit about the eye, it looks a little wide. So I'm going to
take the move tool, make it pretty small, which is squeezed the
eye a little bit. Using symmetry.
Nice. The best part about this is if you need to, you can take all the eye pieces. And I wouldn't do it too much, but you can sort of adjust
them a little bit if you need. That. Looks good. Okay, great. Let's do a quick save. Okay, so now that we have
all this on one side done, let's take all the AI parts, actually all of these parts, bottom blue and black. Add mirror. So now we have everything
on the other side. But we might need
to, It looks like it's a little too
far apart here. So let's go. I
black, white, blue. Maybe we should just
take everything away. Bottom blue. This can come out. I thought this was the i bottom. That's okay. Let's take all of this stuff
and move it a little bit closer to do some adjusting. Probably. We can have the eyes
that far apart. Then actually it looks okay. That looks pretty good. I just wish the mouth the
mouth was a little smaller. So let's see if I can make that happen just by using move. Softly, pulling. And this is a classic example of the difference between
move and drag. Because move tries to keep everything nice and
smooth. Smooth this out. But drag is good in some
situations like e.g. if I'm trying to make him look
a little bit more smiley, drag is actually pretty good. I want to flatten this again because I really
liked that effect. We had. It looks pretty good. Springs
mouth up a little bit. And we'll just the
tongue as well. Okay, so the next thing, Let's see, I want to
take this and the body. I need the tongue as well. So if you see the head
is facing off that way, so I want to match that. So I'm going to spin it like this and then
spin it this blue. So I think I need
to move the pivot. Okay, so I'm gonna take the
pivot, I'm gonna go to front. I'm going to move the pivot up. Hopefully it's an a directly
in the middle of him. I'm going to hit pivot again. I still have all of
these parts chosen. But hopefully I should be
able to n, Here we go. So let's hit front. That looks a little
bit more accurate. Back a little bit. I
think that's perfect. I think those great. I didn't want to give them.
I do want to give him some TVs. Maybe I should. There's really no rules. So I'm going to add a sphere. Really go rogue here. Let's just at least just
see what it looks like. I should have done I
should have done this. I should have I
should have done this before we moved it like
we did, but that's okay. Oh, well, because that would
have made it a lot easier. Excuse me. Hopefully
you didn't hear that. Calmness in the middle. I just want to make it
fairly even even Steven. I think that looks
pretty good and you know what I like the teeth. I don't care that it
doesn't have teeth. I liked the teeth. You
have to remember that's, you know, you can make
these changes if you want. That's the fun part
about being an artist. You can change things, make things yours,
give them a head. So last but not least. Another thing I wanted to do is I'm gonna take
it off symmetry. I'm using move. I just want to flatten him
to see how the CDS gaps. I don't like that. It
doesn't feel natural. I'm going to take the line off. We don't really need it now. So I'm just going to use
move without symmetry. And I'm just going
to stretch him down. This way. He has some weight. Really don't want
to see a gap there. Or at least not much of a gap. Okay. And also I'm gonna do in Fleet. And I think I might want to
inflate around the arms. The arms is okay. I'm going to inflate
around this one to flee tool is one of my
favorite tools to use. Okay, we'll do
something like that. We can even do a
little bit around. Now, remember, I'm on the body. So sometimes it's
a little tricky. You can't really see exactly what you're
doing and you do make mistakes like that. But you can go in the foot
and you can hit blending. So let's go to this
little icon hit blending to bring it down. So let's bring it down
a little bit. Now. We can actually see I was on the foot, should
have been on the body. So something like that. A little bit firmer. Now I just want to smooth just so it's
nice and natural looking. Smooth. This one too a little bit. Okay. Luis
6. Super Star Details: And also notice that this
has like a little seam. If we use, if we put symmetry
back on, I think we need. So we'll use the red symmetry to make this seem what's the
best way to make this scene? I guess just crease
really small. Let's just see what it
looks like. It looks okay. But the problem is
the star is two, it's not dense enough. So let's do a quick save. And let's bring the foot
back before I forget. So we'll go to blending
and just bring it back upwards, put too opaque. We'll go back to this star. Here. Voxel will Vox worry, mesh it around 300. Give it a nice
smooth if you like. Get it looking nice and perfect. And then take crease. Now you should be able to get
a nice crease in her star. Should meet back up. Here we go. So now we have
a nice crease in the store. If you really want to get crazy and get into some details, then you can do things like you can use clay really small. And you can add like little things that look
like It's like pulling, make it look like fabric. There's so much you can do. You can use crease again to like really make it
look like fabric. It's fun to do, but it's,
you know, it's a lot, It's a lot of work
that out a little bit. Symmetry off to. And sometimes I just
go back-and-forth. You can even use a
inflate as well. See it just kinda make, gives
it a little bit of texture. Term Symmetry off. You can see you, I grew up
on these little tangents. You can textures that I don't
really need to be making. But I love adding little
details like this. I think, I think it adds so much to a sculptor really, really do. You can even go like this too. You can add some
kinda make it look like we just saw a little bit of a
little something. I want to smooth all of these out just so they're nice and like blended in COM, blend out the edges. I really want it to be subtle. I think we're good Nice. Now we have a
little texture in there. Nice looking good. This
guy's little tongue. I think we might be good. Okay, so let's do some quick housecleaning with our model. So a lot of these things
are very big in size. So I'm just going to
check everything. So the heads 167. So I'm gonna go ahead
and decimate that. Still looks pretty good. I
might decimate it more later, but let's go to the foot. Obviously this can be decimated quite a bit. Still look good. Same thing with the other foot. Arms, Not bad. Star do have some detail. But I think it still
looks pretty good at 24. This can decimate a good bit. I think it looks good at 5,000. Okay. We got it down pretty well. Let's check the tongue. Check the other arm. Okay, So
I think that's pretty good. So let's go to front.
This is our main view. We can now take it
out of perspective. And let's add a view tab
here and just call this one. You can add some other
views if you want. But I think that
one's pretty good. Sitting on the edge, I
guess you could move them back to if you don't want
them right on the edge. You could always move him back. We can change them from
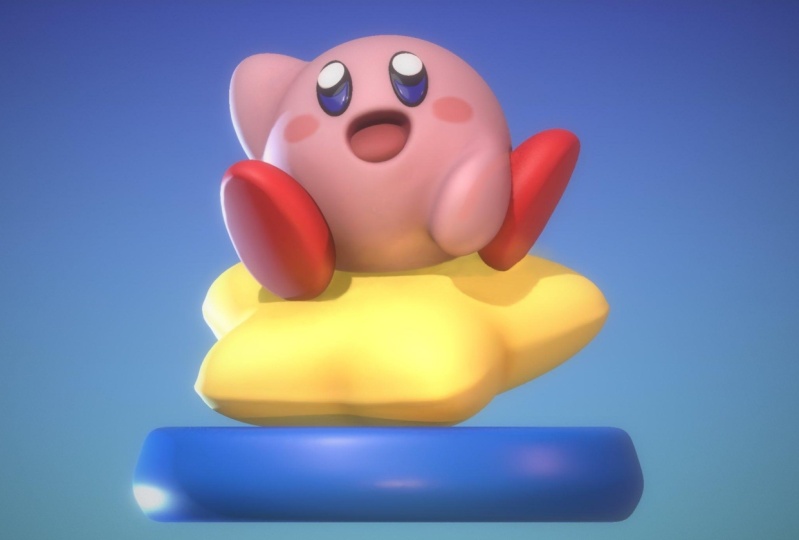
Metcalf to let PBR. Now you see everything is white. I'm going to click Save. So one thing that I've been
doing is I like to make my scopes a nice
terracotta color. So that's essentially kind
of maybe around here. Maybe a little bit more red. Kinda like a
flowerpot type color. The roughness around six. So, so something like that. I'm gonna go to my actual color. I have saved. Here's the
actual color, C, B7. C3 is the color. So I'm going to paint all. I'm going to take
everything actually. And let's see is
that everything. Take everything and paint all. Now we have this nice terracotta
color that we can light. So let's do a really quick,
easy lighting setup. We're going to tap this
little light thing here. We're going to turn off the
environment had a light. So this one can
be our key light. So I'm just going to bring
it over and up a little bit. Doesn't really matter
where this light goes. But I like to put the light where it's looks like
it's coming from. It's a little dark,
so let's raise the intensity to maybe
like 1.53 or so. That'll be our key light. So we can go back
into the lights here, edit T, and then we'll
add another light. You can put this one over here. This way at him. We'll call this one fill and
we'll lower the intensity. We just don't want
it to be black. So we wanna raise it
just so it gets a little bit more light on him coming from this direction. Okay. I think that looks pretty good. And another thing
that I wanted to do with both of these lights. So for this one, tap on the three little
dots and then put softness on this one.
Softness as well. So now let's put an edge light that will give them a
nice bright edge here. Let's go back to our lights. Oh, we forgot to name this one. This one is Phil, is to fill light. So add another one. We'll name this one. Edge. We'll change
it to a spotlight. Will move it behind him. Maybe around there.
I go to the front. So k Now I'm just going
to adjust this light. Can be a little tricky.
Sometimes. It's just this light, so you only have a nice edge. Raise the intensity
a little bit. You can use the orange dot
to raise the the cone angle. This is all the same. Those little dots, they're
the same as if you go here. You have softness. You have the cone angle which
makes it bright or narrow. So we have all of those there as well. I think
that's pretty good. I wish I could get it a
little bit more on his head. So maybe something like
that is pretty good. I'll make this a little wider. I'll go a little bit
more behind him. I think that's good. I like that. Okay. So now
let's add our lightest light. So we'll add, will
bring this light up. Spotlight again. We'll pointed straight
down on his head. This is probably one of my
favorite lighting setups. I use it all the time
and all my models. So coming straight
down on his head. I like to make this like cool. So we'll tap on the color
and bring it up to blue. Just to kind of shake
it up a little bit. Sometimes I change the edge light to be a little
bit more warm. So then we have
something like this. Now let's bring back
the environment, which is gonna be really bright. So what we do is we
bring this down. Remember this is my
customer environment that you can download. So now it's still a little bit bright and where
the shadows are. But we'll take care of that
when we do post-process. So just go here post-process. And I have all these options. You can set the ambient occlusion strength
up a little bit, that'll make it darker
in those shadows. You can adjust
these as you need. But usually they're
pretty good as is. I think it looks pretty nice. So now the next thing
let's do a quick Save. I'm also going to do is
Save As I'll have one, I'll call it blend. Because this one I'll
probably bring over into Blender after I'm
finished with it. So now we can just do a
quick color for his head. Go for a nice Kirby pink. And it would help
if I could see him. So I'm going to move
the image transform, bringing the image here. Okay. I'll keep that there. So now I can see a lot better
what colors should be. Okay. That looks about right. So we'll paint. This
is a little bit, It's close but it's a little bit darker or a little bit more red. That looks good. So we'll paint this
we know is black. This we know is blue. Maybe around there.
This is white. And the two arms. So we can join those for now. And then we can take
our pink will do this little eyedropper
to get the same color, go back to the paint
and then pain. All we can do the same
thing with the feet. Let's just join them. And now we'll just
find a color for that little shoes. That
looks about right. But you can see they're
a little more glossy. So bring this down a bit. Okay. Now this is yellow. Nice pale yellow will make it a little brighter,
a little lighter. If we want. Put a little
bit of gloss on it. So it looks kinda like leathery. Now, this is right about there. Maybe a little deeper in the
purple now, that looks good. The tongue the tongue can
be the same color as this. Probably a little TVs. They're not together.
Now they're not. So let's let's join them. Naming them will make them wait. Maybe we'll make them
a little glossy. Okay. There we go. Can probably bring the edge laid
down a little bit. A little bright. Maybe we want to change
this background color. Could use white, but I don't
really use white that much. But maybe we'll use white. Moving up a little bit,
a little bit more. Let me adjust the lighting, make sure you guys can see this nicely. Okay, I
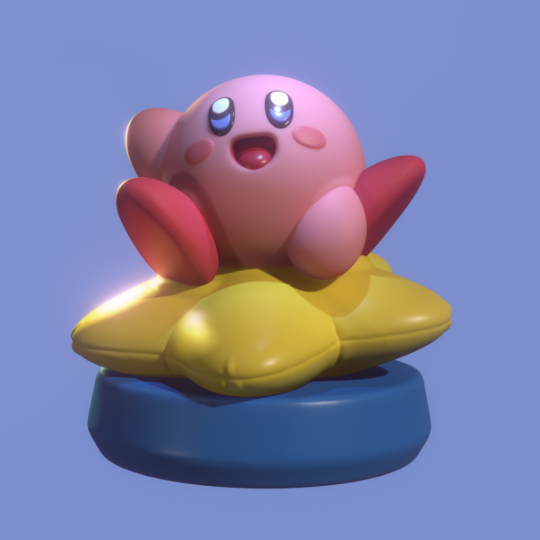
think it looks good. So last but not least, let's change his texture
to a subsurface. So that will make another
big difference with him. Put this down to
maybe round one. I'll probably match
that with most of this, most of these pinkish blush. Let's go ahead and whoops. Subsurface can probably
leave that as it is. Teeth, subsurface, VDS, arms, and maybe even the tongue. Everything just
looks better to me. Maybe not the eyes, maybe just the whites. Maybe not even the whites. Maybe we'll leave that to, let's see how this looks. Subsurface, give it
a little more depth. Look good. I think it looks it looks pretty
cool, pretty close. So February you can continue to change things. Have fun with it. Obviously, I do it kind
of things that I like, but I might make some
changes after this. But I think it looks cool. I don't like the
white background. Ready to go with something like even pink feels
a little bit more. Pink or like orange feels
a little bit nicer to me. Let's get rid of the
reference image. Let's get rid of it again. I want to update the view
without the reference image. All right, and now we
have our little Kirby. Alright, I hope you
guys enjoyed that. Keep drawing, keep sculpting. I'll see you all
in the next video.
7. Extra Details: I just want to see if the
eyes will look better. I get rid of the
white and the blue. I want to see what
this looks like if I make it black but glossy. Because his eyes are
actually just glossy. The white is from
the environment. You can actually bump
this up a little bit by going here and bumping
up the reflectance. But it will look
nicer on something like an application
where you could really see really make
some round lights that this would be
bouncing off of. But I feel like I kinda like
the black better. Really do. Make allusion nice. Let's see if we adjust. The exposure. Just gets
a little bit brighter. I think I like it brighter. Actually. Where's the key light? Maybe they even want to
bump this up a little bit to make it a little more dreamy. Ok, so his arms and his
body I'm going to join. No, wanna make them subsurface and maybe make them a
little more see-through. When you get some
of those pinks. This too, sometimes you can make things a little more
see-through and they actually blend in a
little bit better. I like that. Let's see
this view as well. I think I might like it without all that other fluff to it. You know, it just kinda like Let's see what happen
if I meet them glossy. Yeah, I don't know. I think I I feel like I kinda
like the Black Panther. Kinda cute too. Actually. It's kinda cute. Little more. Maybe we're
bringing down the, the light, the top light, a little bit
more of those pinks in there. It's actually
looking pretty nice. Light. Actually looking quite nice. We can probably make it match up to the background
a little bit more. Click Save. And we'll
do a quick export. I think that's officially welcome back guys. I'm really glad that you guys joined me. I hope
you enjoyed it. I hope you learned a
lot and I'm really looking forward to
seeing your crazy Kirby. That's what I'm really
looking forward to. So make sure that when you, when you're ready,
post the images on projects and resources. Get my class review really helps me, really
helps the class. All that good
stuff. But I really just want to see
your curve ease. Social media tag me so I
can put you in my stories. I love putting my
students and my stories. And it's just another
place where I can just check out your project. And I can also check out
your other work because I just like to see cool
artists doing cool things. But yeah, that's about it. I love doing these
character design classes. I have a lot more
than I want to do. I might try to do longer
either an intermediate or an advanced class because you guys have taken a lot
of my beginner classes now, it's time to start moving
up to that next level. So we can do some
really cool things. Of course, look out on YouTube. I'm going to bring
Kirby into Blender and probably do some really cool renders and things like that. So if you're interested, all
that stuff is on YouTube. But I have a lot of
nomad sculpting. Now Blender and now like 3D
printing stuff on YouTube. So make sure you
follow me there. I spent a lot of time there and I invest a lot
of time there. But of course there's
always gonna be special skill share classes
for my Skillshare students. I love teaching here. I love teaching
with you guys and I love getting to see
you guys projects. There goes another one. I really appreciate you
spending the time with me and we're just going to
keep rocking and rolling. I love it. I can't get enough. Keep
drawing, keep sculpting. I'll see you all
in the next video.
 Dave Reed, 2D & 3D Illustrator - Brooklyn, NY