Transcripts
1. Introduction Custom Brushes: Adobe Illustrator has a
robust brush energy that is often not properly utilized by graphic designers
and illustrators. I'm Martin. I have over 20 years of experience
as a graphic designer, illustrator and Adobe
certified instructor. I have worked with
companies like BBC. These needs, google, ikea, and I cannot wait to share
my best practices with you. This is a streamlined
hands-on course focusing on a real
life design project. I will be walking you through everything step-by-step
and you will get all the exercise files
so you can follow along in case you
prefer not to copy me. You can also follow my workflow using alternative
assets provided. Create something
completely unique that you can showcase in your
creative portfolio. I am pretty sure
this course will inspire you to create
something amazing. We will learn the ins
and outs of creating custom brushes and even
how to combine them. The three main brush
categories we will be focusing on our scatter art
and pattern brushes. Besides all the technical stuff, we will also cover some
important graphic design theory you will be able to apply in any of your future
creative projects. You can join this course without any prior knowledge
in graphic design, illustration or
Adobe applications. But to complete the project, you will need access to Adobe Creative Cloud and a
desktop or laptop computer. But now it's time
to start creating. So I will see you
in the next lesson.
2. Custom brushes workflow start: I'm going to start with
a blank new document. And the first thing that
I normally do is to clear out my swatches
and brushes. We don't need any
templates or presets. So what you can do is
from the brushes panel, you can choose
select unused from the panel menu and then delete. Yes, That clears out everything and just keeps
these two basic brushes. Then let's do the same
with the swatches as well. We go to the panel
menu and choose, select unused, and then delete everything
from there as well. Once again, it only keeps
the white and black colors. Now notice that I already have a few swatches saved
into a CC library. So these are the colors
I'm going to use. And what I can do is
to select all of them, right-click and choose
add color to swatches. So this will add them all here. If you want to use the
same exact colors, you can find the link to the CC library in the
description below. So now that we have
everything ready, Let's draw a rectangle. I'm just using the
rectangle tool and draw a nice rectangle,
something like this. I'm going to change its colors. So first of all, I'm going
to get rid of the stroke. I'm going to use this brighter
green color for the fill. Now, I'm going to
click and drag on the corner widgets and create
a rounded corner on both. The top and the bottom
is going to limit itself so you won't be able to go
beyond the certain size. So that's like the maximum
radius that you can use. Now next, let's draw
a vertical line. I'm going to use the pen tool and I'm going to click here on the top and hold down the Shift key and
click at the bottom. Now for this one, I'm going
to use simply a stroke. So I'm going to press Shift X to swap the fill color
to a stroke color. And I'm going to use the
appearance panel and just quickly change that to
the darker green value. I will also increase
the point size until it becomes a bit
more bulky this line, and I will also click on
the Stroke panel option here and set the cap to round. So that's going to keep these
end points more rounded. So now that we have
this first line, I'm going to duplicate it a couple of times with
the Selection Tool. Hold down the Alt or Option key and click and drag
it to the side. You can also hold
down the Shift key to keep it straight and then press Command or Control
D a couple of times. I think we'll need
for duplicates here. And then now I can
drag them a little bit closer to the actual shape itself and then move
the one on the left all the way to the
edge of our rectangle. Then the other one also
to the right edge. Now select all of
these and then choose from here the Horizontal
Distribute Center. Once I click on that, that's
going to even them out. And we don't actually need
these ones on the sides. I only use them just
to be able to create this perfect quarters
within the rectangle shape. Now, what we need to do is
to add a bit of life to this illustration because
otherwise it would be very geometric and boring. So what I'm going
to do first of all, is to draw a
rectangle once again. And I will use this as a guide. So I am going to set
it up around here. And notice that I'm
using the space bar to position the rectangle
while I'm drawing it. So whenever you are holding down the space bar by
drawing any shapes, you can still move it around
before you let go the mouse. And I'm going to separate this drawing
into three sections, the top, the center, and the bottom sections. This will be
important when we are creating our pattern
brush at the end. For now, I'm just going to set it up to something like this. And then once it's created, I'm going to press
Command or Control F5 to turn this into a guide. When I click away,
you can see it's actually not the shape anymore. It is a guide. And we can also see it here
in the layers panel that this rectangle is now
turned into a guide. Why is that important? Because this element, we
will only use two separate our illustration and we don't
want it to show anywhere. Now what we need
to do is to select everything and move it to the side a bit and
then duplicate it. So we have a second version. And I'm going to select
all of these shapes apart from the guide and then
switch to the eraser tool, that's Shift E on the keyboard. And then holding down
Alt or Option key, we can delete the top section. Just keep a little bit of
section here around the guide. And I'm going to do the
same thing from below. Again, holding down
Alt or Option key, I'm going to delete
from this shape. Now we can delete the guide
from here, zooming closer. I'm going to also make
sure that these lines, so these three lines don't
actually use the cap feature. So going back to the
stroke settings, I'm going to set them
back to Butt Cap. That's the option. And I'm going to also
make sure that they are extended all the
way to the edge. So on the top and on the bottom. Okay, So now that
we have it ready, let's select all of these
elements in group it together, Command or Control G, and then drag it back here on
top of our original shape. So make sure it's nicely aligned so you shouldn't be able to see where it is because it's
exactly the same values. And I'm going to select it and copy it down also to the bottom. I'm going to drag
it down all the way where that guide is. So once you have these in place, they should be on top of your actual illustration
here in the layers panel, I can see that both of them are on top of
everything else. I am also going to lock these, so I will use the lock icon, so I won't be able to
select them and I won't be able to mess them up so they
will stay where they are. Now, these we will use to make sure that our illustration is kept at the exact same position
on these critical edges. This is again very important for creating later on
the pattern brush, because if you alter
anything around these details is
going to show up as little shifts in your pattern brushes
which doesn't look good. So this is very important step. Of course you can skip it
and you can work around it. But I found this technique
to be quite useful. So we have these little
details app that we've logged as a security measure.
3. Distortion, Warp Tool: Now let's move on and select everything in the background. And we're going to
add a bit of life to this illustration
because it looks a bit too flat and
geometric at the moment. So I'm going to use the
warp tool for this, That's Shift R on the keyboard. And with this, we
can start painting over details and distorted. Now notice that if
I use this tool around that detail
that ve logged, that will always tell me
whether I am creating distortions to close to
that secure line or not. So that's the reason
why we have it there. But what I'm going
to do is to be more subtle and use a bigger
brush with this tool. The way you can change the
brush size is by holding down Alt or Option and
Shift key together. With that, you can very quickly
change the brush size and then quickly add a little
bit of distortion up here. And also below. Once again, I'm, I'm avoiding
going close to the guides. We can check always. Once I deselect this, whether we went to close or not. So I'm going to do a bit of distortion here as
well at the bottom. Something like that. Maybe these lines can be
distorted in the middle. And now I can click away and
have a look at those edges. I think they look good. Maybe apart from this one here, this was shifted slightly. So what I can do
here is to select that line and then use the
direct selection tool. Select the point that is
close to that detail. Maybe zoom a little bit
even closer and make sure our align it so it has a nice continuous line that
we can always go back and make further adjustments with
individual details as well. If I don't like the way
this line bends here, I can select it with the Direct Selection Tool
or the path selection tool, and then use the
warp tool again, change the brush size if needed. And then notice that
now it's only going to affect that line without
distorting any other details. So it's almost like
isolating it from the rest of the objects by
making that selection first. Now, what I'm going to do is to also make it a little
bit of adjustment on the main shape just to have a bit more interesting
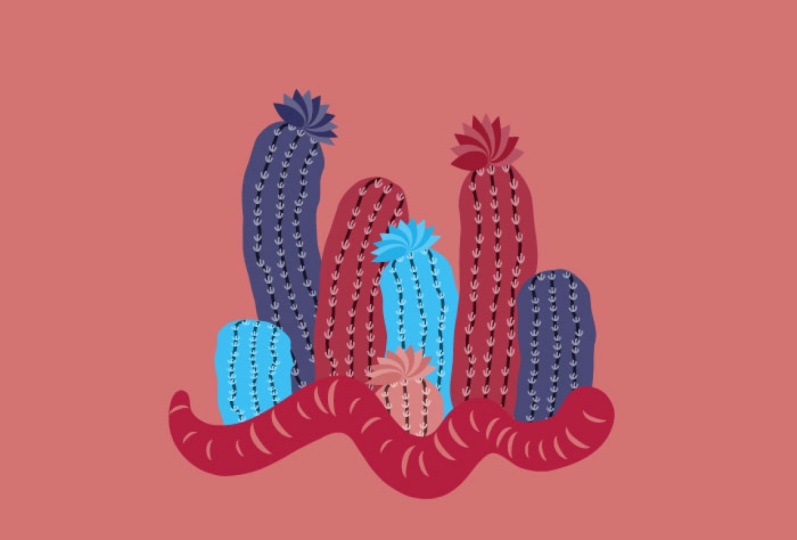
and detail here, something like that. And then I am going to refine these lines
because I would like to create a nice top
and bottom detail for the cacti or
the cactus details. So I'm going to
select this line here first and use the eraser tool, Shift E, delete the
bit that I don't need. And then using the
direct selection tool, I can drag these points into position to create a nice
little bending line here. I'm going to delete
from this other line as well that I can just
keep it straight. And for this one, I'll delete what I don't need. And then the last
point here, again, I can just bend it with the direct selection
tool, like so. To save time, you can
do this even faster. Just use the direct
selection tool and select the top edges
of your lines, delete them, and then use the direct selection
tool to drag them into the position
that you need them. So this one again
can be bent a bit. This one can be dragged down. And then this one again, select the top
point of this path, drag it in there, and then add a little curve here and a little curve there. So if I'm still not happy
with the way it curves, I can still use the warp tool. Just move it around
until it fits. Now, let's take a
look at this from a distance and I
think it looks fine. And now what we can do is to get rid of these locked objects. So I'm going to actually
delete one of them, maybe the one at the bottom. And I'm going to move
this other one here to the side and also
rotate it 90 degrees. So holding down Shift key, just drag it until it is
flat like horizontal. This is the way we will need
it for the pattern brush. So we just keep
that on the side. But now we have
everything here ready for the base of the cacti brush.
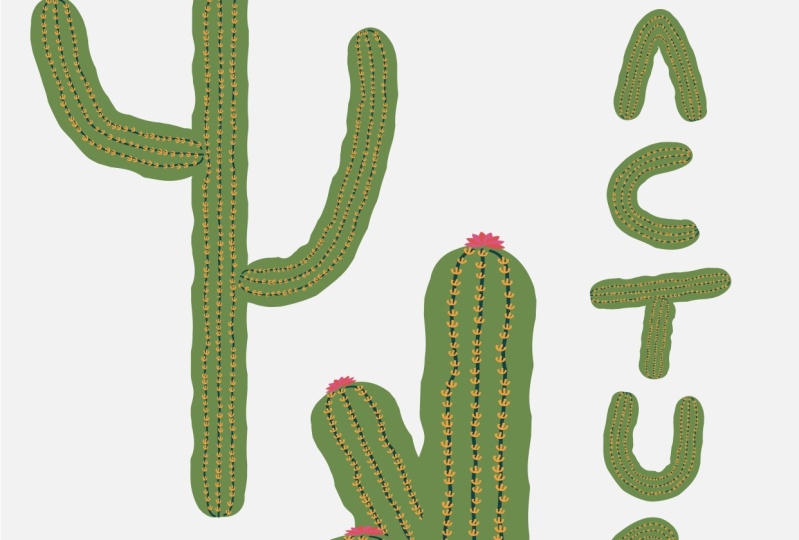
4. Creating Spikes, Scatter Brush: Now it's time to create a scatter brush for
these spikes or spines. So for this, I'm going to use the default calligraphic brush. I just selected
that circle there, and I'm going to use
this third color, this bright yellow color, and I'm going to paint 123. So this will be a spike
detail or spine detail, and I will select it
and group it together. Now I'm going to make
this smaller because at the moment it's too big
compared to the cactus. But before I do so, I wanted to mention that
under the transform panel, you have to check whether
you have the scale, strokes and effects
option on or not, then it's turned on. That means when you
are scaling something, it's also going to
scale the stroke sizes. And that's actually good for us. So that's what I need it here. So I kept it enabled. So remember that
option is there. So I'm going to set it up to
something around this size. Let's just see how it looks. I'm going to place it here. Yeah, that looks quite nice. And I am going to
drag this group, the spine or spike into
the brushes panel. So this is going to be
our first custom brush, and this will be saved
as a scatter brush. So let's click on Okay. Now the scatter brush
settings will come up, but we will come
back to this later. For now, I'm just going
to click on, Okay. Alright, now this is a little detail we
can put to the side. We don't actually
need it anymore, but it's good to keep it there. And notice that we have the
scatter brush already here. Now we can double-click
on this to rename it, I will just call it spikes and then switch to the brush tool by pressing B on the keyboard. And if I drew a line, Let's just draw a
vertical line here. It's already adding
these little details. But what we need to
do is to go into the settings by double-clicking
on the brush icon. And here we will add a bit
of life again to the design. So we need to randomize
all of these values, the size, spacing,
scatter and rotation. So what we do first is to
set them all to random. And then we can
adjust these values. Essentially, you can set
up a tolerance for all of these attributes and minimum and maximum
randomization value. So if for example, the size is set to a
100100 on both sides, that means it's still limited, so we don't allow
any size changes. But once I start changing
the size and I'm normally use the shift up
and down arrows to increase, decrease these values
when they are selected. You can see if I said the
size maybe 250 per cent, then it can already vary the size between
the original size, which is a 100 per cent, that's the maximum value. And 50 per cent, which is half the size. If I want to go beyond
the original size, I can even increase this
beyond 100 per cent, and then we get much
larger sizes as well. So the scale or threshold is already much of either
than originally, but I'm actually going
to keep it below a 100%, maybe 90% for the maximum size
and for the minimum size, I will keep it around 70%. So I don't want too big of a difference between
these details. And I'm going to
do is the same for all the other attributes
for spacing again, maybe between 9040%, yeah,
something like that. You can see that
again randomizes the distance between
each of these elements. Then for scatter,
I'm going to use minus ten and then ten per cent. That's, again, you can see will shift things around
left and right, a bit of randomization there, and then rotation again
minus ten and positive ten. So we can check
before and after that was without using
these random values. And this is how it looks with
all of these randomization. Now let's click Okay, and then click on
Apply to Strokes. So it's going to keep
applying these changes to the existing brush lines. And what you can
do now is to use the brush tool again
with the same brush and just draw
another line here on the left and one more
here on the right. Something like that. Now, if you find that your
lines are not perfect, you can have one of
the line selected and double-click on the
brush tool from the toolbar. So that's once again
here on the left. Make sure you have the
edit selected paths turned on and also keep
selected. This way. When you are painting
over a line, you can make adjustments to it. And it's going to
allow you to even continue drawing
details like this. But all I wanted is to refine the line a little bit and then maybe select
this other one. Also just drag it down a bit further and also just
continue it up here. So extend those lines. And that looks quite good, but I feel like the spikes are spines are a little bit too big. So I will deselect
everything and double-click on this
little detail here. Let's just reduce
the size further. So the maximum size
I'm going to set to 70 and minimum to 50. Yeah, I think that looks better. Let's click Okay. And also apply to strokes.
5. Flower detail, Art brush: Now next what we need to make
sure is we keep the areas around the guide free
of any spike details. And the way we can do that is
by zooming in a little bit closer and just simply
adjusting these lines. We can even use the
good old Warp tool and just move things
around a bit. Let's say something like that. Okay, That line is fine. So it's not going
over the guideline. Let's select this
other one as well. I will use the warp tool, move it around a bit and if it's not going,
but I wanted it, I can always select the
whole path and just simply use the up and down
arrows and shifted down a bit. I just noticed that there
is also an overlap here. I'm going to delete
a bit from that line until again is not
overlapping the guide. Yeah, that looks good. Let's go down here as well. Left and right is fine. Just the central part needs
to be adjusted slightly. So I'm going to maybe delete
this bottom section here, couple of points from it and
then drag this one down. Just simply using the
direct selection tool, adjusting these anchor points. And maybe we can even divide
this path to make sure that there is a gap
around the guide. And the way you do that is
simply select an anchor point close to the guide and then
press Backspace or Delete. Now, I have two separate parts, and they all inherited the attributes of
the original brush. So I can now refine
the two end points. Make sure that that again, is an empty space
around the guide. Now if I zoom out, I
can have a good look at this and I think it
works quite nicely. So we already used our
scatter brush for the spikes, but now we will
create an art brush. Before doing that though, we need a flower on the top just to create a nice
little detail there. So for this, I'm going
to again very quickly draw something using
the Ellipse tool. I'll just draw an
ellipse and I will set the fill color for this to
be this bright pink color. Then I will duplicate this and select both of the ellipses. And then use the
shape builder tool to delete the excess
details that we don't need. Hold down Alt or Option key to delete the left and
the right sides. So there we have a nice
little leaf detail. Now, we can select this and I'll zoom a
little bit closer. You can see what
I'm going to do. Select this and
maybe just rotate it to its left,
something like that. And then press R
on the keyboard. Place that little center point
here on this anchor point, and hold down the
Alt or Option key, click and drag to duplicate it. Let's say something like that. And then press Control
or Command D a couple of times to create
additional duplicates. Then select every second shape and change the fill color
to this other color. And there you go. There is a nice little
flower created. We can select all
of this together, group it, control or command G, and then reduce the size and fit it here on the
top of our cactus. How lovely is that? Now let's select
everything apart from the guide and the
way you can make sure you don't select
the guide itself is either that you look it from
here in the layers panel, or you can also selectively say from the view menu
to look or guides, I'm going to use this because
it's probably easier. And then select everything here. Also, don't forget to select that little section at the
bottom because we divided it. And now everything is selected. We can drag the whole thing
into the brushes panel. This time, we will
set this up as an art brush and
then click Okay. Now once again we have
loads of settings here. The only thing I'm going
to change is the size, which I will set to maybe 50 per cent or
40 per cent even. And then click Okay. Now we can see
that these brushes created and we can
access it from here. I'm going to select
the brush tool by pressing V on the keyboard and also making sure I
selected this new brush. And now all we have to do is
to start painting our cacti. So this is already
looking really nice. The only thing I notice
is that whenever I drew something too long or too
short, it gets distorted. So on the left side, these are very similar to
the size or the scale of the original detail
that we saved as a brush by these other
ones, they get distorted. Now, you can refine
these by going back to the settings of the brush by double-clicking on it
here on the right. And you can decide whether
these other options will improve the result or not. Having the preview on, I can click on scale
proportionately or stretch between guides and then maybe adjust this setting here so the flower, for example, is not going to be distorted and the bottom part
will also not be distorted. But I feel like it's still
not going to help much. So let's just see once again, it certainly removes
the distortion from those top and bottom parts. So we can see the details
are not distorted, but still the center
section is very distorted. Both on the smaller
size brush strokes and also on the
longer brushstrokes. So again, we could see
that the art brushes cool, but it is limited as long
as your brushstrokes are very similar in length
is going to work nicely. But if you want to draw brushstrokes with
different length, then you will need
a pattern brush. And I'm going to show
you in the next part.
6. Custom Pattern Brush Preparation: You might remember
or recall that we created these details
with an art brush and we decided that
it works well if we create similar
length brush lines, but when we are drawing
longer or shorter details, it gets distorted. So this doesn't look good, and also this doesn't look good. So let's resolve this by going back to the
original details and prepare them for a
custom pattern brush. This brush type is probably the most complex
one and it takes the longest time to
set up properly. But believe me, doing
this really pays off and it's worth the
extra time and effort. So the first thing that we
need to do is to select all the little details
that we created last time, the scatter brush, and make
sure that they are expanded. The reason for that is
because we will need to rotate all of
the details soon. And if I rotate these lines, notice that their
orientation is not changing, so they are still
pointing upwards. So what we need to
do is to expand their appearance from
the Object menu, Object Expand Appearance. And now when I'm rotating them, they are going to
follow the changes. So that's great. But what we also need to do
is to select this guide. Now if it's locked
from last time, you might remember, you can
unlock it from this menu. But what we need
to do is to also release this guide because we
will have to also rotated. And guides can be transformed
or scaled and move around, but they cannot be rotated. So for this technique
that we need to do next, we also need to use
this shortcut Command, Option five, or control or five. And that will turn the guide
back into a normal shape. So that's all we needed to do. And now we can select
everything and I will make it a little bit
smaller while holding down Shift key and
just drag it down. And then let's rotate it again, holding down the Shift key, making sure it goes into a horizontal perfectly like this. Let's put this here
on the top and then duplicate it twice. Alt or Option key with
the selection tool, drag it down once and then one more time
here at the bottom. So we will be creating
three separate section, the bottom, the center, and the top part of the
cactus to keep it easy, the detail on the
top I will use for the top section of the cacti. So I will select this
rectangle and drag the left edge of it
over to the right side. So it's almost like
flipping the rectangle without affecting the original
line that we had there. That's very important
because that will need to be aligned to the
central segment. I will do the same thing
here at the bottom. Select again the rectangle, and then drag it onto the left. Now to simplify things, I'm going to also make sure that these rectangles don't have
much gap on the edges. So I just drag these rectangles
a little bit closer. They don't have to
align perfectly. Just make sure that
you don't have much empty space there. And now that we
have these ready, we have to also make sure
that these rectangles are on top of everything else
in our layer structure. The way we can do that
quickly is by selecting them, holding down the Shift key, I can select all three of them and then right-click arrange, bring to front or use the shortcut Command
Shift square bracket or Control Shift square bracket. And that will put them here on top of the layer structure. Now, we can select these
details here on the top. So making sure that
both the rectangle and all the illustration
details behind it are selected. And then use Command
or Control a seven to turn it into
a clipping mask. Let's do the same thing
here in the middle. Let's select this command
or Control seven. And then once again, Command or Control seven
here at the bottom. So now we have these three
separate sections ready, the top, the center, and the bottom parts
of the cactus. But before we go any further
for the top section, I will create a version
where there's no flour. So I will just simply
select this group all to click and drag or Option
click and drag to duplicate, and then double-click
to get into it, and then delete the flower
with the backspace or delete, then double-click outside
to exit the isolation mode.
7. Custom Pattern Brush: Now technically we
have everything ready to create
our pattern brush, but still we have one
more thing to do and that is to eliminate
the clipping masks. The problem with clipping masks in the pattern brushes that they leave huge gaps
between the sections. So when it's supposed
to repeat nicely, there will be big gaps that
you can't really remove. So to avoid this happening, what you need to do is to
select one of these sections. I'm going to start
with this one in the middle and go up to the Object menu and choose
Expand as a first step. And then click OK
in the expand menu. But then you also need the Pathfinder panel and
click on the crop option. That way is going to get rid of everything
that was originally inside the clipping
mask and it will only preserve the details
that were visible. So notice how the selection
or the bounding box changed. Let's see this a
couple of more times just so you remember what to do. So I select this other one, go up to expand and then, okay, and then crop
from Pathfinder. We have to do this
two more times. So Object Expand, okay, crop. And then once again, Object Expand, okay, crop. Now we have everything ready
for the pattern brush. So let's start with the center
part with this selected. I can just simply drop it into the brushes panel and
choose Pattern Brush, and then the dialog
box comes up. You can see why I started
with the center part because by default that's what's
added to the brush first. So these five lethal swatches
here are called the tiles, and they each are dedicated to certain parts of
your pattern brush. The first one is for
the outer corner. The second one is the site title it's called but I call
it the center part. And then there is one for
the inner corner tile, but we won't be
bothering with that. What's more important
is the start N tile. So we will set up the Start
Tile for the bottom part of the cactus and the anti will
be the top with the flower. The only setting that I'm going to change here at this point is the scale which I
will set to probably, let's say 40 per cent. We can always come back
and make changes to this. And then I'm going
to click on, Okay, notice that we can already see these tiles here in
the brush panel. But what we need to do now is to select the bottom part of the cactus and start dragging
it over the brush panel. But then hold down the Alt
or Option key with which we can target specific
type that we need, which is this one here, this is the Start Tile. The one on the right is the end. This is the star tile. So let's just hold down the
Alt or Option key and let go the mouse that's going to add that detail that
then we can click. Okay, and then let's do the
same thing with the top. I'm going to do first
the one with the flower. So I'm going to hold
down the Alt key while I'm targeting
this last tile, which is the n tile, and you will see it updating here in the dialog box as well. So the tile shows a preview
of what you just added. Let's just click. Okay. And now we are actually
ready to test this out. So let's move here in
this empty artboard. Select the brush tool by
pressing V on the keyboard, making sure that this new
pattern brush is selected. And then let's draw a line. So I start from the
bottom and go up. Let's draw another one. And then let's draw one more and maybe move this
a little bit closer. And then you go, we have perfect continuous details without anything
being stretched.
8. Creating variations for the Pattern Brush: The only thing now is that
you might want to create a few stems without
flowers on them. For this, we will go into the brushes panel and
from the drop-down menu, we choose duplicate brush. And on this new version
we are going to replace the top by using
this other variant. So once again, drag over, hold down the Alt key
and replace that detail. So that's how easily you can update any segments
of your brushes. And just to test this out, if I select an existing
brush line and choose this other brush is going to immediately
update to that. So we can easily switch between stem without a flower
or with a flower. Now it seems like these pattern
brushes work perfectly. But let me point
out one weakness. What happens if I
drew one that's much shorter than
these other lines? So I'm going to use
the brush tool, select the one with the flower. And maybe I want to have a little branch or stem
coming here to the side. If I drew a short one, that will look a
little bit weird. I mean, this one maybe
is not that bad. But if I drew an
even shorter one, it still gets distorted. But if I draw a medium length, it can get even worse. So once again, you can see
the stretching going on here. So what happened here? The problem is that we have
a very long center part, which is great for
these long details, but it's not going
to work as well for these short-term or
medium length lines. For this again, we
need to have a brush that will have a much
shorter center tile. So if you remember in
the previous episode, we set up this very narrow piece which will come in handy. Now, I'm going to move this onto the art board and make sure that it's aligned in size to these other details
and it seems fine. So now what I can do is
to create a duplicate for this brush for
both versions. So let's select both of these brushes and
choose duplicate brush. So now I will have
two of each of them and select the one
with the flower first. Then select the
little piece here. Drag and move it over. Hold down the Alt or Option key to replace the center part, which will update that brush. But then we will have
to do the same with the other duplicate brush, again, holding
down Alt or Option key and target that center tile. And then click Okay. Now the successfully created the variations that we needed. For the longer
details like these, we have our original
two brushes, but for these medium
and short lines now we have these additional brushes and let's just test it out. So I have this one selected. Click on this one,
and you can see immediately how much better that looks. The same thing here. If I select that, I
choose this brush, it looks already much better. But still don't forget
that you can use the brush tool and
paint over it. If it doesn't look right, you can stretch it out
a bit or move it in a direction that is going to work better,
something like that. And of course, there's plenty
of refinements we could do steel with these brushes and improve the
settings on them. So we've done a
scatter brush and Art Brush and several
pattern brushes. So have fun experimenting with
these features and try it out on different
objects because it doesn't always have
to be a cactus.
9. Conclusion: Well done for
finishing this course. I hope you had just as much fun going through it as
I had recording it. And of course, don't forget
about the class project. Because remember,
practice makes perfect. I can't wait to see your work, so make sure to submit it. And in case you
like this course, and you would like to
learn more from me, then there's plenty of other courses that
you can find here. Go ahead check them out now. I can't wait to meet
you in the next one.
 Martin Perhiniak, Graphic Designer, Illustrator & Educator