Transcripts
1. Intro Video: do you want to learn a fun and easy way to create amazing patterns? Using Adobe Illustrator in this exclusive skill stare class, I share with you the tools and techniques I used to create simple and complex beautiful patterns very quickly. So in class you will discover my methods for creating beautiful visual patterns. Have fun designing patterns with ease using Adobe Illustrator as well as learn how to create a perfectly repeating tile very easily. Get access to my patterns and principal grid system with over 15 grid templates. Get the working files 10 completed pattern designs and over 120 plus royalty free. Ready to use design assets. Learn how to create high quality mock ups for your surface patterns on products using a very simple method and discover how to produce and potentially monetize your pattern designs. There are many different methods out there for creating patterns. These tools and techniques that you'll learn will help you create quality patterns and a really cool way with these very quickly. This is a great class for any graphic designers who was trying to hone their skills and learn some new techniques, and especially for someone who's looking for a new wait up creates a passive income. So jump in today and learn something fun and easy to do. Not already a skill share member. No problem joined this class today and get two free months of unlimited access to more than 25,000 classes. That skill share has to offer where the year into design illustration. Business technology, photos and film, entrepreneurship and even writing. There is a class for you on skill share, and you can cancel at any time. So sign up today and get instant access to a great class and great resource is.
2. Getting Started: Hey, welcome to the course. Getting started. Let me quickly break down the course material for you, and I'm gonna show you how to use the file will be working out off. If this is your first time on skill share, you can find the course materials by clicking on the projects and resource is tab. Now, go ahead and download the working files and the digital assets as well. They're all for you. Once you download it, unzip it and find the getting started. P and P Grid. Ah, Adobe Illustrator File. Now open it up and should look like this. So I took the liberty to create everything you'll need already so that you can enjoy my pre May tools and Gridley outs. Have fun with all this cool stuff, I encourage you to explore and use it to the best of your abilities On the layers that are named after numbered patterns, I created an effect by using a duplication reflection technique. This technique duplicates and reflects whatever you create in a particular space. I'll demonstrate it for you and explain as we go. I also show you how to create the technique for yourself later on in the class. Okay, so let's start on the two point pattern layer. I'm going to use the brush tool for this demo. As you can see, anything I do on this layer is duplicated by two. And this layer is duplicated by four. So each layer duplicates by the number that corresponds to. And just remember, you have to draw in a particular area where your mark won't show up. Each layer has a different area. You can draw in. I'll discuss it more later. I just want to give you a quick crash course before you take the whale. So just watch. As I demonstrate, I used this technique a lot. That makes creating patterns very fun and easy. I hope you find it just as enjoyable as I do.
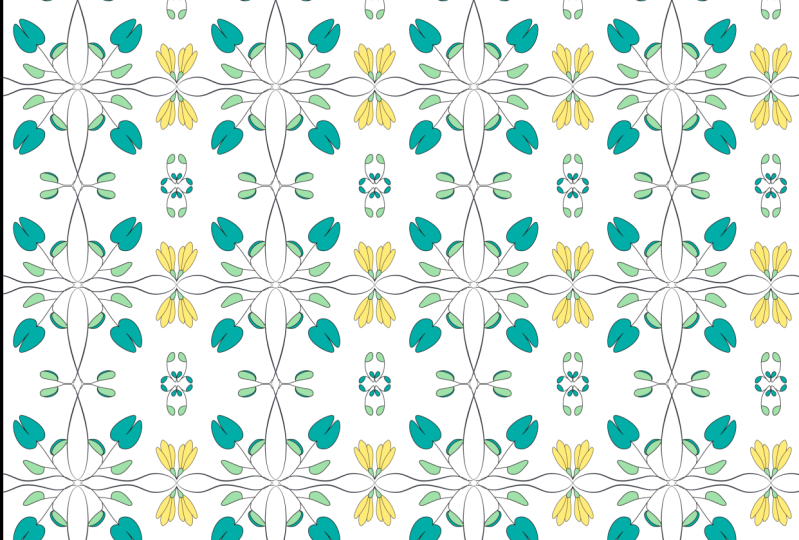
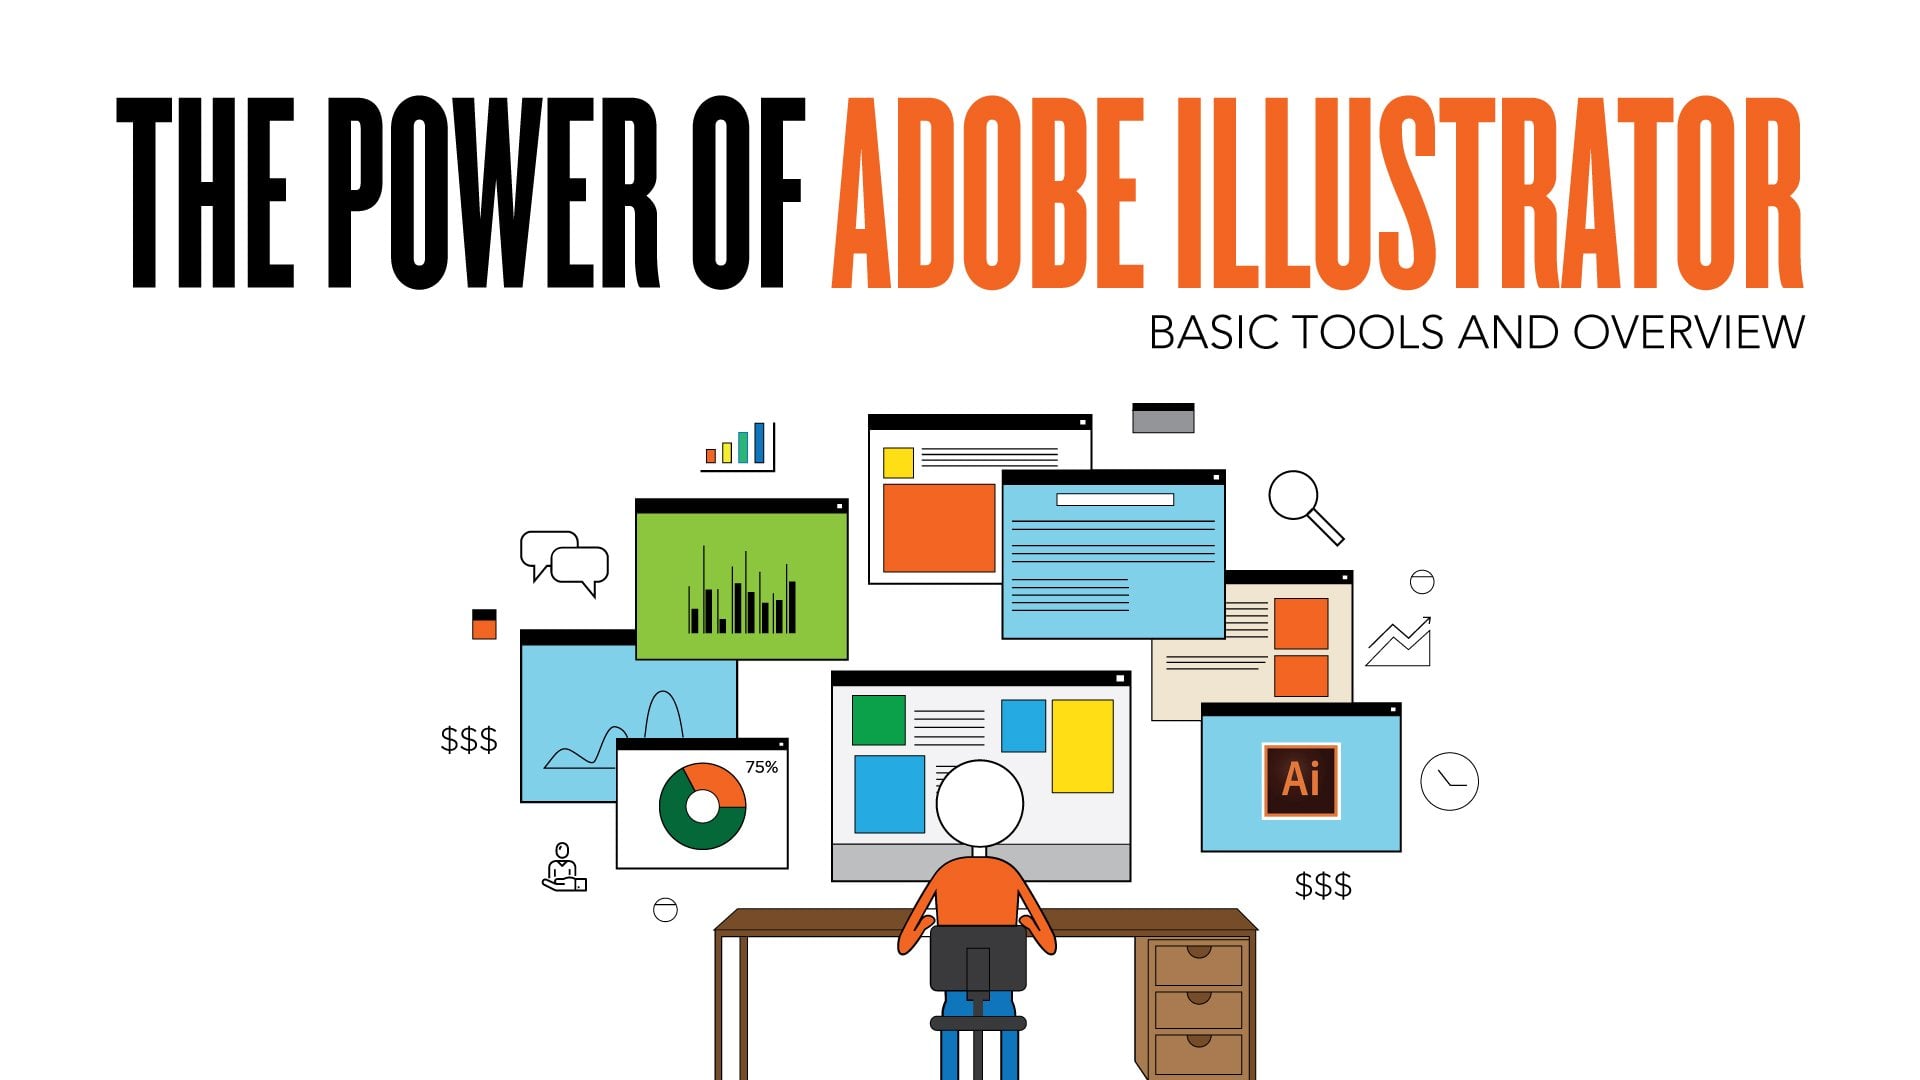
3. First Pattern: in this video, we're going to be creating the first pattern. The pattern we're going to make using Adobe Illustrator was originally a sketch of mine. My creation process normally starts with ideation and sketching before even touch the digital tools. So let's get started. First things first. Go to the course materials and open up the PNP grid file in Adobe Illustrator. Make sure the grid structure is visible. Make sure you're creating everything on the eight point pattern layer. We're going to start with this one first. Now let's begin by using the pencil to create the overall frame of the flower pattern illustration. The pencil is a very powerful tool in the creative suite. If you're not too familiar with all of its functions, you can check out my free course on skill share called The Power of Adobe Illustrator. Basic Tools an overview and and I break down how to use the pencil as well as several other tools in The Illustrator. As you can see, I'm creating a four point flower by using the eight point reflection technique layer that I previously created. Yeah, I'm going to use the circle to create the butt of the flower, Then I'm going to delete the vector points. I don't need way that. Yeah, but Okay , so the initial structure is complete. Now, I'm gonna add in a few extra details. Okay? Now I'm going to use the with tool to change the width of the lines. Once that is done, I'm going to add a few more lines to the illustration to make it a little more unique. Okay, once that is done, I'm going to start adding in some details by using the stifling technique. Using dots like this does take a longer time. However, it gives really nice textures here, illustration of it, - way after that is done. I like to go back and adjust anything that I feel can look better with that. Okay, so we're done with the first illustration. Now we have to select all the graphic elements we created by clicking here and then expand the appearance of the design. After that, go to the Pathfinder tool and click on the merge function. Once you do this, the reflection technique that was created on the layer will not be in effect any longer. And you will be able to select the entire pattern. Also some reason, After you merge everything together, it creates a curved line that wasn't there before. I can't tell you why it happens, but it doesn't always happen. Every once in a while just shows up. You can easily delete this line by using the direct selection tour any other method you could think of. And if you didn't come up for you, then don't even worry about it. In this case, it kind of works. So I'll just leave it there for now. It's like making a mistake and discovering something new that you can use. So okay, works. Okay, so let's move on and work on a next illustration for this pattern. This time we're going to use the four point pattern layer to create an infinity symbol. I'm going to use the pencil to thicken the line with. The next step is to take both illustrations and to create the final pattern using the test elation technique. All I'm really doing is duplicating the illustrations by using the hot keys and creating a pattern layout using the grid structure as a guide. Three. Okay. - No . Yeah. And that's pretty much it. The pattern design has been completed over
4. Second Pattern: this pattern technique I'm about to show you is one of my favorites because it's so simple to use, and you can create a ton of really cool and simple patterns by using it. So start by using the PNP grid file in the course materials. Make sure to use the eight point pattern layer. First, select the paint brush tool opened up the properties by double clicking the icon. Make sure the fidelity is on smooth and it's within 12 pixels. After that, we just draw line and modify it until we are satisfied. Now change the stroke of the line here and make it thicker. - If you want the lines to be pointy, make sure you change line type to this one and the breast. Type two. Basic now make it as thick as you want. Once that is complete, select the active objects on the layer by clicking here and select, expand appearance and then use the Pathfinder tools. Merge function. You notice the extra line that shows up. Just delete it, Then select the graphic element you made and begin the test elation process. You can duplicate the pattern as much as you want. - Now let's give it a background color. Using the direct selection tool. Select an area inside the pattern color and click on select similar objects, but in to change the color of the thick lines and then group them together. Highlight the pattern and select the paint bucket tool and make the inside part of the pattern. Whatever color you want, - once we're satisfied with the color are new. Pattern is complete.
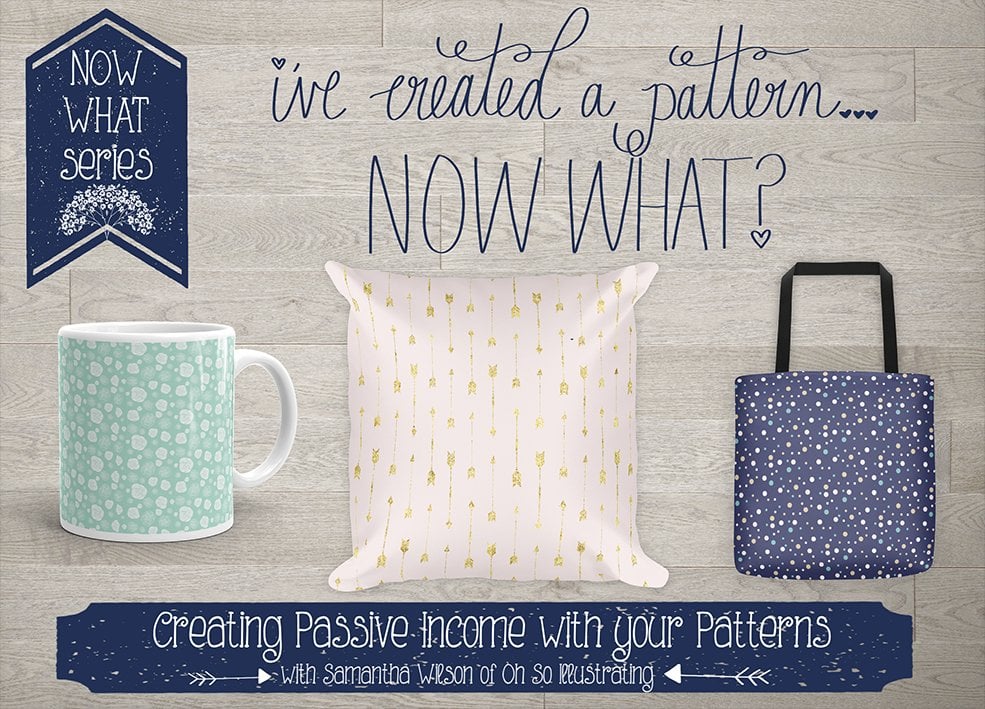
5. Creating Mockups: So in this video, we're going to quickly go over saving our files and getting them ready for use. After that, I'm going to show you a really cool resource. I used to generate tons of quality product mock ups. So first, I'm just gonna quickly modify my colors way. So next I'm going to create a new art board and make it a little bit bigger. It doesn't have to be really big, but you wanted to be a good size. So you will get the maximum quality out of your production files. You know that. Okay. After that, we duplicate the pattern on a new art board. Now we're going to export as J pic file. Name it. Whatever you like. Make sure the resolution is high and the color mode can be rgb for Web or seem like a for print. Think like OK, now let's make another version of the pattern and save it as another file. Yeah, Okay. Once we're done, let's jump onto the Internet and go to prince awful dot com. Now print Feliz, a printing company. I used to help me create merchandise to sell on my website. It's a great resource that gives you access to plenty of different products. Signing up for an account is free and easy, but I don't think you needed to use. You don't need to sign up to use the mock up generator, but it's like I said, it's free. So when you're on the site, you want to click on the mark of generator, okay, and then you can select whichever product you want. Now, let's do the iPhone case for this example. To start off, click on Drop your Design here. Next we upload the pattern files that we saved and then select artwork you want to use from here. You can adjust the size and alignment of the pattern design to your liking. - So once you're pleased, then you select generate files. Here you can select all the mock up files you would like to download. Pretty sweet, huh? It's a very efficient system. Let's do one more time just to reinforce what I just showed you. So let's select the liquid glitter phone case. Select the art, go to generate files, select the mock up format, then click generate file button to process all the files, then hit download. Check your download folder. Unzip it and voila! Quality mock ups ready to be used. Okay, okay, so let's do it one more time on a different kind of product. Let's do a backpack this time. Quick note. Make sure you use the right files for the right product. Larger products need files with high resolution so that the printing quality will be awesome. Yeah, if the files dp I isn't large enough, you will get a message saying to use a bigger file. - That and boom mock up. Done. Uh, pattern looks great on this product. Might they say, I really enjoy the lifestyle imagery print full gives you. So let's say you wanted toe order Product with your own design while you have to do is click order. Choose your store once you set it up and proceed to pricing. Now you have the ability to buy your very own product for personal use, or you can sell it and make some, you know, some income on the side. The choice is yours. So that's it. I encourage you to check out, print full and play around their platform to see what kind of cool stuff you can do.
6. Complex Patterns: Sometimes when you create a really complicated pattern design, chances are your illustrator is going to start slowing down on you. This is because the more vector points you have, uh, the longer it takes illustrated to process every move of the object in this video, I'm going to show you, Ah, work around for the really detail patterns. Here's an example of a really complex pattern. What I like to do is make sure the pattern is a line properly, like so. Oh, uh, Theun create square using the rectangle tool and place it on top of the pattern. Make sure all the pieces of the pattern is grouped together. - Select the pattern and the square and create a clipping mask. Hockey is command seven on the Mac. After that, used the crop function in the Pathfinder tool. Once that's done, select the pattern and copy and paste it into Photoshop. Now you can work on the pattern and photo shop and not worry about your system slowing down too much. - Okay , no
7. Reflection Technique: I'm going to show you how to set up a technique that I use to create very cool patterns very quickly. Eso If you're ready, we're going to jump into Adobe Illustrator, and I encourage you to follow along and build this tool with me. So first thing we need to do is create a new layer and you call it whatever you want. I named mine a point reflection as a reference. Now, the second thing is to create two lines. Ah, one vertical and one horizontal. And make sure you center both of them and then group them together. Okay, so next Ah, use the brush tool to create a mark that slightly overlaps one of the lines like So Now I want you to highlight everything on the layer by clicking on this button here. Ah, this step is very important. Please make sure you click on this button. Um, next, go to effect this store and transform and choose to transform function. Now in this green, you want to select, reflect X and make one copy and click preview to make sure it looks like this. Now, with everything still selected Ah, now we're going to go back to the transform function again and apply a new effect on top of the one we already made. Now we need to select three copies with a 90 degree angle and click preview. It should look like, uh, like this once you get it. Ah, Hit. Okay. And as you can see, the eight point reflection technique has been applied, but we still have a few more steps to do before it's complete. So after that's done, I want you to create ah, square and cover the top right quadrant. Oh, and make sure smart guides is on. I forgot to mention that earlier. Sorry. So once that's Ah checked. Ah, once you have this square, it's in place. Um, select the lower right vector points Onley and move it to the middle of the art board. Now, with the layers selected, I want you to create a clipping mask by clicking, uh, this button down here. This helps you hide any extra marks that you might have now just expand the layer, um, and make the sub layer with the lines invisible. And I want you to, um, the layer that the clipping path is on. I want you to lock that layer. So now you can delete the first breastroke you made and start creating some magic. Remember, you must create within the clipping masks space we made or the Marks won't show up. So I really enjoy using this technique. It's really cool and very useful.
8. Closing Statements: Hey there. So we finally reached the end of this course I know. Sad but true. My hope is that you have gained something valuable out of it, whether it be learning a new technique or gaining new perspective as long as that's the case than all of this was a success in my book, we as human beings learn best by doing so. Now that you have gained these new abilities, it's not enough to just know it. Now you have to use it. In order for you to develop these techniques. Experience is needed. I mean, what's the point of learning something if you don't use it right. Your creativity will help you in figuring out how you can apply these techniques in your own way. When you do that, then it will become yours also before you go and never come back. I would like to ask you to do two things. Number one. Right after this video, I would like you to go to the review section and leave a short critique about what you liked disliked about the class. I'm asking for this because I want to revise and improve the class as much as possible number to share pattern design you created with the tools and techniques you learnt about in this course. It could be just the pattern alone or a mock Oppa's. Well, that's your choice. And that is all. I'll put no other burden on you. Well, I guess it's time to say goodbye. I just want to thank you once again for taking my course, taking the time out, taking this class. Excuse me? Check out my other classes. Um, you know, also check out my website, the gallery dot com. All right, So thank you and have a good one.
 Hans Fleurimont, Author, Educator & Graphic Artist