Transcripts
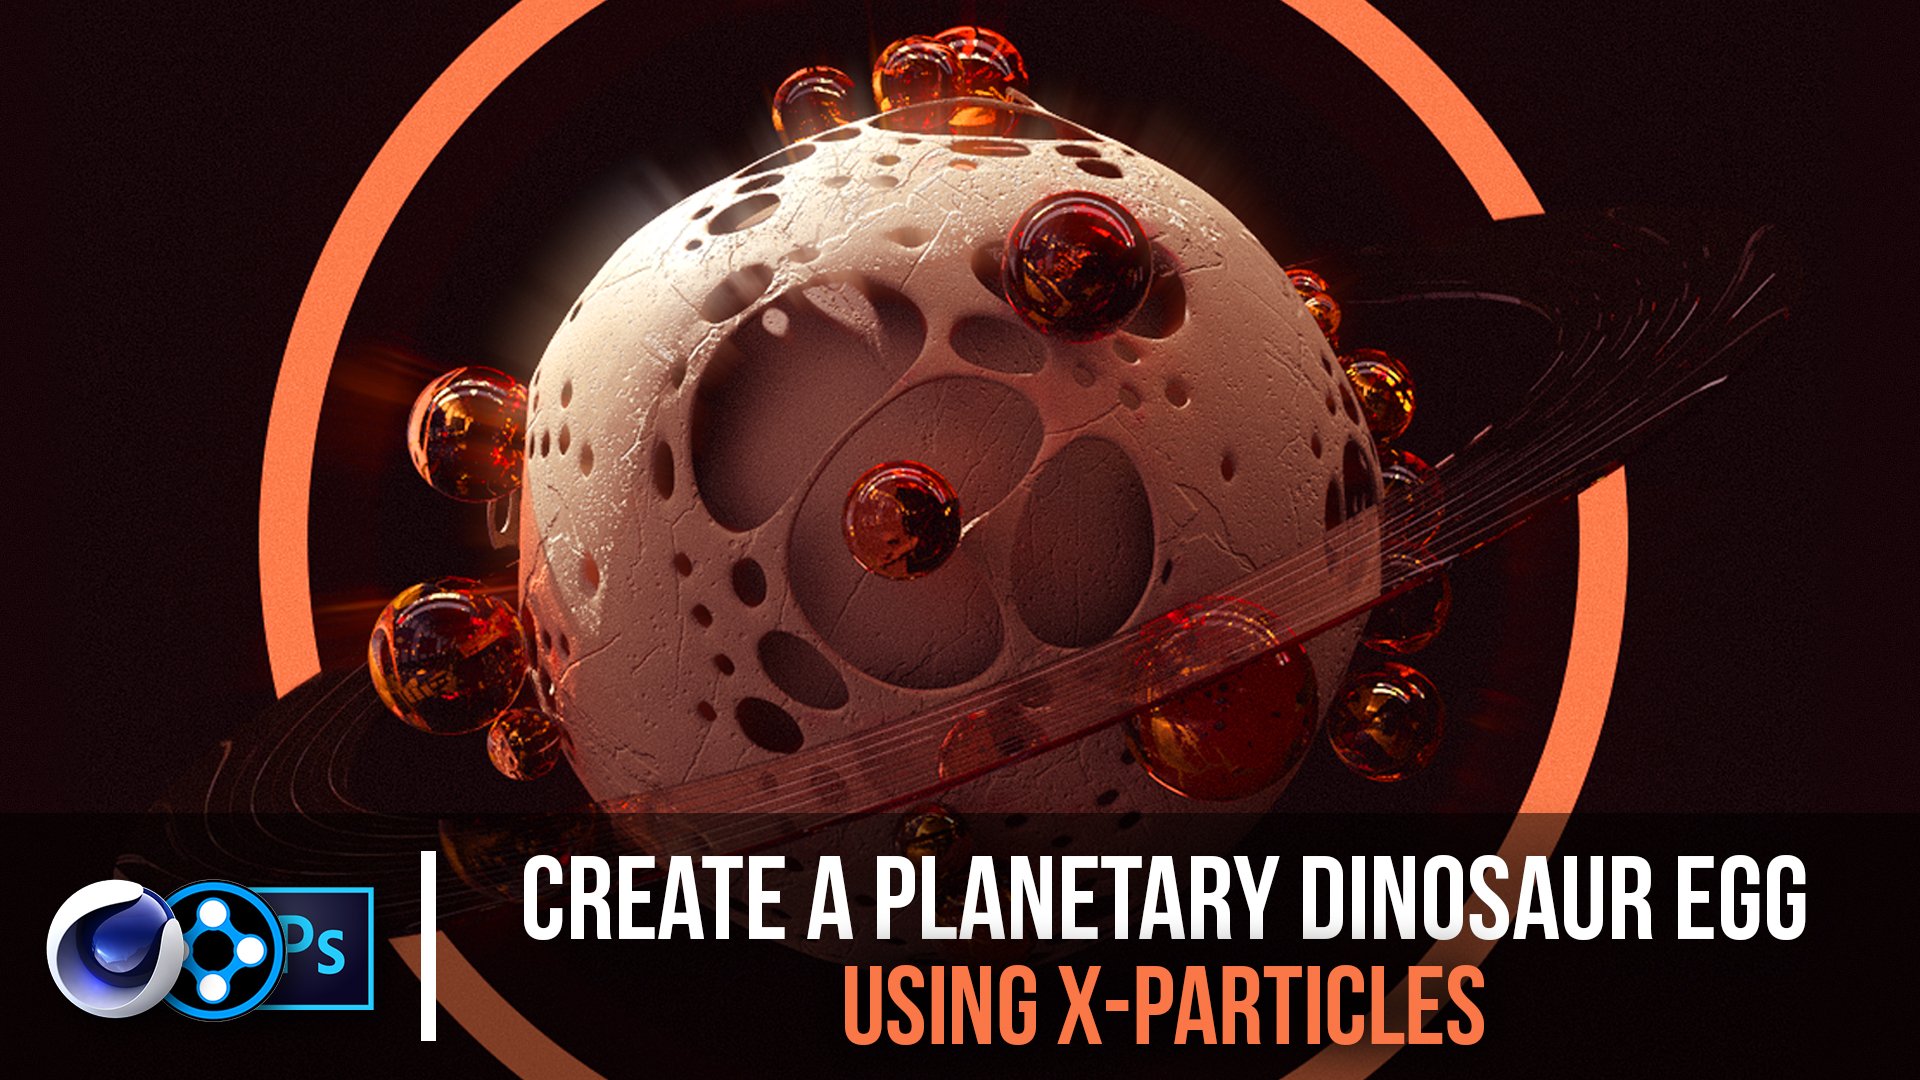
1. Introduction: This one, a lot of you guys have been asking for awhile and I have not done it because there were plugins involved. But we're going to be going over how to make one of these organic, abstract, blobby things and it look really cool on platform such as Instagram everyday. If you're familiar with the work I've put out there, a lot of stuff, kind of looks like this. We're going over how to do that. We're going to need Cinema 4-D and Photoshop and x particles of third party plugin that you can download for cinema 4-D, and that's what we use to get this going. We'll model it, and texture it, light it, do all this stuff and introduce some post-work on Photoshop to make it look really nice. I think that's it. Let's get into it. We'll see you in there.
2. Getting Started: Hey guys, so right here in cinema 4D. We got a Blink template here. As you can see, my interface might look a tiny bit different just because I've placed some certain icons or I usually use them most often. But it's really not going to have anything to do with what we're doing today. To start off, here's my account on Instagram for a bunch you probably know me from. We're going to be going over this series I did a little while back and it's kind of like these abstract little blobs, some subsurface scattering. Also the first time I think I'm ever doing a tutorial then follows x particles, a third party plugin and I know a lot of you guys are not going to want this tutorial specifically because you do not have a plugin. But that's not the only thing you'll be able to take out of this tutorial. We're going to light it, of course and we're going to do everything. Just the modeling part of it you might not be able to get. But also I have done pretty much every class I've ever taught. I've done free of plugins and this is not the dawn of me starting to work with plugins. This is just one that I feel like I owe to anyone who owns x particles, who's been following along and give them a little treat. Of course we're going to be coming out with a lot more content, a lot more classes. This one I thought was necessary to at least have one of them. We can begin here, something like this. What I really like about X particles is you can make some really crazy organic looking shapes. It's pretty easy once you get the grasp of how this stuff goes on, it's really great and these stuff's especially great for abstract. Let's jump in here. Right now you'll see right off the bat, if you go to our Render settings, usually by clicking this little icon, I have it up here. We're going to make the output something like 600 by 600 for now, we'll increase it later. We can lock the ratio and I like to have this, a square aspect ratio because I always bumped out for Instagram and other social media like that. We're going to be on the physical renderer and none of these have to be checked on right now. We're good on that. Just make sure the settings look like this and if you go to the physical settings, make sure we're on progressive for now and keep all these settings at two. Remember we want these really low so we can get these fast render speeds. We have to wait a long time to see every single increment that we're doing. Without further ado, let's get started here.
3. Intro to X-Particles: If you haven't used X-Particles before, you're not very familiar, there's many ways you can go about this. I have a lot of these X-Particles icons saved up here, but it's not going to be necessary because we'll just go through the regular X-Particles menu. The first thing we're going to want to do is create a camera. I already have mine created. But for the sake of it, we'll make a camera, and as you can see we got the cross hairs here. I'm going to click this to go inside of the camera. Again, I'm not going to explain every single thing because I assume if you have X-Particles, you already know how to get pretty much throughout the program in basic terms. Once we're inside of the camera, we're going to go to the coordinates and zero out everything out except Z. We can keep Z at negative 600 centimeters for now. Negative 600 not bad. Zero everything out on the rotation as well, so that we can see that we are literally perfectly aligned with the center of our composition here. The next thing we're going to want to do is jump right into it. We're going to go into X-Particles and get ourselves an Emitter. Pretty much what happens is there's no geometry that's coming out when you press play here. As you can see, stuff is going outwards right now, and we're set at 90 frames, it restarts after a little bit. The first thing we're going to do is take our frame rate and go to something like 250. I don't think we're going to need more than that. I'd like to give us a little wiggle room, so that our stuff doesn't disappear after every two seconds or so. The next thing we're going to want to do is, first of all, if you click the Emitter and you go to object. We're going to be doing all of our settings within the Emitter in the object panel and the emission panel. I'm only going through because I don't wanna spend 50 hours doing this. I'm only going through the panels that we're using and the certain options that we'll be using. There's a lot of stuff, millions of stuff we could do. I can talk about X-Particles, but we wouldn't get through this class and time at all. The first thing we're going to do is go to our object. This is pretty much saying what we want these little particles to come out of, and where we want them spinning towards and where we want them exiting. Right now we have a rectangle. If we rotate this, we can rotate where they come out in real-time, just like that. That's cool, but if we were to render this, put our Interactive Render Region, nothing comes out because there's no geometry given to us yet. If we reset that and go to something like, forgot what I used for the other ones, but we can achieve really similar results. Let's go Objects. Let's go to Circle. For the circle we're going to rotate this 90 degrees. You can do it this way. Hold down Shift so it gives you clear increments of 10, or you can literally just click X plus and I'll set it all the way going to the left, just like that. We like what we got here, but it's literally just a circle shaped radius of particles coming out. That's cool, but we're not getting geometry and it's not giving us anything really abstract. The next thing we want to do is putting something almost like a wind to get these things riled up, because that's really what's going to be the difference between making this look really abstract and really funky, and organic and not. What we're going to do is while we have the emitter selected right here, we're going to go back to our X-Particles tab, go to Modifiers, Motion, and go all the way down to XP Turbulence. If you had XP Emitter selected automatically, it's going to apply the turbulence to the emitter. If we see now, everything starts to wave a little bit. That's cool. We're getting some really good movements here, but it's still for the most part looking straight. That's not exactly what we want. The only way that would really work, I guess if we place this Emitter way out here so that when it got towards the middle of our composition, it would be floating around in every direction. What we want to do is bring that back, and you can do a couple things. This is why I like these programs like Photoshop, 740, X-Particles as a plugin. There's a million different ways to do certain things. These guys right here, remember we're on the XP Turbulence, Modifier. Pretty much what these guys do is control the parameters in which the particles can be modified. If I were to uncheck Y, these are only going to be moving on the Z and X axis. As you can see, everything is still level on this plane. But if I were to go into other views, it is definitely not level. Vice versa, if we were to check Y and nothing else, all we're going to see is variations on the Y. From this view you really can't tell. But if you go to the top view because they're sticking on the Y, they are staying intact. It looks like nothing's changed here, but in every other view you can clearly see there's other stuff going on. I think for this we want everything checked. We want these things moving around in various locations. What we're going to do here is, scale just like anything else. The higher you move this, the more uniform everything's going to move together, nice and fluid. If I were to take this down to like 49, we're seeing these things move all different directions. If you put this thing like zero, these things are all going to be in different directions, going crazy and there's literally no uniformity going on here. What we're going to do here is keep the scale at a 100. We're going to take the frequency down to zero, and we are going to keep the strength at five for now. But we're going to go to Curl. What that's going to do is, to me, it gives a much nicer wavy motion of this whole thing. It doesn't go as crazy right off the bat. As you can see, everything stays in the middle and we get this cool little effect. It's almost just like there's wind coming from all directions and it's really slow and flowing and it looks really cool, especially when we start applying geometry. But first what we want to do is go back to the Emitter and we're going to go to the Emission tab for the first time. If you go down here, there's a bunch of settings here. It's easy to get confused. But the two things you really want to pay attention to actually the three things are Emission Mode, Birthrate and Speed. Emission mode rate, it means it's constantly coming out at a certain rate of 1,000 particles per second. Shot, everything is born at once, and we can see already the different possibilities with these things here. The last one that we'll probably use, that you might ever use is pulse. These come out at increments. It's like pulsating here. Each of these has their own cool way you could mess with them for lack of a better term. We're going to want to do here is go to, I think we're going to go to shot. If we have that already said it a 1,000 let's take the speed is zero. When you take the speed to zero and don't have turbulence, everything just stays there and you can't even see what's going on. But if you were to rotate this, you can see they're all there. It's pretty obvious why that happened, we took the speed all the way down, ballistic the turbulence on, and with the speed still at zero, everything still moves freely about. What we're going to do is, I kind of don't want everything to be too spread out. Let's take the turbulence and take the strength down to like three or two, and take the shot count to 2,000. We're getting some cool waves going on here. There are other ways you could make sure that you get certain parameters. Like if you didn't want these things to leave here, we could do something like create a sphere around this. This are just parameter, something like this, and then hide it on both channels so we're not seeing it and the render views not seeing it. Then if we were to take a tag over here and go to X-Particles tags and go to Collider, and then go to Normals, Inside. Now it's going to have boundaries on every single piece of. You can't see it here. But if we were to enable this, the outskirts of this circle will be the boundaries of where it can't enter or can't exit. If we'll see, let's press Play. We're seeing they're stopping here, and it's a bad example because they barely got there. But let's bump this strength up back to five, and everything's staying there. If you want them to be suspended in a certain area, this is a perfect way to do that. I think we can actually roll with that. But I think we'll start messing with geometry, because we can only get so far with just looking at particles.
4. Adding Geometry (Skinner - Blobs): The next thing we're going to do here is apply Geometry. We're going go to x-particles. We're going to go click the xpSkinner. This is the key factor when you're trying to make anything blobby or anything like that, and it's very important, if you don't really use this. This is by far the easiest way to make these things look blobby so what hat we're going to do, is having the selected, we're going to drag the emitter down to the objects. The object within the sources tab of the Skinner. As you can see, we already have this thing. It looks gross and it looks low less, if we go to the constant shading lines, it is very low res. One other thing having to display at ground shading, or ground shading lines. It'll show you the segments here. We can see what we're working with. In their service level, there is a bunch of settings you can adjust here. Moving this up and down, changing the size of these things. But the first thing we're going to want do is see the, if you notice the polygon size and the polygon render size are different. You're going to want to make sure these are the same, you know, what we're actually getting. We're going to get this down to five, and you see everything gets a little more fine and easier to comprehend what's going on here. But the first thing I'll do is, let's rewind this and let's go back. This is just about trial and error. Let's go back to rate, at 1000 particles per second and we press play with the Skinner. Just be careful, depending on your birth rate and what's going on. This will slow down the speed of the action you got going on here. A lot of times I will have this checked off and play, and then check it on after. But you can do it as well with this checked on, it's is just going to be slower. You see it gets slower after every particle that comes out. But at least we're getting some blobs. We're getting some really cool abstract blobs already, not even doing anything, and remember we got these boundary boxes here. Maybe another thing we could do is just go to basic X-rays so you can actually see the bounding box. You can always get rid of it too, just you can keep organized thing, just knowing that it's around these lines here. But we're going to go back here, take this off, and play this thing until we're happy with something that we got. It's wrapping around this sphere. A lot of stuff is going on here. Turn it on. Already, this looks really cool. We haven't textured it. This is just the raw output. Notice this thing looks really blobby. Maybe you're going for more of a liquidity thing or something smoother. If you click xpSkinner, there's something exactly for that. We're going to go to object, scroll all the way down to smoothing, and the main thing you're going to want to check out, here's Geometry. Watch what happens when I click this. Much smoother. It's like milk or something. Something very smooth, a smooth liquid. The more you adjust these settings, the more you can get potentially where you're going for. But I'm I'm pretty happy with that. As a matter of fact, I was actually fine with this. Maybe tone this back, just a little bit. Something like that. That's really cool. If we turn this off again, let's make sure we're getting the best out of this turbulence. I'm going to take the scale down to maybe 75 percent, and then see what we got. Get more movement. Different movement going on. Again, still bounded by the sphere that I had here. Take the Skinner, turn it back on. Now, we're getting some really cool wavy stuff going on here, and as you can see, this already looks way different than anything else I made here. That's just how easy it is to use this stuff. I think a lot of people are intimidated by x-particles or just any plugin you can download because semaphore D has already set a dense program and something that allows you to do these things. It's going to be really hard, but it's really not. It's a little bit expensive. I don't know if it's like $400 or $500, but to me it's been very worth it. We're going to go back into the Skinner settings, and again, you can get these things to look much more squeamish, or much tighter, or you can have them look like blobs and there's a bunch of different presets here. There's fluid. Better for fluid simulations. Turning that up. There's blobs, for bigger blobby stuff. There's a ton of different stuff here. I think I'm going to go to the blobs here, tone it down a little bit. Go to like four centimeters. Get that extra resolution on their. Bumped to scale up to like 125, 135. That looks cool to me. Let's try fluid. It's just messing with a bunch of these settings that can change literally without even having to re-render anything. Play it. That's why I like this, because these all happened in real time as well. You don't have to replay every single time, I've got 150, maybe 250. It's easy to get these really cool results here. Depending on what we're going for, I think this looks really cool even. Let's go down to a 100 and that might be a little too intense. Scale this down. I like the scaled up, as you can see, since we're working with a smart polygon size, It's harder to load these things as fast as we want them. But if we go to the display, we're getting a lot more stuff going on there. But I'm happy with this at least for the sake of the tutorial, what I'm going do now is, with the xpSkinner selected, I'm going to press C in my keyboard or make it editable. Once that's done, we can move this just like any other piece of Geometry, without having to worry about pressing play or whatever, and I'm trying to figure out if I should show you guys another piece of x-particles, I think because I don't want to release too many particles, videos, I'll go through one more thing. What I'm going to do now is , the emitter is still there, everything is technically still there, and I think emitting properly. If I go here. Yep. Still emitting certain things. With that still centered where we had it, we're going to show you one more thing here and I'm going to go to a emission, I'm sorry, object, and then go to emitter shape object. I guess, you might imagine what this does. If you drag the Skinner in here, it'll emit from the Skinner. If we're emit from polygon area, and now, all of these particles will emit from this thing. You can see how this would be very useful in projects or making some abstract or anything. This is also hide you those little hair things or things like tendrils coming down.
5. Trails Modifier: I'm going to restart here, while having the emitter selected, I'm going to click the "XP trail". You can find that right here. We can see all these things drawing lines and you can see the y squiggly because they're being affected by the turbulence that we had. If we take that off, they're all going to just be going in straight direction. I'm sorry, they're actually not because we don't have a speed. Its speed says zero but if we didn't have speed, they'd be going in a straight direction in all directions. We don't want that, we can have this be zero speed and with the turbulence we can check on. I'm cool leaving the turbulence at a 100 percent scale, five percent strength. Let's see where that gets us. Looks pretty cool to me. If you wanted to do the thing that I did here, or they're all following the thing. All you would do was pretty much have the turbulence sets a curl and you would add another modifier. While having the xpEmitter selected, you can go to x-particles modifiers, motion, and XP follows surface. Now everything is affected by, if I were to click this and drag the skinner on here, you'll see that they all follow the surface of the thing. It's really easy to see how you can get some really cool designs from just doing this. What we're going to do is bump out this trail, so press "C". Now this whole thing is editable. Again you can twist it even something like this would be cool. But we're going to do is now we're going to delete everything that we don't need, we're going to delete the turbulence, the emitter, the trails that we had, so we're left with the trails, the spline, the skinner and the sphere, which we can also get rid of because we're not using anything in motion anymore. I might just make this a little bit smaller, the skinner, just so we can get a cool design, that pop out a little bit. The next thing we're going to do is go to x-particles and xpspline measure. What this does is pretty much adds part surface geometry to any splines that you haven't. It works with things not even involving x-particles. If I were to create a random spline here, just connect point and go to spline measuring, drag this in. It gives us a cool, you don't have to do the circle spline and then the sweet nerves or whatever. You can add the subdivisions right within here. You can see this right here. If I were to take the spline and go to uniform and bump this segments a little bit more and take the spline measure subdivisions up. Much easier to get like a rope or any cool geometry you need, you could add caps to him. As you can see, and also cool for, if you want to take the size since there's these charts here, hold down "Command" and drag the ends, this is how you get cool tails or anything like that. The same thing with this go around. It's just cool being able to fully maneuver these any kind splines you get. We can delete that spline here. You can actually get rid of all these settings that we just tweaked. What we're going to do is you guessed it, take this spline and drag it in. It's going to go all the way down to the splines, drag trails in. But we don't need these things subdivided rarely, at least not now, everything looks good here. What we're going to do is go back to the shaded mode, what's an easy mode to look at here? That's fine for now, let's go here. We're going to jump out of the camera here just so you can see what's actually going on here. As you can see, these things are crowding this thing which is fine. First thing we're going to do is add caps to these, the second thing we're going to do is shrink the skinner a little bit as a whole. The next thing we're going to do is take the size down to 1.5 because we don't need these things to be that big at all. As you can see, we're still getting a lot of good stuff going on here. But I'm not really crazy about how many. It's overcrowding this thing, to be honest. If we want this to work, we might have to make them smaller, like one or even 0.5 and just have this thing, have these big metallic or something. Honestly, I'm not crazy about them, I'm going to delete them. But then I'll just show you the implication that you could use those for and that's another way you could use those in the future, but we're going to work with this here.
6. Lighting (HDRI / AREA): I think we can light this now before we texture it and we're good here. I'm going to take the camera, I'm going to go to a portrait and then just select this guy here and zoom back a little bit to where I think it looks somewhat decent. Then so we can get a feel of are framing new Shift V and crank your opacity of 100 percent. This is our actual dimensions here. If you wanted to do any last minute rotations before we start, this is the time, obviously. Something like this. I'm cool with. What we're going to do is first, we are going to add in HDRI. For a lot of these I like to keep the background black, so that's what we'll do. We're going to create a massive sphere that wraps around everything. If we hop out of the camera, we can see we are in a giant dome, which is totally fine. Let's jump back in there and let's start our interactive render region here. Looking great. Let's check on Ambient Occlusion, lets also check on Evaluate Transparency and let's add our first material to this background. With that enabled there, we're going to disable the color and disable reflection and enable the luminance and while we have the luminance is enabled, lets go to elimination and check on GI Area Light to prevent some splashiness later. We're back here. The next thing we're going to do here is add an HDRI. I'm going to go Texture, Load Image and I'm really just going to add one that I've made before. Something like that works. I might just use something like this, to be honest. I'm going to upload that just to 360 degree image, nothing crazy, not edited. Then going to check on global elimination and now we're getting some nice realistic lighting here. The first thing I'm going to do is, actually click the sphere, which is our HDRI can rename it. I can go to tags and before the tags and go to compositing and after compositing tag on hear and uncheck seen by camera, so we're just getting this thing which is what we want. The next thing I'm going to do is actually take the luminous channel of the HDRI, could have mixed-mode multiply and take that down to like 60 percent, we don't get anything too crazy. Then I'm going to make a plane light here and if we can see correctly, let's rotate this plane. Let's take this guy up so we can see the plane here. By the way, I got into the few just by clicking, this guy right here or middle mouse button and so I'm going to move this guy up, left and pointed towards it. Just a little bit and if I want to be really honest, I'm going to hop out of the camera, move this guy this way towards the back end of it and rotate it a little bit this way. Just so we're going to get some nice, key light or back light hitting it from the back. Now once we know that's there, let's create another material, drop it on the plane which will be our light, turn out that light and we're going to go and kill the color channel, color reflectance and bump the luminance. Now we're going to get, a little bit starts to go on here as we had this on, but we're going to bump this up to like 350. We can clearly see a nice key light coming from over there and we're going to take you Illumination GI area lights prevents them splashiness and we can keep that white for now. Let's go 450 actually. You can see we're getting some nice dramatic lighting now and that's what we want. The only thing we don't have is a nicely textured objects, so we're going to make the texture right now.
7. More Geometry: Before we apply that, let's add some couple more cool things to this thing because I think it's looking a little empty. Let's see. I might end up leaving a sphere shown here in the middle of the segments up a little bit, and making another sphere, dropping that in a cloner. Let's go monograph cloner, doing this a little fast. But everything I'm doing now I explain in other classes. If you're watching this already, I know because it's a premium class that you have access to the other one. So I'm not really worried about that. I'm going to drag this sphere into the Cloner, Object mode and then drag the Skinner within there and before it's too late, go to distribution and surface. You can see these guys are all within this surface. I'm going to go to Cloner, Monograph effector. Let's go random with this. But not random on the position, we're going to be random on the scale and rotation. So absolute scale, rotation, sure mess it a little bit. Let's boost the count up a little bit just so we get some, 36 is cool and then just messing with the Seed will finish the job. Put it in a place where you think looks nice and random. Still haven't found it. It's hard to know when you actually found the right spot. It's never an easy place. That might be good. It's fine with me. We're going to take the cloner because I don't like a couple of these. I'm going to not check render instances and press C on my keyboard while selected on the cloner. Kill this guy, kill this guy, kill this guy, and we should be good. Is there some overlapping here? Sure. That's fine. That should be good. But we still have this cloner thing that we can rename. Actually, it's literally the cloner, so there's the clones. If we wanted, we could actually add these lights that I had here. All I really did for that was two cylinders. Let's go make this bigger, tiny like that. Really all I did here was rotate this 45 degrees. Matter of fact, it's probably easier just to go 45, Enter and Command-Copy, Command-Paste, so we've got two of them. Let's go negative 45. Now it's in an X shape, and we can clearly see that here. Actually, you know what? Let's make our own source. It'll be a plain light and we'll duplicate it, and that'll be it. Let's say, 300, so they don't have to be as intense. We can rename that to cylinder light. There we go. If we jump back, they look to be in good positions. We're good. The only thing we have textured so far is these little lights here. Let's work on the actual meat of this thing.
8. Texturing (SSS): We'll call this 'blob'. I'm going to drag it on this guy and the first thing we're going to do is give it some nice texturing, nice reflection and subsurface scattering. Depending on what color we go with here, I'm going to uncheck the color channel first. So we got this black blob going on here. Oops. Sorry, I was trying to uncheck that and then we're going to add a luminance but we're not going to have it glow like this. You go to effects. Within the texture of the luminance channel, go to effects, subsurface scattering and we're finally getting this, it's lighter here, darker here, that's what we want. So when I click that, let's go take this to 250 strength, much more prevalent now and then take this guy down to six centimeters. So we can clearly see it's darker here and lighter here. So I think what I did here was I made these guys a little bit pink, let's go pink, drag these guys out. Matter of fact, I think there were actually white. I add a reflection to them, killed the specular and took this layer down to like 15 percent, which gives you that nice icy feel. If I were to change this cylinder light color to nice pink but not to the point where you can see the thing is pink, it's got to be white. So we're getting a little bit going on there but not as much as I'd like. So we can take that up to like 500. Now, we're getting some glow on the outside of this thing, which is exactly what we want. Let's take this to 600 and bring it back over a little bit. Perfect. Depending on what you want to do with this, if you group these guys into null and swivel these around to wherever you thought would be nice, you're going to get a much better result if you can actually see where it's getting into but I think for this, it'll be fine here. So we're looking good for the most part. I do a lot of this stuff in Photoshop after. So let's make a glass texture for these cloners here. Let's kill the color channel, reflectors channel, check on the transparency and for a fraction that's going to be like 1.333, which is the water preset. So we're going to allow like water droplets here, going on, not bad. But we can always change the color of these to make these look more prevalent to something like blue, that'd be a nice cross. So let's take a blue color like this. So you can see in a little bit and take the absorption distance like 30 centimeters. You can see I'm a little bit better but it's still kind of hard to see them. Let's go to 15 centimeters, not bad. Now let's add some bump. So that'll make it much easier to see when you go in here. So let's choose a noise like paxo or poxo, take the bump down to like a global-scale of 40 percent. Matter of fact, let's take that down 25 percent and take the bump up to like 33 percent. So that looks fine to me. It's kind of hard to see here but if you boost up this resolution, it's much easier to see that there is something going on there. So we're looking good here. We've got this nice abstract little shape going on. We do have one more thing in the back so let's create another texture for that in this little sphere here. I'm not really sure what to texture this thing, we do a lot of stuff with it. I'm thinking we try killing the color, adding a subsurface scattering texture on it. As a matter of fact, let me see what this does. That can even be really cool too especially if we add a little reflection to it. Yeah. So there's a ton of stuff we can do. I'm pretty happy with that. If we boosted up the brightness to like 400 percent, this thing would be really glowing, glowing this whole thing. So maybe that's what you want, maybe it's not. But I think that looks pretty cool. You can take this back a little bit and then this down to like 200. Let's see here, let's try this in a blue. So really all depends, this is like icy now, it depends on what you're going for but we're generally getting what we asked for here.
9. Camera Settings - Depth of Field): One of the last things I'm going to do, I can keep it like this for now, is go to the physical tab, check on depth of field because we want a nice amount of depth of field here. I'm going to zoom in a little bit. Once I'm happy with the cameras, I'm going to click the "Camera", could do a tag, Cinema 4D tag. I'm going to put a protection tag on this. Then no matter how much I want to zoom in or out or move around, I cannot when I'm within the camera. So if you want to do that now you got to jump outside of the camera. We're going to hit the camera and let's go to physical, let's go to an f-stop of one and everything will probably be blurry now, for the most part it is blurry. Let's got an f-stop of 0.7, where we can see that it's blurry. That's perfect because the focus distance is way out there, so it makes sense that it's blurry. We just wanted the f-stop low enough so that we can clearly see that there is a depth of field, whether that's shallow or not shallow. But next thing we're going to do to make this thing have an accurate depth of field, is click the object panel, click this guy right here, which will allow us to click our focus distance and then click anywhere that you want it to be focused on soon after you click out, there's clearly a focus on right here. If we see the render, we can see that the back is that a focus a little bit in the front is clearly in-focus. If you want to change that a little bit, we can go to 0.6 or 0.5, and that should be good. Now we got a decent amount of shallow depth of field going on here, I'm happy with that. I'm going to add a little texture to our blob just by adding a bump, going to a noise, and just go in something simple like the elastic electric noise. Just something to give it a little bit of texture here when the lights bounce off of it, we don't need anything crazy. Let's go to maybe 10 percent and that'll be perfect. I'm really happy with this, it gave us a little bit of texture. I'm happy with the little blobs and I think I want these things to stick out a little more and not fade away into this white blobs. What I'm going to do is I think if I just take the cloner here and expand them all, I think that'll do the trick for the most part. Yeah. It got those things out a little bit, you can see more color within them. I'm liking this one, this looks very nice, and that's what we're going for. I'm happy with that. If you wanted to do just a little bit more, maybe this might be a little extra, but adding another one like this, putting it in a cloner in these will be the ones that are just going all over the place, the small droplets of water. We're going to make these much smaller. Could increase the radius of this thing and then make the individual guys much smaller. Let's go to another random effector. I'm sorry, I got to have the selected, monograph vector random. So now these guys are just all over the place. Let's go to scale, it made a difference in scale for sure. Rotation, doesn't matter for this one, but what the hell? Then just bouncing these guys up till we're happy with the amount. So let's render instances because we're not going to have to mess with that too much. It's got a five by five by five. Make sure these guys are all over the place. Make these guys small enough to where they're not making that big of a difference. We can maybe shrink this a little bit, so we're around something like that because six by six by six even. I'm pretty happy with that. So we're just going to make these guys the glass texture. Now when we render this thing, we can see these guys are everywhere, being hit by this thing going on here. Even something like that, it doesn't have to be crazy. Seven by seven by seven. Anything to give it a little bit more of an organic feeling. Let's see what we're actually looking at here. What are these guys doing? Yes, and we're getting a little bit. But for the most part I'm happy with that. These guys popping out now will also give a bigger idea of the depth of field because these guys were in the back or out of focus. We want to see that it gives us a bigger illusion of the actual true depth of field here. We did everything from, we have the camera in there, we have the HGRI that does a lot, gives the subtle reflections that are very much needed. I think we're good there. I think we're good to bump this one out. That's X particles. It wasn't that bad, we only had to use it for the first little part of this. So right now I think what I'm going to kill the pre-render view and let's get my global illumination sample count. I set it low to 20, so it would load faster. Plus, we went over that in the beginning. But we're going to boost that up to 150 samples. For now, everything here looks good, I mean inclusion looks good. Physical, We're going to go to fixed sampling, so divisions by five and then make everything by four and we do need a four as well for subsurface scattering because we are using that as well. Output we can change that now from 600 by 600 to 108 by 1,080 for Instagram. Now we'll you see next time in Photoshop in the next segment here in a second. But I believe that is good. Make sure you are in the correct camera, which we are. Remember, our backbone will not render out. We don't have to worry about it because we have this compositing tag on here which disables the camera being seen or the camera's seeing the background here. So I think we're good here. So let's render this out. Let's see, we're looking at I'm not exactly sure, what do you call it? I'm not exactly sure what the render time for this one will be. My guess is It will be something like, because there's black space that will not have to be rendered out, something like 15-20 minutes maybe. Give or take. As you can see, I got this guy here, this was my last render. Excuse the profanity bunch, you guys are requesting it. I'm in this series right now. I'm doing a lot of these brands and it is, yeah, a lot of you guys are requesting some some interesting businesses. So I had to do this one, I'd to respect where you guys are saying. But I will see you in the next segment here. This is already running pretty fast, but yeah, we'll see you when we get to Photoshop.
10. Color Grading in Photoshop: All right guys. This actually didn't take long to render at all is nine minutes. That just shows you how crazy easy this stuff is sometimes. Especially when you're working with the all-black background, there's not much for our computers to render or process. There is subsurface scattering, we are going to get a lot of just take a hit but not as crazy as you would think. With that being said, let's bump this out. We're going to save it right-click save as a TIF PSD layers 16 bits. Let's bump this out to, let's call it tutorial blob X particles and that's bombed out. We're good here. Let's go back to this guy right here. Drag it on here, and we have it here. The first thing we want do is that command J aka duplicate the layer just so we're not editing destructively or if we ever do, we can go back. I always like converting for smart filters as well to increase the capabilities of editing non-destructively and so the first thing we're going to do here is actually adding some blur. With that being said, I'm going to change the blending mode to lighten and right after that go to radial blur and then go to zoom and zoom out a bit. Let's see if we get some cool effect here. Even that's kind of cool. I like that. What we can do, is put a layer mask on this guy and if you click command I, while you select on the layer mask, it goes away. Then we can see what parts we want kind of being affected here. So obviously you want the light to be affected. It's totally your call. If you're not feeling this whole vibe here, you don't have to do it at all. But stuff that I thought looked good, nice blurs to these things. Maybe tone it down 50 percent. It's nothing too crazy, but just giving it a little something, so many do Command Option Shift E to create a new layer based on that and again, converting for smart filters, Camera Raw Filter. First thing I'm going to do is increase the vibrance because you want this thing to look really vibrant. See what we've done. We don't want to do all that work for nothing. What we're going to do here is increase the black a little bit and then take the contrast down. Just a little bit. Looks good so far and we're going to split tone this thing a little bit. This is how you can get these really cool clashing colors here, I'm increasing the reds here, but also taking the highlights and doing something else. I'm going with blue, red with the shadows. Sometimes that looks cool. Again it depends on what mood you're going for here so just filled it out. Everyone, you got to edit completely differently. This one's more purple or pink it depends on what color you like the most, I guess. I think to me, kind of more bluish. Then of course you can change the hue of certain colors and the glow. I like how we had it, to be honest. Let's see we're going to add some noise, first of all, a little bit. But that photorealistic quality. Let's see what else we can do here we're going to change. We can mess with the saturation. Saturation, plays a huge key in these images apparently rather than vibrance. That looks really good to me adding some purple in there for sure. Maybe you can turn the blues down little bit, adding a little bit of red and most part that looks good to me. Of course, the shadowing, depending on how much of the glow you wanted involved here. That's fine by me. Now we can start to figure out what vibe really wanted to go with here because I know I did like the original look of this thing for sure. I don't want to go too crazy on the highlights because we're already losing some detail here if you'll see definitely losing some detail and a ton in the shadows. But that's okay because it's pure black that's what it's supposed to be. There's really no for sure way I can be like right, put these levels here all the time. But those levels there all the time, you really can't do that because every image is so vastly different. You can't possibly instruct someone a certain way to do it, for every type image is literally different for each one. But because I am clipping here, I got to be mindful and I don't want to go too low because we will see clear drop off here, which looks unrealistic. I guess I got to mess with the blacks here and it looks pretty good. Anamorphic style. Really there's not too much else I think needs to be done with this. I think that's for the most part good, we shall see before and after. Just stylized it a little bit more. Some people might think this even looks better, totally fine. Do what you got to do. But I think for this, I'm definitely feeling this a little bit more. I'm going to press okay and because it's a smart filter, we can always go back and re-edit certain parts. I always like to go hue and saturation adjustment layer afterwards and see if any combinations happen to look better these are very funky, if you yearn for purple or pink. But I think that honestly looks good and I think we're ready so we can bump that out like it is. I thank you guys again for watching. That's literally how I make that'll fit perfectly next to these guys. These guys right here. It would be another one that I post and that's exactly how we do it. It's no different. I thank you guys for watching. Please submit what you have to me. I'll try to get back to you. I've been pretty bad at getting back to some of you guys because I've been very busy in my personal life. But I will definitely try to get back to you. Submit to me in the project section, please. Under this video, I would love to see what you guys have. Please give me a thumbs up review and that helps me get on trending page and I thank you guys for sticking with me for this long. It's been a pleasure. I really appreciate it. That's why I really make these, because I got to give back, it's only right. I've learned this stuff because other people have been generous to show me along with just messing with stuff myself. But now really appreciate every single one of you guys the slides in the DMs and congratulates me or gives me props and says my work inspires them. So it's really great. I appreciate that and continue going crazy with the stuff. Never give up and I will see you in the next class. Thanks.
 Patrick Foley, 3D Artist