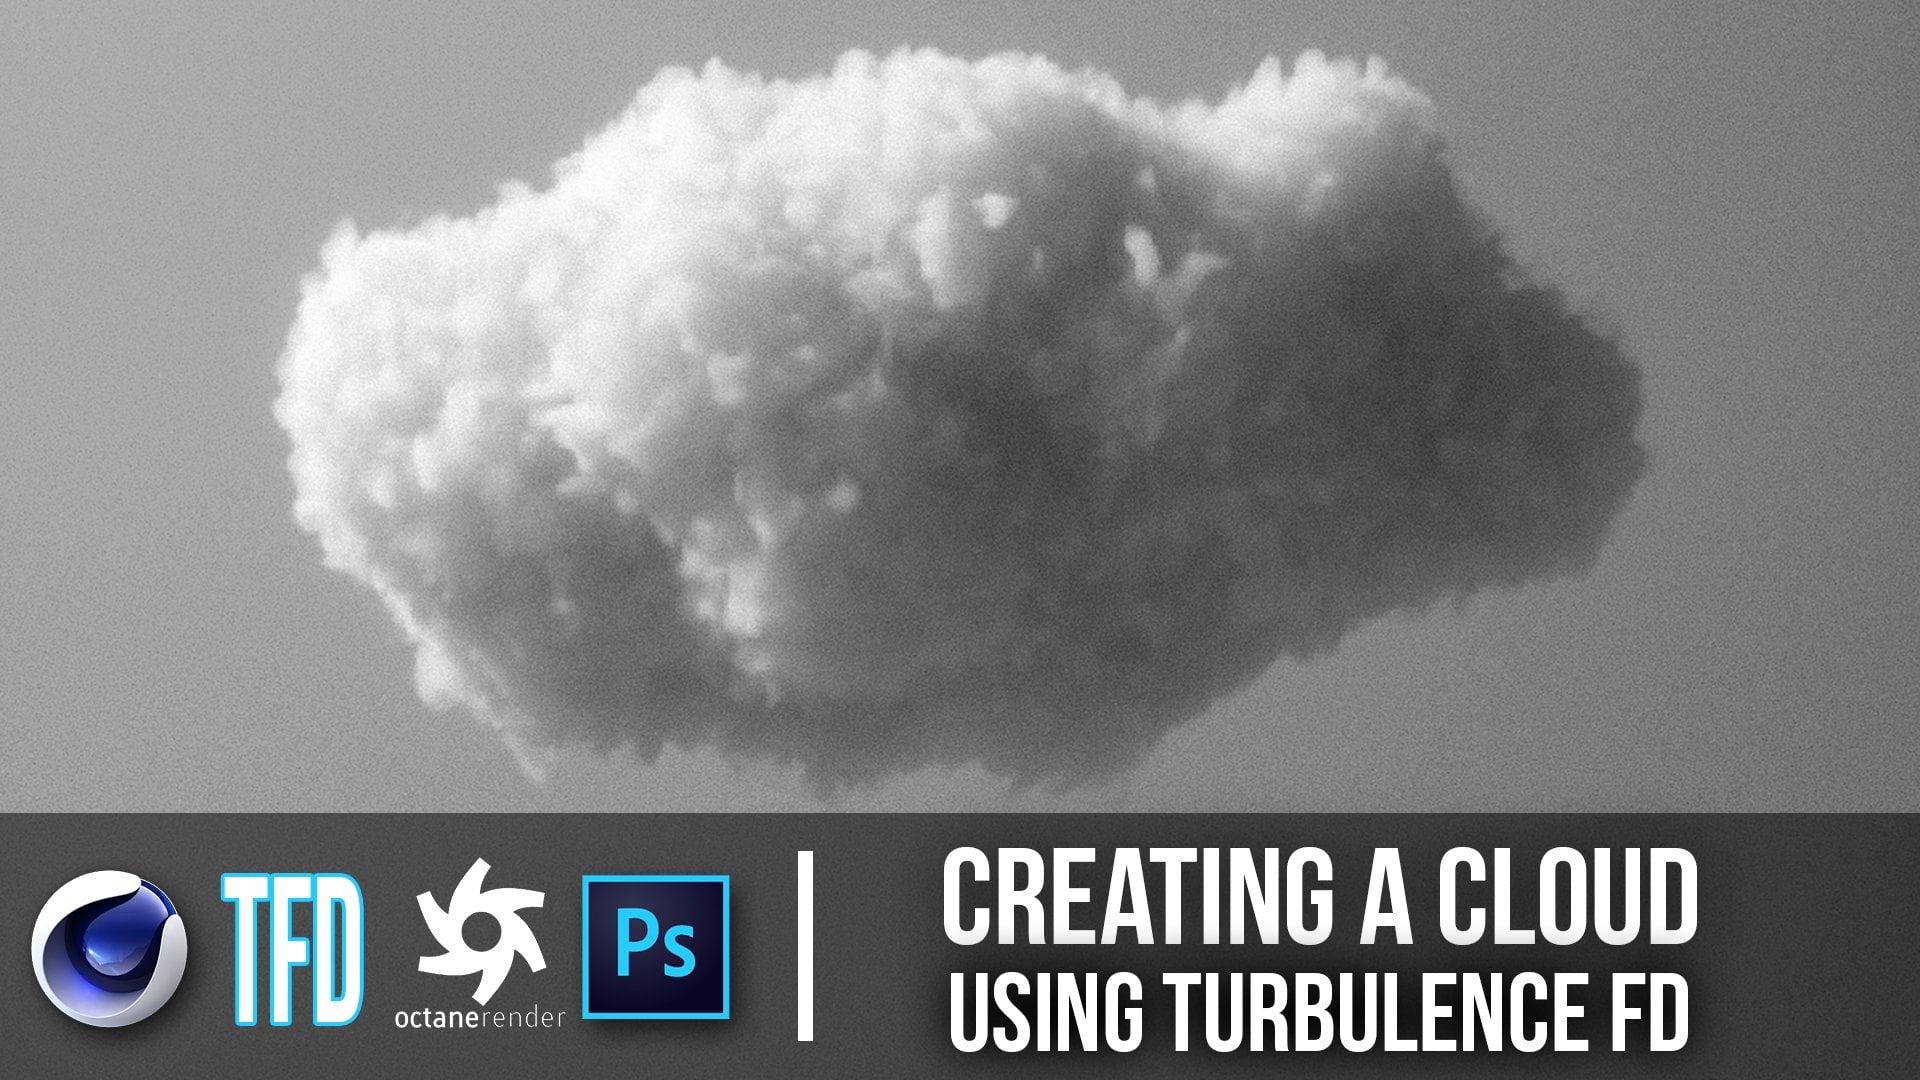
Transcripts
1. Introduction: What's going on guys, this is Patrick again, aka Patrick four D, as you know me on social media. Over the last few weeks I asked, what renders do you want me to go over in a class? One of the big ones that stuck out where these like bone structures that had like holes organic looking like holes in the surface, and although it does require a little bit of x particles, I think the results are really cool, and so even if you don't have x particles in the first place. X particles picks up maybe only 20 percent of the whole class, and I think the biggest thing to take out of this one is actually making your own track texture via an image that I provide or one you take by yourself and you had take to these ascribes to put an end to civil forties, this one's a big one and you guys will learn out of it, and can't wait to see you guys come up with.
2. Explanation: Hey guys, what's going on? We're jumping in here we're actually on Instagram.com real quick. Wanted to give a quick shout out. I appreciate all of you. We just reached 30,000 followers. It's crazy. I don't know what else to say, so I appreciate you guys jumped onboard and checking out the daily renderings I post on here, which has allowed me to make classes you know on skills share like this. Without further do, what we are going to make is really in the past couple weeks, I've gotten the best feedback from these types of images like this bone looking material. With these glass spheres going on top of them, even stuff like this. You guys requested it. I know we're going to be using some x particles here. I apologize if you do not have it, but not to worry, the next class will not have x particles, I will assure you. But yeah, there's a bunch of different things we can get out of this one. We're actually measuring some 2D, really simple 2D stuff in Photoshop and post. Just the subtle things like the cracks you guys are asking about and these holes. This definitely easiest achievable in x particles, you'd be surprised how easy it is. We don't even use any emitter. I think we can just get started here and I can break it down for you guys a lot easier. Without further ado, let's go into Cinema 4D.
3. Layout / Camera / Pre-render Settings: Here's my layout here, and it definitely, probably looks different than yours. If you want it to look like this, I do make a class on layouts, a free one, probably my shortest class yet. It's somewhere in my skill share, just hanging out and it's got a little red free sign on the thumbnail. But for this, I think I'll just make it easy on you guys and go to standard. This should be more so what you guys are looking at. We can start putting this stuff together. The first thing we want to do here, is open up the render panel or the render settings and just put that somewhere convenient for you. I usually just put that, right around here and that way we don't have to keep jumping back and forth of all the settings when we bump this thing out and change our sample settings and all that stuff. The next thing I really want to do is take a panel and create a new panel here. This is for those of you who don't use octane. How are we're going to get that simultaneous render viewer going as we do our own thing in the regular V panel? What we're going to do is drag this by the box here, and let's just drag it right here. We got two render panels here. This one you're going to want to make sure is much smaller because when we want to see a preview, we don't need all that detail and all that time it's going to take to render, so something like this. The majority of the stuff will be happening in here when we create it. We got this here and to make it easier and more defined for us, once you hover the mouse over this panel, you're going to go Shift V and that's going to pop up this panel here. We're going to take the opacity and this adjusts the borders, so we can see it easier. Let's get that to like 90 maybe, that'll help. When you do pop up the render viewer option, R, it's easier to see. I believe if you had this all of the 100, blocks out the render viewer, so we don't want that. So let's go to 90. It's easier to see what's going on here, and just set these parameters accordingly so we get most of the render viewer in a frame here. We can option R that again, we're not going to need that for a little bit. If you want, you can do the same thing with this panel. So option R, it'll just be a little bit more of, oh, not optional R, my apologies. Shift V, which we already had this panel over. Notice if we click on this panel, capacity changed to 90, this 110. Let's go to 90 again. Make it much easier for us to see the boundaries. Your viewer will probably look different because you haven't set the parameters or the dimensions yet. We can also get that out of the way. With the render settings, can split out here for us. Make sure we're on the physical render before we do anything else. We're going to go to the output. We're going to lock the ratio at 600 by 600 pixels. If you want, we can actually change that to 1080 by 1080 now, it's really not going to matter until we bump it out. But that'll lock at a 1080 and you're going to check on ambient occlusion and global illumination and if you don't have these here, they'll be in the Effect tab right here. Just make sure they are checked on and enabled. Within the ambient occlusion, you're going to keep everything the same except makes sure, evaluate transparency is checked on. That helps when you're working with glass, which we are going to be doing. I'm not sure it's going to make a big difference in this specific render but sometimes glasses can go black if they're refracting weird substances or having things shining through them. So it just prevents some black formations that sometimes pop up in the render. Then if you go to global illumination tab, let's make sure, actually going to slide everything over a little bit, let's make sure that we're on custom sample count here with a sample count of 20 and we're setting it very low because before we need to render, we do not need much of the render time being taken up. Every time we want to see what's going on, it's going to take a ridiculous amount of time to calculate every time if we want to see what's going on. So will boost that up once we're ready to render out the final image but for now, 20 samples is good. I think we're good to start creating some stuff. We got the objects panel here, we got our camera. Before that I'll actually delete the camera so we can start fresh. You guys probably don't even have any camera, but have something similar to this current set up here. The first thing we want to do is pop open a sphere, of course. With that being said, let's go to display in garage shading lines so we can see the segments going on here. What we can also do is, before we do anything else, let's hop ourselves into a camera. So all we got to do is, click camera. Regular cameras bring it below the sphere. I'll just like to organize it this way and we're going to hop into the camera. It looks like we are in this render view right now. Let's make sure we hop into the camera here, so let's use this as the render view. Notice this turned black. Now we're officially in the camera in both of these render viewers. Again, if I want to hop into this viewport render and hop out of the camera here, I'm just going to click the black square. So we are officially inside the camera and both of these render viewers, which is good, we can start there. Let's give ourselves a good base point. We know where to render from. Let's go to the coordinates and zero out everything except z. Let's go minus 1000 centimeters and under the rotations, let's go zero, zero and zero. This thing should be perfectly centered. We didn't move the sphere at all, we didn't move the camera. We can actually go to object within the camera settings and go to portrait. That'll give us a nice little starting frame here. It's actually going to affect the depth of field if we decide to use that later on, because a portrait lens is going to give us a much more shallow depth of field than a wider lens like a classic 36 millimeter, 25 millimeter. The wider you're, the larger the depth of field will be, that's why everything, usually landscape shots are always on focus and nothing is really out of focus in those specific shots. From that we can just zoom in maybe a little bit. Once I like the position of the camera, something like this. Let's go ahead and lock this camera. So let's right-click the camera. Go to cinema 4D tags, protection. Now no matter what I do, I can't rotate, can't zoom out no matter what view panel I'm in , if I'm in the camera, I cannot move, which is why if I want to hop out of the camera, let's go out, the camera's still locked there. This is what I was talking about. This is why we have two render panels here, because we can move simultaneously in this panel and this will stay exactly as is. If this camera thing gets annoying for you, you can always hide it by double-clicking the top bubble there until it's red. But sometimes I actually do like to see where we are in reference to what's going on. So reinstate the camera right here for now. The next thing we will do actually is a little bit out of order, but as long as we do this right now before we start rendering things, the settings to output, everything's fine here. Save, everything is fine. This is probably the standard that you're used to be optimized with anything in there. At least not right now, all of this is fine until you get to the physical tab, let's make sure depth of field is checked off for now. Let's go to the progressive render, which will make all of this grayed out. Let's go to all of these values set to two. So really low settings right now because we only need a general estimation of what's going to be going on, with these renders, especially just starting out. So everything should look good and if you click Render, we should be getting a general picture. Actually, no, we shouldn't because global illumination is checked on. That actually relies on actual physical lights being in the scene. So, if we don't have any lights currently on the scene, it's not going to show up because it's pitch black and there's no lights. But if it were checked off, I believe it would show the sphere with a default way, but we don't want that, so let's go to Blue Moon, global illumination, my apologies and I think we're ready for some x particles. Before we do that, let's go to the sphere, and go to type, set that to icosahedron. So make it a little bit easier for us in a second.
4. X-Particles (Skinner): Let's open up some X-particles. So let's go to X-particles and the cool thing is we're actually not going to use an emitter at all. Usually we're using an emitter to make these funky shapes. We're actually going to be using the backbone of this sphere the whole time. But we will be using X-particles of course. Lets go to the XP Skinner and make sure the Skinner is below the sphere. This is going to matter in a second, I'm actually going to show you why. If I don't do that, let's drag the sphere into the objects panel of the Skinner. And you'll see that if I were to render this, actually, for now we can turn off Global Illumination just so we can see these things without lighting them. If I were to render this sphere, it actually does show up. It's pretty funny. Maybe it's just a Global Illumination thing. Let me check on something real quick. Let's see. Well it looks like we're good and maybe it's the other way around. Is that what I'm thinking of? Well, either way we're good. So let's turn off this light that I just created for no reason and turn off Global Illumination again. So we should be back where we were in like two seconds ago with the Skinner, just a basic Skinner and the sphere inside the Skinner. Make sure the Skinner is below the sphere. You can actually turn off the sphere. So let's hide it on both accounts here. So the sphere is not showing, it's only the Skinner which is replicating the sphere. So let's go to the sphere and add 60 segments or so. So it's going to give the Skinner more points to do what it needs to do. And these values here on the object tab of the Skinner are going to be what we manipulate here to make this cool bone shape or this abstract bone shape. What we're going to want to do first is go to the surface. Let's go to fluid. Already we're seeing some holes here, which is pretty cool. And let's make sure the render viewer, see the polygon size here is 10 centimeters for the viewer here and five centimeters for the render polygon size. Let's make sure that those are the same so we're getting accurate results. So this looks a little bit more like what we see when we render it. Actually exactly like what we see. So that's looking good. But obviously way too low res and not looking as good as we need for a shape like this. Let's see how we get into that. Let's click the Skinner again and let's go to this smoothing tab here. Next thing we'll do is going to drastically improve what we're looking at here without having to up the sample or up the segments at all. So we're going to click Geometry. And now we're getting this smooth shape that we need but it's still pretty low res. What we're going to do now is go to the Skinner and take the surface level down. You'll see as we do this, we're already getting that look that we saw. Obviously it's less organic and it looks mathematical-based. It's very, what do you call it? Symmetrical. But that's not to say that these are not very cool looking results here. Without doing pretty much anything, we already have this cool looking abstract design here. But how do we randomize this to fit our liking? So what we want to do first is lower this a little bit more to a point like that and then up the scale. So when we up the scale, it gives this whole structure a little bit more, I don't know how you would say, fluidity? All this stuff's hard to explain when you're getting down to it, but that's the best I can do. So we're getting some like this still not looking really what we're going for, but it's definitely a start. Actually, what we're going to want to do is take the iterations up of the smoothness to something like 120. So that looks good now. We're just smoothing this whole thing out. And as you can see, it's getting flatter and almost looks like some puffer fish or something. But again, that's not what we want yet. So let's see, let's take the scale down. It's really about messing with all these segments until we get something that we like. This is a good starting point. Again, this doesn't look like what we are going for, but it's a good starting point. We are getting some loose holes. We messed with these values a little bit and we smoothed it out. Now the cool thing here is so far everything is procedural and everything is non-destructive. Meaning we could even mess with these samples again, we can get more samples with the sphere that we have. We could take them down. And the best thing is we can actually manipulate the underlying shape. So even though this sphere is not being seen, because it's hidden, we can still manipulate it. So let's go to a Displacer and add a Displacer, and just add that on top of the sphere as a child. And you'll see that once we go to shading shaded noise, just messing with displacing the sphere underneath is already making this not uniform and more organic. So let's go to the Noise Channel and let's take the Global scale up to like 800. And already, look what we're getting, something that looks not as much, it's looking more organic. So let's go to the height and mess with that and you'll see it starts to break apart the further we go away from the actual circle or the radius here. So this looks like something, some rapper is blowing up or something like that. Let's go to like maybe 50 and let's change the type of noise to maybe VL Noise. And let's see here, maybe we don't need the scale to be that large. Let's go 20, maybe 10. And just doing a tiny bit of that is actually giving us a good result. So we can for now take the shading off just so we can see the sphere, the circles are the openings here, a little bit easier. So let's go to the Skinner and take the surface level down more, and you'll see now we're getting some bigger, some definitely more circles. And this is totally cool if you wanted to go with something like this already. This is by all means a very cool shape. But let's go back to the Skinner and let's go to scale and bring that up a bit. So we're getting somewhere now. Alright, that looks good. And just again, messing with these values, making sure, you know, every time I try to make this it's different than the last time. Let's bring these iterations maybe up a little bit. That looks cool. Taking the scale down. As you can see, these are very cool shapes being made here. Take the surface area down a little bit to be something like that. We don't want to preserve the volume in this instance. Let's see what else we can do here. Okay, that's cool. Yeah, we're going to want to keep the polygon size at five for now. And once you have an object you're feeling good about, of course moving the sphere in any direction will change what's going on here. So just moving it underneath changes the output of these settings. But stopping it where you see that it looks the best and remember, we're going to be putting a sphere inside. So I'm actually happy with this. And if you'll notice, let me hop out of the camera real quick. If you'll notice, the insides of these things are very low res and choppy looking. That's totally fine because I'm going to show you how to get that smoothed out in a second. Because if you'll go to the lines here, there's not that many subdivisions. It's all over the place and it's not really uniform. But I'm happy with this start. So once you guys are happy with something, let's keep it there. And we're going to take the Skinner and if you want to play it safe, you can current state to object and you can always go back and manipulate the settings anymore. For this specific class. I'm just going to go to hit "C" and make it editable. So it is destructive. I'm going to kill the XP Skinner tag because we don't need it and that also means we do not need any of this. So we are left with the shape, very simple, the shape that we just created.
5. Smoothing & Perfecting Geometry: The first thing we're going to do is extrude this a little bit. It's not going to be paper thin because I think we want this to be thin, at least with this egg hatch material. But we don't want to be a computerized then where it's literally like a pixel big. Because that doesn't look exactly real me. Easy solution, we're just going to go to simulate cloth surface and drag the Skinner as a child of the cloth surface and by default it's going to sub-divide it by a factor of one. We do not need that. But we are going to take the thickness and take it up 1.5 centimeters. That looks good. Might not even need that. It might just be good at one. I think that's right, so just keep it at one. The whole thing has a little bit of a thickness now. If you want, put it at 0.5, if it looks better to you. I think I'm going to keep it at one just for now. Now to fix these weird openings here and smooth those out and make them a little bit higher lens, we just taught this whole thing actually into a subdivision surface. Just make this a child of the subdivision surface. You'll see now that all of these things are smoothed out on how we want. Even though we're seeing the subdivision editor showed as to it's really at three when we render it. This is looking great. We can take this down for now to two. Subdivision editor two, subdivision renders three. Right now we're looking very good. If we kill that, this whole shape looks much more manageable and much more doable and if you feel like you have too many holes, just rotate a little bit to a point where you think. There's a little bit better on the eyes. After that, all you're going to do is make this sphere for the inside be like this. This is, I guess, in my mind when I was first creating this the outer shell and this thing inside was maybe an egg. It really doesn't matter. Do whatever you got to do. It doesn't even have to be bone material. Let's just go. What we're going to be going over in a second. I'm really happy with this right now. This looks good, It's ripping apart and this egg is almost expanding. Looks pretty cool and it took a civil water.
6. Lighting: I think we're good to start lighting this thing before we texture it, so the first thing we want to do is turn "Global Illumination" on. So now we shouldn't see anything if we go "Command" "R", but we do have the parameter sets pretty correctly. Let's see what happens if we go to, let's create a sky object, so just hold down here on the floor and go to sky. We should get a good-looking object there, so that's looking good. Finally, being affected by natural light now. So we can bring the sky object all the way to the bottom, so we don't get confused with anything. Really, we can collapse this subdivision surface and rename it egg shell or something like that so we don't get confused. I can rename this egg. That's really just the names I thought for this. The next thing we can do actually, is add an infinite light and by default that's going to be shining exactly at it, which is going to make this thing look very flat. Next thing, we're going to do is rotate this to give it some contrasts. We want this to look like, mysterious in this cool little space. Let's move that over there and for the shadow, let's go to area. Now, I should be giving it some pretty nice realistic shadows, and the way these things fall off here looks really nice to me. We want this black background too, but we had the sky object, and to get rid of the sky object. Let's go to right-click, "Sky Cinema 4D Tags" "Compositing" and with that we're going to go uncheck seen by camera and that should get rid of all that stuff for us. This looks very good so far. The next thing, we're going to do is mess with the HDRI. If you want to see what the HDRI looks like on this, you can click "Seen by camera" again just for this part. As long as, we add this tag on here, we can always go back and uncheck, seen my camera. What I'm going to do is actually create our first material. You're going to drag this on the sky object right here, just like that. Now, it's going to be much brighter, as you can see. It's being affected by bright white light now. Let's go to the Material Editor by double-clicking on, "Material" and unchecking everything, we don't need that. Let's go to luminance, and within the luminance tab, let's upload an HDRI. I have a personal favorite, I've been using for some of these ones. It's literally just my friend holding a camera. This is Brian, shout out to Brian and I like this image, it's not the best quality, I took it with an iPhone. But I like this image because there's a clear light area and there's a clear dark area. The really the rest of the whole image is dark and the left side is giving off light. What that translates to is a high-contrast HDRI and better shadows because of the whole thing was lit by like what we have now, a singular light source, everything looks flat. So good reflections for such a simple image in a parking garage. It'll work very well. Let's choose that image there. Let's click, "Yes" and let's see what happens. There we go. Much more contrast in this image. But if we look here, the light is coming from the back and we want that, see the light we're passing. The prime light area right now. We want the light to be coming in the same direction as light we place. As you can see, the light would be coming from the right now. Let's make the light come from the left. There we go much better. What we're going to do is, let's go to the material again. We got the HDRI setup is good illumination. Just click on, "GI area light" will prevent some splotch in us in the future. We can go back to this compositing tag and uncheck seen by camera and we should be looking much better.
7. Dynamics (Ring): Well I guess actually before we do that, let's get the glass balls or whatever in the picture here. For that we're going to use a little bit of dynamics of course. To do that, let's option R so we can get rid of the Render Viewer. It'll be much easier on our system, once we're running simulations and won't take up double the processing power. Let's go to a sphere. Of course, that's what these little glass balls are going to be made from. We're going to go to "MoGraph" "Cloner." Then you're just going to drag this sphere underneath as a child of the Cloner. To maybe make this easier lets strike the light all the way to bottom all the stuff we're not going to be using. Let's go to "Cloner." Within the Cloner "Object," let's go to "Mode" "Grid Array." Grid array looks very big, so let's keep the Cloner as it is. With the sphere checked, let's click T on our keyboard, which will pop up the scale and just get the scale of the individual spheres down a little bit. Of course we want to randomize this by going to MoGraph Effector with the Cloner selected. MoGraph Effector, "Random." We don't want to randomize the scale at least right now or I'm sorry, the position, but we do want the scale to be randomized. Let's go to "Uniform scale" and go to something manageable something like negative 0.34 looks good, or maybe negative 0.45 looks good actually. With that, let's make sure the sphere is actually good to icosahedron. Everything else looks fine here. Under the sphere, let's right-click "Simulation" "Rigid body." What that's going to do is going to make these things actually react and fall. They are falling because we have gravity on. To turn gravity off which we want in this case, we do want to turn gravity off, let's go Command D. We're going to go to our "Dynamics" tab, and we're going to go to "General," "Gravity" zero. Zero centimeters now for your kit play, zero things happen because we have no outside forces acting on it. It doesn't actually even see these objects in the center as physical objects to bounce off. Next what I'm going to do is go to "Expert" "Collision Margin." If you'll notice sometimes when you're going and having things collide with simulations and there's like always a tiny bit of space in between the objects that look unrealistic, that's this thing right here. Just putting that 0.1, not 1.1, just 0.1. That'll minimize the spacing it gives you there. I think it just does that by default because it's easier on the Render, less things colliding, I think, but for this it's pretty simple, so we're going to go with that. Now we're going to have to make these things physical objects to bounce also off of. With the egg selected, let's right-click go to "Simulation tags," "Collider body." Within the collider body, let's go to "Collision," shape, "Automatic MoDynamics." What that's going to do is it's going to be more important for this egg shell material. But a lot of times when you have these holes, they are really finite cracks these spheres could technically fit in, they won't recognize them as individual holes that it can slip in and it'll just recognize the general shape and bounce off the general shapes so it is unrealistic. We're just going to take this tag, hold down command and drag that onto the egg shell. It should also have MoDynamics selected because we just copied and pasted the same collision and expressions dynamics body to each other. These things are now physical objects that they should bounce off of. As you can see, they did to the ones already colliding with them, collided. Let's actually take this Cloner and get it out a little bit and shrink the individual spheres a little bit more. The next thing we have to do actually is let's go to "Simulate," "Particles" "Attractor." Now there will be something affected by all of this. What will happen is the Attractor that we just clicked, of course, you can move it around wherever you want. Once you press "Play" these spheres will go too. But because the default is the center of the egg, that's exactly what we want. What we're going to do is go to "Attractor" and take the strength up to like maybe 2,000. Let's see what happens now with all of these spheres selected. Perfect. Now it's a little slow because we do have some subdivisions with this subsurface going on and there are decent but a segment is going on here. But something like this actually looks pretty good. If you want to actually increase the difference in size, some of these spheres will be fitting in into the holes here. Let's see if they work. I believe they are fitting into the cracks. Yeah, got you. Let me do one last check because I can't tell if they are fitting into the cracks. It's going to hidden line real quick and just shrink everything down. Yeah, I believe these are actually being, let's hop out out of the camera. Yeah, looks like we're good. Actually we can increase the segments of this one's, it's pretty low lets take this to 60, and change this to icosahedron and redo the simulation. There we go. Just a little bit more accurate, I'm going on here, everything looks nice and tidy. Depending on how big you want these spheres, I think I might want them a little bit bigger. That should be good. Let's see where we're going with them. Lighting aspect of this. Looking good, looking much better. It really just depends on where you want these things. I guess you can leave this simulation going on a little bit more see where they actually tend to go. You can change the angle of where these things are. I probably don't want them to be exactly on the middle at least. Let's change the Attractor to 2,500. Let's see here. Let's increase a little bit and increase the differences in the spheres. This might look good actually. I'm happy with that. There may be a little too many spheres, if we wanted to take it down a notch. Let's also Render instances that's going to change how fast everything goes as you can see. Let's go. I'm waiting for a place where they all land or I'm actually happy. It's not that randomized to me. Let's go, let's take this up to three, take this down to two. Anything you change will pretty much change where these guys end up going. This might actually look good as long as they're not crowded in the middle of it. I'm happy with. I can't tell I'm happy with that. It really doesn't matter as long as you guys are good, you should be more than fine. Let's change the, I believe its somewhere on here. I think it's the "Random." Let's change the seed. That should be, yeah, I'm pretty happy with that, whatever. Let's let's make that work. Maybe it's sandy but smaller. I'm not making up my mind. It's not really the point of this class. I should be fine with anything. That looks good. Let's get this out of the middle. Let's see, let's change the seed again. We'll work with it. Once we have something we like, let's take these down to 40 frames. We've got less frames to worry about. On top of the Cloner, we're going to right-click it and go to, I believe "MoGraph tags," "MoGraph cache" and bake what we have. Perfect. Now that we have baked there, we can render these as boost these out as instances by clicking C. You'll see here, we just finalized where these things were. All of these are instances which don't really change the speed of what's going on here. I think we can remove something like this, maybe one of these guys, because I don't want too many of these here. I'm happy with that. Perfect. I think we are ready to actually texture this thing. I believe the original actual Render had a disk on it, so if you guys want to add that, that's totally cool. We can just add that with a simple tube, of course, Render this on an axis here. Change the thickness of it. Of course, let's go to "Hidden Line" here, so it's much easier to see what's going on here. We're actually getting some pretty cool now, this whole thing is coming together. Of course we'll want to take the tube. Let's option R real quick so we can get rid of this "Render viewer." We're going to take the tube and go to an inner radius of 100, maybe 150. I'm sorry, not the inner radius. Let's go to the "Rotation segments" let's go to like 150. Let's go to fill it with the segments of maybe five or four. I just rounds it out a little bit. That should be good. Let's go to the "Inner radius." Something like that is cool. That should be good. Let's get this down a little bit. Awesome. We're looking good here. Let's see what is going on here when we Render. Of course, no textures yet. That looks good with me. I'm happy with that. If you want to take the, let's see,outer radius out a little bit and the inner radius a little bit more. It's not as crowded. That may work a little bit easier. Again, I'm happy with that. We are good to officially texture this thing. We might have to change the brightness of some of the lights as we move on.
8. Texturing (Crafting Custom Image-Based): Let's go to texturing this thing. So let's create a texture here that we're going to title "EGG." Let's start with the shape. This is the shape we care about the most right now. We've got a white material on here. It's actually funky how you create this texture. It's a very easy texture inside of Cinema 4D, but we're actually going to be using a bump taken hopefully by ourselves, like these cracks. They work well as bonds. Before we do that, let's take the material and go to color, and take it to this yellowish kind of cream color here. We don't want anything too crazy. Just like this old bone looking like material here. This is where we can increase the lighting a little bit to brighten it. Let's go to our infinite light and maybe increase the intensity up to like a 128. I think that works well, because it brightens things up a little bit and we're actually going to want to do is plus 128 and option R so we can quit the rendering for now and the texture. If you'll look at this, these textures are kind of like cracks and there's not too much else going on with reflections or anything like that, especially in this one, but let's work on this texture. I'll show you the textures that work. If I happen to photoshop here, this was a custom texture I made and it looks like cracks. It's a pretty decently sized image. I think it's actually what we looking at, about 3.5K by 3.5K, a little bit over that, which is definitely good enough for this. I made this literally by an image that I took. I actually already messed with it here, the street. Yes, we can start from scratch. So we're in Photoshop now. Let's do this. I'm going to grab an image that I took. I'll probably include this in the description or on the project file here, this image, but what I did here is let's just start a new composition here. I think this is actually the same composition. Let's just drag this in here. This is the image we have here, and what I can do is just delete everything else. We'll start fresh. This is an image of a sidewalk, a pretty high resolution JPEG I have. For this, it's totally fine that we're using it in JPEG. Usually, you don't want to use a raw image, which I do actually have, because there's more latitude, but for something like this, we do not need it at all. It's a very high resolution image. We're looking fine. First thing you'll want to do is, let's flatten this real quick. Let's rasterize it. Let's go to Image Adjustments. Let's go to Levels. I'm sorry, before we do that, let's go to Image, Desaturate. We've got a black and white image now because none of the bumps stuff really requires any color. Let's go to Levels and let's start messing with these slides. So let's drag the middle slider here all the way down and the right slider up to boost the whites even more. What we really want is an image that shows the kind of contrast we need to bring out these cracks. I think something like this because you don't want to go too far this way, till we're losing detail, although it did actually look pretty good. Something like this right here. This will bring down the unnecessary info here, but I'll show you how we get that in a second. Right here, as long as the imagery looks very contrasty, all the cracks are popping. We're looking good, so let's click "OK" and we're good to start grabbing the cracks. The easy way to do that is going to Select, Color Range. You can see here this thing pops up and you are able to select certain parts of the image and select different things here. I actually clicked on something and that brought out nearly all the shadows very well, something like that. What we're going to do is click, literally the black spot of a crack. You'll see all of this is selected. We want to get something like this. Click "OK." So everything is selected here. Once everything's selected that we want, let's go to Command J, which will duplicate and actually make a copy of just the selection. If we hide the other image and we add solid black ground underneath, you'll see that one will have to actually add a color overlay that we actually are getting good cracks. What I did there is double-click here, Color Overlay and then just make sure it's set to white. That's really all we have got to do. This stuff looks good, as far as the cracks, but we don't need stuff like this here that's obviously the sidewalks. What we're going to do is take the Pen tool and get rid of that. Let's see what we can do. It's got Pen tool here and we're going to select the areas we don't want. So just go around here, and again, I actually didn't take these photos. The only reason why we have to do this is because I didn't take these photos knowing we're going to use this for like a bone crack material. Yes, that's literally the only reason so you can go cut this out, but I think this is important to show that any photo can salvage a certain type of texture if you look for it. So let's select. Make selection and get a feather radius of one if we want. I think we actually selected the black area. What we're going to do is "Shift," "Command I" to make sure the white areas are selected and go to Layer Mask. It create a layer mask of everything we don't want. With the layer mask selected, let's go, "Command I" and invert it. This is exactly what we want here. All we have to do now is just duplicate this layer and move it around. Again, because we're using this as a texture, even if we overlap this thing weirdly, nobody knows what this image started off as or even cares, as long as it looks cool and cracky, like you guys thought my image will be looking fine. Let's just overlay the stuff. Even if it doesn't make sense, I don't want to stretch it. Let's see, something like this, and even if this goes against certain design principles, I would actually be posting this image, but for something like this, I think it works really well, just kind of layering stuff like this, looking good. The thing with this image is, even though we're overlapping these things weirdly, you can't really tell when you step away from it. A regular person wouldn't be able to tell. You just duplicate it all that stuff. Maybe it looks a little duplicated here, but again, even if this looks a little bit non-organic or synthetic, it's not going to look that way when we put it into the texture channel. So let's duplicate it and just drag it over here. This thing is fine. I think we're good here. If you want to get rid of some of these cracks, by all means do that, but for this, I think I'll just save this. Let's export as a JPEG high resolution, the same resolution we have here and just save that in our texture channels. Call this Skillshare Crack. Cool. We're literally good on that and we can start applying that to the bump channel back in cinema. Let's enable the bump here. The cool thing about this is I didn't use any displacement. I've literally just used the bump that we made. Let's go to textures, Skillshare crack texture. Of course, we just made this. Let's see what happens if we apply this. I believe we have to go negatively on this strength. Let's go to negative. I think you really have to crank it for this. Let's go to negative 250. Within this texture, let's drag that on the subdivision service and go to the material properties of the texture tag and go from UV mapping to cubic. Now we can see what's going on here. Let's render this out, negative 250. Now let's see what this looks like here. Let's actually boost interactive render region with the highest render setting. Let's drag this little arrow all the way up and make this a little bit smaller so we'll be able to see detail much faster and see what happens. Cool. We're definitely getting a texture. Let's see if this thing looks like cracks on this thing. Awesome. Perfect. We're getting great cracks, great results here. Let's drag this up to get more of the image. Of course, it will take a little bit longer because we are using the higher settings now. Awesome, it looks pretty good. It does actually look pretty thick for an egg so maybe we can take this down because we still are able to do that. Let's go to the cloth surface and take the thickness down to 0.5. Just deleted that whole thing. Command Z, let's to under the thickness, negative 0.5. Let's see what this is looking like. A bit thinner and maybe that's a little too thin actually. I want it to be a little bit thicker. I did negative, my bad. It does not need to be negative. Let's go 0.5. That's looking better. I may want this to be 0.8. I think it should be good like that. Let's see what we're looking at. Nice. I am pretty happy with that. Let's see what happens if we boost it to negative 500 and you can see there's nothing wrong with going above the parameters or below the parameters when needed. Totally normal, sometimes you really need to do that. I think this looks good for me. We can do the same thing. Let's take the same material and drop it on the sphere below. We can also change this to cubic. Map's a little different. Let's see what we're looking at. Looking pretty cool. Yes, so that's really how I made this weird looking shape here. I think we're ready to work texture the ring and the balls. We're good on that. Actually wait, I think that's why this is looking weird. The sphere on the inside was actually, if we changed this to hidden lines, the sphere was actually smaller. What we can do is actually take this down and make it a little bit smaller and see what that does. That'll create a much more of a contrast between the lighting hitting this thing. I think that'll work. Which might mean that these balls are floating, which I'm not necessarily mad at. It looks fine. Cool. Looks perfect to me. I'm happy we're getting longer shadows due to the light hitting this thing differently now. I think we can hop back. Let's just pick a couple of these spheres to test on with this new material, the glass. Let's go to these guys. It'll take a little bit less time to render all these. Let's create our second material, which I think we'll use for both of the ring and the balls. Let's just go to the balls first. Just drag it on the whole cloner. I guess we can go to the shading for now. With this selected, let's go to glass. With Glass, I think you just don't need color, don't need reflectance. You do need transparency and let's go to the custom filter, the refraction preset of glass. I'm going to take a sip here of water. Notice it looks great, but it's reflecting or refracting, I should say the HDRI we have, which we don't want because I think if you have a background that is an actual background, not black, it would look appropriate, but we don't. It would look appropriate is if this thing was refracting black. What we want here is to go to the sky again and go to the compositing tag and uncheck seen by refraction. Now let's see what happens, much better. We're not being seen by the refraction. I think it is still reflecting the image, but it at least dims it down to the point where it doesn't look out of the ordinary. See what we're looking at, much better. I'm happy with that. Let me see if we uncheck seen by reflection now too, that might be too much. I think we want that, so that'll be fine. So just to get a sense of this image as a whole, let's see what we're looking at. Got you. I'm happy with that. We're also going to work with Alpha channels in this section. Of course, we need to create another material and drag on top of the cloner. Now they're all being covered by this next material we made. Let's uncheck color. Let's make this 100 percent reflective because that's what we did last time. In the reflection color, let's make it an orangey scarletty almost red thing. That looks cool to me. With this, you're going to click the Alpha channel. I'm pretty sure we can honestly we just use a noise or even the crack texture we made before. Look how cool. With that selected, let's go to projection cubic. It might be transferring these guys a little bit more evenly, boost the exposure up so more the stuff is shining through and let's see what we're getting here. That's pretty cool. We are having some cracks shine through here. Let's check seamless here. It looks seamless when it starts patterning. Let's go to 60 percent by 60 percent and that should make these small crack textures and look a little bit more formed to these things much better. Looking good. Let's take the image again, boost the exposure of this thing. If we want, actually, I don't know how I feel about this color, maybe we can do something a little bit more gold and make the glass actually absorption color, make that a little bit gold too. I think we'll be fine there but adding a full amount of gold because the absorption distance is pretty far. As you can see, it's almost not shining through. So let's go to 20 centimeters of absorption distance, and that should be definitely showing up a little better. Actually not, surprisingly. In that case, let's actually see what's going on. Let's make sure. Any second now. It's actually not. So let's go to five centimeters and this will definitely make these things pop, no doubt. I think I do see that it's shining through these things. Let's make sure. For some reason it does not look like it's popping as much as it should. That's pretty funky. I'm not sure exactly what is going on. Let's see here. I think it's shining through a little bit more there. I can see it. Let's see. Let's go check the ambient occlusion, evaluate transparency, uncheck that. That wasn't it. This is fine. This should be totally fine. The transparency is set right here at one centimeter. Let's look at this thing as a whole. Shouldn't take too long. Got you. I'm pretty happy with that. I think the problem is this salvage channel. So if we were to delete that real quick. Let's delete that real quick. I'm guessing these are definitely showing up. Something's happening with this alpha channel, which is very weird because the insides are not showing up. Okay, so let's see what we can do here. Am trying to figure out what the problem would be. But I guess this is good because you can see the problem solving happening in action. It has to do with the alpha channel, and maybe it has something to do with the black point. Okay, there we go. So was it pre-multiplied? No, I guess it was the black point. Okay. Cool. I think because the black was not black enough and not showing up enough It was blocking for whatever reason, the absorption color. Let's take the absorption color back down because we definitely don't need it that crazy. Let's go to ten centimeters instead of one. Now the shown up is more like orange to the 20 originally that we had. Got you. We don't even need it to be that crazy anymore. Again, we're probably going to change these colors, definitely will probably change these colors and post. Let's take the glass. Again, let's actually duplicate the glass [inaudible] glass. Glass to input on the ring. Of course. Let's see what that's getting us. Definitely looking cool, getting some cool reflections out of it. But let's put some bump on this glass. I think a really cool one that I've been using a lot is services, tiles, and then within the tiles channels go black and white. To get the most out of this contrast, instead of squares actually, let's go to rings one. We don't need any of this or the grout width or any of that. We're just going to take the global-scale to like 50. As you can see, it's actually maximum of this year so let's go to 30. There we go. Let's see what happens. It's going to give it a slight texture here. There we go. It's leaking called me. Something's going on here. I don't like how thick thick this is or something. So let's take the radius of the foot down to 0.5 and the height as low as it will go. Okay, so that's looking more kind of natural there. Let's increase the rings actually. Let's go to the channel again. Bump. Let's go to 20. It's looking better. Maybe even a little height actually, It's height can be at 0.5. Let's take this transparency absorption color down to ten centimeters. Flash is little bit more red. Okay, cool. I think what I want to do actually to add a little bit more flavor to this thing is add a light that looks stylistic. So if I jump out of this thing and I add a plane, let's go bring it down like that, make it really wide and bringing out a frame. Let's add a luminance, kind of texture on this thing. Give it some light. Nothing. [inaudible] , luminance, illumination tab, check on. Let's go to 150 for the brightness. I think they should actually add a little bit of stuff for the reflections of everything. There you go. It's adding a little bit. It may be hard to see, but it's adding definitely some reflections going on for the spheres up here. Widen it a little bit and duplicate it couple of times maybe. Got you. Okay, cool. So maybe we don't need the third. Two should be fine. Something about this glass I don't really like. Let's jump back into the camera and let's take the bump strength down to 10 and take the global scale like 35. Let's see what's going on now. So little more subtle. It's looking fine. Let's see. I think it honestly needs more height to it. I think it's just too thin. I know guys, I'm dragging this out, but sometimes you just don't feel done yet. So there's the height, let's see how this affects now. Then I'll up the absorption color too, I believe. Okay, so it's helping a little bit actually. Let's take the bump down to like five. Okay, and we should be just about good. I'm pretty happy with this and I don't think we need to use any depth of field, so we don't have to go over any crazy camera settings now. What we have now is fine, and I think this is good enough for me to bump out. So without further ado, let's actually take the cloner here and go back to cubic. Assuming these don't mess up the adsorption color again, which they didn't. Still looking good. That'll be nice. Okay, cool. So we're looking good here. We're ready to bump this thing out. Sorry for messing with that ring for a while. Lets go to.
9. Render Settings: Everything here is fine. Let's go to render settings is pumped at 1080 by 1080 is fine, totally cool. We don't need to bump this as an alpha because of the specific shape we'll be doing. As a matter of fact, let's just run it as an alpha. That'll be easier. Let's go at PNG, 16-bit Alpha channel selected. That's all you've really got to worry about. Everything else is fine. Physical tab, depth of field checked off, we don't need it. Fixed, let's go five sampling subdivisions. Then we're going to go to check all of these on as for, except for subsurface scattering. Because we didn't use anything that involves subsurface scattering, so it's unneeded. Ambient inclusion is fine and sample count in the global nation is 150. This should be good to go. We can just click render and we'll be good. Here's some other renders I was working on earlier. As you can see, the transformation is pretty crazy between Photoshop and cinema 4D so I think we're good. This thing should probably be expected to take around, I'm guessing like ten minutes, but we'll see you back here when we do the Photoshop. We'll see you in the next section.
10. Post Coloring & 2D Elements: I guess we're back. It took about 10 minutes. I forgot what I said that I thought it would take. I think I said five minutes, but it really doesn't matter. 10 minutes is fine. Still not that long, and we're looking good here. Let's right-click this thing. We actually forgot to do one of the most important things ever. Let's save this to let's say Skillshare EggShell.c4d. Nice. We're looking good. Let's right-click, save as, let's go to PNG 16-bit Alpha channel. It should be checked on already, and 16-bit is really just going to let us have more latitude when editing. Let's save this. Let's go under, what do we want to title this? Yeah, EggShell. Nice. Let's save that there, let's go to Photoshop which our correct texture is up along with two random renders I did. Let's just bring it into finer then. Let's drag the PNG IF a few monitors as well. I'm dragon offscreen here. The PNG onto the Photoshop template, as we see here, it is transparent. Let's add a black backdrop. Let's go solid color, a 100% black underneath, and now we're looking at how we looked like the last time. The only difference is when, whenever we want to add an object, that of course is not black, it shows up behind. There's a lot of cool stuff we can do with these capabilities here. Of course, the one that we already are familiar with is a sphere with zero fill and a stroke, and I actually did like that color. Let's do a stroke. Not that big, would be something like this, and just make sure it's centered in the middle, actually it's really cool. That's a little too crazy. It's looking good like that, and honestly, we don't need too much else. I really actually don't like the fact that it's shining through the stuff. In this particular instance, I think it's a little distracting. But it really, all we got to do is add a layer mask for that, and just delete certain parts. Let's make sure our Eraser tool is selected. Let's go to a hardness of 87, and our brushes apparently way too big. Let's scale that down by hitting the left bracket key, and let's go all the way in here. Just remove this stuff. Let's go around the ring, and based on how far you zoom in, you can get much more defined. If you guys want to keep this in there, by all means I might actually just delete that. Just for the sake of it, let's go here and delete. Very simple. I wouldn't say this is the best way to go about erasing everything, but in an instance like this, it's actually boost up the hardness because I want to make sure we get all of this stuff. Keep doing that, cool, got you, and to me that looks much cleaner at least. We're looking good in depending on our stylistic you want. This is where I've actually been making. A lot of you guys have been asking if I'd been doing toon shader stuff and I'm actually not, I'm bumping it out to be pretty realistic as is in Photoshop and then later manipulating it very harshly to give it that cool glow stuff. We're going to do, is we're going to flatten this whole thing in its own layer. Option Command Shift E should flatten everything in its own layer above at least everything that is checked on. Let's go to camera filter or convert for smart filters if you want to edit non-destructively. For me, it really doesn't matter here. Let's go and boost the vibrance here. Matter-of-fact, actually, let's take some of this color from the ring out. Let's go to saturation, wait. My bad. Let's go to actually edit this ring and go to the stroke, and within this color, let's go to saturation and bring it back a little bit here because we want that thing to, and maybe actually darken a little bit too, so brightness. Here you go. Let's go Saturation up. Cool. That's looking at it. It's not as harsh because when we boost the saturation and everything in the vibrance in camera, we don't want that to outshine everything else. Let's boost the vibrance now, much better, and let's boost the blacks a little bit more. Boost the contrast, let's boosts that a little bit up. Again, we can actually take the black lifted up ever so slightly, just so when we do add green in a second, we can see that green is affected, but because it's pure black, it's not going to be affected that much. That looks good, and we can take this down to 12. Looks fine. That looks good. Plus bottom of life now we can really make this thing look cool. Let's take the shadows and the split toning and boost them into a color that we want. This is more retro. Whatever you're going for, I personally like the red a little bit here and then the highlights, maybe some blue and this is really where I go crazy guys. If you want to go absolutely insane and make these things more stylistic, this is definitely the place to do it, especially in this channel, and then crossing them really gives [inaudible] and cool outputs like this is starting to look stylistic because of how much stuff we're doing to it, like right there. Very cool. Almost looks like a poster on a religious depends on how stylistic you want to go with it, and this looks pretty cool to me. Very cool, and not to worry, we're actually going to be manipulating this even more once we come back out, and of course, I forgot to do one step because I do like exporting these things at higher, Instagram, people either upload square photos or the longer ones, which are 1080 by 1350. But I guess for now we can keep this as a square I forgot to do that earlier. It really doesn't matter though. You can change certain parts of this image based on the color. The oranges, of course, are being affected a lot. This is that pink when I posted earlier. But we should be good actually for right now. This is a cool cross between the blue and the orange. But that looks good for now. Let's save that, and as you can see, so much life that we have gained from beforehand, and let's duplicate this Command J and take the blending mode of this layer on the top to lighten, and let's go blur, radial blur and zoom. Let's zoom out quite a bit here. Let's click okay, and this is how I get those cool zoom trippy things going on. Let's go to the curves and take down the shadows so only the bright areas are being affected by this moonshine looking thing, and you can see how you can get very cool results by just doing this simple step. For the most part, this looks fine, and take this down to maybe 50. We are getting some crazy stuff going on. But if we actually duplicate that and actually increase what's going on here. Very cool ways to increase just the amount that's going on because you really can't get these geometric shapes in light patterns any other way. If you were to lower that to like 30, It's just a cool thing you can add to the render here, I haven't decided whether I want to keep that or not, but it's definitely greater. That might be a little too much, but something not as crazy as maybe 60% opacity, something like that might look cool. But it's all what you guys are feeling. Now, looks cool to me and then above all on top of this, let's apply the transformation. Let's change the hue and saturation so we can see different color combos with this whole thing. This was that blue one that I liked earlier, even just the saturation even more, and this just comes down to whatever one you think looks coolest. After we've made this whole thing, you can sit back and be like, this is just with a click of a button looks much cooler. Actually a slide of a slider rather. But I think for me, I'd be fine with something like this. Whether I want this thing or not, I haven't decided. Let me take that down to five, and yeah, I think we're looking pretty good just like that. I think that works well, and I want to thank you guys again for watching another class here and will be coming out with a lot more. Life has just started here, and yeah, I can't wait to see what you guys come up with. Please submit this as a project. I will definitely give you feedback. If I were you, I would submit, the original image, AKA this guy with the finished Photoshop edited version as well so I can see the steps we took in Photoshop. I'll definitely give you guessed feedback, we got the cracks. We've got the openings here, like the things being stretched out, and we got the glass balls and the glass ring with a little bit of 2D magic going on. Thanks for watching guys, and will see you in the next class.
 Patrick Foley, 3D Artist