Transcripts
1. Intro to Course: When I'm filming someone's crowdfunding video, I feel like I am creatively connecting someone's mind and the world and creating this bridge between people who share the same passion to collectively make something beautiful happen. It's the most rewarding feeling when someone I make a video for successfully reaches or exceeds their goal, and you see them then pursuing and making real their aspirations. So I created this course because I wanted anyone who wants to gain support for their idea on a crowdfunding platform to be able to make their own video. The first part will be dedicated to story, where we will look at the elements, the timing, and structure of your story so that you craft a compelling one that effectively communicates your personality and your idea. The second part will be dedicated to filmmaking, where I will teach you the cinematography, the audio, and the interview skills needed to make your video. The last part will be dedicated to editing, where I will guide you step-by-step in the edit room as of how you can make cuts and shape your story all the way to export. By the end of this course, I hope you will leave with all the knowledge, a road map, and excitement to go and make your own crowdfunding video.
2. Make This Course Your Own!: A quick word before we start the course is to make this course your own. Yes, I will be giving you the nuts, the bolts, and also a road map you can follow to assemble your own video, but along the way, if you feel like you want to do something differently, feel free to break the rules and do what you need to do to achieve your creative vision.
3. The Big 3: So it's important to focus on three main things. First, letting your audience know who you are and what your story is. Second, sharing your idea and letting them know why they should care about it. Third, focusing more on the mentality to give rather than to get. This is crucial in establishing a connection with your audience and deepening their willingness to support you and your project. So now that we have taken a look at the three main things to focus on. Let's delve into the structure of your video.
4. Structure Your Story: I think it's important to keep your video within two to three minutes. You really want to make sure that this is not an infomercial where you just present information, but it really is crafted like a story with a clear beginning, middle, and end.
5. Hook: Within the first 10 seconds, you really want to have hooked your audience members into wanting to know more. When thinking about your hook, think about the elements that make your proposed creation or process unique and stand out. If you told your backstory of creating your product to people, what would they remember the most? Some ideas include, creating a sequence of striking visual images of your creation process or product, they allure people into wanting to know more. Two, start with a funny, strange, or memorable line that makes you want to stick around for the backstory. Three, start with a thought-provoking question, what would this be like if? Four, film a common situation you are offering a solution to so people who face the situation can relate right off the bat. Here are some of my favorite ways that videos have hooked their audiences. I really enjoy that rhythm of it at times. It becomes like a dance just moving around the shop. My name is Jeff Wolovitz. My title at Heiwa is the Supreme Ruler of the Tofu universe and the Tofu Maker. I like this hook because it uses the beauty of macro images to pull you into the story. You want to discover what are they making. It's a smart way to make a generic factory setting look intriguing and make you want to stick around to discover the whole picture. A Kickstarter. My name is Jake, and are you ready for some wild? It starts in the underwear section at Macy's. Of the 10 or so high-end brands they sell, not one is made in America. I went to another store, and another, and another. Here's the crazy part, with 50 brands currently making men's underwear, only one is actually making them in this country. It's not exactly a high-quality product they're making either. Don't you think it's time we did better? I think so too. I like the way this video starts because it starts with a provoking question, want to know something wild? Then it brings you into the story immediately where you can see the scene unfold through his photos. A Kickstarter. My name is Cassey. If you turn these docks for your iPhone, you're [inaudible]. That's why I design my own. It's the Elevation Dock. I like it. I really love how it visually shows a problem so we can first relate to it and then understand the positive value this product will bring into our lives.
6. The You + The Why : After your hook, it's time to introduce yourself and start with, the why. When presenting their ideas, most people typically start with the what, then the how, and then why. But Simon Sinek, who studied how leaders inspire action, found that those who start with the why are most likely to spark action after sharing their idea. So when presenting yours in your video, you want to start with the why. What problem are you trying to solve now? Or what intention, belief/mission is driving you to fulfill your project. Try to turn this why into a little personal story. Was there an event that happened that made you realize there was a problem that you're trying to solve now, or did something happen in your life that caused you to adopt this belief/mission that is driving you to want to fulfill this project. Be authentic, be yourself, and don't be afraid to let your personality shine. Here is an example of a product oriented why from the Flow Hive, where you present the problem that led you to create a solution. We had evolved alongside the honey bee in a symbiotic relationship. We care for them, they pollinate our crops, and of course, make lots of delicious honey. But getting the golden nectar has always been quite a task. I just thought it was crazy to have to crack the hive open, pull the hive apart, stress out all the bees, and spend all day in the shed just to get you honey, and I thought there must be a better way. So my dad and I got to work. If you're working on a creative or a personal project, unlike presenting a product which offers a specific technical solution to a problem, I would emphasize your personal story. How did you come to embrace your particular point of view or passion, which forms the why of your work. Here's an example. My name is Rafael Araujo. I'm an architect and illustrator. I have been drawing when for 40 years. I was 15 when I started noticing intelligent patterns in the work of nature: spirals, sequences, proportions. The secret of nature's beautiful designs unfolded before my eyes. Phi, the golden ratio. This ratio equals 1.618 and is found everywhere in the realm of nature. Let me show you.
7. The How: Now it's time for the how. How are you going to solve this problem? Or how are you going to bring value into people's lives? Now you don't need to do any of that. Tame a tent, sit back, and watch the honey pour out. It's pure, unprocessed, untouched, delicious honey directly from the hive. No mess, no furs, no expensive equipment, and much more friendly for the bees. This is the first time in the world this is being possible. There is nothing else like it. How does it work? The fly frame consists of already partly formed honeycomb cells. The bees can plate the comb with their wax and feel this house with honey. Everything I draw is by hand. I don't use a computer. Just a pencil, a compass, and a protractor. I made the construction lines intact to highlight the golden radio at work. It can take me up to 100 hours to create a single composition. Recently I have received requests for prints of my work to color in. People are coloring them, into beautiful works of art of their own style.
8. The What: Finally, it's time for the what, what is it that you're trying to raise funds for and how we use those funds? After a decade of development and three years of testing the current design, we now in production would top manufacturers in Australia and the US. Flow hives and frames are now available for pre-order on our website honey flow.com. From this came the idea to create a beautiful coloring book with my best illustrations. I have been developing this project with a team in Sydney. We have already selected the drawings the graphic designers are lined up and the highest quality and printing house is shortlisted. With your help we will be able to get this project on rails
9. The Call to Action + The Thank You: Time for the call to action. You want to explicitly ask your viewers to support you and to tell them what you will do with the support, and ask them to share your campaign to spread the word. Help me make magpies happen and you won't be a bed bug in your next life. Even if you can't afford to donate, you can still totally help. Share the link to the Indiegogo page on Facebook, Twitter, Google Class, or your blog, or write it above the urinals in your favorite public bathroom. Well, maybe not that. We need help to finish this facility here so we can stay for the long run and make delicious tofu for years to come. Finally, thank them with all your heart and gratitude. We thank you for your support and look forward to serving you sausages. Thank you for your attention and your support. This has to be worth like a gazillion karma points. With this book, we hope to help you to understand the magic of nature a little bit better and feel at one in your heart with her. Thank you for your support.
10. Timing: Besides the hook, I think the timing of these elements is really flexible and dependent on your unique story. I typically structure mine so that the personal story or the personal why, takes most of the time.
11. Concept: Now that we've come up with the six main talking points that will create the structure for your video, let's talk about the concept. When you think about your video, what do you want it to look like? What types of emotions and tones do you want to convey? Do you want it to feel sleek and minimalist like your product? Or do you want it to embody the quirky, bubbliness of your personality? Coming up with a coherent concept is really key because it'll help you make important film making decisions along the way, such as where you want to shoot, how you want to convey the main points of your story, how you want to edit everything together, and what music you want to use to bind everything together?
12. Shooting Footage Overview: Now that we have the structure and the concept for our video, let's delve into the film-making aspect. To make a crowdfunding video, you will need two types of footage. A-Roll or shots of your interview, and B-Roll, which are shots other than the talking head, which serve to support and show us your story.
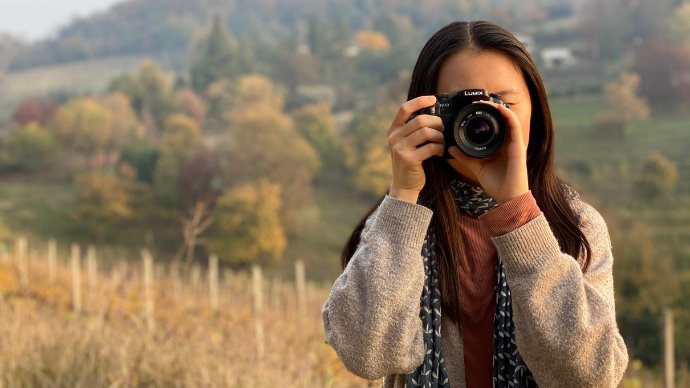
13. Equipment: To film your video, here is the equipment you will need. A DSLR, like the Canon 5D or the Panasonic GH3. The 50 millimeter lens, which I believe is the most versatile lens, it is also the highest quality lens you can find at the lowest price, such as the famous cannon nifty 50. If you're shooting on a micro four-thirds camera, such as the popular Panasonic GH series, you want to get a 25 millimeter lens, which is the equivalent of a 50 millimeter lens on a full frame sensor camera. A lavaliere mike with an external recorder, a shotgun mike, a tripod, headphones, and editing software like the Adobe Premier Pro trial, which you can use for 30 days. I'll be teaching the cinematography aspect as if you had a DSLR. But if you don't have one, can also rent one from your friends or rent one from a camera store. Feel free to use whatever you have even if it's an iPhone.
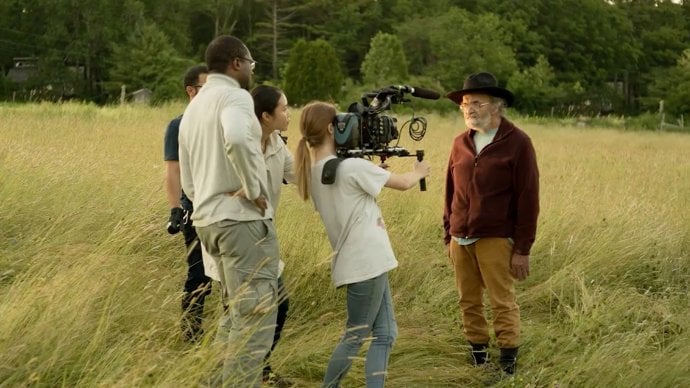
14. Interview Location: Next, you'll need a location to film your interview. I recommend choosing a place that will inform us more of who you are and what you hope to achieve with your campaign. I recommend choosing a place that's indoors, quiet, and has a big window where you can use to light your interview.
15. Intro to Cinematography: Let's talk about cinematography. If you are intimidated by all the buttons and settings on your camera, don't worry. I'm going to introduce a simple process you can use to make sure you will shoot beautiful images. For cinematography, I will break this lesson down into two parts: lighting and composition. Let's start with lighting.
16. Lighting: If you're shooting indoors, which I recommend because you get better quality audio, I would place your subject, or yourself if you're being interviewed by a window so that the window light illuminates one side of your face. I find that the window lay is the most beautiful natural solution when it comes to lighting if you're not using artificial lights. If you don't have a window in your location, pick a spot that has good even lighting on the face, not too bright, so that you get hotspots like this, and not too dark so that it becomes hard to see. Make sure that you film your interview early enough so that the sun isn't setting and you have plenty of light left.
17. Composition : For composition, you first want to bring your subject away from the wall so that their face doesn't look too flat against it, and your image doesn't look too two-dimensional. Then you want to pay attention to your frame, or the viewfinder of your camera, and notice the corners and the edges. See whether there's anything cutoff awkwardly, or whether there's anything in the background that's distracting us away from looking at your subject's face. Then you want to place your camera eye level to your subject on a tripod, and position them so that they are one-third to one side of their frame. If you mentally divide your frame into thirds, both horizontally and vertically, the eye naturally falls on the intersection of the top horizontal line with the right or left vertical line. If you put your subject there, it draws attention and looks more balanced and natural. If you want to speak directly to camera, feel free to also position yourself so that you are in the center looking right in the lens. You first want to choose a background that is relevant to who you are or your project, and pick a spot that is nicely lit, either with a window on one side, or in a spot with nice even lighting on the face with no hotspots or places that are too dark. Then you want to bring your subject away from the wall, and frame them so that nothing is distracting us from their face, or nothing is cut off awkwardly in the frame. Then apply the rule of thirds and set your camera eye level on a tripod. Now with lighting and composition in check, Let's learn how to set your optimal camera settings.
18. Setting Exposure: After you're happy with your frame, your composition and lighting, now it's time to almost press the record button. Before, it's important to set a few settings on your camera, and now I will talk about five. When it comes to camera settings, there are five main settings you want to focus on before you press the record button. The first is white balance. On your camera you should find the little button that says WB on it. If you press it, you will find that it has a few presets or icons that basically tell you camera what type of setting you're shooting in so it can get the right colors, like whether you're shooting on a sunny day, a cloudy day, in the shade, or indoors. To set the white balance, just press the icon that goes with the setting that you're shooting in. The second setting to focus on is frame rate. Because video is literally a string of photographs moving together through a short period of time, frame rate is how many frames per second your camera is taking. Set this to 24 or 25 frames per seconds. Now, it's time to set the shutter speed. Shutter speed is how fast the shutter in your lens opens and closes. Typically, you want this to be twice your frame rate. For this video, set it to 148th or 150th of a second. The fourth setting to work on now is aperture. Aperture is basically how big the hole is in your lens, which opens and closes to let light in, and it determines how bright your images and also how blurry the background is. For your interview, I recommend setting an aperture of F4 because it'll give you a nice blurry background while also making sure that it doesn't become too difficult for you to set the right focus on your subjects. The last setting is ISO. ISO determines how sensitive your camera sensor is to light and therefore how bright your image is. If you have set all your settings already, you've set your shutter speed and your aperture, and the image is too bright or too dark, adjust the ISO accordingly so that your image looks just right. A big catch though, is that the higher your ISO is, typically over ISO 1,600, the more grainy and noisy your image will become. So try to not go over ISO 1,600. Now that we've taken a look at these five camera settings, let's put it all together into a step-by-step process you can use for your shoots. First, you want to set your white balance. Second, you want to set your frame rate to 24 or 25 frames per second, depending on what your camera has. Third, you want to set your shutter speed to 148th or 150th of a second. Fourth, you want to set your aperture to an F4. Five, you want to then adjust your ISO so that the brightness in your image is just right, keeping in mind that you can get noise and grain at higher ISOs. To make these exposure changes, make sure you have picked the manual exposure mode or the "M" on new camera dial.
19. Setting Focus : Now that we have set these five settings, it's time to set the focus. With your subject in frame, press the button with the magnification glass on your camera body until you can zoom in on your subject's eyes. Turn the focus wheel around your lens until those eyes become crystal clear. To control focus like this, make sure that you have chosen the manual focus, not the auto-focus mode on your lens and camera.
20. B Roll: Shots to Include: Now that we've looked at A-roll, let's talk about the other type of footage you'll need for your story or B-roll which refers to shots other than the talking head interview. When you're planning to shoot B-roll, think about what types of things you'll need to include in your video to support and show your story. When planning your B-roll shots, I recommend including these types of shots to make everything smoother in the edit room. The establishment shots. These shots give your viewers a sense of time and place. Not only do these shots make your film look more cinematic, they also serve as valuable opportunities for you to convey key information to detail and make your viewers feel a sense that they're right there with your subject. Finally, closing shots. These serve to conclude whether that is a scene or wrapping up your entire film. I think it's really important to think about at this stage, how you can gracefully exit.
21. Shooting B Roll: When you're shooting your B-roll, and still, it's really important to keep in mind lighting. You just want to make sure that nothing is overblown or too bright, and nothing is too dark. If you're shooting outdoors, I would avoid shooting from noon to the afternoon because when the sun is right above you, it tends to castes very hard, unpleasant shadows in the face and blow out a lot of areas. Instead, I recommend shooting an hour after sunrise or shooting an hour before sunset, which has what we call magic hour because then the light is really soft, all the colors come out beautifully, and it's just a magical time to film. Another thing to keep in mind, one shooting B-roll, is to keep everything stable on a tripod. Handheld footage, sometimes when you're not that experienced, can look very shaky, and when that shake is not intentional, it can really take away from the production value of your video.
22. Intro to Audio: The quality of your audio is just as or even more important than the quality of your video. So in this section, we will talk about how to record great sounding audio in terms of the key equipment you need and how to improve your audio recording space.
23. Audio Equipment: I will cover how to use three types of equipment. The shotgun mic, which records the sounds of your environment and what is going on in front of you. Then the lavalier mic, which clips onto your subject and works with the external recorder to record what your subject is saying. I really recommend using at least one of these microphones because the internal audio of your camera sounds really poor. To use a shotgun mic, it's simple. Just hook the mic into your camera and turn it on. Make sure to use a wind buffer if you're shooting outside. Otherwise, you will hear the wind muscling with your sound. To use a lav mic. Please set on your subject sternum, six to eight inches below the mouth and point it up. I personally don't mind seeing the lav mic hooked on my subject in the interviews. But if you don't want to see the lav mic, you can ask your subject to tape it inside of their shirt. Just keeping in mind that this might record some rustling noises of their clothes, moving over the mic during the interview. Or you can also get a tighter frame of their face so that you cut the lav mic out. To use external recorder, first, make sure you have a micro SD card inside. Then insert your lav mic and set the recording format to wav 48 kilohertz 16-bit, which is a higher-quality file than the MP3. Next, notice your audio meter. This records the decibel range or loudness of what is being picked up by your mic. You want your audio levels to bounce between negative 6 and negative 12 decibels. To set your audio levels, do a test with your subject beforehand. Tell them you're going to check the audio levels. Ask them about how their day went and press the up and down input level buttons on the side of your recorder until the audio levels are between negative 12 and negative 6, when in doubt it safer to keep your audio on the lower decibel range, since it's almost impossible to fix sounds that are too loud. If your sounds are too low, however, you all get static.
24. Audio Environment: For your audio recording environment, you ideally want to choose a quiet place. Before you start your interview, listen for competing sounds. Here you want to make sure that they're no noise is coming from windows. You want to close doors, turn off electrical appliances, turn off your cell phones, turn off the fridge, clocks and the AC. Whatever, that will leave a subtle harm in your audio.
25. Interview Tips : For your video interview, if you are filming someone else, here are a few tips I recommend to just make the interview run more smoothly and help put your subject at ease. Clap in the beginning of your interview so that it becomes easier to sync your video and audio automatically in the edit suite later on. This is really difficult for me because I tend to get really excited when I'm hearing someone's project or idea. But try to refrain from making noises, especially of excitement like yes, during the interview because they will be recorded by the recorder. I would place your subject on a non swiftly non rocking chair just so they stay in place during the interview. Don't be afraid to revisit questions if you feel your interviewee or yourself has not answered them fully or could have done a better job in the delivery. Just revisit them towards the end.
26. Saving Files: This is how I like to keep all my files organized just to make sure everything is nice and ready for the edit room. Typically start by creating a new folder with my project name. Here I named it Heiwa Kickstarter. Within this folder, I'll have three main categories. Video, Audio, and Assets, which is basically the extra stuff that you'll add to your video, like photos. Within the video, I'd like to divide it by Interviews and B-roll footage. Within my Interview folder, I like to divide it by Character. I like to divide my B-roll into Place, Event and always label the date. For the Audio folder, I like to categorize my audio files into audio for interview or music that I'll get later, or audio for B-roll. For my assets folder, I typically like to have a folder for Titles and a folder for Photos.
27. Writing a Transcript: After transferring your files from your shoots, I think it's really helpful to write a transcript of the interview, so you can pick out the main talking points and use those to structure your story in the edit room. This is how I like to write transcripts. This is what my transcript typically looks like and I'll do it on Google Docs, because I liked how you can automatically save and share with your peers. I'll write the event here, the date, and the filename that I'm transcribing. Typically, I like to mark every 30 seconds or so but I think on this one I wanted to be more specific, so I marked it after every phrase. Go ahead and do this with your whole interview, and I will meet you at the next lesson.
28. Creating a Paper Edit: The paper edit is basically a rough draft of your story where you arrange the key talking points that you'd like to include from your interview into a story. This is my paper edit. As you can see, I've arranged it according to the structure that we've talked about. Here I have Possible Hooks. Then I go into the personal intro and the company story. As you can see here, I've rearranged the order of his interview, so feel free to take something in the beginning of the interview and put it at the end or combine different parts together to fill in the holes, just as long as it doesn't change the honesty and the intention of what your speaker was saying. Here I have the why, the how, the what sections, the call to action, and the thank you, and I have an extra section with things that I'm not sure I'm going to include, but as I go along, the edit might come in handy. Go ahead and do your paper edit. This might take a little bit of time, have fun and play with it. Try out different ways you can tell the story, experiment. I will meet you in the next lesson.
29. Intro to Editing: Congratulations. We are now at the home stretch and are going to enter the edit. So for editing, I recommend Adobe Premiere Pro, which you can actually download as a free trial for 30 days. or if you don't have Adobe Premiere Pro, there are other options out there. Just use the editing software you like the most. So now I will teach you the basic operations for editing and also give you a few tips to shape your story in the edit room.
30. Premiere pro Interface: When you open up the Premiere Pro interface, it should look something like this. This is your workspace and it is comprised of four main areas. The first is a window where you can preview all of your video and audio files before deciding to drag them into your timeline. The second is the timeline and it is the place of action. Here is where you'll be placing your clips, making cuts, and dragging them back and forth. The third place is your monitor which plays back all of your sequences in the timeline. Then you have your project bin which holds all of your project files. Then you have your toolbar which contains all the tools you'll need to cut your clips and order them on the timeline. Finally, you have the audio meter to your right, and this will tell you the decibel levels of your audio.
31. Importing Footage: Now that we know how the editing interface works, let's dive right in and import a footage. To do this, open up your app and create a new project. Then title the project. Now I will do Heiwa Tofu Kickstarter Project and press "OK.'' Now it will bring you to the project interface which should look familiar to you and notice the project bin. Here you want to start creating the folders for your imports, just like you created the folders for our transfer earlier on. I will name one folder video, then I'll create one for audio, then I'll create a folder for assets, and I will create a new folder called slugs. These are basically the labels you will add to your clips just so you know what they are in the timeline, but we'll get into that later. Within these folders, then I'll create the sub folders just like you did before. For video, I'll create one for interviews and I'll create one for B-roll. For audio, I will create one for the interview and I will create one for B-roll and one for music. For assets, I'll create one for photos and titles. Next I will then start importing my footage and I'll do the step-by-step per category. First I'll do the video and we have interview, so click that. Once I'm in the interview folder, then I will import my footage. I'll click ''Import.'' Sometimes when you import your files you'll get this box that says file import failure. Just click "OK" and don't worry about it because it will actually be able to upload all of your files. Now we have uploaded our interview footage and you can see it in this bin. Now I will upload the audio recorded during his interview that was recorded on an external recorder connected to his left mic. To do this, you do the same thing. You go to import, then you find the file wherever you chose to save it. In total you have all of the audio files in this bin. So go ahead and import all of your footage from your shoots into the respective folders here and I will meet you in the next lesson.
32. Setting Up Sequence: Now that we have imported our footage, it's time to drag our embroil onto the timeline to actually begin the edit. I'm so excited for you to discover the stage. First, you'll need to create a new sequence. Go to file and then click ''New Sequence'' and title it rough cut. For the settings, just check that they match your shooting settings in terms of the frame rate. Here we have 23.976 frames per second and the frame size which should be 1920 by 1080 for most of you all. You can also drag one clip recorded on your camera directly onto the sequence and the sequence will automatically match your camera settings. Then click ''OK.'' Notice how it puts a new timeline with the time code and channels for video and audio.
33. Placing Clips on Timeline: The first step is to cut together your A role or your interview based on your paper at it. Let's go to our interview footage in the project bin and click and drag all of the files onto your timeline just like this. Now if you scroll through this bar, you'll see that you'll have all of your footage located on your timeline. If you want to preview each clip, feel free to click on one and you'll see that it'll pop up on your preview window. You can use this little blue knob to scroll through the whole clip. If you just want to take one section of the clip, you can press these brackets. One that'll mark the beginning point of the clip, and one that will mark the end point of the clip. If you just click here, you'll drag both video and audio. If you just wanted to drag video, you click this scroll and it'll just drag the video only, so you see how there's no audio underneath. But if you just want to drag the audio, then you click this little funny shape here and you drag it onto your timeline. Now that we have the main interview on our timeline, let's also drag our audio footage. If you recorded audio separately during your interview like I did where I recorded this interview on an external recorder connected to love mic, go to interview audio file in your bin and drag it onto the timeline as well. Like this. You'll see that I can only drag the audio files onto the audio channels marked by an A and I cannot drag them onto the video channels because they're different. In the next lesson, we will learn how to sync your audio with your video and make cuts.
34. Syncing Audio with Video: If you recorded your audio externally outside of the camera, like on an external recorder, then you want to sync your camera with your audio. To do this, place both clips on your timeline. Here I have my camera footage and here I have my audio recording. Then it's simple. Drag and select all of the clips, right click and hit "Synchronize." You want to click Audio and Track Channel, click "Mix Down" and press "Okay". Then it'll do some processing and your clip will be synchronized with the video. If you want, you can delete the audio that was recorded in your camera and move the higher audio file underneath. Now it should be very well synced. Because it's automatic sync sometimes isn't exactly precise. Magnify your timeline as far as it'll go by pressing the plus key on your keyboard or dragging the bottom scroll bar, you zoom out, if you feel like something is off, feel free to move the audio clip forward or backward, one or two milliseconds until you feel like it's an exact match. Do this for all of your clips and you'll be ready to make some cuts. Happy syncing.
35. Making Cuts: By now you should have your A roll or all of your interview files, all sinked and on the main sequence and the timeline called A roll like this. So you can see I have my whole interview here that's all sinked, now it's time to make the rough draft of your video by picking up the talking points according to your paper edit and cutting them out onto a new sequence. So let me go to my paper edit, so I see that the first talking point I have besides the hook is this personal introduction where he says my name is Jeff Wolowitz and my title at Heiwa is a supreme ruler of the tofu universe, pun intended and the tofu maker. So my time code that happens at 21 seconds. So what I will do is I will go back to my A roll and find that talking point. So it start here. My name is Jeff Wolowitz. So now, once you identify the starting point of your clip, click on your razor tool and make the cut just by passing along the blue line here. Then I will find the end of the clip, there it is, and I will do the same thing. I will mark the end point of that clip by cutting it out and there we go. So now you can separate this clip apart from the main sequence, and we're going to put it on a new sequence. So to do that, we're going go to file, new, sequence and call this the rough cut. It should show up on your timeline like this, and now we're going to copy and paste this clip onto the new sequence like this. So now you'll see it. Now we are going to create a slug or basically a label for this clip, just so we know what this clip is talking about when we are looking at the timeline. So to do that, go back to your bin and click on your slug folder. Then go to file, new, title or you can also get this by pressing Command T, and label the clip. So here he's giving his personal intro and click Okay. Then you'll see this window pop up, but just ignore it for now, and you'll see that there is a black screen with the label personal intro. Click on it and drag it over your clip so that when we look at the timeline, we see that this clip is labeled personal intro. So go back and forth between your paper edit and your able sequence and find and cut out the main talking points. Then copy and paste them into the rough cut, label them with a slug, and I'll meet you in the next lesson after you have done this for all of your talking points.
36. Adding B Roll : I hope you're having a lot of fun with this process and that you feel like your video is literally forming before your eyes now that you have all of your A roll cut together. To show you how to add B roll, I've taken a part of my A roll cut together that covers the introduction of Jeff's story, as you can see here. I've broken apart the sections just to give room for the B roll. Let's go through a few clips and see where we could add B roll to enhance the story and to really make it visually engaging. Let's play. My name is Jeff Wolovitz, my title at Heiwa is the supreme ruler of the tofu-niverse and the tofu maker. I think I will leave his introduction as is because I like the idea that when he introduces himself to the audience, the audience members can see his face. Let's go on. Heiwa Tofu is based in Rockport Maine, we use mean grown organic soybeans to make our tofu. Heiwa means peace in Japanese. I think it's a great opportunity to show viewers what these soybeans look like just so it would enhance the connection they have with their company's product and to their identity. I'm going to go into my B roll and find the clip of the soybeans. Let's look at it in our preview window. As you can see it is right here if you scroll through, right here. I will pick the parts I like, which I've done already by pressing the "IN" and the "OUT" keys and I will just drag the video over to the part where he mentions the soy beans. Heiwa Tofu is based in Rockport Maine, we use mean grown organic soybeans to make our tofu. Heiwa means peace in Japanese. Fantastic. Now let's keep going and see where we could add value to our story with more B roll. We first formed the company. We came up with this idea that a local plant-based diet is a way to a more peaceful planet. I like the idea of just leaving it as is, where you can see him telling you about these core values. But I think I would like to show a little bit of how he puts these values into practice in the real world. After he says that, I think I'm going to add a little segment of B roll to show him at the farmers market where he's interacting with community members and providing this local sustainable food. I'm going to go back to my B roll and open the Farmers Market folder. Now I see I have an establishing shot of the farmer's market just to let viewers know where they are. I will choose a section, which I've done already here, by pressing the "IN" and the "OUT" brackets. I want both video and audio this time,so I will click on the actual preview screen itself and drag it onto my timeline like this. Then I see that there's a shot of them working at the booth where you are closer to the action and so I again, I will mark my IN and I will mark my OUT points by using the brackets or pressing "I" and "O" on the keyboard and I will drag both. Then I see I have some close ups of the actual produce found at the market which I think will really enhance the feel of local sustainability, which is the value and the feeling we want to convey as we decided in our concept. I will drag a few of those as well. Right there. Now I'd like to show their actual products as part of the sequence of sustainable ingredients. I'm also going to mark IN and OUT and drag it onto the timeline. Now we have something that looks like this. A way to a more peaceful planet. Great. This is a great time to introduce this new tool, which is the Track Select Forward Tool, which you can get by pressing "A". This will move the clip that you click on, including all of the ones that come after it forward together, so you don't need to move them individually one by one. When I'm adding these B roll clips, I'm also keeping in mind that there'll be music playing underneath. The music will give a nice rhythm and bind all of these B roll clips together. For now, I'm just going to pick the B roll clips that I like and refine them later on if necessary. I'm going to go ahead and keep adding B roll to my entire A roll sequence. I want you to do this as well. When adding B roll, first listen through your A roll a couple of times and think about places where the story would really come alive with additional images. Also, don't be afraid to add a sequence of B roll to just add a breath or a pause to all of the interview talking. I will meet you at the next lesson.
37. Adding Music Magic to Video: When it comes to looking for music, I think there are two important things. The first is the emotion the music evokes, and second, the rhythm as well. I really like to match my rhythms with the pace of the video. If I'm showing a frenetic process that's about creative spontaneity, for example, I'll look for something fast paced. But if I'm looking for a piece of music to go along with reflection, then I will choose a slower rhythm. One of the biggest mistakes I've seen in Crowdfunding videos is people putting just one track throughout the whole piece. I feel like this really drowns out the story. Instead, you want to be very selective and only put music where it enhances the melody and the flow of the story. Don't worry, you do not actually have to compose your song. There are many music banks online, but I will show you a few of my favorites. So the first one is called Audio Network. This is the one I use the most because I think it gives great value for the price of the music. So you'll see that when you open up the page, you can browse by all of these categories, "Musical Styles", then you can also browse by "Mood / Emotion". I typically filter by this one the most. For a lot of Kickstarter videos, I like ambient sounds that are not so overwhelming, but just give a nice background feel. I'm now looking for a piece of music for my hook, where I'm imagining a series of beautiful macro shots of the tofu making process that'll pull you in by the poetry. I want it to sound a little bit mysterious, a little bit whimsical, and a little bit Japanese to go with the company's name and their product. Japanese, ambient, bells, and you have all of these. I'll look at Reiki Zen Meditation. Press play, and while it plays, you can also see that there is the wave form of the audio on the bottom. This will give you a sense of the pace and the intensity of the music before you even play through the whole thing. So here the waveforms are not as spiky, so I know the sounds a bit rounded and not as intense. But it's a little bit too strong for what I'm looking for. So let's look at this one, Eyes in the Sky because I see that it says, "Gently pulsing harp & Japanese koto with light bells & wistful string bass." Just by hearing the first 10 seconds of the song, I can already imagine my footage. So I know it'll be a good match. What I love about Audio Network is that the music has different mixes of the same song. So for example, if I didn't want the string bass, then there is a version without a string bass. So I will star this to keep it in mind, and I will continue looking until I have a short list of a few songs. One thing you want to keep in mind is that you want to make sure you buy the right license for your songs. So every music bank will have a few, and they'll have different conditions for each. For example, the creator license only allows you to use the music for your own personal needs, like a family video.
38. Cutting Music: Now that we're back in our editing home, I am going to add the song I just found in the music bank to my B-roll, which forms the hook of my video. As you can see here on my timeline, I created a new sequence for my hook and without any music, it looks like this. It starts with an opening shot of the factory at sunrise. Really enjoy that rhythm of it at times. It becomes like a dance just moving around the shop. Then it goes into a series of close-up shots of the tofu making process in the factory. Let's put in our music in the second audio track, and just listen to the music to see whether it complements our B-roll. I think the spirit of the music really matches the spirit of the B-roll, but we're going to have to do some work in terms of cutting the B-roll so that it matches the music even more. One two by half to make sure your cuts flow smoothly in your [inaudible] is to match the cuts of your clips to the beat of the music. For example, with this song, I see that there is an entrance of a bell which marks a new beat. I think this would be a great time to transition the B-roll from this outside shot to an inside shot of the factory. I will find that bell again and mark where the bell enters. Just right there. What I will do is I will shorten the clip of the establishing shot and move the shot of the bowl, which takes you right inside at that bell, so it looks like this. Now I'm going to listen to the next cue and it seems like there is an entrance of a long withdrawn cellos. I'm going to stop at the cellos entrance and add another clip. Just about there. I will add my next clip, and review it. Fantastic. I will move his talking point because I find that if it's placed over the cello point. It really drowns out what he's saying. I will put it in the beginning where there are lighter plucks. Really enjoy that rhythm of it at times and it becomes like a dance just moving around the shot. With this last bell, I really like using that as another cue to put in just personal introduction. It's like the bell comes and then you see Jeff.
39. Adding Transitions: At this point, your video may seem a little bit choppy. Let's smooth it out by adding a few video and audio transitions. To do that, open up the effects panel by going to window and clicking effects. Then you should have something like this pop up. You'll notice that you have audio transitions and video transitions. I'll first do the video transitions. If you open it up, you'll find that you have all of these transitions available. My favorite ones are in the dissolve main folder. I like these because I find they are more subtle. I especially use the cross dissolve and the dip to black function. When I'm looking to my clips, I see that I have an establishing shot. I think I would like it to fade in just to give a sense of a beginning to my video. To do that, I will add the cross dissolve. You add an effect by clicking on it and dragging it to your clip. If you zoom in, you'll see that you'll have a bar that says cross dissolve. You can affect the length of it by dragging it back and forth. I think I want this to have a longer cross dissolve. If you could play it, you'll see that it slowly emerges on the screen. The next part I would like to soften is the entrance of Jeff, when he's introducing himself. Right now it looks like this, where it goes from the macro shop and just jumps into his interview. But let's add a little bit of magic by adding in a dip to black effect to the beginning of the interview. As you can see here, you can see the bar and you can adjust it back and forth. Now looks like that. Now, I will look at the audio transitions, and here there are three. There's constant gain, constant power, and exponential fade. The ones that I use the most are the constant power and the exponential fade. Let's start with the exponential fade. I typically like to use this to fade my music in and out. For example, as the interview will begin, I will also fade the music out. I will apply an exponential fade here and lengthen it. Beautiful. Now, we'll move look at constant power. So, I use this to smooth out talking points. If I had cut something out of the interview and join two parts together. I will also use them to smooth out the music if I had cut out a section of the music and joined to segments to make it shorter. For example, when I go to Jeff's interview, you can see here that while he was talking, I also cut something out in the middle, so I have two segments. I find in those places it's also really helpful to add a constant power. So you covered the audio jumps. Play around with these transitions, add them to smooth out your video, and I will meet you in the next lesson.
40. Level your Audio: Ladies and gentlemen, there's just one last essential thing you will have to do before exporting your video and that is tweaking your audio levels so that they remain consistent and within the right range throughout your video. Audio engineering is one complex field, but for the purposes of this video, I want you to keep one thing in mind and that is to keep your audio levels bouncing between negative 12 and negative six decibels on your audio meter to the right. If your audio meter is too small to see, you can adjust the size of the area including all the other areas of your editing interface by going to the edge of the section and dragging it to make it bigger or smaller like this. This is my rough cut so far and I've started to level the audio. I actually duplicated the interview audio just to make it stronger. But I will zoom in on one by dragging down the audio track. Now you can see a wave forms more clearly. You'll notice that it has this bar and you can move it up and down to adjust the levels. I will move it up until I see that his talking is bouncing between negative 12 and negative six decibels. My name is Jeff [inaudible]. My title at hewar is the supreme ruler of the tough universe. Is the supreme ruler of the universe. Next, you may be wondering what to do when you have music and talking playing at the same time. You want to stick to the basic rule of thumb, which is to keep the overall audio levels between negative 12 and negative six decibels. Here I have a section where music is playing while Jeff is talking and now it sounds like this. As you can hear, the music is overpowering Jeff's interview a little bit. What I will do is I will open up my music track and I will drag the audio bar down until Jeff's voice stands out and the overall levels balance between negative 12 and negative six. I think it can go down a little bit more. Okay, great. One last thing I want to show, if you want to have more control over your audio levels, is a new tool called the Pen tool, which you can get by pressing P. This allows you to add specific points to the audio like this so that you can control individual sections. Just like this. If you want the music to start off more loudly, but then decrease its volume when the interview comes in then you can use the pen tool to decrease the volume gradually like that. Go ahead and level your audio and I will see you in the next lesson for exports.
41. Export: Congratulations. I'm so proud of you for making it this far and I hope you're proud of yourself as well. Now, it's time to set your video free by exporting it. To do it first move your playhead to the beginning of your video, and press "i" to mark the beginning of your video. Then, move your playhead to the end of your video, and mark "o" to tell where you want the export to stop. Then go to File, Export Media, and if you're just posting this online, I recommend keeping the format to H point 264 and changing the preset to YouTube 1080p HD. Then for the output name, write the name of your video, so I will write Heiwa Indiegogo Video and choose a place you'd like to save it and click "Save". Make sure that Export Video and Export Audio are both checked and then scroll down and check, Use Maximum Render Quality. Then click "Export" and watch the magic happen as it exports into a QuickTime file. Grab a bowl of popcorn and share with your friends and family to celebrate the hard work and the artistry that you put into this video.
42. Bonus: Ken Burns Effect: If you want to add photos to your video, I'm now going to show you a neat little trick that will bring them to life. Here in my timeline, I've added a few photos that look like this. You can see on this first photo was dynamic because it has a little movement inside. This is named the Ken Burns effect and I find the subtle movement really helps transform the photo into film. To do that, I'm going to delete this photo and start from scratch. I'm going to open my bin with my photos and I'm going to open the photo app like this. Then I'm going to drag it and shorten it so it'll fit right into my timeline. Now it will look like this. When you place your photos into your timeline, you'll find that it will look enlarged, so to make it smaller, go to Effect Controls and look at scale. Make sure your clip is highlighted and reduce the size of it so it fits nicely within the frame like this. To animate it, you can add subtle movement by either changing the position of the photo, like making it move from left to right or you can make it increase or decrease in size. The important thing to keep in mind is that a has to be subtle. Otherwise, it will look very cheesy. I'm going to animate this photo by moving the position of it from left to right. To do that, I'm going to scroll to the beginning of the photo and I am going to add some key frames just to mark the position of where it is now. Then I am going to scroll through to the end of the video and I'm going to add different keyframe this time by clicking this Add or Remove Keyframe button. I think I wanted to expand a little bit and move to the right. To do that, I'm going to change the scale to 47. We'll see what that looks like and I want to choose a new horizontal position for its ending points. I'm going to move it a little bit here. Now it'll look like this. We started off as a raw market. Magic. Thank you Ken Burns.
43. Bonus: Adding Titles: This is how you add text or subtitles to your video. Go to title and click New title, and name it, so I will name it, Jeff's intro. Then it'll pop up a window with the current shot of your video based on where your placeholder is. What I'm going to do is I'm going to create this type tool, and I am going to click and drag, and write Jeff's name.Jeff Wolovitz, king of the Tofuno verse. Then you can choose your fonts here, and I'm a big fan of sans-serif fonts, but just choose the one that you like the most. You can adjust the width here, and you can adjust the size of the text here for example. Then place it where you think it looks good, and then if you exit it out, this is a great time to save it into your assets folder, where you have a special folder for titles, so all of your titles will be there, and then drag the title over the part where you would like it. Now you have a title. I actually don't really like the way that looks. I'm going to play around with the fonts and the format, but just notice that the title card becomes like a new video clip. So if you wanted to add credits, you would just write your text on a new title card and then place them as if it was a clip in the beginning or the end of your timeline.
44. Bonus: Warp Stabilizer: If you find that your footage turned out a little shaky, have no fear because there is a cool tool that will help smooth out the shake. For example, when I took a shot at the Farmers market, it was handheld and it turned out a little shaky, like this. To smooth out the shake, there is a cool effect in Premier Pro called warp distort, which you can access by going to Window and clicking Effects. A new Window should pop up and you might find this actually nestled within your bin section. Then go to Video Effects and you'll have a list of all of these cool effects. Go to Distort and if you scroll down, you'll find something called Warp Stabilizer. If you click on it and drag it onto the clip that needs a little help, it'll start analyzing and figuring out the best ways to smooth out the shake. If you go to your Effect Controls panel here, you'll find that the effect is recorded here and sometimes you'll have to click the analyze button to initiate the fixing process. But when I play it back, you can see that it's a lot more smooth. Now this won't work for all of the clips, but give it a try and see what it will do.
45. Bonus: One Last Tip: Besides planning your story and learning about all these film making essentials, I also recommend going online and checking out all the cool videos that are already up there. Pick a few that you find really resonant with you or similar to your project and study them. Ask yourself, what is it about this video that I love so much and how are they effectively communicating their idea in a way that makes me want to jump in and support them?
46. Thank you!: Before I close this course, I just really wanted to thank you for taking your time with me to learn about this beautiful craft of making crowdfunding videos. I really hope that by now you feel like you have all the knowledge and a road-map needed to go and make your video happen. Feel free to share your videos that you create on the course discussion site. As I am so excited to see all the cool projects and stories you'll be sharing through your lens. Thank you so much and I wish you all the best for your upcoming film making journey.
47. Newsletter Sneak Peak: [MUSIC] If you enjoy this class, I invite you to leave a review and sign up for my newsletter. This is not your
ordinary newsletter, but instead a
Virtual Teahouse of Wonders where I share
curated inspiration, behind-the-scenes updates, and more high-value resources on the art of authentic
creative within. It is my most intimate space to spoil my readers with delight. Sign up to receive on my course
instructor page. [MUSIC]
 Dandan Liu, Filmmaker | Contemplative Creative