Transcripts
1. Hello and Welcome!: Pattern templates have been a key part of my design
process over the years, helping me create
countless patterns. While the templates provide
a solid foundation, it's the way I
customize and improvise them that they make
each pattern unique. In this class, I will guide
you through creating some of the classic reusable
pattern templates and show you how to infuse
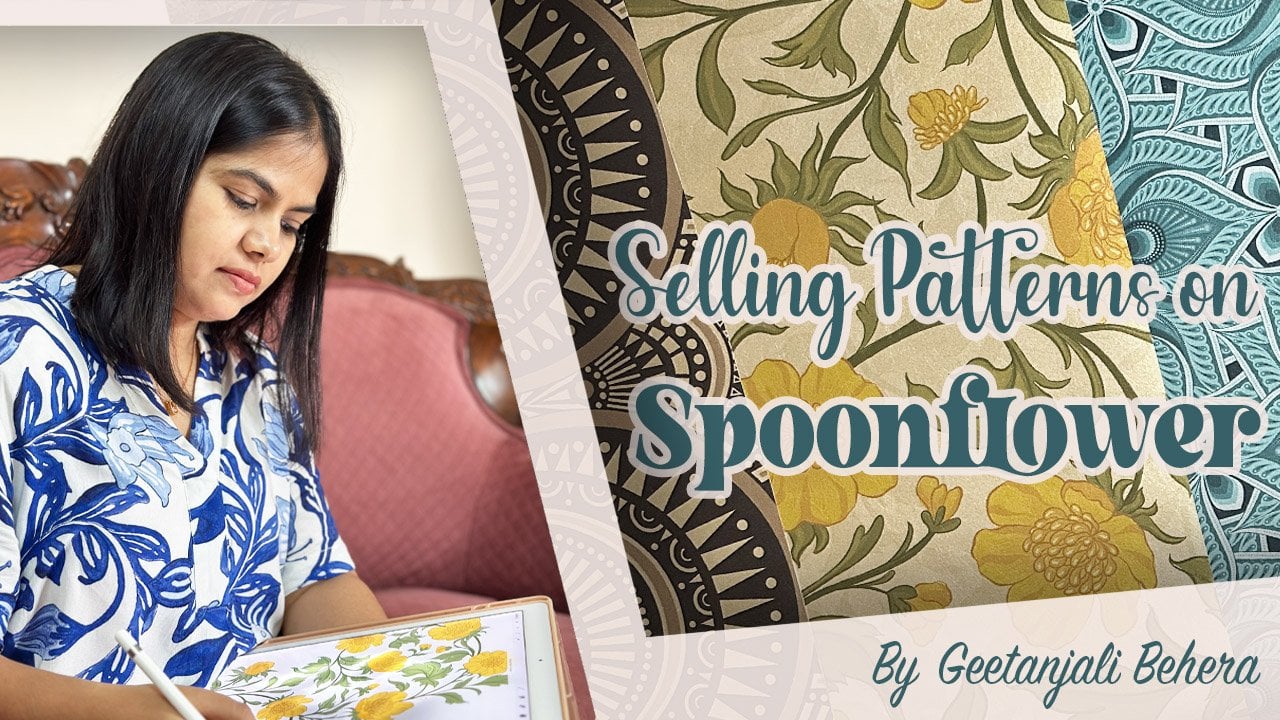
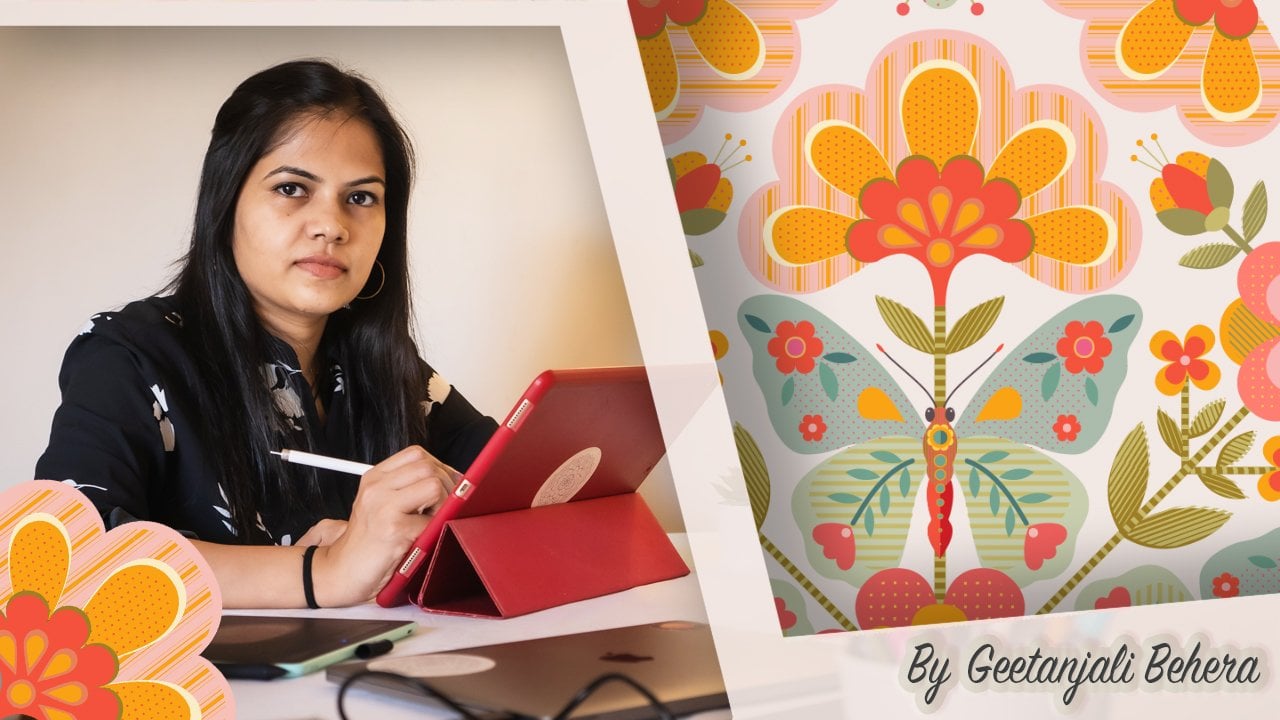
them with your personal style. Hi, everyone. I'm Ghans,
an artist, Illustrator, surface pattern designer,
and hanker painter, from the beautiful coastal
state of Goa, India. In this class, I will explain what pattern templates are and their benefits in
the design process. Next, we will work
together and create some of the classic
pattern templates in Adobe Illustrator, using my favorite tool
pattern option feature. Whether you are
creating patterns using iPad applications like Procreate or desktop softwares
like Adobe Illustrator, photoshop, or affinity designer, these templates will
help you save time. This class is suitable for beginner and
intermediate levels. If you are new to
surface pattern design, you may want to start with the fundamental series
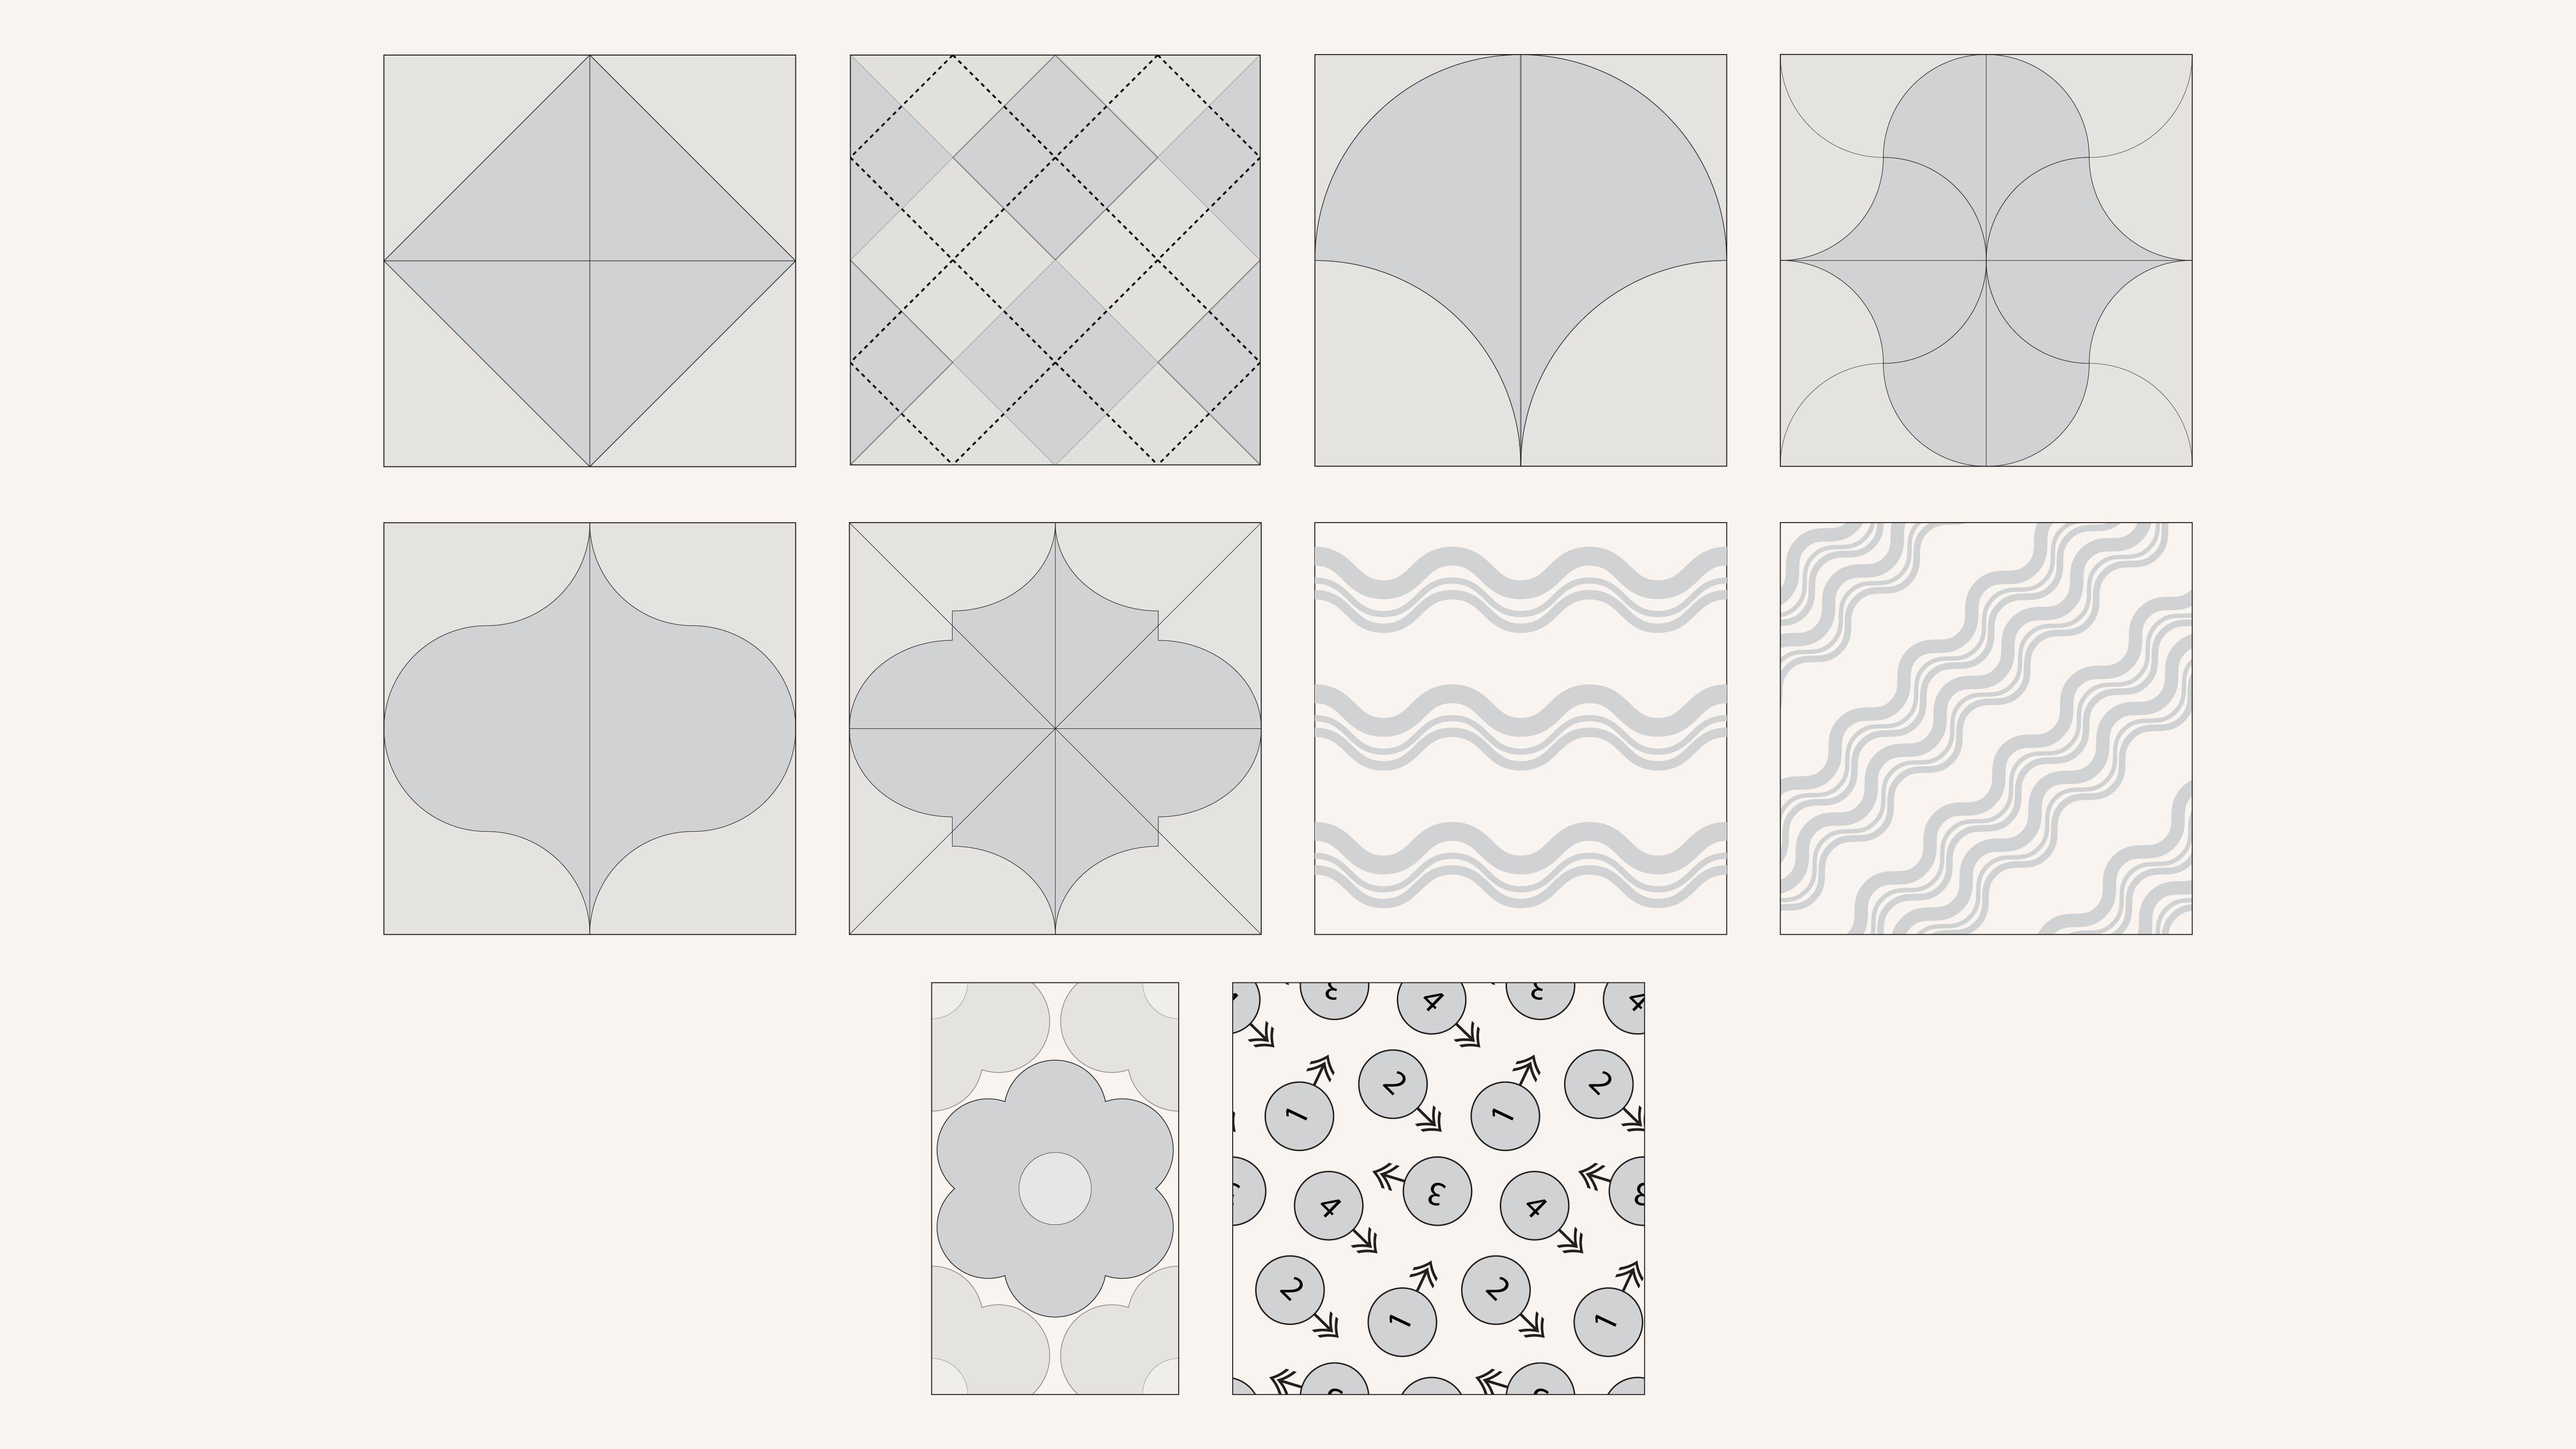
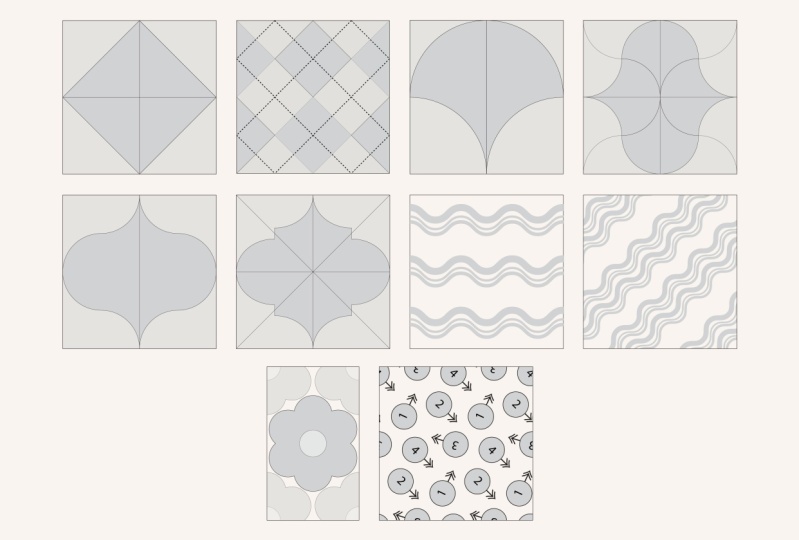
before taking this class. By the end of this class, you will have created ten
different pattern templates that can be used to create
a variety of designs. You will also gain a
deeper understanding of the pattern design process, making you more efficient
for your future projects. Let's get started on this
exciting journey together.
2. Class Overview and Project: Hi, everyone.
Welcome to my class. In this class, we will
learn how to create reusable pattern design
templates in Adobe Illustrator. Here is the breakdown
of our lessons. We will start with introduction
to Pattern templates. Exploring different pattern
repeats and layouts. Creating repeating patterns
in Adobe Illustrator. Designing a diamond repeat
template with variation. Crafting a scallop repeat
template with variation, designing an OG repeat
template with variation, designing a wave stripe repeat
template with variation, creating a hexagonal
floral repeat template, building a non directional
tossed pattern template. Then we will design
a tossed pattern using the same template. Finally, improvising
the pattern templates for a personal flare. M. For the class project, follow along and create the
different pattern templates. Create your own templates
or use the ones provided in the resources to
create one or more patterns. Use any existing motives or create new to test the
pattern templates. Adjust the repeat and
scale of your pattern. Finally, share one or more of these templates and patterns in the student project gallery. I am eager to see
your creations. Let's dive into our first
lesson and get started. H
3. Introduction to Pattern Templates: Let's start with, what
are pattern templates? Pattern templates are
predesigned layouts that can be re used to create multiple
variations of a pattern. Pattern templates
are derived from various types of
repeats and layouts. These templates often
include guides, shapes, and elements that serve as a
foundation for your design. Now, what are the benefits
of using pattern templates? Firstly, pattern templates, streamline the design process, making it faster
and more organized. With templates, you don't have to start from scratch each time, allowing you to focus on the creative aspects
of your work? It creates consistency. Using templates helps maintain a consistent look and
feel across your designs, which is especially useful while creating collections and
developing your style. Templates are great for
creating complex hero patterns, as well as simple
blender patterns. And last but not least, it enhances your workflow. By reducing repetitive tasks, templates allow you to
work more smoothly and effectively, increasing
overall productivity. Now talking about why you should create your own
pattern templates. I strongly encourage
you to create your own pattern
templates from scratch. This approach has its
own unique benefits. Firstly, creating your
own templates helps you understand the intricacies of pattern design and layout. It enhances your creativity. Designing your own
templates allows you to experiment and come up with unique and interesting patterns. You can tailor your templates
to fit your specific style and needs rather than relying
on generic ready madevs. The process of creating
templates improves your skill in using design
tools like Adobe Illustrator. In the next lesson,
we will learn about the different types of
layouts and repeats used to create pattern templates. Bo
4. Exploring Different Pattern Repeats and Layouts: Pattern templates
are derived from various types of
repeats and layouts. I have covered the details of repeats and layouts
in the first class, which is an introduction
to surface pattern design. Feel free to check it out
for more information. In seamless patterns, there are generally three
types of layouts, all over, one or two directional
and multi directional. The most common repeats
include basic repeat, half drop, brick, diamond, hexagon by row,
hexagon by column, OG, scale or scallop repeat, and straight and
diagonal stripes. By mixing and matching these
basic layouts and repeats, you can generate an endless
variety of pattern templates. In this class, we will create ten different templates using some of these
layouts and repeats. We will begin with the basic and then explore variations of each. I personally prefer using
Adobe Illustrator for creating these templates as the
pattern option tool makes it incredibly easy for me to visualize and
adjust my pattern tile without dealing with the complex calculations
and technicalities. In the next lesson,
I will provide a brief overview of how to use a pattern option
tool in Illustrator. If you would like to explore
this topic in more detail, consider checking out my class, Adobe Illustrator for
Surface Pattern Design of the fundamental series.
5. Creating Repeating Patterns in Adobe Illustrator: Before we dive into
our pattern template, let me quickly review how I create repeat patterns
in Illustrator. To create a repeating pattern, you can either select a motif
or with nothing selected, go to object and choose pattern
from the drop down menu. Then select M. The
final pattern swatch will be saved in
the Swatches panel automatically unless
you cancel it. If the window closes
unexpectedly, simply double click on the
Swatches panel to reopen it. In the pattern
option tool window, you can name your pattern, and on the right
side, you will see a small preview of
your final swatch. This preview updates in real time based on the
type of repeat you select. Next, select your repeat type from the five available options, which are grid, brick by row, brick by column, hex by
column, and X by row. For the brick by row and
brick by column options, you can also adjust
the offset values. Remember that choosing more
complex offset values will result in a more
intricate pattern swatch as shown in the preview. Next, let's discuss
the tile size, which sets the initial
dimensions of your tile. You can adjust both the width
and height of the tile. To change the size by a
fixed amount, hold shift, and click the up or down arrow to increase or decrease
it by one unit. You can set your preferred
dimension unit in the properties panel while
working on the pattern. This option lets you
adjust motif placements, change the size of your artwork, and overlap selected motives. To make proportional adjustments
to the width and height, click on this small button. In case your final artwork
matches the size of your tile, check the size tile to art box. If you also want to move the
tile along with the artwork, check the box below it. Next are the horizontal and
vertical spacing options. These boxes become enabled when you select size tile to art box. Since the tile size is now
fixed to the artwork size, you can create variations by adjusting the spacing
between the tiles, either horizontally,
vertically or both. Remember, you can choose only one of these two
options at a time. With the overlap settings, you can decide which
motifs appear on top if there is a overlapping
at the tile edge, both vertically
and horizontally. The next set of settings is useful for previewing
your pattern. Adjust the dim opacity
to distinguish the main tile and
make edits as needed. For a clearer preview, select the number of copies
from the drop down menu. Finally, click here to view the tile edge and the
pattern swatch boundary, which will be saved in
the Swatches library. Once you have made the changes, click here to save the pattern
in your switches panel, or click cancel to
discard the changes. If the window closes by mistake, while you are still working, double click on the swatch in the Swatches panel to reopen it. To save the pattern
as a newswatch, click on save a copy, and it will be saved
as a newswatch. In the next lesson, we
will start working on our first template. A
6. Creating Diamond Repeat Template and It’s Variation: Start by creating a 12
by 12 inch chart board or any other square
size you prefer. Press M on your keyboard to
activate the rectangle tool. Then click once to create a square with the same
dimensions as your artboard. Center it on the
artboard and select a fill and stroke color
that is in black or white. Next, select the shape, whole shift and rotate it 90 degree to transform
it into a diamond shape. Finally, adjust it size to 12 by 12 " in the property spanel. Now select the shape and
go to object, pattern, and choose M. Name the
pattern as diamond template. In the preview, you will notice it already resembles
a diamond pattern. But the white spaces are empty. For a perfect diamond repeat, each diamond should
contain motifs. To achieve this,
select the repeat type as brick by row or
brick by column with an offset value of half and
adjust the tile width and height to 12 inch by
six inch or vice versa, depending on the repeat
type you choose. This is how the diamond
pattern will appear. If you would like to add
spaces between the tiles, you can increase the
width and height values by pressing the
up or down arrow. Poll shift to adjust
by one unit at a time. Once you are satisfied
with the pattern template, click Done to save it
to the swatches panel. Now to save it as a template for future use or in other programs, clear the artboard or
create a new layer. Drag the switch from the
panel onto your artboard. Select the Swatch
and ungroup it once. Press command or control y to enter the
outline viewboard. Next, select the bounding box
with no fill and no stroke, and go to arrange
select bring to front. Press command for Control y
to return to preview mode. Now the next step is
completely optional, but it is helpful when you are working with
complex patterns. Select everything and click once on the center tile
to deselect it. Reduce the opacity to 50% so that only one
tile is in focus. Finally, select everything,
then press command or Control seven to
create a clipping mask. This is your final template, which will repeat perfectly
as a basic grid repeat. You can change the colors
at just the stroke width, resize it, and
export it as a JPEG, PNG or PSD file. Just like that, our
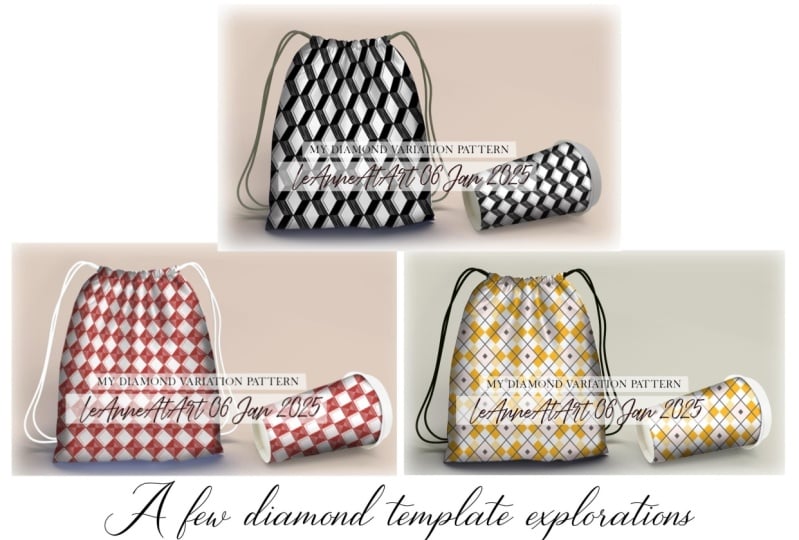
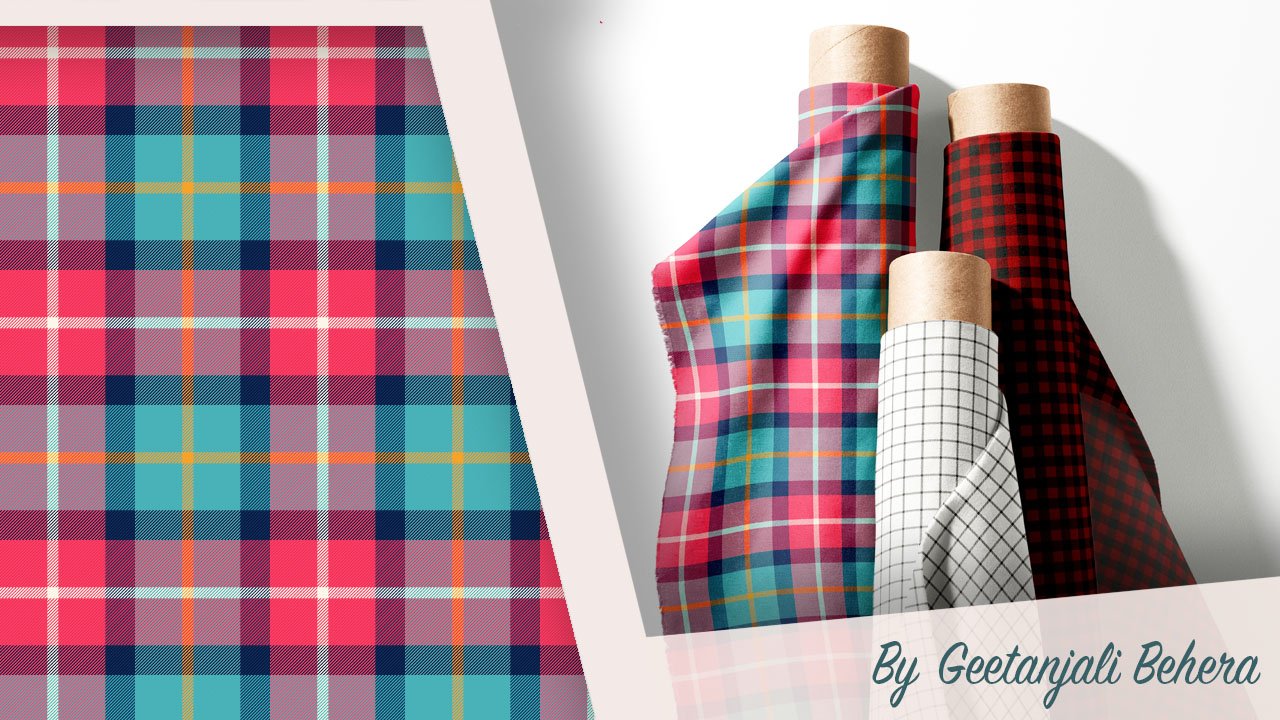
first template is ready. For the second template, we will explore a variation
of the diamond repeat, often recognized as the
classic argyle pattern. A AVL pattern is characterized
by overlapping diamonds on Lozenges with intersecting diagonal lines
overlaying the diamonds. To start, use the same
artboard settings, and draw a six by
six inch rectangle. Fill in with a color, but
leave the stroke color empty. Create three more copies
of this rectangle. Applying two different fill
colors to the diagonal ones. Next, draw a 12 inch
line and make a copy. Place them 3 " from
the sides or top. Repeat this process for
the other side as well. You can apply a stroke
effect such as line or a color and then expand it. Select everything
rotated by 90 degrees, and then resize it to 12
" to fit the art board. Select the motifs and open
the pattern options window. Name the pattern
diamond variation or Agile pattern template. Choose brick by row or
brick by column from the repeat type with
an offset value of half and set the tile size to
12 " and 6 " respectively. You can also compress the motifs to create an
elongated diamond shape. Although this will adjust the tile size and patterns
swatch accordingly. Once you are satisfied, click done to save the
pattern to the saches panel. To save and export your
template for other programs, repeat the previous steps. Clear the artboard or
create a new layer, then drag the
pattern swatch onto the artboard and
ungroup it once. Press command or control y
to enter the outline mode. Select the bounding box
with no fill and no stroke, and go to arrange,
bring it to front. Press command or control y
to return to preview mode. Select everything and
create a clipping mask. This is your final template. You can now change colors, resize it to make it look elongated and export it
as a JP PNG or PSD file. Here we have our
second template. In the next lesson, we
will learn how to create a scallop repeat template
with its variation.
7. Creating Scallop Repeat Template and It’s Variation: For the third template, we will create a scallop repeat. Use the same 12 by 12 in chart board or any other
square size you prefer. Press L on your keyboard
to select the Ep stool. Then click once on the
artboard to create a circle with the same
diameter as the artboard. Send to the circle
on the artboard and choose a fill and stroke color
that isn't black or white. Using the direct selection tool by pressing A on your keyboard. Select the left, bottom and right anchor
points of the circle. In the control panel, click on cut the path at
selected anchor points, or press C to use the scissors tool and click on the selected
anchor points. You will see the circle is
now divided into three parts. Select the bottom left
part and rotate it inward. Then do the same with the bottom right part to form
a scallop shape. Select all the three parts and press command or control
j to join the path. Your scallop shape is now ready. Select the shape, go to object, choose pattern, and select make. Name your pattern as
scallop template. Set the repeat type
to brick by row or brick by column with
an offset value of half and adjust
the tile width and height to 12 " and
6 " or vice versa, depending on the repeat type. This is how the scallop
pattern will appear. To add spaces between the tiles, increase the width
and height values by pressing the up
and down arrows. Hold shift to adjust
by one unit at a time. Once you are satisfied, click Done to save the pattern
to the swatches panel. Now to save it as a template for future use or for
other programs, clear the artboard or
create a new layer. Drag the switch from the panel onto the artboard
and ungroup it once. Press command or control y
to enter the outline mode. Select the bounding
box with no fill and no stroke and go to arrange
and bring to front. Press command or Control y to
return to the preview mode. Now select everything and click once on the center
tile to deselect it. Reduce the opacity to 50% so that only the
center tile is in focus. Select everything
and press command or Control seven to create
a clipping mask. This is your final template. You can now change color, stroke properties, resize it, and export it as
a JP PNG or PSD. You can also flip it downwards to create
a fish scale repeat. And there you have your
scallop temp ready. For the fourth template, we will create a variation
of the scalp repeat. Repeat the initial
steps until you have a scallop shape
of 12 by 12 ". Duplicate it by pressing
command or control C and command or Control
F to paste it in front. Move the duplicated shape
vertically by 12 ". Then reflect it horizontally. Select both shapes, make a
copy and rotate it 90 degrees. Now reflect each shape vertically to create
the new motif. Adjust the size of the
new motif to 12 by 12 ". Now select the shape and open
the pattern option window. Name your pattern as
scallop variation. Choose a repeat type of either
brick by row or brick by column with an offset
value of half, adjust the tile size to 12
inch and 6 " respectively, depending on the repeat
type you choose. If you want to adjust the stroke width and
color to make it appear as negative space between the shapes, you
can do that here. Once you are satisfied
with the pattern, click done to save it
to the switches panel. To save and export your
template for other programs, follow the same steps as before. Clear the art pod or
create a new layer, drag the pattern swatch onto the art pod and ungroup it once. Enter the outline view mode, select the bounding
box with no fill and no stroke and go to
arrange, bring to front. Return to preview mode. And now select everything
and create a clipping mask. This is your final template. You can change colors,
adjust stroke properties, resize it, and export
it as a JP PNG or PSD. There we have our
fourth template ready. In the next lesson,
we will see how to create an OG repeat
template with variation.
8. Creating an Ogee Repeat Template and It’s Variation: For the fifth template, we will create an OG repeat. Press L on your keyboard
to select the Ep tool. Then click once to create a circle with a
diameter of 12 ", matching the artboard size. Center the circle on
the artboard and choose a fil and stroke color
that isn't black or white. Using the direct selection tool or press A on your keyboard, select the top, right, and bottom anchor
points of the circle. In the control panel, click on cut the path at
selected anchor points. You will see the circle is
now divided into three parts. Select the bottom right part
and move it upward by 12 ". Ener -12 in the vertical tab. Then move the top right
part downward by 12 " by entering 12 "
in the vertical tab. Select all the three parts and join them to create
the curve shape. Duplicate the shape by
pressing command or control C, and paste it on front by pressing command or
control F on your keyboard. Move the new shape
to the right by 12 " and flip it vertically. Select both the shapes and press command or control
to join the paths. Your OG shape is now ready. Resize the new shape to 12 by 12 " and center it on the to fit. Go to object, choose
pattern, and select make. Name your pattern
as OG template, set the repeat type
to brick by row or brick by column with an
offset value of half. Now adjust the tile
width and height to 12 inch and six
inch or vice versa, depending on the repeat type. This is how the OG
pattern will appear. If you want to add spaces
between the tiles, increase the width
and height values by pressing the up
and down arrows. Whole shift to adjust
by one unit at a time. Once you're happy, click done
to save it to the swatches. To save it as a template for future use or for
other programs. Clear the artboard or
create a new layer, drag the swatch from the panel onto your artboard
and ungroup it once. Press command or Control y to enter the outline view mode. Select the bounding box
with no fill and no stroke, and go to arrange,
bring it to front. Return to preview mode. Select everything and
create a clipping mask. This is your final template, which will perfectly
repeat in a grid format. You can change color
ad gestro properties, resize it, and export
it as a JP PNG or PSD. You can also rotate it by 90 degrees to create a
vertical og pattern. And there you have your
OG template ready. For the sixth template, we will create a variation
of the OG repeat. Repeat the few initial steps until you have a circle
divided into three parts. Move the top part upward by 3 ", enter minus three in
the vertical tab. Move the bottom
part downward by 3 " to ensure even spacing
between the three shapes. Join these three
shapes together. You can use a different number, but keep it a round number
for easier calculation. Make a copy of this shape, move it horizontally by 12 " and reflect it to create the new variation
of the OG shape. Join the two parts. And adjust the size to fit the art wood. Set the height to 12 ", you will notice that the
width will be less than 12 ", which means it is not a
square motif anymore. You will need to manually
adjust some settings in the pattern option tool
window to accommodate this. Select the shape and open the
pattern option tool window. Name your pattern
as OG variation. Choose your repeat type. If you select brick by row, which is brick repeat, keep the width fixed at 9.6 ". And reduce the height by half. To do this, enter two in the height tab to achieve
a perfect repeat. If you choose brick by column, which is also half drop repeat, keep the height fixed at 12 " and reduce the width by half, that is 4.8 ". Click done to save the pattern
to the swatches panel. To save and export your
template for other programs, repeat the same steps as before. In this case, you will get a
rectangular swatch template. This is your final template. You can change color,
stroke properties, resize it, and export
it as a JP PNG or PST. In the next lesson,
we will create a wavy stripe template
with its variation.
9. Designing Wavy Stripes Repeat Template and It’s Variation: For the seventh template, we will create a
wavy stripe pattern. Choose the line tool and
create a straight line while holding shift to keep it
perfectly horizontal. Set the line to 12 inch
wide to fit the art. Set a stroke width to 25 points or more for
clear visibility. Select the line, hold ult, and rack to create a copy, ensuring their center aligned. You can create a set
of two lines or more. Select both the lines, go to effects, distort and
transform, and choose Zi Zac. In the Zi Zac setting window, keep the preview enabled, and set the size
to around 0.5 ". Choosing absolute. For the ridges per segment, select an odd number to ensure the shape
matches at both ends. Choose the round option for the points to create
a smooth wave effect. D. Adjust these settings
according to your preference, and once you're satisfied, click to apply the changes. Now select the shapes and go to object pattern and choose make. Enter a name for the pattern. Lgtrit wave stripe template. Set the repeat type to grid, adjust the stripe thickness. The number of lines, the
spacing between them and the height to a round number based on your design preference. Keep the bid fixed at 12 ". Once you're satisfied
with the adjustments, click done to save the pattern. To save it as a template for future use or in other programs. Clear the artboard or
create a new layer, drag the swatch from the
panel onto your artboard. Select the swatch
and ungroup it once. Press command or control it to enter the
outline view mode. Now, select the bounding box
with no fill and no stroke. Go to arrange,
bring it to front, return to preview mode, and finally select everything
and create a clipping mask. This is your final template. You can also turn at 90 degrees and use it as a
vertical stripes template. Here we have our
seventh template ready. For the next template, we will create a variation with diagonal stripes
at a 45 degree angle. Repeat the initial steps until you have a few wavy lines
that align on both ends. Create a set of two groups with different thickness
for the stripe repeat. To prepare the motifs
for diagonal stripes, extend them so that when
rotated by 45 degrees, the motif still
touches the edges. Hold t and rag to make
a copy of the shapes. Group everything and
then go to object, pattern, and choose make. Or pattern as diagonal stripes. Set the repeat type
to grit and adjust the width and height
values to 12 by 12 ". Lock the aspect ratio by
clicking on this lock icon. Rotate the lines by 45 degrees. Click on the width or height tap and gradually press
the down arrow key. Since the lock icon is active, both values will
change simultaneously. When you reach 11.375 ", the pattern should
align perfectly. Click done to save the sot. To save and export your
template for other programs. Repeat the same steps as before. Here you will notice that
the swatch size is 11.375 ". Adjust these values to 12 by 12 inch or any other
size as per your preference. This is your final template. You can now change its
colors, stroke properties, resize it, and export it
as a JP PNG or PSD file. In the next lesson,
we will learn how to create a hexagonal
floral repeat template.
10. Creating a Hexagonal Floral Design Repeat Template: Another versatile repeat
type is the hexagon repeat. This is ideal for
motifs that are hexagonal or rounded in shape. To start with, use
the same 12 by 12 inch artboard or any
other size of your choice. Press L on your keyboard
to select the Ep stool. Then click once to create a circle with a
three inch diameter. Apply a full color and
stroke color to the circle. Since this isn't the
final size of the motif, you can choose any size for now. Select the circle
and go to object, repeat, and choose radio. This creates a
circular repeat shape. Adjust the number of instances by dragging
the slider up or down. Set it to six for a
hexagon repeat motif. Expand the shape and use the shape builder tool to merge it into a single shape. Place the flower shape
in the center of the artboard and adjust its size so that either the
width or height is 6 ". Select the shape and go to
object pattern, choose make. Name the pattern
hexagon template, and choose the repeat type as hexagon by row or
hexagon by column. Adjust the height and width to control the spacing
around the motif. You can also change the size of your motif in the
properties panel. Once you are satisfied
with the adjustments, click Done to save it
to the swatches panel. To save it as a template for future use or other programs, clear the artboard or
create a new layer. Drag the swatch from the
panel onto your artboard. Select the swatch
and ungroup it once. Press command or control y to enter the
outline view mode. Return to preview mode, and now select everything
and create a clip mask. This is your final template. You can change its colors,
stroke properties, resize it, and export it
as a JP PNG or PSD file. Here we have our
ninth template ready. By now, you should feel
confident working with simple shapes and the
pattern option tool. In the next lesson, we
will tackle creating a non directional tossed
pattern template with motifs and colors. Oh.
11. Designing a Non Directional Tossed Repeat Template: For this pattern, we will
use a directional motif. Use the same 12 by
12 inch art pod or any other size
of your choice. Draw a circle with an arrow
indicating the direction. Group these two
objects together. Make three additional copies of the motive and apply
different color to each. With the motive selected, open the pattern
option tool window. Name the pattern tossed
pattern template, and select the repeat
type as brick by row, which is also commonly
known as brick repeat. Keep the opposite value to half, set the width and height
of the tile to six by 6 ". For the previous settings, set the opacity to 50% and enable both
tile and swatch pound. Using the selection tool, click on the motifs and place them evenly
across the board. Rotate the motives to change
the direction of the arrows, ensure that motives remain
within the tile boundaries. If a motive goes missing, it might be placed
outside the tile area. So keep an eye on its placement. Ideally use three or more
different directions to create a dynamic flow and
movement in the pattern. You will see the
overall pattern layout improve as you keep adjusting
and adding motives. It takes time and
experience to master the basic principles of
design and pattern layout. Starting with a simple design like this is a good approach. Once your basic
pattern is complete, set the opacity of the copies to 100% and increase the number of copies to fill
the entire screen. Turn off the pattern
swatch and tile bounds, and you can also hide the board. Carefully examine the layout for any noticeable gaps,
gutters, or lines. You might find it helpful
to squint your eyes, to spot any irregularities. If you notice any issues or if the movement feels disrupted, make adjustments as needed. When you are satisfied
with the pattern, click t to save the swatch. If you want, you
can also replace the fill colors
with numbers one, two, three, and
four respectively. This is our tenth
and final template. This versatile template can be adapted for various
design needs. You can also add
simple shapes or additional elements to
highlight the direction. For example, if the
motif is a bird or animal oriented to face in
a particular direction. If it's a flower, add leaves or birds that point
in that direction. We are creating a
tossed pattern template that allows flexibility. You can use one motif
in the same color up to four different colors or four different motives with either uniform or varied colors. In the next lesson, we will
test it using a real motive.
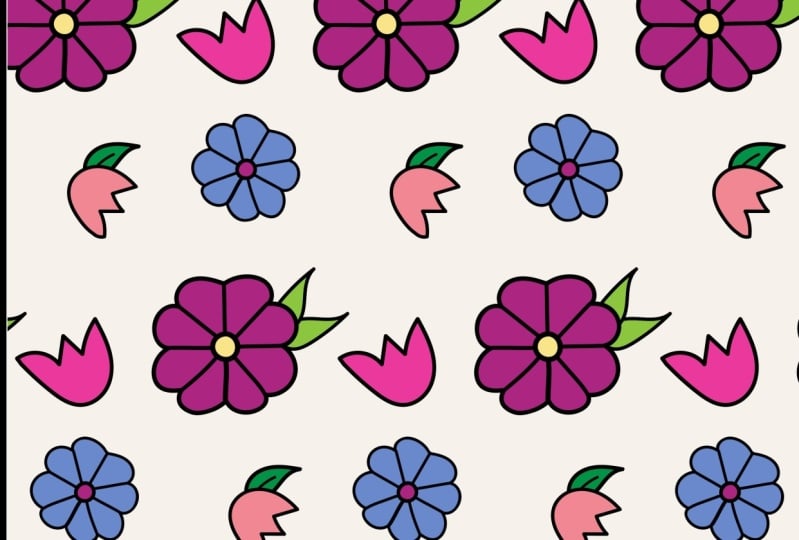
12. Designing a Tossed Pattern Using the Template: Now that we have
our template ready, we can test it
with a real motif. Here are a few ways
to use this template. Single motif with same color. Place one motif in the template, ensuring the direction of the motif matches the
templates design. In this case, you don't need to worry about the
colors or numbers. Single motive with
multiple colors. Use the same motif in four
different colors and place each color in the corresponding colored or numbered area on the template. Multiple motives with
multiple colors. Use four different motives, assigning each one a
color or a number. Let's try it using an example. I'm using a fish motive here, but you can choose any
directional motive that fits your pattern. Since we used brick by
row as our repeat type, the pattern tile and swatch will have different dimensions. We will recreate just
one repeat tile. Drag the swatch
from the panel to your artboard to extract the repeating tile
from the swatch, select the swatch
and ungroup it once. Then create a new layer above. Click at the center
of the artboard to select one group of motives
or the repeat tile. Hold the small square in the layers panel and drag
it to the new layer. Lock this layer and turn
off the bottom layer. Now on a new layer, place your motives and arrange it
according to the template. Keeping the directions in mind. Once all the motifs are placed, select everything
and go to object, pattern, and choose make. Apply the same pattern
repeat settings as before. Using brick by row, offset value half and
tile size six 6 ". Check for any
necessary adjustments depending on your motive. Ensure the colors are balanced and look for any gutters or
extra spaces in between. Make adjustments as needed. Play with the preview settings
and view your pattern from a distance or zoom
out to scale down. Squint one eye to check
if the movement feels restricted or is predominantly
pointing in one direction. The pattern should exhibit
a good flow and movement. Once you are satisfied, click Done to save
it to the swatches. In the next lesson,
we will learn how to improvise the pattern templates
for a personal flare.
13. Improvising the Pattern Template For Personal Flair: Even though these templates are versatile and allows for
multiple variations, it is important to ensure your patterns don't
all look the same. Here are some techniques
to differentiate your patterns while
using the same template. Incorporate small motives. Add small non
directional motives to fill gaps between
larger motives. Non directional motives are preferable because they won't disrupt the flow of
directional patterns. By filling the gaps
within a single time, the pattern will be consistent
across the entire design. Add an all background. Create a background layer
with patterns like checks, abstract shapes, dots or lines. You can use the
same tile size as the main pattern
or scale it down. For example, if your
main tile is six by 6 ", a background tile could
be three by three inch, that is 50% smaller, or even 1.5 by 1.5 inch, which is 25% smaller. To illustrate, let's add a dashed line effect to simulate water flowing
under fish motifs. Design a few lines, apply a dashed effect and
create a pattern tile that's either six by 6 " or three by three or 1.5 by 1.5 ". Once your background
pattern is ready, ayer it beneath
your main pattern to add depth and dimension. Layer width offset patterns. Add another layer with reduced opacity and an offset pattern for
additional depth. Draw a rectangle with the
pattern swatch dimension, fill it with the pattern, and then create a duplicate. Move this pattern fill by half of the tiles
width and height. This will change the
placement of motives. You can also reflect
the pattern fill to alter the motive direction. Or scale the pattern down by 50% or 25% to add perspective. This is how the final
pattern will look. These techniques help enhance your patterns and
create unique designs, even when using
the same template.
14. Final Thoughts: Thank you so much for
watching my class. I hope you enjoyed it and
learned something new. If you have any
doubts or questions, feel free to drop them in the discussions page and I will be more than happy to help. If you like the
class, do consider leaving a review and
sharing with your friends. Also, don't forget
to follow me on scale share to stay updated
on my upcoming classes. Remember, while templates
are a great starting point, creativity is the key. Don't be afraid to use
different colors, motives, layouts, and background layers to give your patterns
a unique touch. T hank you all for your time and dedication throughout
this class. I'm really excited to see the incredible patterns and templates you create
using these techniques. Be sure to share your work in the students project gallery. You can also share them
on social media and don't forget to tag
me at Gehang Dob, so I can like and comment. Once again, thank you
so much for joining me, and I look forward to seeing
you in my next class. Till then happy creating.
 Geetanjali Behera, Surface Pattern Designer | Illustrator