Transcripts
1. Welcome! Start here: Welcome to AI Video Mastery. In this class will
go from simple ID to finished AI video you
can confidently publish. This class is for
creators who want to make A videos but feel
stuck or overwhelmed. If you've tried tools
before and ended up with weak or random results, you're in the right place. You'll learn a clear system
built on three core pillars, choosing the right direction, writing prompts that work, and turning images
into finished videos. You'll identify what to create,
generate strong prompts, pick the right AI,
create images, turn them into video clips, and combine them
into longer pieces. By the end, you'll complete
a polished AA video using the exact workflows
taught in this class, and you'll have prompts and examples you can reuse at ten. I'm going to watching
videos in order because every lesson builds
into the previous one. You can control the volume and the playback speed of every video to learn at your own pace. If you get stuck
have any questions, be sure to drop them in
the Q&A section below. Just make sure to
check the existing questions first because there's a good chance that the
question you want to ask has already been
answered in detail. At some point, you'll be
asked to leave review. Please wait until
you had a chance to really experience
the material. Your honest feedback
helps improve the course and better serve
you and future students. Thanks Gail for
joining this class. I'm genuinely
excited to help you create professional
AI videos and to give you the
confidence to use them in projects whether personal
or clients based. Let's jump to the first lesson.
2. Choose Your AI Video Idea: Welcome. The first
thing to do is to identify what
exactly you want. With AI, at this point, we can literally create
anything, generate anything, whether that's a person
or a cat speaking, whether they're on Earth, somewhere else, whether
that's particles, whatever. You can generate literally
anything at this point. And so this gives us
a great opportunity, but it also is a bit of
a disadvantage because, well, we can choose anything. And when there's a
bit too much choice, then it becomes a
bit of a problem. So in to identify
exactly what you want. By that, I mean,
the main subject or the character
or the background, the surrounding the weather, the time of the
day, the, you know, whatever you want to generate. The more detail you give, the better the results
are going to get. Because whatever you don't give, it's going to be automatically
generated by AI, and in order to give as
much detail as possible, you to identify what you want. So this is going to be
the very first task. Identify what you
want to generate, what can visually you
want to generate, and let's jump into
the next video.
3. How to Write a Strong AI Video Prompt That Works: Once you know what to generate, we need to go to GPT or Claude AI or another
AI of your choice, and we will ask you
to generate a prompt. Now, why do we need this? Because you want to give as
much detail as possible, and you want to be pretty concise and descriptive and
AI is just pretty good at it. So what we can do is we
can just tell AI like a bunch of random stuff
and not cohesive words, and then AI will put it into perfectly balanced sentences
that we are going to copy and then paste into our video generation
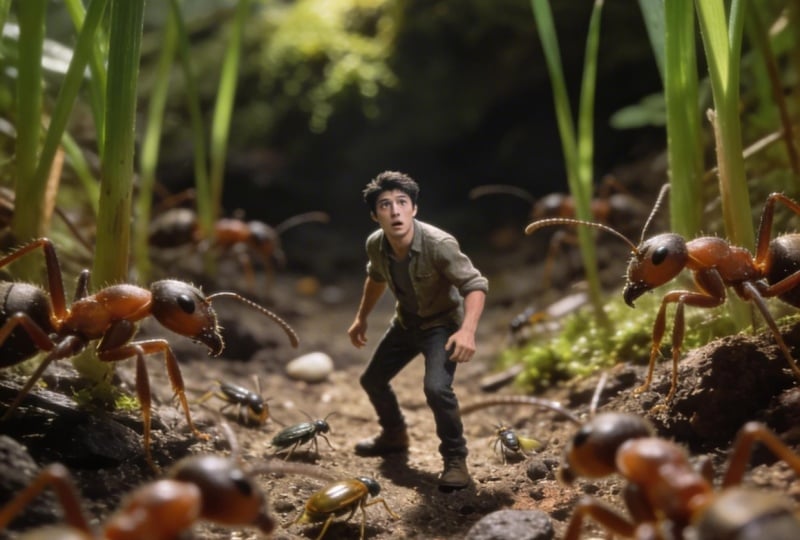
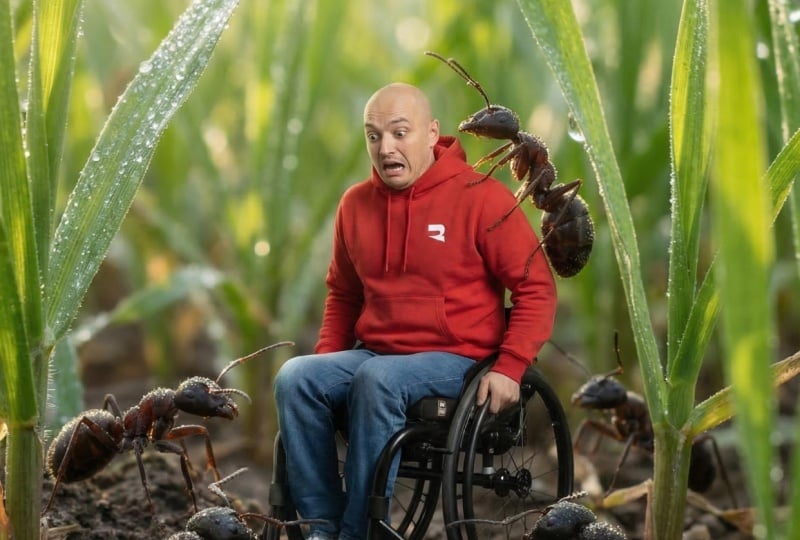
of so for this video, I'd like to generate a person who's going to
become very small, the size of the ant, basically
shrinking to the size of the ant and being
surrounded by ants. And then the ants are going to kind of come from the
side, close to the person. An important note, I
will tell ChatGPT to generate both the
video and an image. Why? Because it is a lot easier to generate
an image first and then animate that image instead of generating
a video right away. It's just it's
way, way easier to generate a frame.
The whole video. And then it's also easier to animate that frame or to making changes to that
frame so that you have more control
over this process. He HGPT, you are a prompt writer for AI that's going to
generate a video for us. The video is going to
be the final output, and I need you specifically
to generate two things. One image prompt and
one video prompt. The image is going to be an
initial frame of the video, and then from that frame,
we'll start the animation. So what we'll generate
will generate a person, a man roughly 25-years-old that is shrunk to
the size of an ant. And we will have this
very small world of the insects fill the frame. We're going to have
a man standing on the ground
surrounded by insects. We need to have grass
and all sorts of, like, greenery around
in the background. The focus is going
to be on the person, and the person's
going to be kind of surprised that he's in that. So that's going to be
in terms of the image. And then for the video
we need to surround our person and then get close to him as if they want
to be on top of that person. So I need you to generate
these two prompts, make sure that they
are concise and descriptive enough to generate
the scenes. There you go. So once we have
that, I'm going to send and we'll have ChatGPT
generate two promps, okay? So the image prompt, great. Sometimes it will give
descriptions like eight K, which we can delete
because we're actually going to
set this ourselves, but this is good. So this length is okay. If it gets a little bit longer, and it can be a
little bit too much, and it's going to take a
bit more time to generate. In terms of the
video, let's see. Okay, good. So we
have our two prompts. Let's jump into the next
video and start generating.
4. Best AI Generators: Which AI Tool Should You Use?: No, a very big question becomes what AI do we use to generate? Because we have a ton
of AIs at this point, there's a ton of video AIs, a ton of image AIs. Which ones do we use? Well, first of all, I
use a website called hicksfeld.ai that has a bunch
of AIs on this platform. It's like a platform that has a lot of AI solutions
put into it. And if I go into
image, for example, and I click and create an image, we'll have a ton of images
that I generate in the past. And if we click
here at the bottom, we have a ton of
different models. So these are all the models that will be Hicks field hold, HikFelFaCWOp, naa
Banana banan Pro, CDream and a lot of others. I don't know all the AIs, so don't worry that you don't
know all the Is as well. Now, if we go into video
and create a video, so that's a similar thing where we have a number of
different models, and then we can choose
between the different models of the models, a lot
of different stuff. So what I do is I create images in Banana Pro that's this AI, and then I animate the
video with Kling 2.6. First of all, I tried
this combination. It works really, really well. Secondly, it doesn't
take a lot of credits because a lot of the stuff can
be a little bit expensive. It doesn't matter what platform you use, what website you use. You can use another
website and it's going to show the process
on this website. For example, to create an image, I can click on Unlimited, and it's actually not going
to cost me any credits. But if I go into video, the video is going to
cost me five credits. Every month, I get 1,200
credits, I believe, and then I can buy
additional credits, but it all costs money. So in order to save the money,
I use this combination. I can definitely use
other combinations. And for example, if I
switch to Kling 3.0, it already takes nine credits, and if I generate 1080, it does ten credits. Then I can go to other
ones, like, for example, SR Pro Max, 153 credits, and I would not even be able
to generate ten videos. So we can take different
amount of credits, and that's why I use Kling
2.6 and nana banana Pro. But what I do recommend is just testing this see how
it works for you. You can experiment
with different models. And if you're satisfied,
just continue using it. I mean, you can see
on the screen the video then generated here, for example, it's pretty,
pretty unbelievable. Anyway, that's how we do it. Let's jump in the next
video and actually start putting our prompt and
generating our first image.
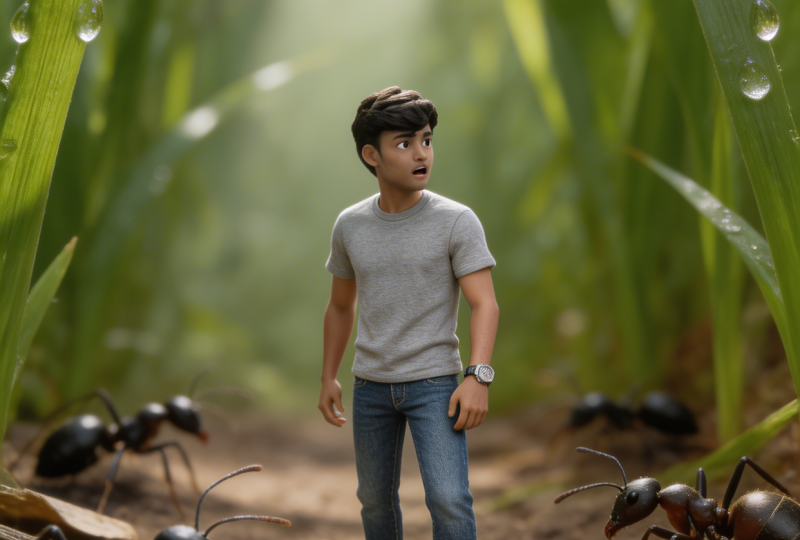
5. How to Generate High-Quality AI Images for AI Videos: In this video we'll
generate our image. I'm going to take this prompt, literally, just copy it. Come to Hicksfeld website, go to image, create an image, and I'm going to put our prompt here and I'm going
to select No Banana Pro. And what we can actually do is, let's say we generate
a character, and this is actually
a picture of me. So for example,
this is a character of me that I generated. And I can click here, for example, to
use for reference. And then it will create like me in the video
like it did here. But if we don't reference, it's just going to generate
things from scratch. Go ahead and generate
from scratch. I'm going to click and generate. And then let's also do one with the reference of me, so I'm just
going to click here, and then you can see
the pop up that we are referencing that image and then click on Generate as well. So it's going to take some
time to do the generation. And because I'm
using the unlimited, sometimes it doesn't
do it right away. It needs a bit more time
because like the free version, but then if I unclick Unlimited, it's going to cost a
little bit of credits, but it's going to be done
a little bit faster. As you can see, this
one is in the process. Now, I've experimented
with different models. As I said before, not
banana works pretty well, and you can actually just
go ahead and ask GPT, the difference between
all the different models. Some models have some
advantages and disadvantages, some are better in terms
of the video, for example, with lip syncing with speech, the other ones with,
like, realism. So depending on the model,
we have different results. Let's wait until we
see what we get here. Okay, so this is me
in the AI world. And this is without
reference of me. Based on the
description, you can see the scene is very similar. But then the details
are slightly different. So we can actually animate both. Okay, let's see which
one we like more. Well, I actually prefer
this guy a little bit more. I think he blends in
a little bit better. I stand out too much from the background as if I was
put there with Photoshop, but this guy, it seems like fits there a little bit better. Let's back to the next video, and I'll show you how to
turn this into a video.
6. Turn an AI Image Into an AI Video: Now, once we have
our image generated, we need to over it and
then click on Animate. It will be the
equivalent of just going into video and create a video, and then uploading
our image here. So I can just come
here, click on Animate. And in this preview, we're going to have our video, and all we have to
do is to go back to ChatGPT or to AI of your choice, and then copy prompt, select and past our prompt here. So once again, cling 2.6, I can make it longer if I want to so we can customize
the settings. The orientation is basically going to be the same
one as this one, and I'm going to click on G.
Take a little bit of time, sometimes a little bit longer, sometimes a little bit
less long depending on how many requests they have and how many people using
this AI at the same time. But as you can see, it's
already generating, so it was pretty, pretty fast. Now, if I go into my
account, so here, we can see that I did like
456 free generations. And then the pay generations, I'm not even sure how
much I did, but a ton. And on this website, if we going into upgrade, it has a number of
different subscriptions. So we have one subscription for free. The other
one is basic. Then we have pro
Ultimate, the creator. Honestly, just come here, check if you want
to use this or not. I don't have any
affiliation with them. It's just a great place
to create videos. Way, let's go into video. Oh, it's already done. So let's go ahead and download this video by clicking
on this button. And before we watch the
video, I just want to say that we can actually just delete this image and then go ahead and just literally put
an image here, like dragon drop it or
select it from the computer, and then you can turn
any image into video. But anyway, let's see
what we generate here. Great. Looks amazing. If you have
any questions, let me know. Let's jump into the next video.
7. Combine AI Clips Into Longer AI Videos: In this video, I'd
like to tell you how you can make
your videos longer. Well, you have to use
different models. For example, for Kling, we can do 5 seconds
or 10 seconds. But if we search for Kling 3.0, we can make it longer up to 15. But then if we go into
let's say another model, minimax, for example,
to this one, it has a different
length as well. So based on A models, you can generate
different lengths. But what I found
works really well, I just generating a bunch of clips and putting them together because usually if you think about if you create
videos for social media, you don't just
have one long clip that lasts for a minute, let's say, you have
a lot of small ones. And then with those
small ones, of course, it's going to cost some credits. If let's say we use
like ten videos, it's going to cost 50
credits if we use Kling 2.6. And then from that, you
can generate videos. So, for example, if we
take a look at this video, which I'm not going to play
because it has some audio. But this is that I did literally like in an hour where
a person's walking, actually, me walking
through an abandoned city. The video is called
something like, What if you were the
last person on Earth, and you can see the
video is 55 seconds, I generated probably
like 15 different clips, and these are the results
that you can get. And I'll give you
another example. I did a little bit of
experimentation, and once again, I put a lot of clips together
where I was trying to make content with this
blue mascot character, and it was with dinosaurs. Just a bunch of
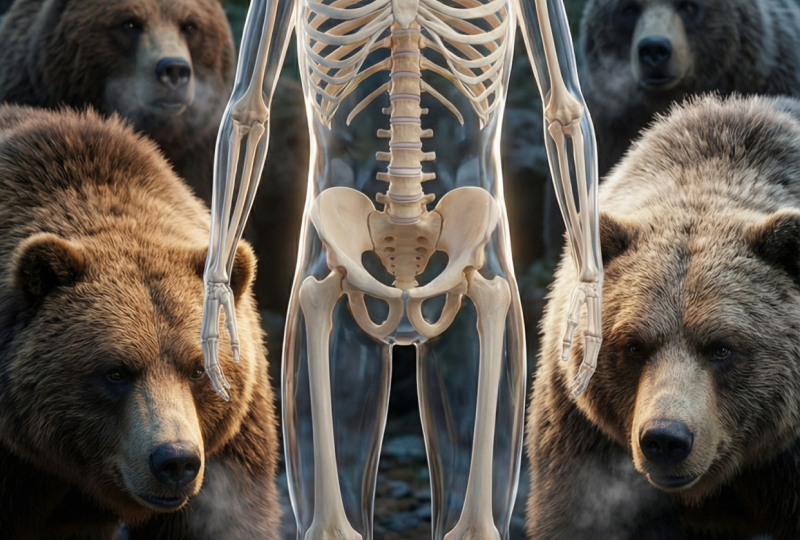
clips put together. And then I had another one
where I did skeletons, you know, those kind of
skeletons went viral recently. And so I was able to
generate skeletons. All I did is literally just to create a skeleton first and then generate an image
using the reference, and then just animate that
video super simple or animate that these videos went
stratospherically viral. In the first, like, one, two, three, four, five, six, seven. In the first, six, seven days, it got 90,000 views. And if we take a look
at these videos, so I show it to you on YouTube, the realism is pretty
unbelievable as well. And it was all generated once again using exactly
the same process, Nano Banana and then clean AI, super simple, but
looks pretty unreal. And that's why these videos got the above views
that they got. So that's how you do it.
If you have any questions, let me know, let's jump
into the next video.
8. Final Step!: Congratulations to you. You are nearly 100% done with
the AI video mastery. There are just two
small steps you need to take. First, take action. As Kafuhi said, a journey of 1,000 miles begins
with a single step. So if you haven't already,
take your first step by creating your first AI video. All the best information
in the world means nothing if you
don't act on it, and even small steps lead
to massive outcomes. Lastly, if you found
value in this program, I would really appreciate
it if you could take 60 seconds to leave
your honest review. I'll be immensely
grateful to you, any feedback will massively help future students in deciding
the best program for them. Although this
course is complete, your journey has just begun. I'm excited to see
you edits online, so be sure to keep me and
your fellow students posted. B, I'm here for your success. So if there's anything
you need, don't hesitate to reach out
in Lina section below. Thank you again for
choosing me as instructor, wishing you all the
best, I'm looking forward to seeing you
in future courses.
 Vladislav Sateev, Video Editor